


A step-by-step tutorial for building a cross-border e-commerce independent website using Linux + 1Panel + WordPress + WooCommerce. Tailored for complete beginners.
No coding required | Containerized deployment | Fully open-source solution | HTTPS supported
Video tutorial:https://www.bilibili.com/video/BV1G88AzsEkz/
What Is a Cross-Border E-Commerce Independent Website?
A cross-border e-commerce independent website refers to a self-built official website by a business or individual to directly conduct international e-commerce transactions. Unlike selling on platforms like Amazon, eBay, or AliExpress, this is a sales channel entirely owned and controlled by the seller.
In this model, the seller has full ownership and operational control of the site, including brand presentation, pricing, customer data management, and marketing strategy. Simply put, a cross-border independent site is like opening a "direct brand store" on the global internet, directly reaching international consumers and completing the cross-border sales loop.
Key Features of a Cross-Border Independent Site
- Independence & Autonomy: No reliance on third-party rules; sellers design their site and strategies freely without paying high commissions or following strict platform rules.
- Global Reach: Breaks geographical limits through the internet, accessing customers worldwide, unlike platforms with regional restrictions.
- Exclusive Brand Presence: Showcases brand vision, product uniqueness, and corporate identity in one place, enhancing consumer trust and loyalty.
- Private Data Ownership: Access to user behavior, purchase history, preferences, and more, enabling precise product selection, marketing, and services.
- Closed Transaction Loop: Integrates international payment (e.g., PayPal, Stripe), logistics, and multilingual support, allowing overseas users to complete full transactions on the site.
Comparison with Third-Party Platforms
| Aspect | Independent Website | Third-Party Platform |
|---|---|---|
| Rule Control | Freely defined, flexible rules | Must follow platform policies |
| Brand Control | Full ownership of brand direction | Limited by platform templates and policies |
| Customer Data | Fully owned, reusable long-term | Owned by platform, hard to retain |
| Cost Structure | Higher upfront but no commission long-term | Ongoing fees, commissions, ads |
| Traffic Acquisition | Requires SEO, social media, ads | Built-in traffic but high competition |
| Risk Management | No risk of account bans | Risk of bans, delisting |
For companies aiming to expand globally and build a long-term brand, a cross-border independent site is a strategic necessity. The Linux+1Panel+WordPress+WooCommerce stack is a low-cost, beginner-friendly, and mainstream tech solution—especially ideal for small and medium businesses launching their international presence.
Join our webmaster community:767557452
Need help building? Join the group and contact me!
About 1Panel
1Panel is a modern, open-source Linux server management panel built on Docker containers, designed to simplify website deployment and server management. It offers rapid site creation, efficient management, security features, and one-click backup and restore—perfect for beginners and developers alike.
Key Features:
- One-Click Site Deployment: Deep integration with WordPress, Halo, etc., with domain binding, automatic SSL setup, and app store installations—no manual environment setup needed.
- Visualized Ops Panel: Web-based GUI supports file management, database access, container orchestration, and real-time monitoring (CPU, memory, disk), reducing CLI reliance.
- Security & Scalability: Ensures safety through minimal exposure, firewalls, and container isolation. Supports reverse proxy, static site hosting, and multi-language runtimes (PHP/Java/Python).
- Cross-Platform Support: Compatible with major Linux distros (Ubuntu, CentOS), ARM architecture, and deployable on cloud servers or local VMs.
Best For: Blogs, business sites, forums, and other lightweight deployments—ideal for users seeking security, efficiency, and simplified operations.
1Panel Official Website:https://www.lxware.cn?code=zeruns (Use this link or promo code zeruns for 20% off Pro version—though the free version is sufficient for most.)
About WordPress
WordPress is the world's most popular open-source content management system (CMS). Originally a blogging platform, it has evolved into a powerful and versatile website builder. Over 40% of global websites are built on WordPress, making it the leader in CMS tools.
Core Features of WordPress
- Open Source & Free: Fully accessible source code with no licensing fees, allowing free use, modification, and redistribution—greatly lowering site costs.
- Beginner-Friendly: Visual interface enables easy setup for users without coding knowledge. Themes and plugins allow drag-and-drop building.
- Highly Extensible: Boasts the world's largest plugin ecosystem (60,000+), supporting international payments, multi-language switching, SEO, social sharing, and more.
- Vast Theme Library: Thousands of free/paid themes covering e-commerce, business, blogs, etc., with one-click switching and deep customization.
- Cross-Platform Compatibility: Built in PHP, works on Linux, Windows, and other OS; integrates with MySQL and is compatible with the Linux+1Panel setup in this guide.
- Robust Community: Backed by a huge global developer and user base, with extensive documentation, forums, and tutorials for quick troubleshooting.
Advantages for Cross-Border E-Commerce
When paired with WooCommerce—a purpose-built e-commerce plugin for WordPress—WordPress can fully support international e-commerce:
- Multi-currency pricing and global payment gateways (PayPal, Stripe);
- Multilingual support via plugins (WPML, Polylang) for different markets;
- Powerful SEO plugins (Yoast SEO) to improve global search visibility;
- Product variation management, inventory tracking, order processing;
- Integrations with tools like Google Analytics and Facebook Pixel for marketing and analytics.
Who It's For
- Small to mid-sized exporters and individual sellers wanting low-cost independent sites;
- Users lacking a development team, needing fast deployment and simple maintenance;
- Those needing site flexibility to adapt to changing business needs;
- Businesses aiming for long-term brand building and data ownership.
These advantages make WordPress a top choice for cross-border e-commerce sites. Combined with Linux and 1Panel, it allows for fast, efficient, and affordable deployment.
Recommended Website Building Tutorials
- Set up a personal blog using Typecho on a cloud server – beginner-friendly guide: https://blog.zeruns.com/archives/749.html
- Quick setup of a personal blog using Cloud Server + Pagoda Panel + Gridea: https://blog.zeruns.com/archives/783.html
- How to build your own custom domain email server? Poste.io setup tutorial: https://blog.zeruns.top/archives/8
- Set up a Cloudreve file hosting site with Rainyun server and mount Rainyun object storage: https://blog.zeruns.com/archives/743.html
- Build a Discuz forum on Linux – full website deployment tutorial: https://blog.zeruns.com/archives/681.html
- One-click Halo blog deployment using 1Panel – step-by-step guide: https://blog.zeruns.top/archives/47.html
- Flarum forum deployment tutorial, with theme and plugin installation: https://blog.zeruns.top/archives/52.html
- Set up a PHP site using Rainyun RCA Cloud App (K8s-based) – high availability, no server needed: https://blog.zeruns.top/archives/54.html
- Set up and configure Baota Cloud WAF (Free Edition) to protect your site step-by-step: https://blog.zeruns.top/archives/56.html
- ALLinSSL setup and usage guide – one-click SSL certificate issuance, renewal, deployment, and monitoring: https://blog.zeruns.top/archives/58.html
Overview of the Setup Process
- Register a custom domain name
- Purchase a cloud server
- Install 1Panel and Docker
- Deploy a WordPress site with an eCommerce theme
- Set up WooCommerce plugin to manage the store
- Enable HTTPS encryption
Domain Registration
What Is a Domain Name?
A domain name is the "address" of a website, used to replace hard-to-remember IP strings like 192.168.1.1. For instance, typing blog.zeruns.com lets users access a specific site without remembering the server IP.
A domain is made up of three parts:
- Extension (e.g.,
.com) – indicates site type - Main domain (
zeruns) – customizable name - Subdomain (
blog) – freely configurable
When a user enters a domain name, the DNS system automatically resolves it to the corresponding server IP. To register a domain, you can use platforms like Alibaba Cloud (approx. ¥50/year), then bind the domain to your server IP to bring the site online. A good domain is short and memorable – for example, taobao.com is catchy due to its phonetic appeal.
How to Register a Domain
You can register a domain via Tencent Cloud, Alibaba Cloud, or Rainyun. Rainyun also offers free subdomains.
- Tencent Cloud promo link: https://curl.qcloud.com/rbDL8jYd
- Alibaba Cloud promo link: https://www.aliyun.com/minisite/goods?userCode=jdjc69nf
- Rainyun promo link: https://www.rainyun.com/zeruns_?s=blog-en
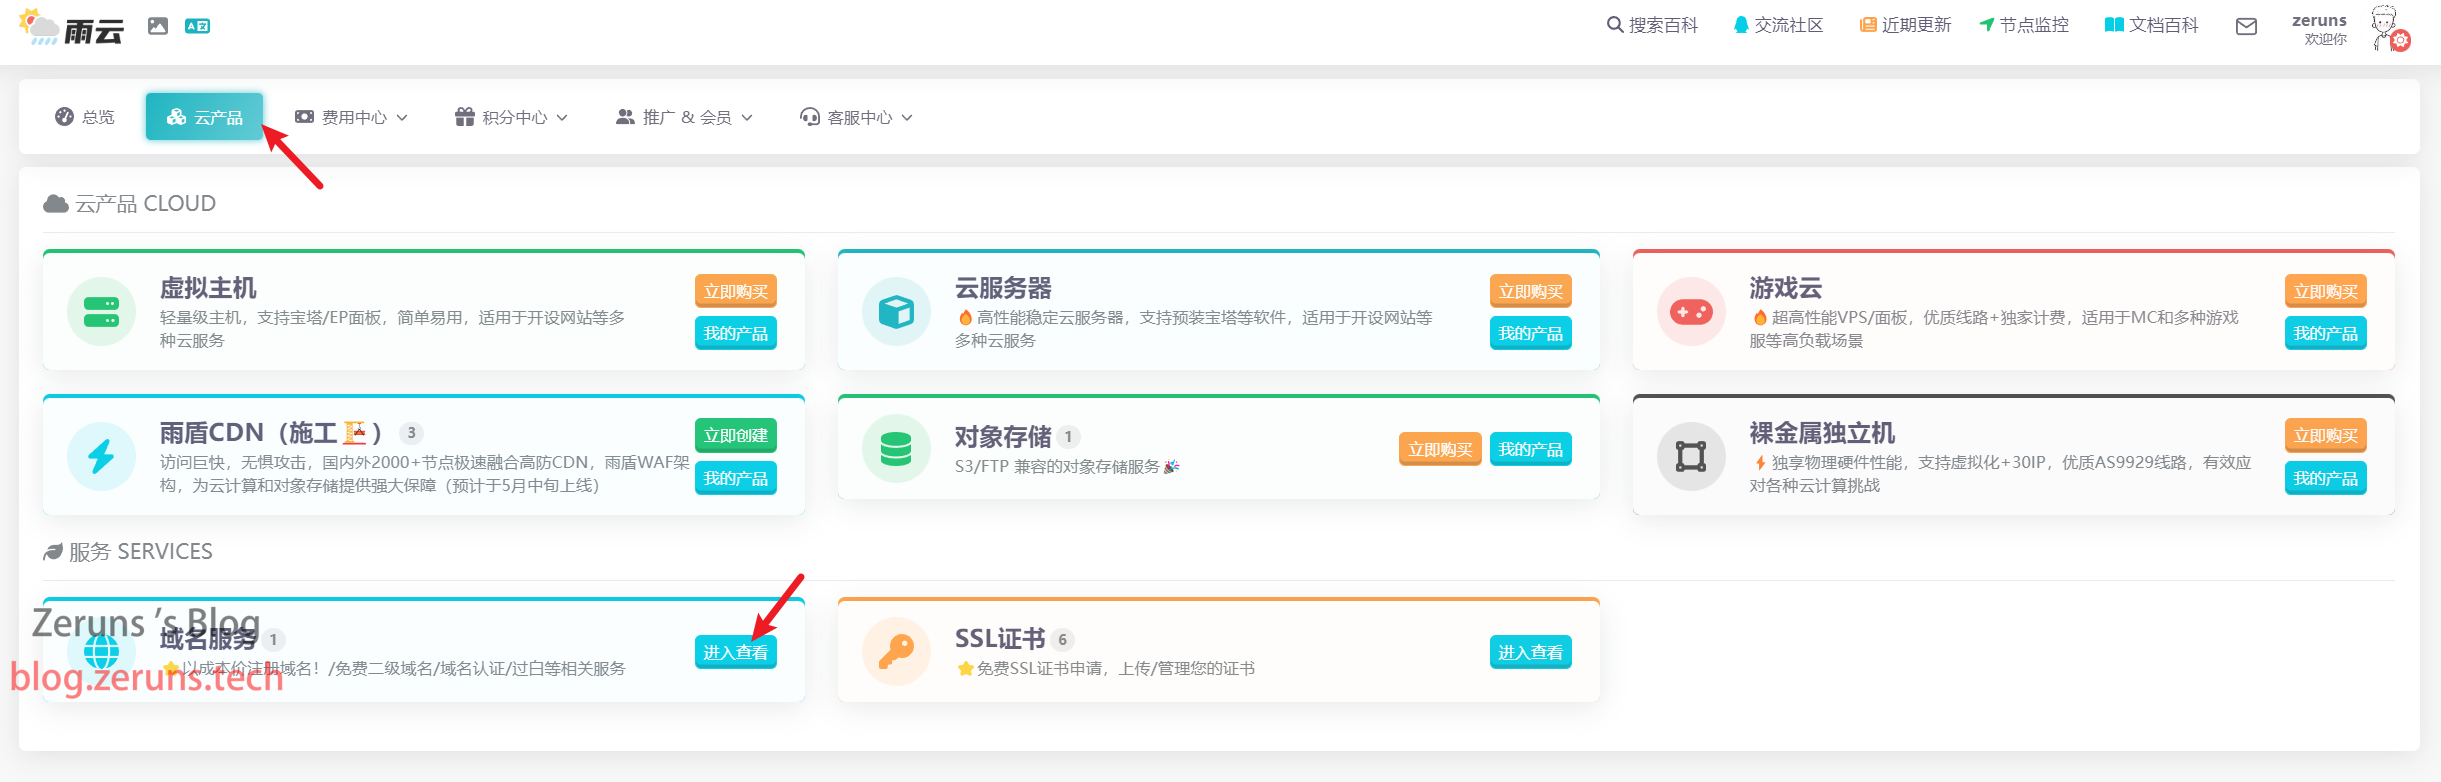
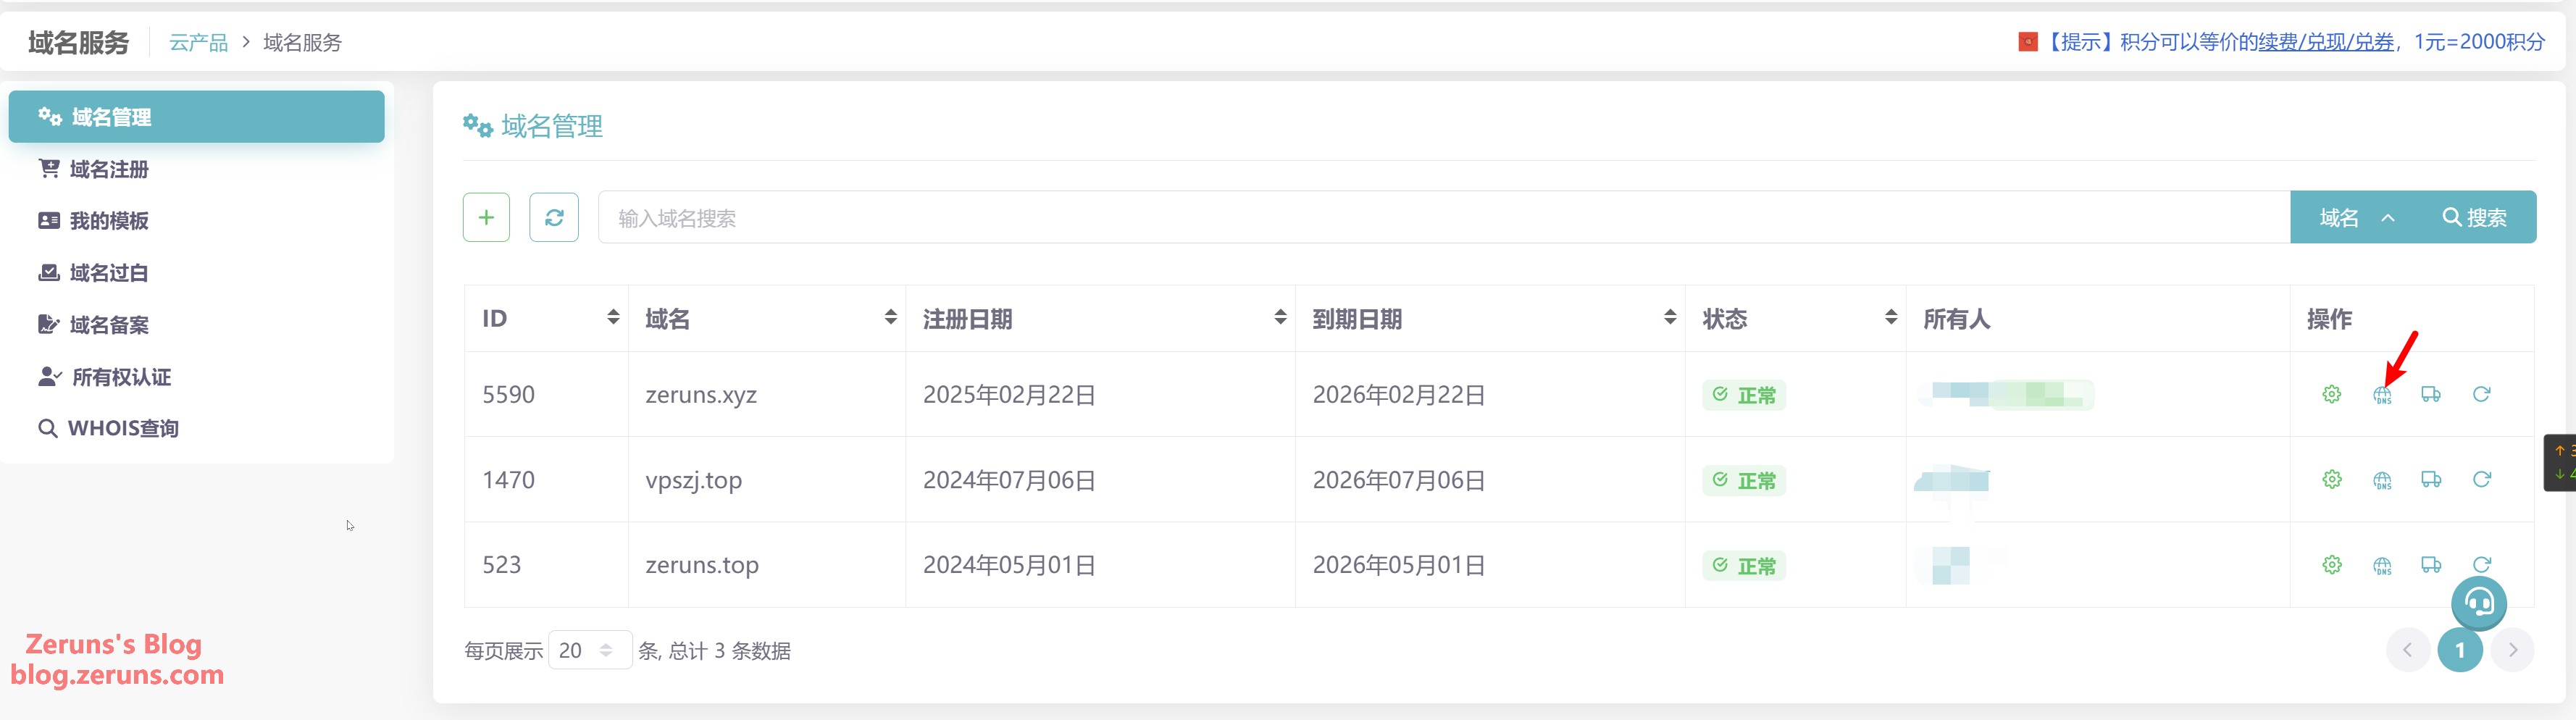
Let's take Rainyun as an example and register the domain zeruns.xyz.
Find the domain service under cloud products.
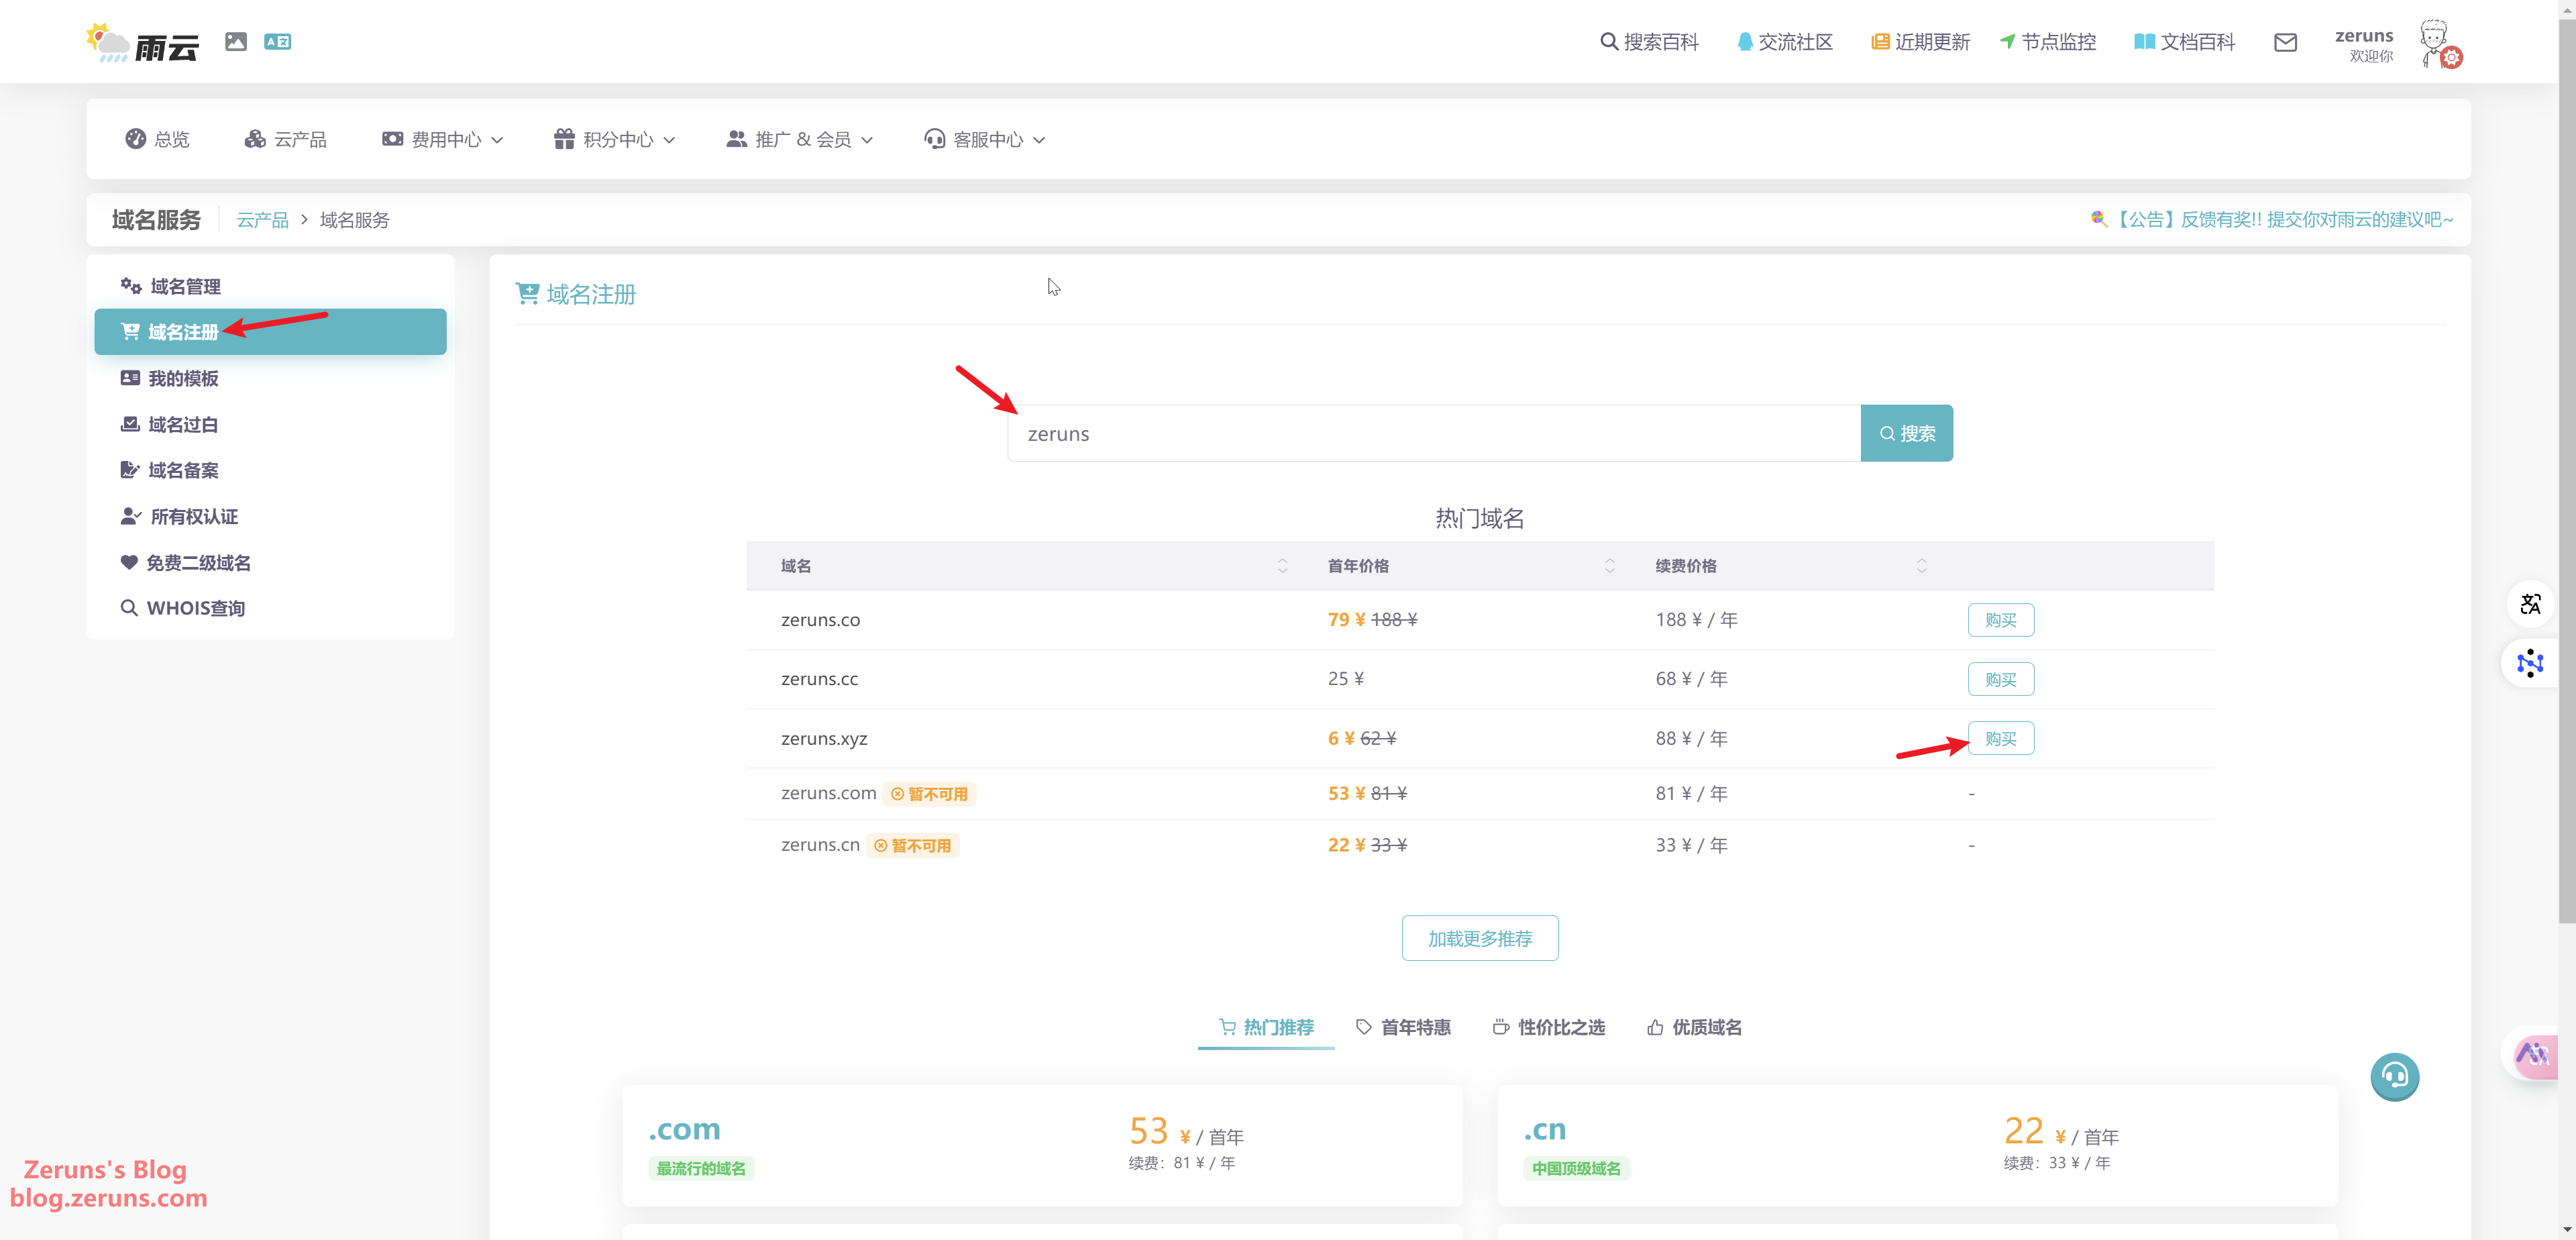
Click on "Register Domain" and search for your desired domain.
Fill in the required information as prompted.
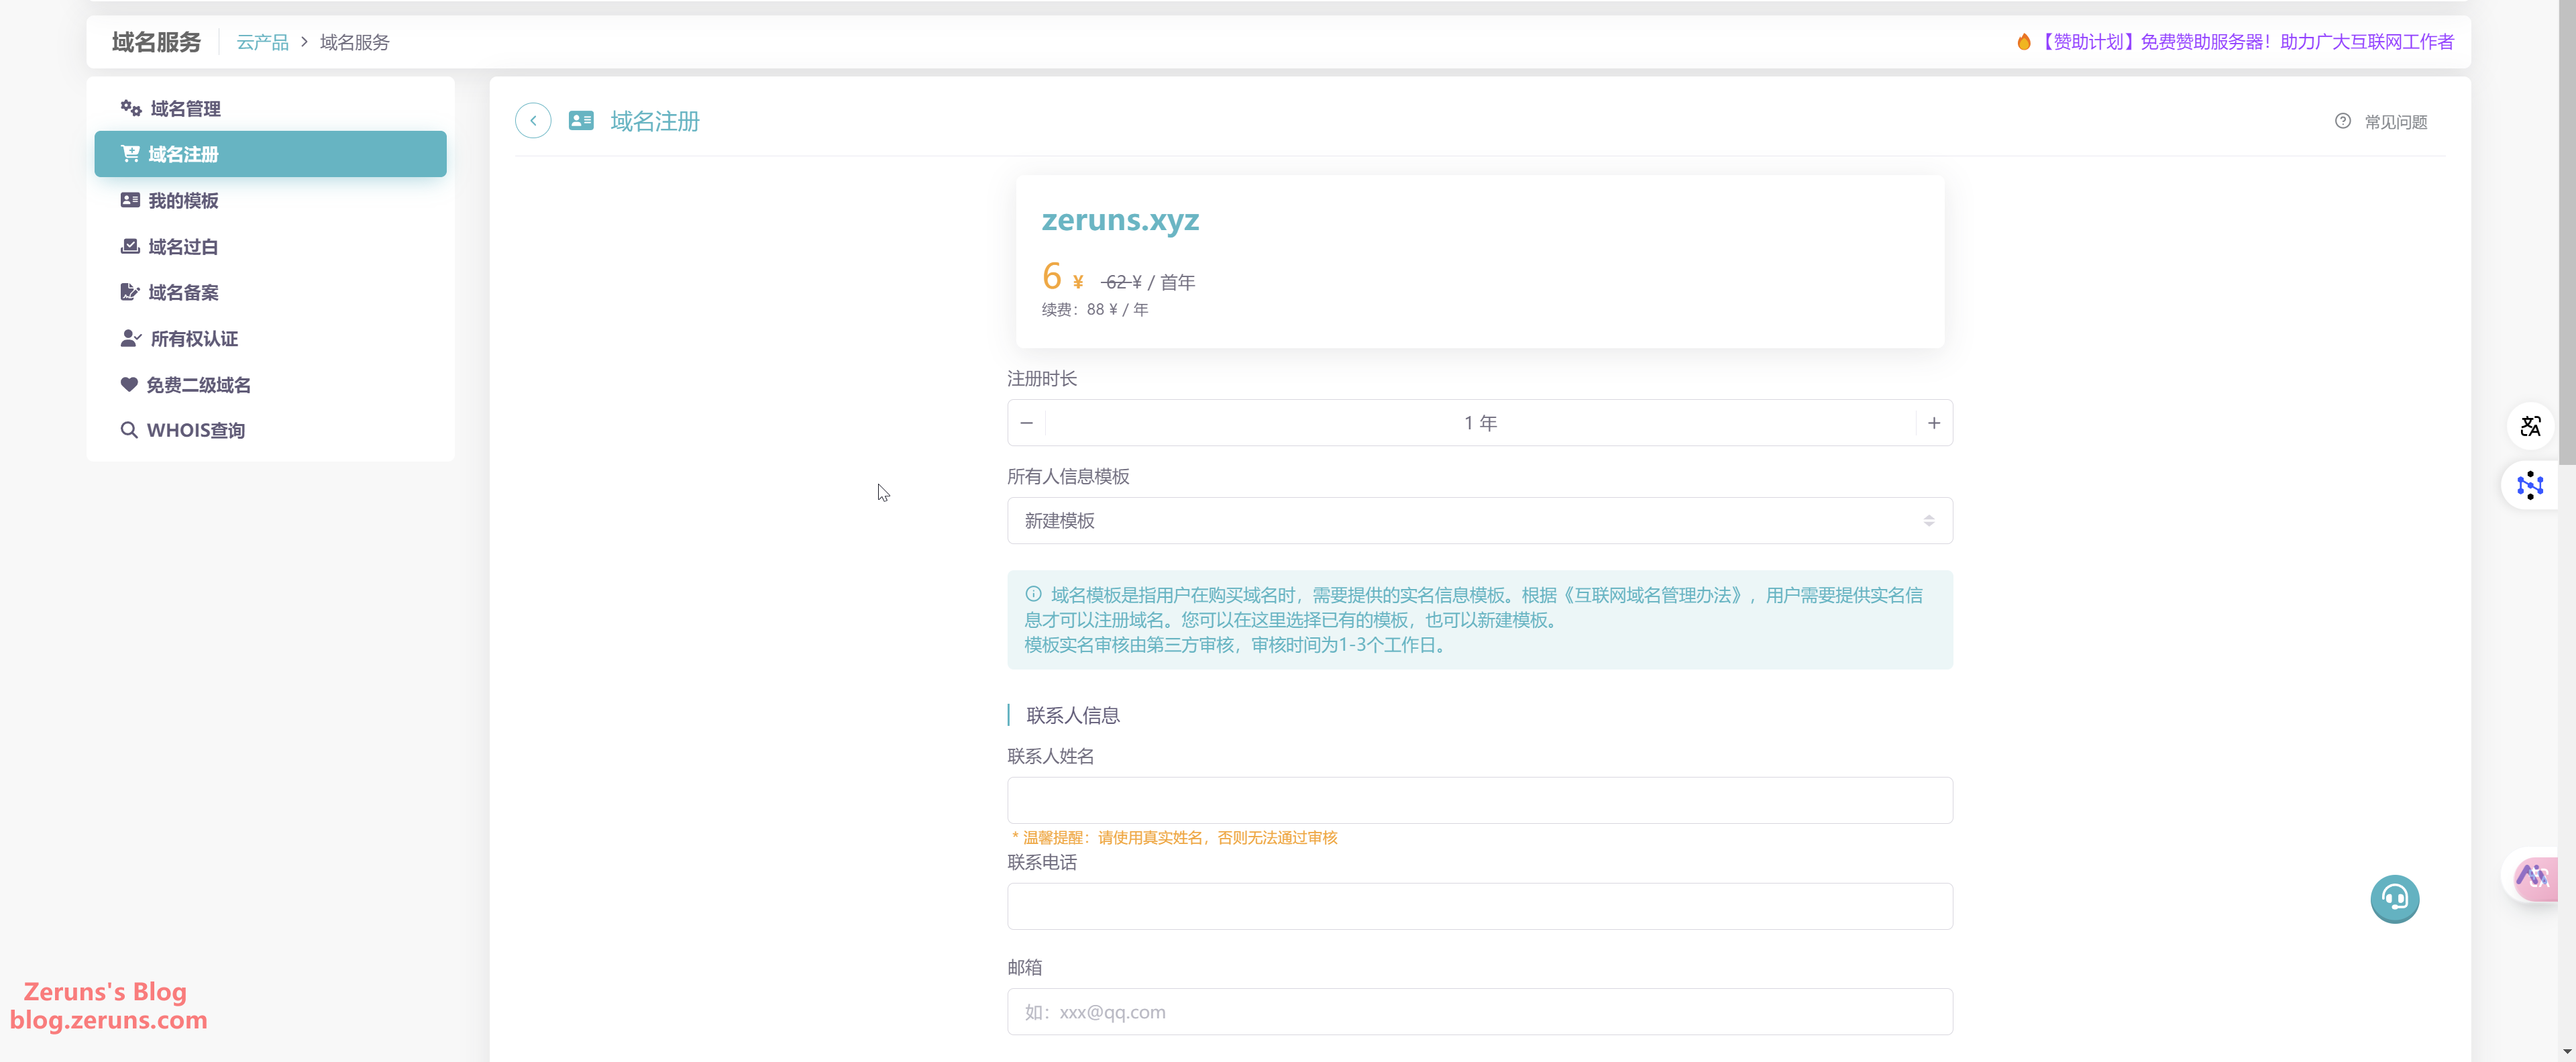
After completing the form, click "Register Now" and wait for the approval.

Preparation
First, you'll need a cloud server with a public IP address. We recommend using Haoliang Cloud:
- Haoliang Cloud Discount Registration Link: https://www.haoliangyun.com/?source=blog-en&aff=zeruns
- Invitation Code: zeruns (Use this link or code to receive a 50% discount coupon upon registration)
- Other cloud server recommendations: https://blog.zeruns.com/archives/383.html
- Haoliang Cloud Hong Kong Lightweight Server Performance Review: https://blog.vpszj.cn/archives/2540.html
- Ucloud Singapore Cross-Border Lightweight Pro Server Review, Dual ISP IP: https://blog.zeruns.com/archives/876.html
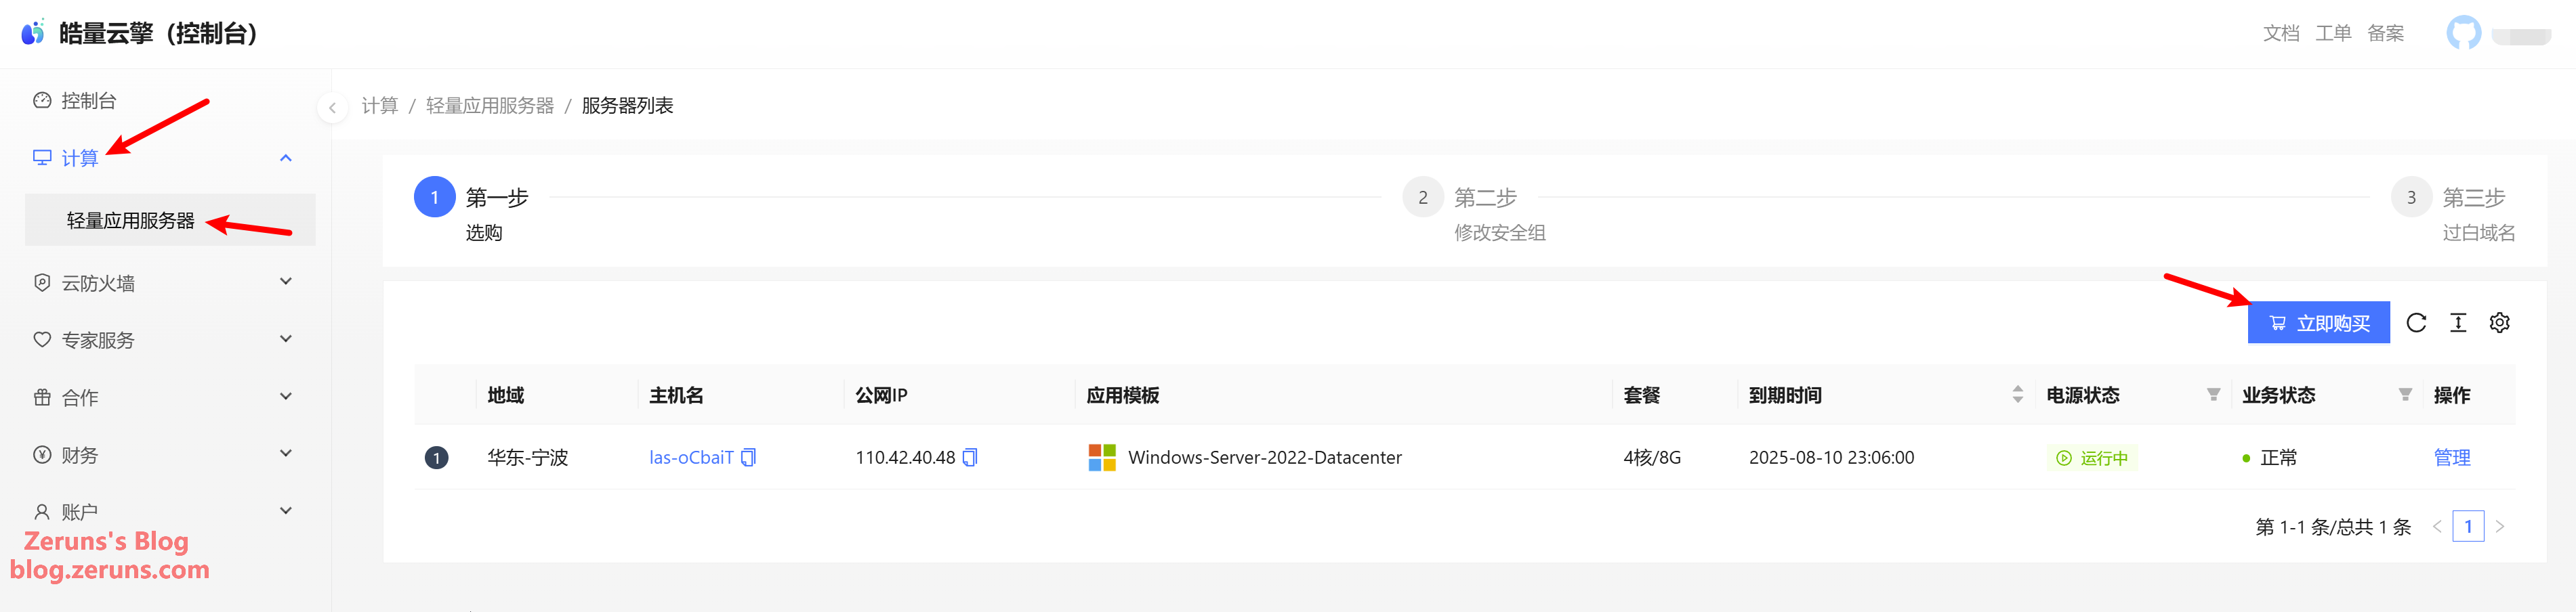
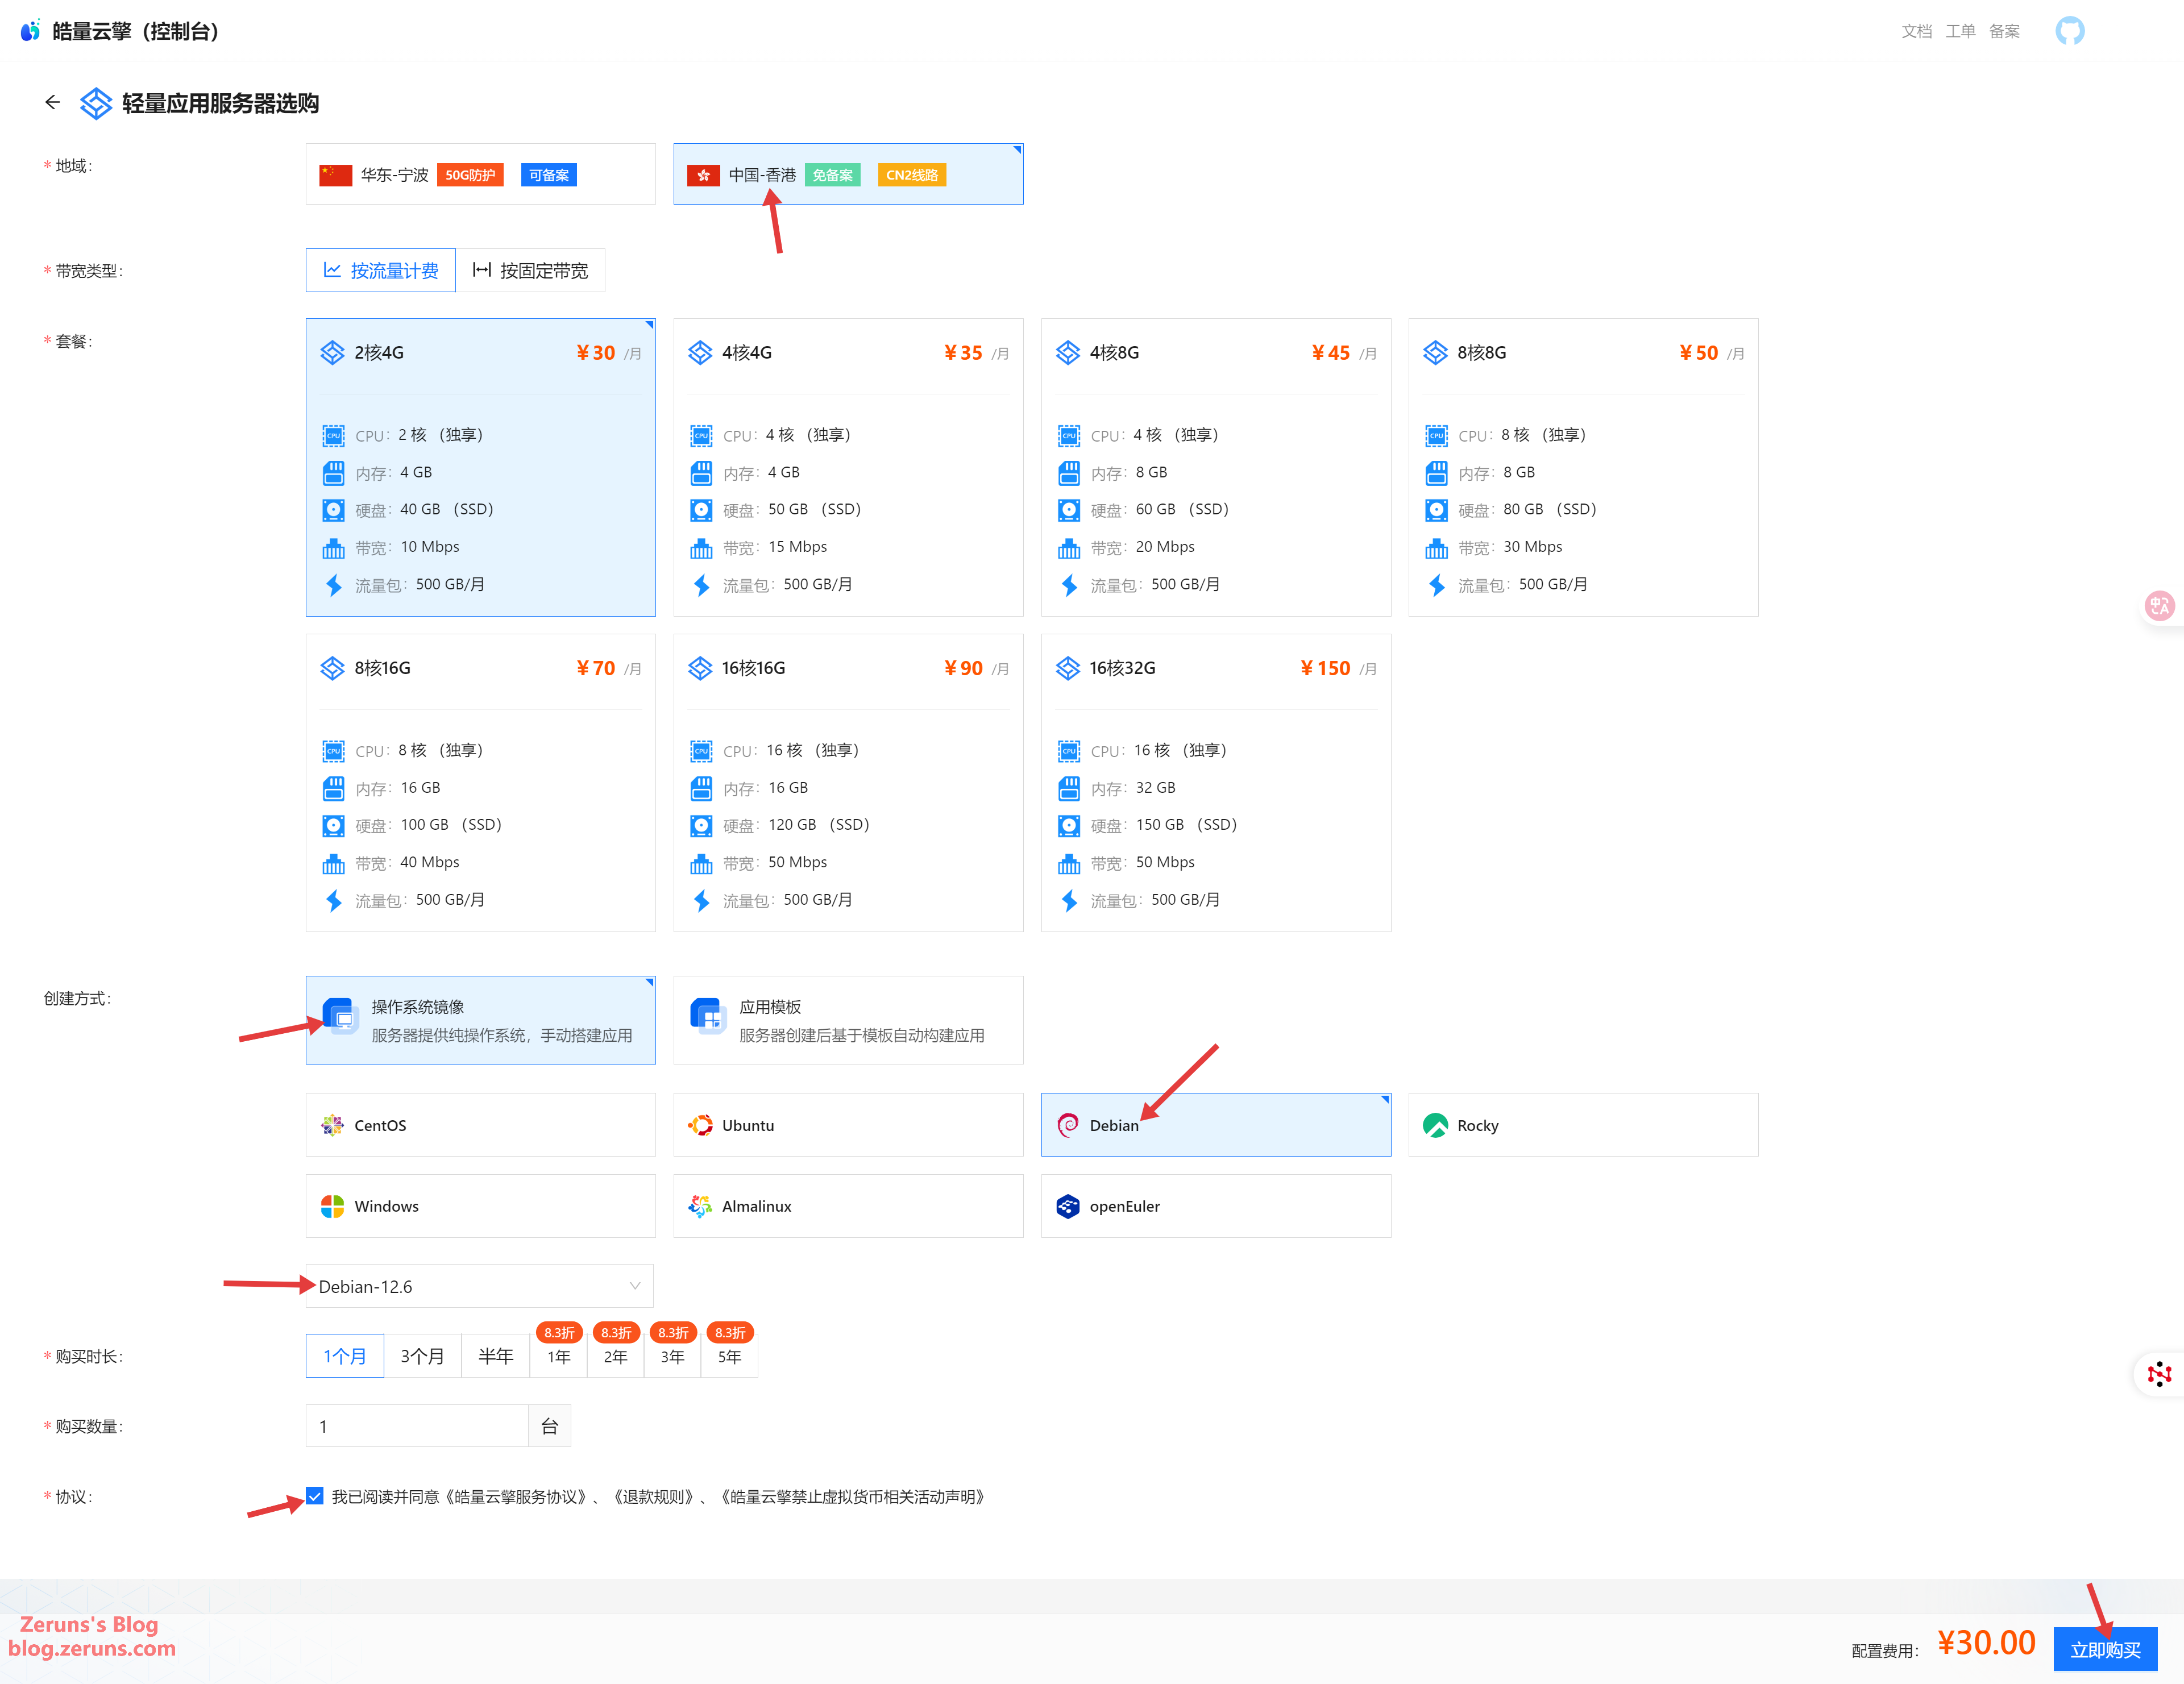
After registering an account, go to the Haoliang Cloud dashboard. Click Compute → Lightweight App Server → Buy Now.
Select region China Hong Kong. It's recommended to choose a 2-core 4G plan (or higher if expecting more traffic). Choose Debian12 as the system, then click Buy Now.
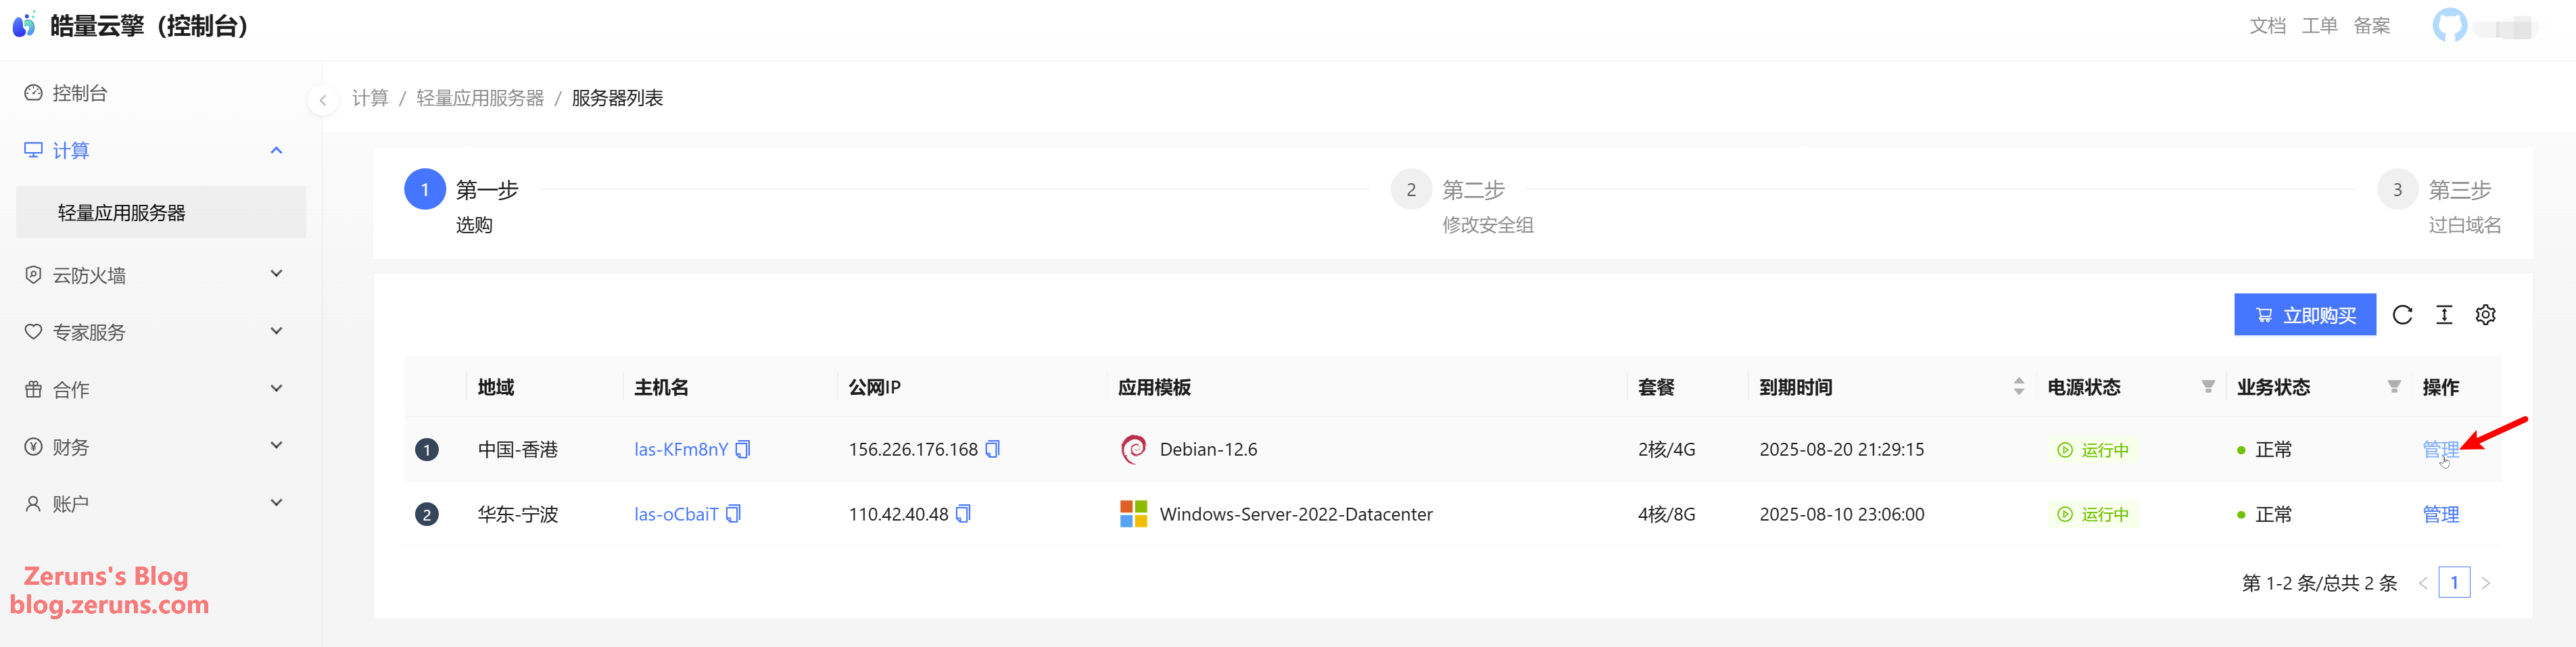
Click Manage to enter the server console.
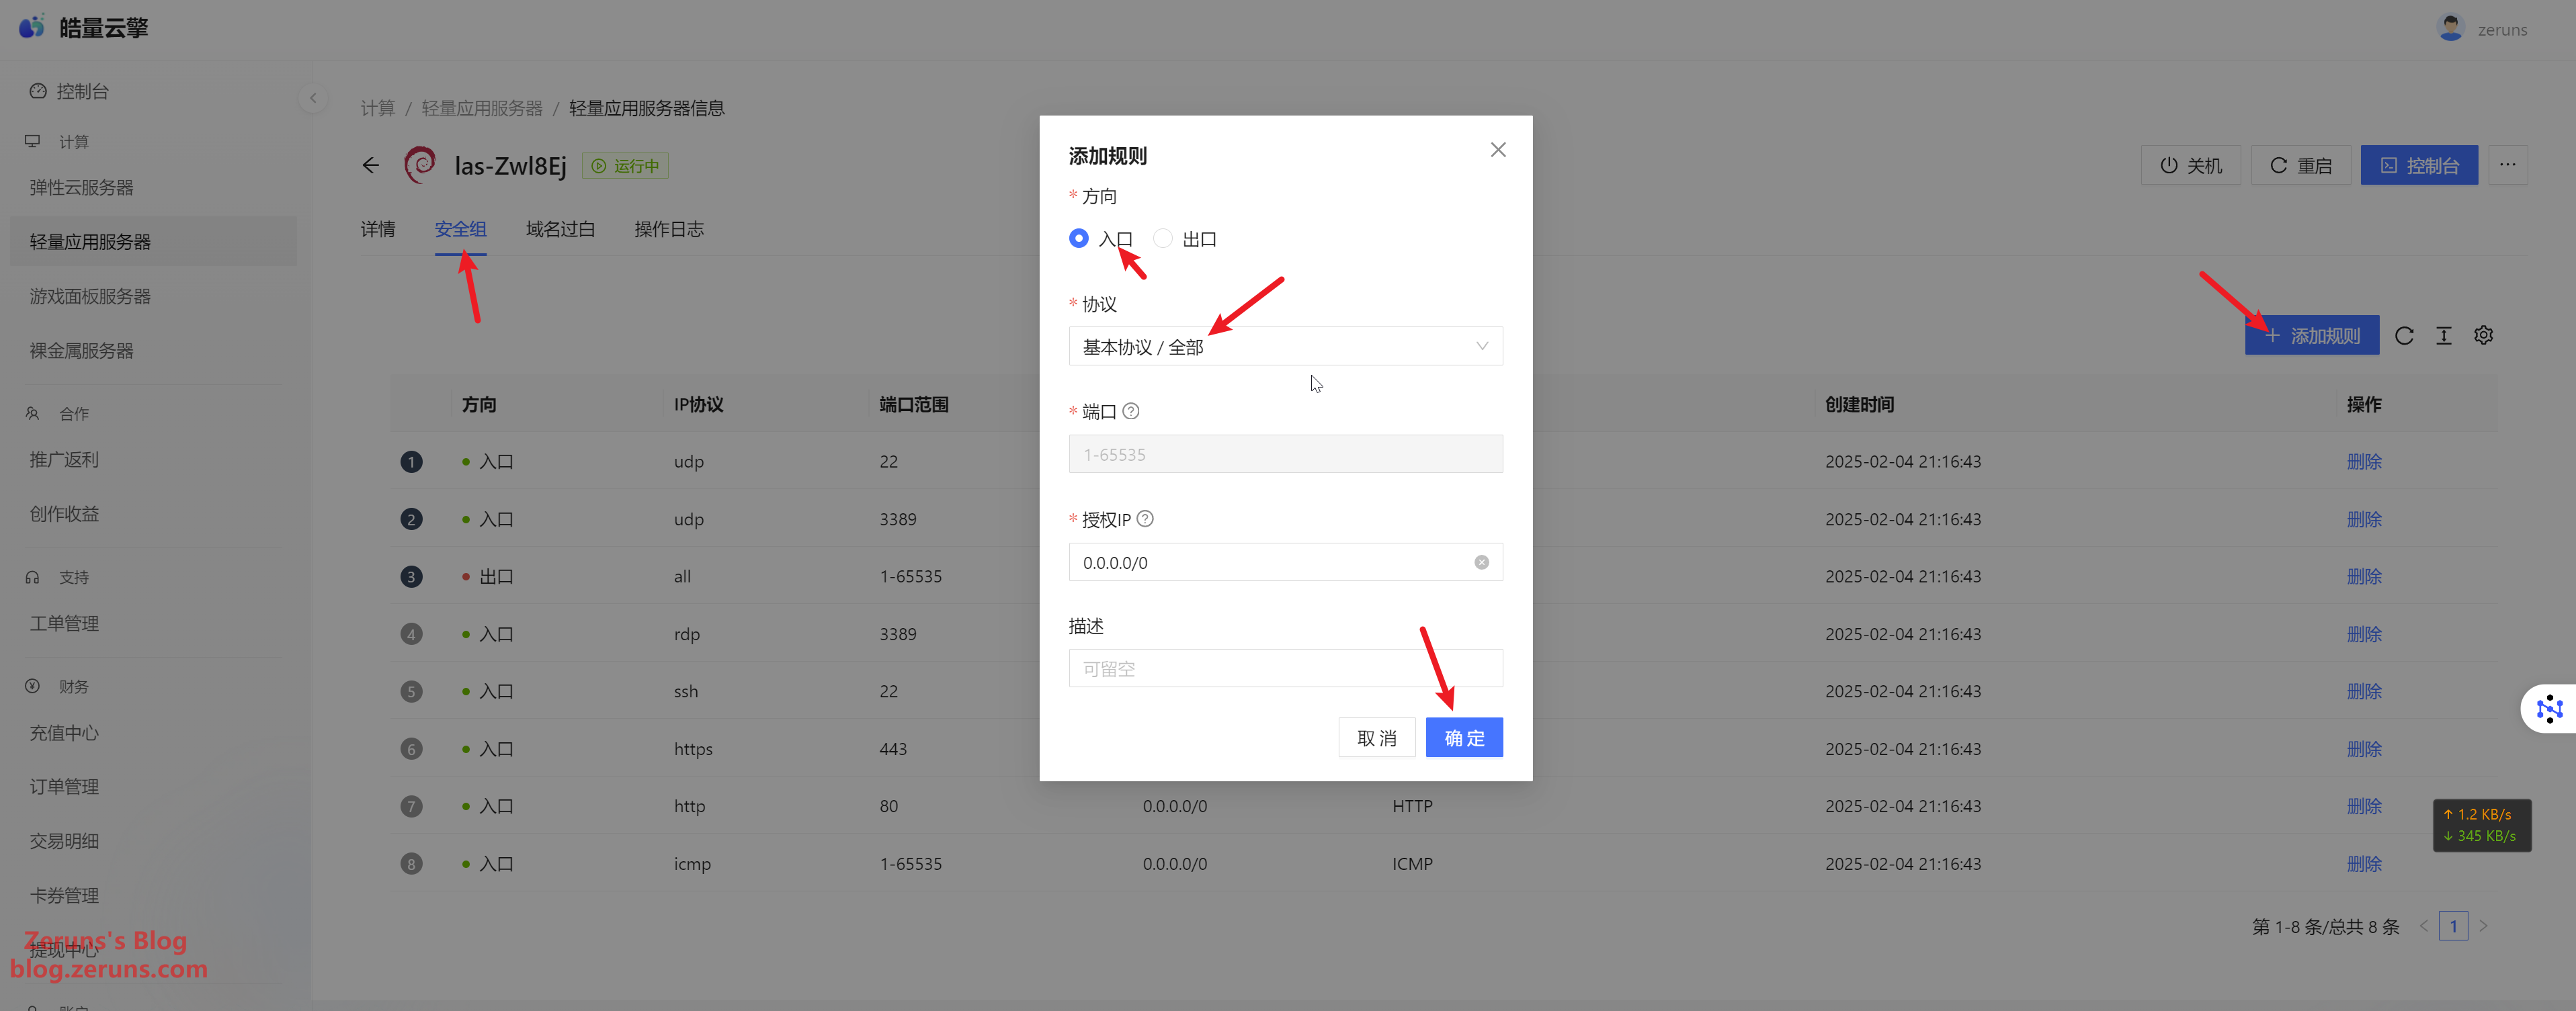
Click Security Group → Add Rule → Inbound to open all ports (or only the necessary ones).
Connecting to the Server
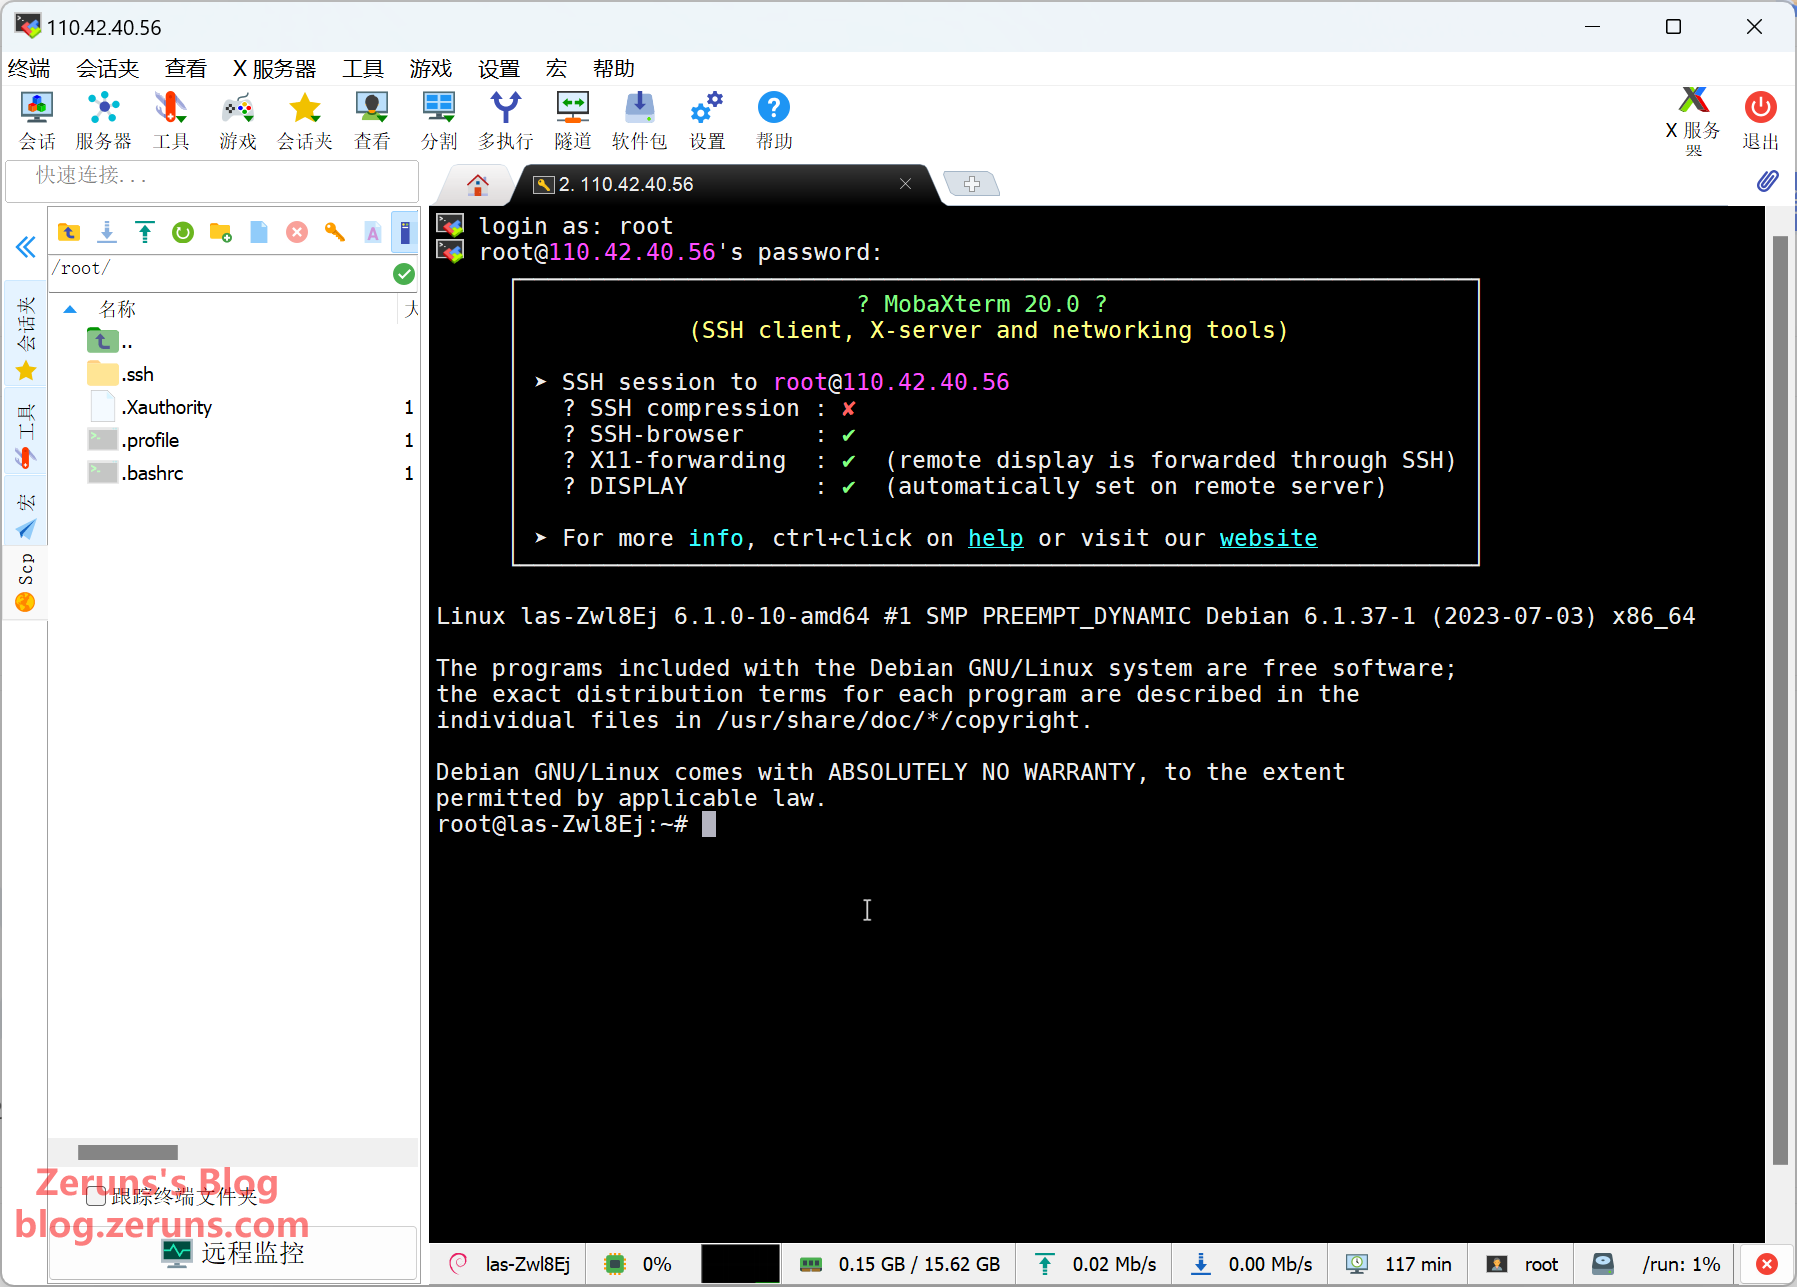
Download and open an SSH client. Recommended SSH clients are Putty or Mobaxterm.
SSH client download link: https://www.123pan.com/ps/2Y9Djv-UAtvH.html
Here we use Mobaxterm. In the SSH client, enter your server's IP address (found in the console), the SSH port (default is 22), then click OK or Open.
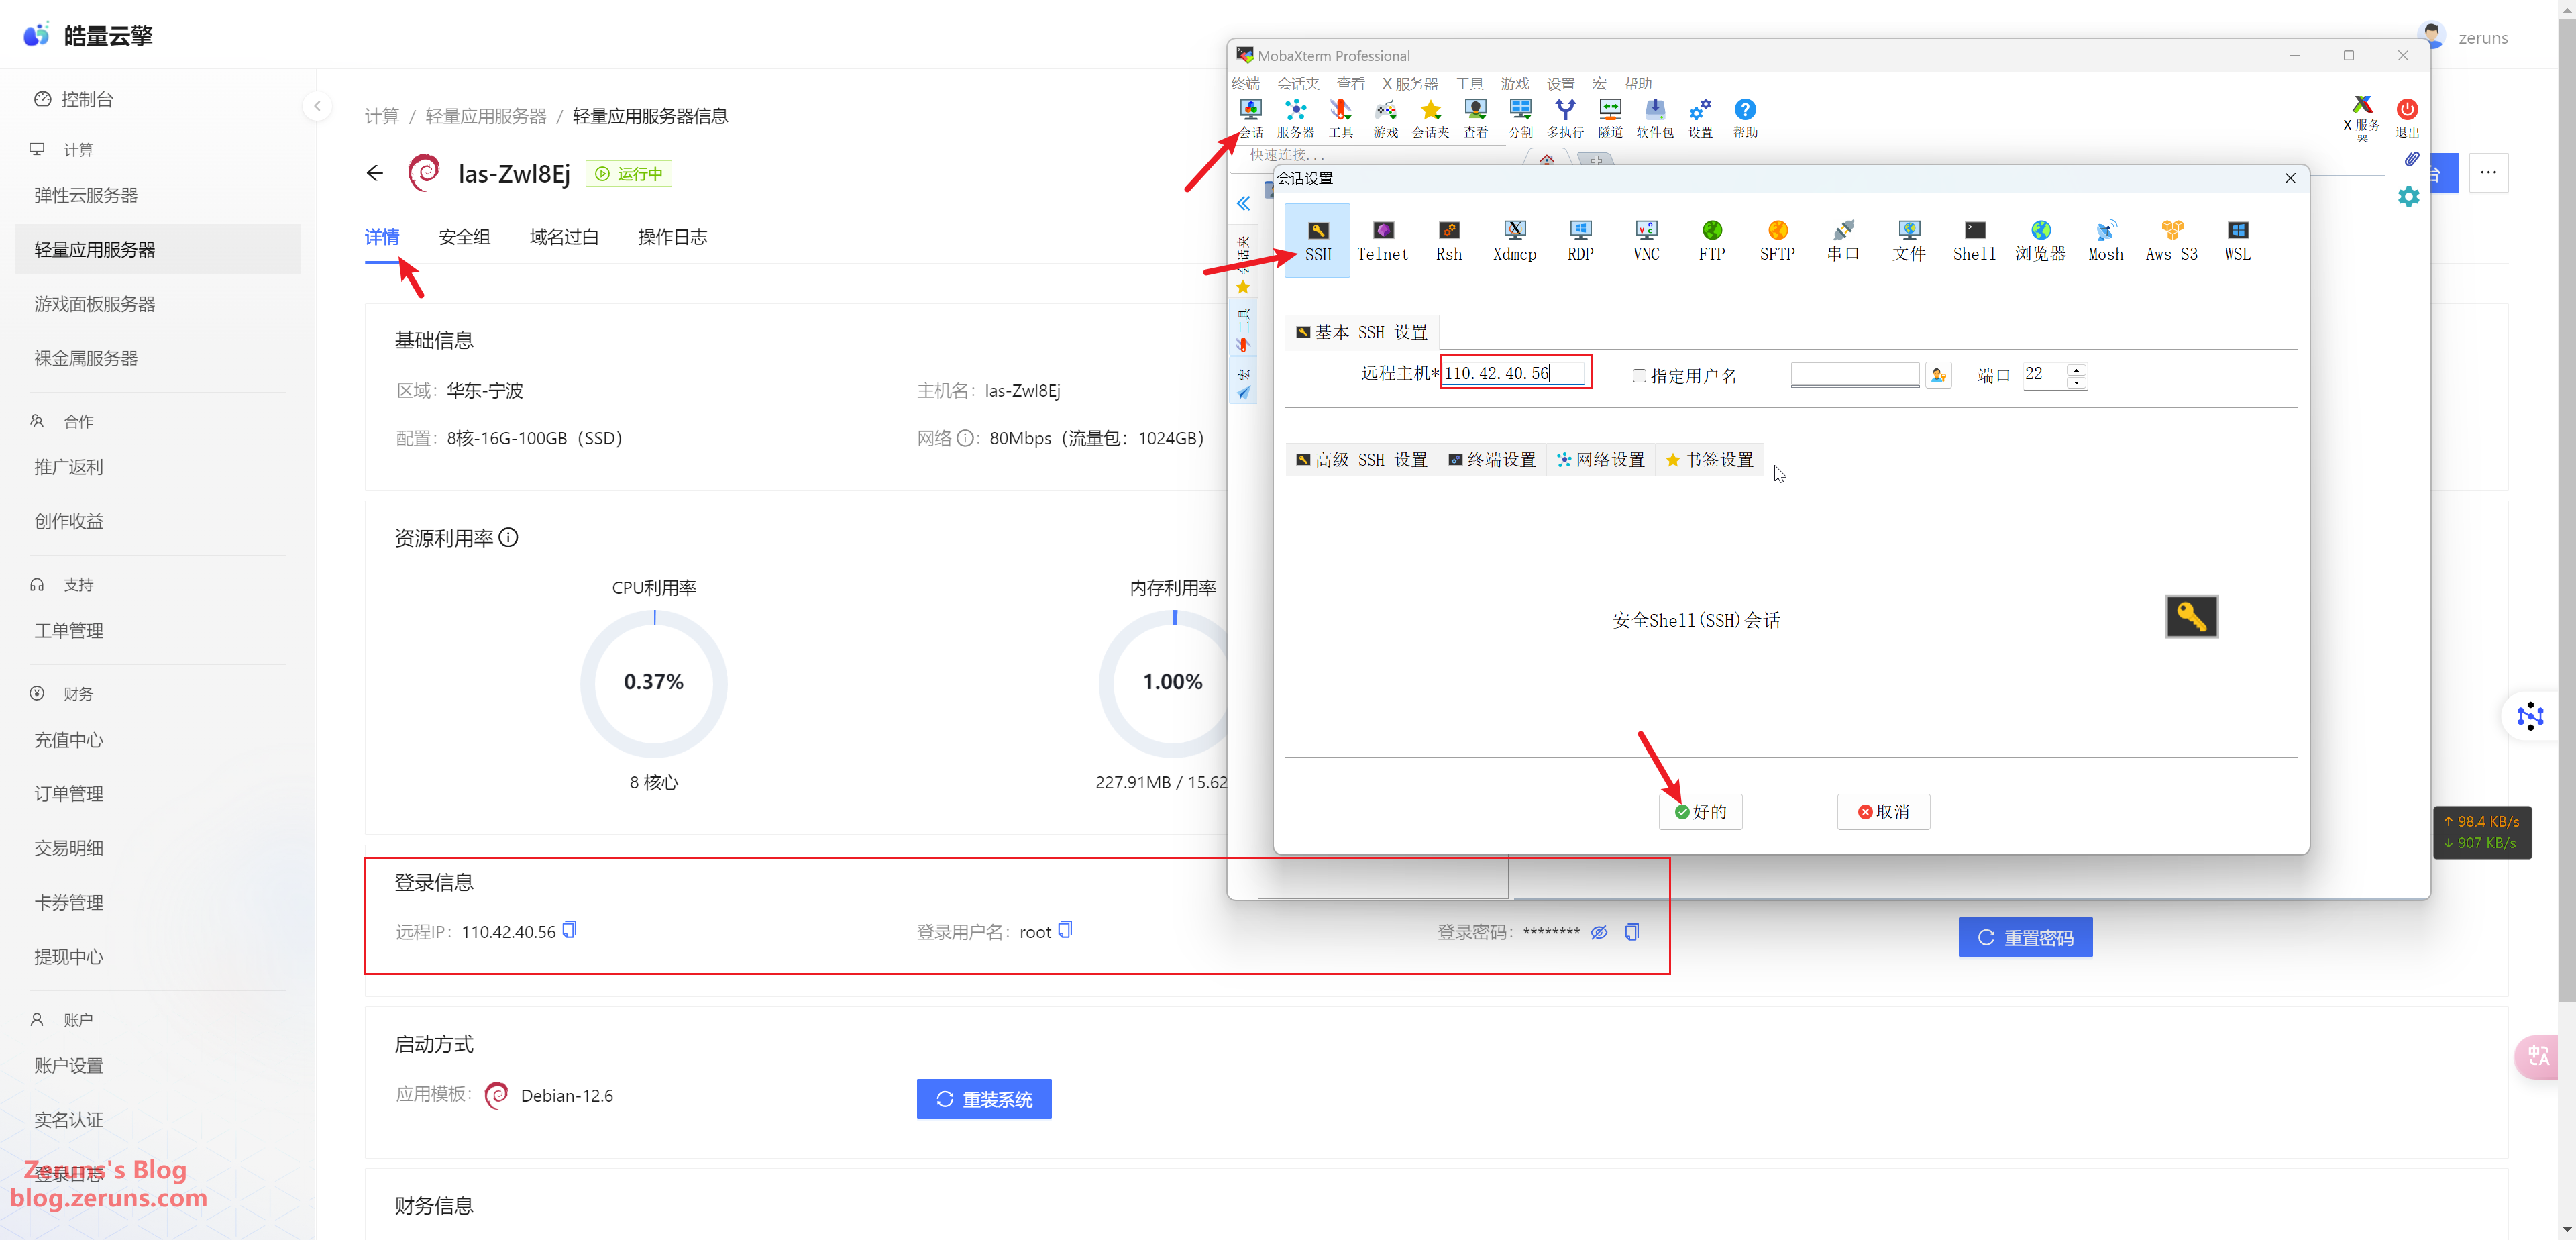
Next, enter the username and press Enter. The default username is usually root. Then enter the password (available in the console) and press Enter to confirm. Note: the password will not be displayed while typing.
Tip: In the SSH terminal, hold down the left mouse button to select text, release it, then click once in a blank area to copy. Right-click in the terminal to paste.
Installing 1Panel and Docker
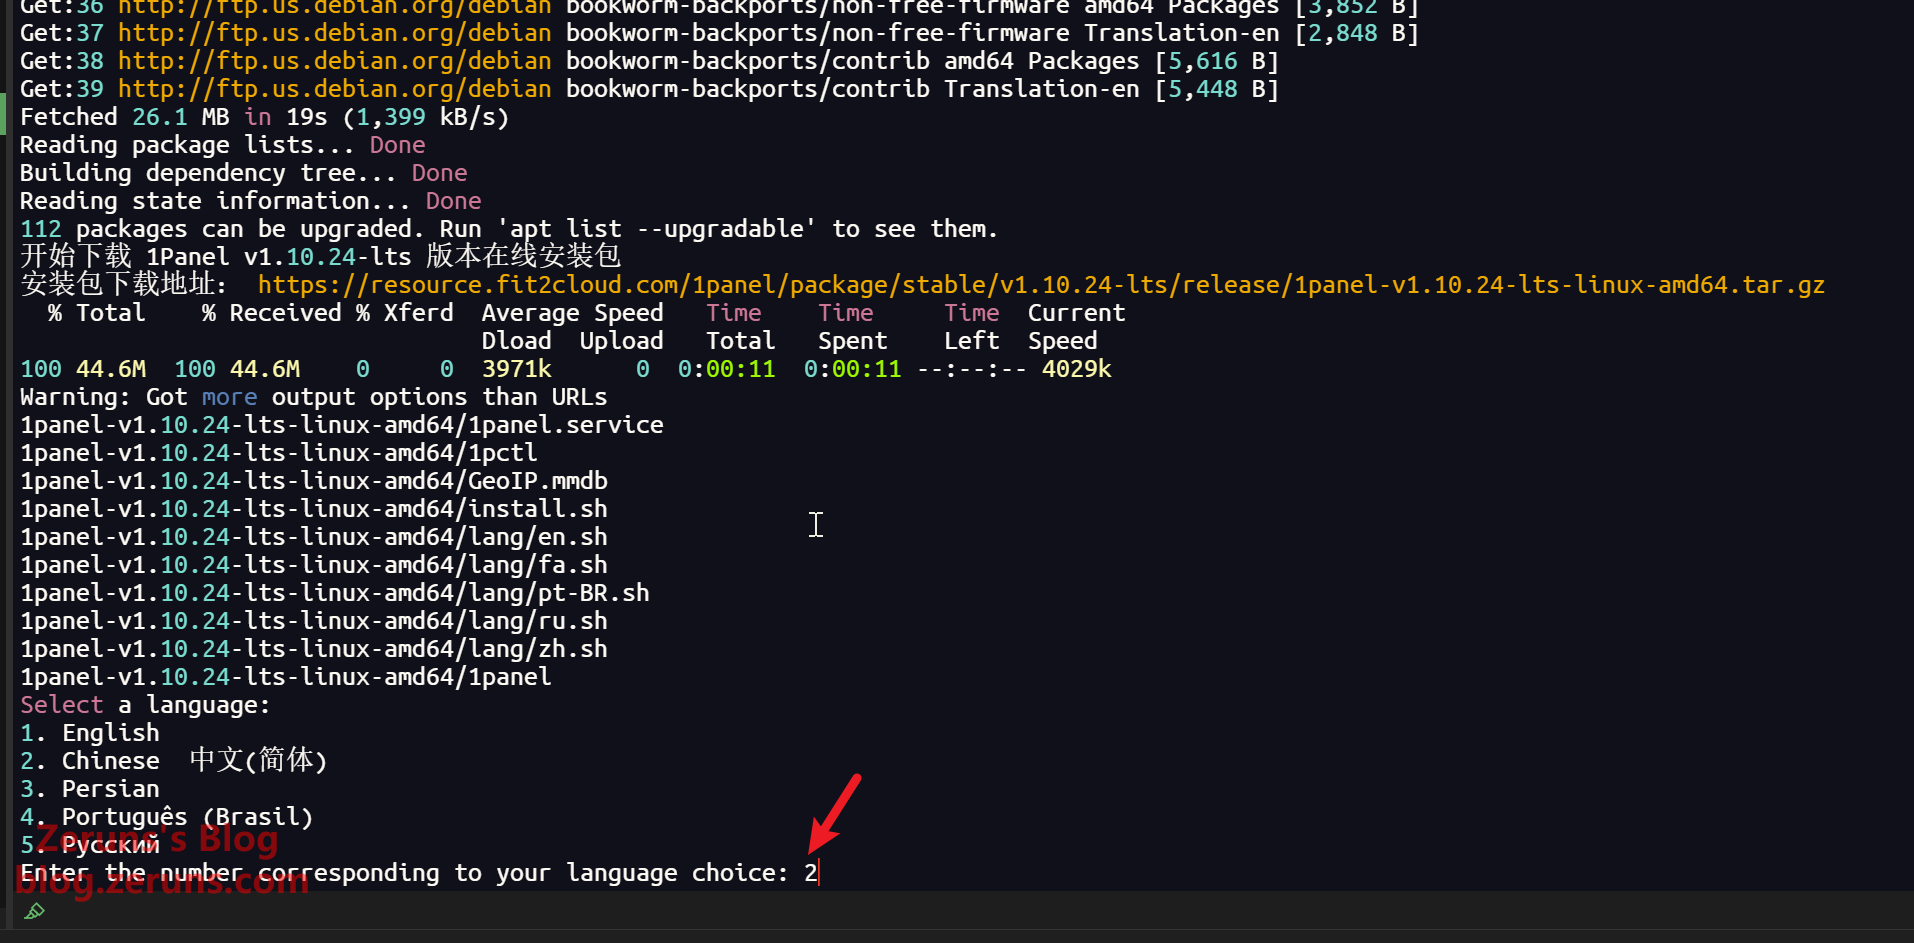
In the SSH terminal, run the following command. This is the installation script for 1Panel, which will also install Docker automatically:
apt update && curl -sSL https://resource.fit2cloud.com/1panel/package/quick_start.sh -o quick_start.sh && bash quick_start.sh
If prompted to select a language, type the corresponding number and press Enter. Here, we select 2. Chinese 中文(简体).
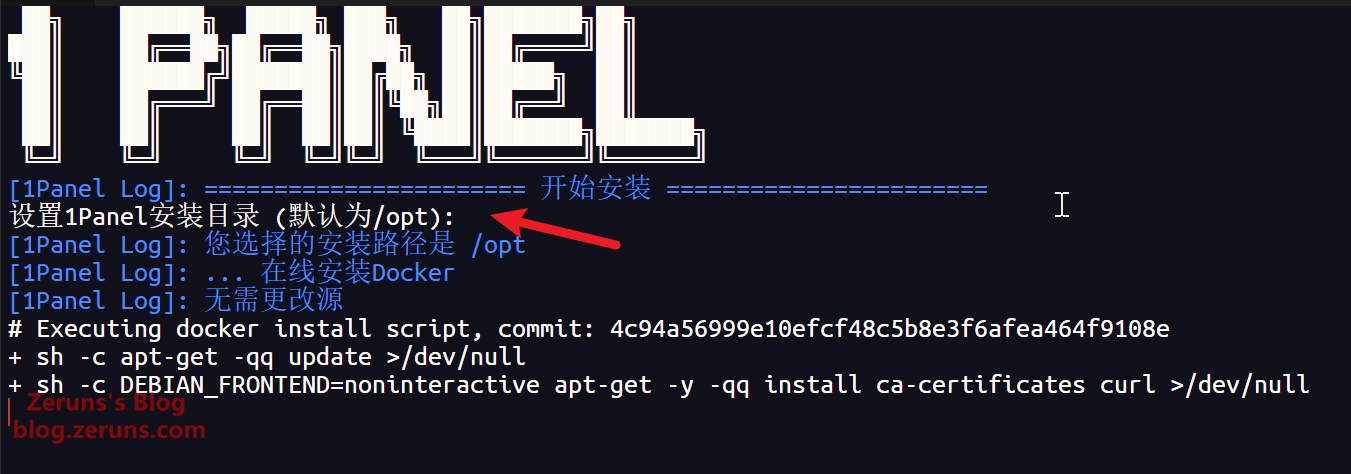
If asked to set the installation directory, just press Enter to use the default /opt directory.
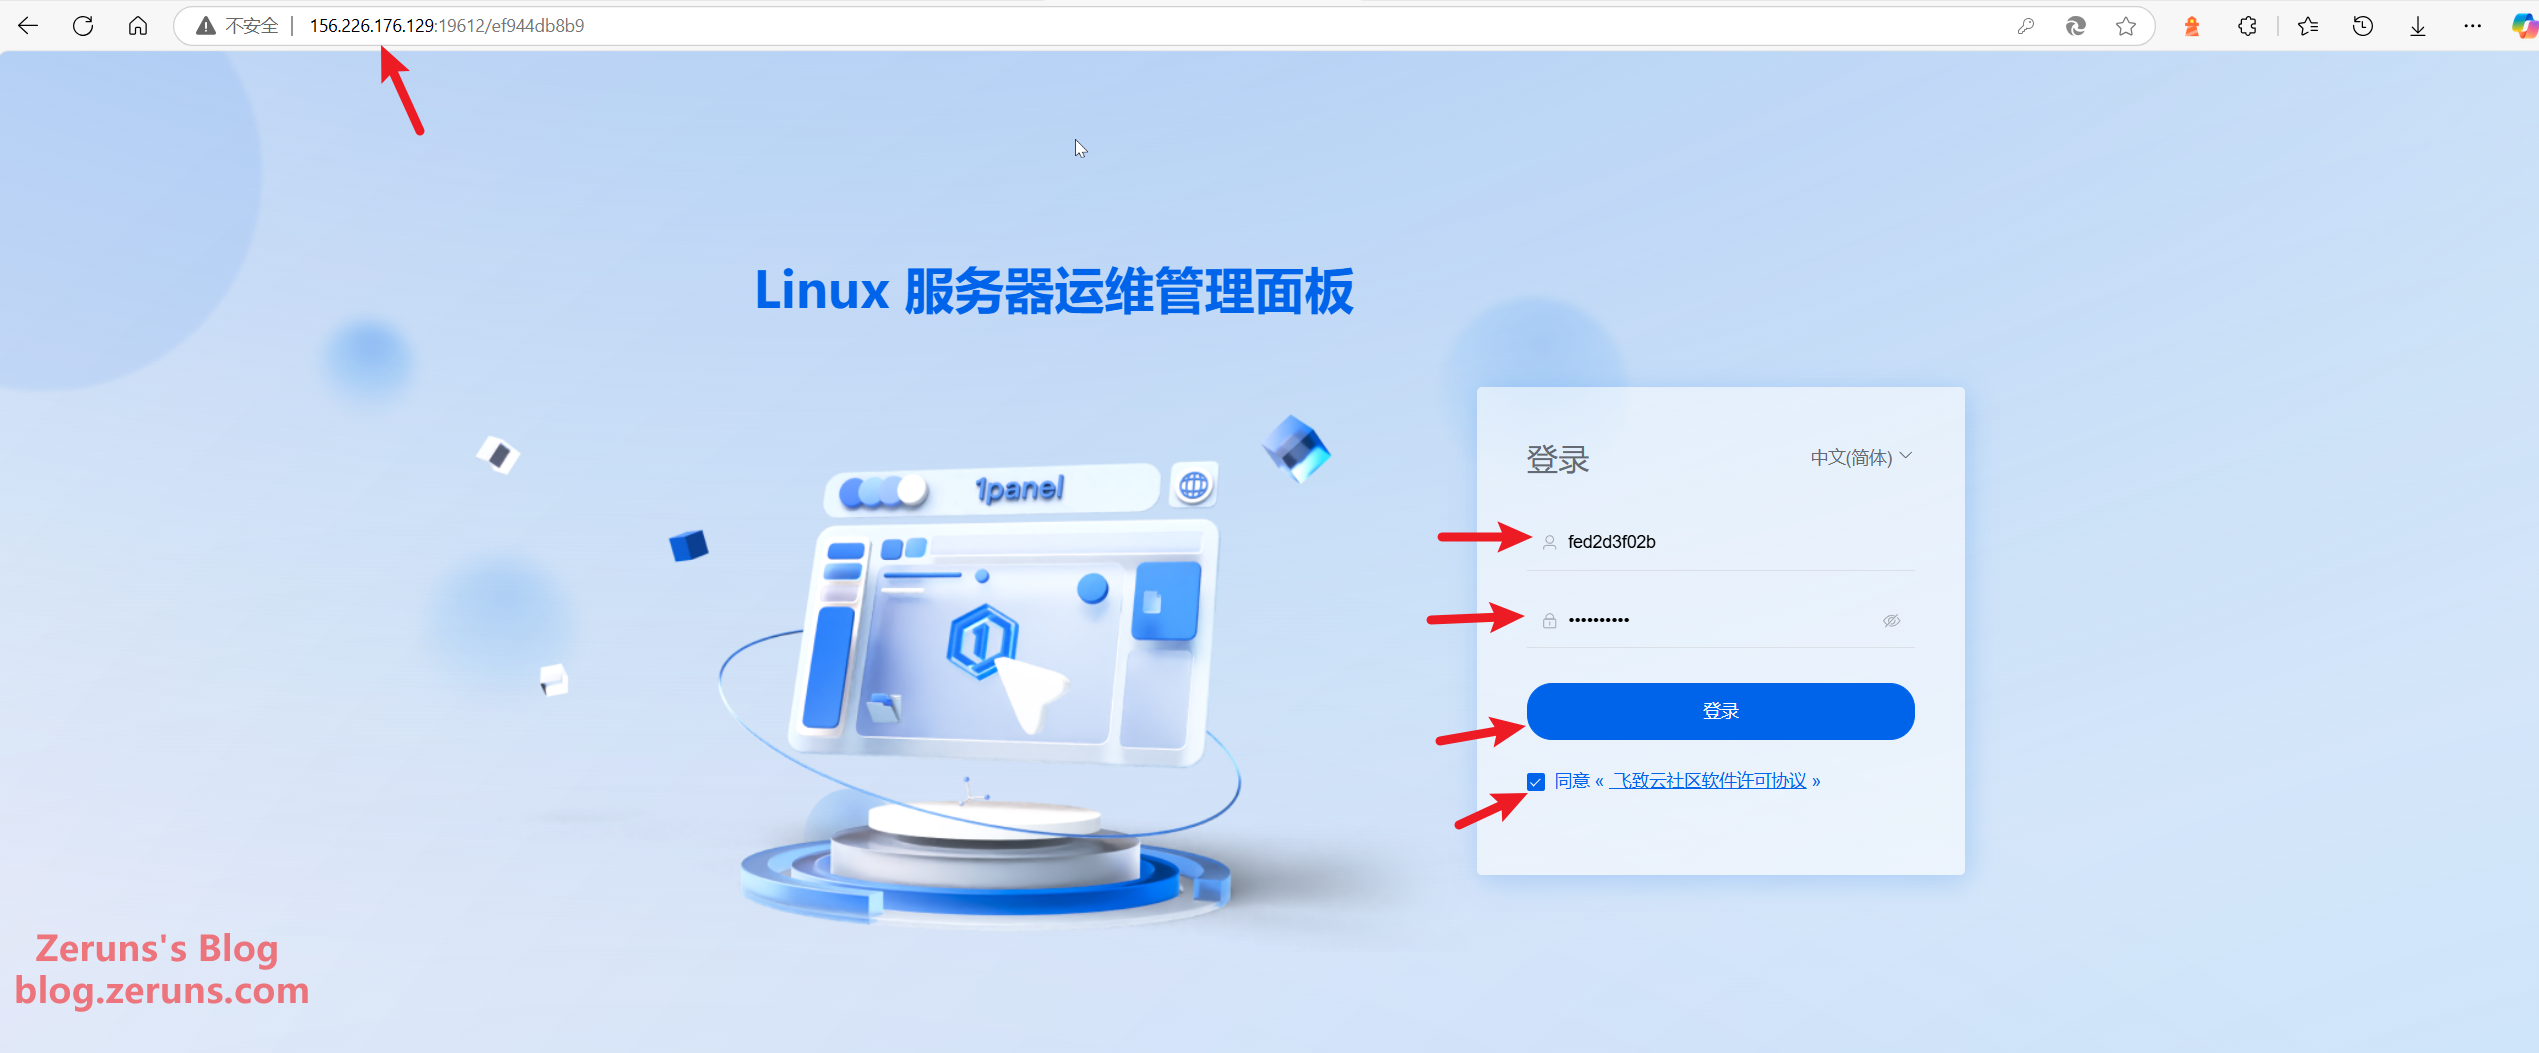
Next, you'll set the panel's port and login credentials. The default values are usually fine, or you can set your own. Then wait for the installation to complete. Make sure to remember the panel address and your login credentials shown below.
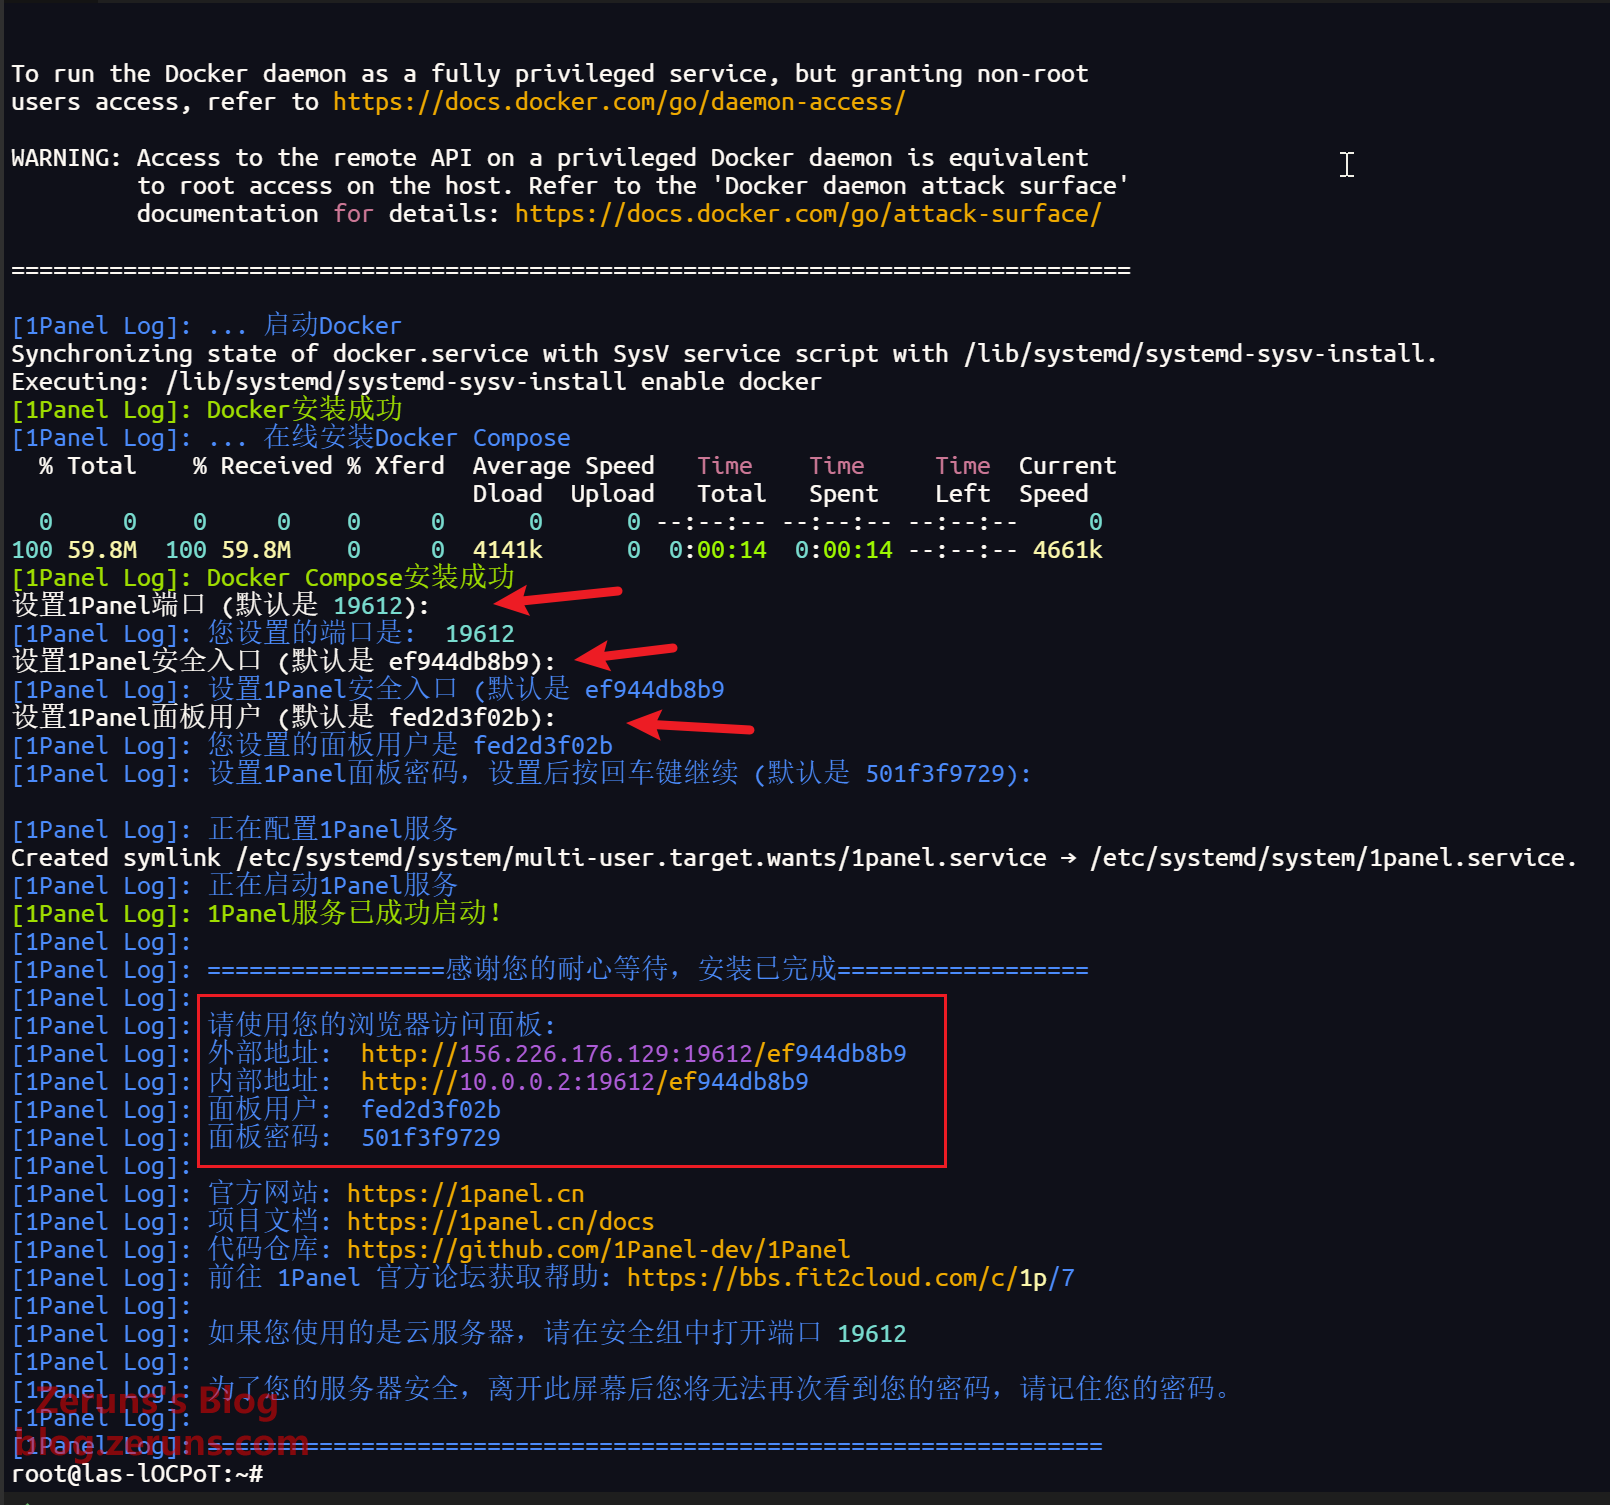
Enter the panel address in your browser's address bar to log in.
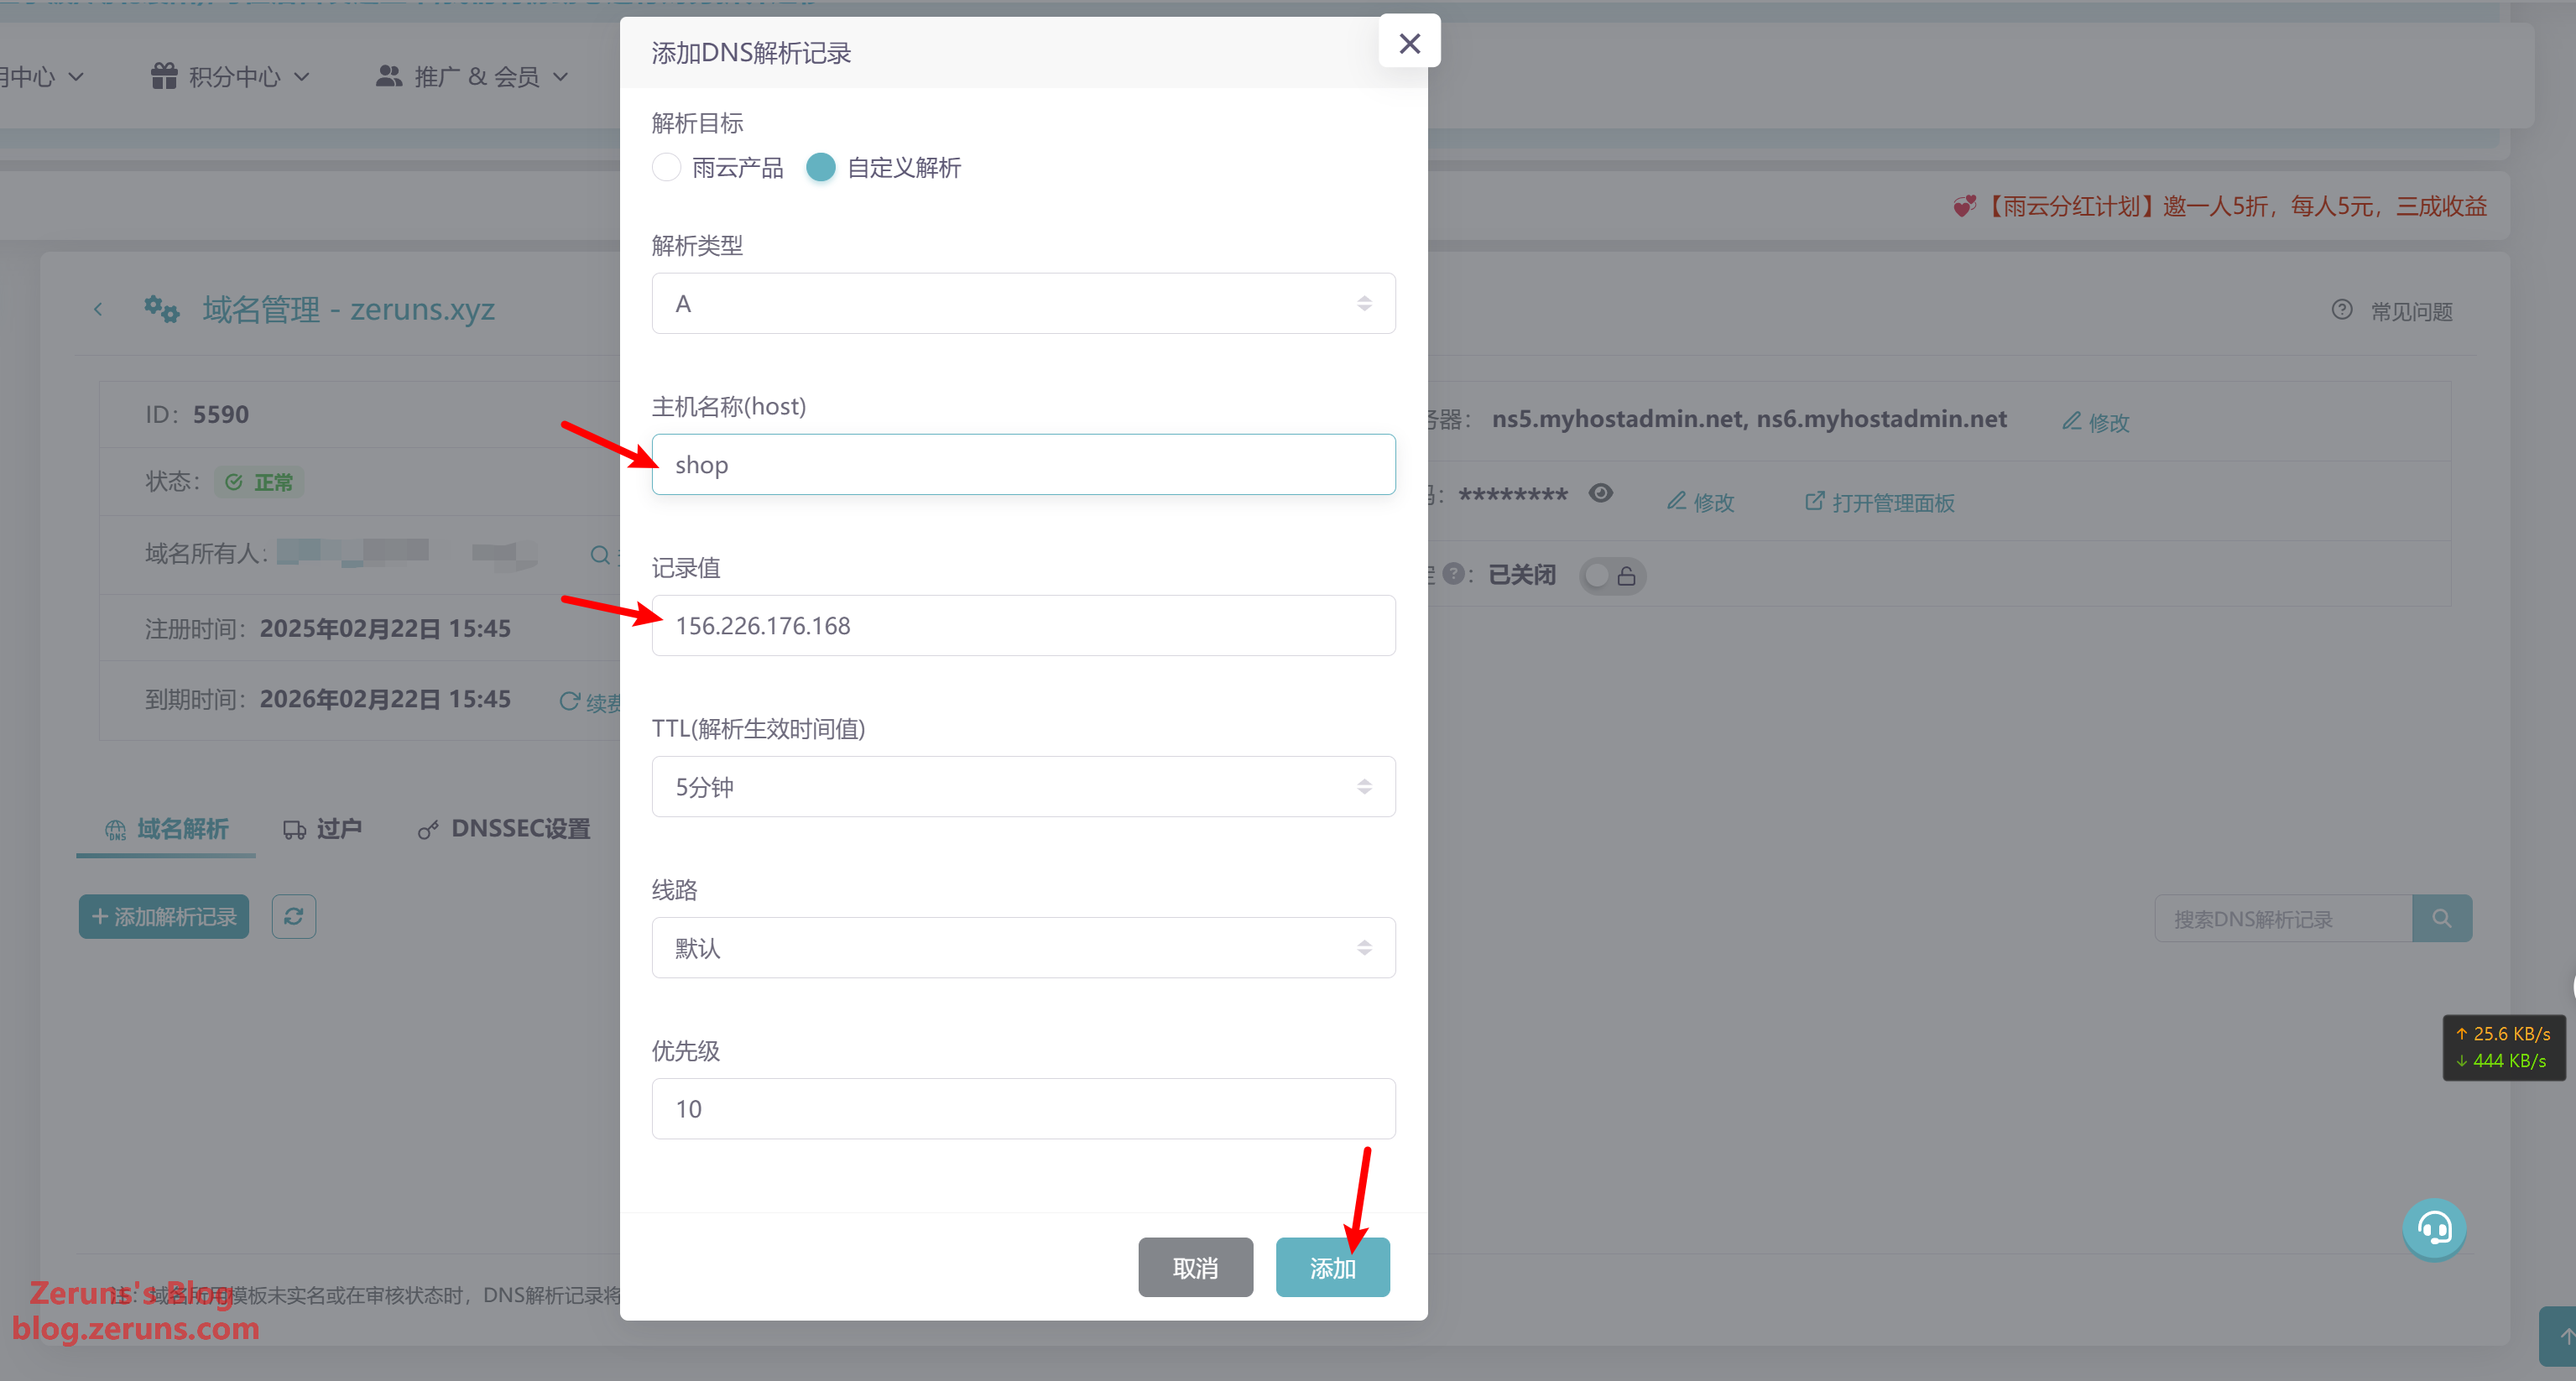
Domain Resolution Setup
Go to your domain DNS console and add a new DNS record. For the host name, enter a name of your choice—e.g., shop, so your website will be accessed via shop.zeruns.xyz. If you enter @, the website will be accessible directly at zeruns.xyz. For the record value, input your server's IP address.
Environment Setup: OpenResty + MySQL + PHP + FTP
OpenResty is a high-performance web server built on Nginx. It integrates a Lua scripting engine, combining Nginx's high concurrency with dynamic configuration capabilities. It will serve as the front-end web server for WordPress to handle requests and resource delivery.
MySQL is a lightweight and stable open-source relational database that stores WordPress content, user data, and configuration information—ensuring efficient data management and persistence.
PHP is the popular open-source server-side scripting language used to build WordPress. It processes dynamic logic, communicates with MySQL, and generates browser-readable content, acting as the essential middleware.
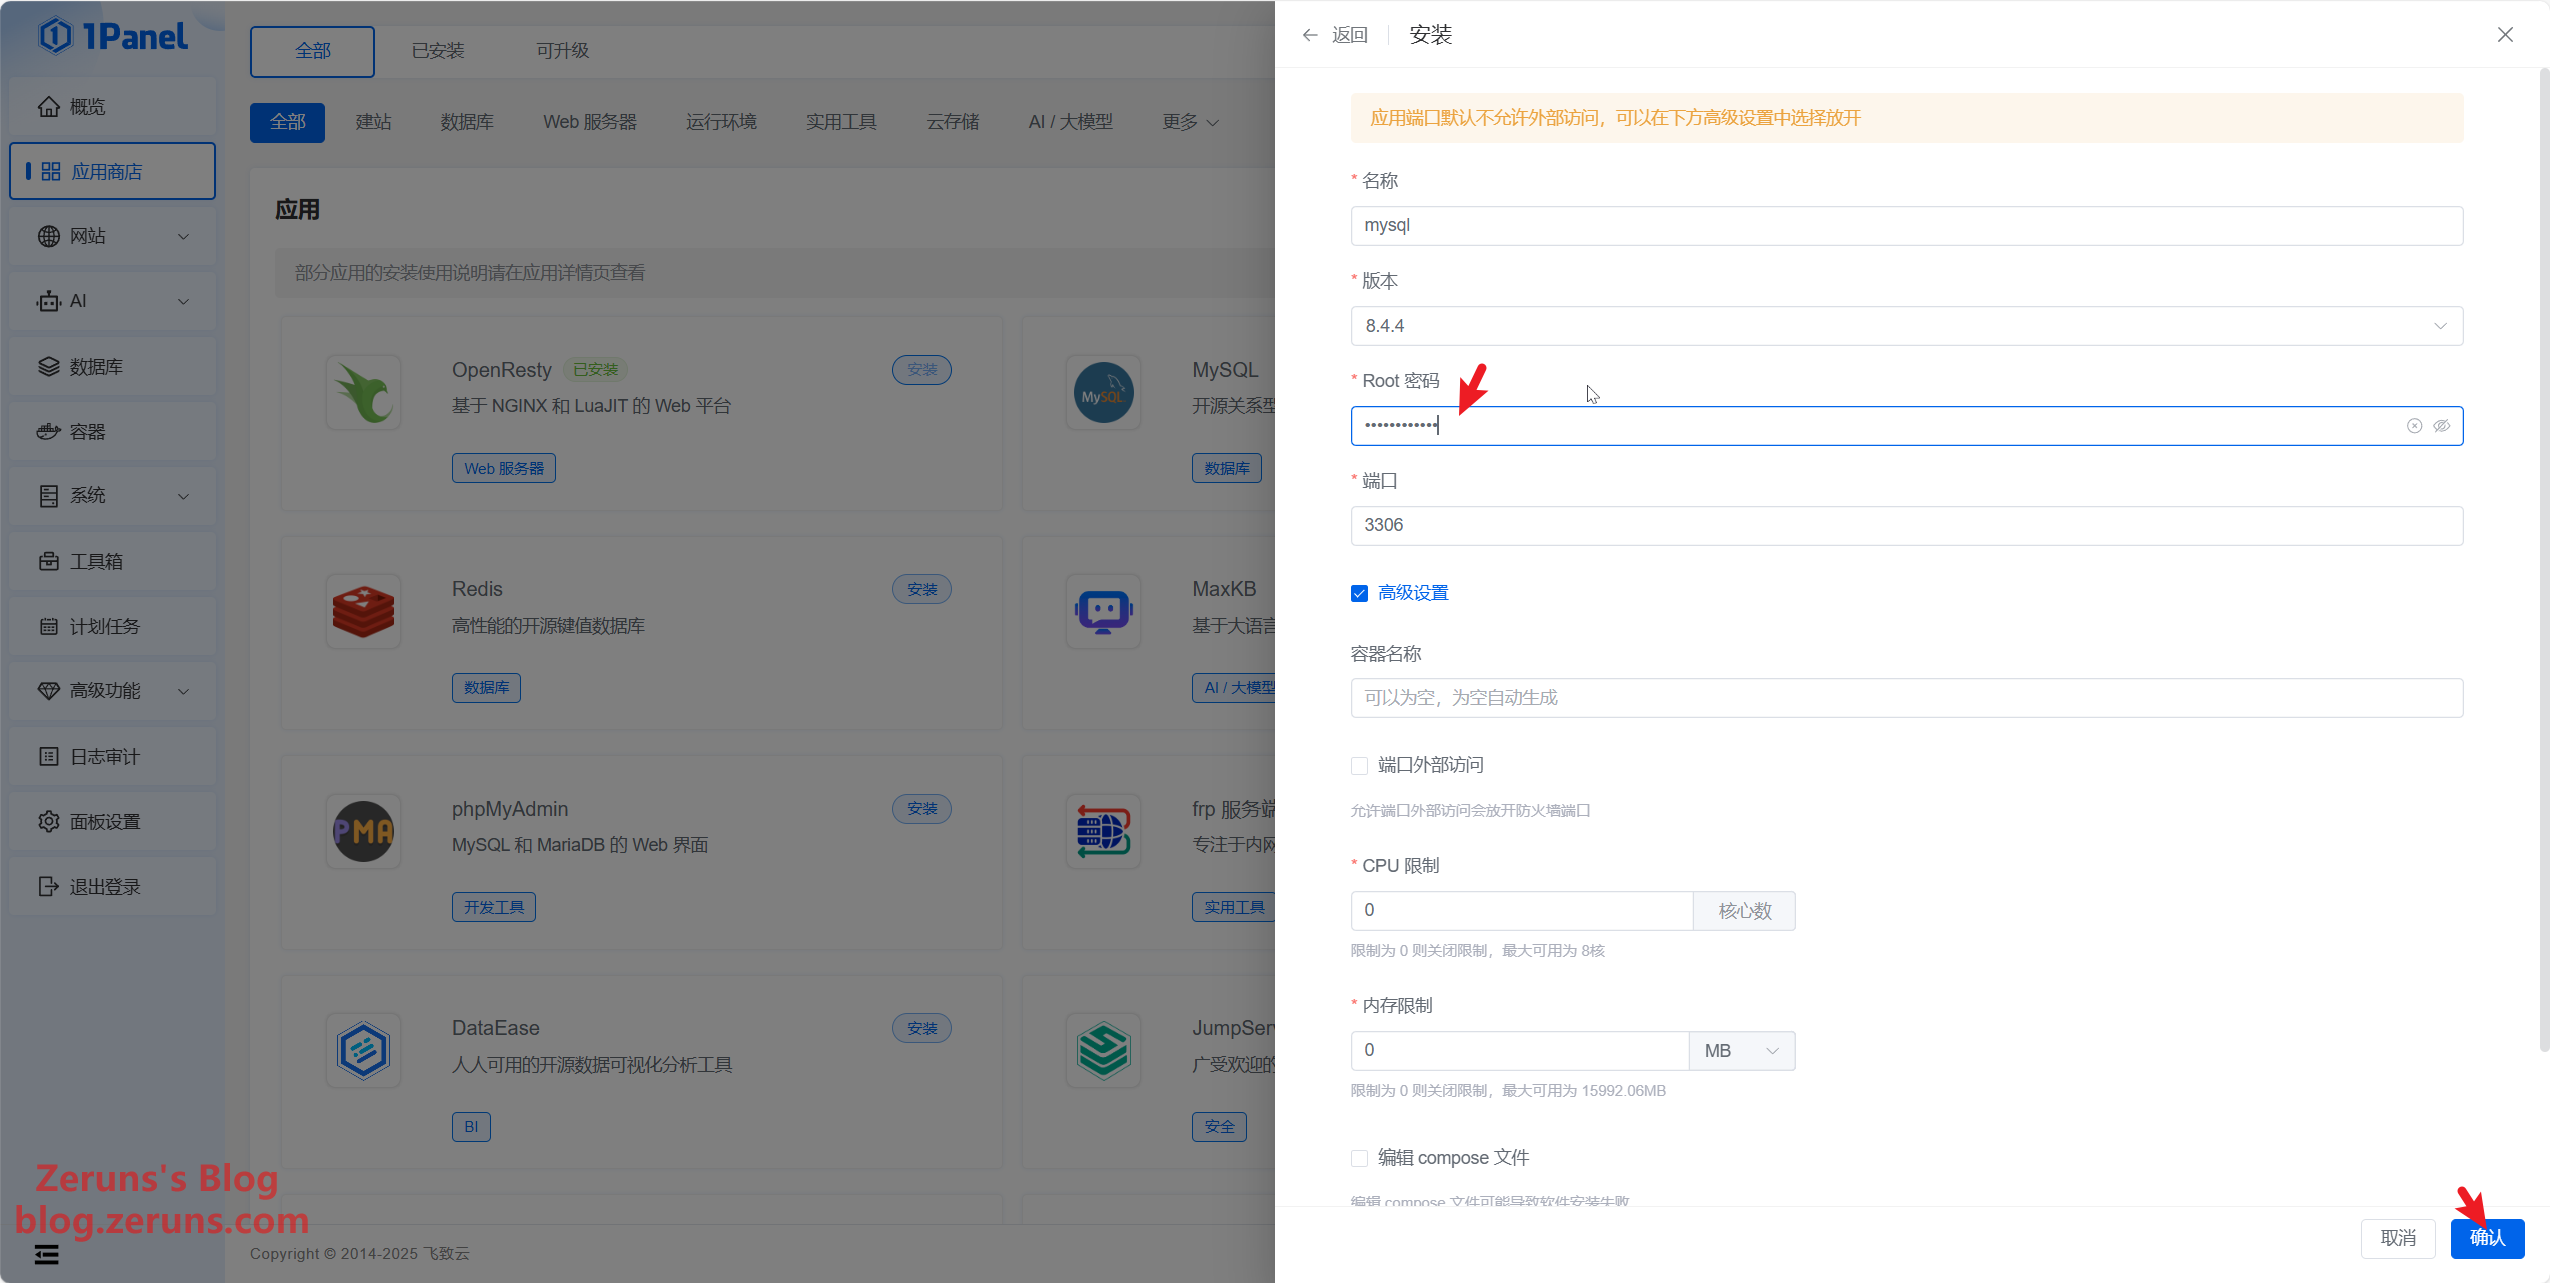
Back in the 1Panel dashboard, click App Store, then install both OpenResty and MySQL with default settings.
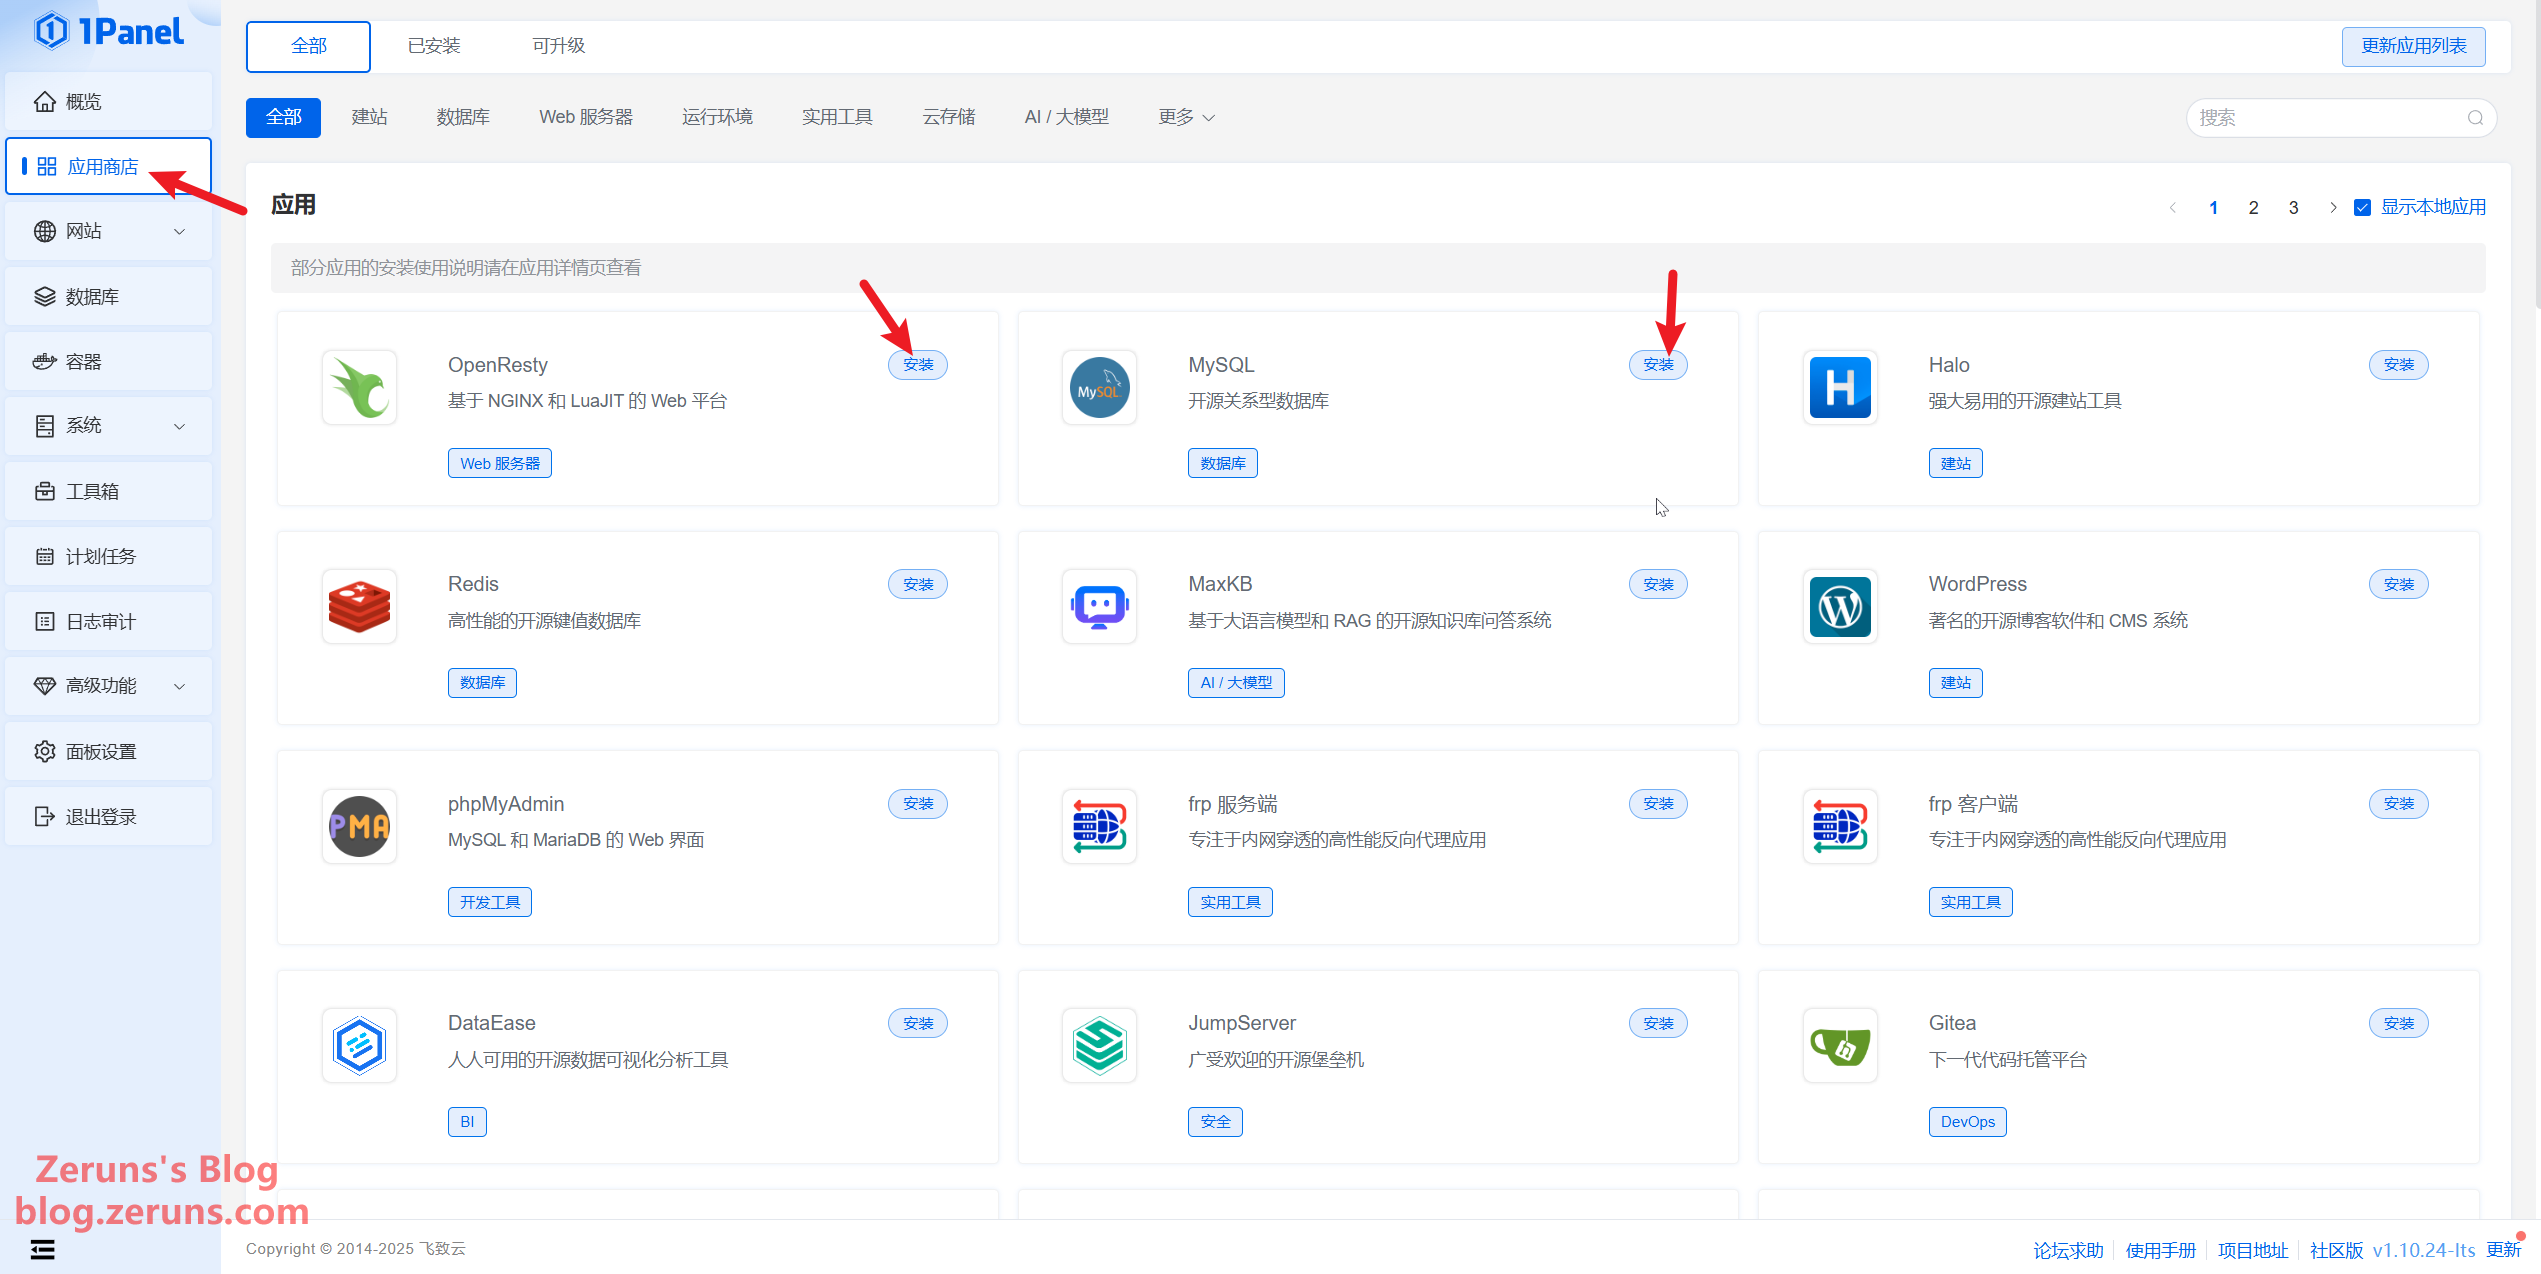
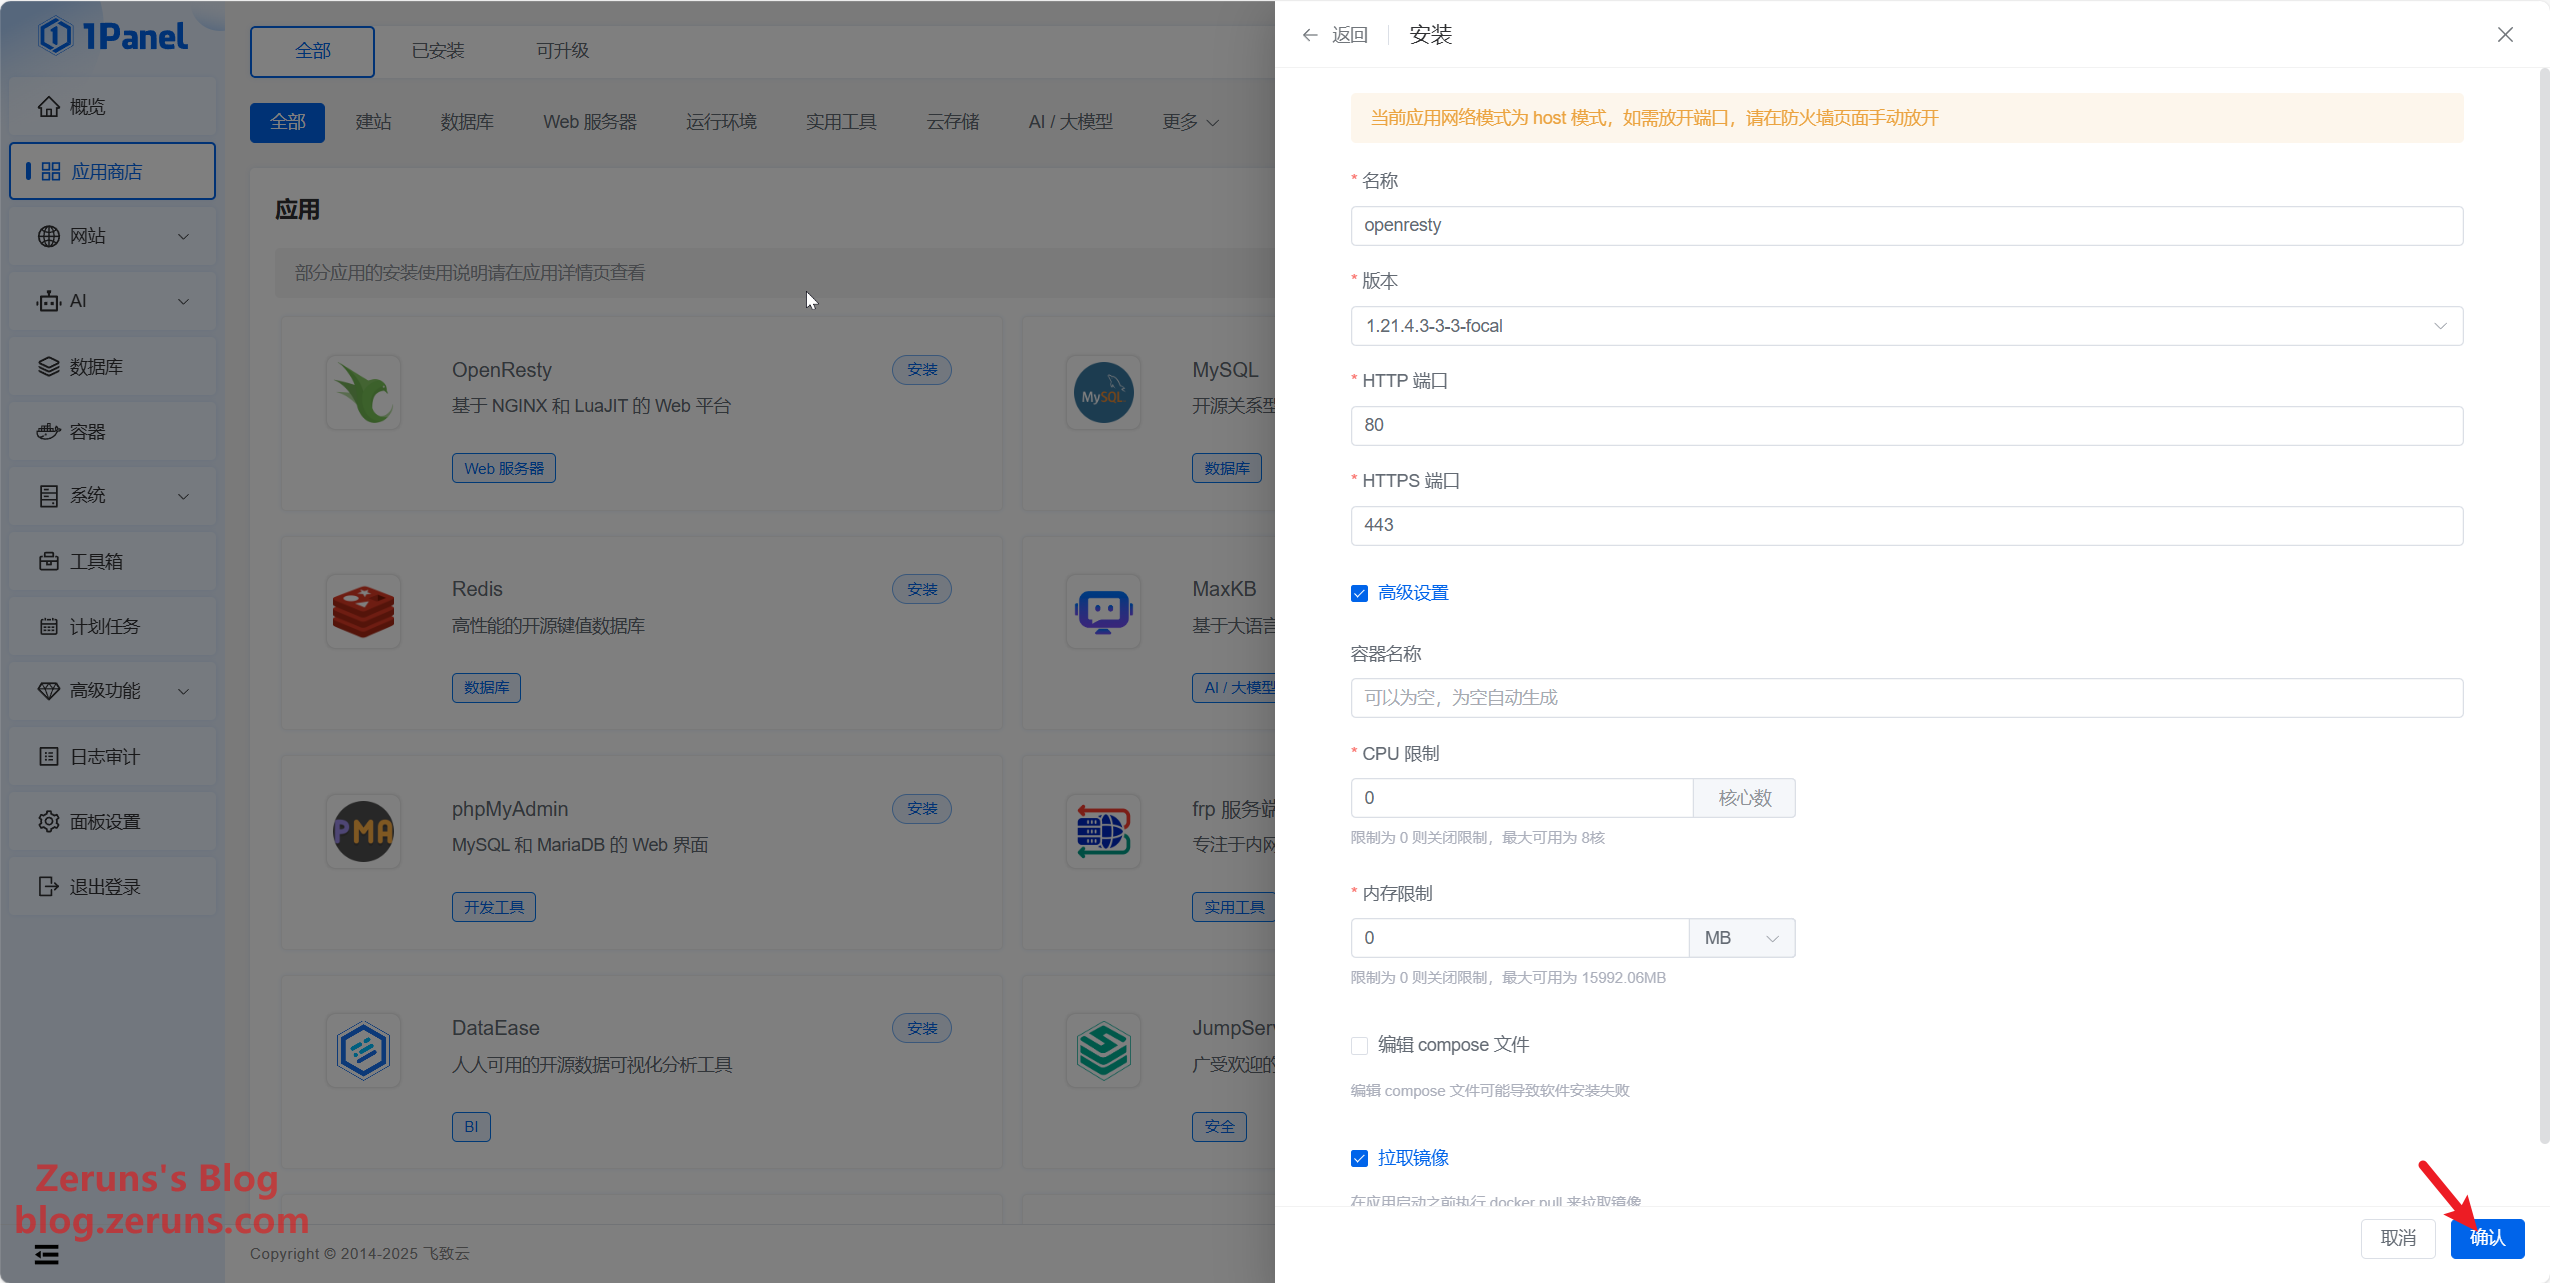
You can set your own MySQL root password, but it's recommended to use the default randomly generated one.
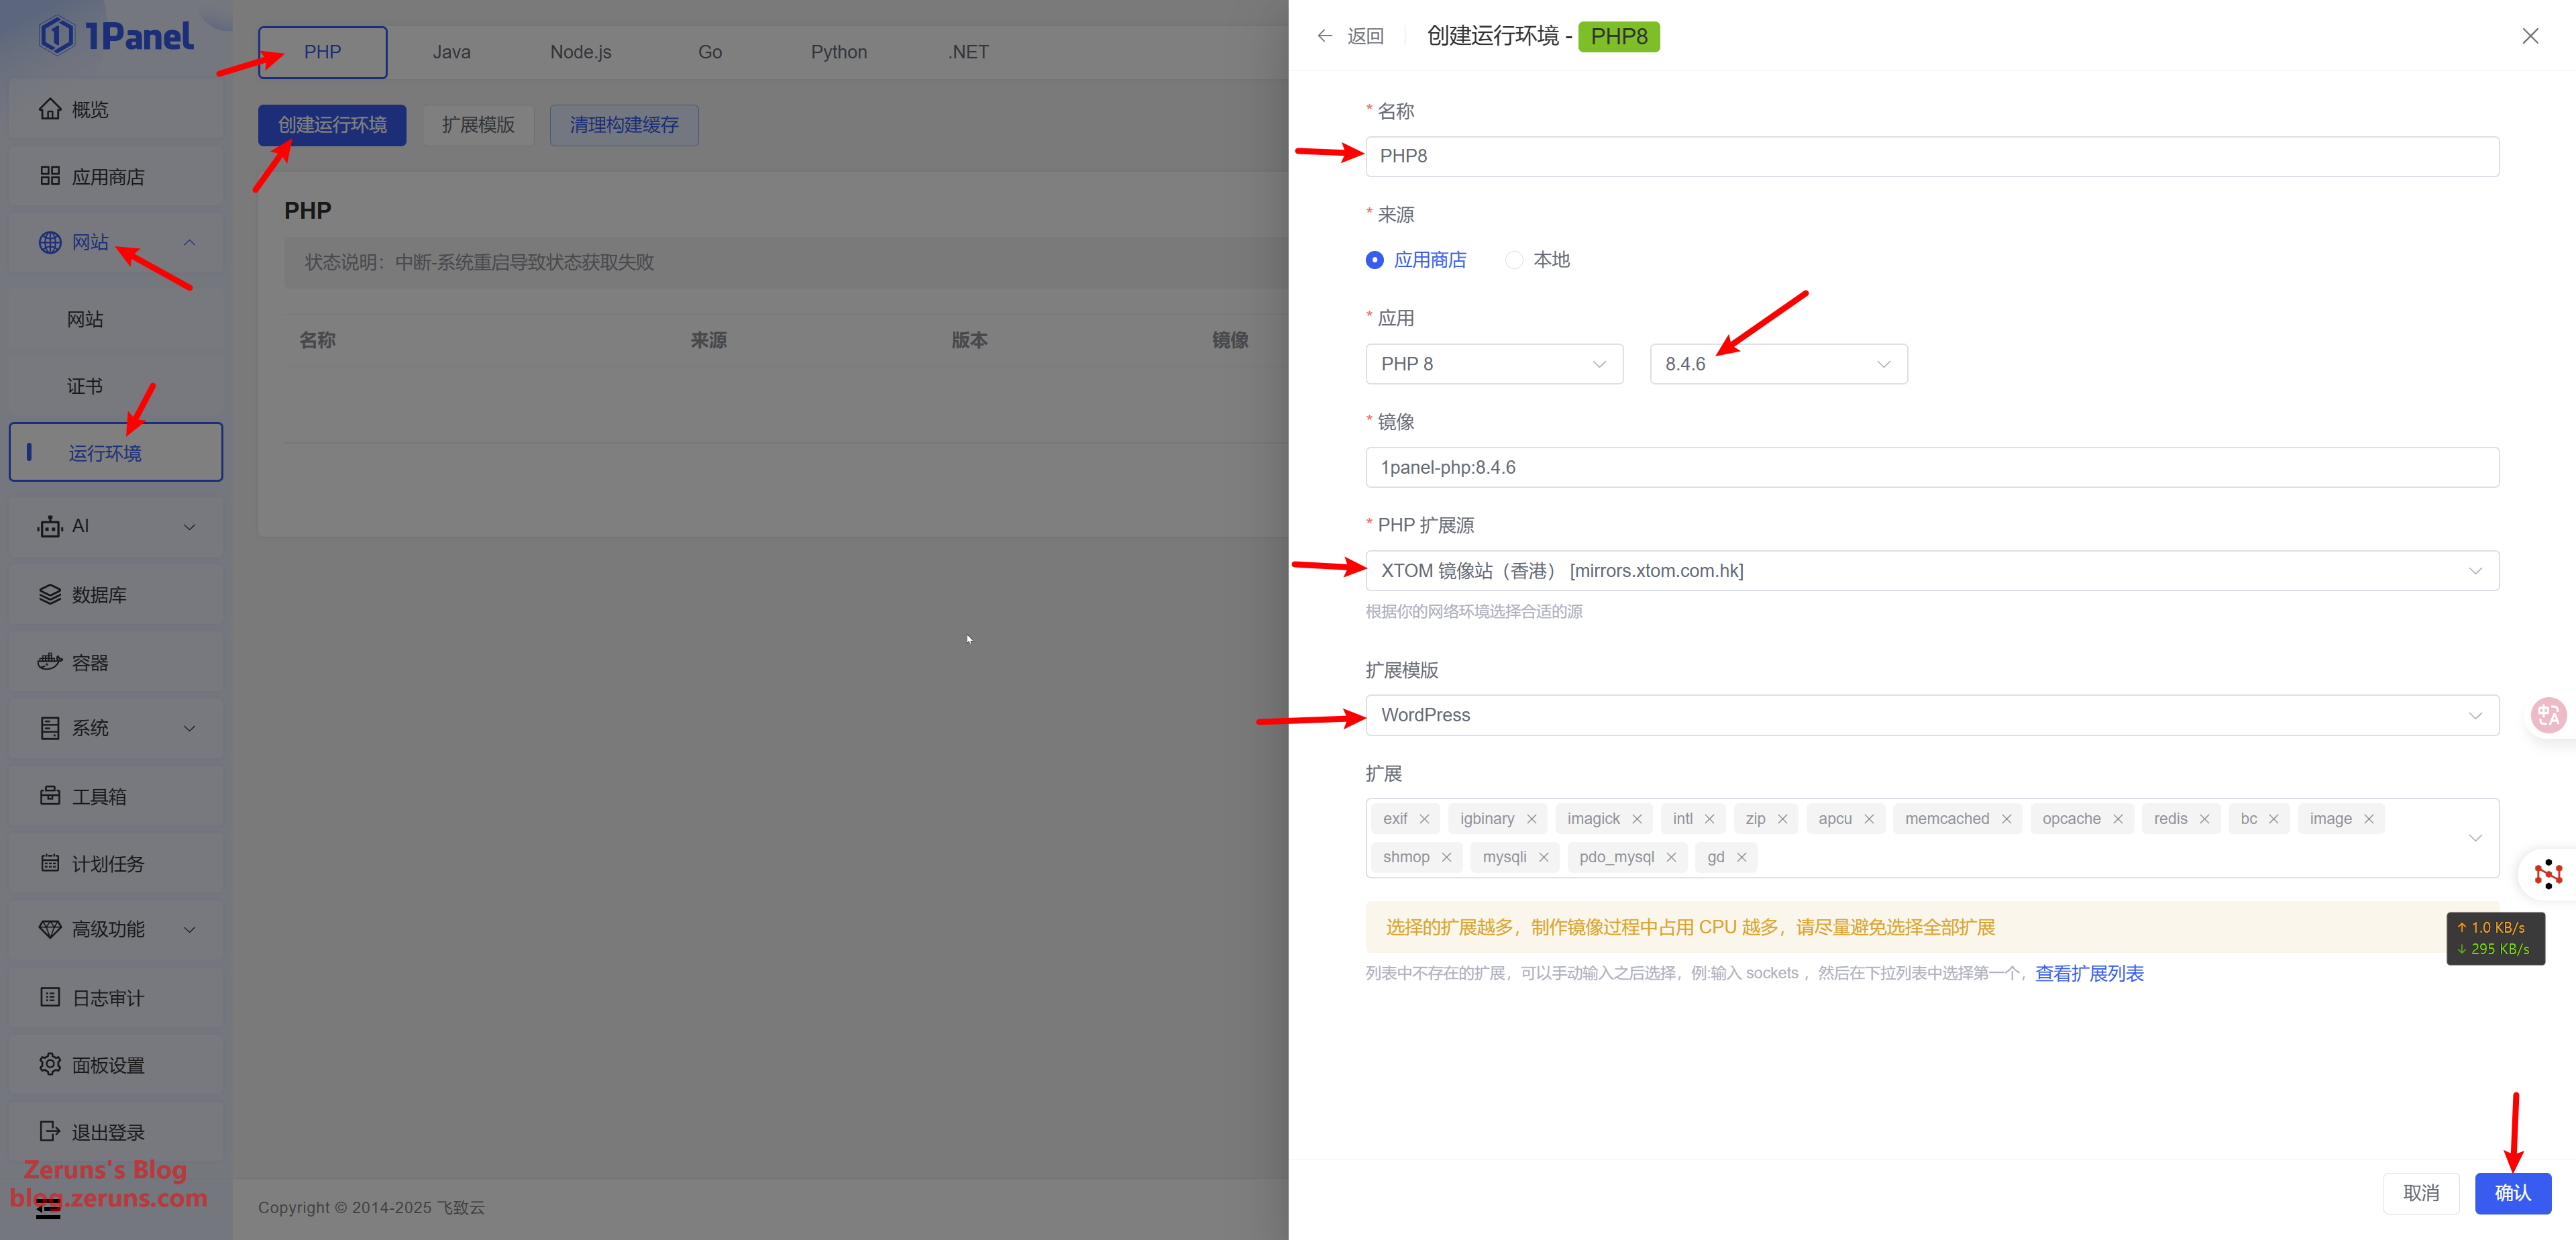
Go to Website → Runtime Environment → PHP → Create Runtime Environment. WordPress requires PHP 8.3 or higher—select PHP 8.4.6. Name it (e.g., PHP8). Choose a suitable PHP extension mirror based on your server's location (e.g., XTOM Mirror (Hong Kong)). For the extension template, choose WordPress, and click Confirm.
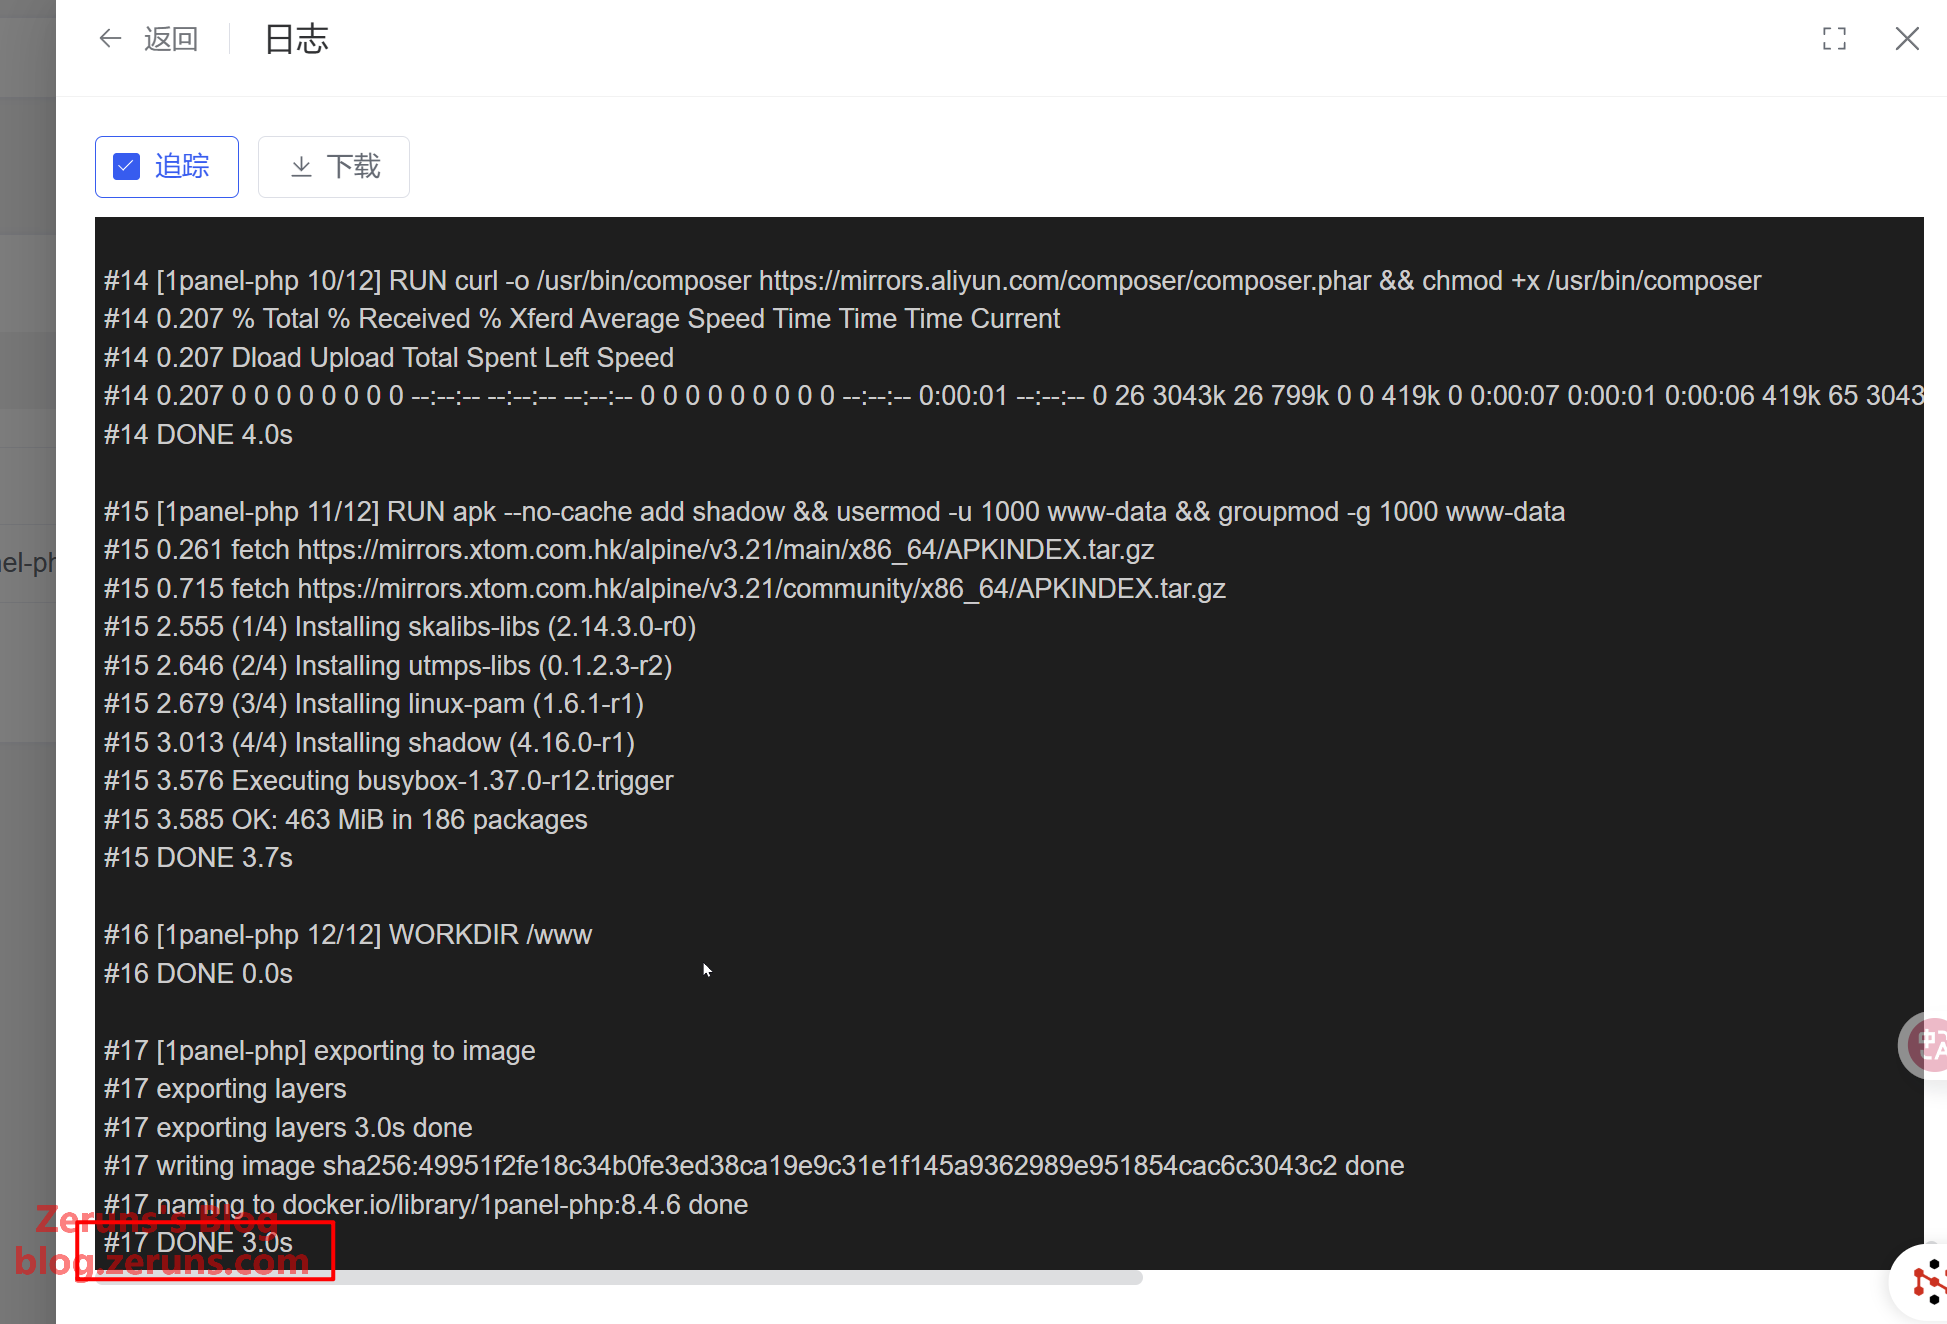
Wait for the installation to complete.
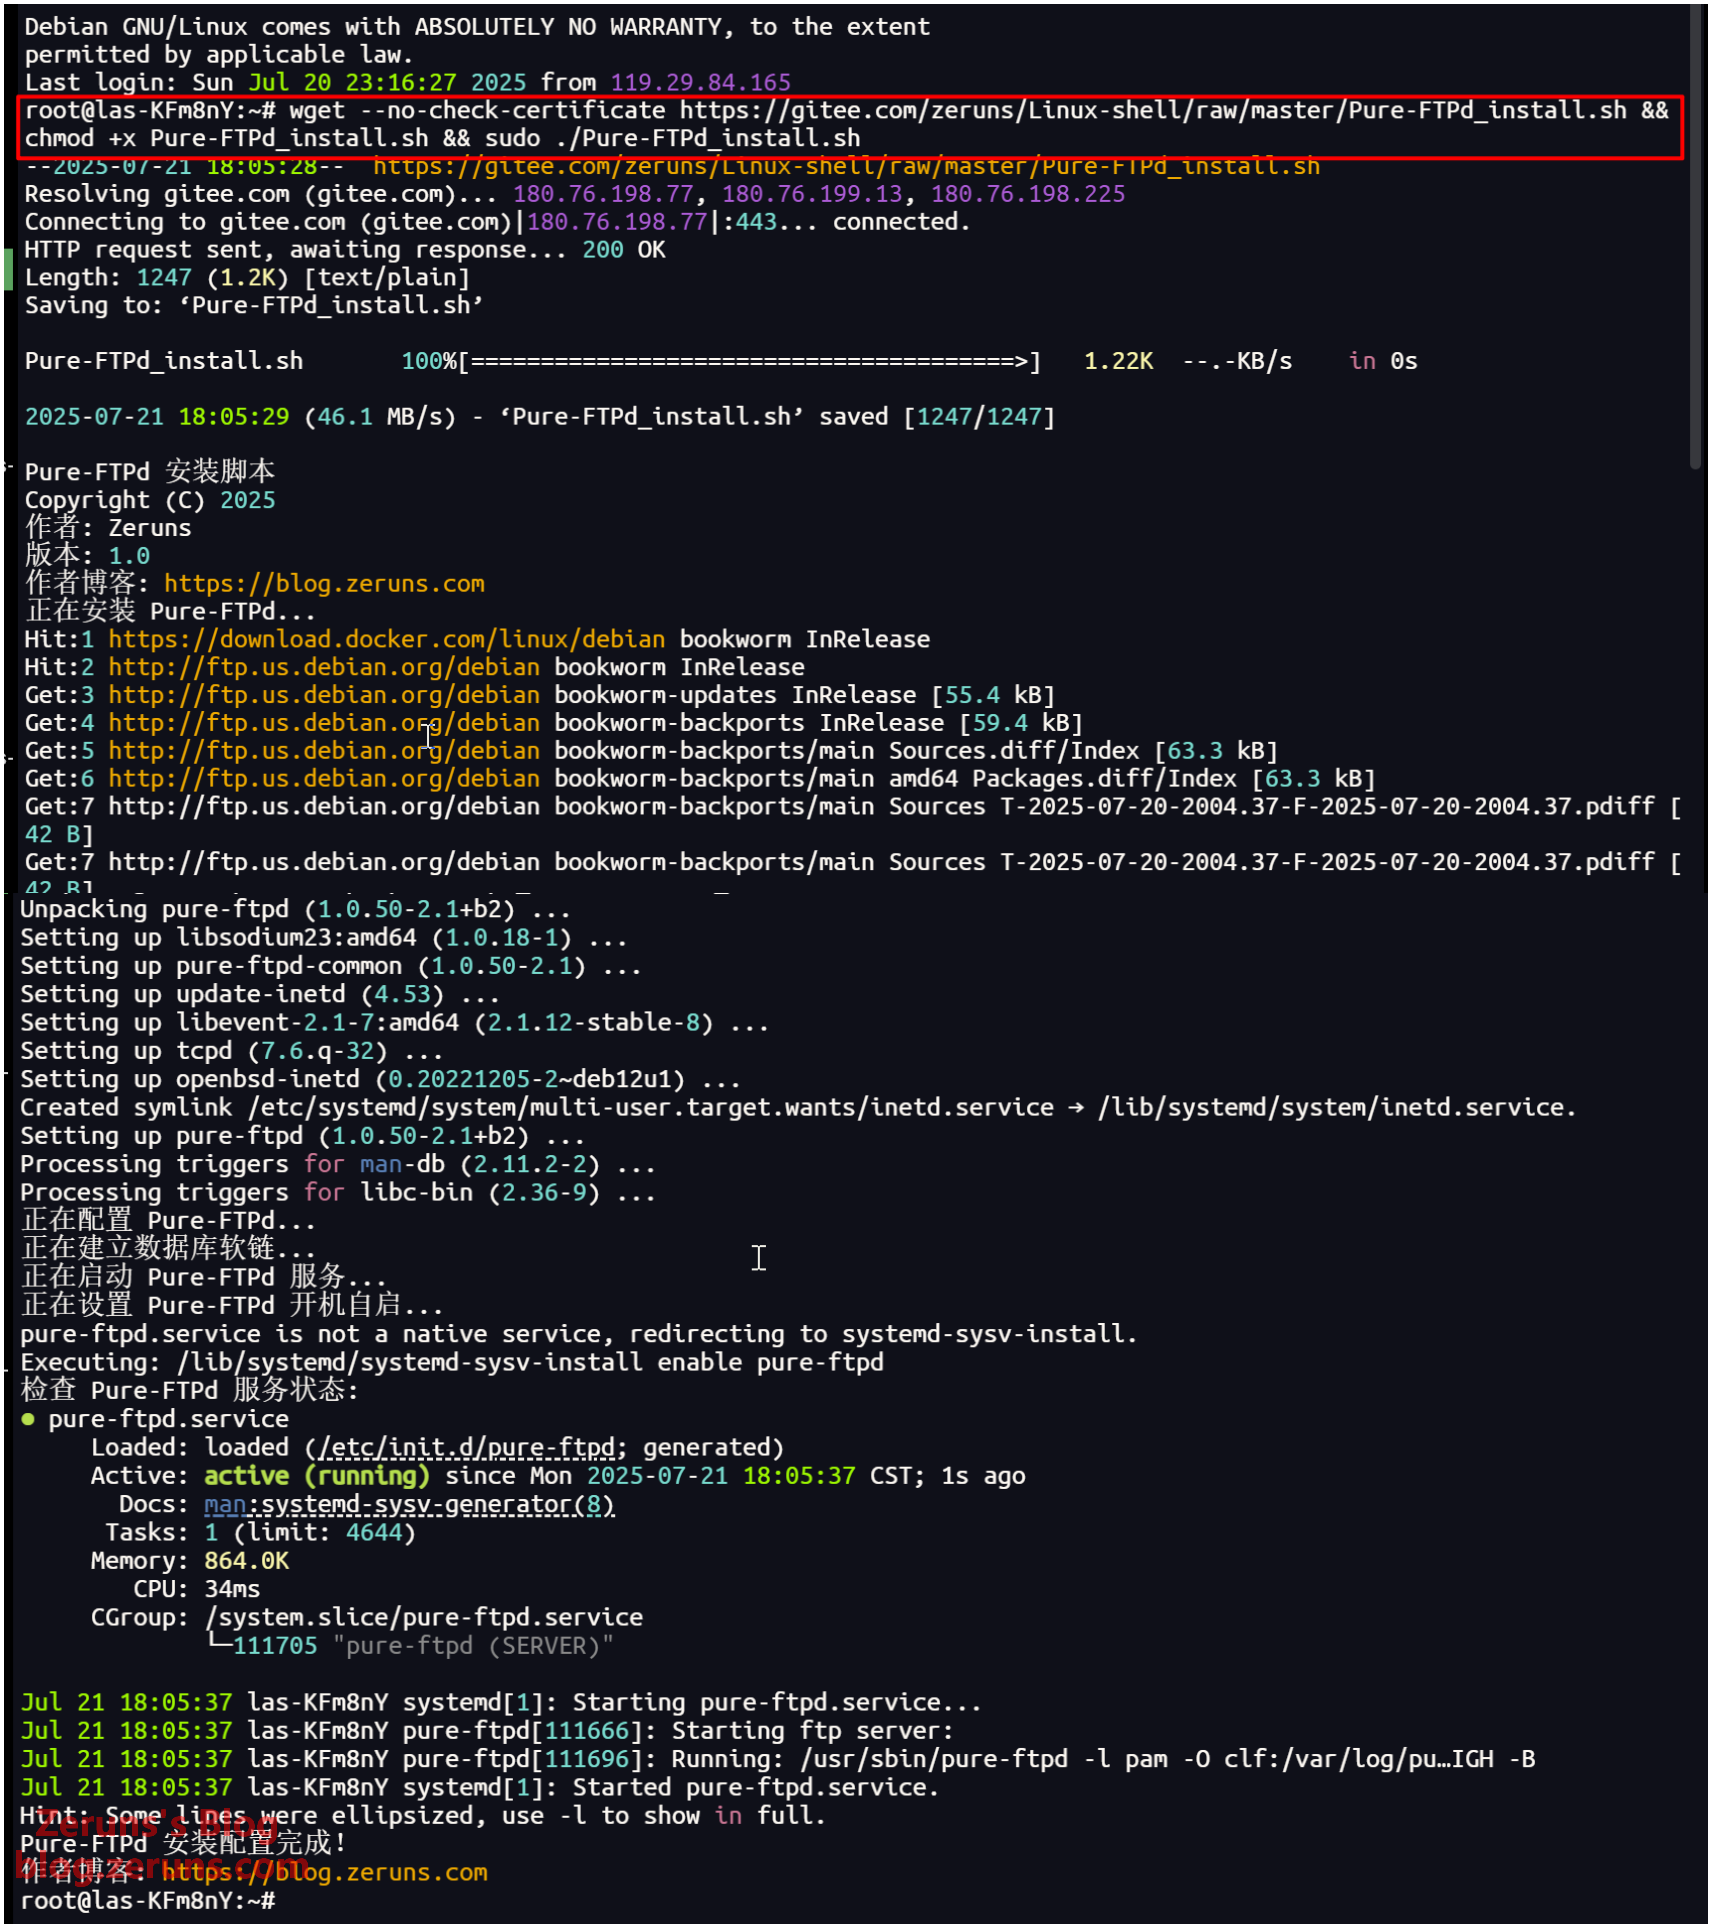
Back in the SSH terminal, run the following command to install FTP:
wget --no-check-certificate https://gitee.com/zeruns/Linux-shell/raw/master/Pure-FTPd_install.sh && chmod +x Pure-FTPd_install.sh && sudo ./Pure-FTPd_install.sh
Installing WordPress
First, download the latest WordPress from the official site:https://url.zeruns.com/WordPress
WordPress 6.8.2 download link: https://www.123684.com/s/2Y9Djv-QNVvH
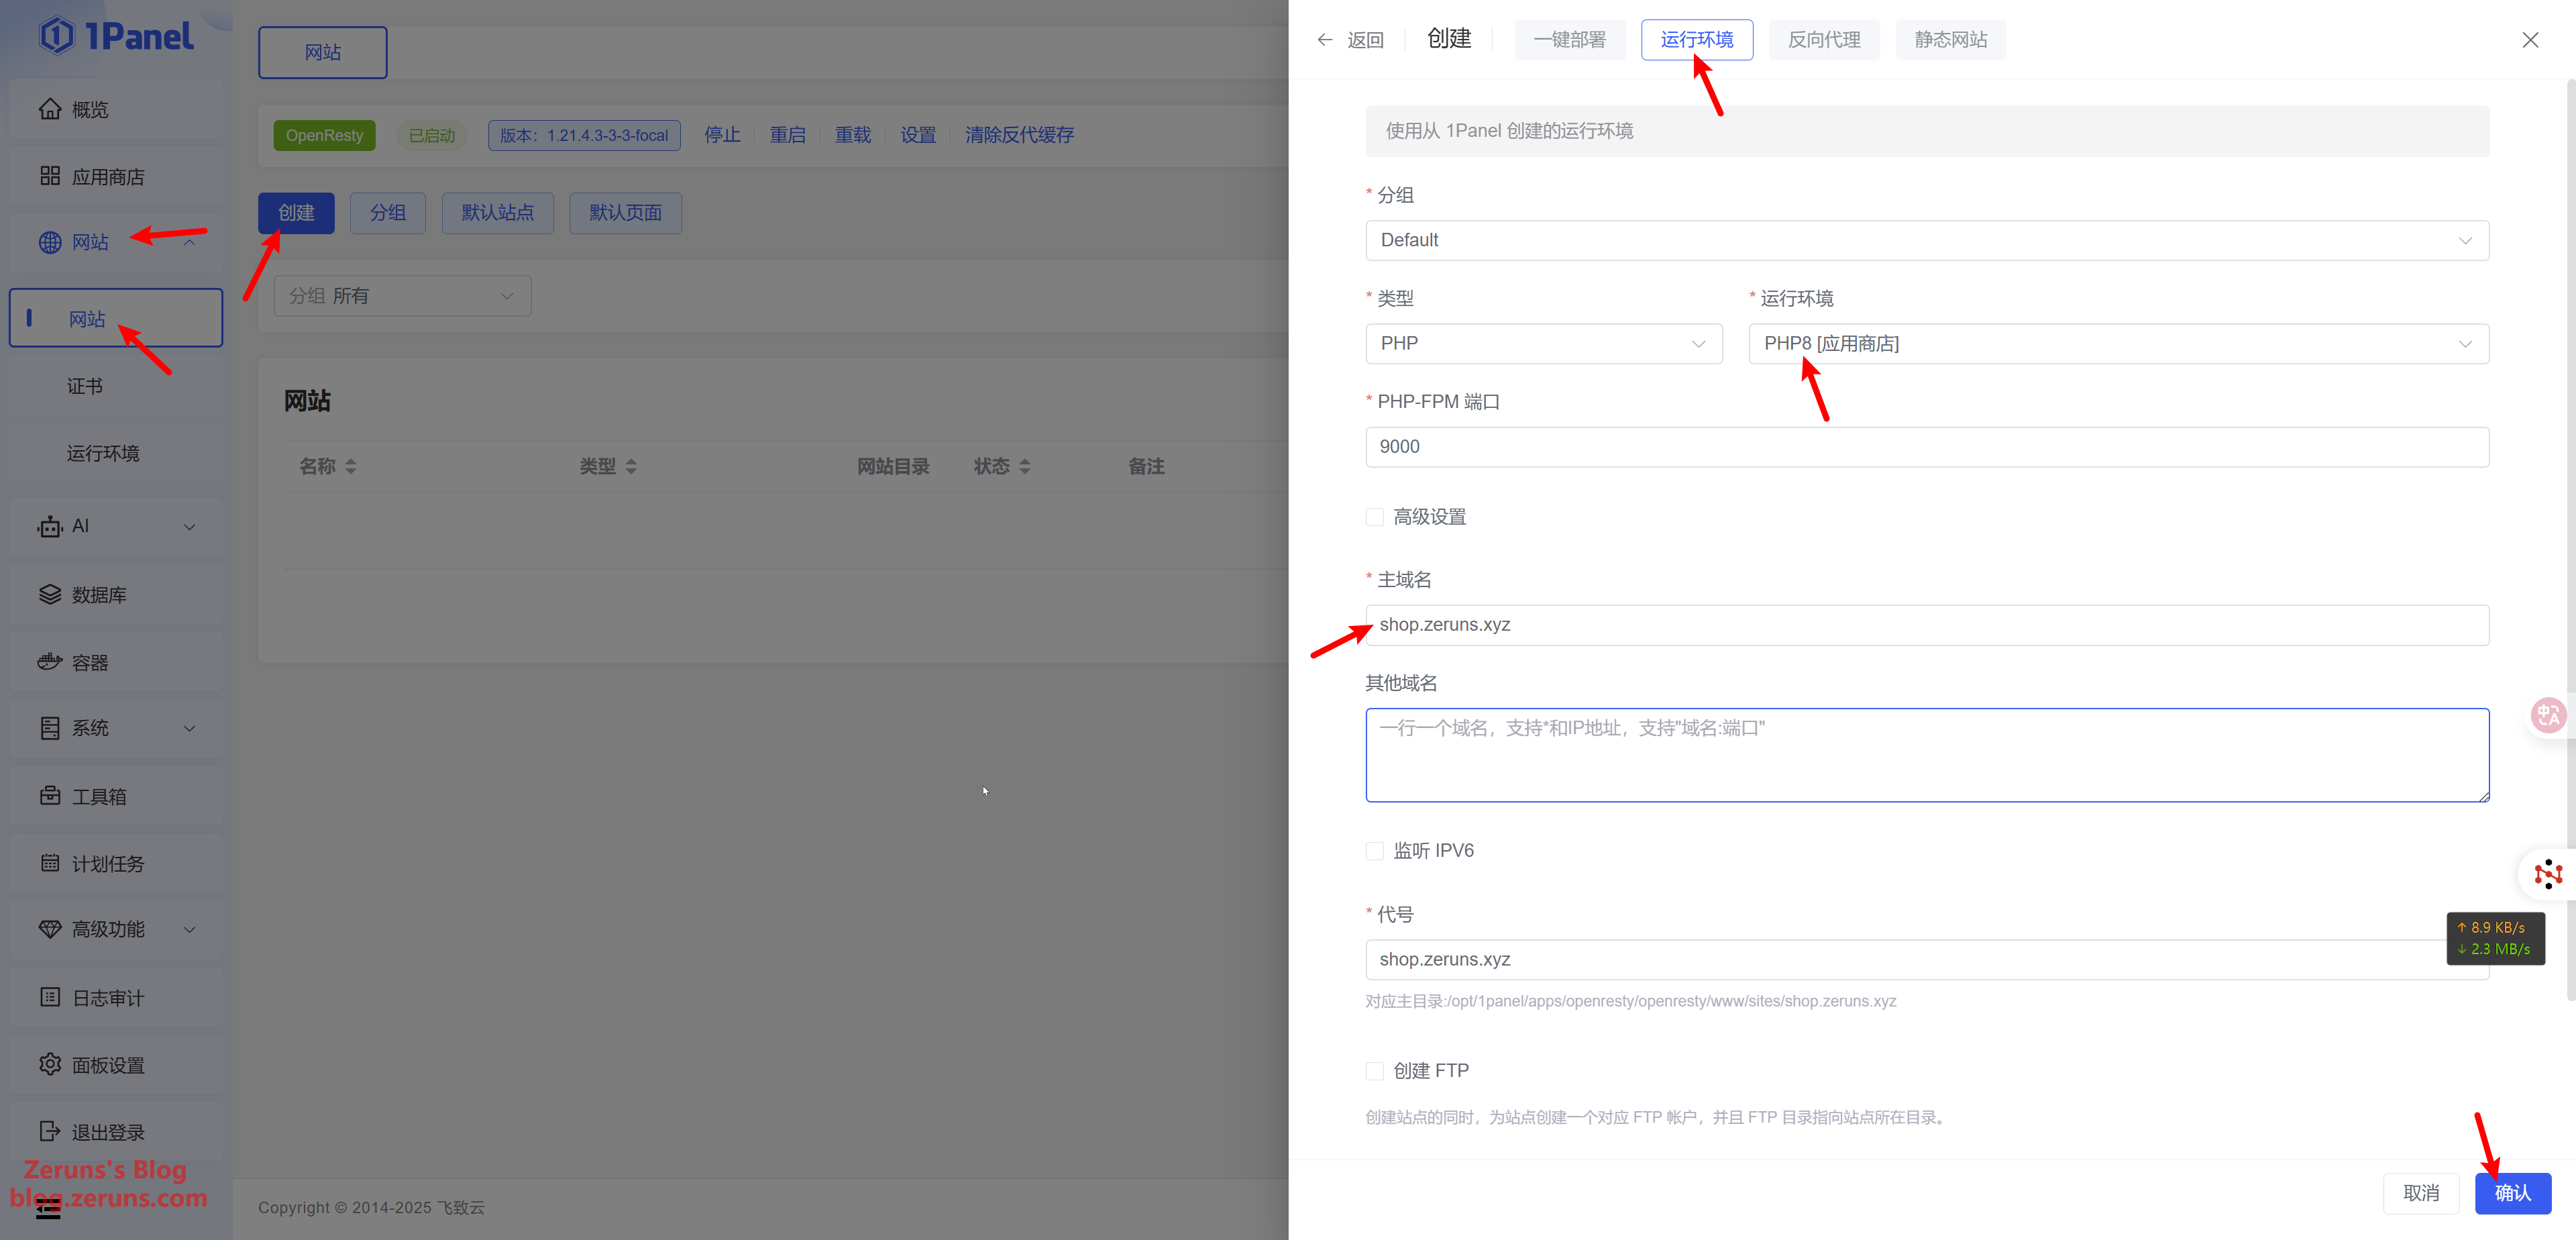
In the 1Panel dashboard, go to Website → Site → Create → Runtime Environment, select the PHP8 environment you created earlier. Enter your domain name as the primary domain and keep other settings as default, then click Confirm.
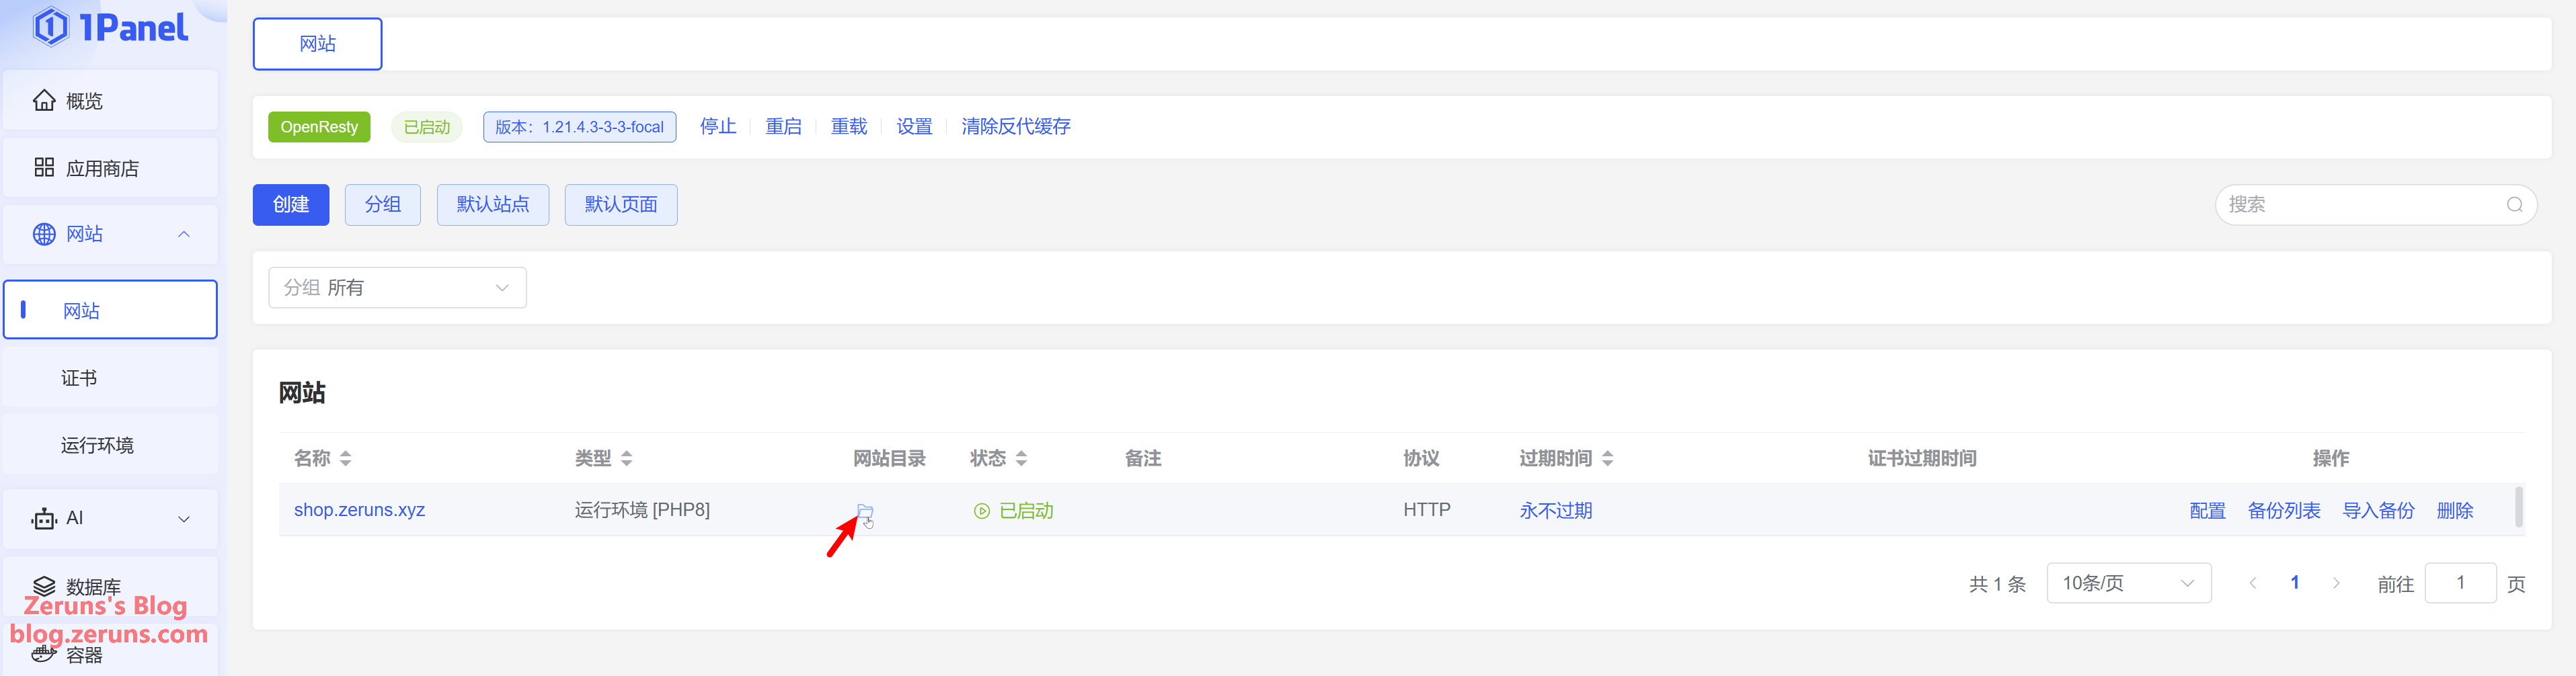
Click the folder icon under Website Directory to enter the site's root directory.
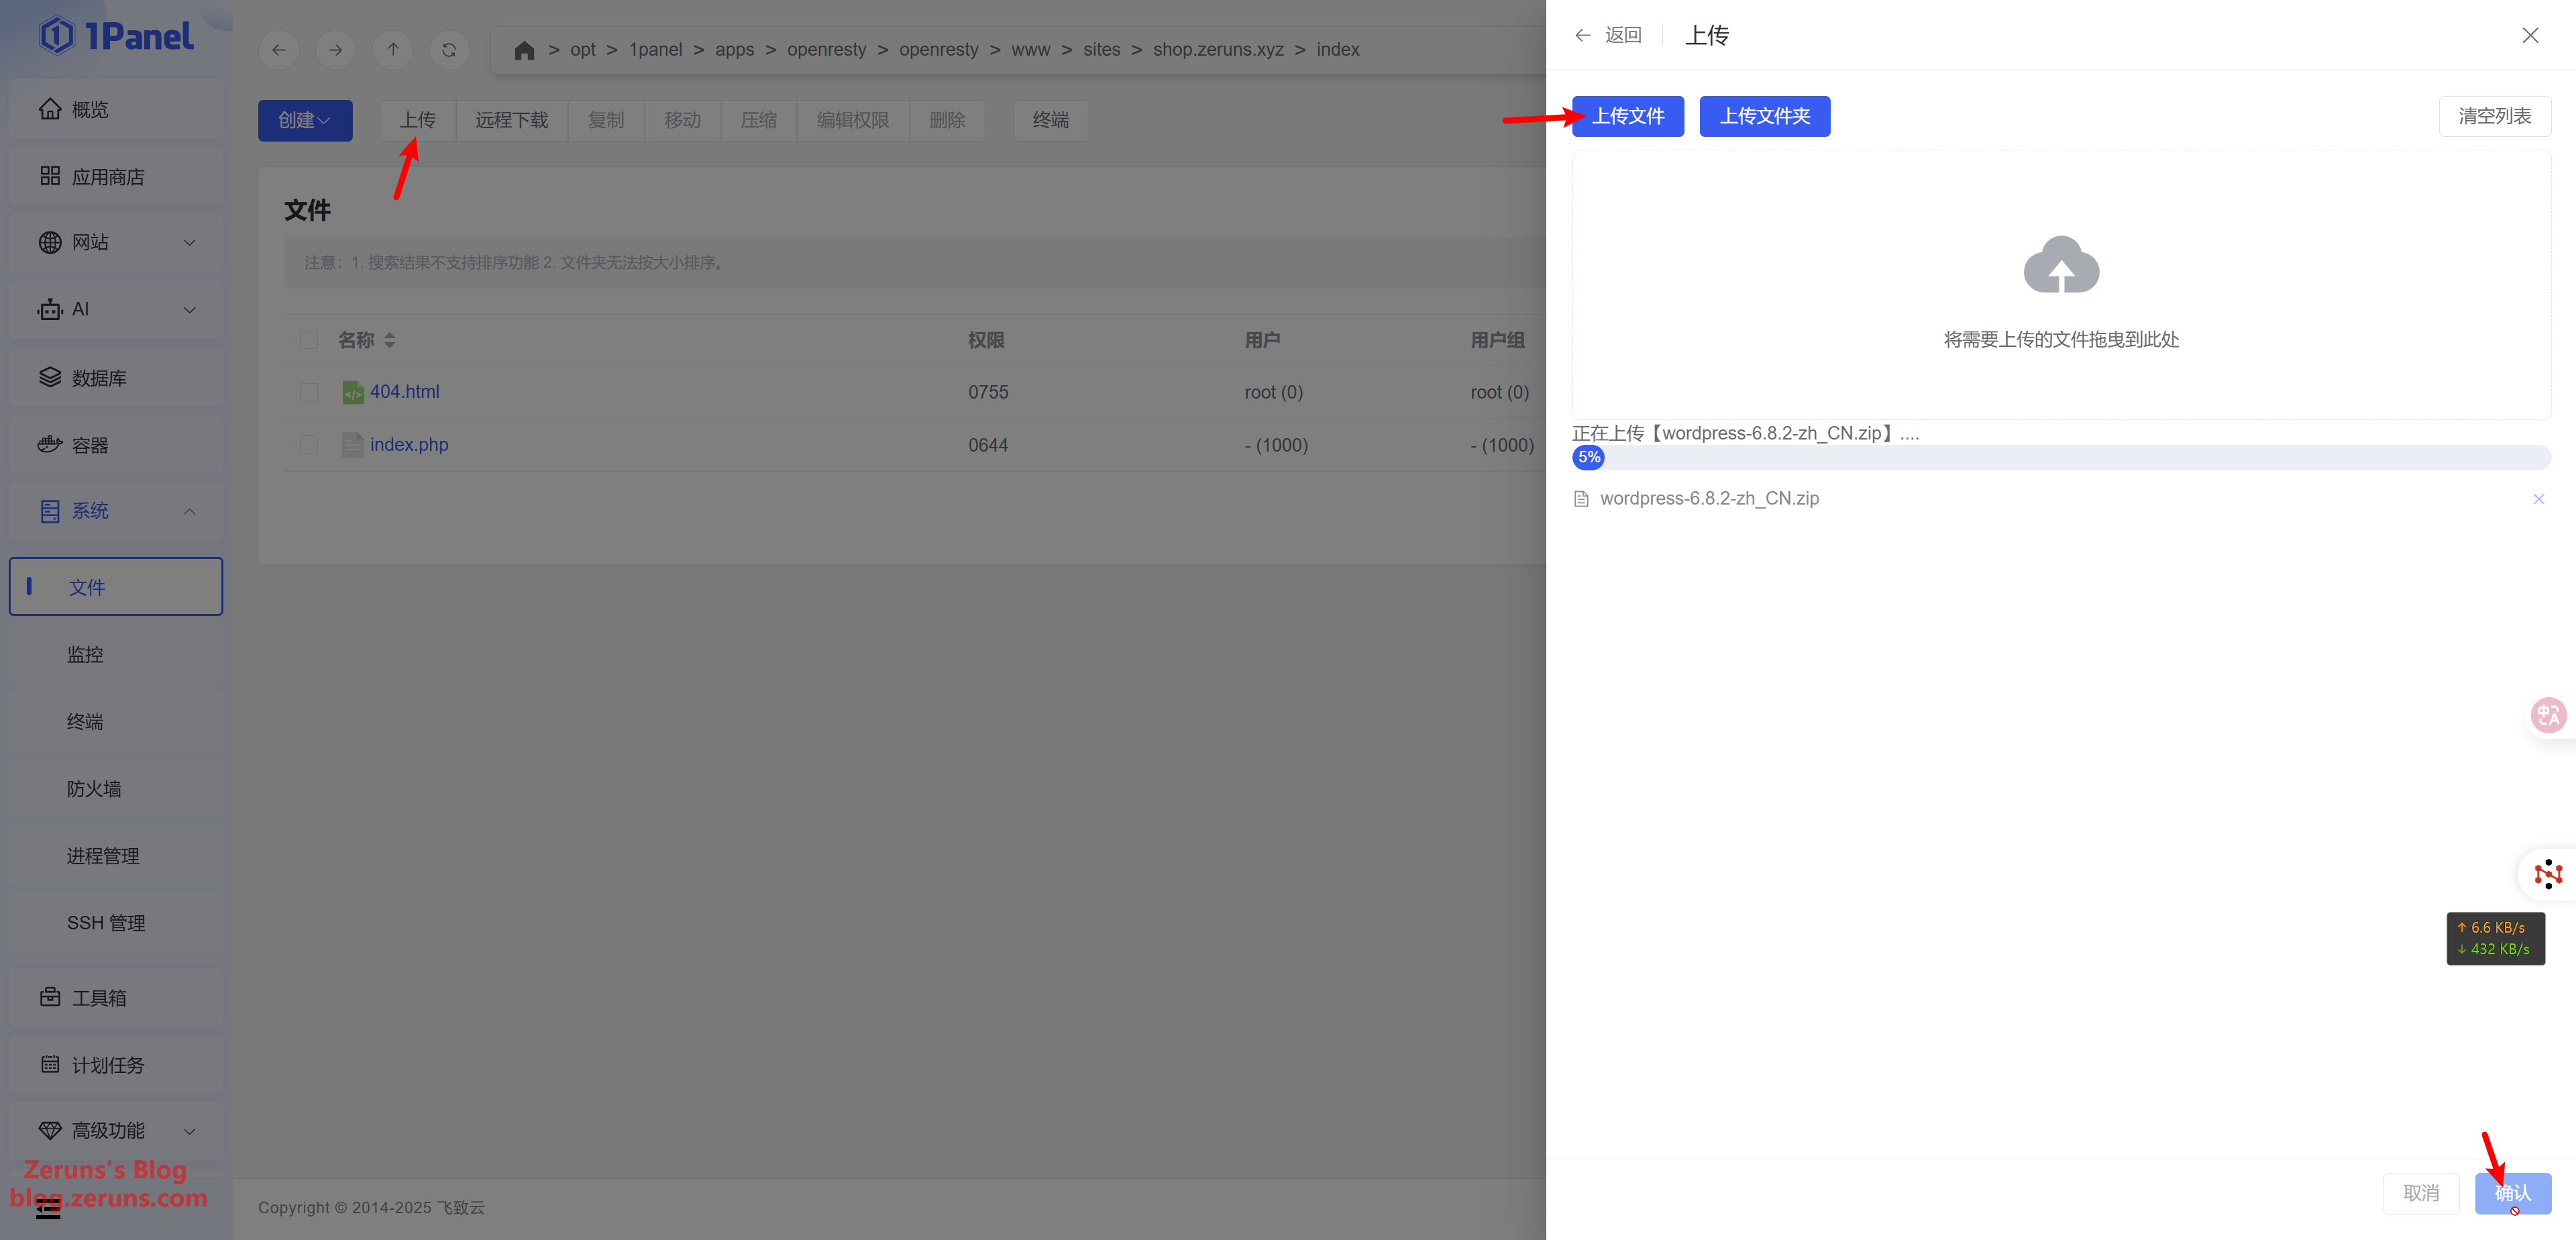
Click Upload to upload the WordPress zip file you downloaded.
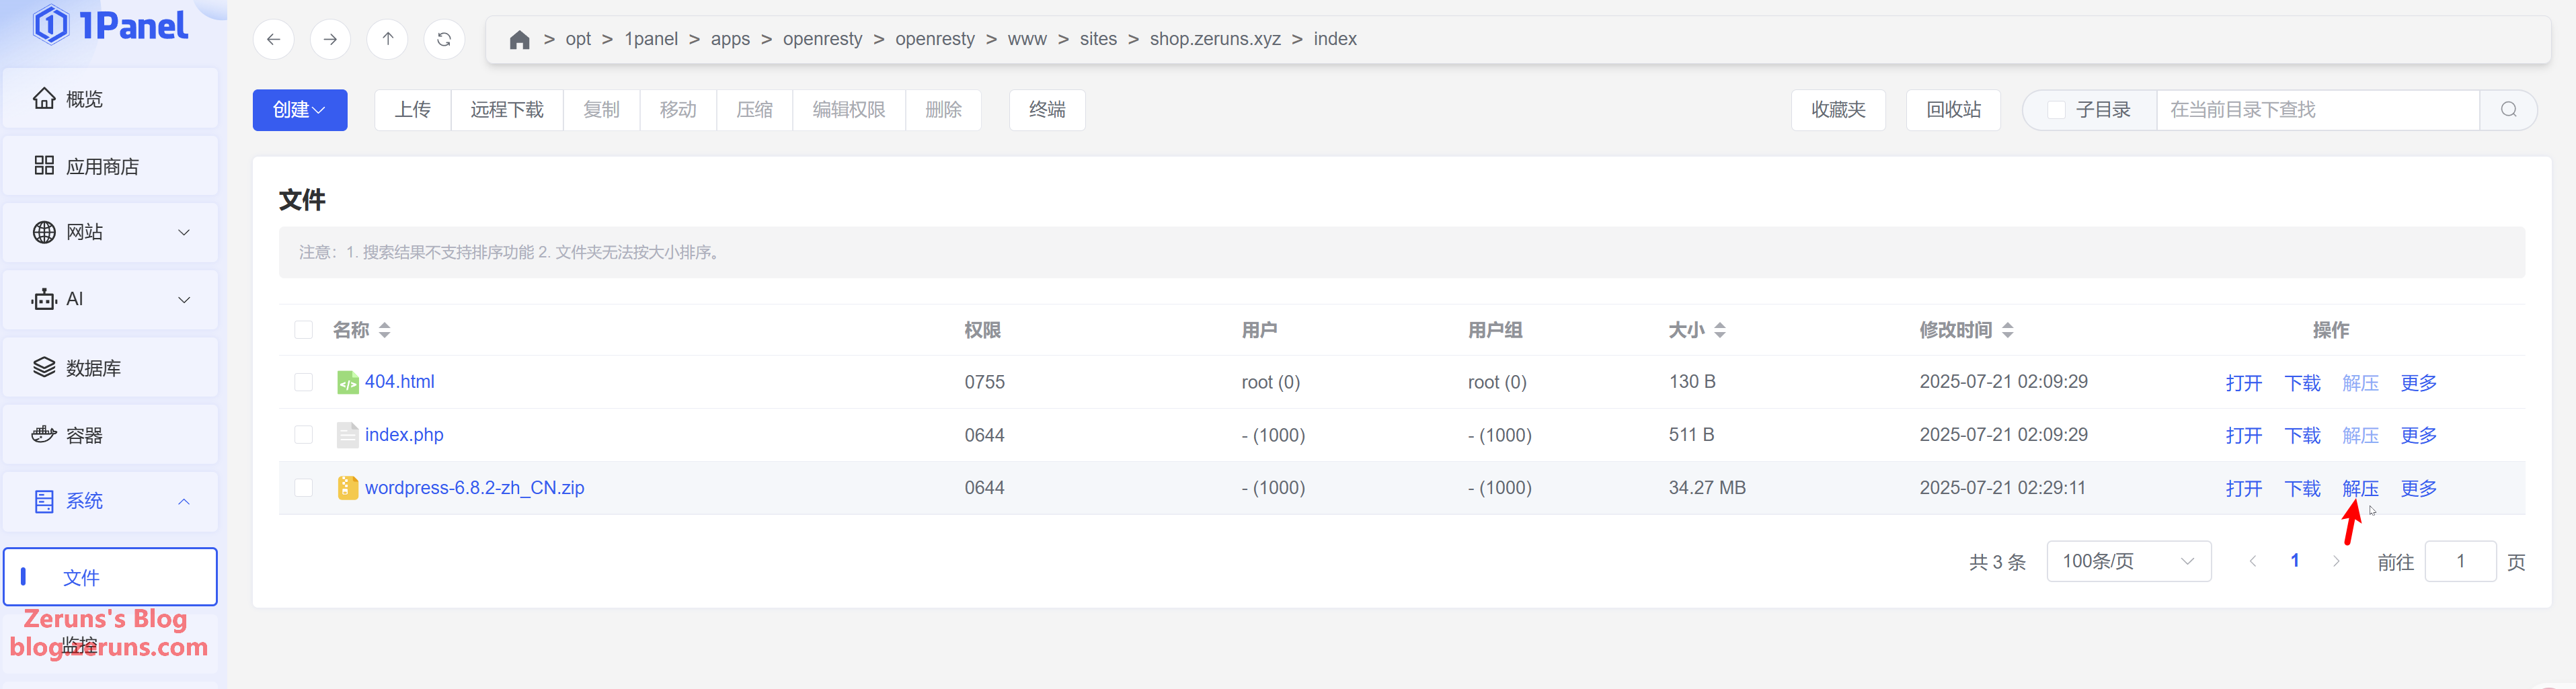
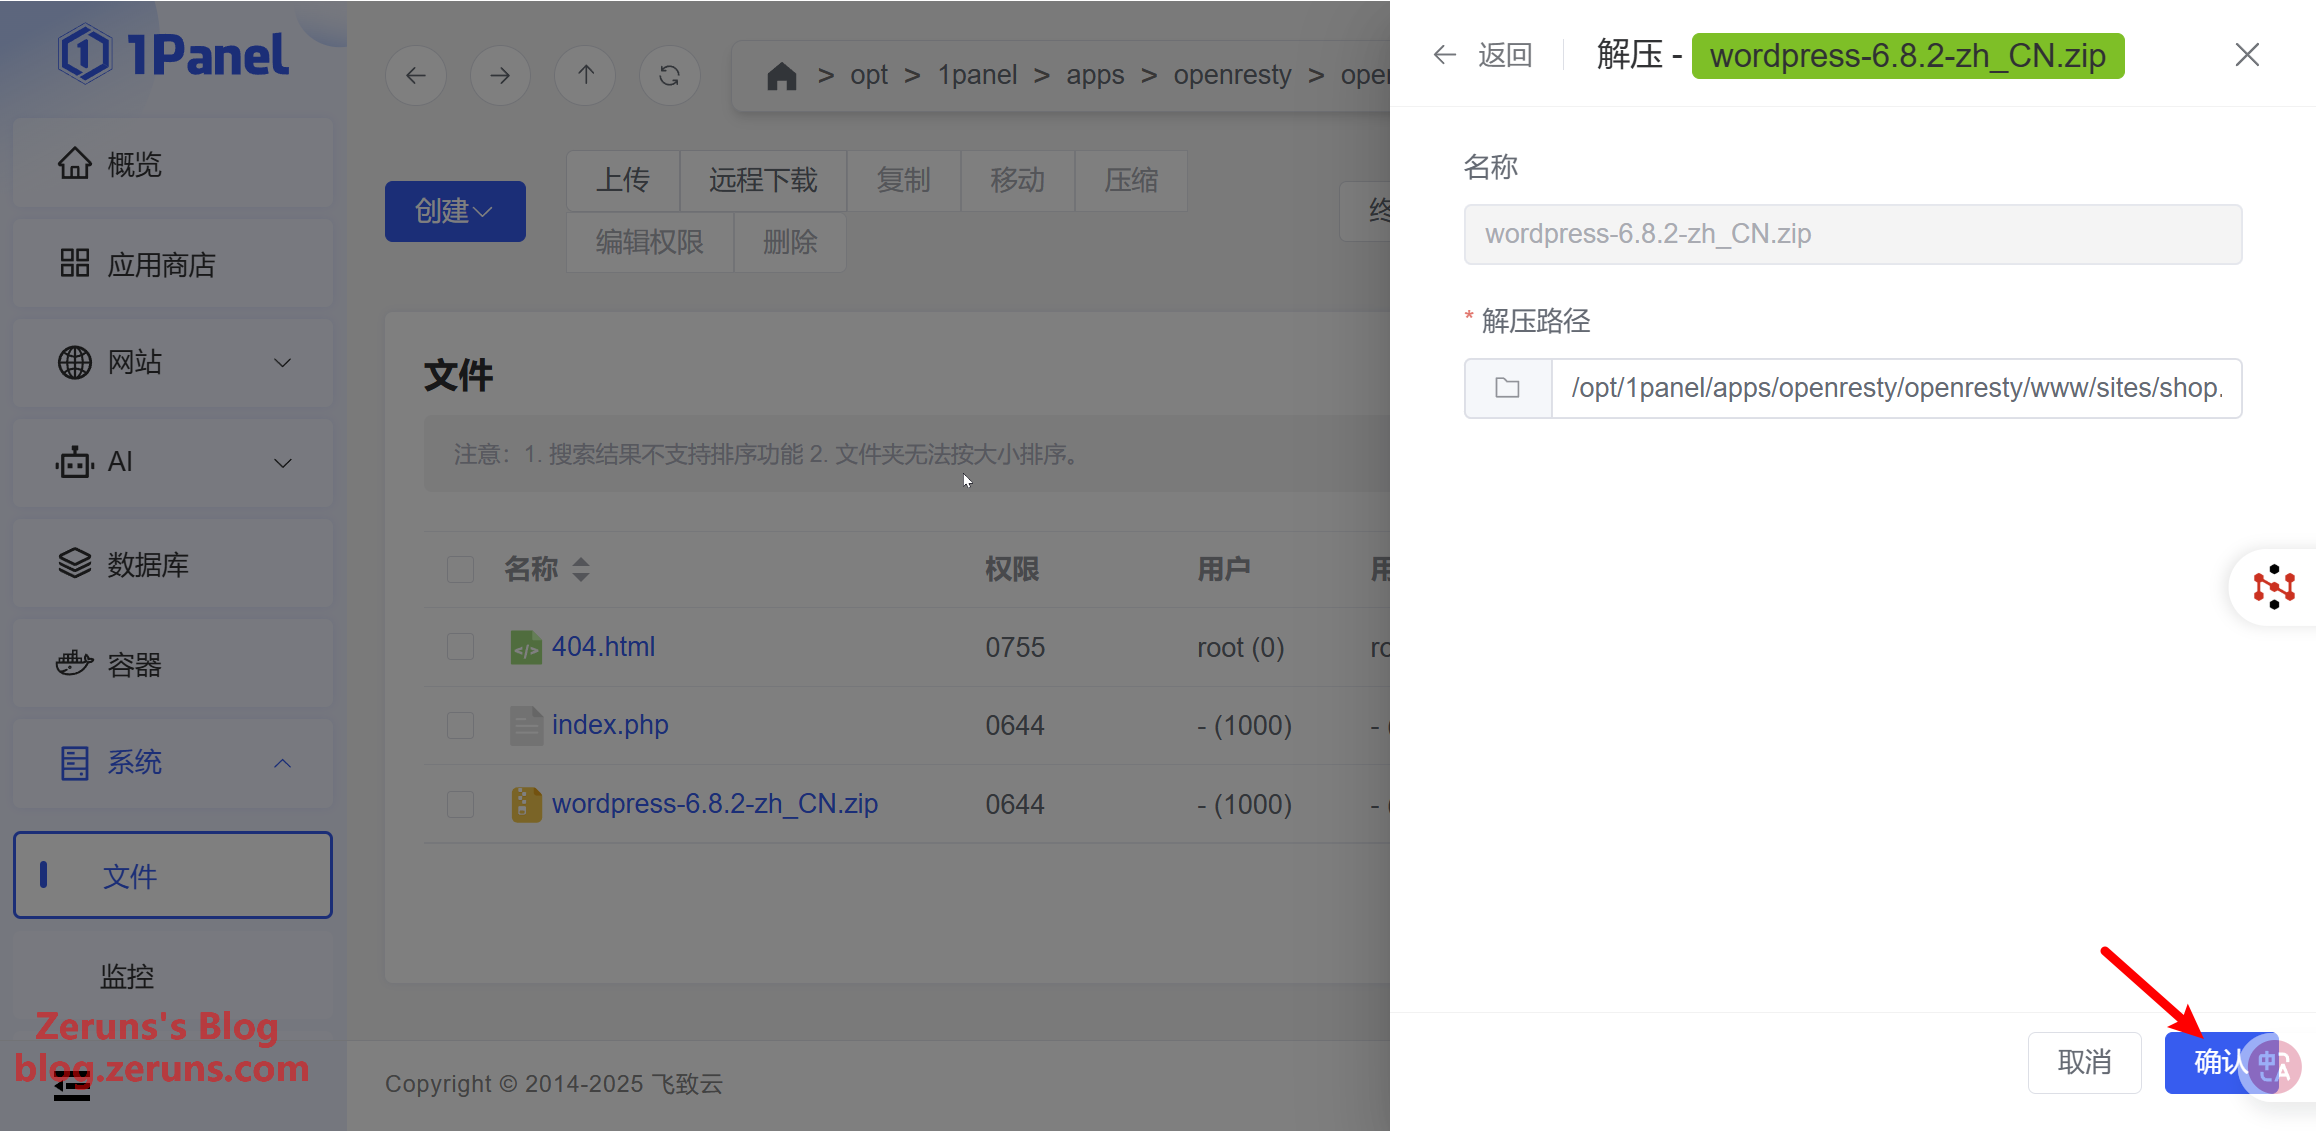
Once uploaded, click Extract next to the zip file, then click Confirm.
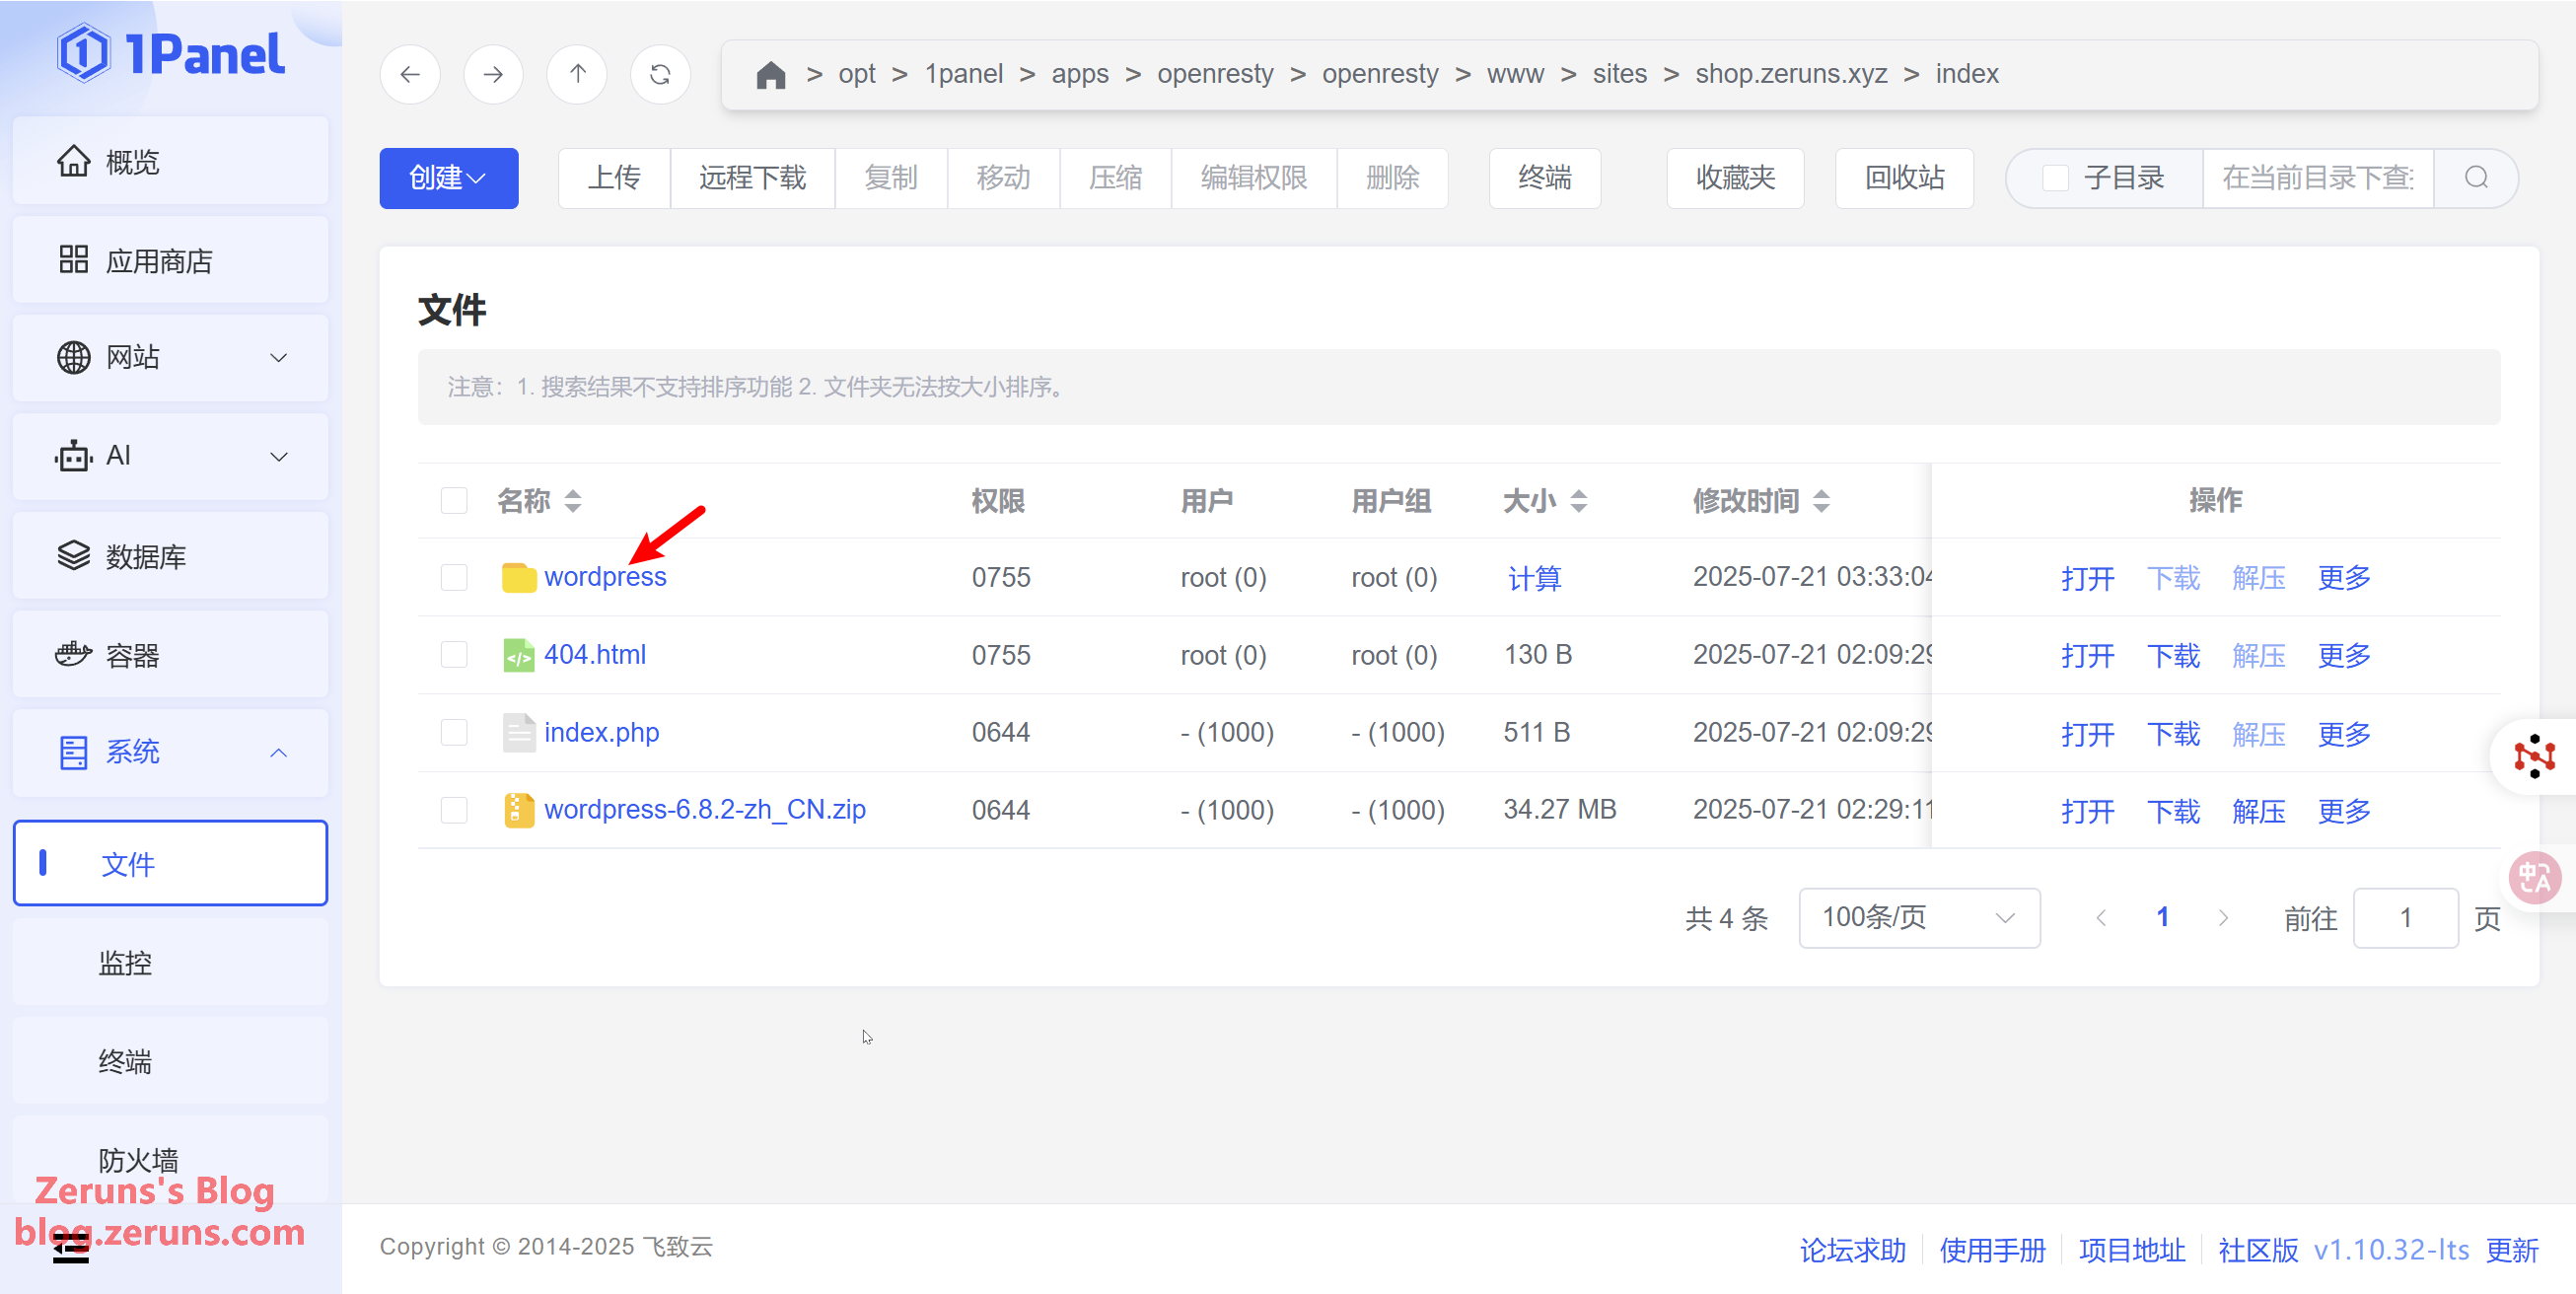
Enter the extracted wordpress folder.
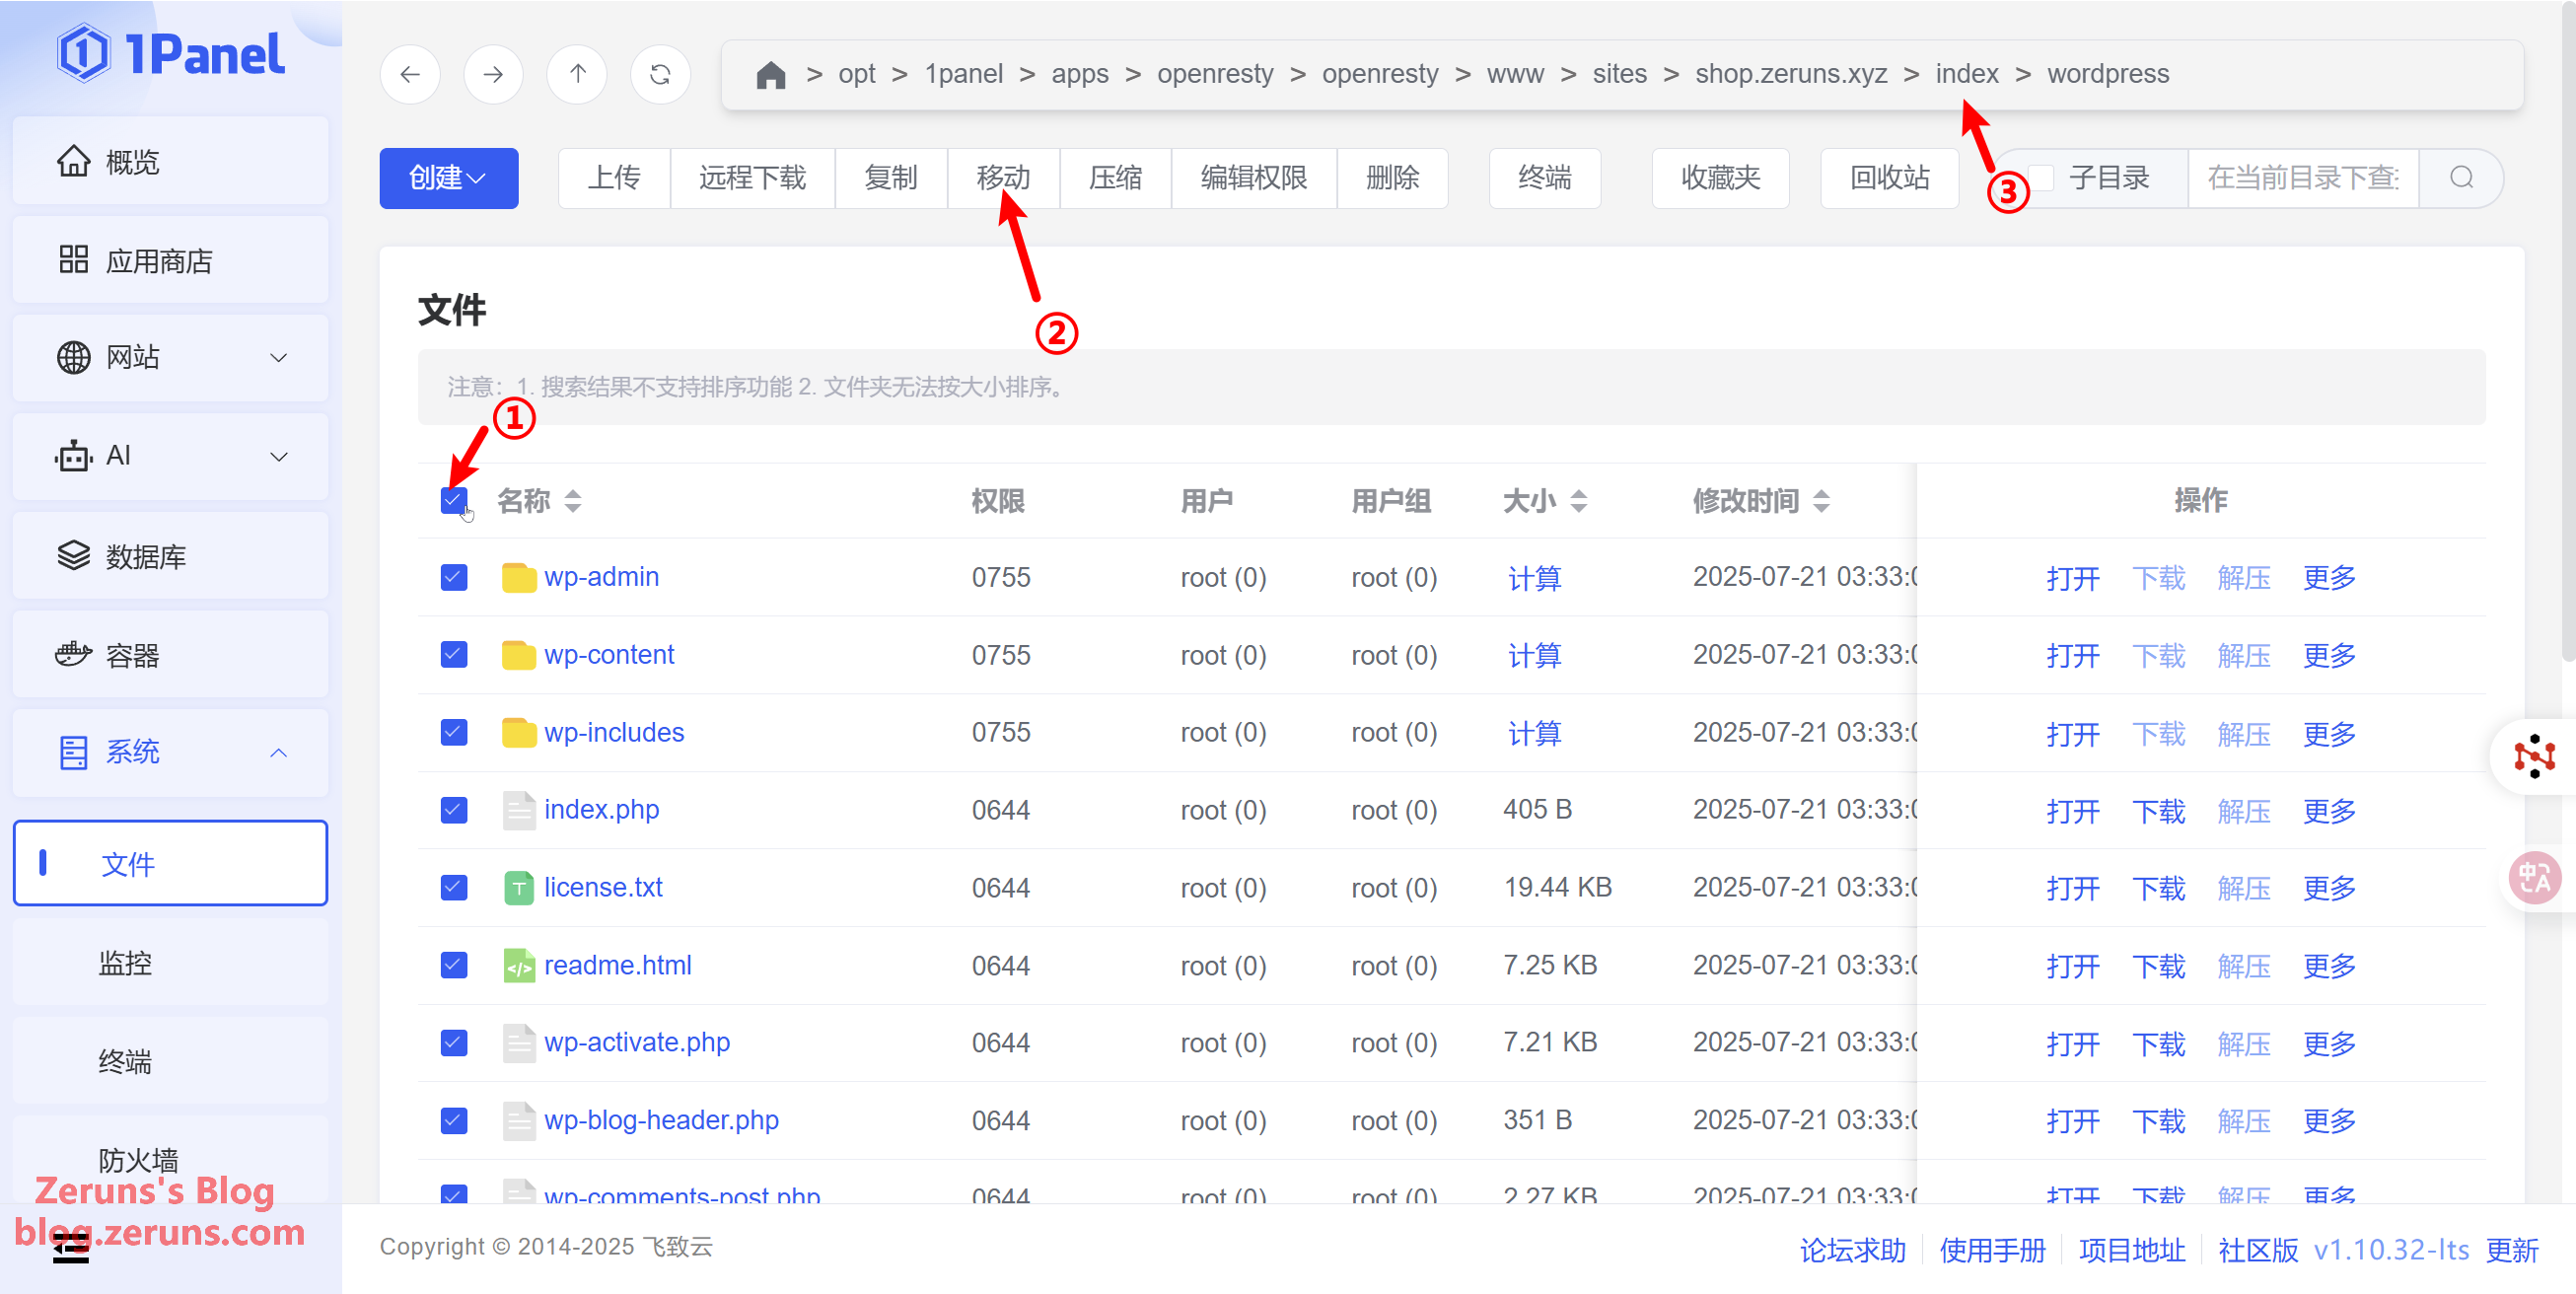
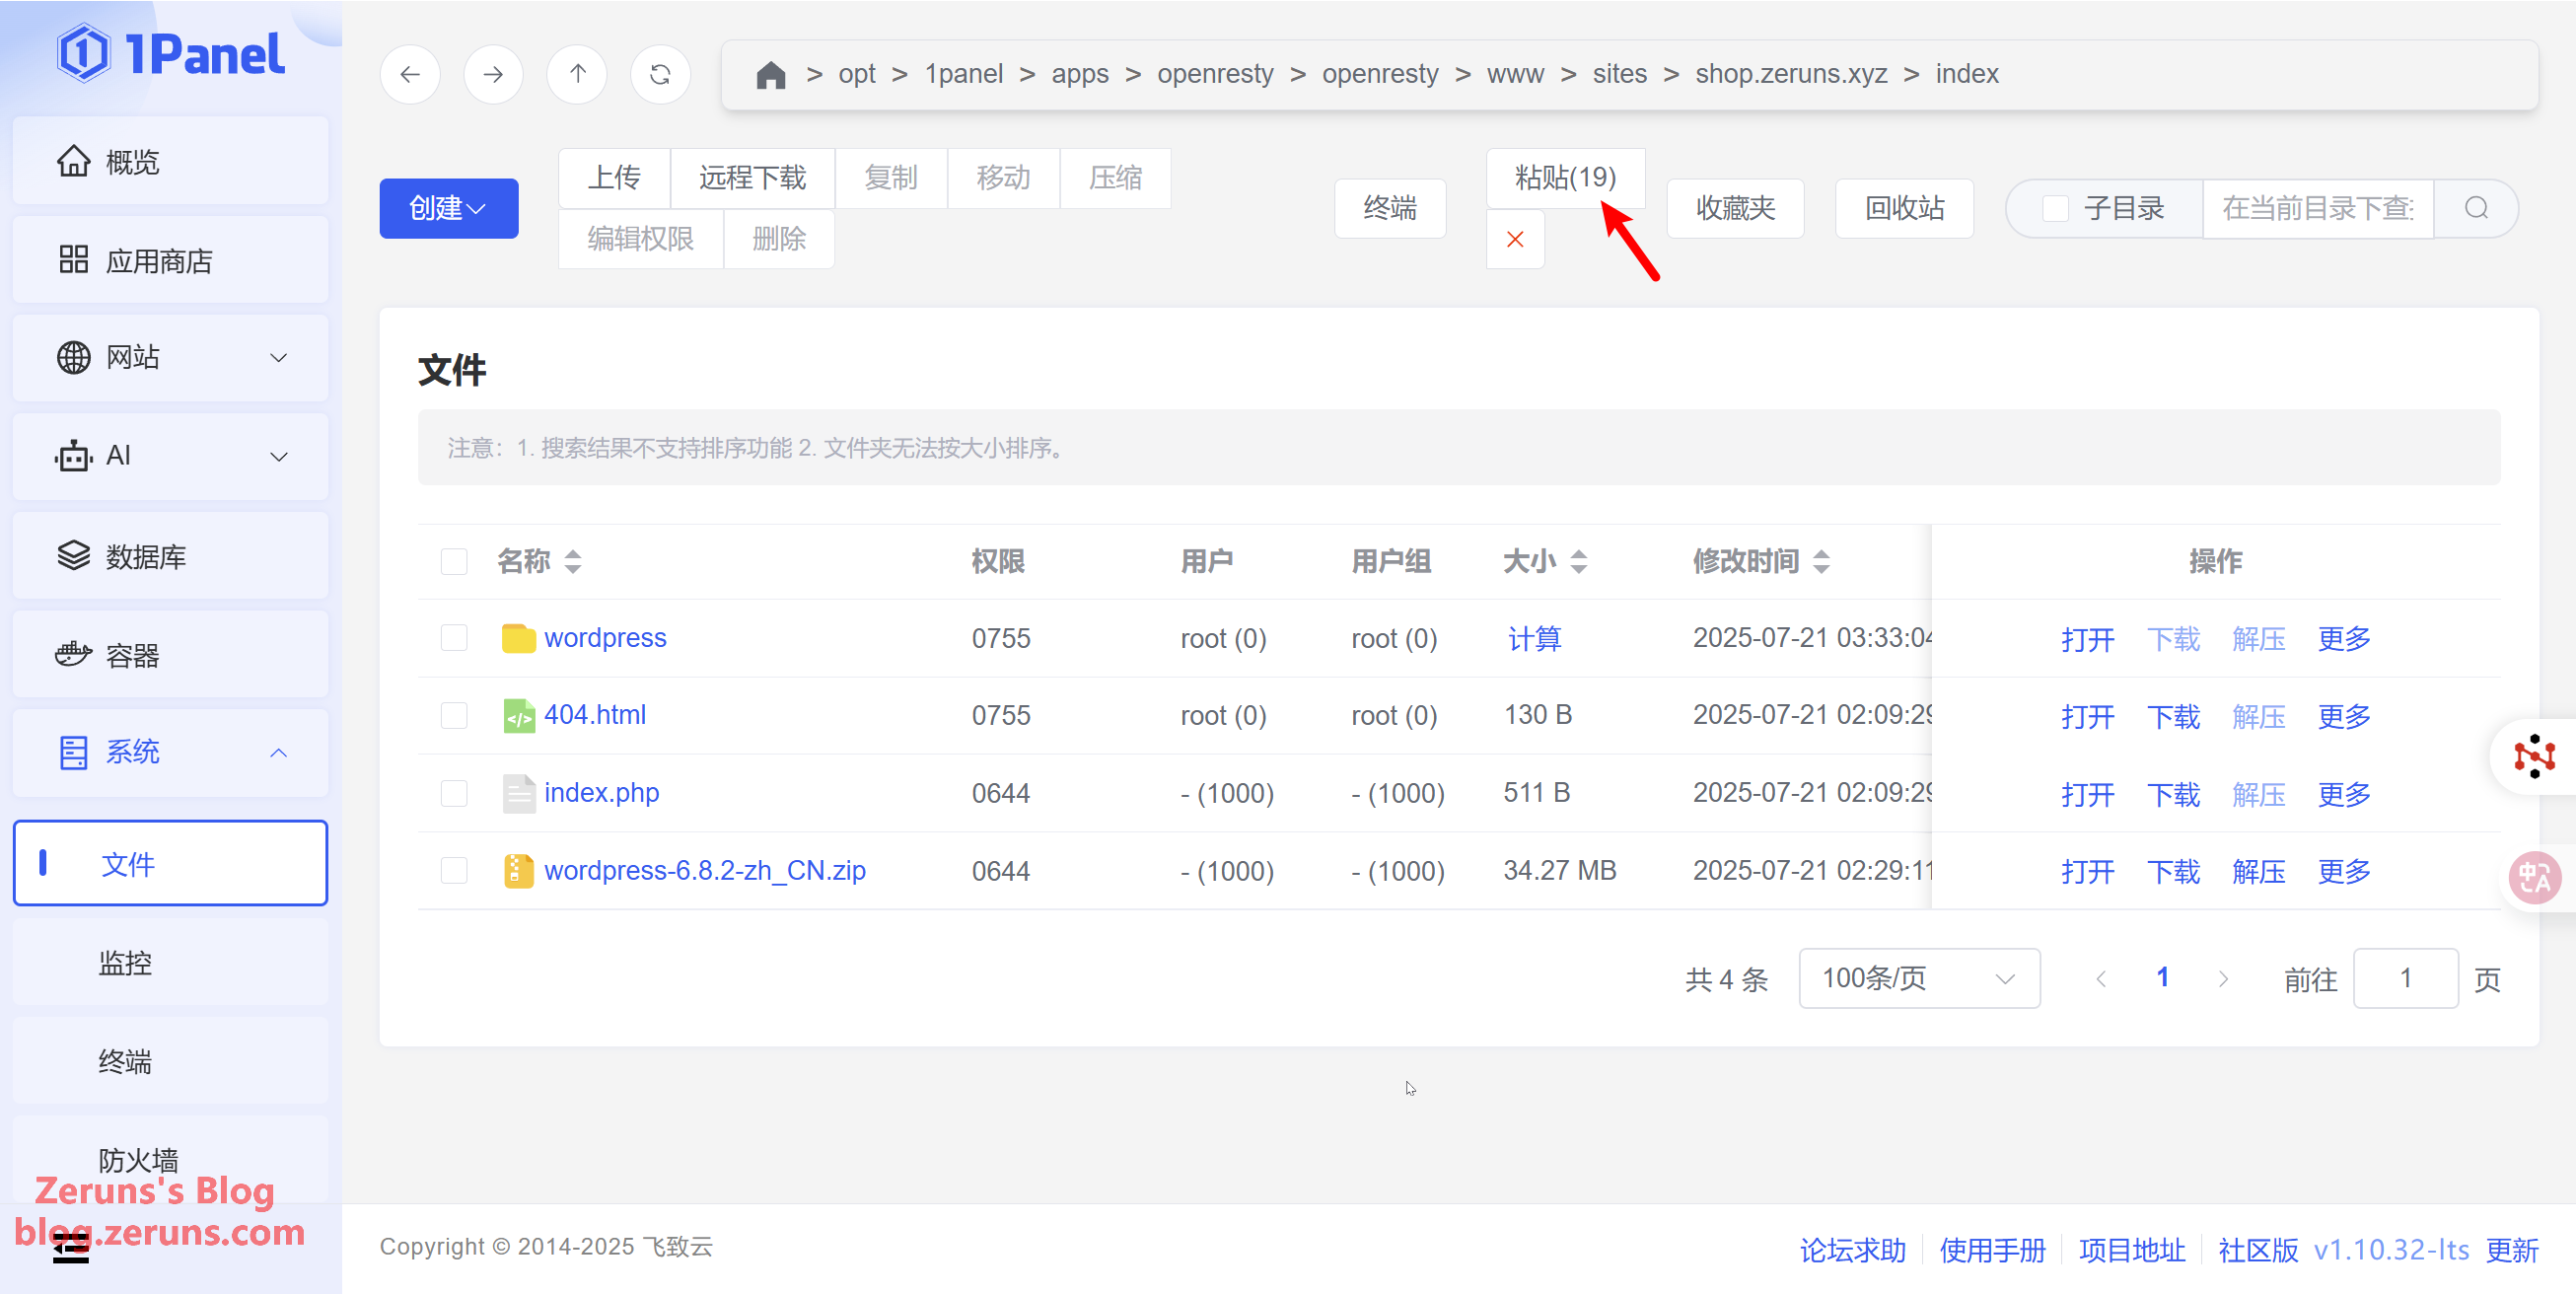
Select all files in the folder, click Move, then click the index in the path above to return to the site root.
Click Paste.
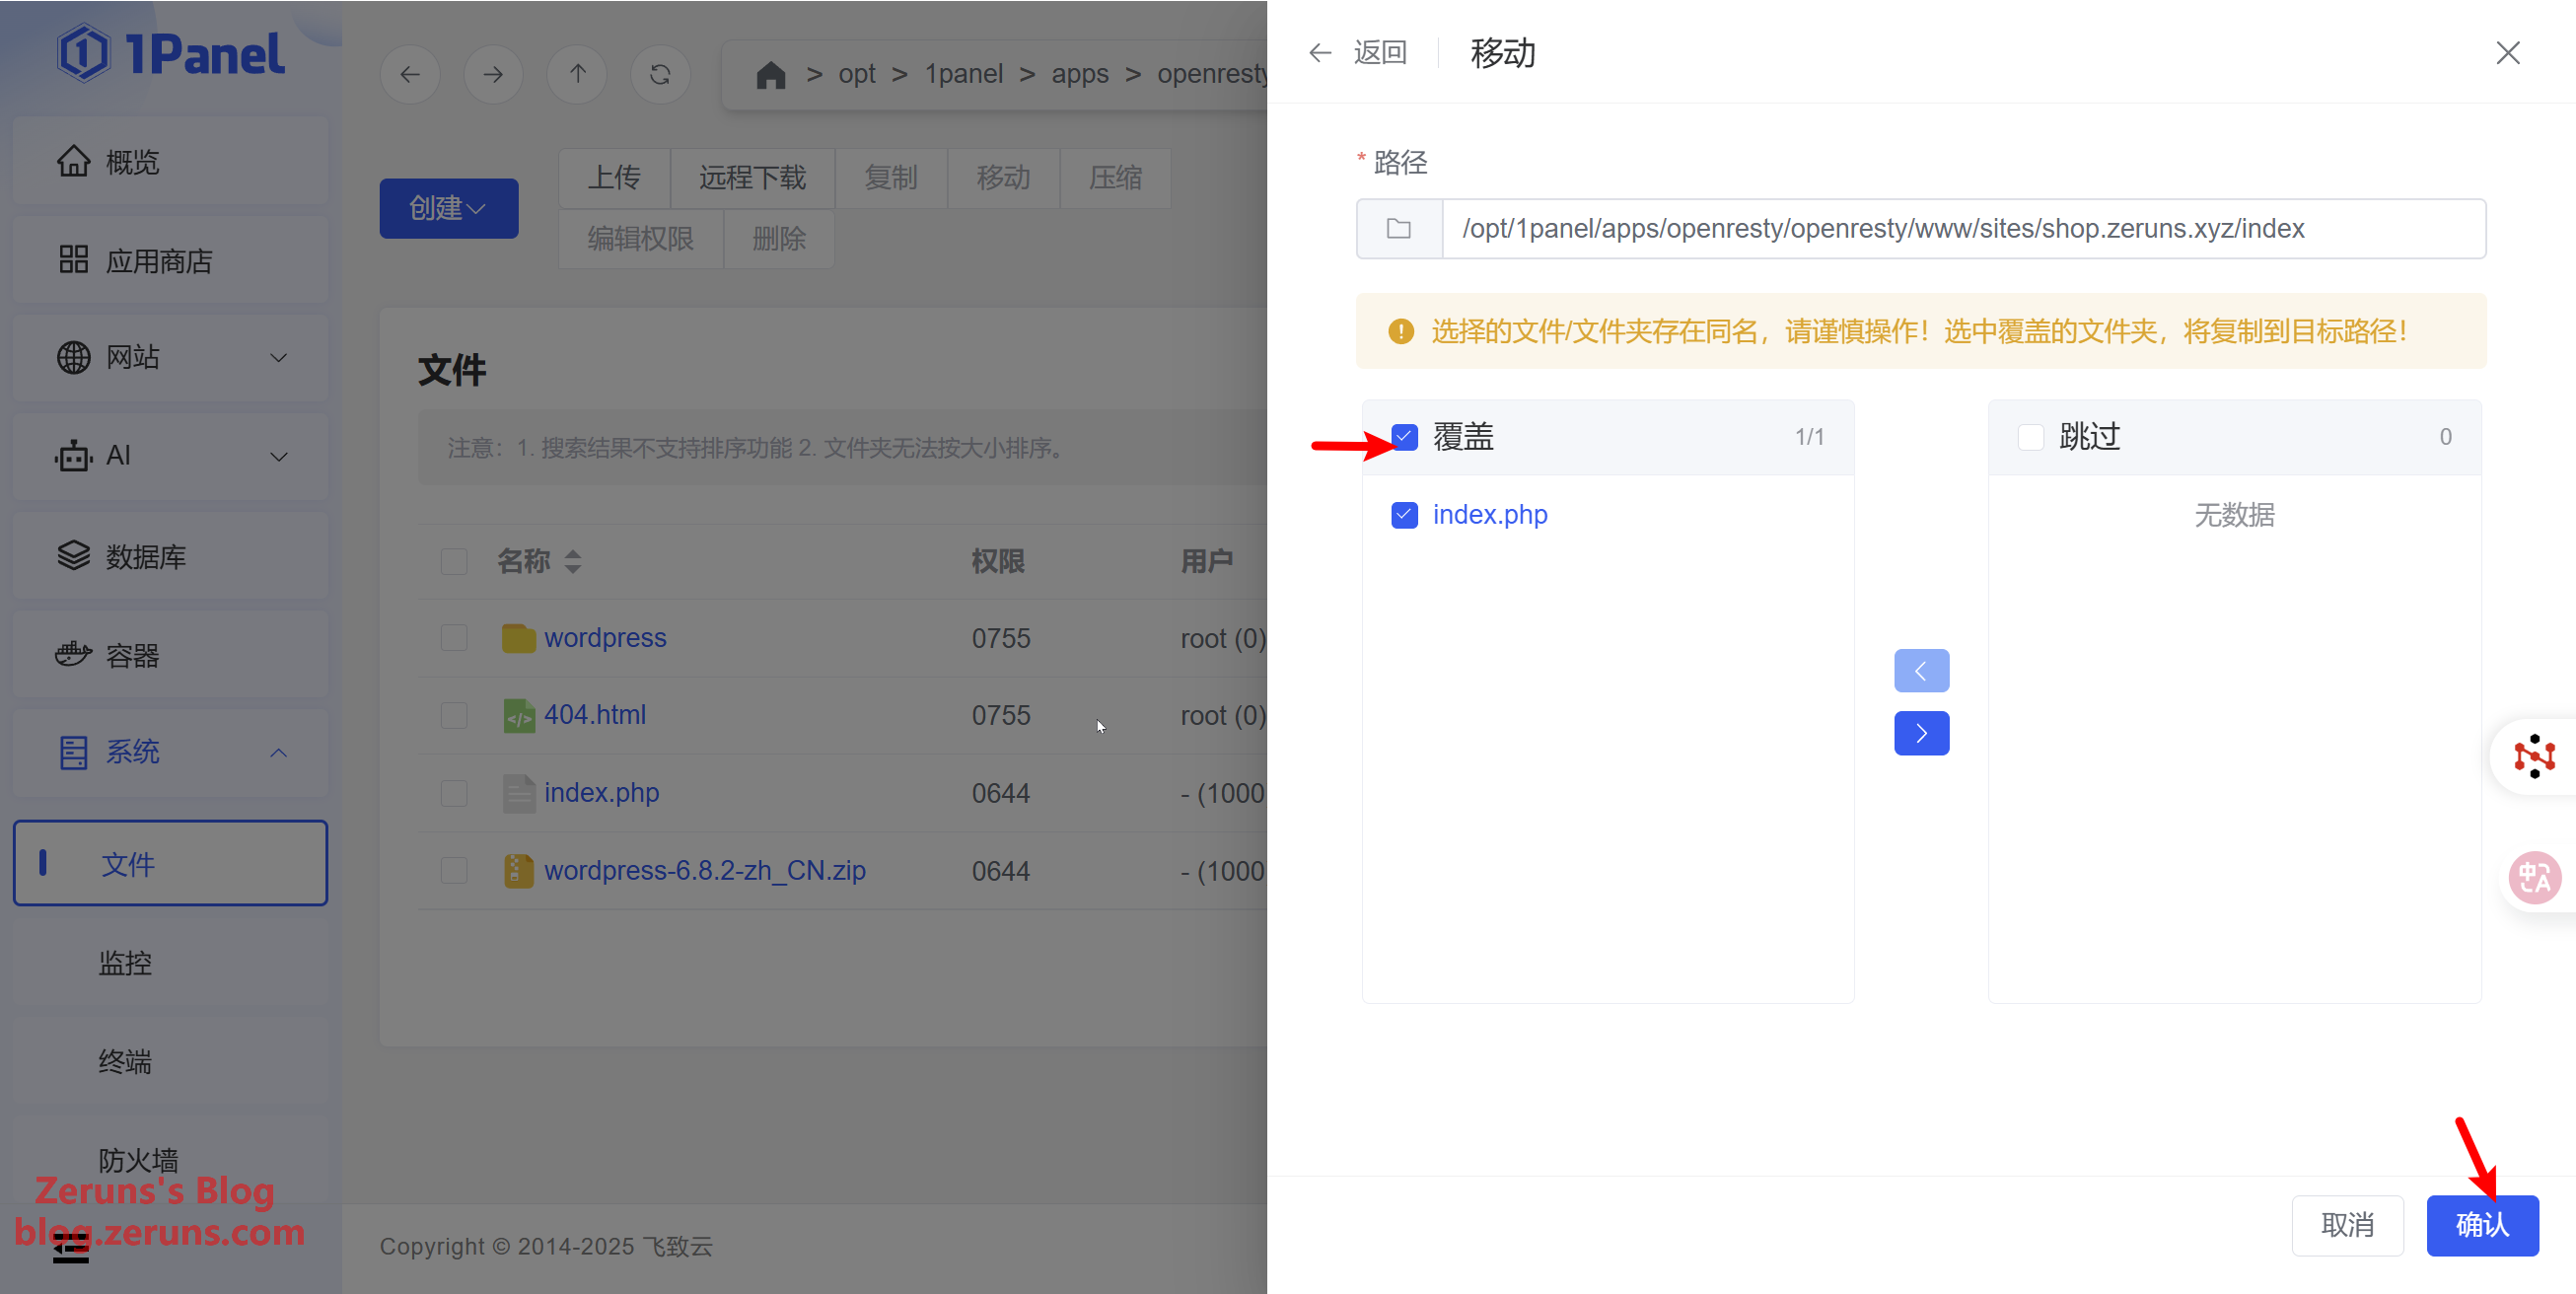
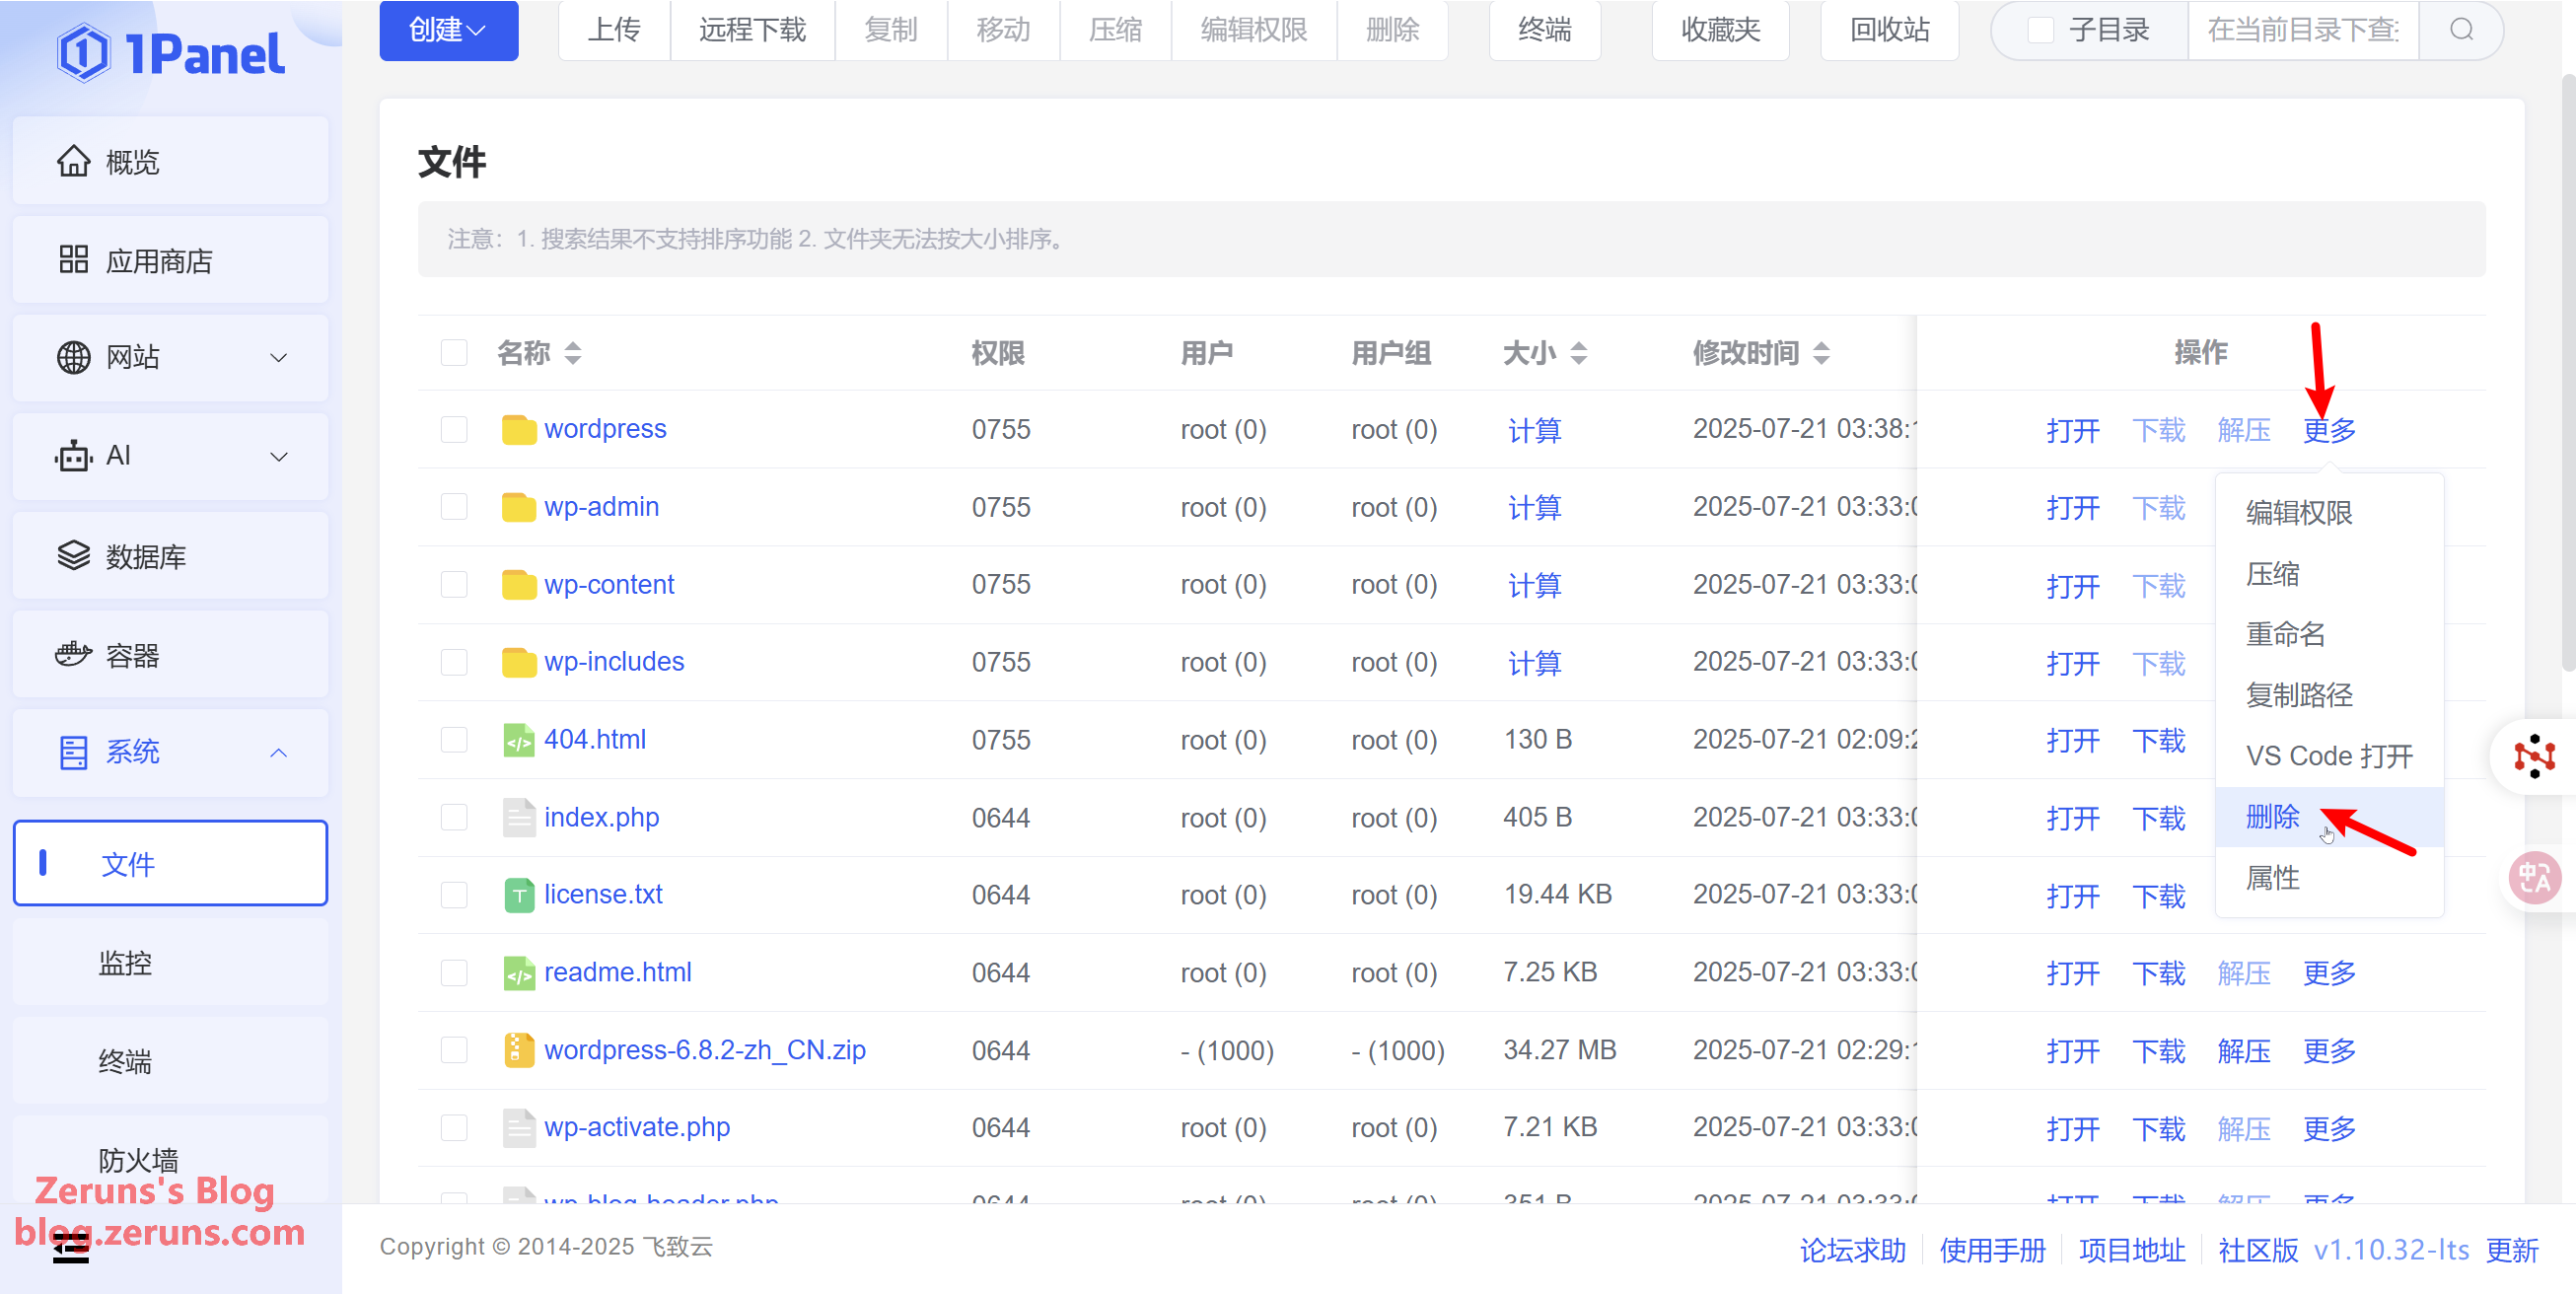
Check Overwrite, then click Confirm. Finally, delete the original wordpress folder and the uploaded zip file.
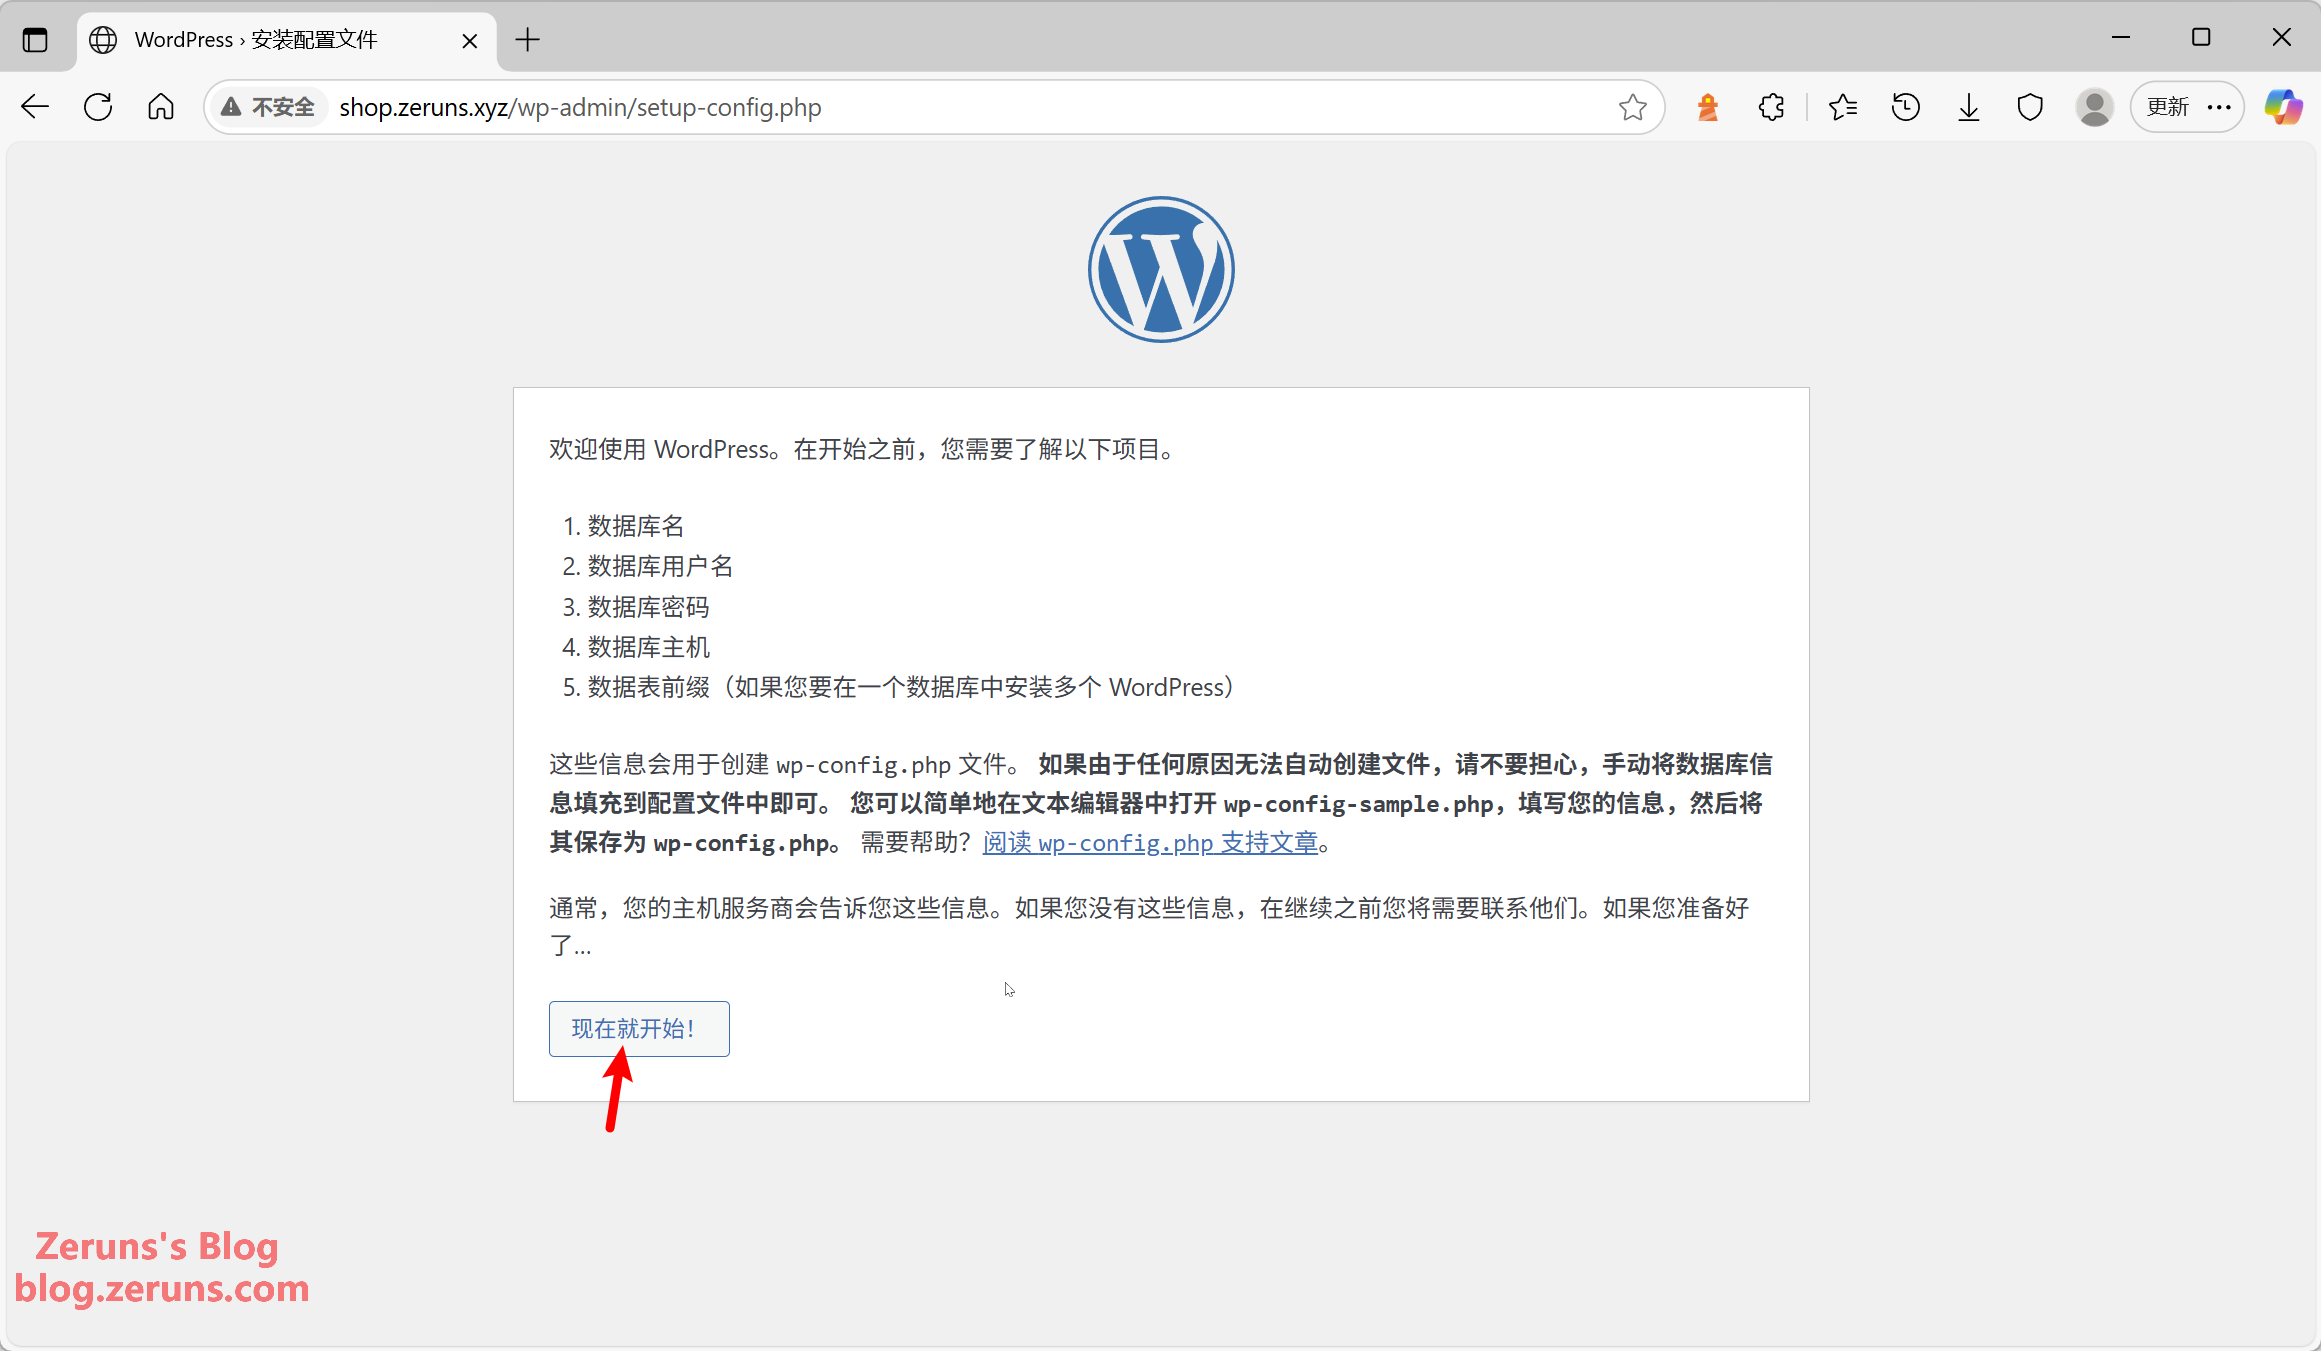
In your browser, enter your domain name to access the WordPress installation wizard. Click Let's get started at the bottom left.
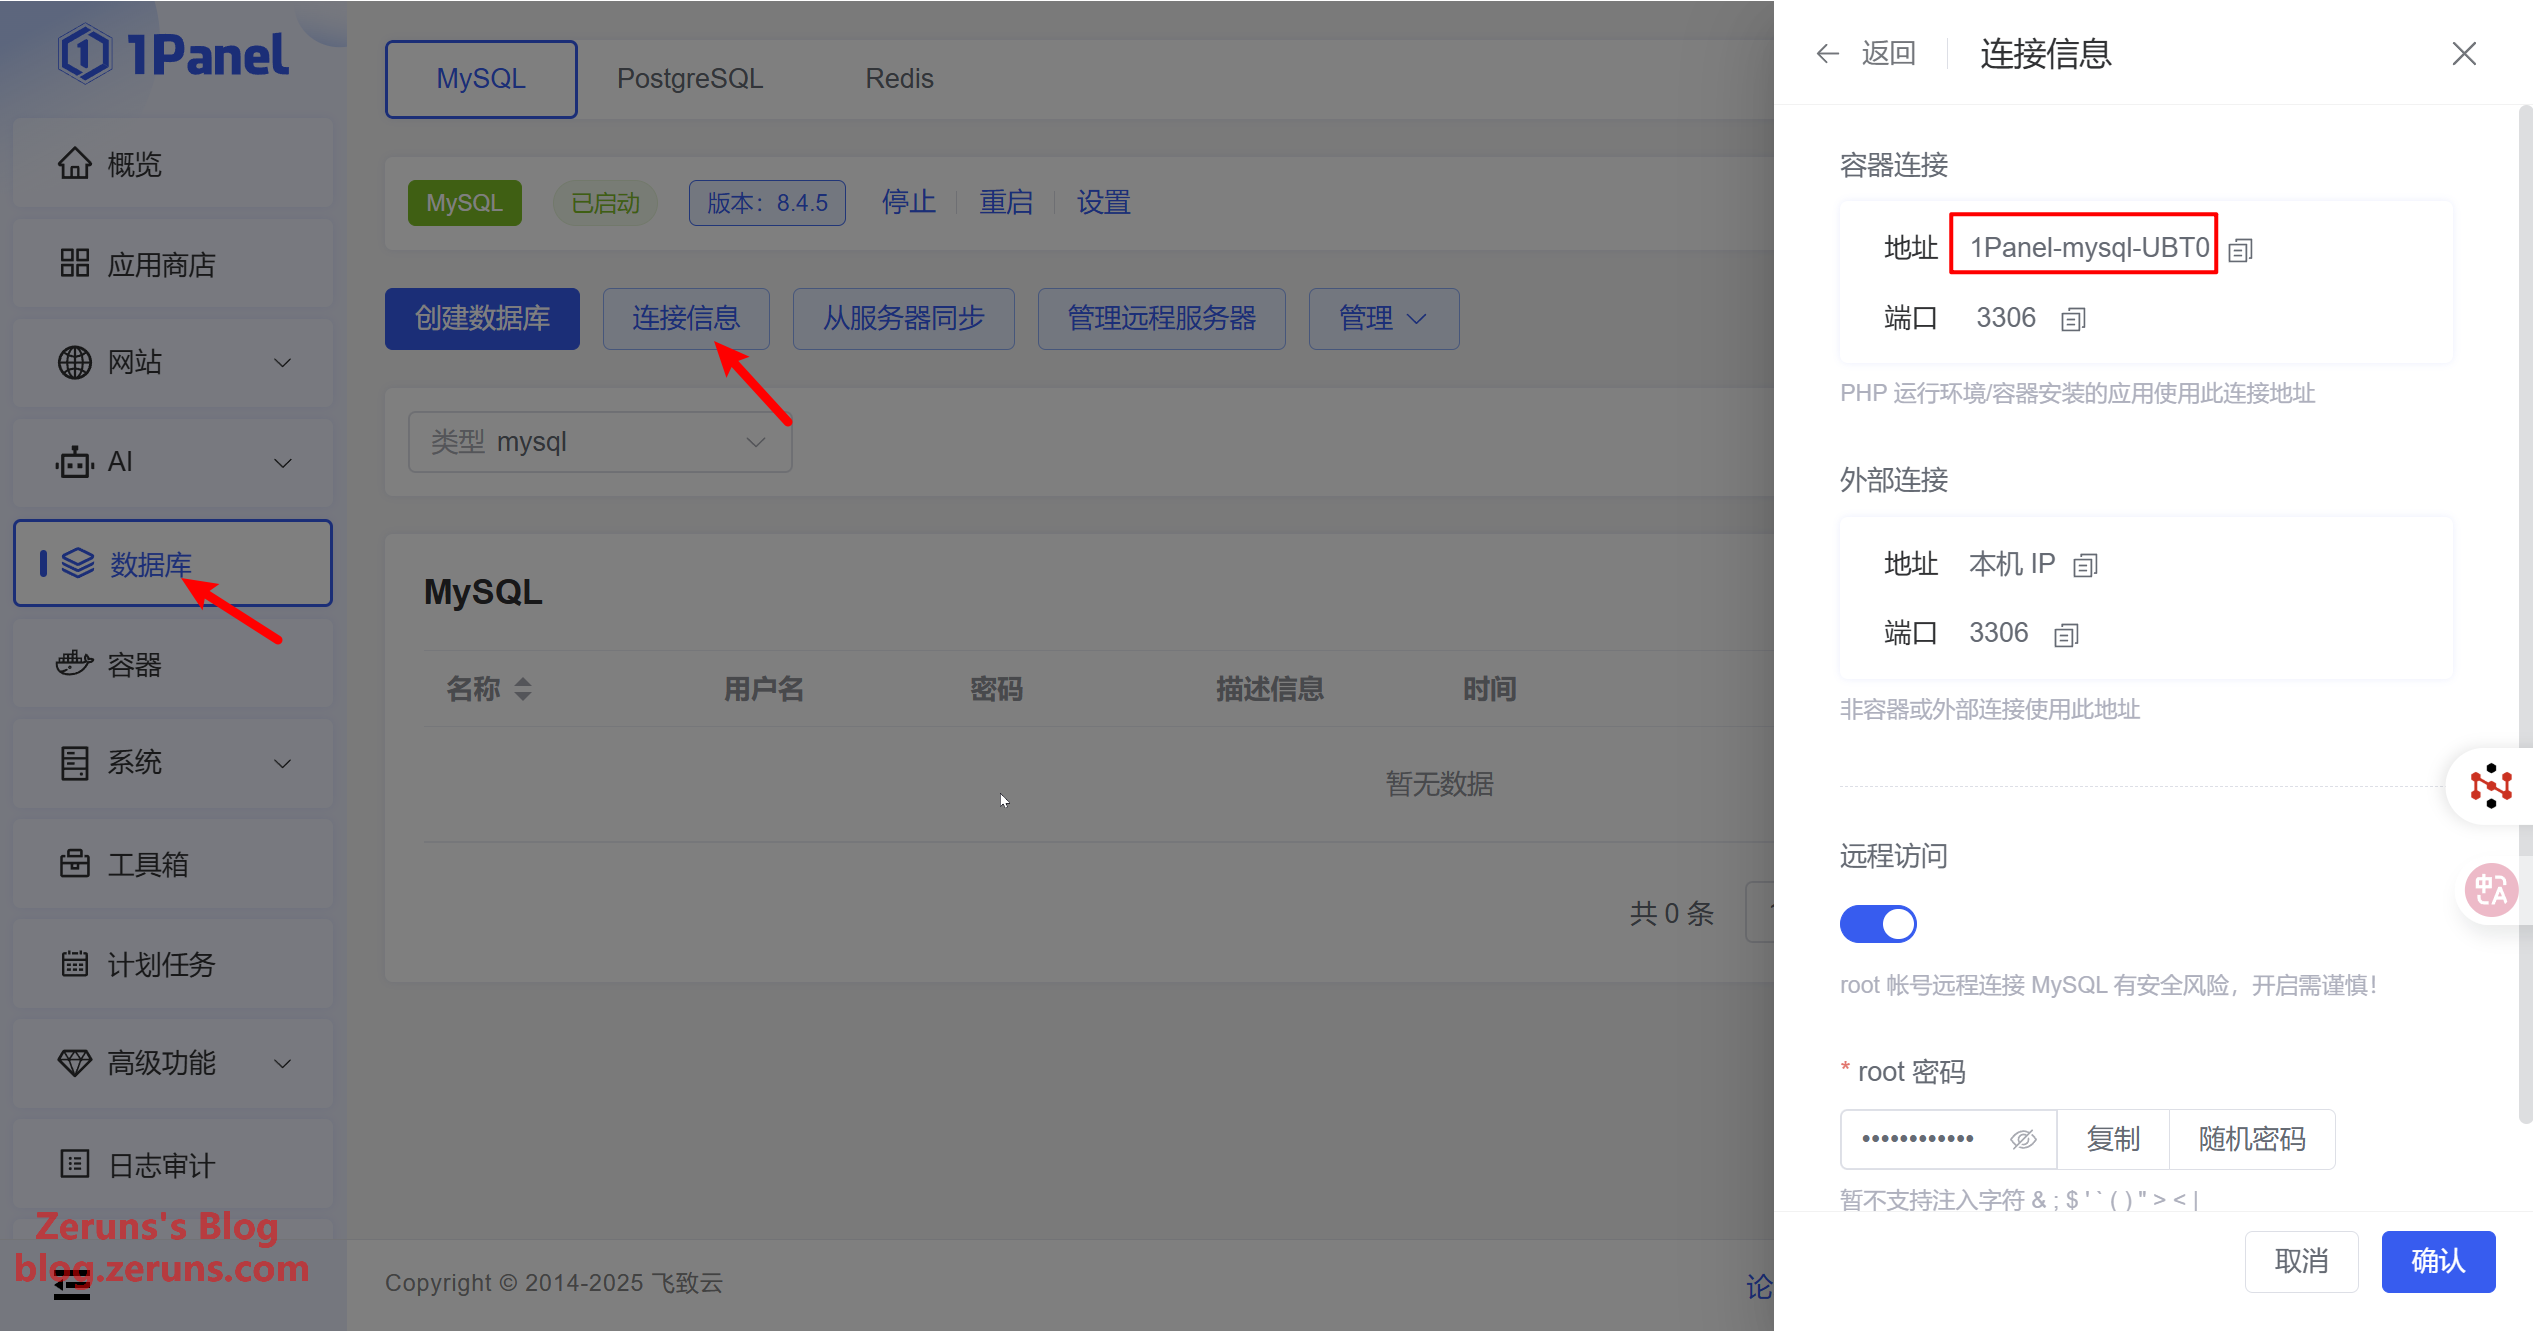
Get your database connection info by going to Database → Connection Info in 1Panel—this info will be needed next.
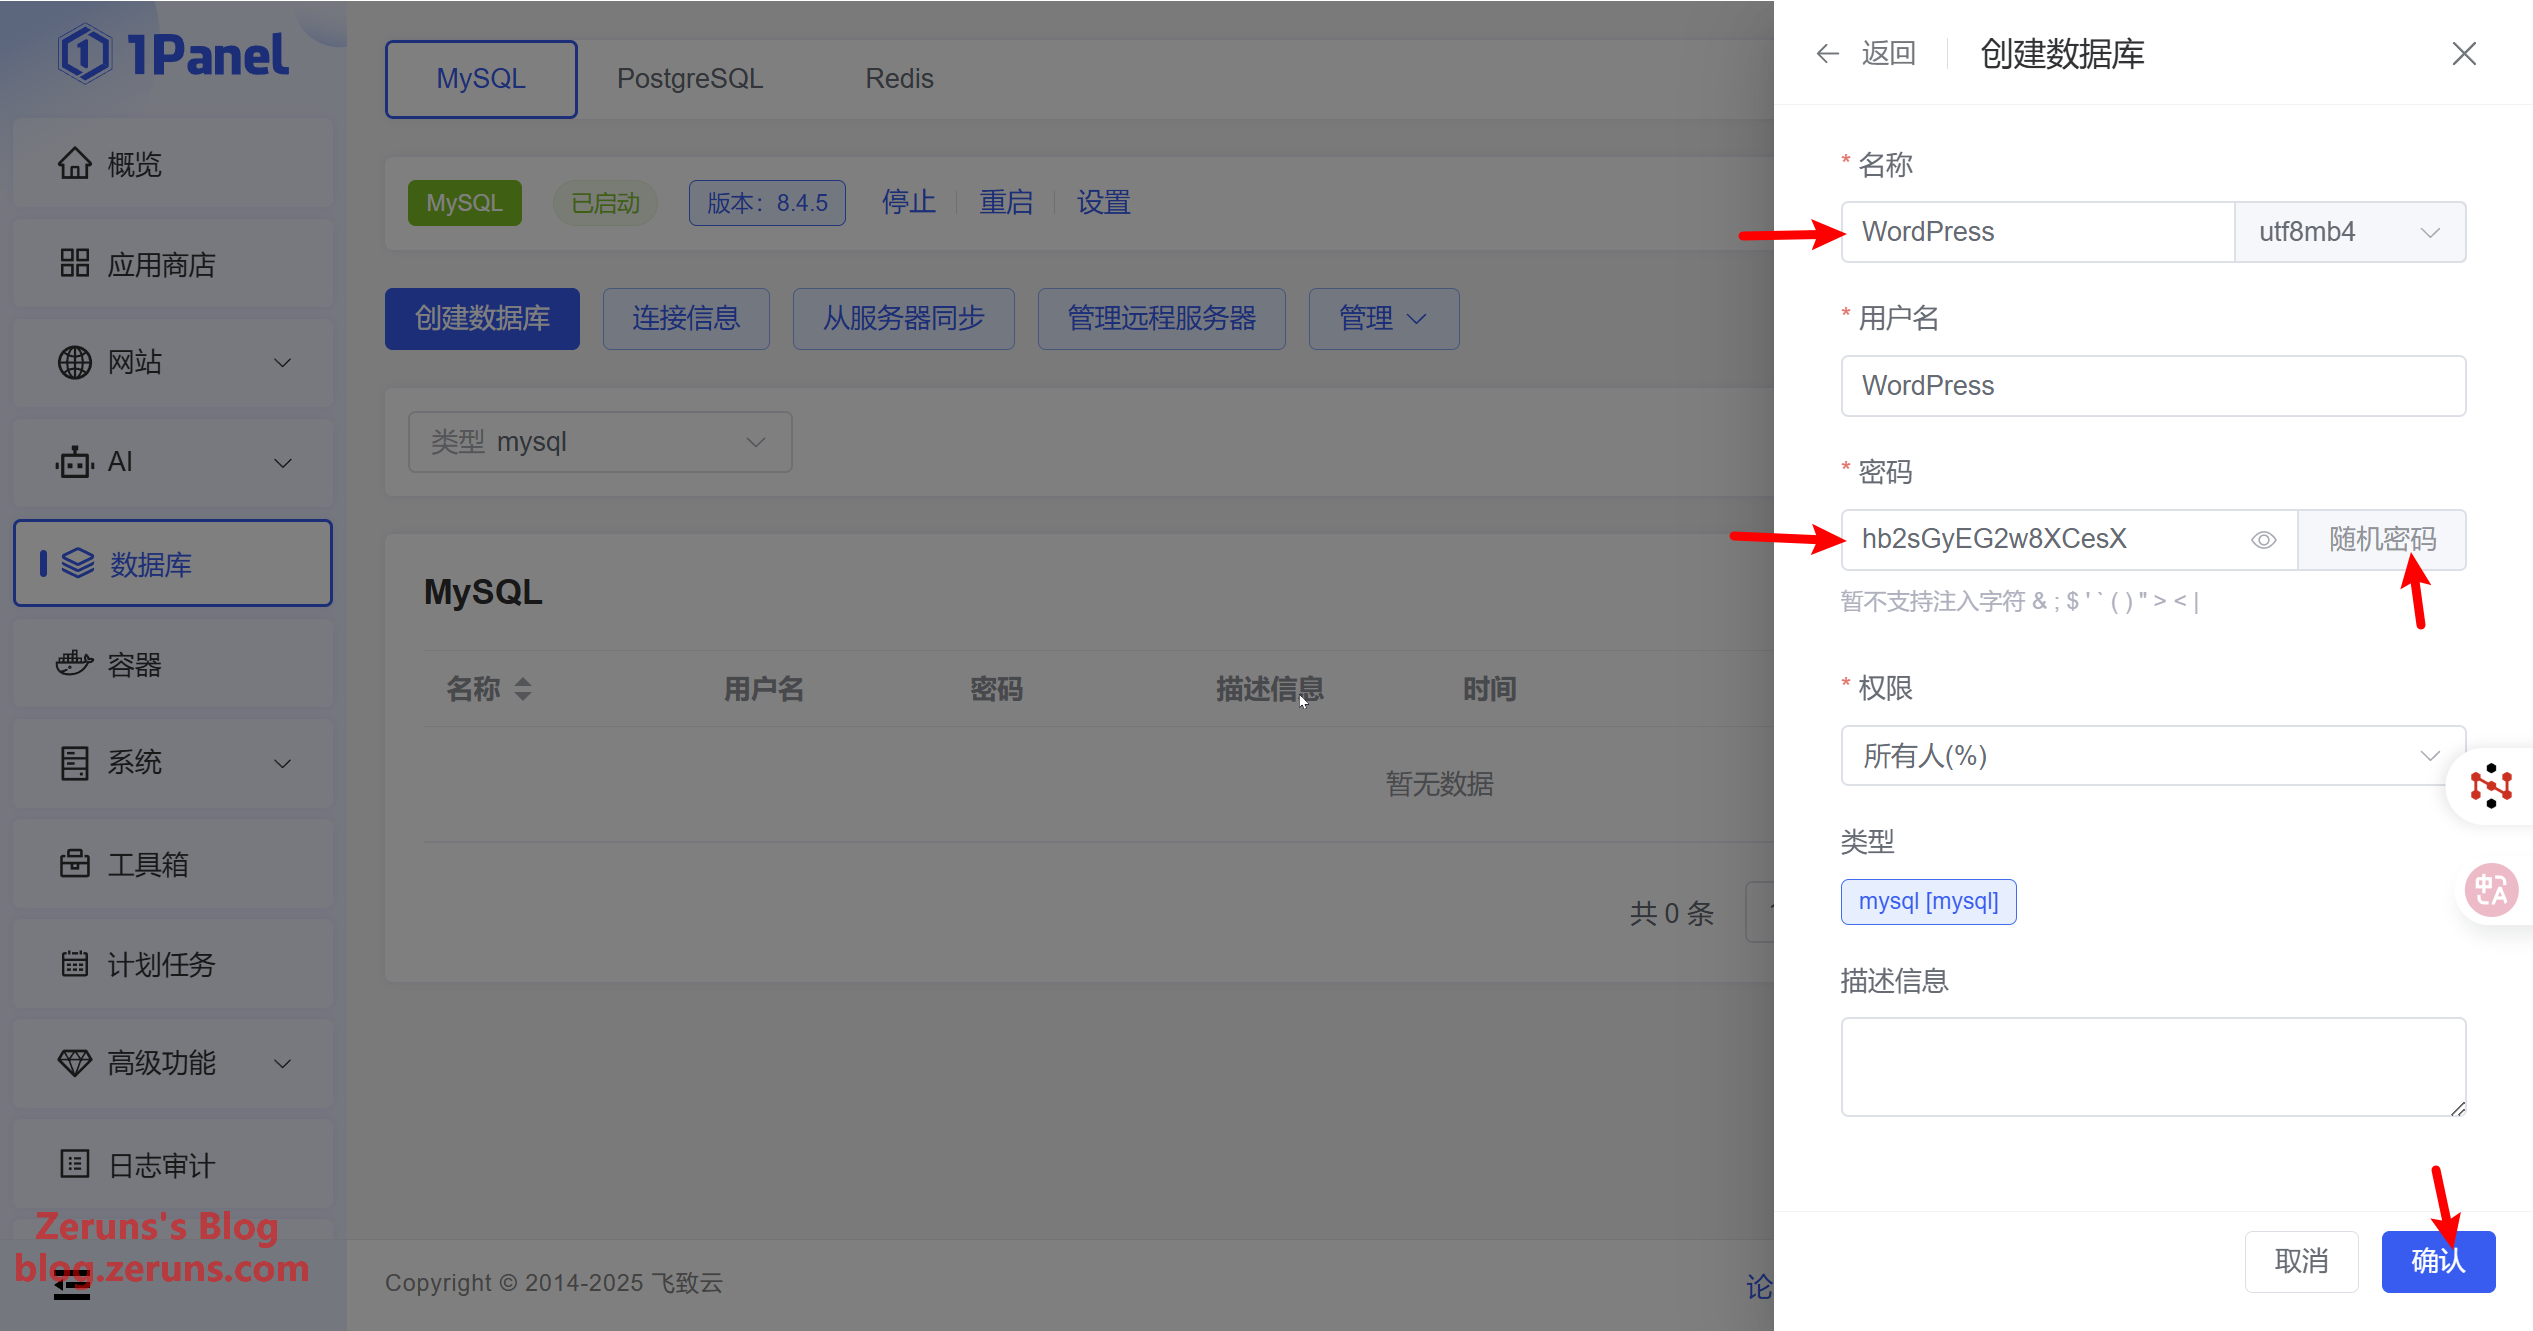
Click Create Database, set a name (e.g., WordPress). Use the same name for the username. Click the random password icon and save the generated info, then click Confirm.
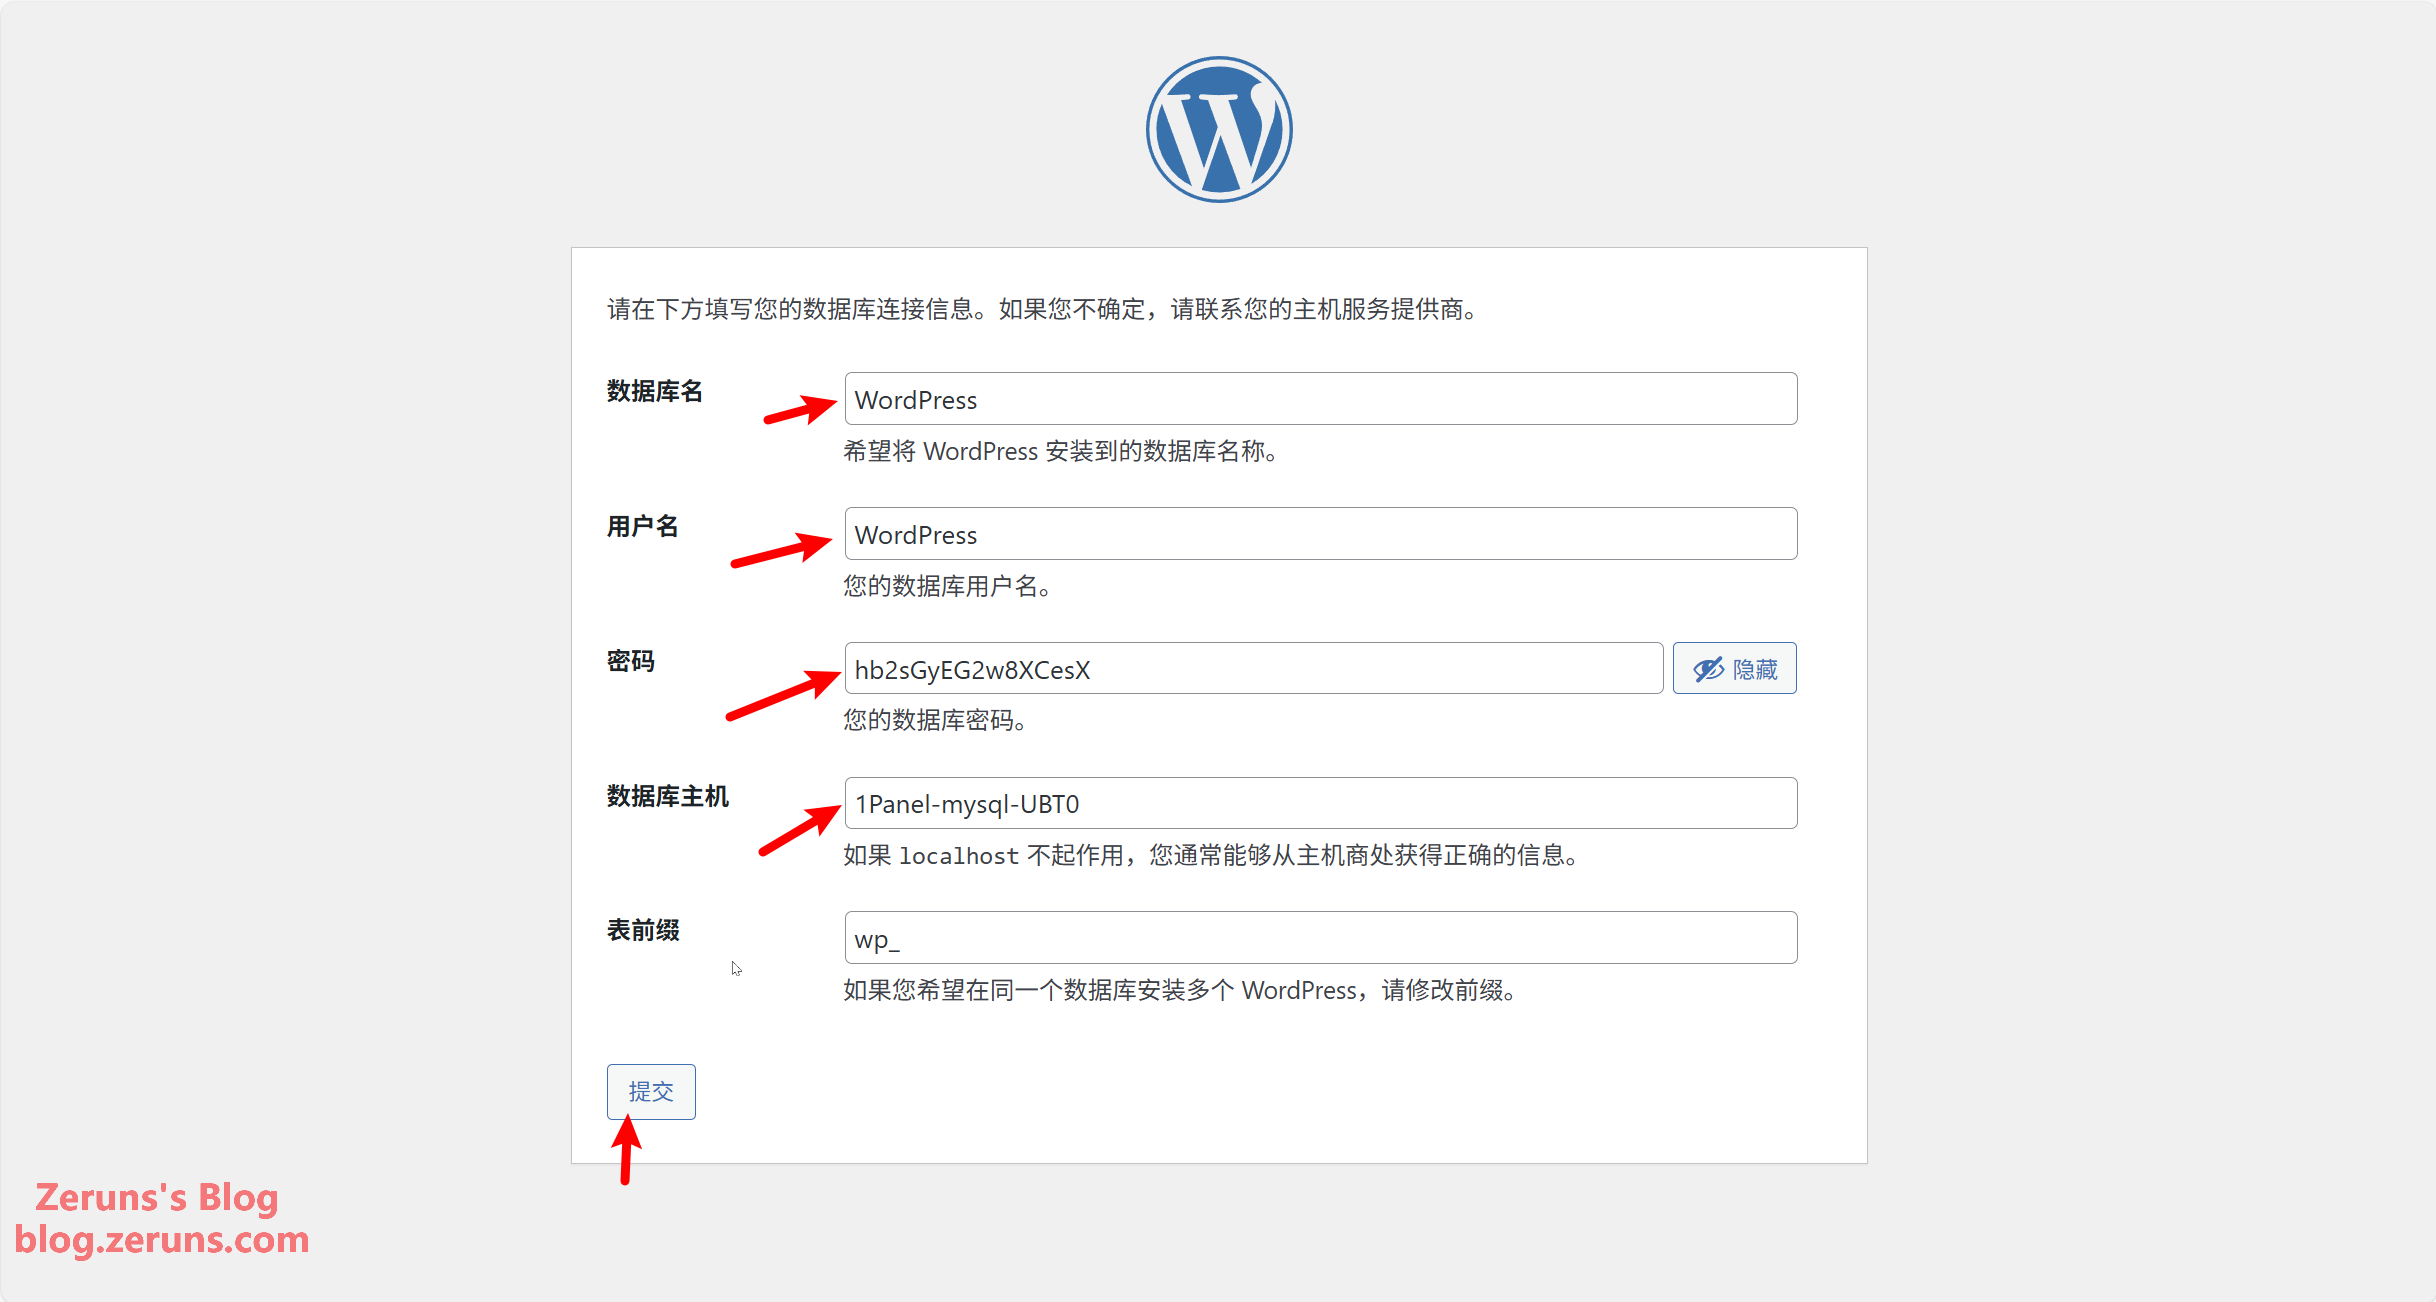
Return to the WordPress setup page, input the database name, username, and password you just created. For database host, enter the database address from earlier, then click Submit.
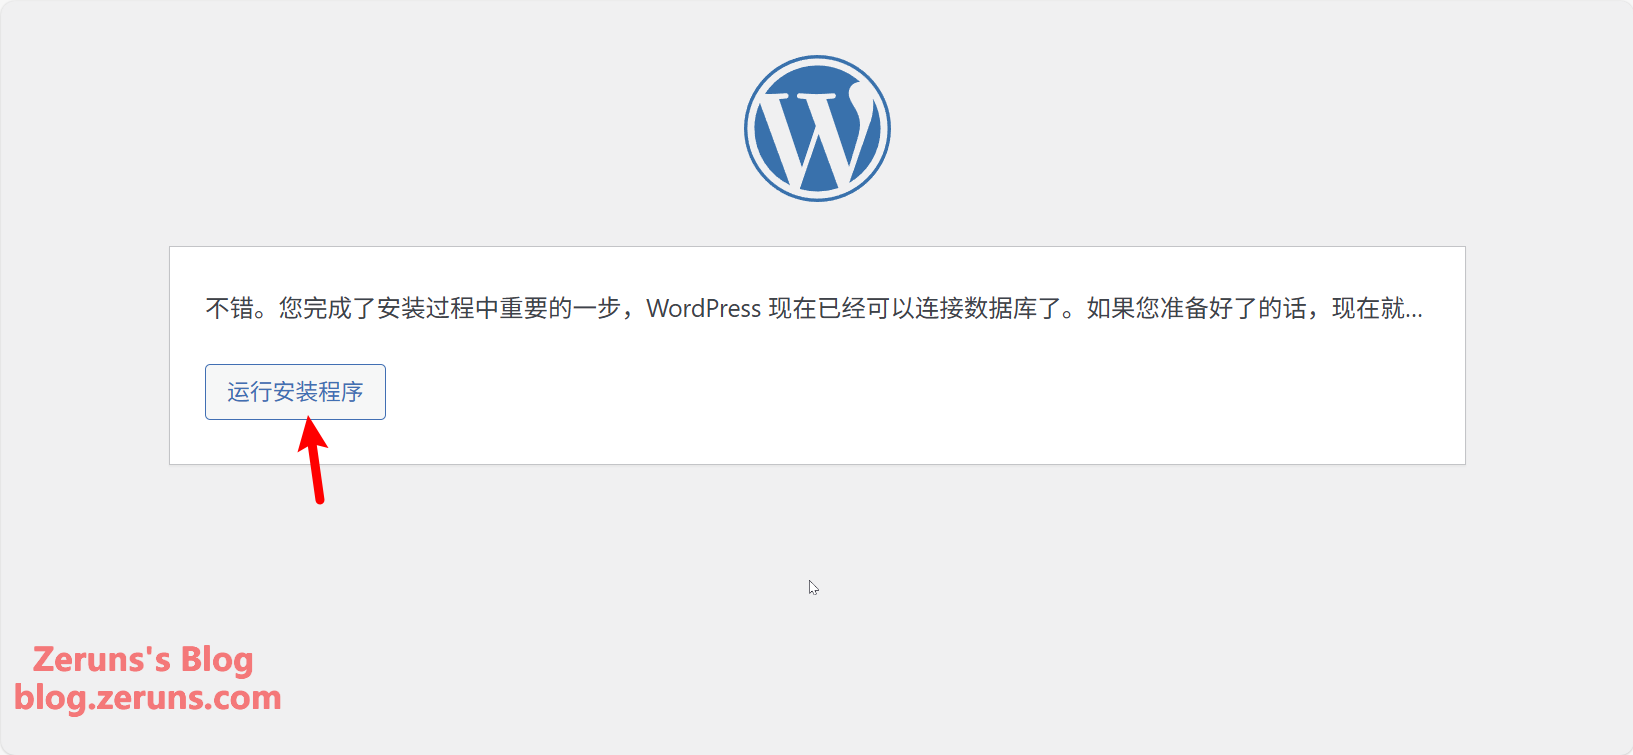
Click Run the installation.
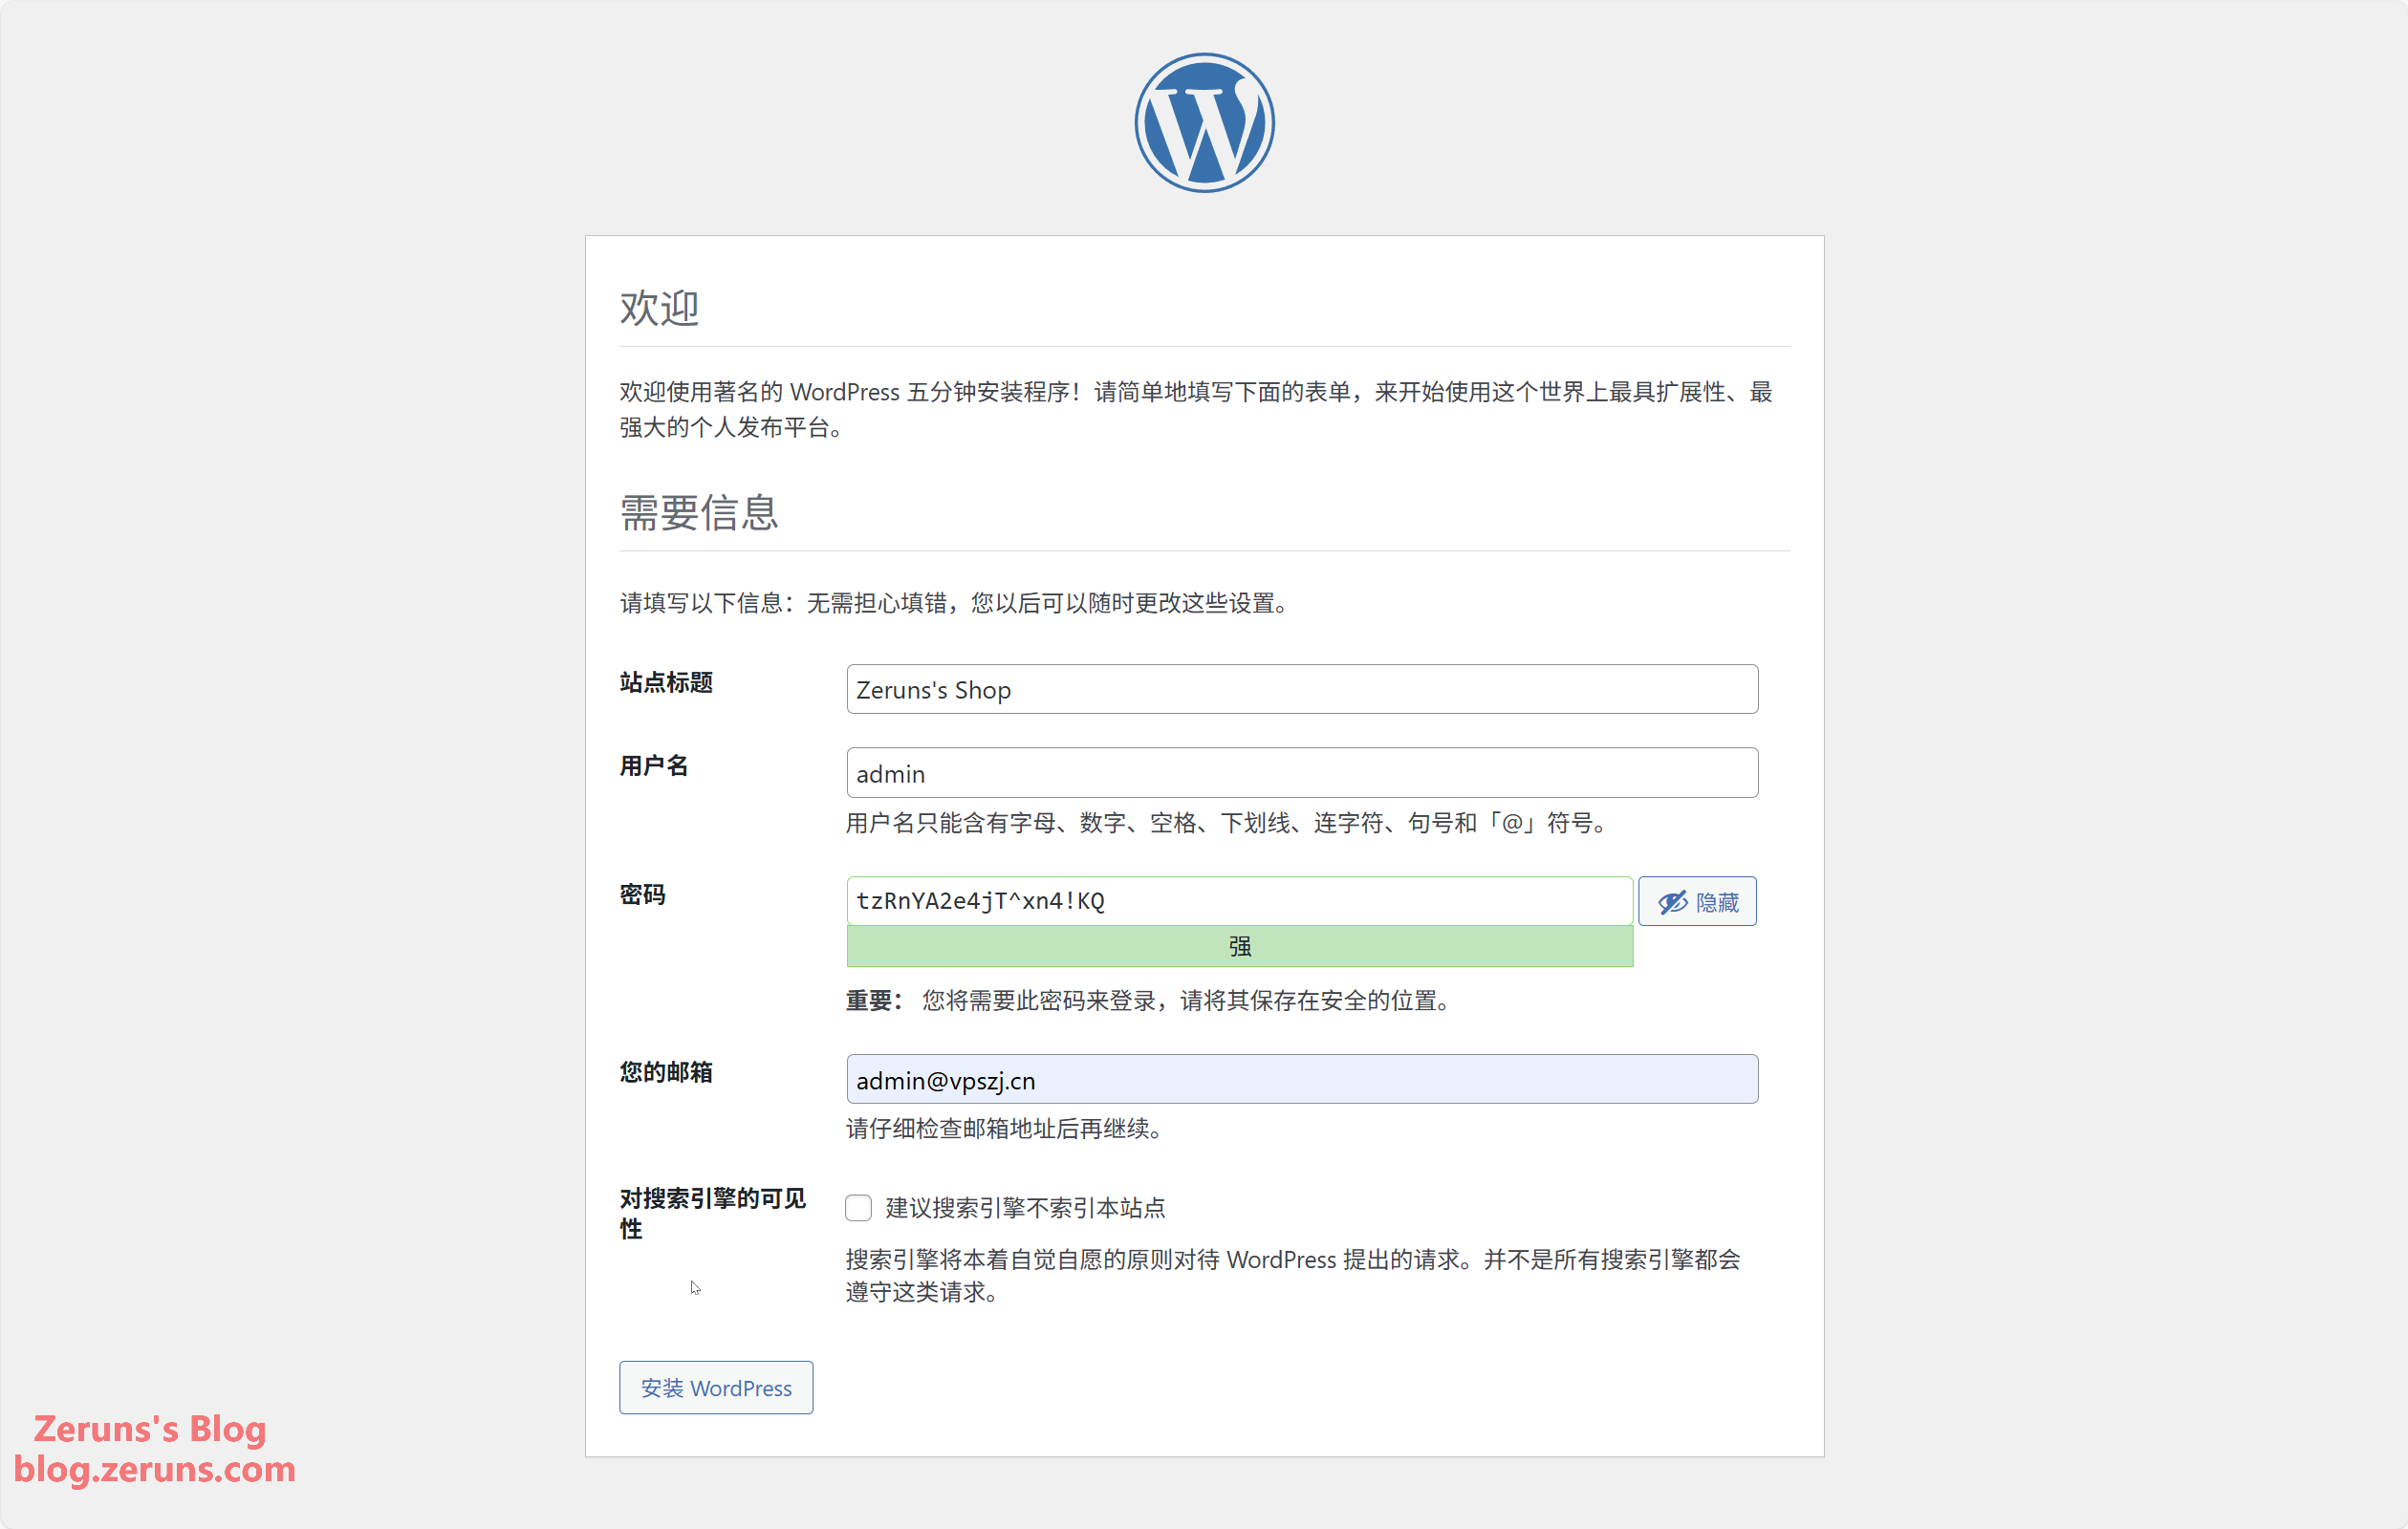
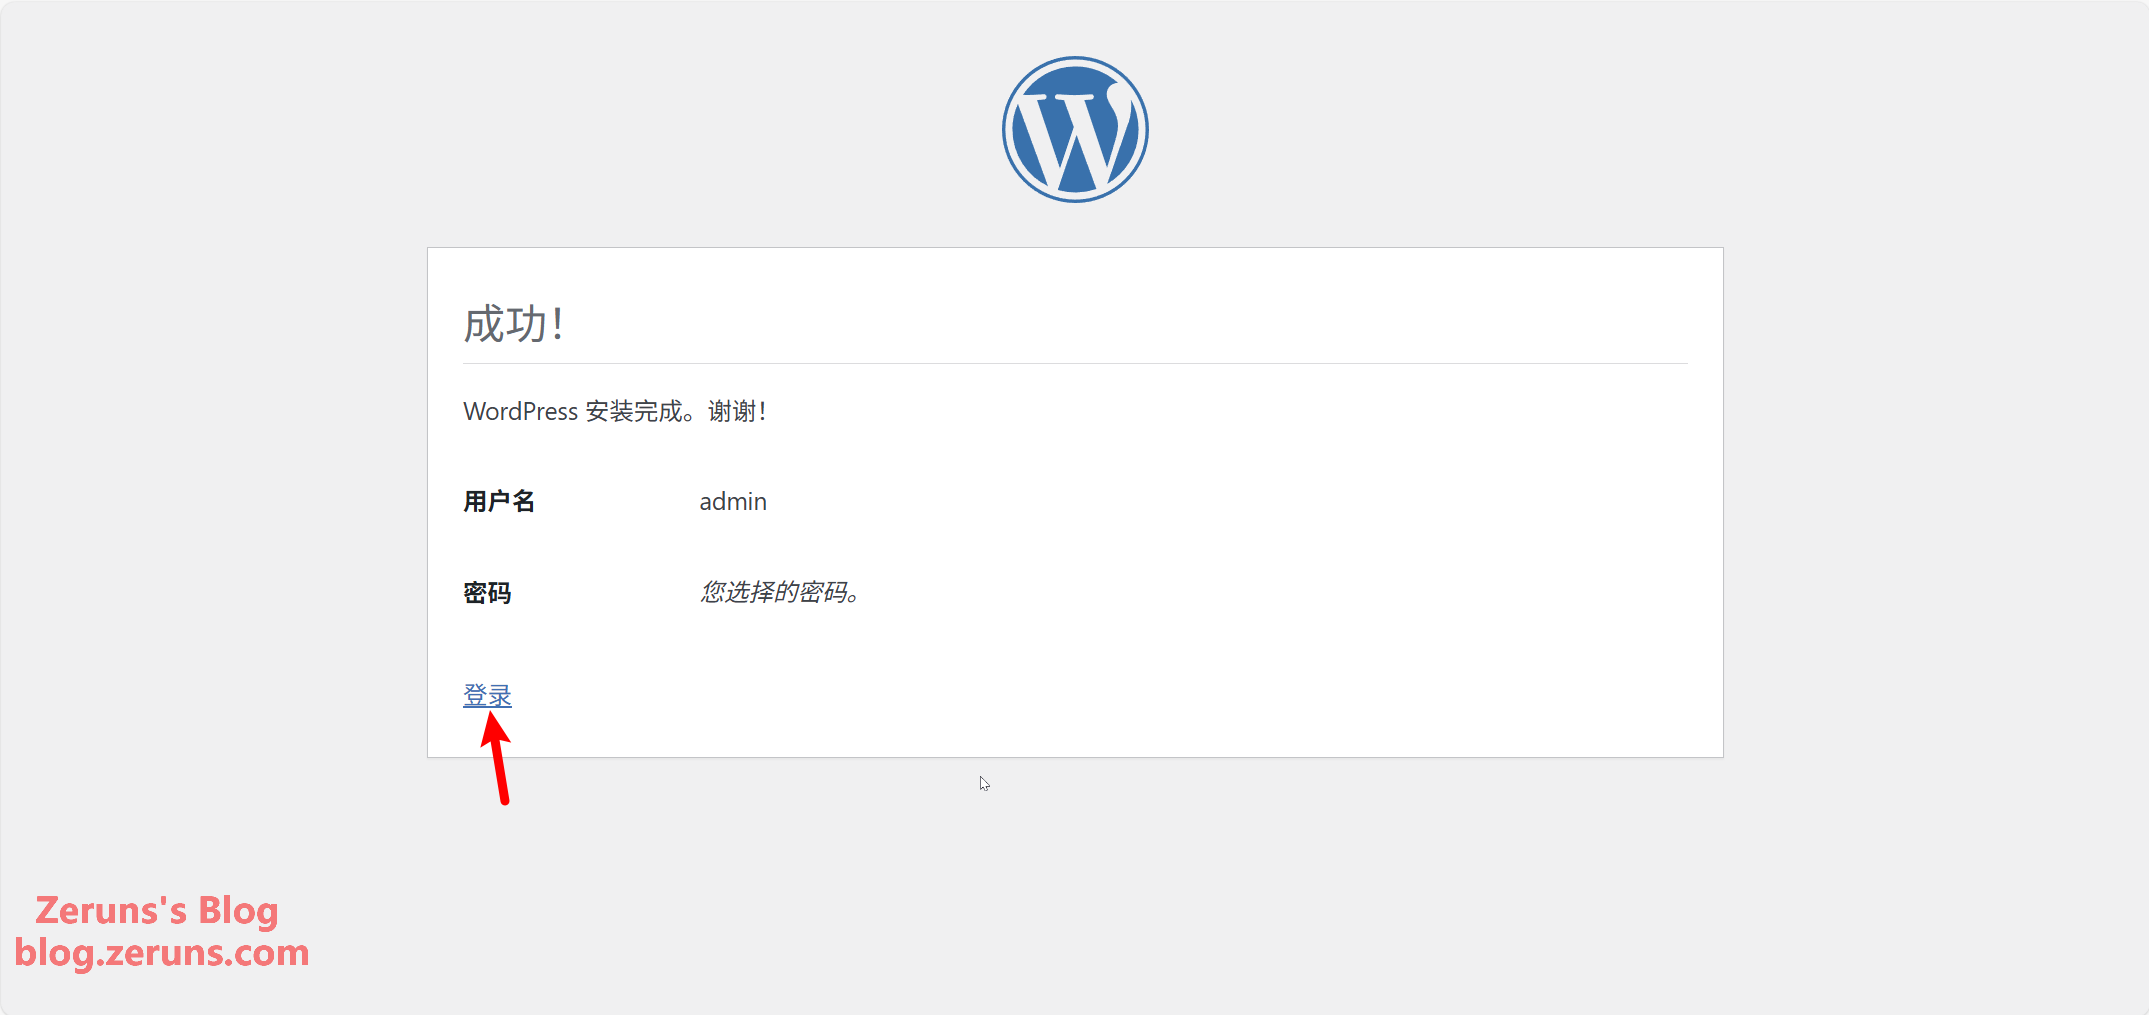
Now configure your site: enter a site title, admin username, password, and email. Click Install WordPress.
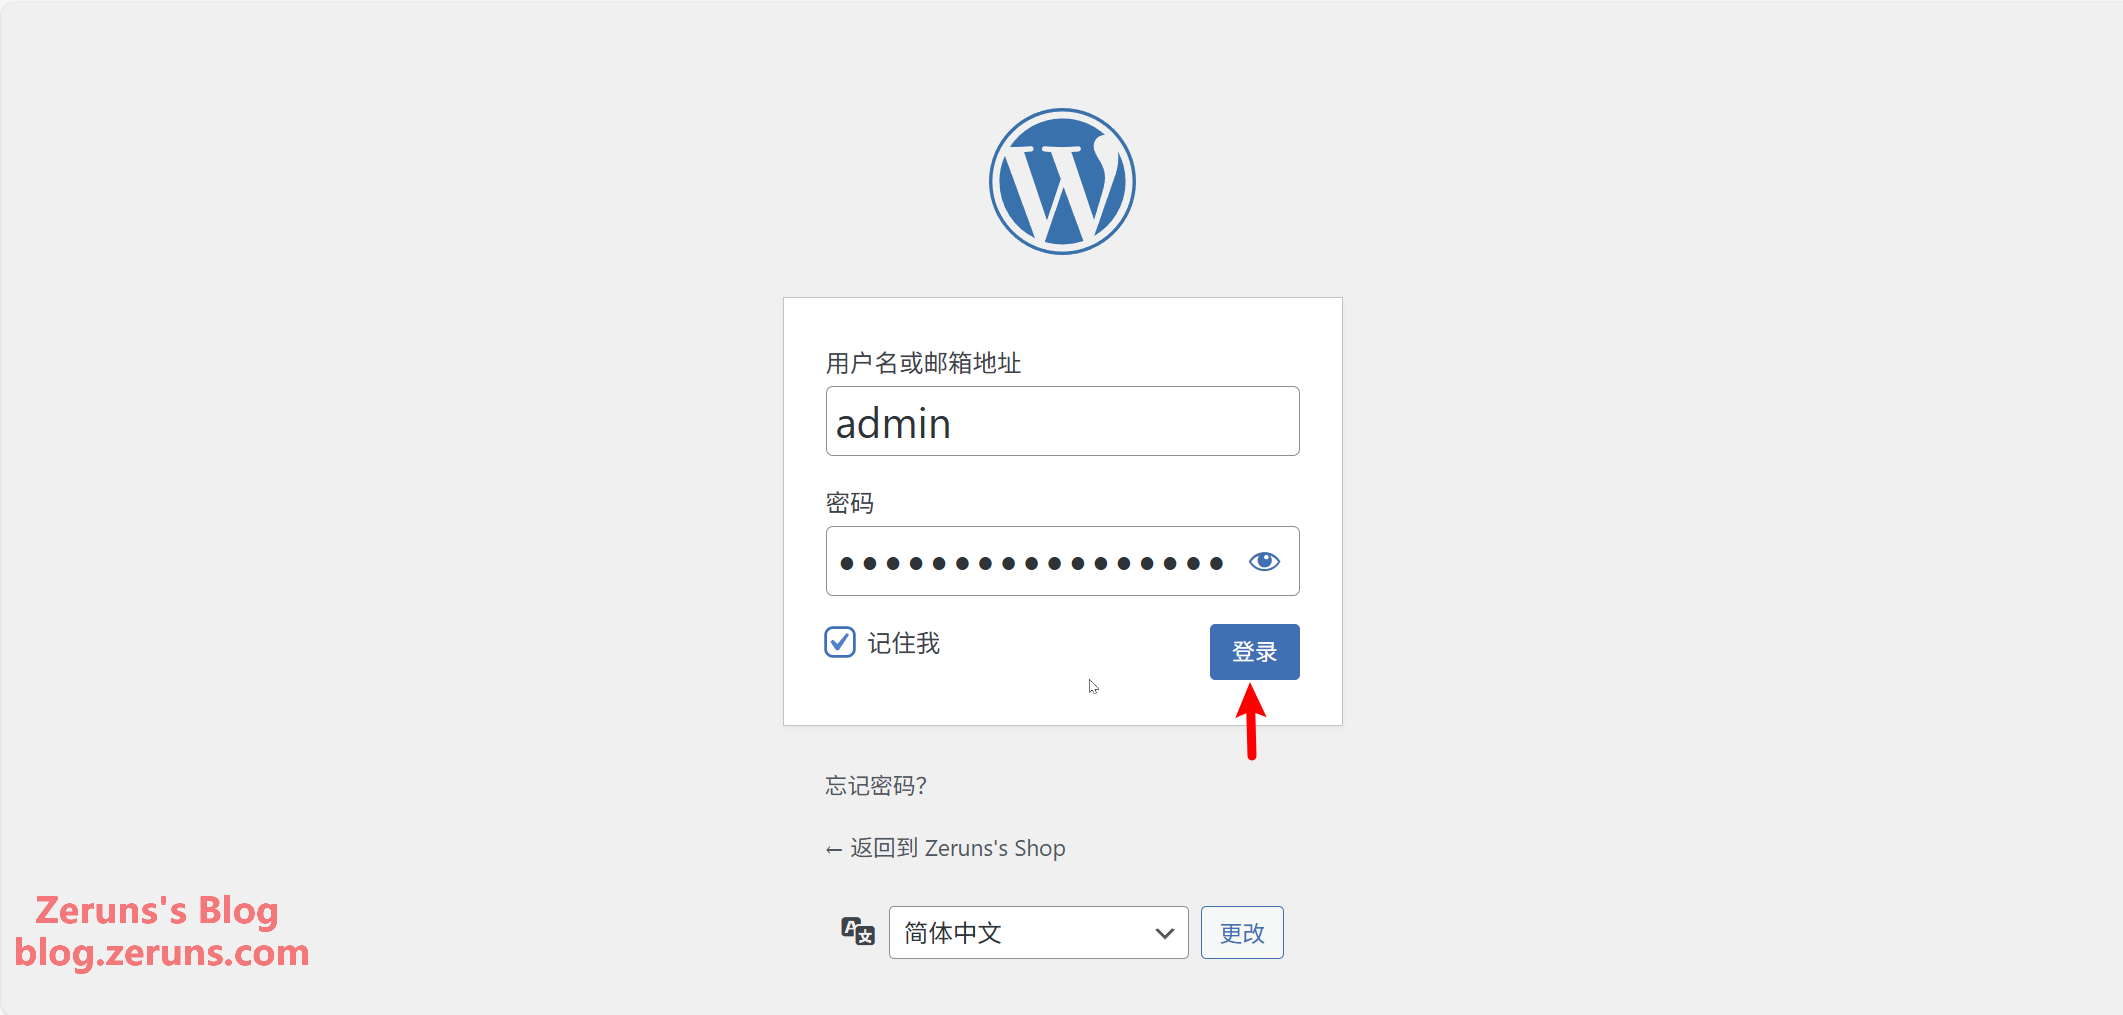
After installation, click Log In, enter your admin username and password, and click login.
Install a Theme
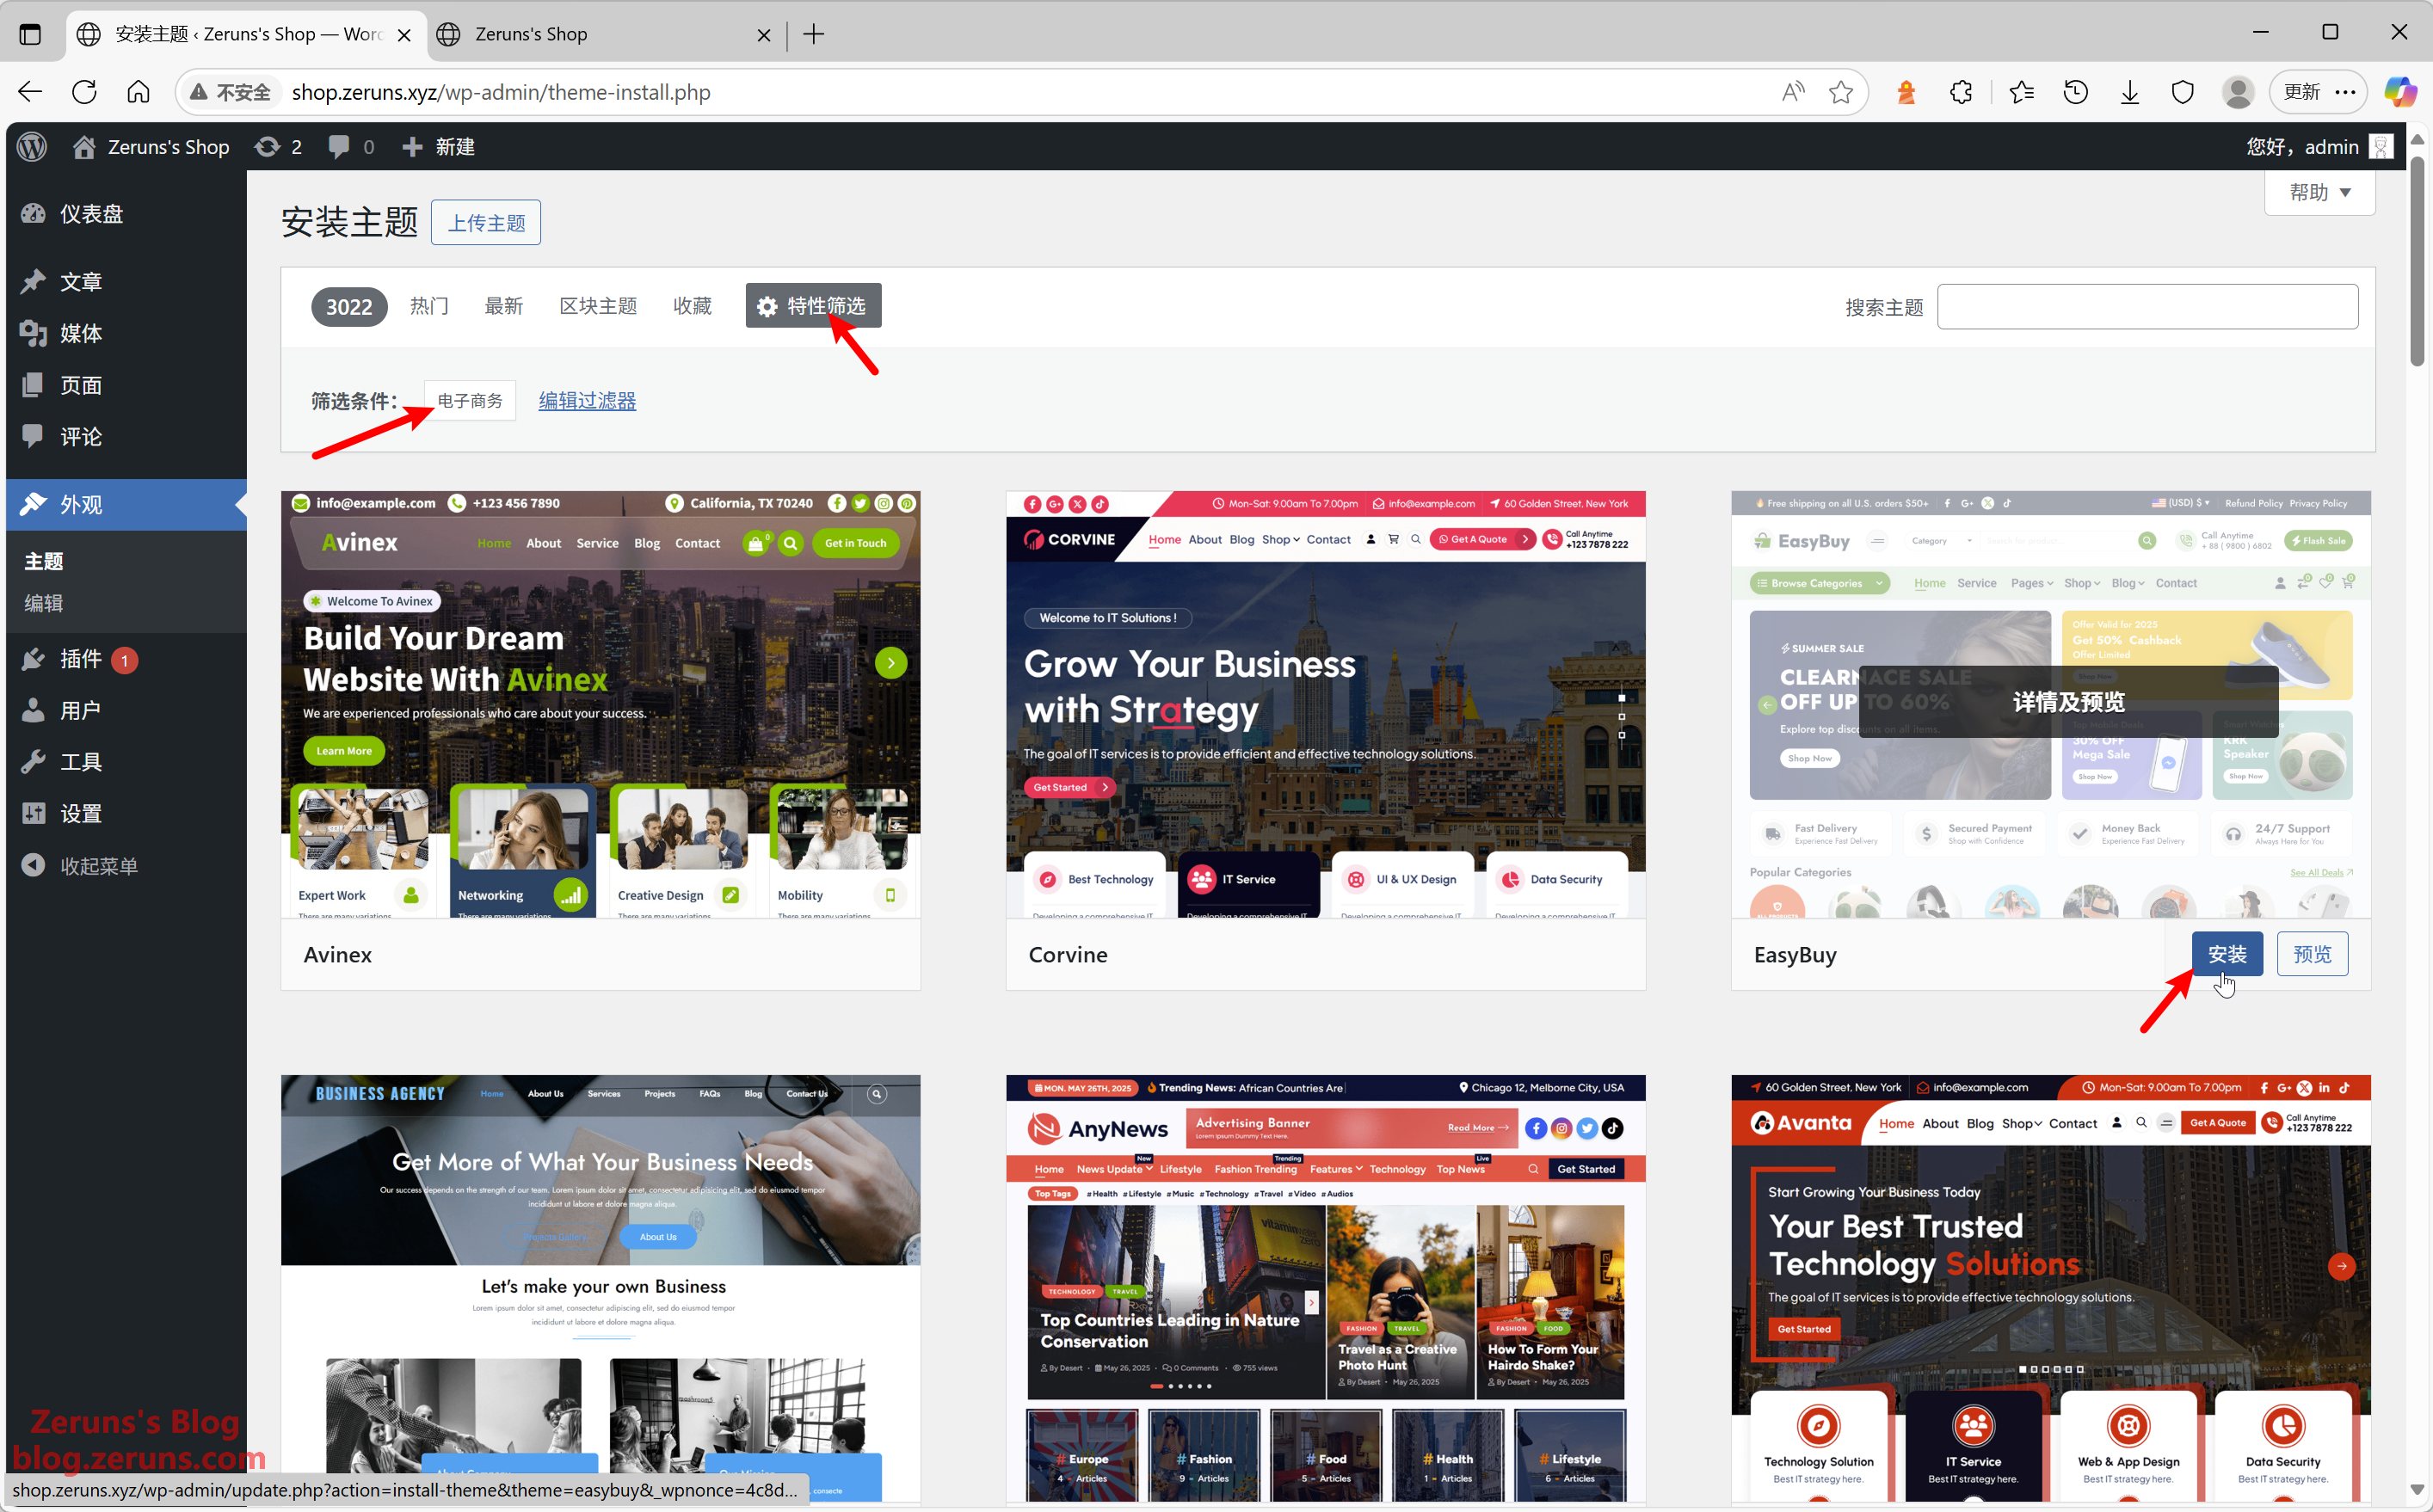
After logging in, go to the WordPress Dashboard (Admin Panel), click Appearance → Themes → Add New.
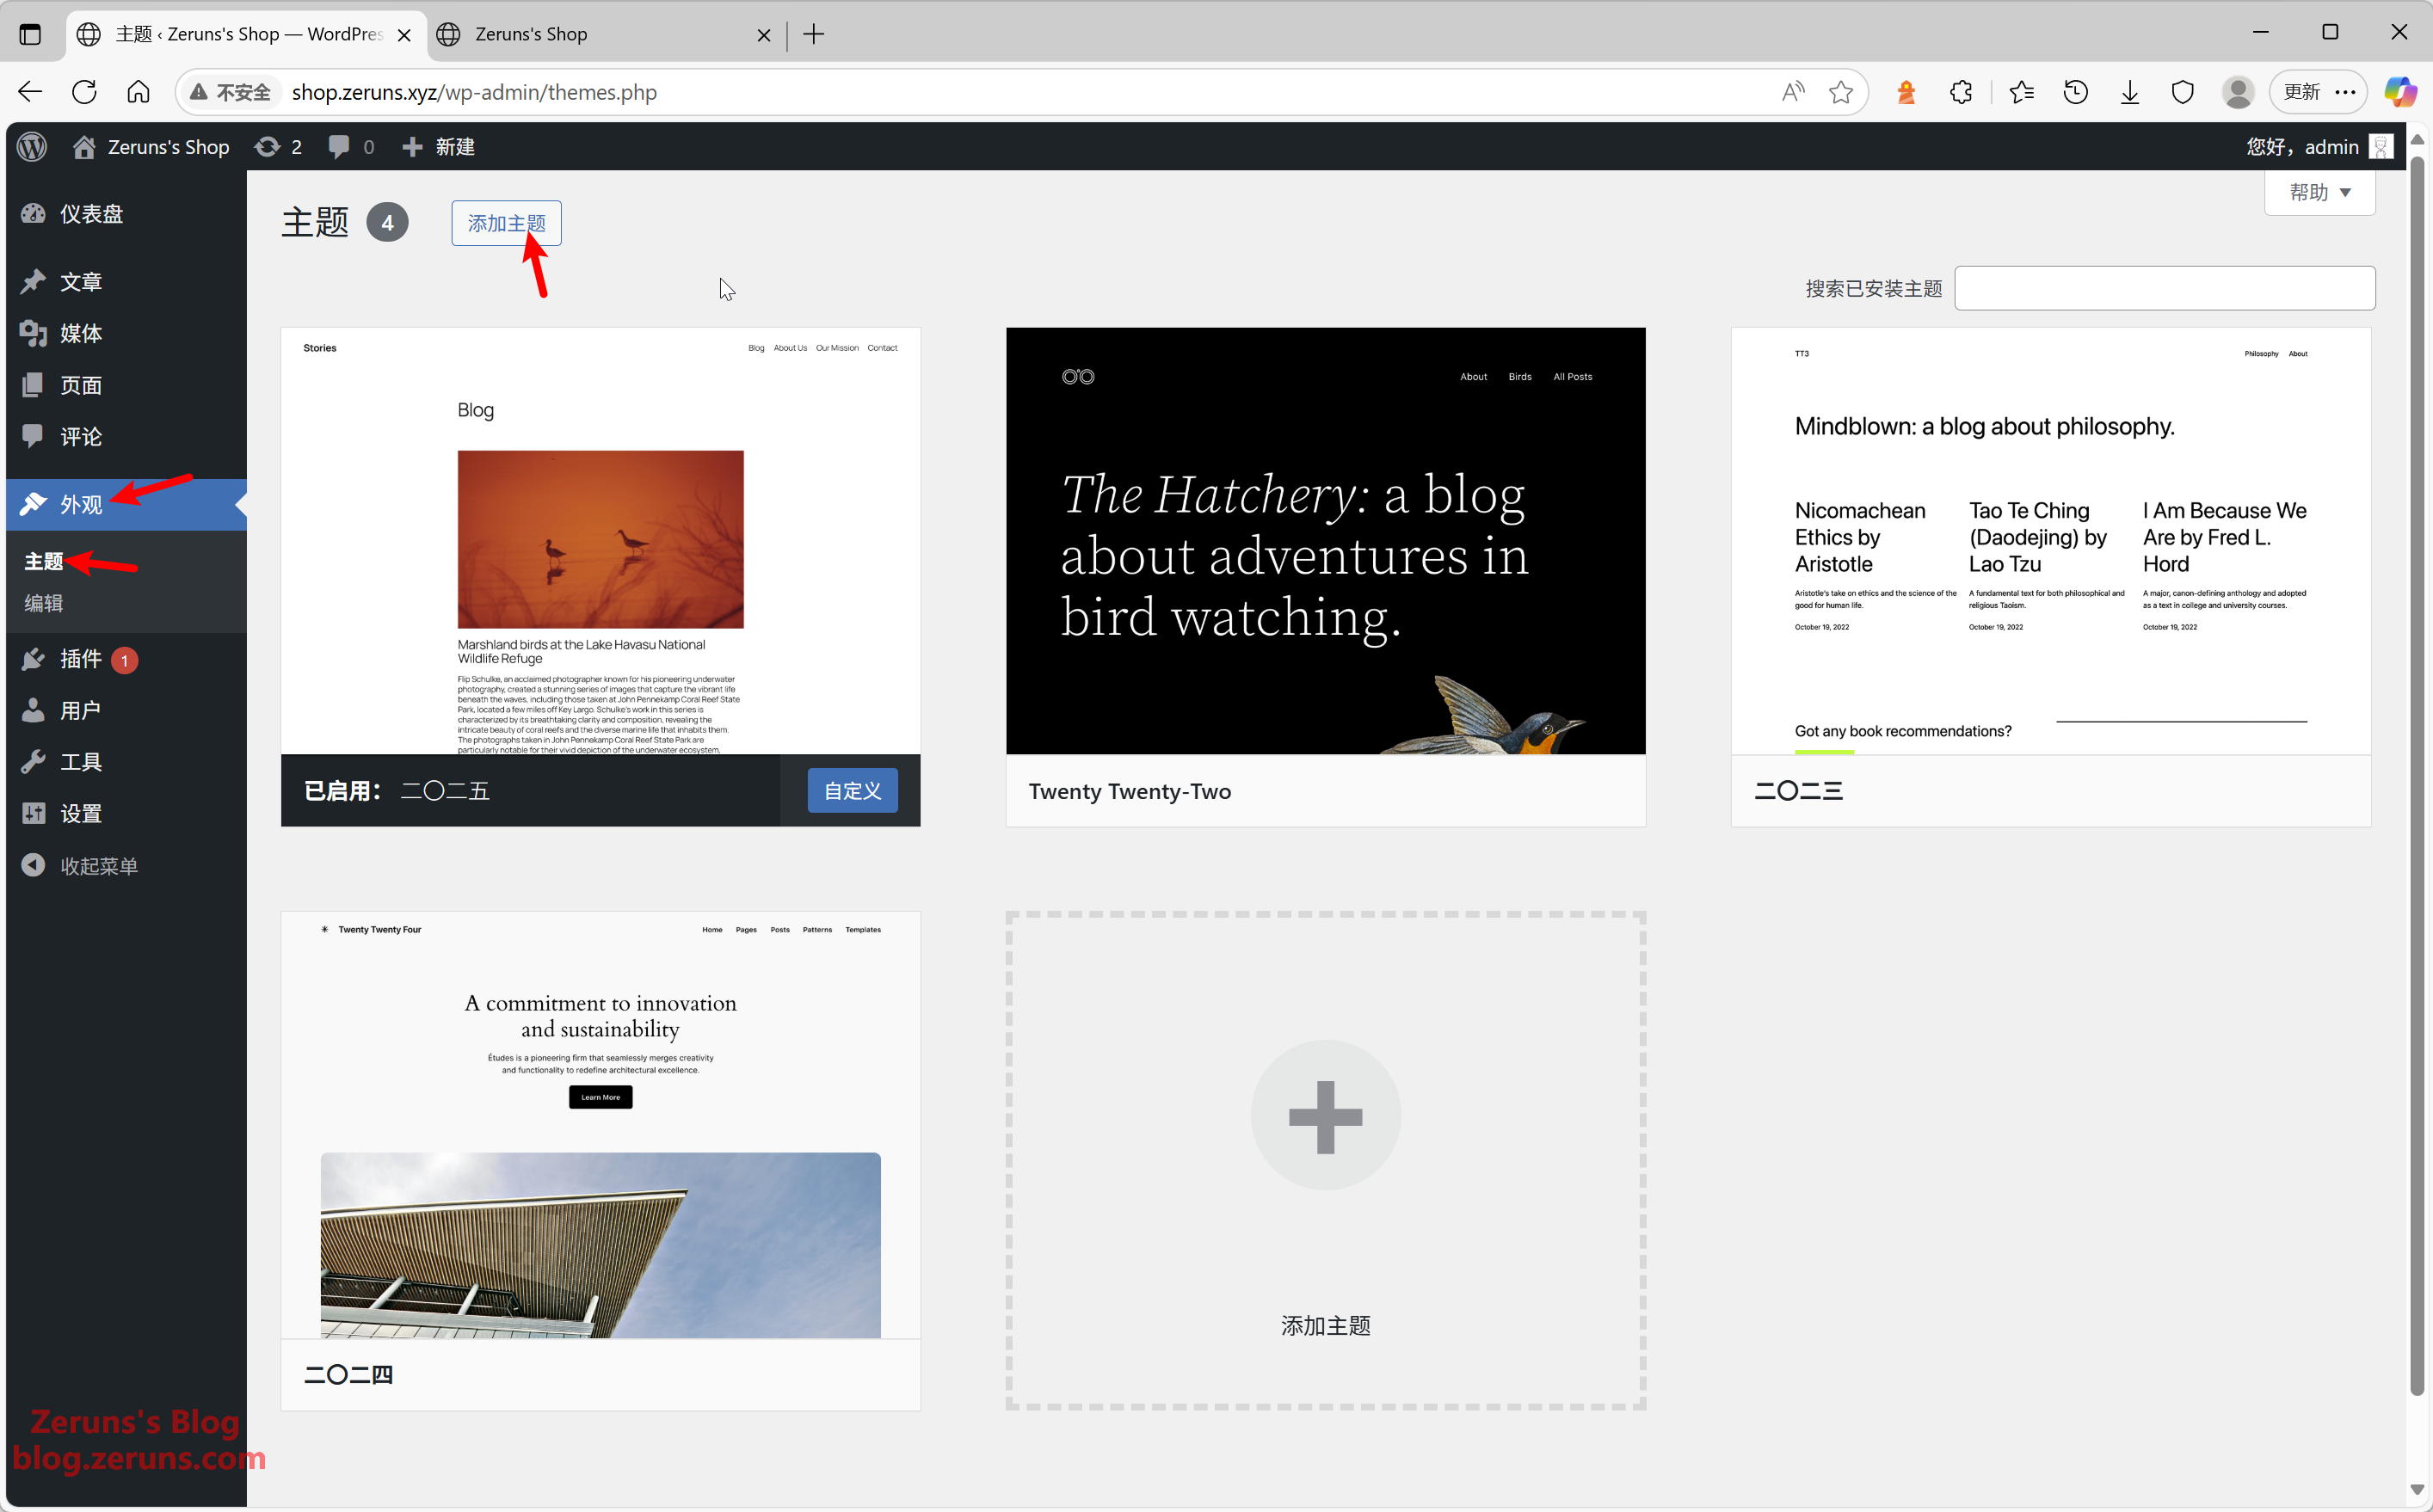
Click Feature Filter, choose E-commerce, then pick a theme you like—preferably one that is compatible with WooCommerce. In this example, we'll use the EasyBuy theme. Click Install.
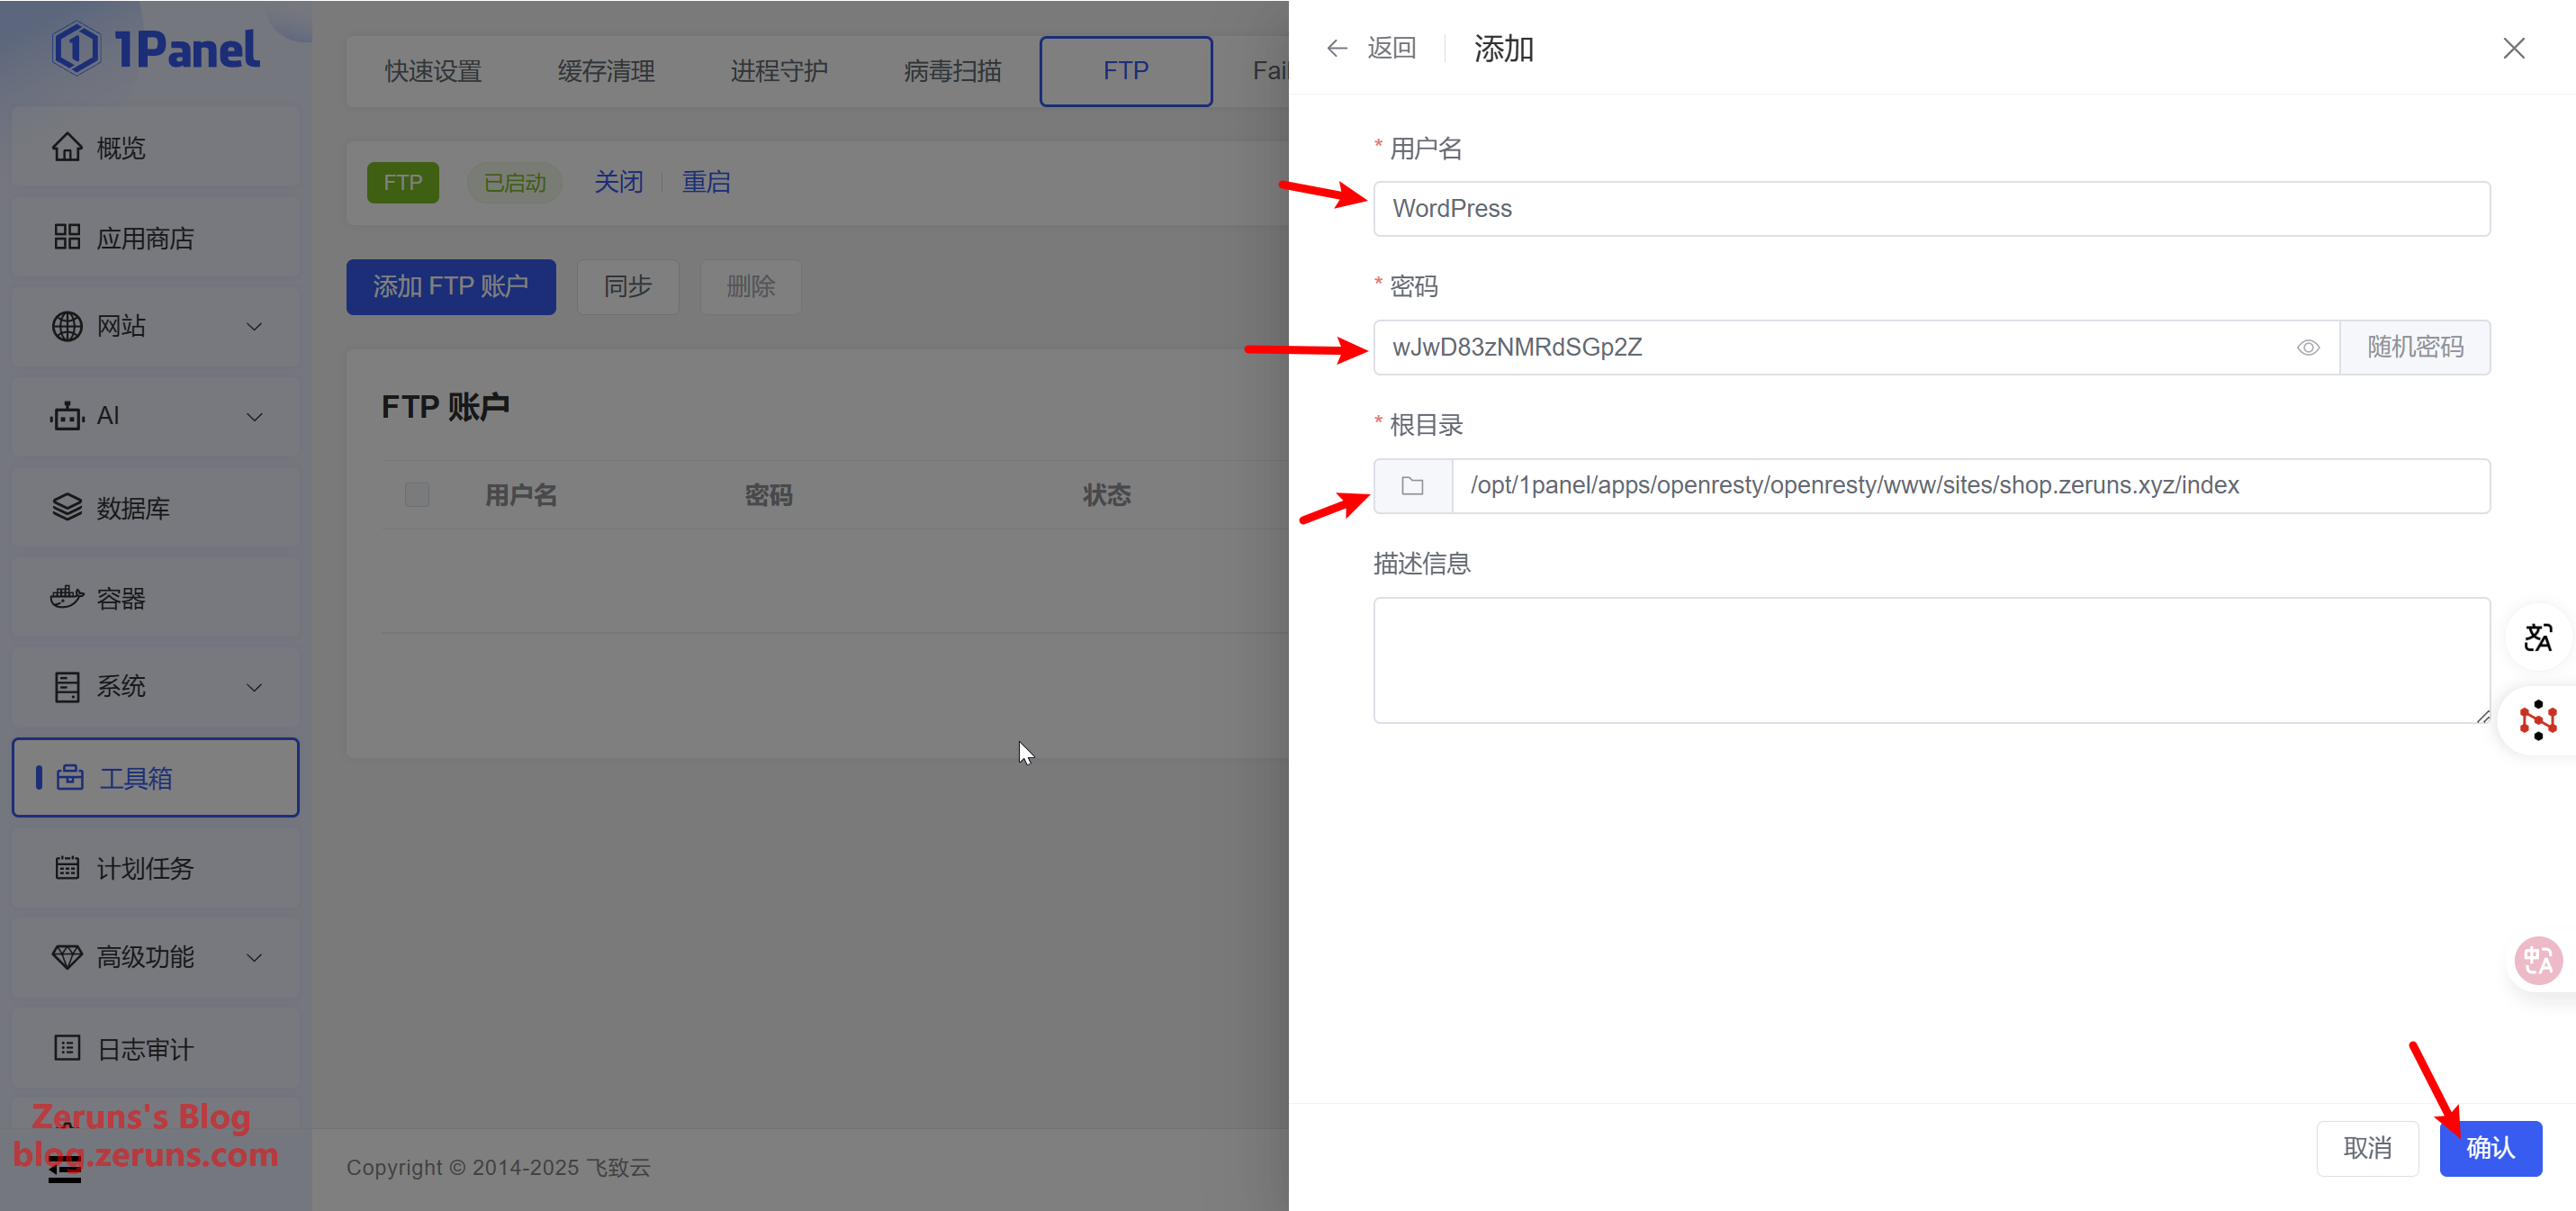
Back in the 1Panel dashboard, go to Toolbox → FTP → Add FTP Account. Set a username and password and make a note of them. For the root directory, enter your website's directory path (this is the same path where you uploaded the website files earlier—you can copy it from the top of the file management page). It's usually something like /opt/1panel/apps/openresty/openresty/www/sites/your-domain/index. Finally, click Confirm.
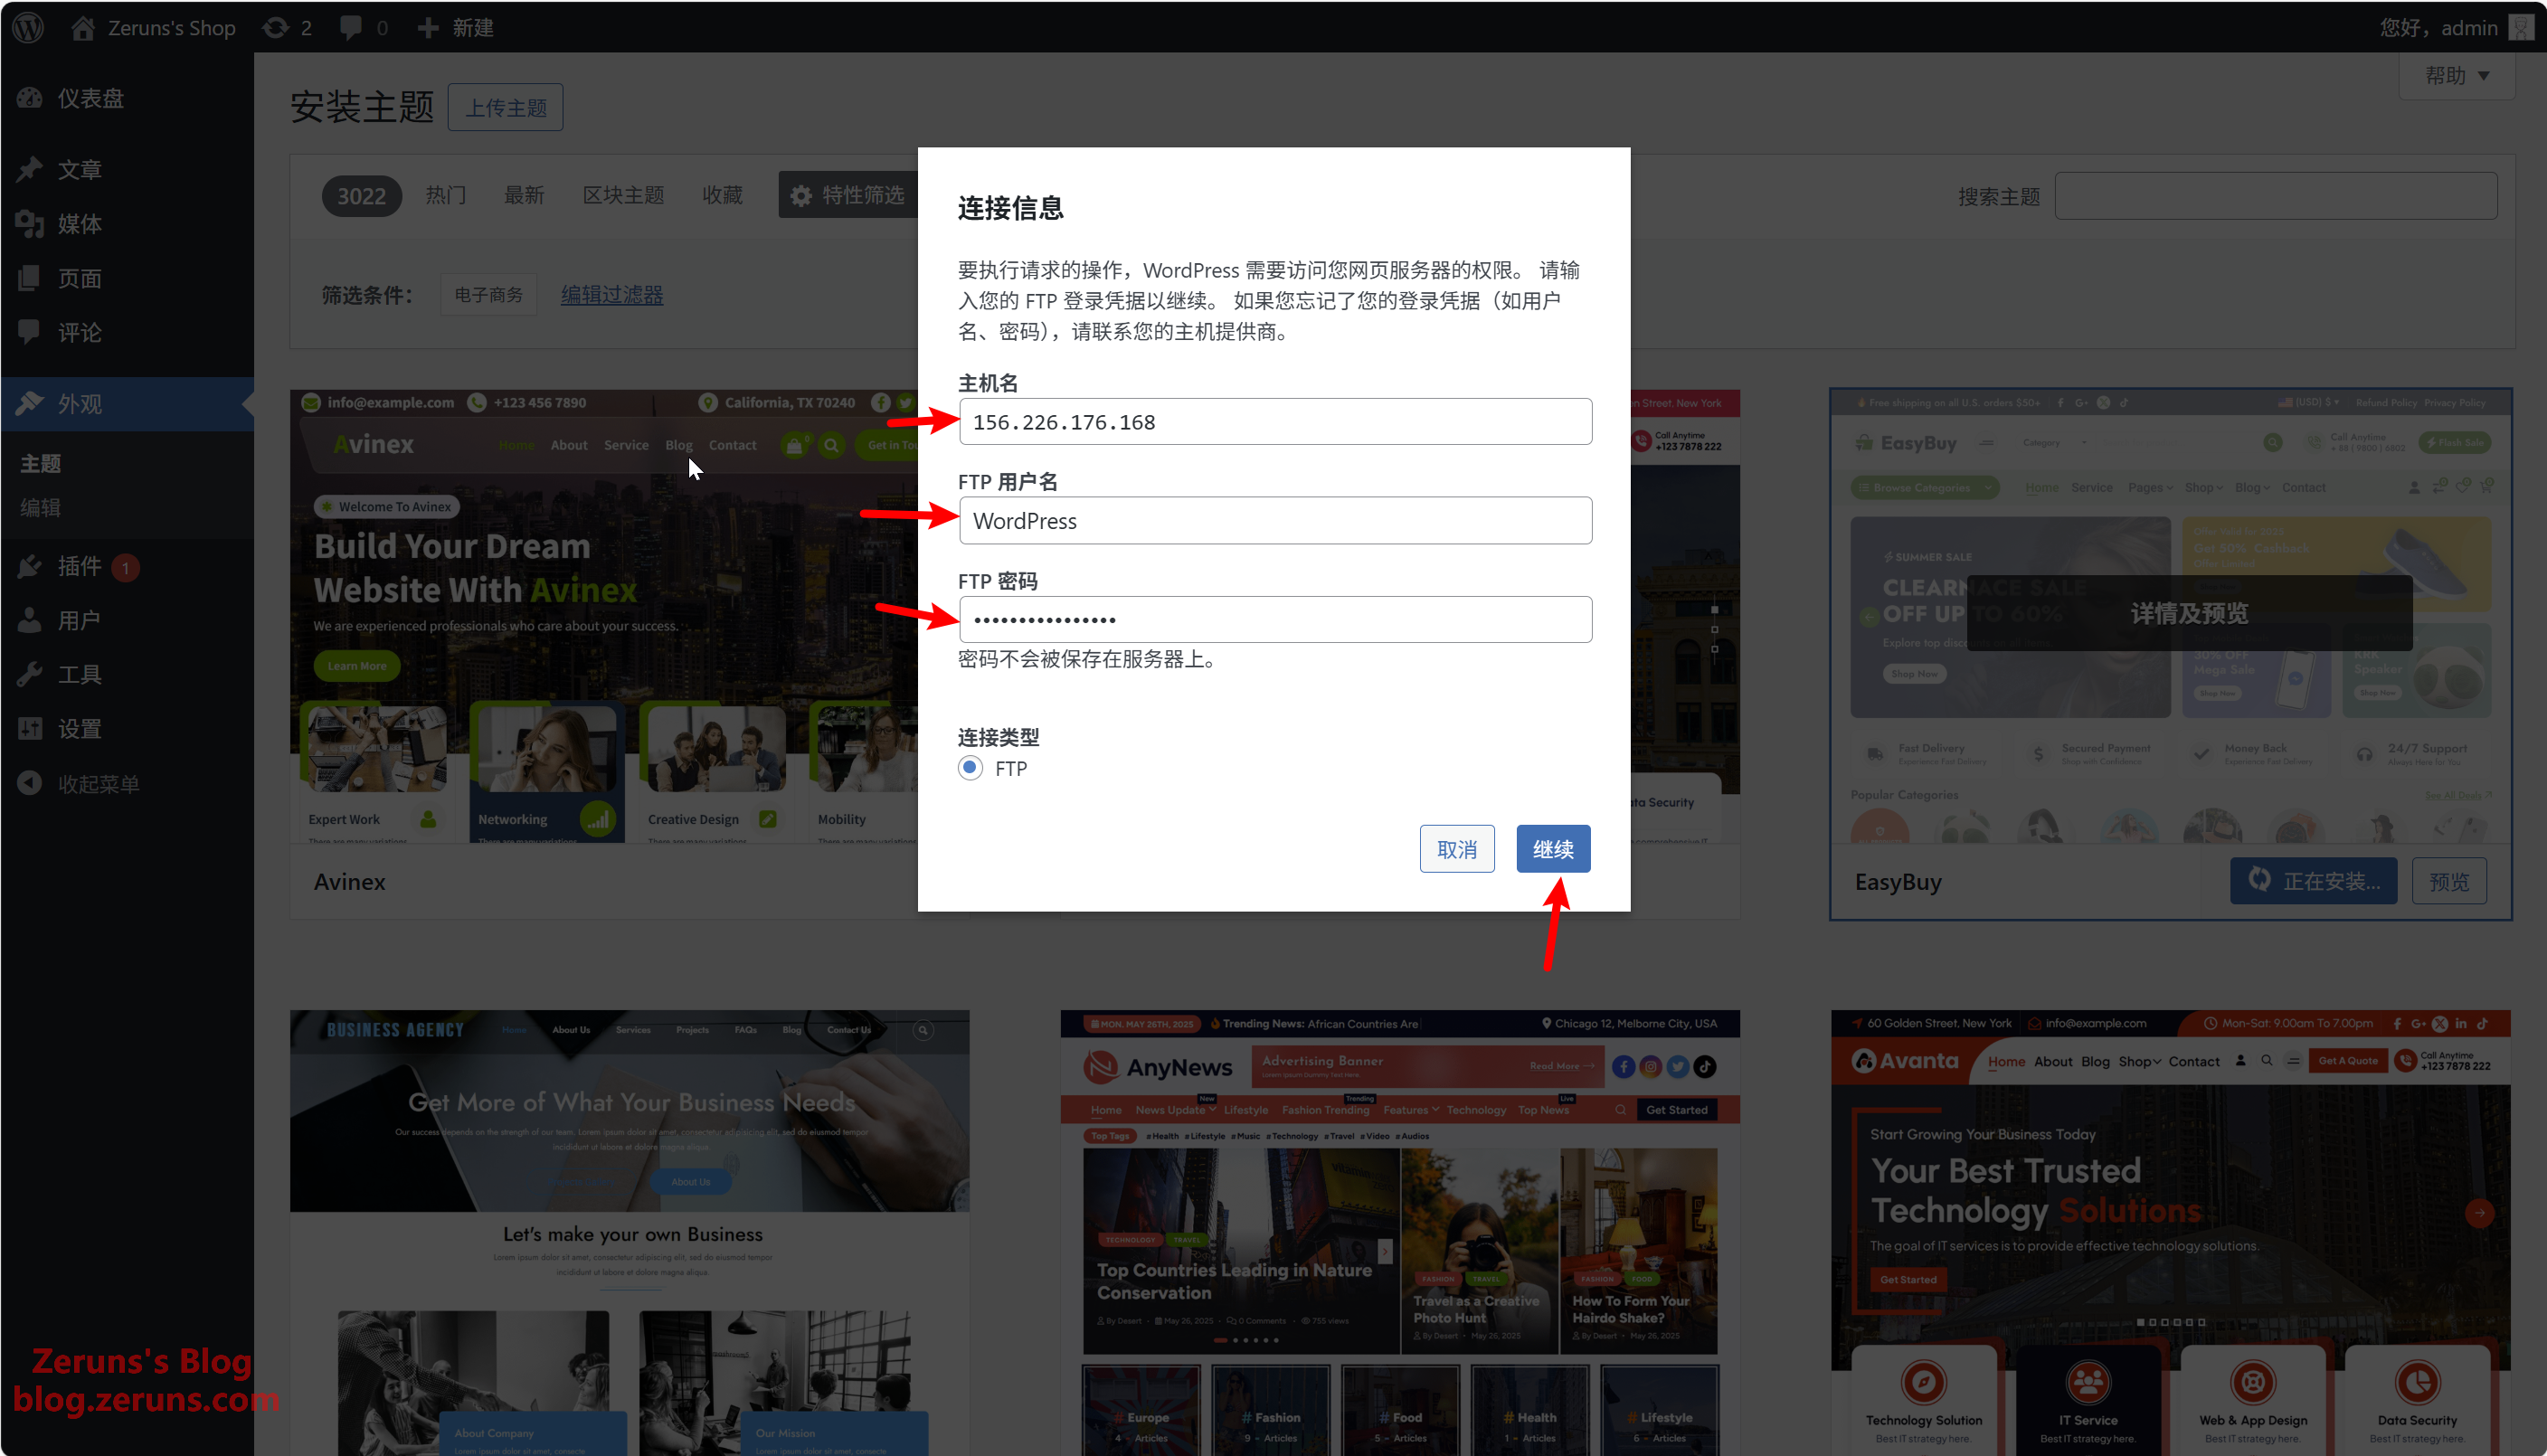
Back in the WordPress dashboard, continue the theme installation by entering the FTP account and password you just created. For hostname, enter your server's public IP. Then click Proceed.
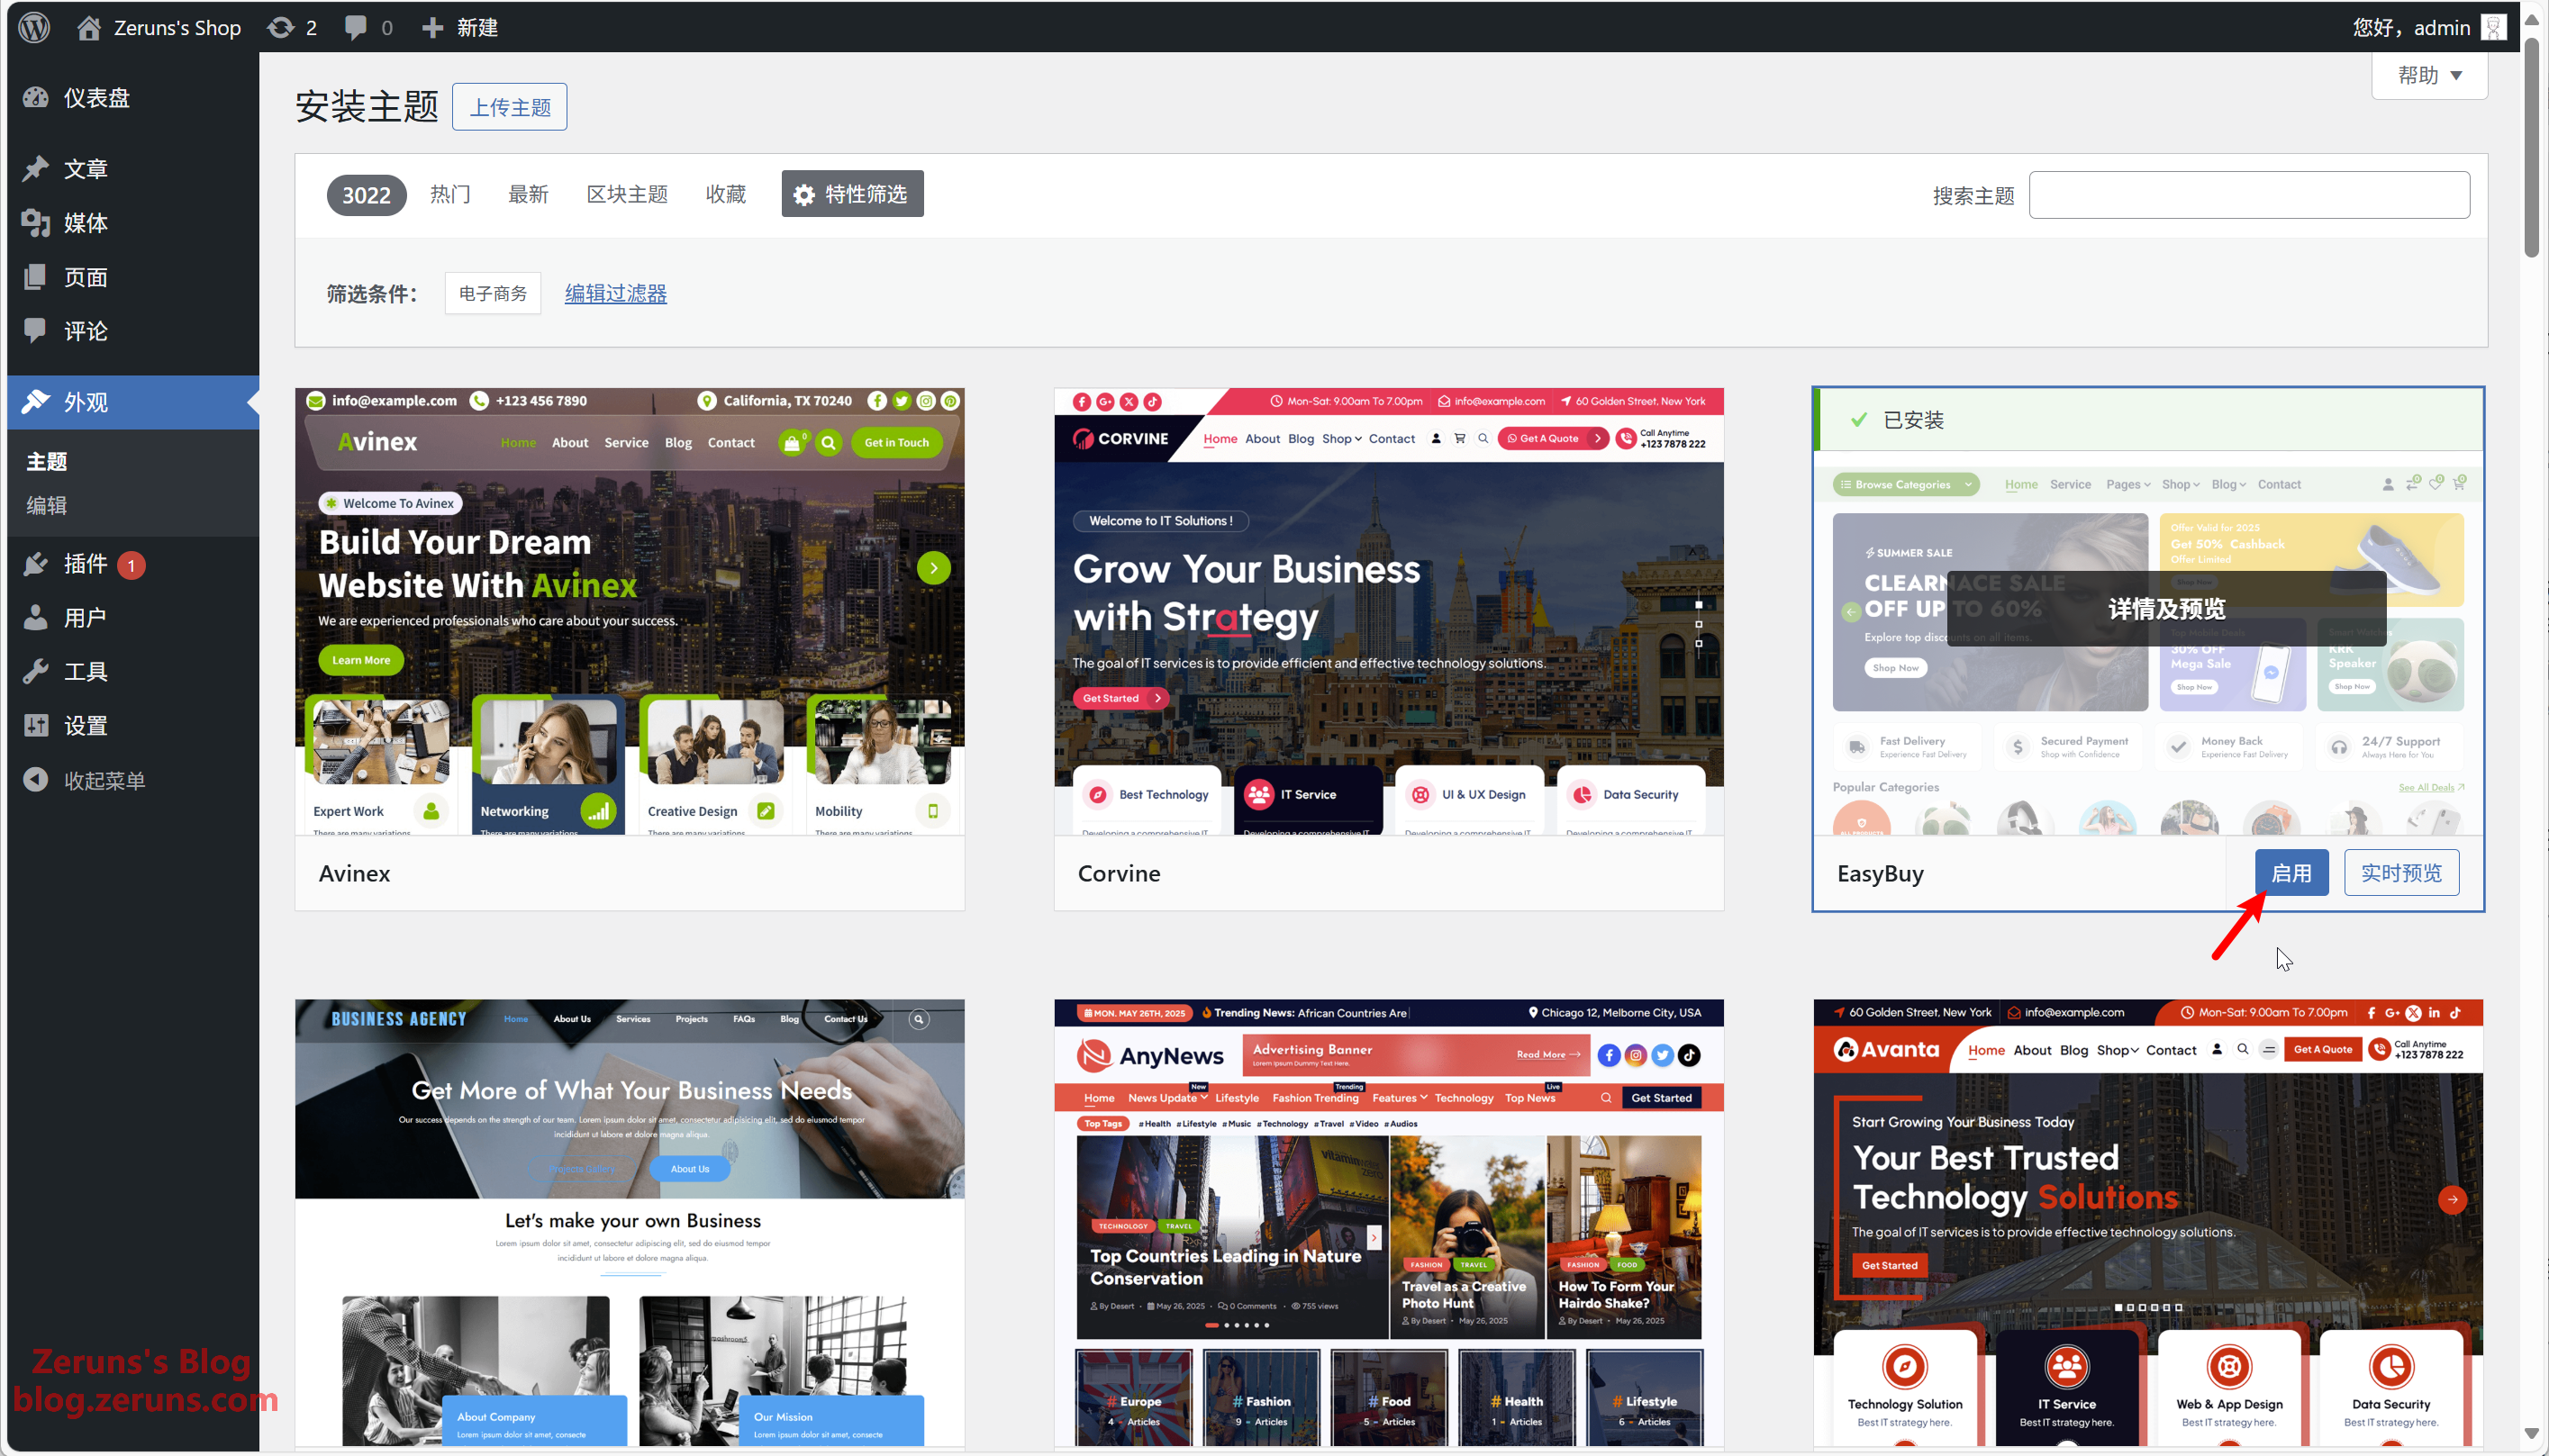
Once the theme is installed, click Activate.
Install Plugins
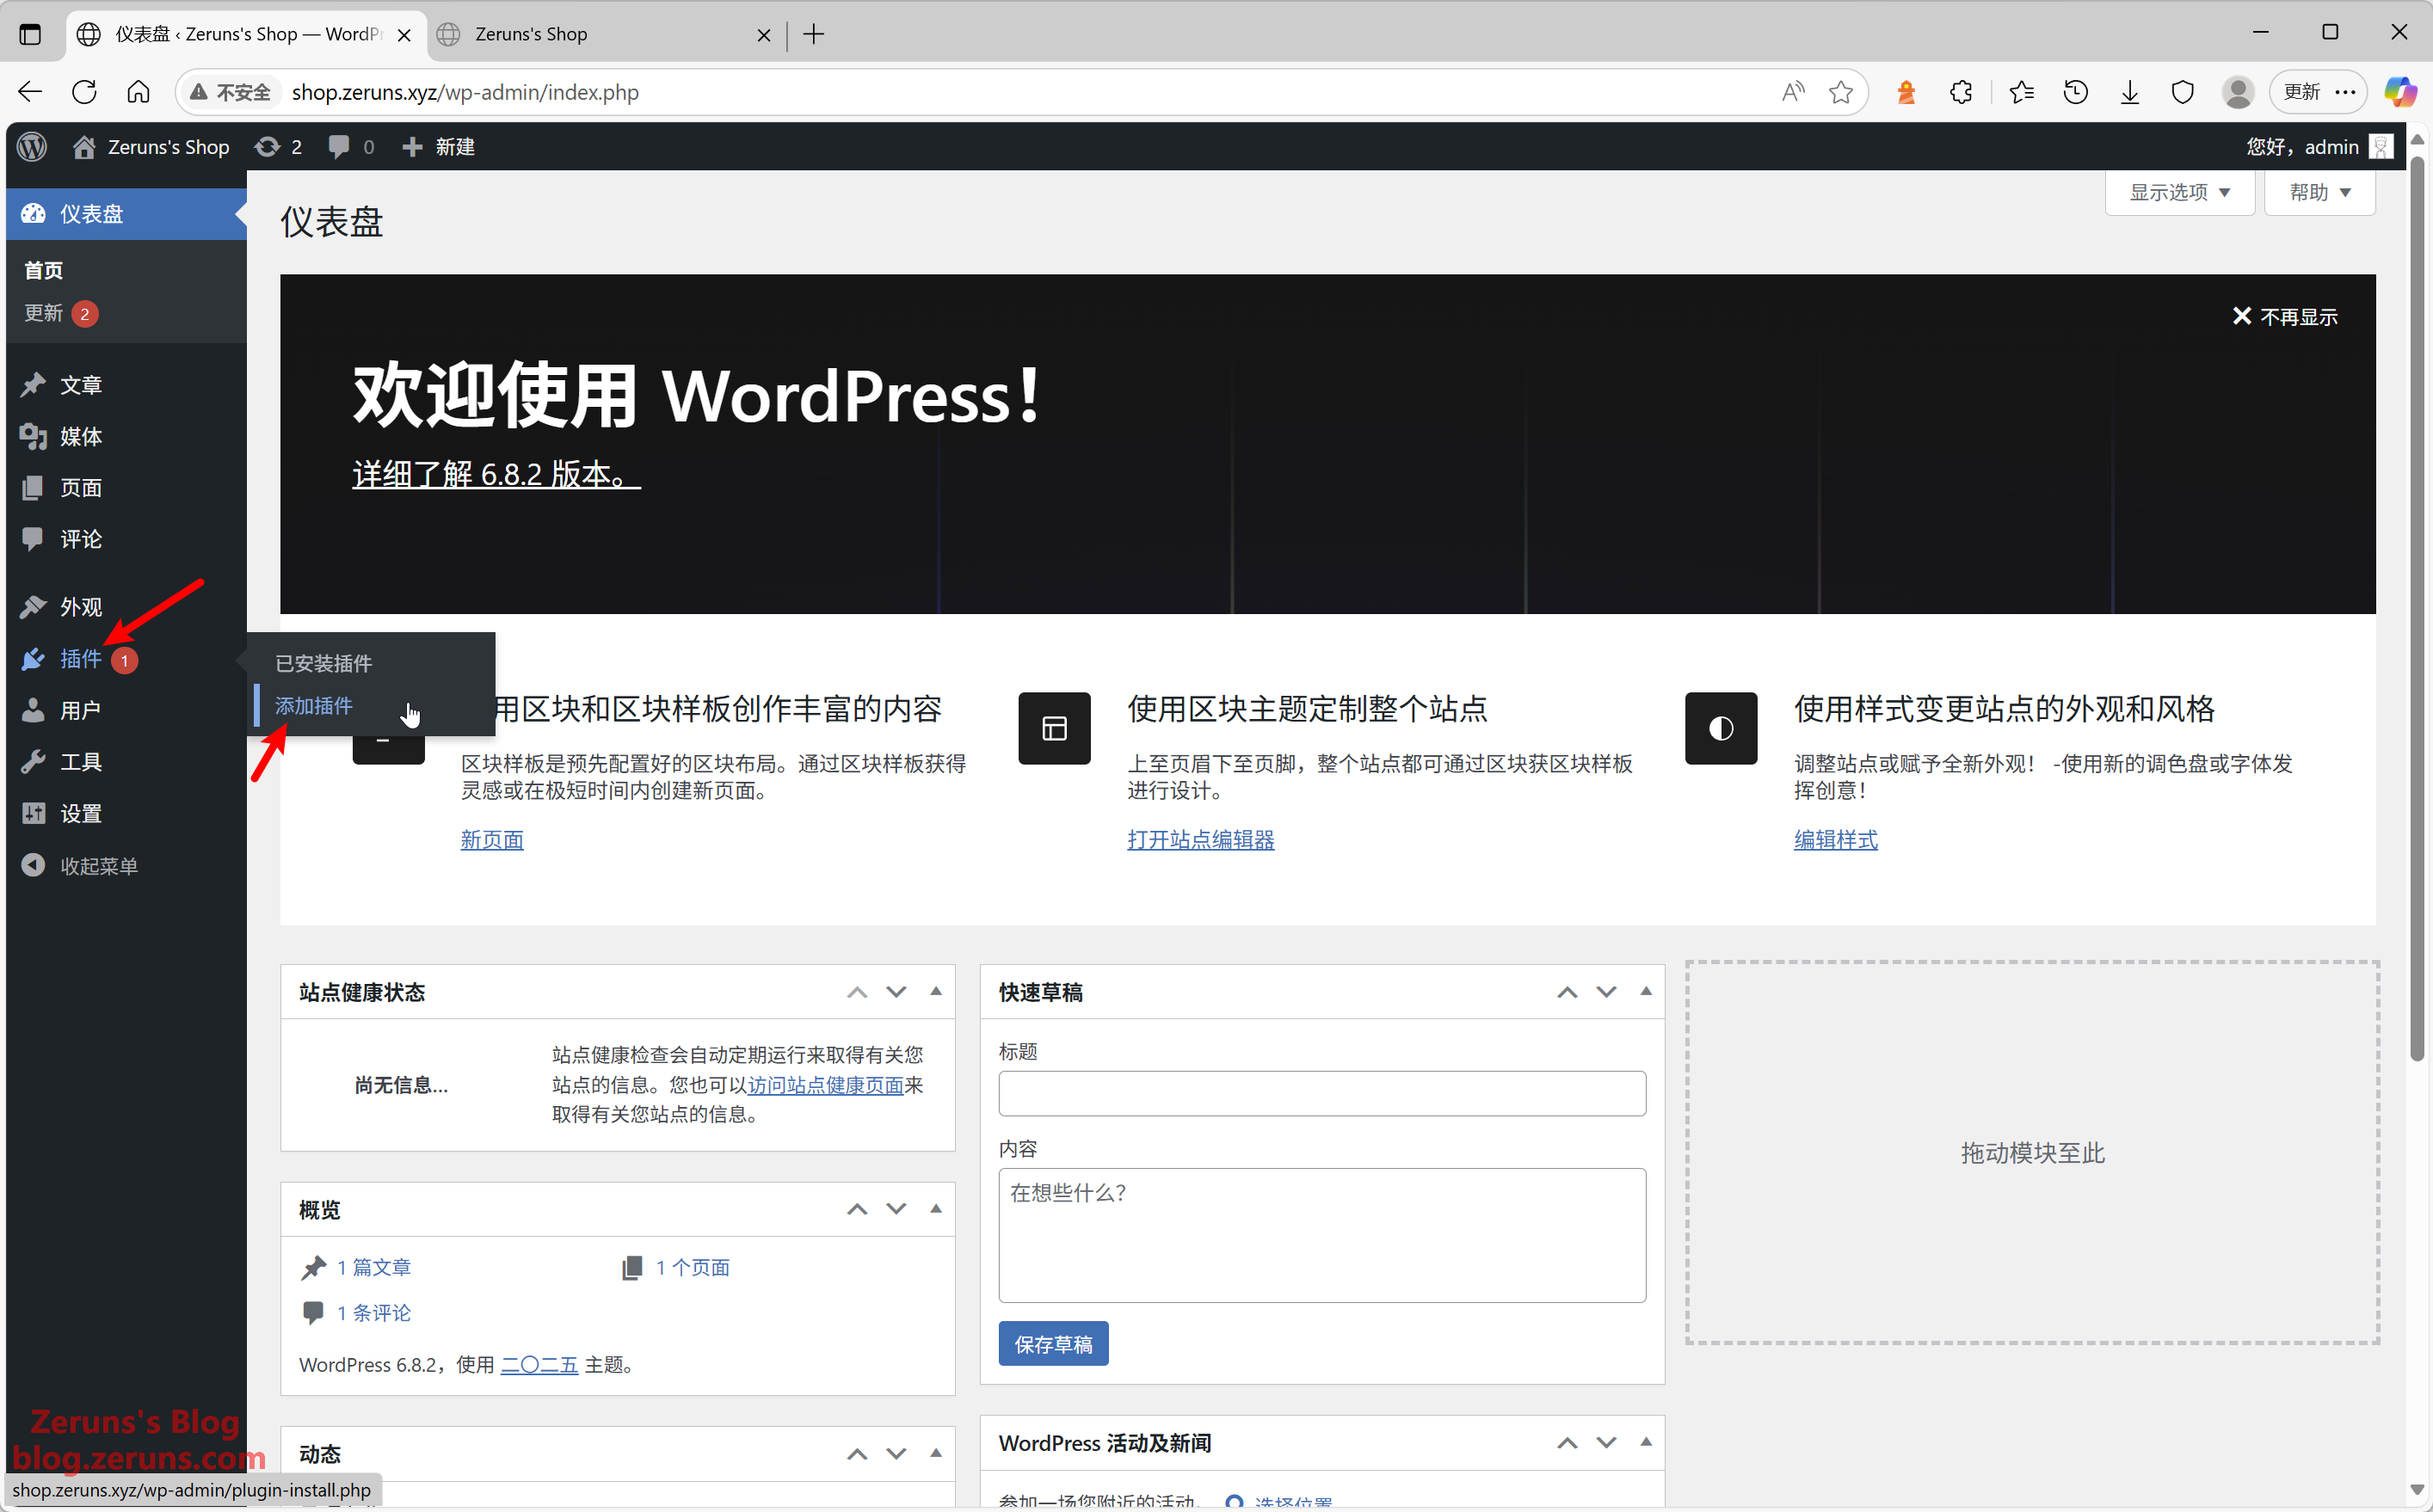
In the WordPress Dashboard, go to Plugins → Add New Plugin.
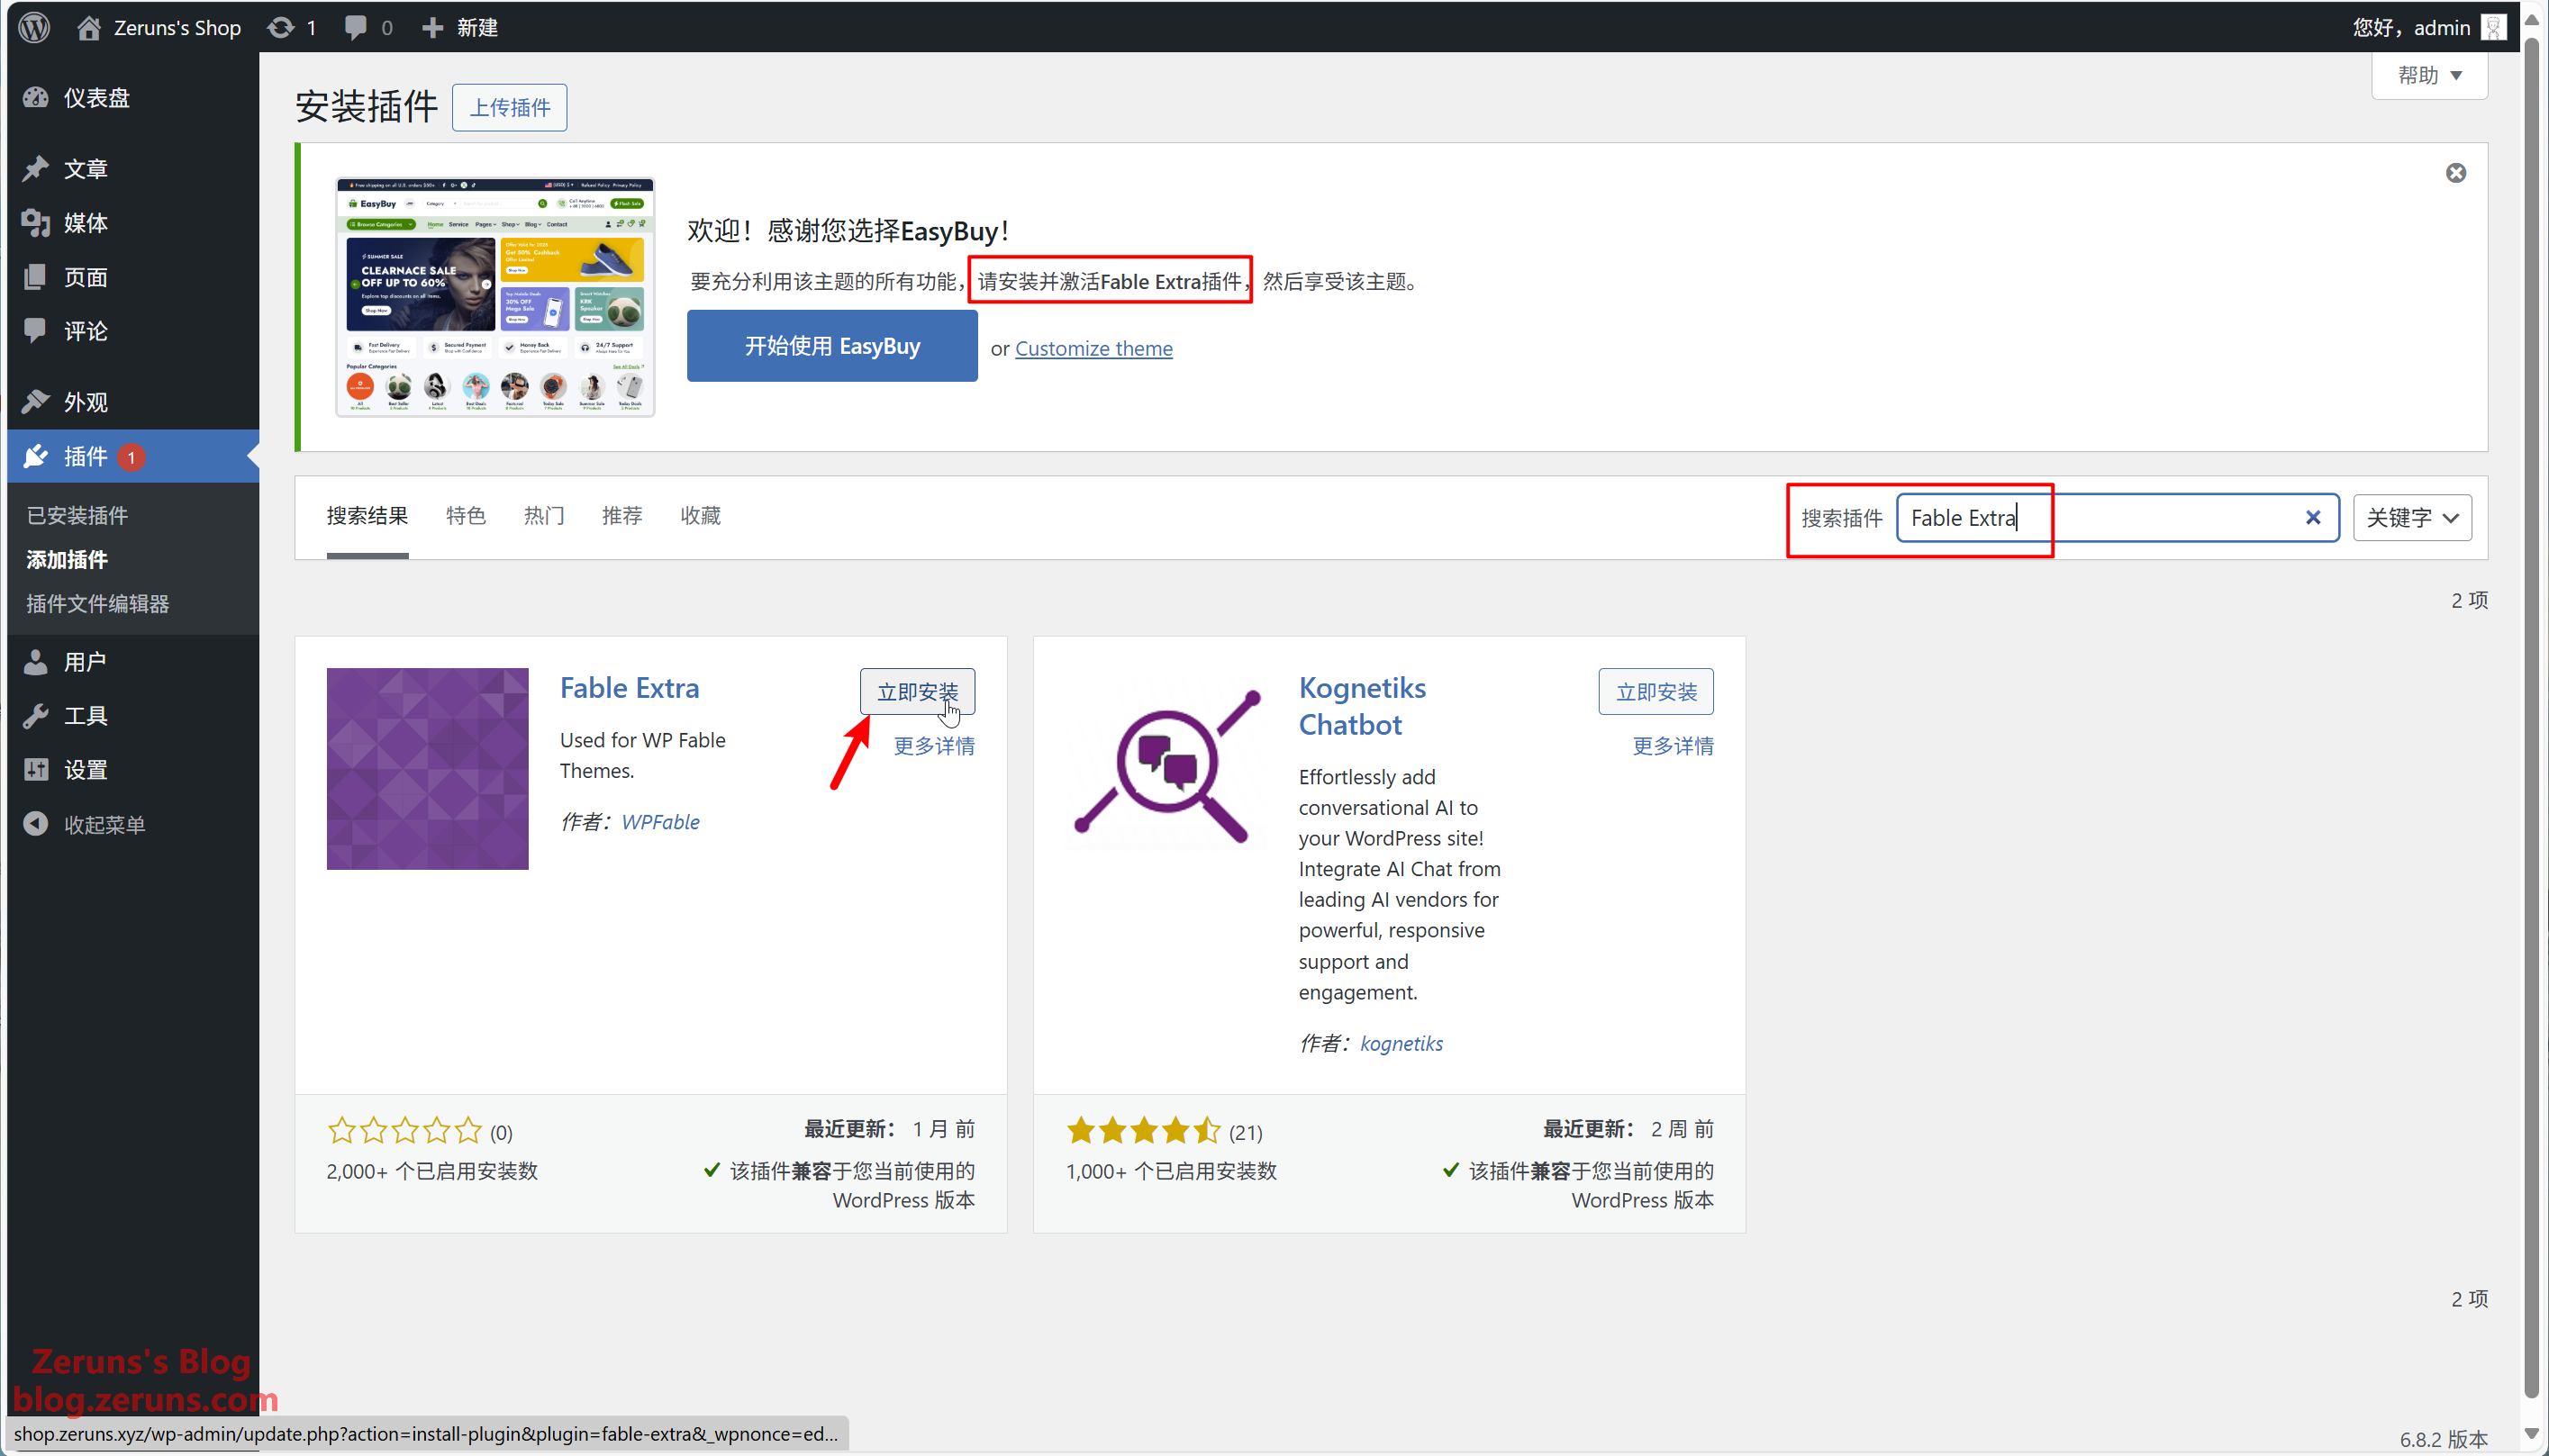
The EasyBuy theme requires an additional plugin called Fable Extra. Search for it in the search bar, then install and activate it. (If you're using a different theme, install plugins according to your theme's requirements.)
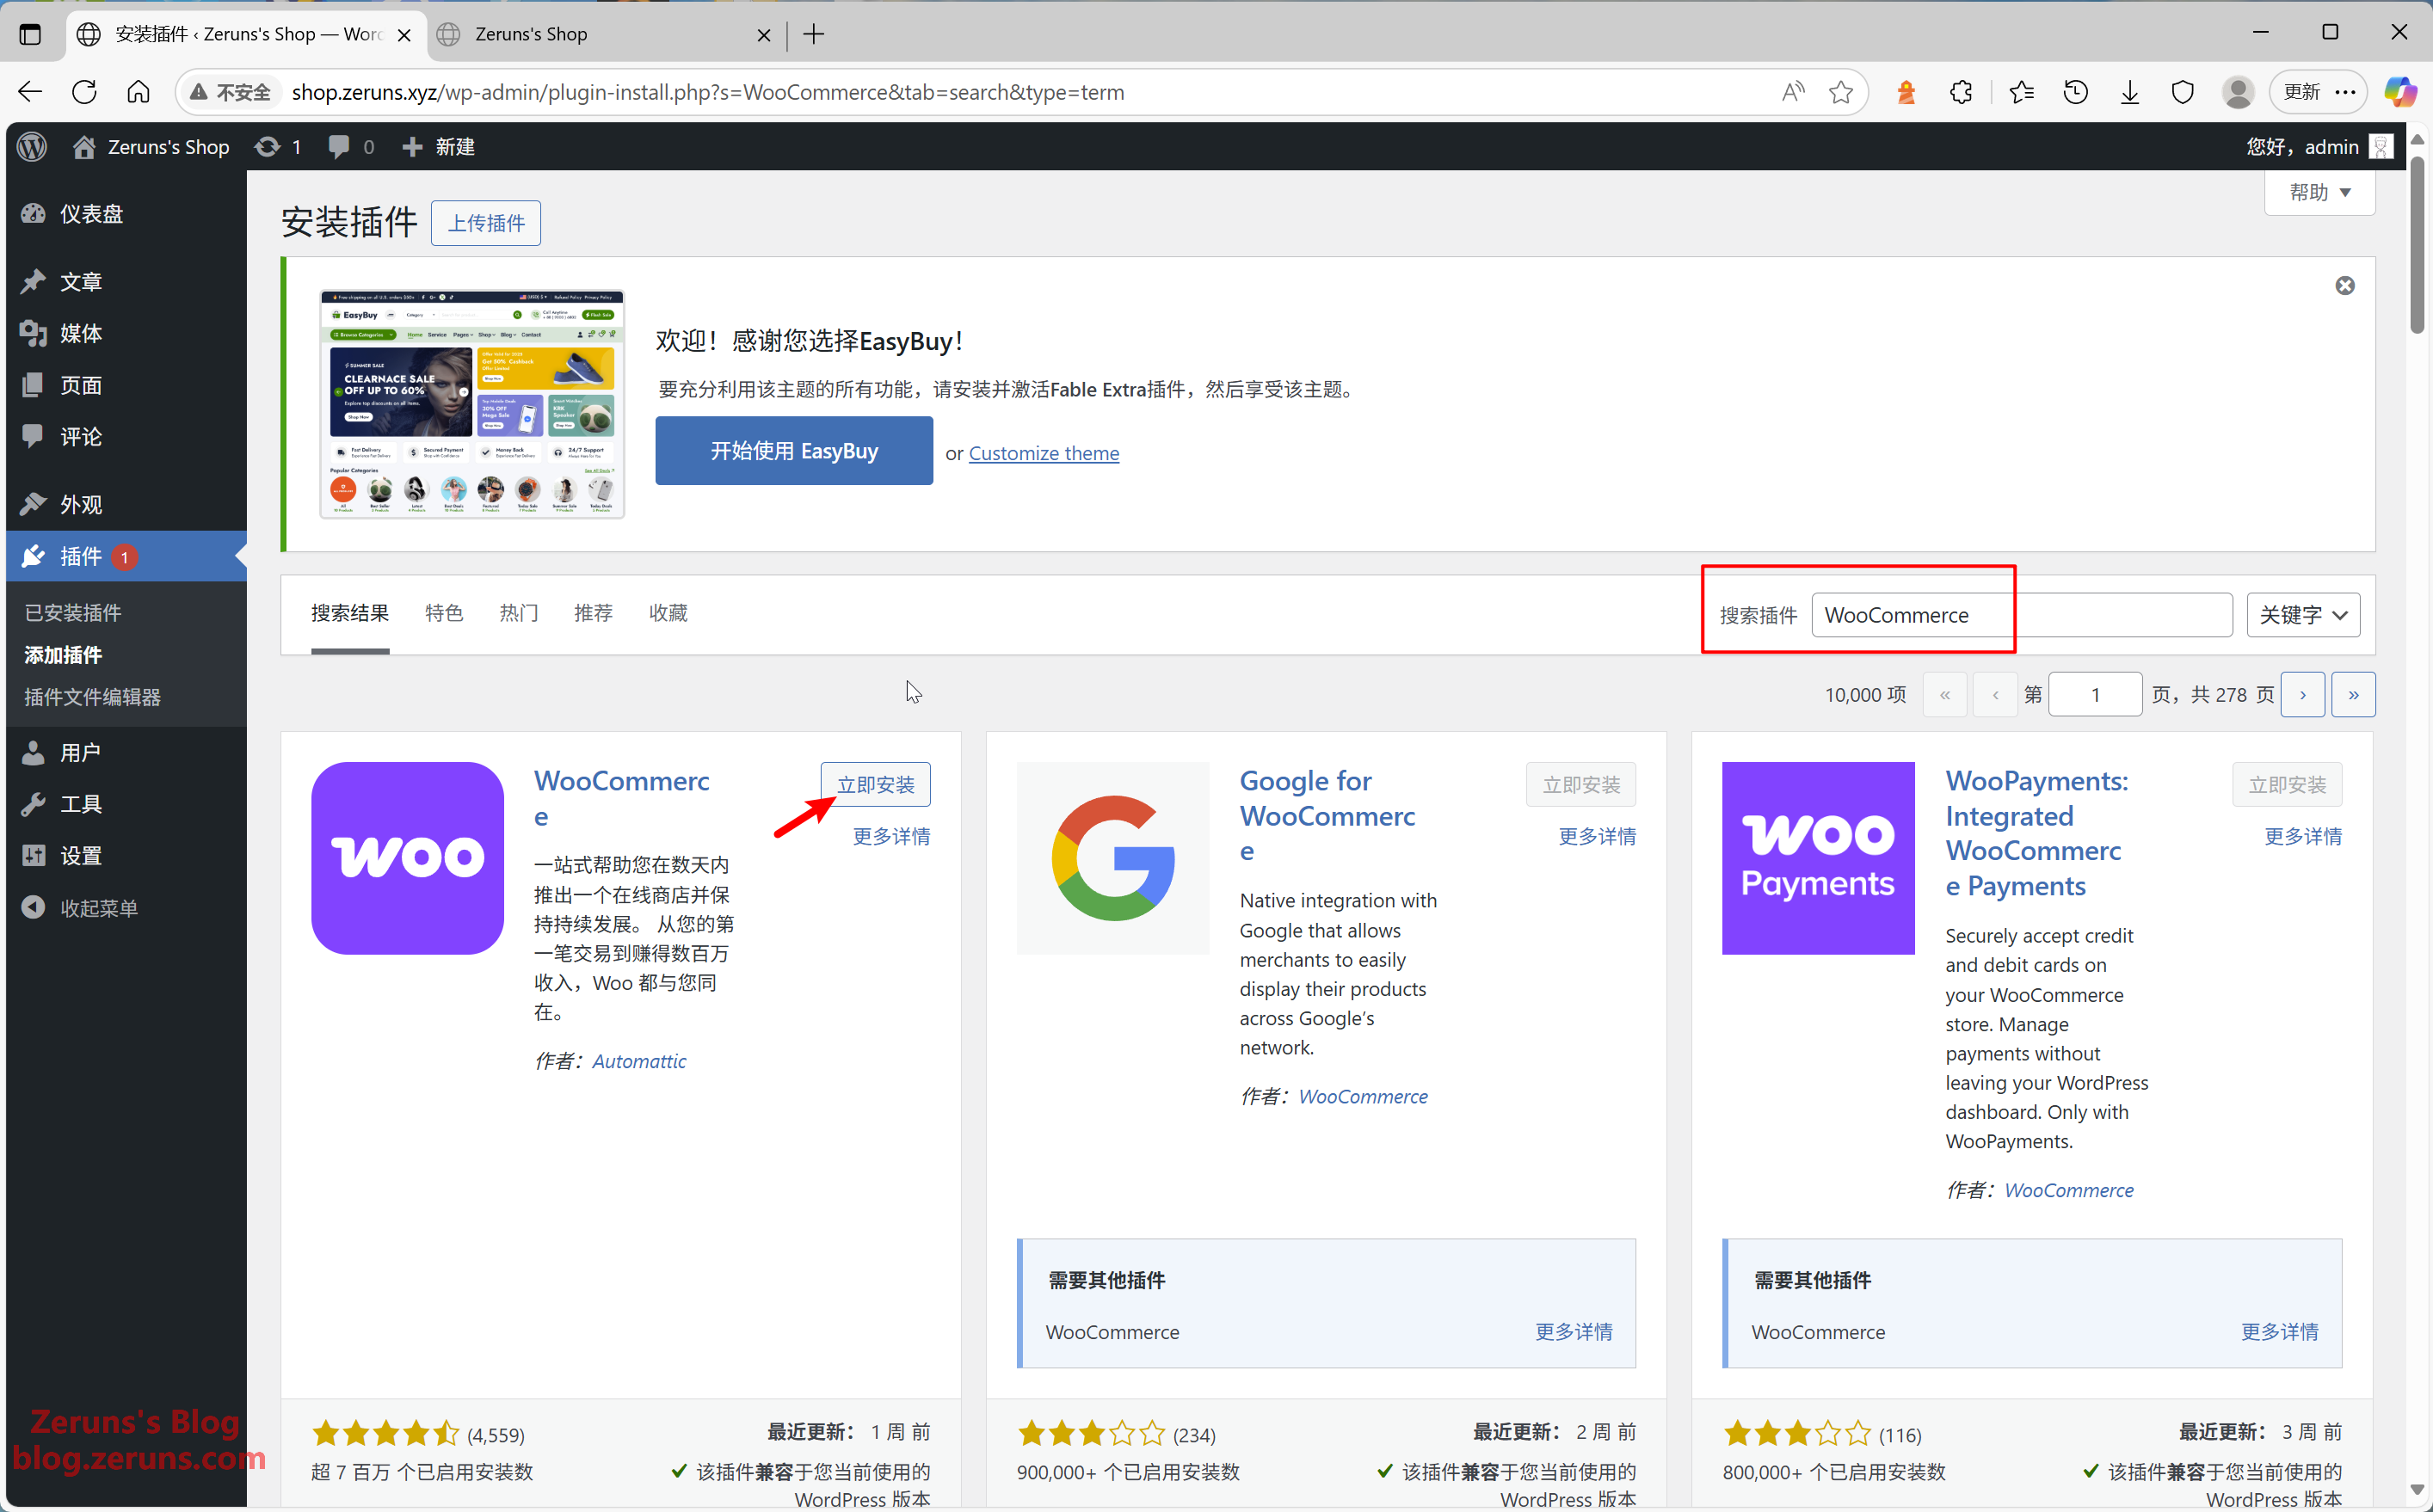
Continue by adding another plugin. Search for WooCommerce, then install and activate it.
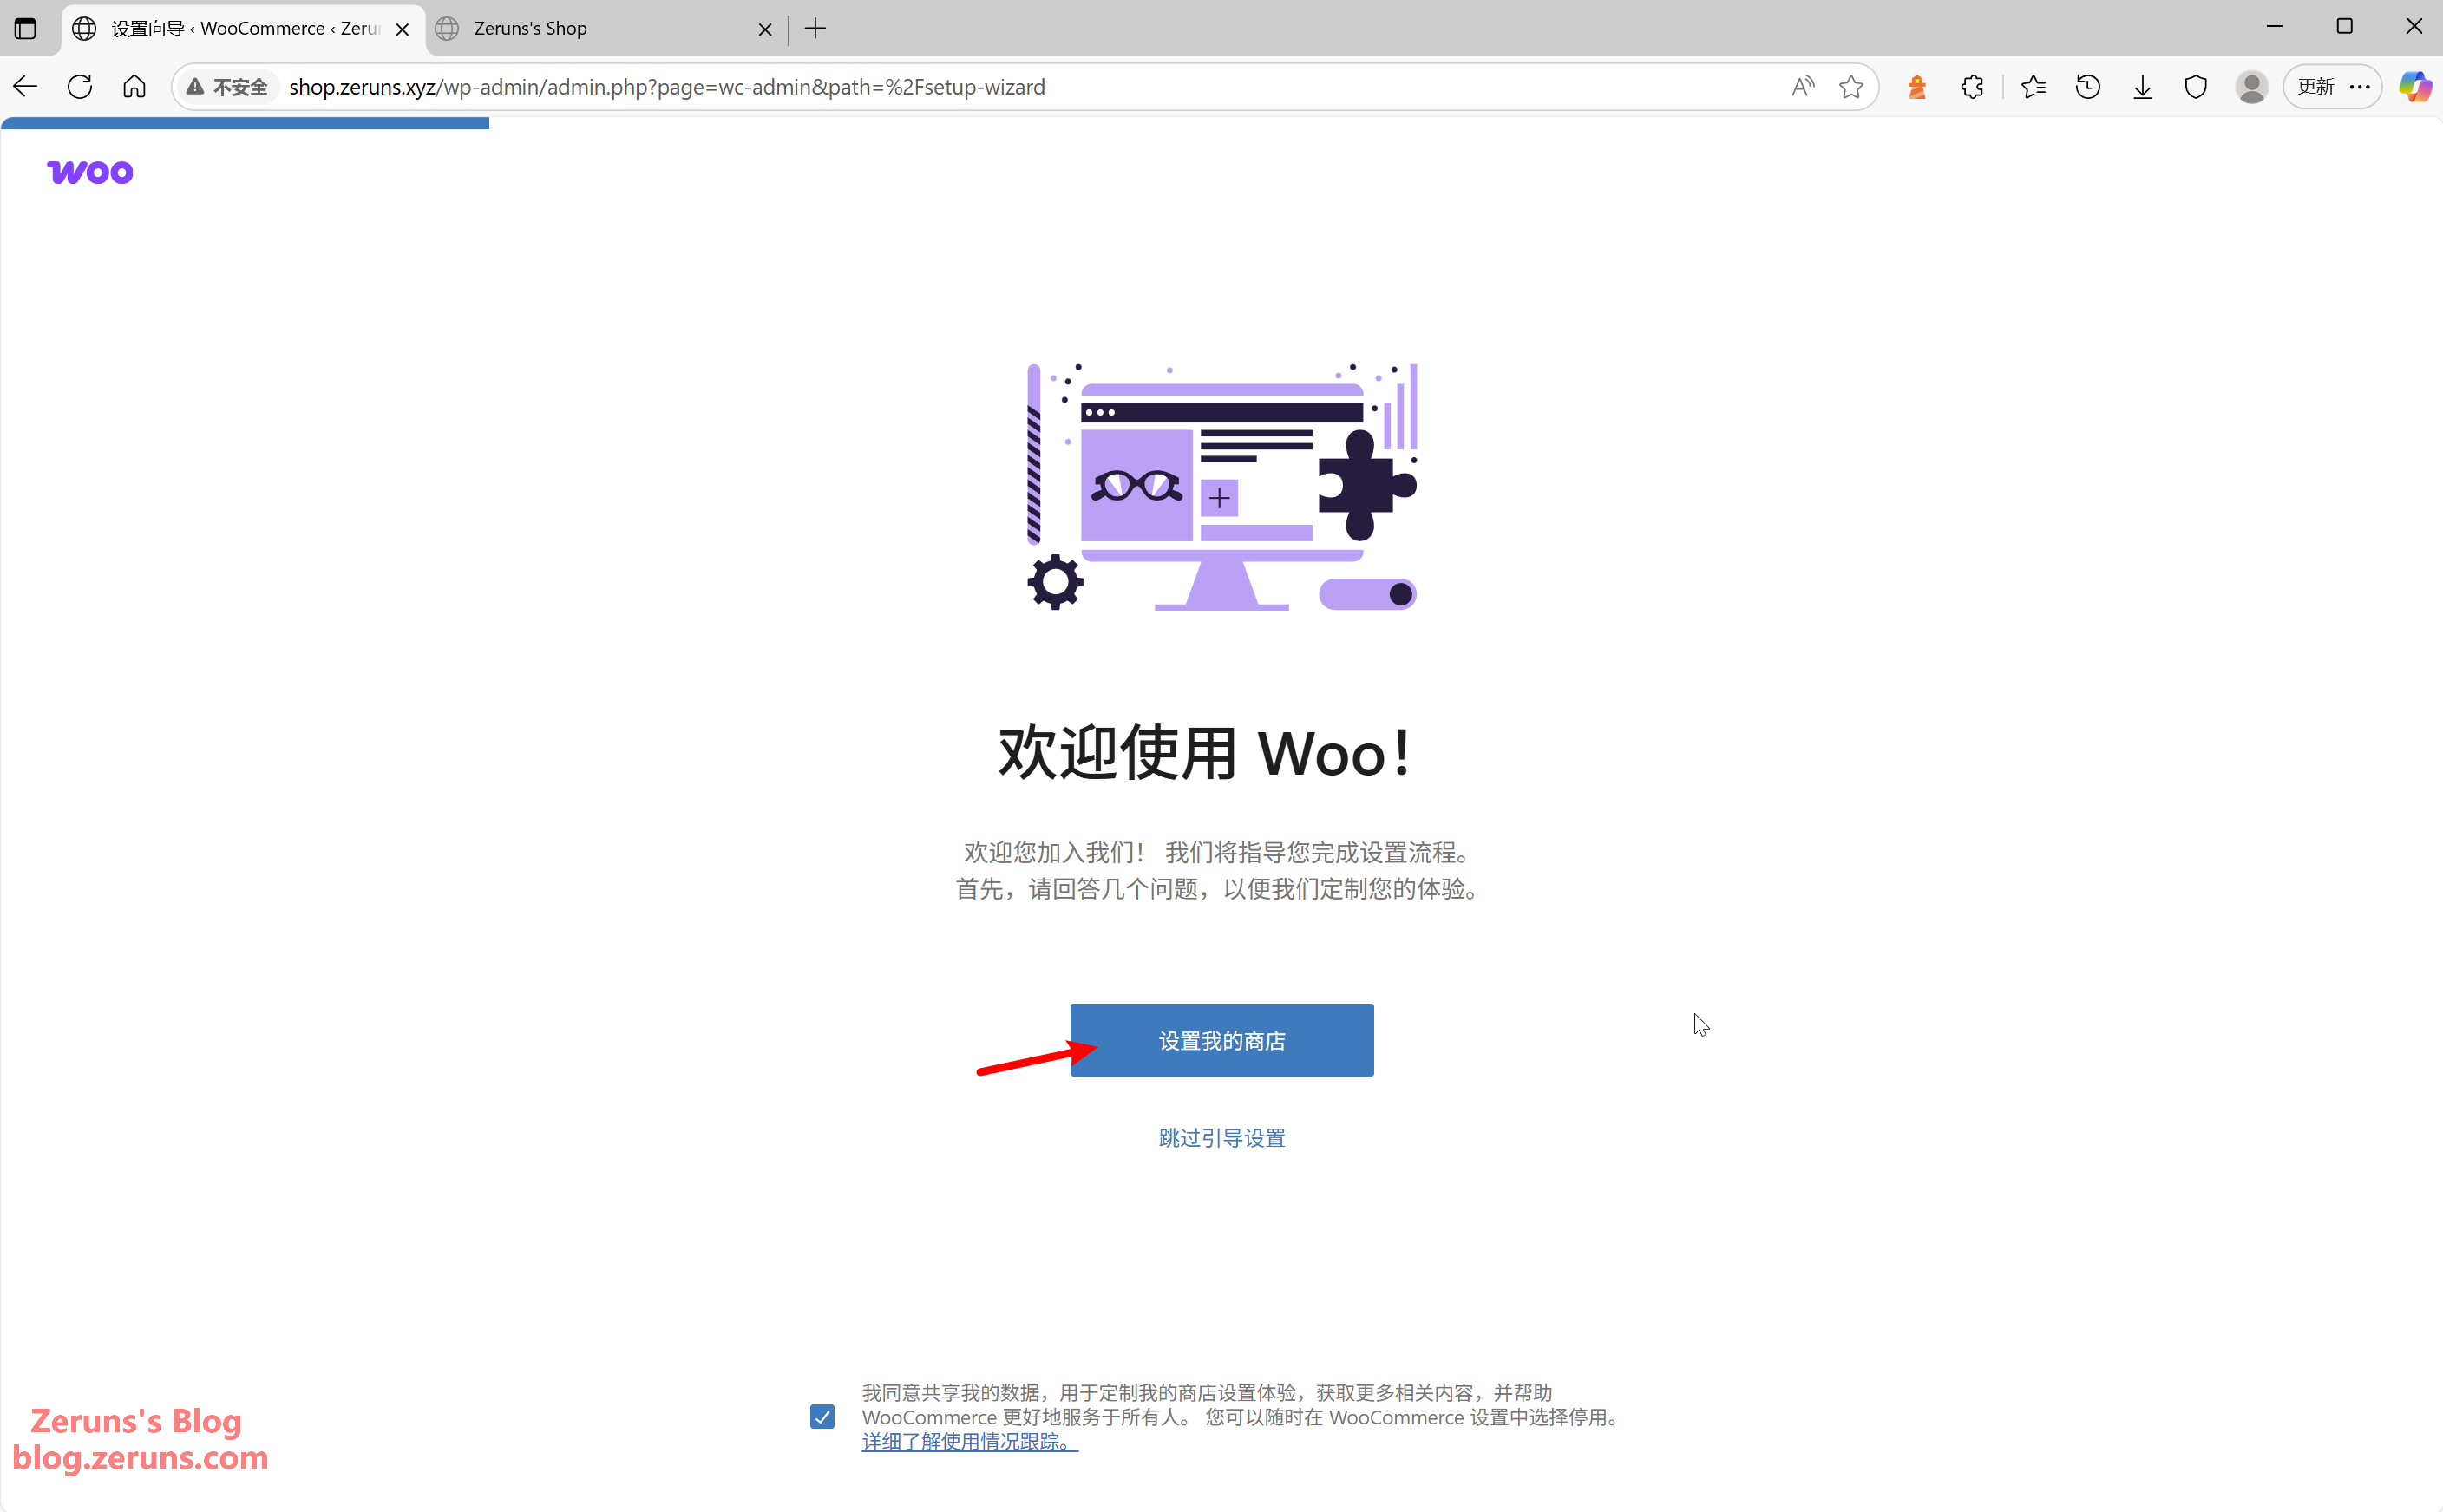
Once activated, WooCommerce will launch its setup wizard. Click Set up my store and follow the guided steps.
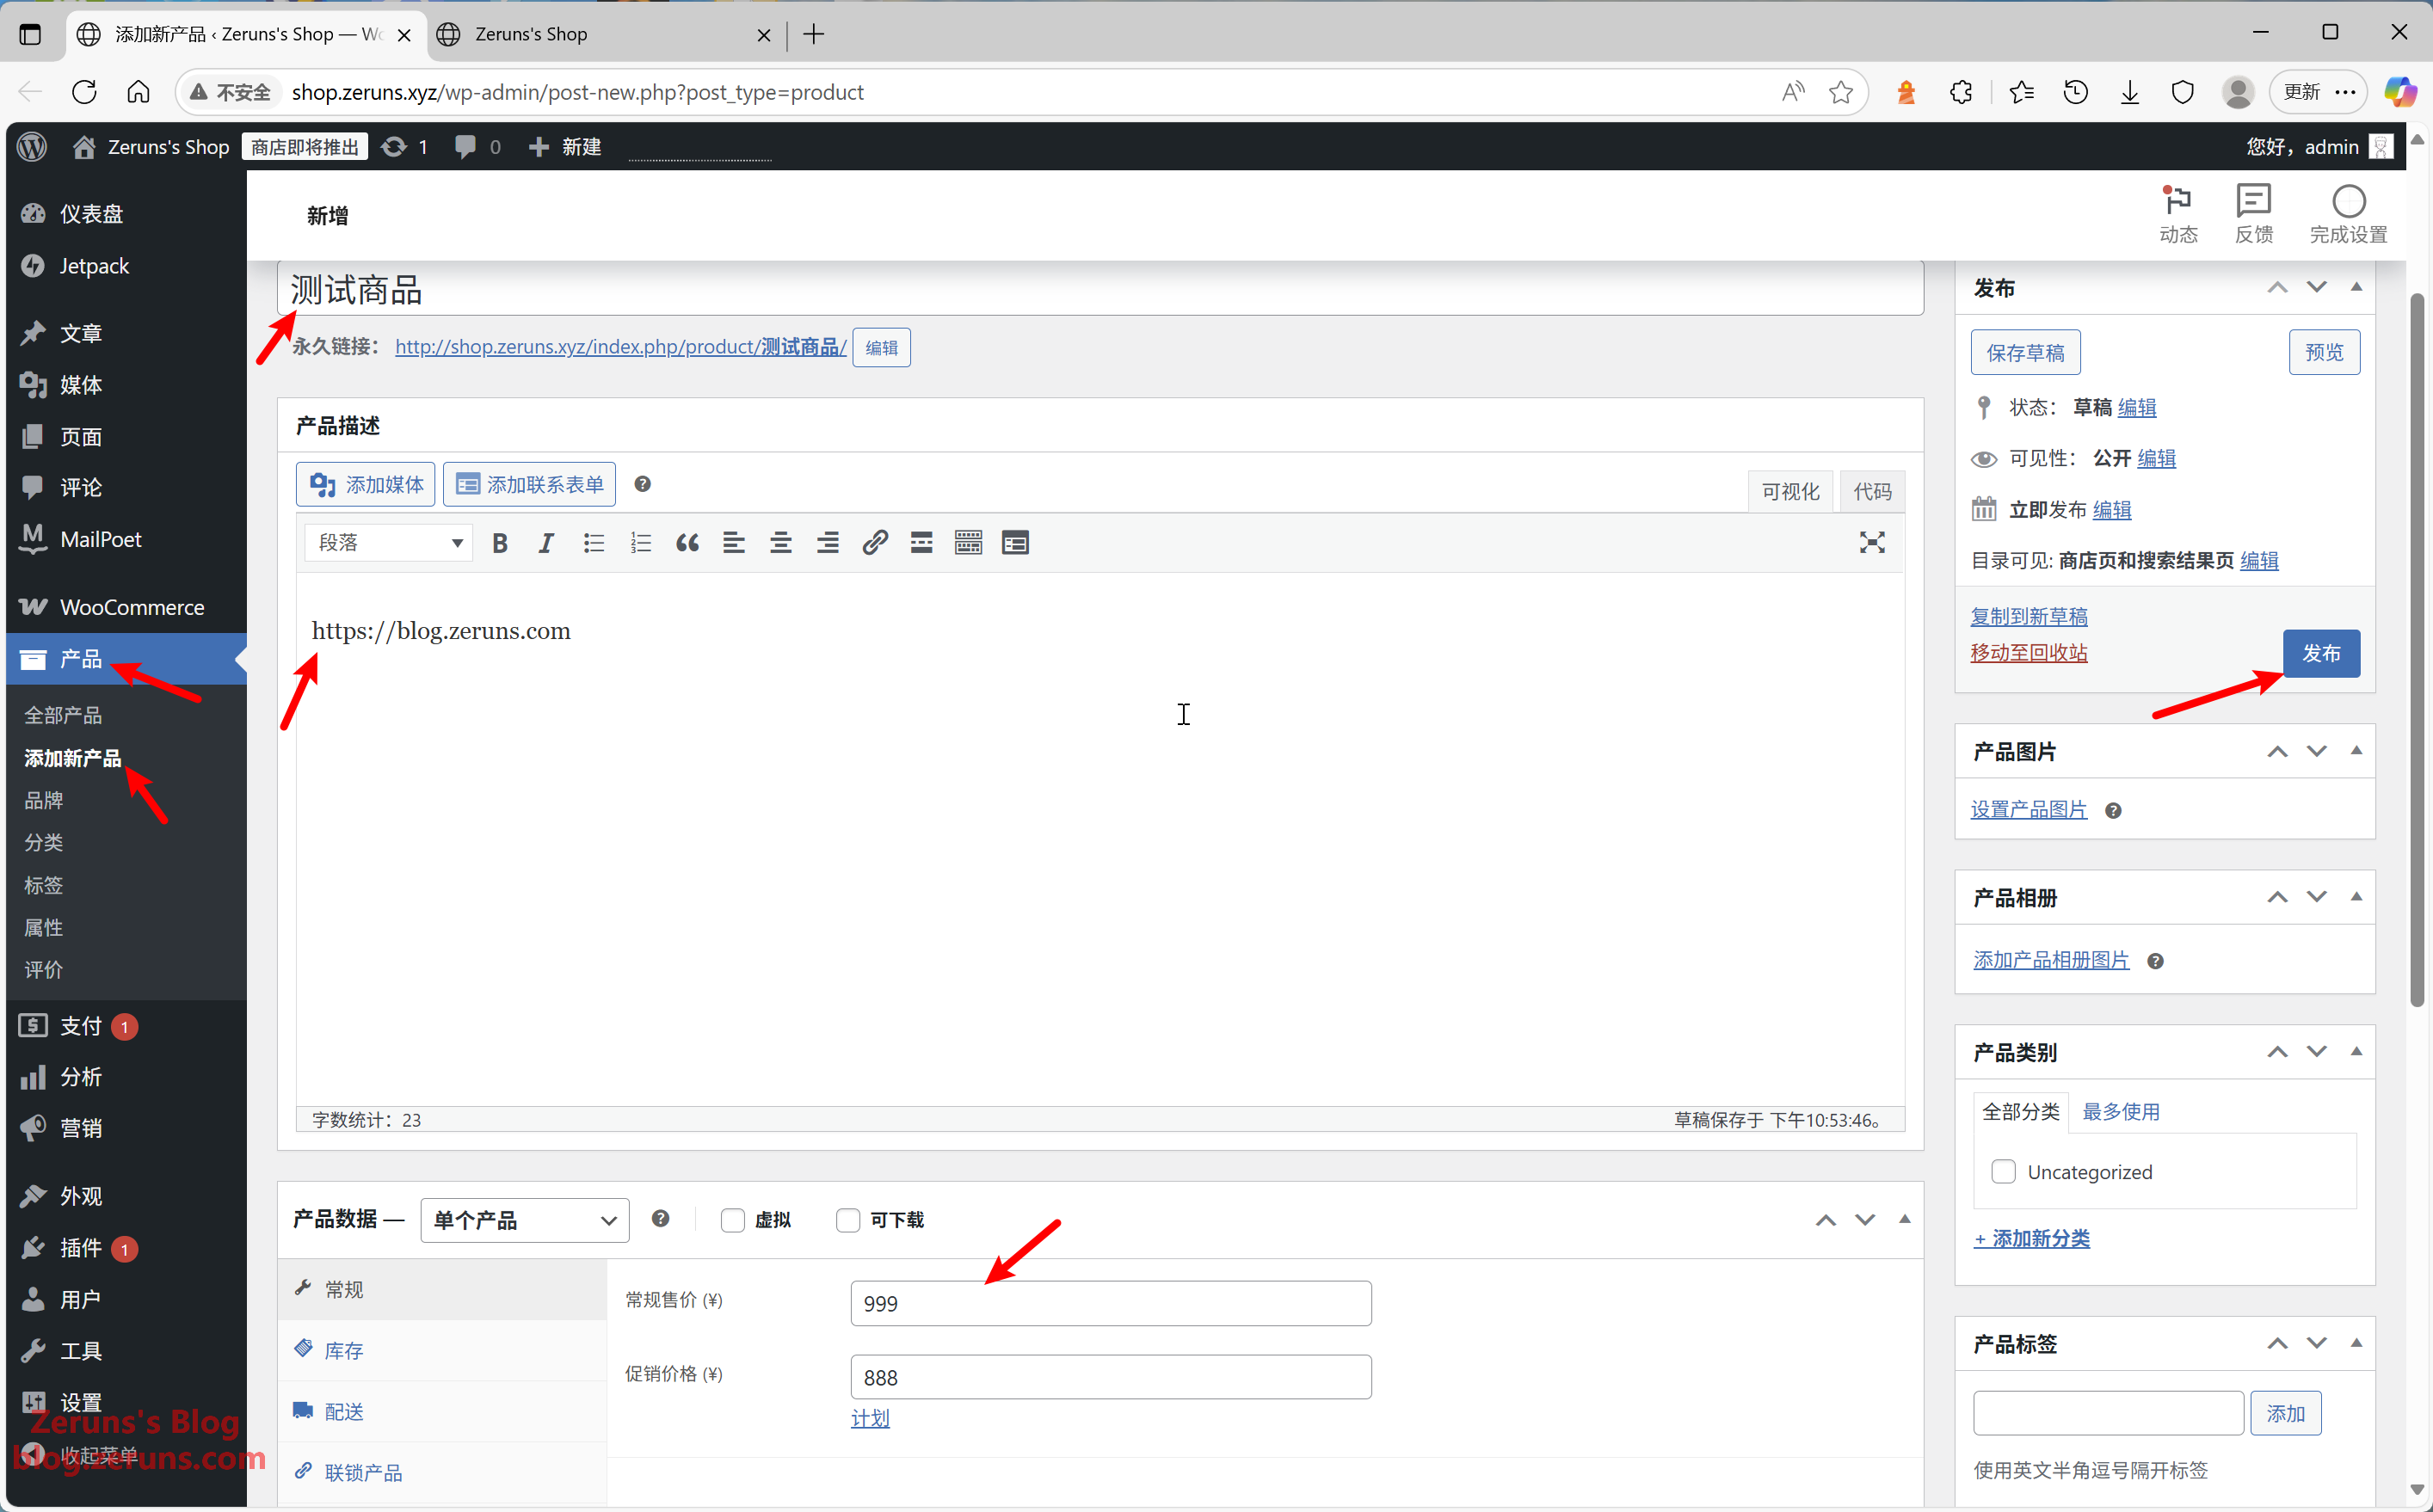
Configure Your Store
In the WordPress dashboard, click Products → Add New to create a new product listing for your site. You can also configure categories, brands, tags, and more. (Important: avoid using Chinese characters in the permalink, or it will result in a 404 error. The image below shows an incorrect example. You can manually edit the link.)
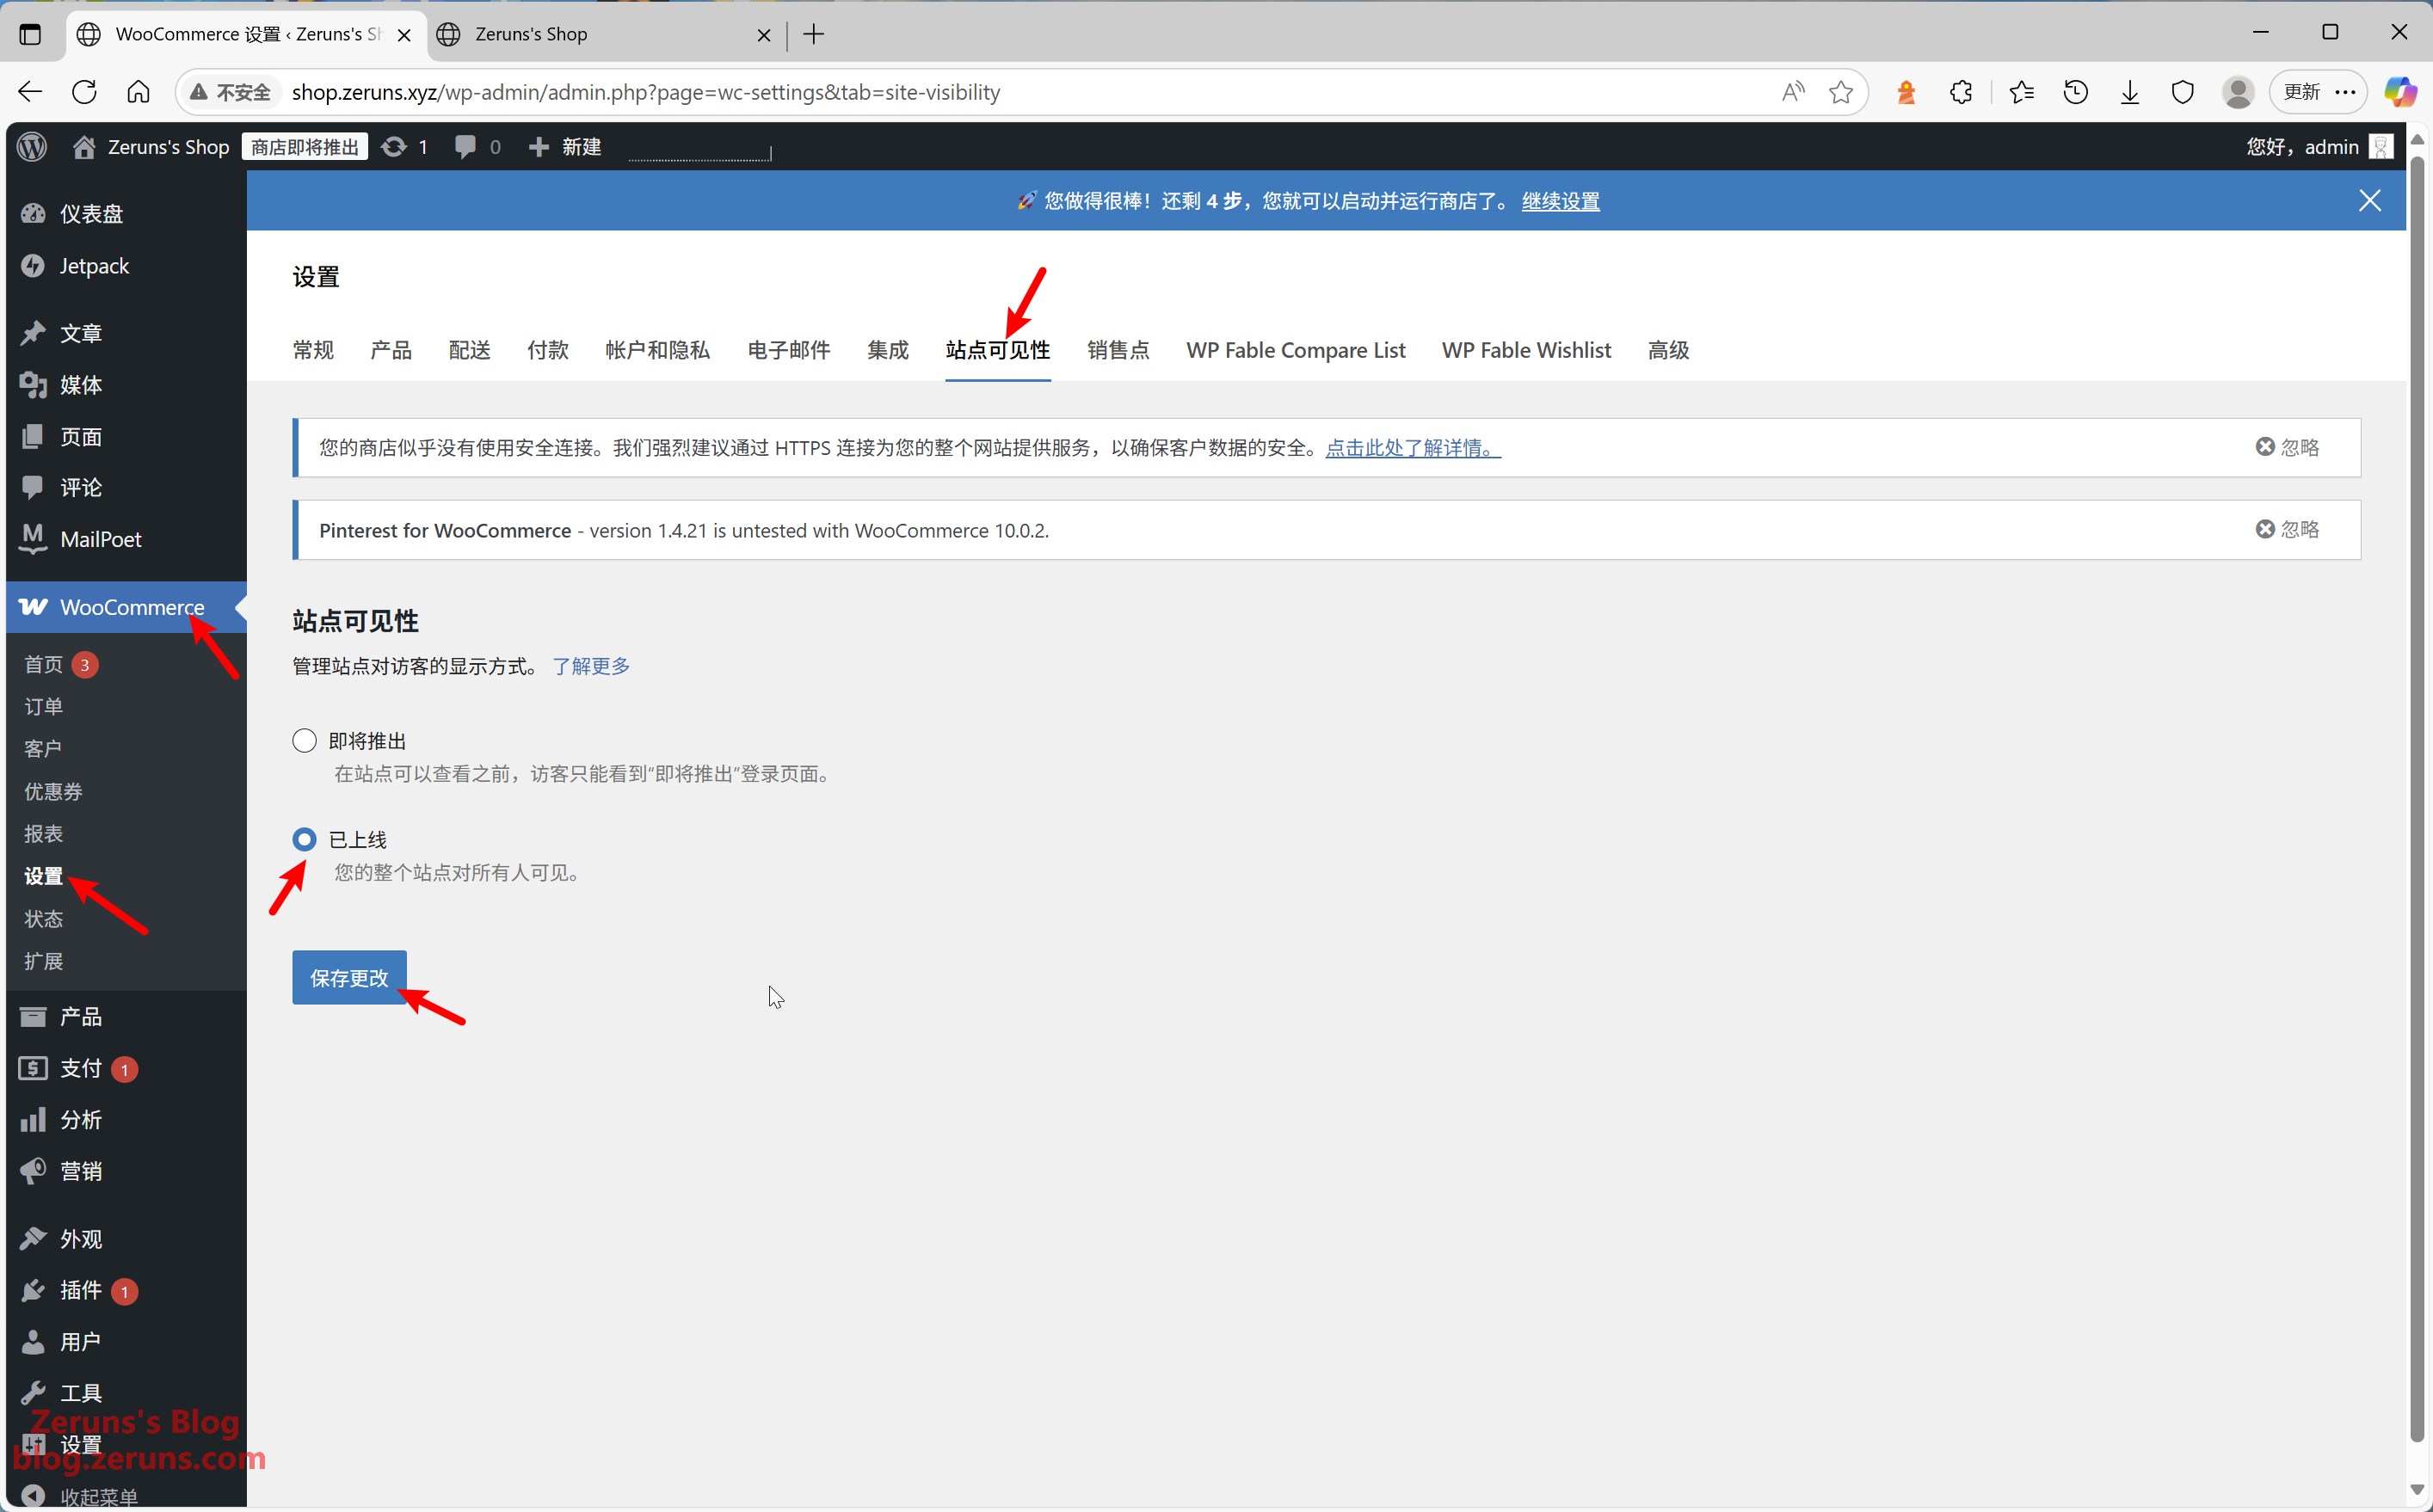
In the WooCommerce plugin settings, go to Site Visibility, check Store is live, and save changes. Only then will visitors be able to view your store.
In the WordPress settings, you can switch the site language to English if needed.

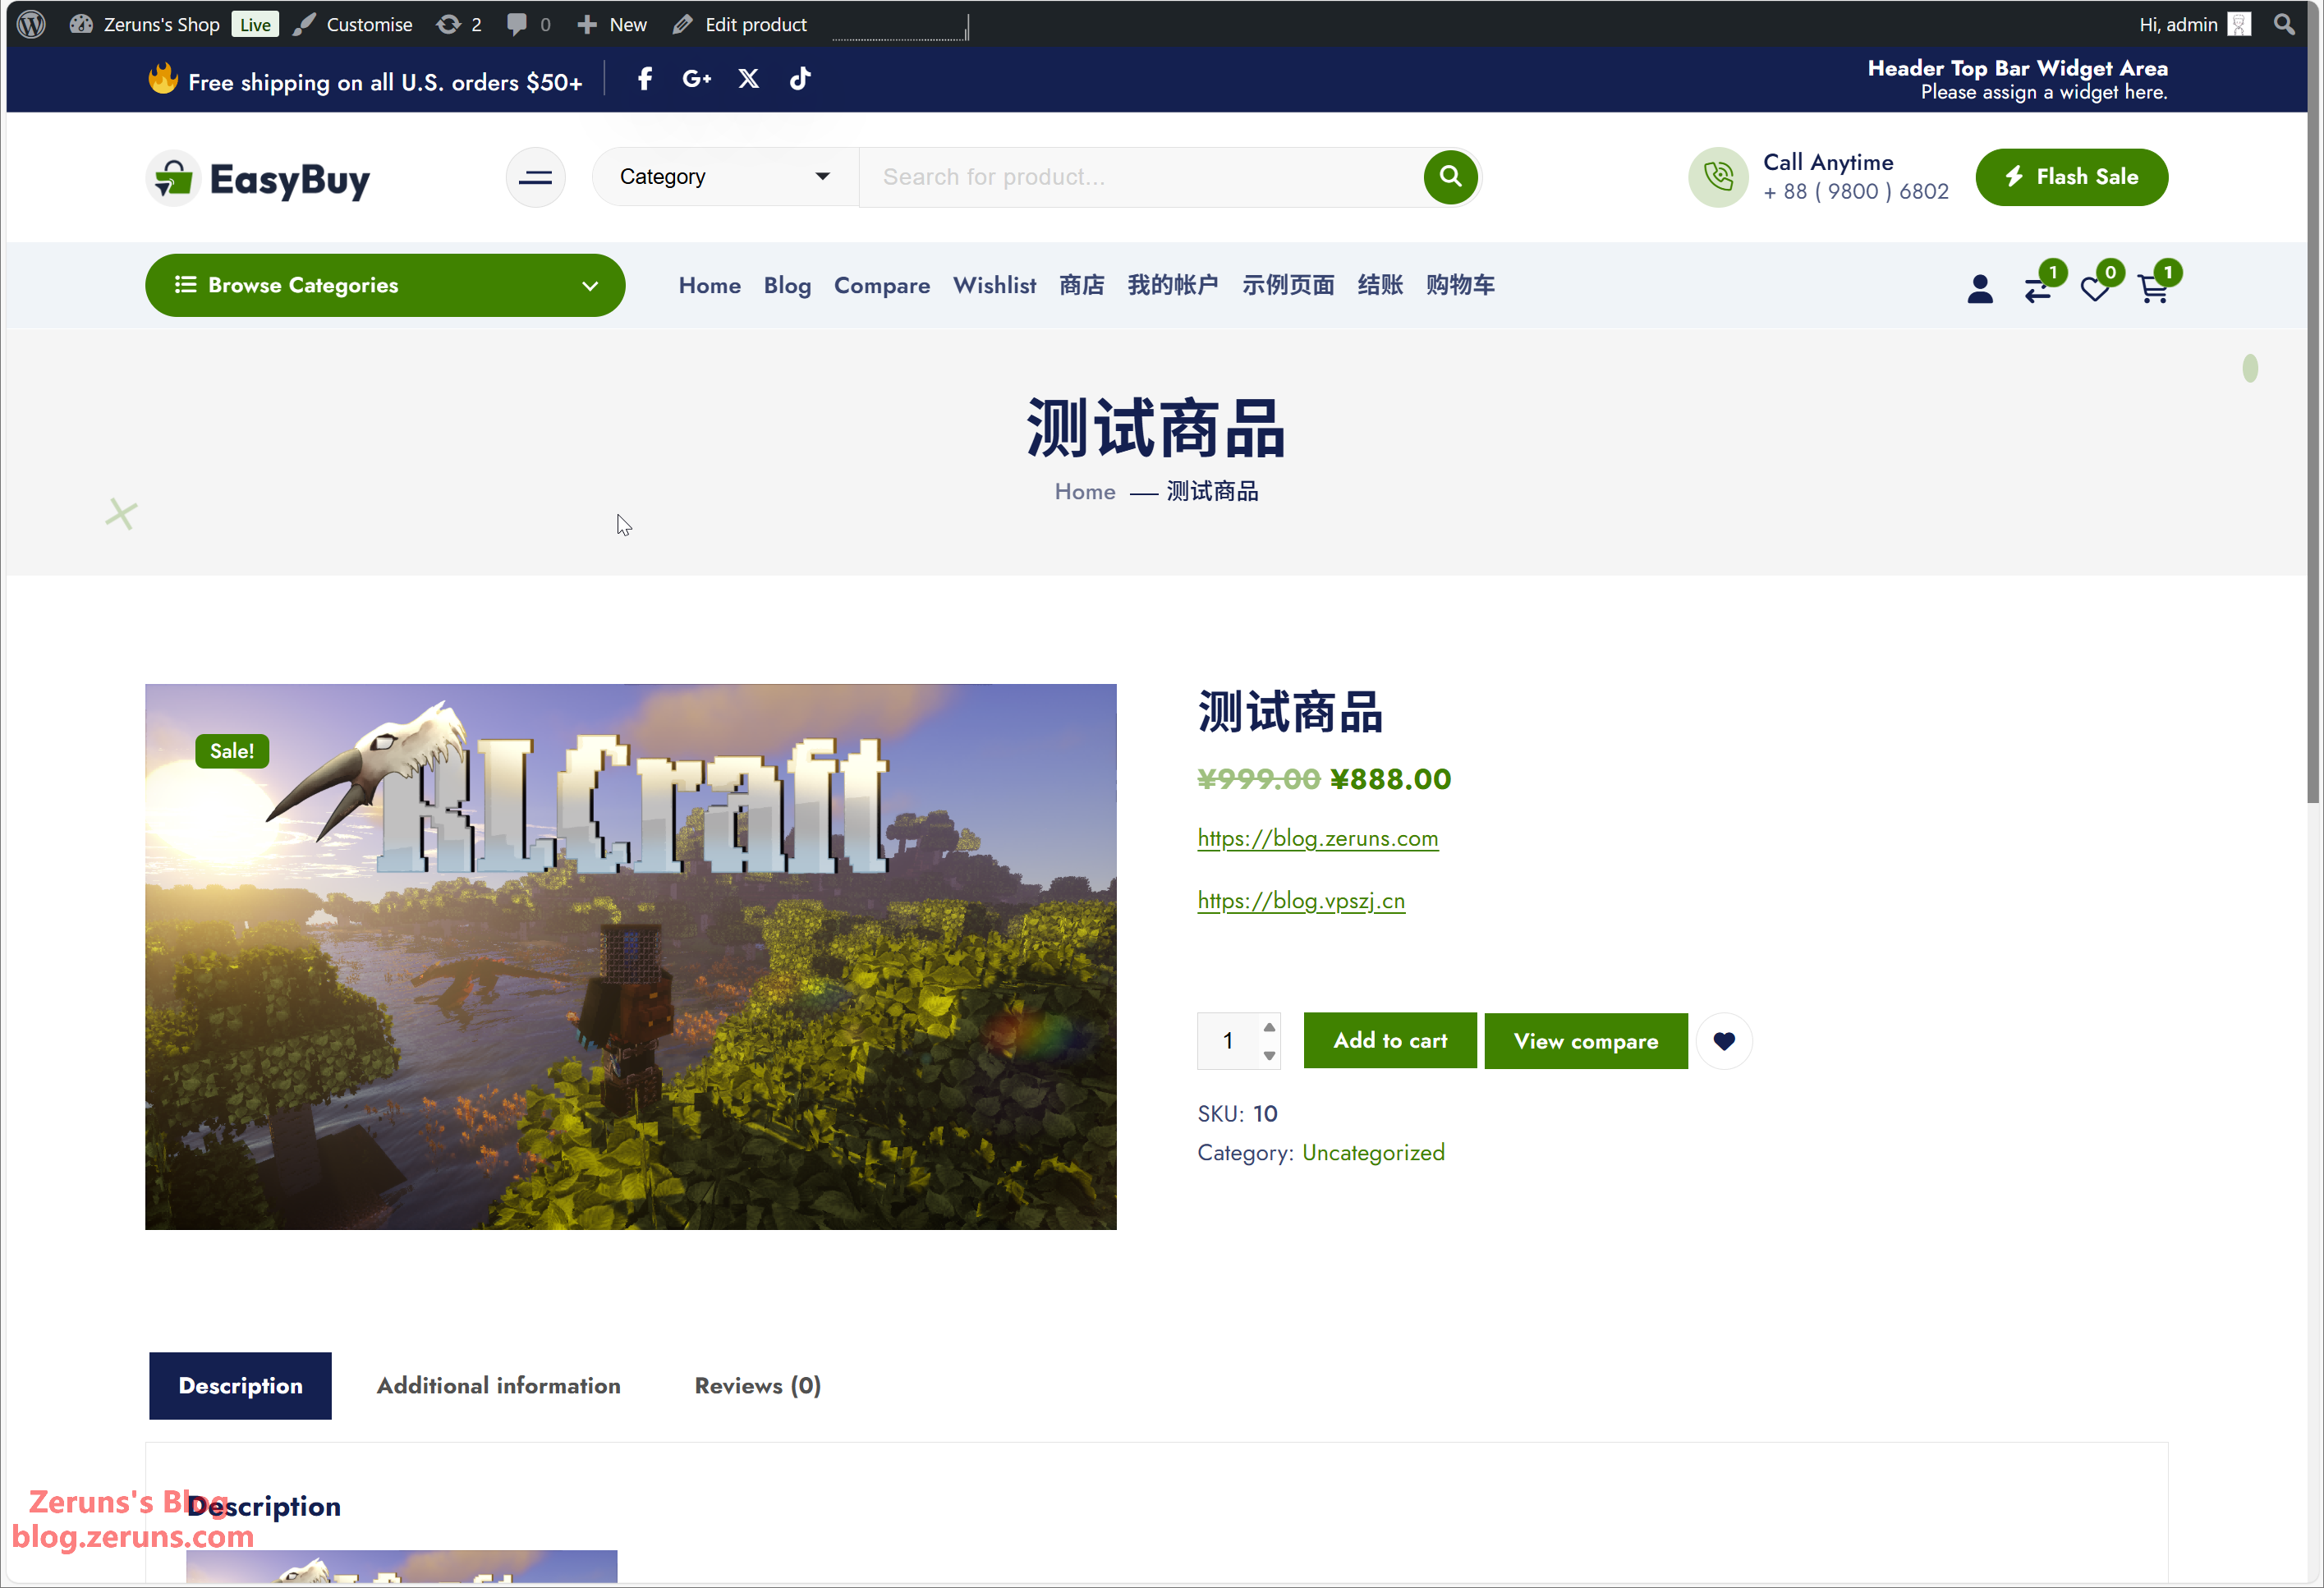
Product Page:
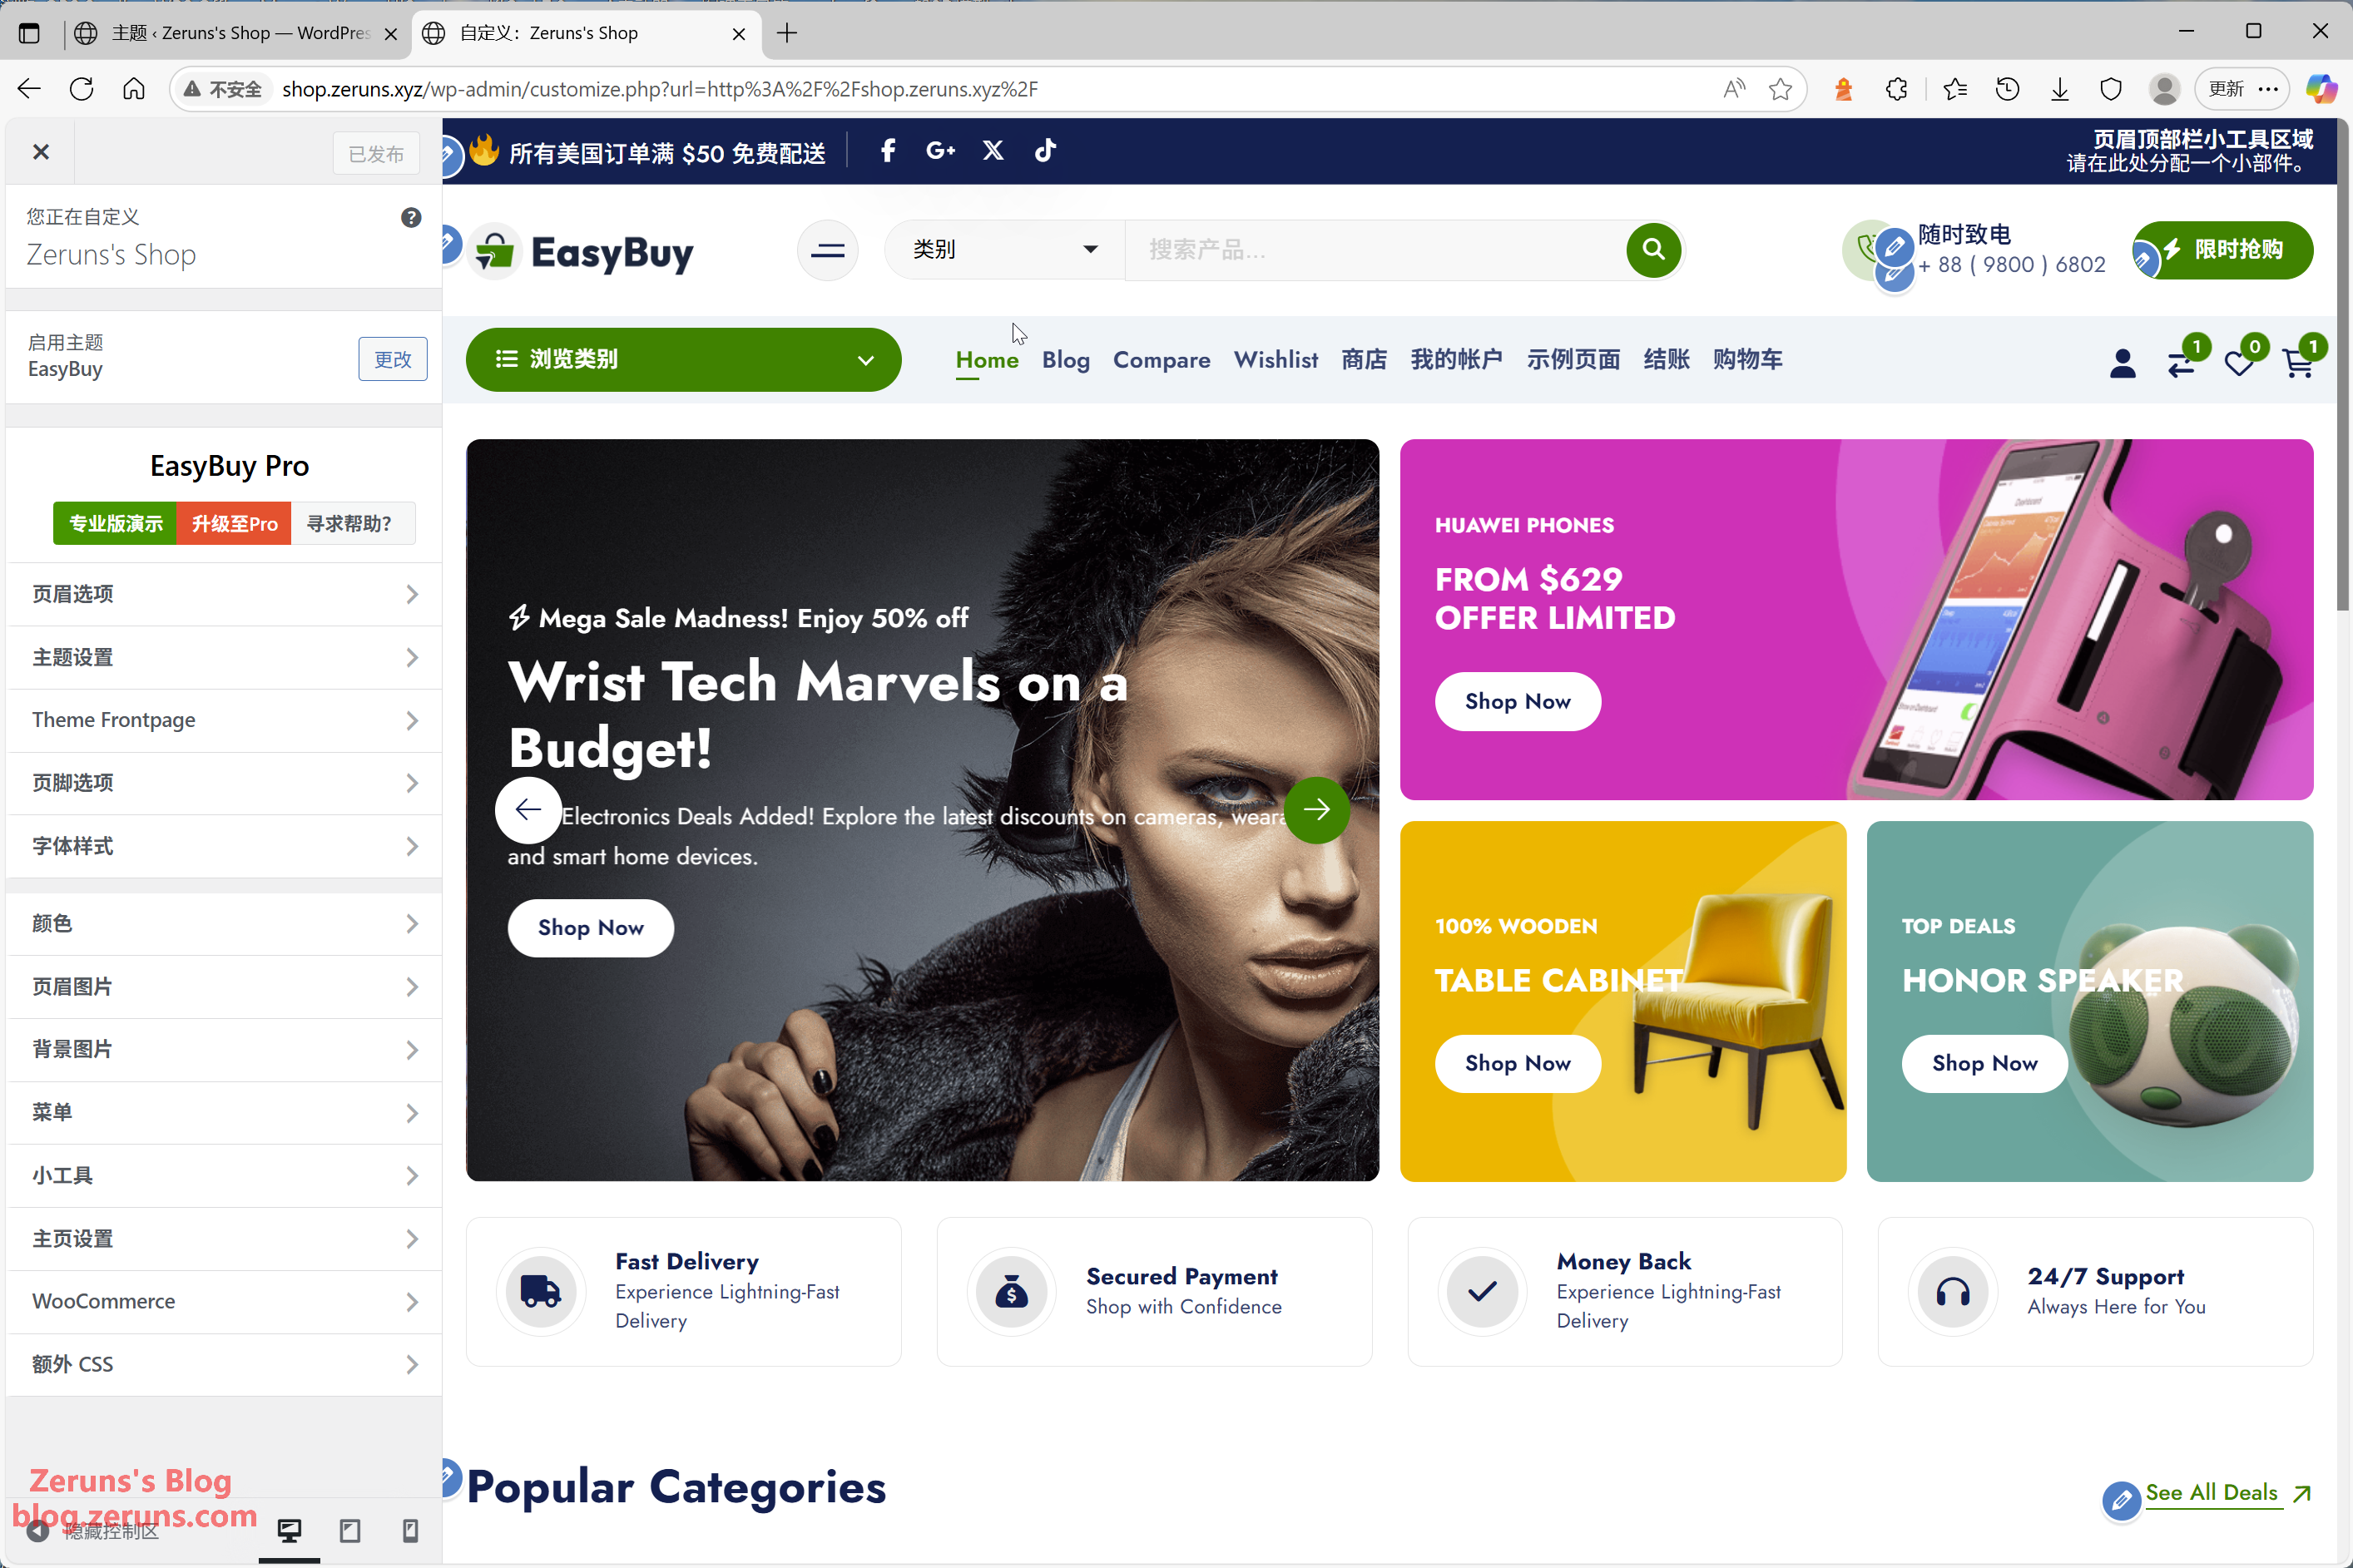
You can also customize the theme.
Feel free to explore more settings on your own, such as payment methods, shipping fees, coupons, and so on.
Enable HTTPS/SSL
Enabling SSL allows your site to be accessed via HTTPS, encrypting data between the server and browser and eliminating security warnings.
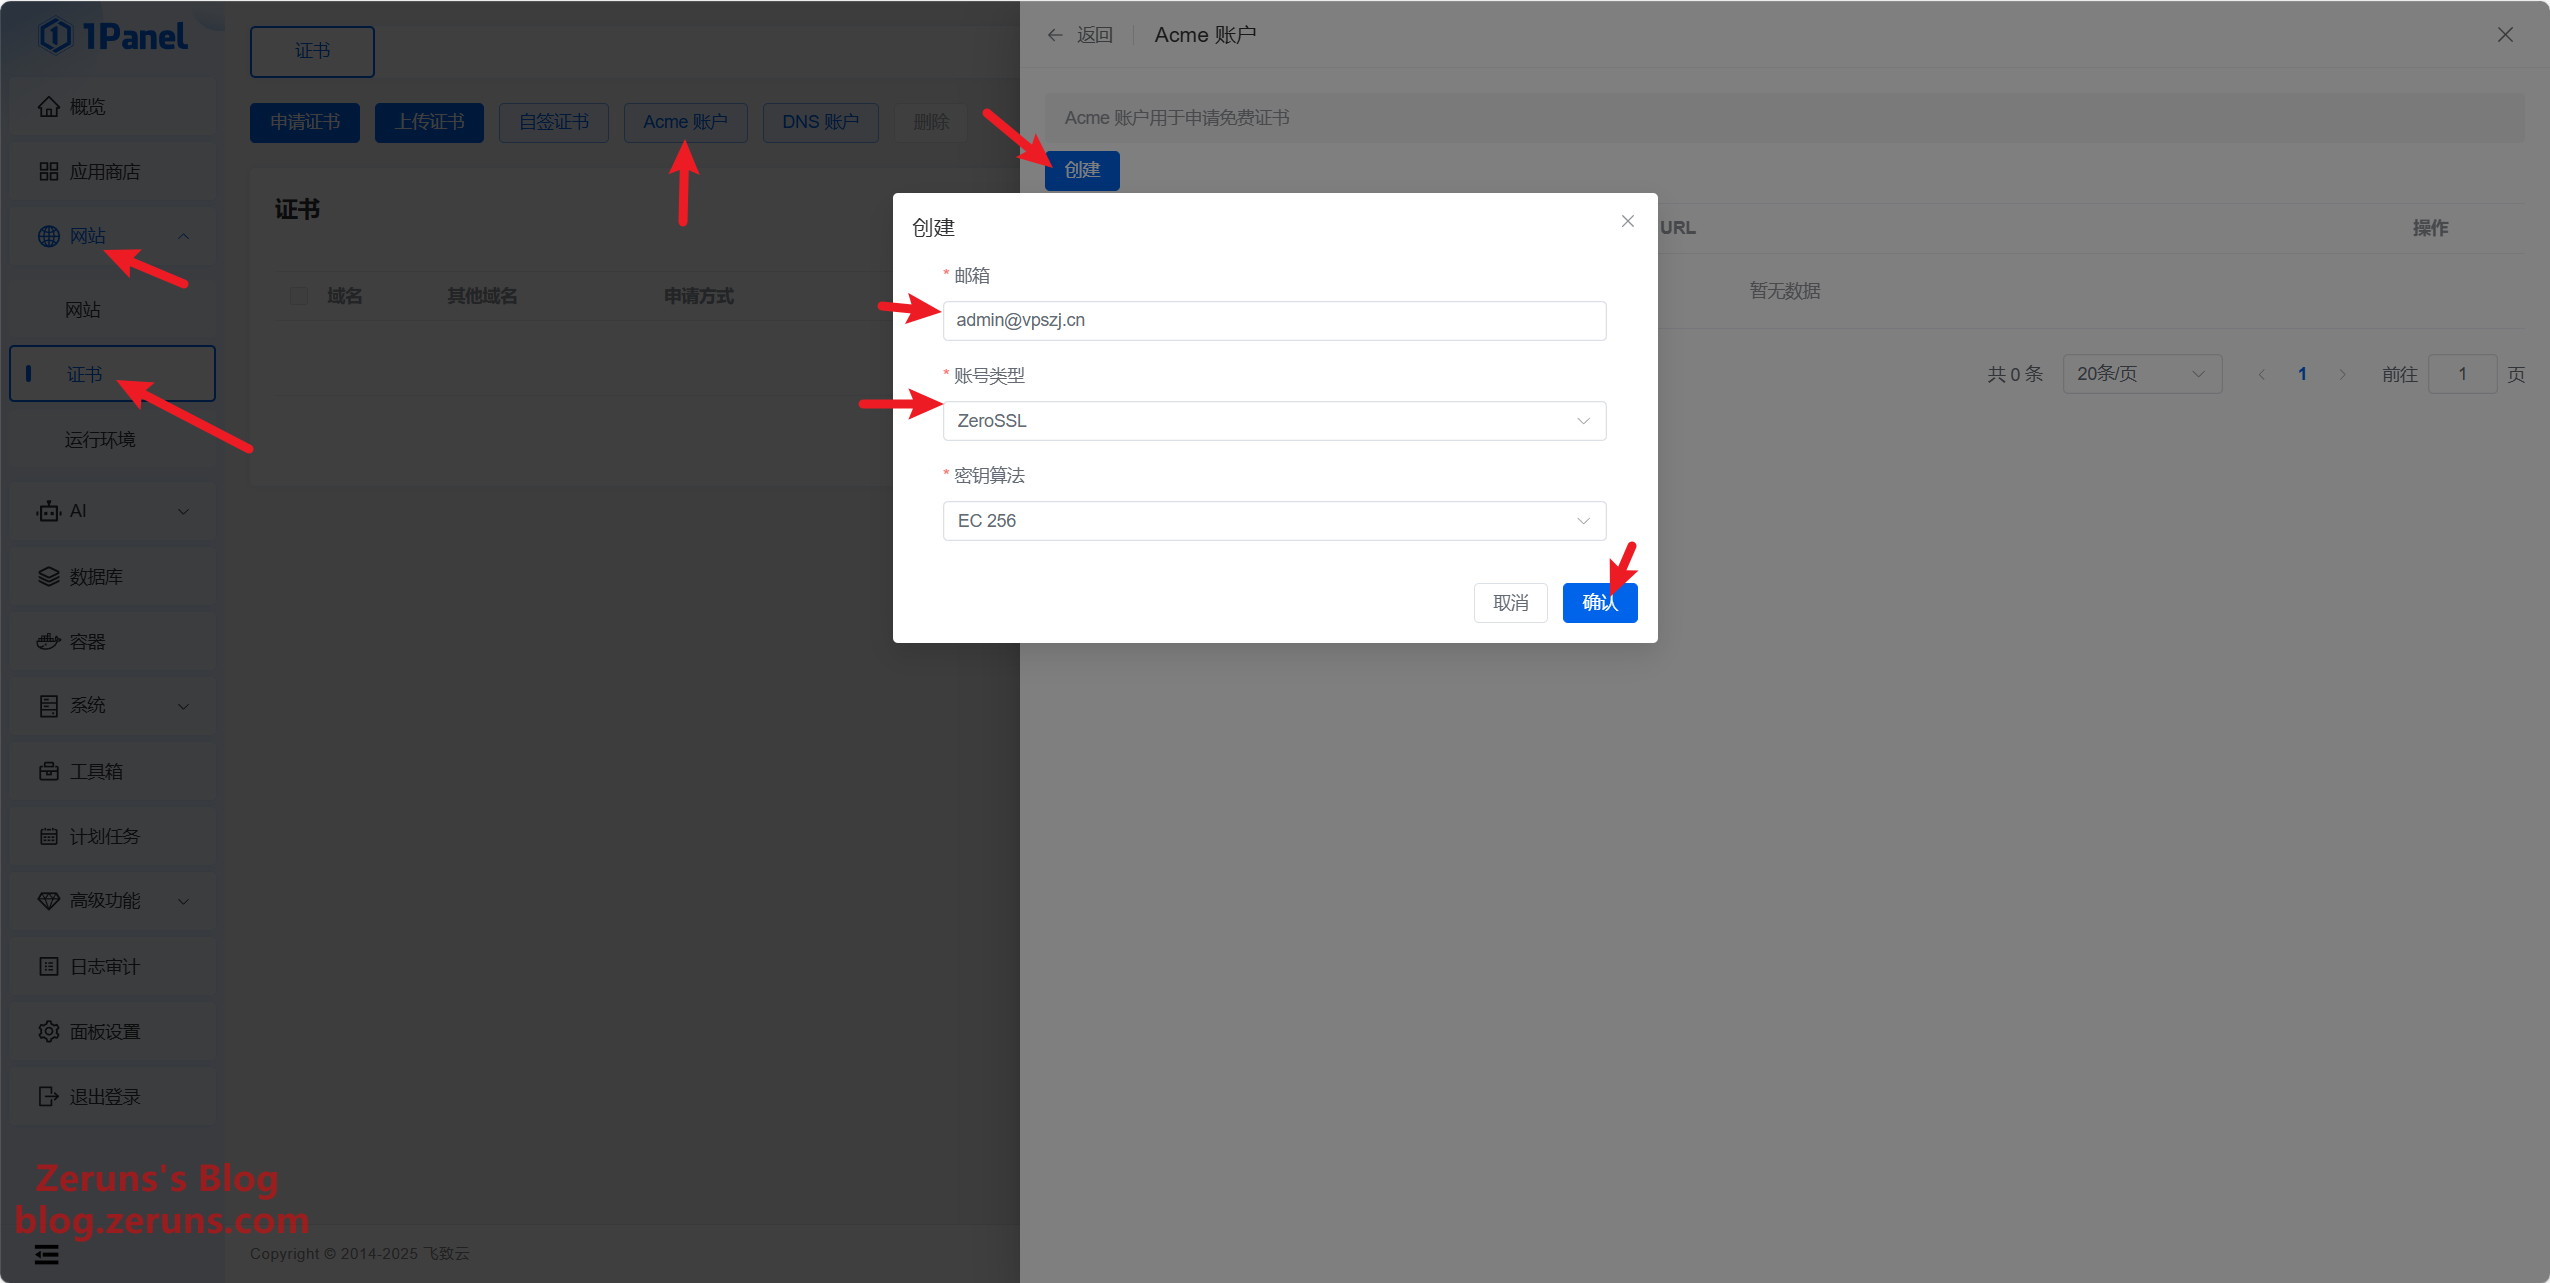
As shown below, in the 1Panel dashboard, go to Certificates → click Acme Accounts, and first create an Acme account. Choose ZeroSSL as the account type (I personally prefer ZeroSSL certificates), then enter your email and click Confirm.
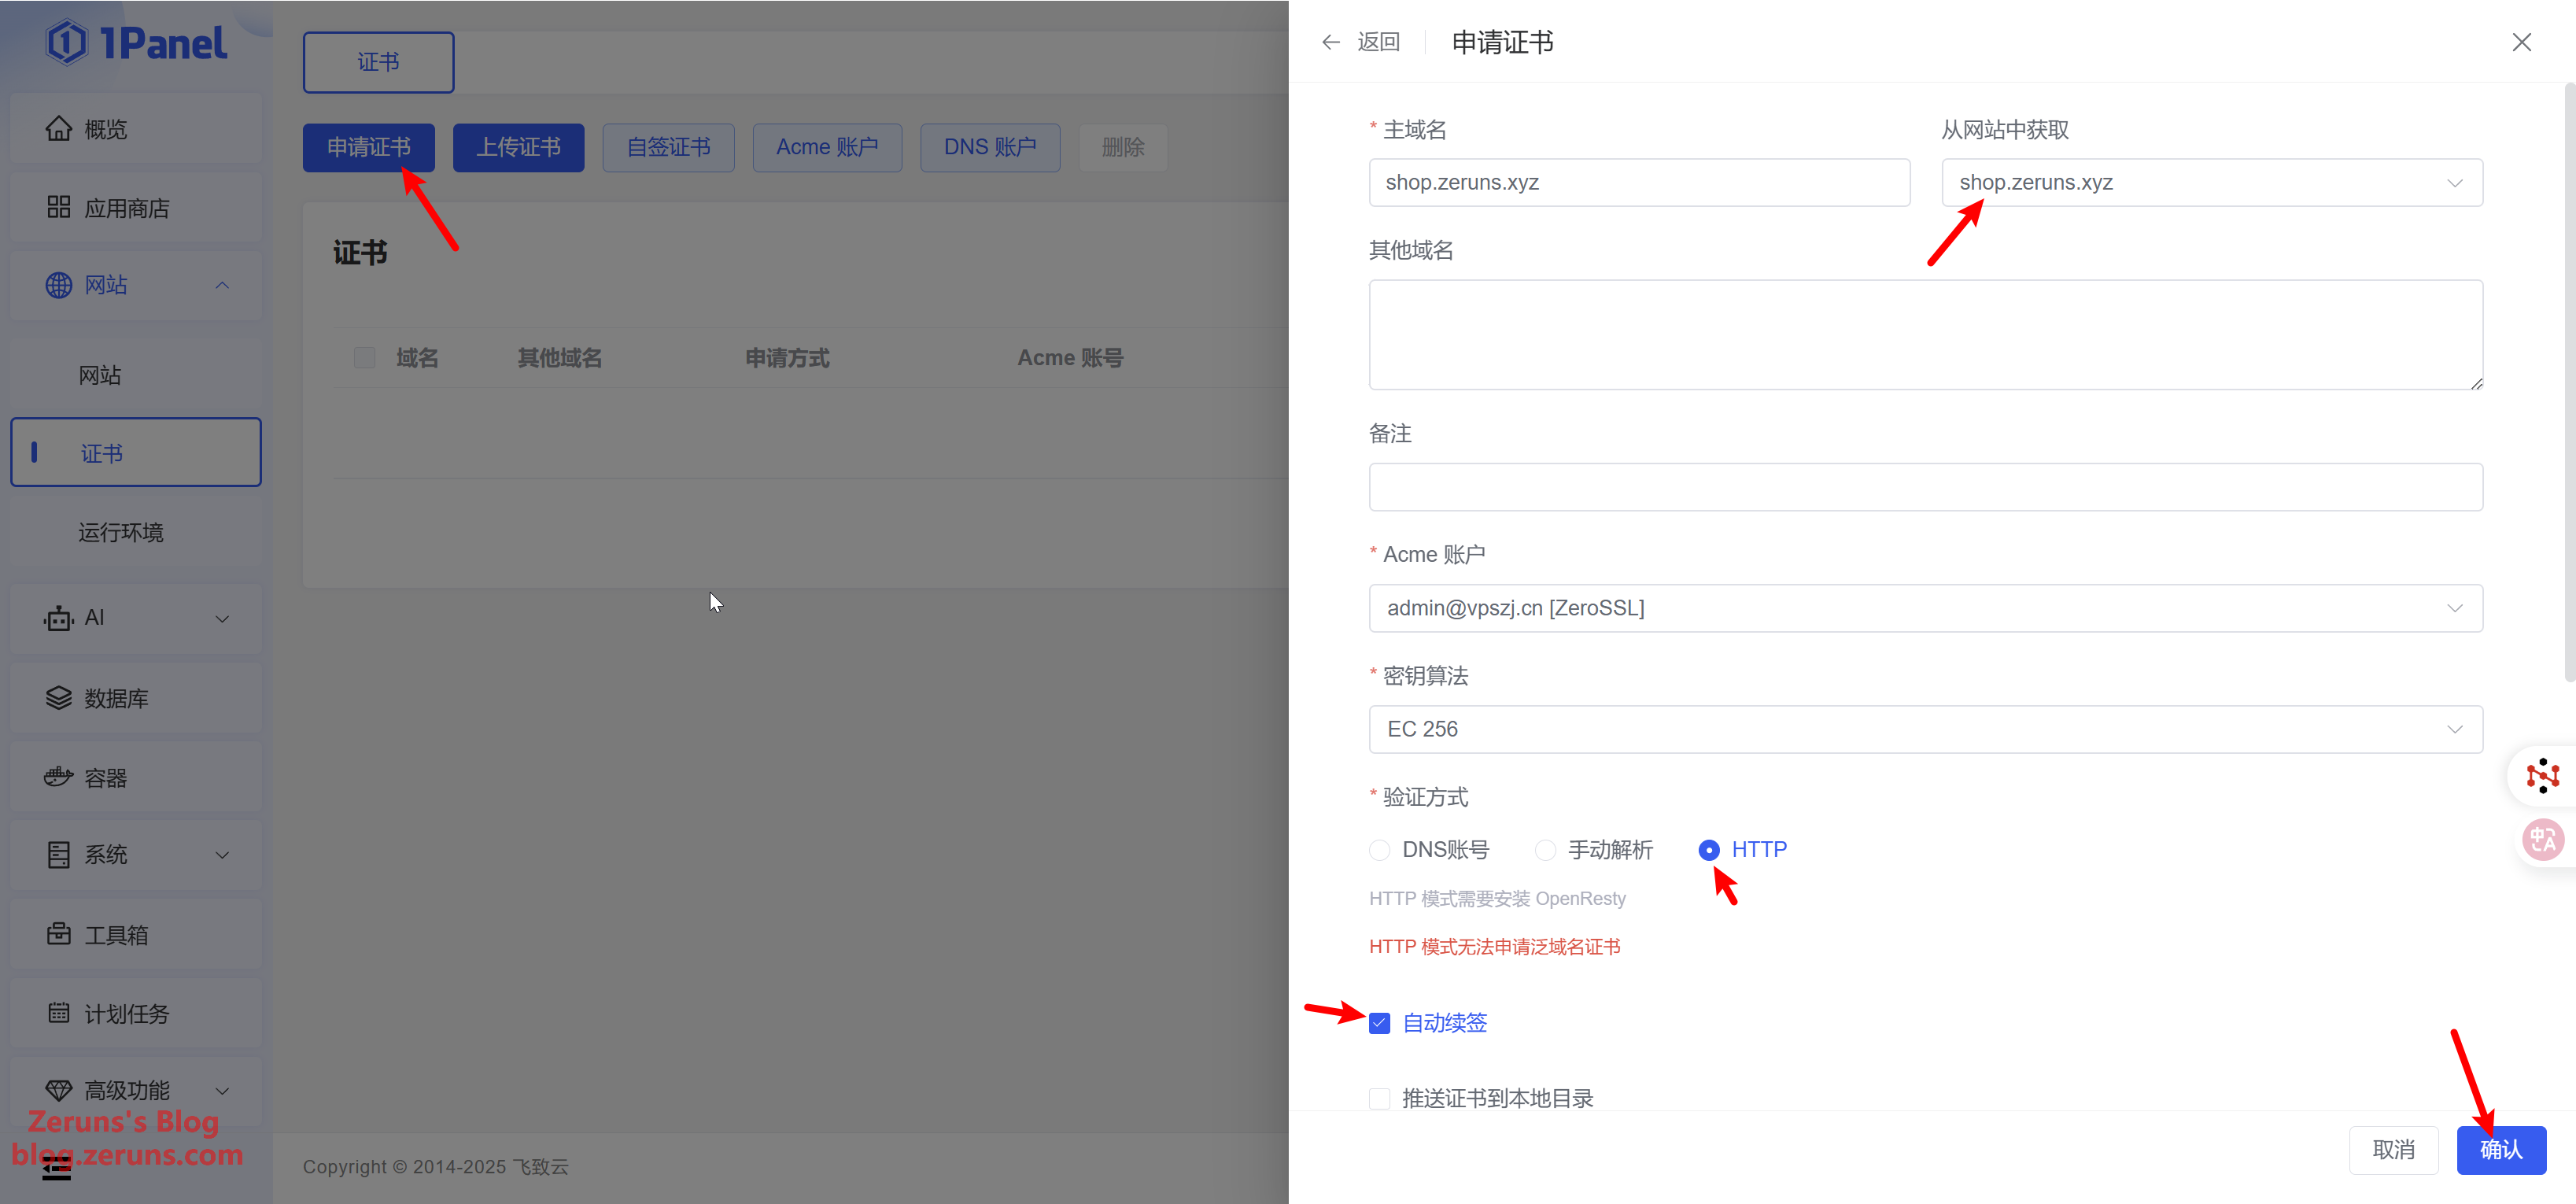
Then click Apply for Certificate, choose the website you previously created, select HTTP for the verification method, and click Confirm.
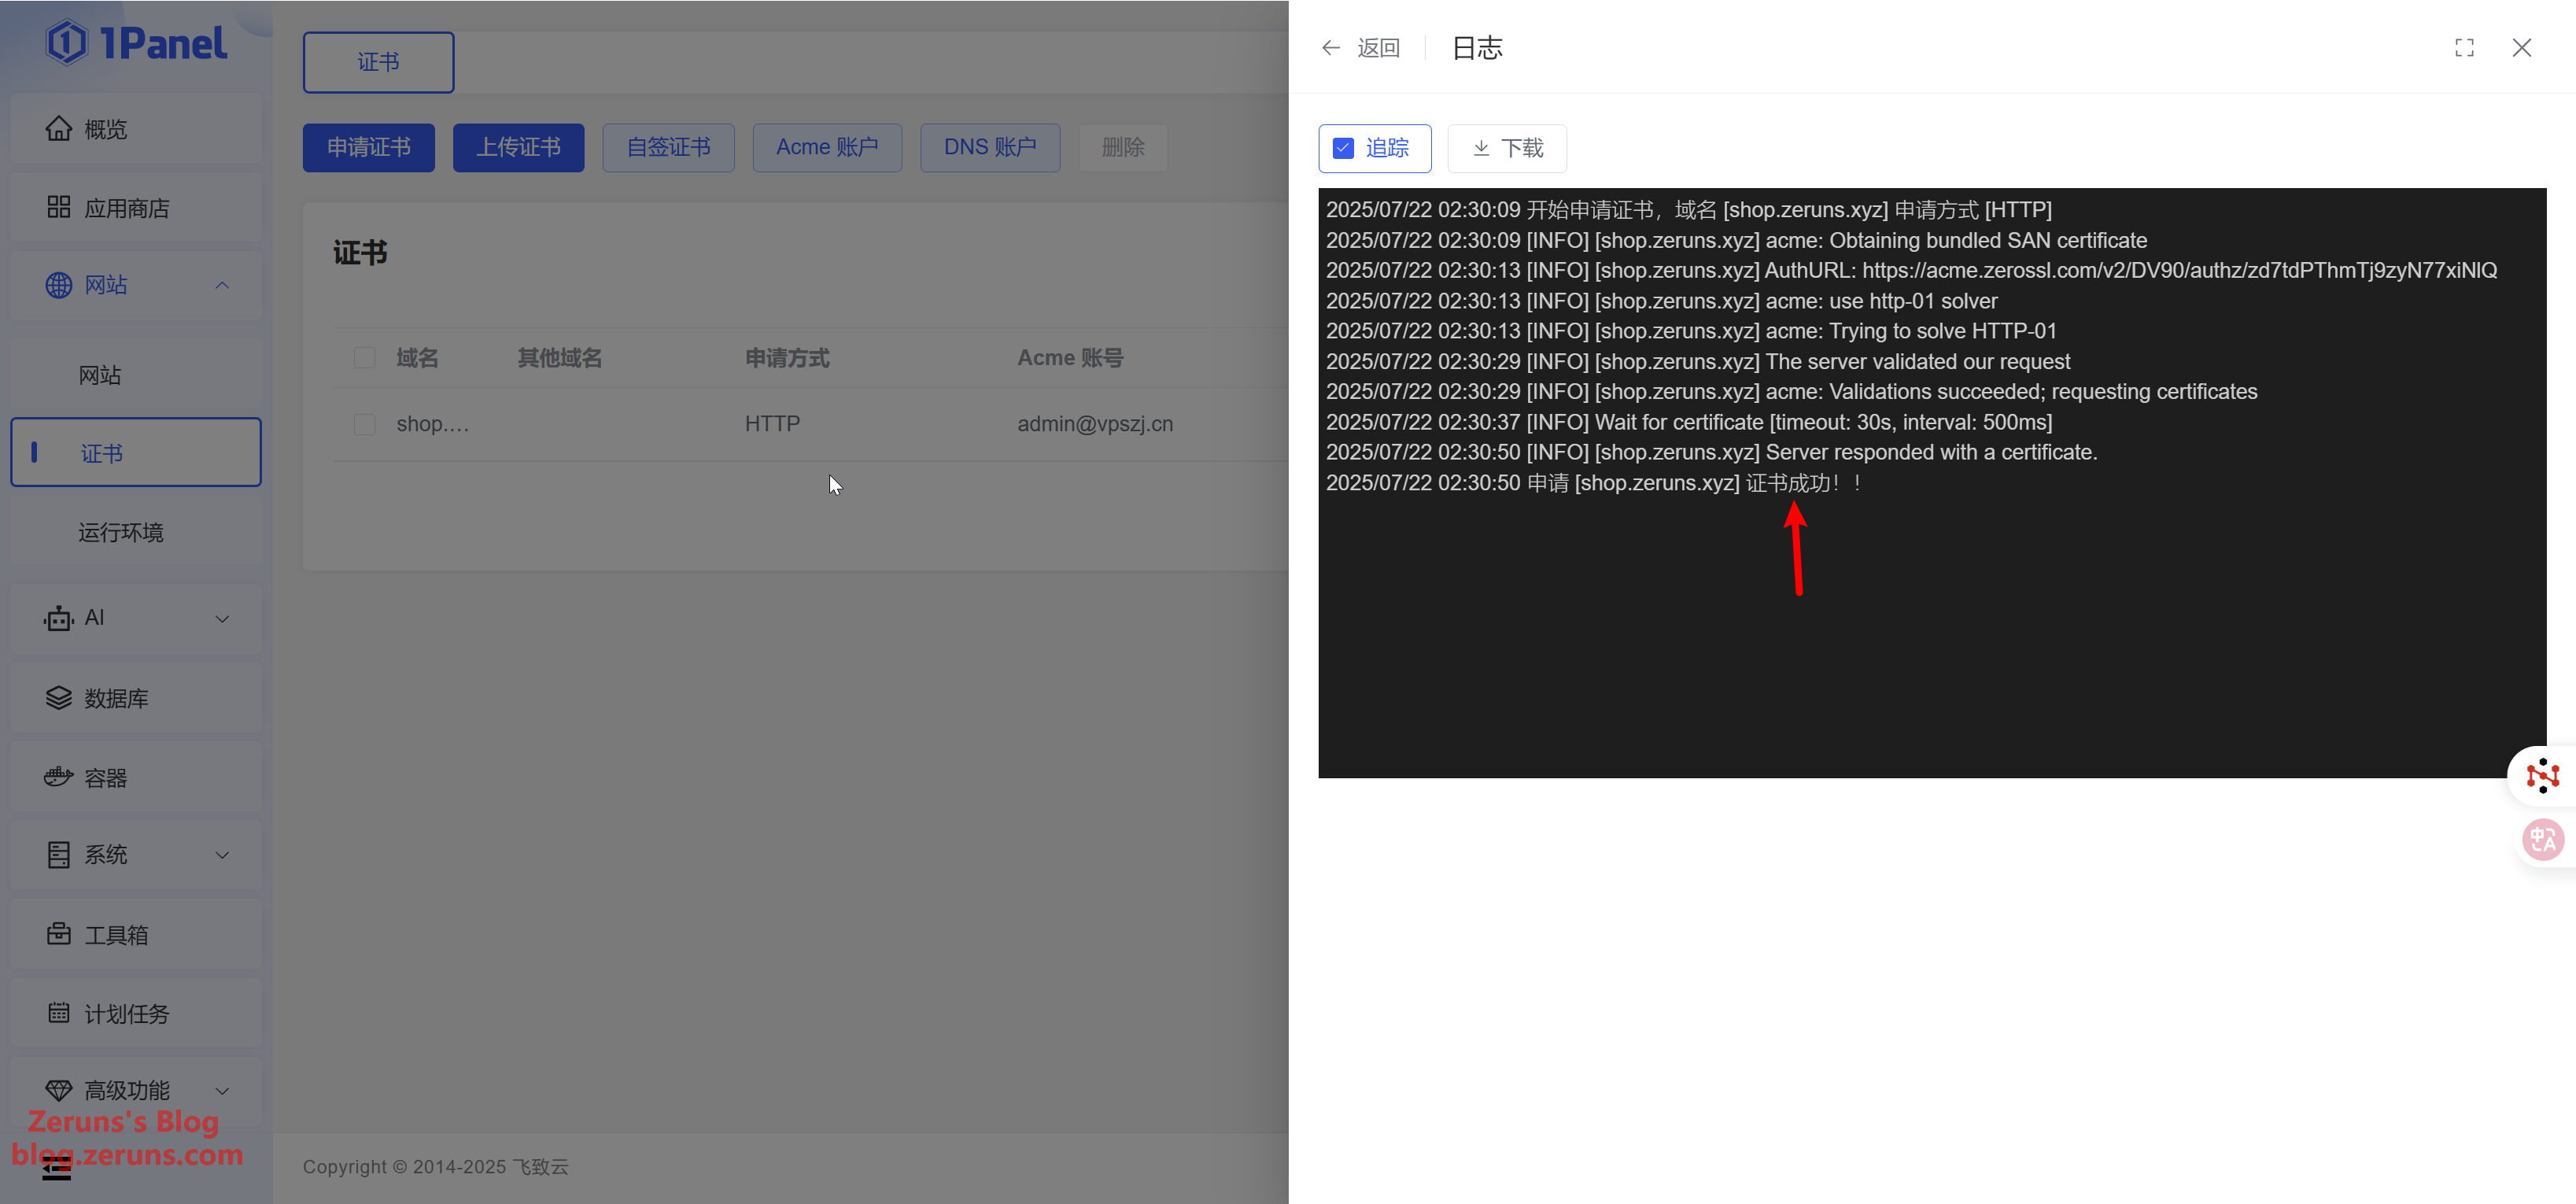
Wait a moment, and you should see a successful certificate application message.
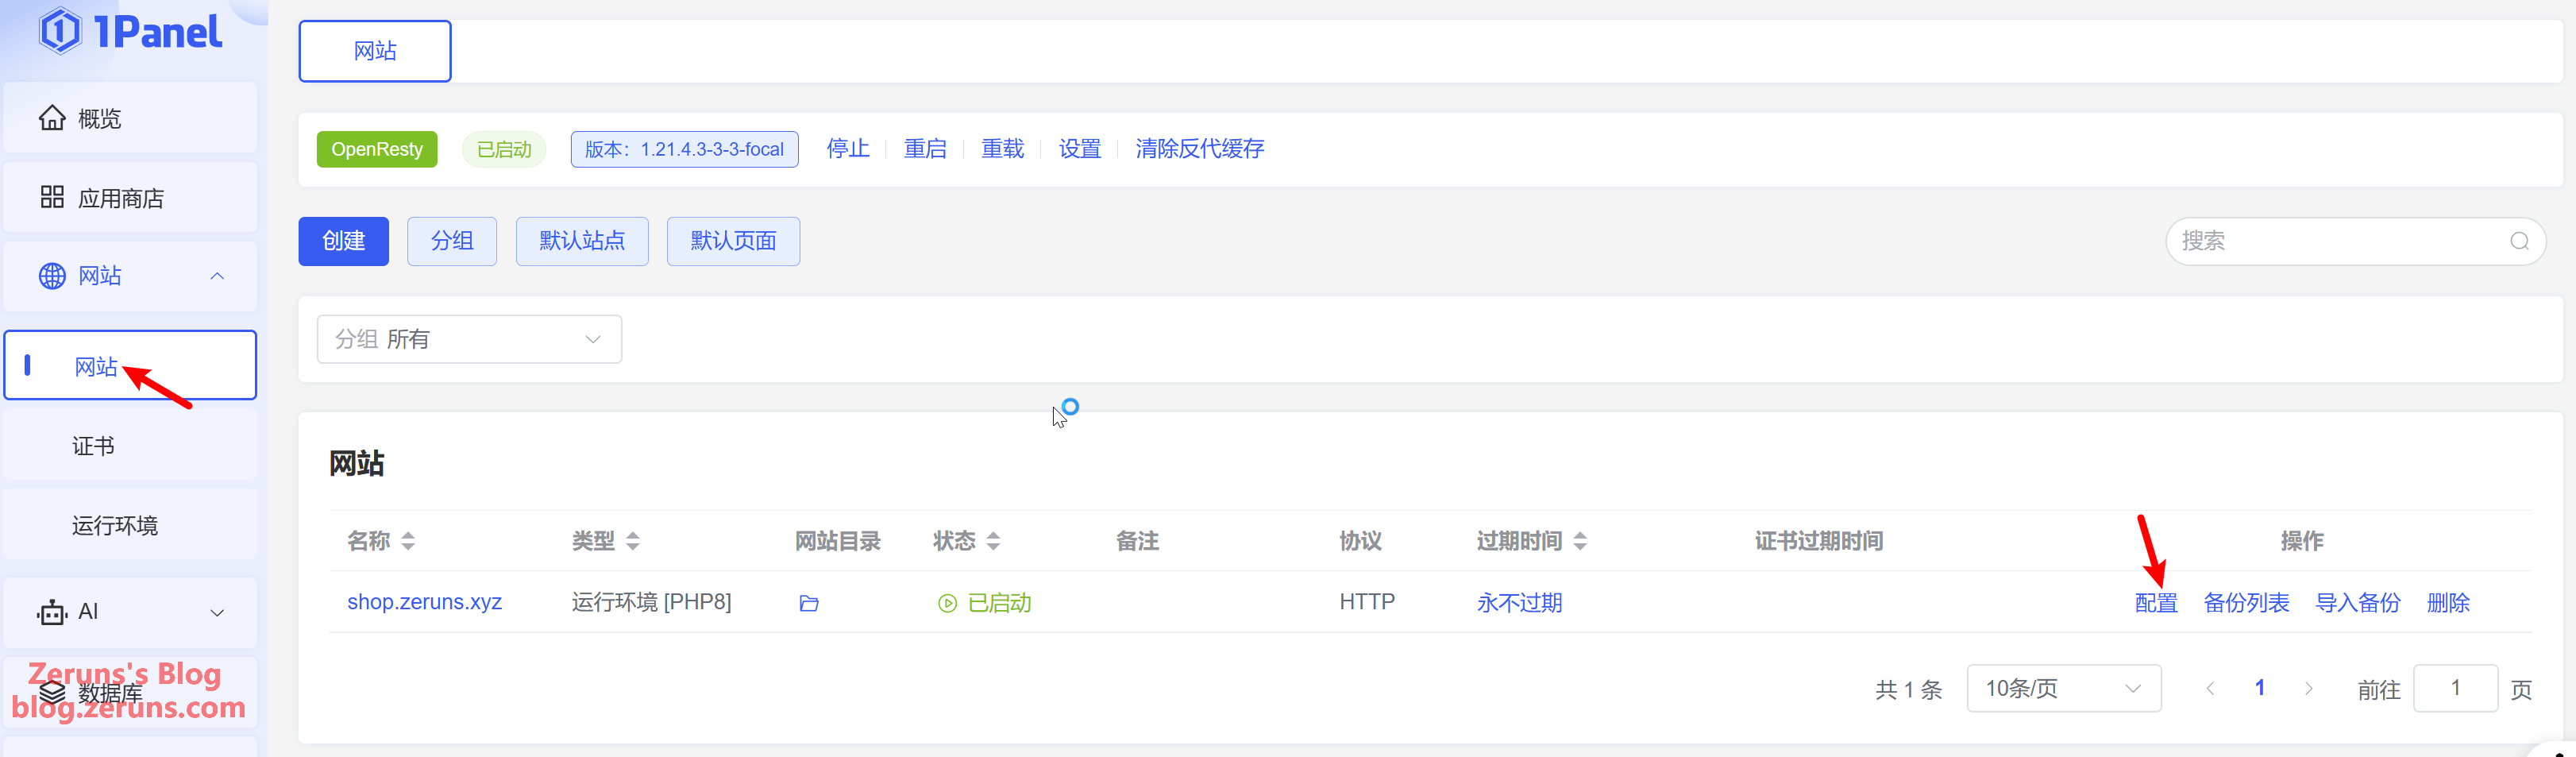
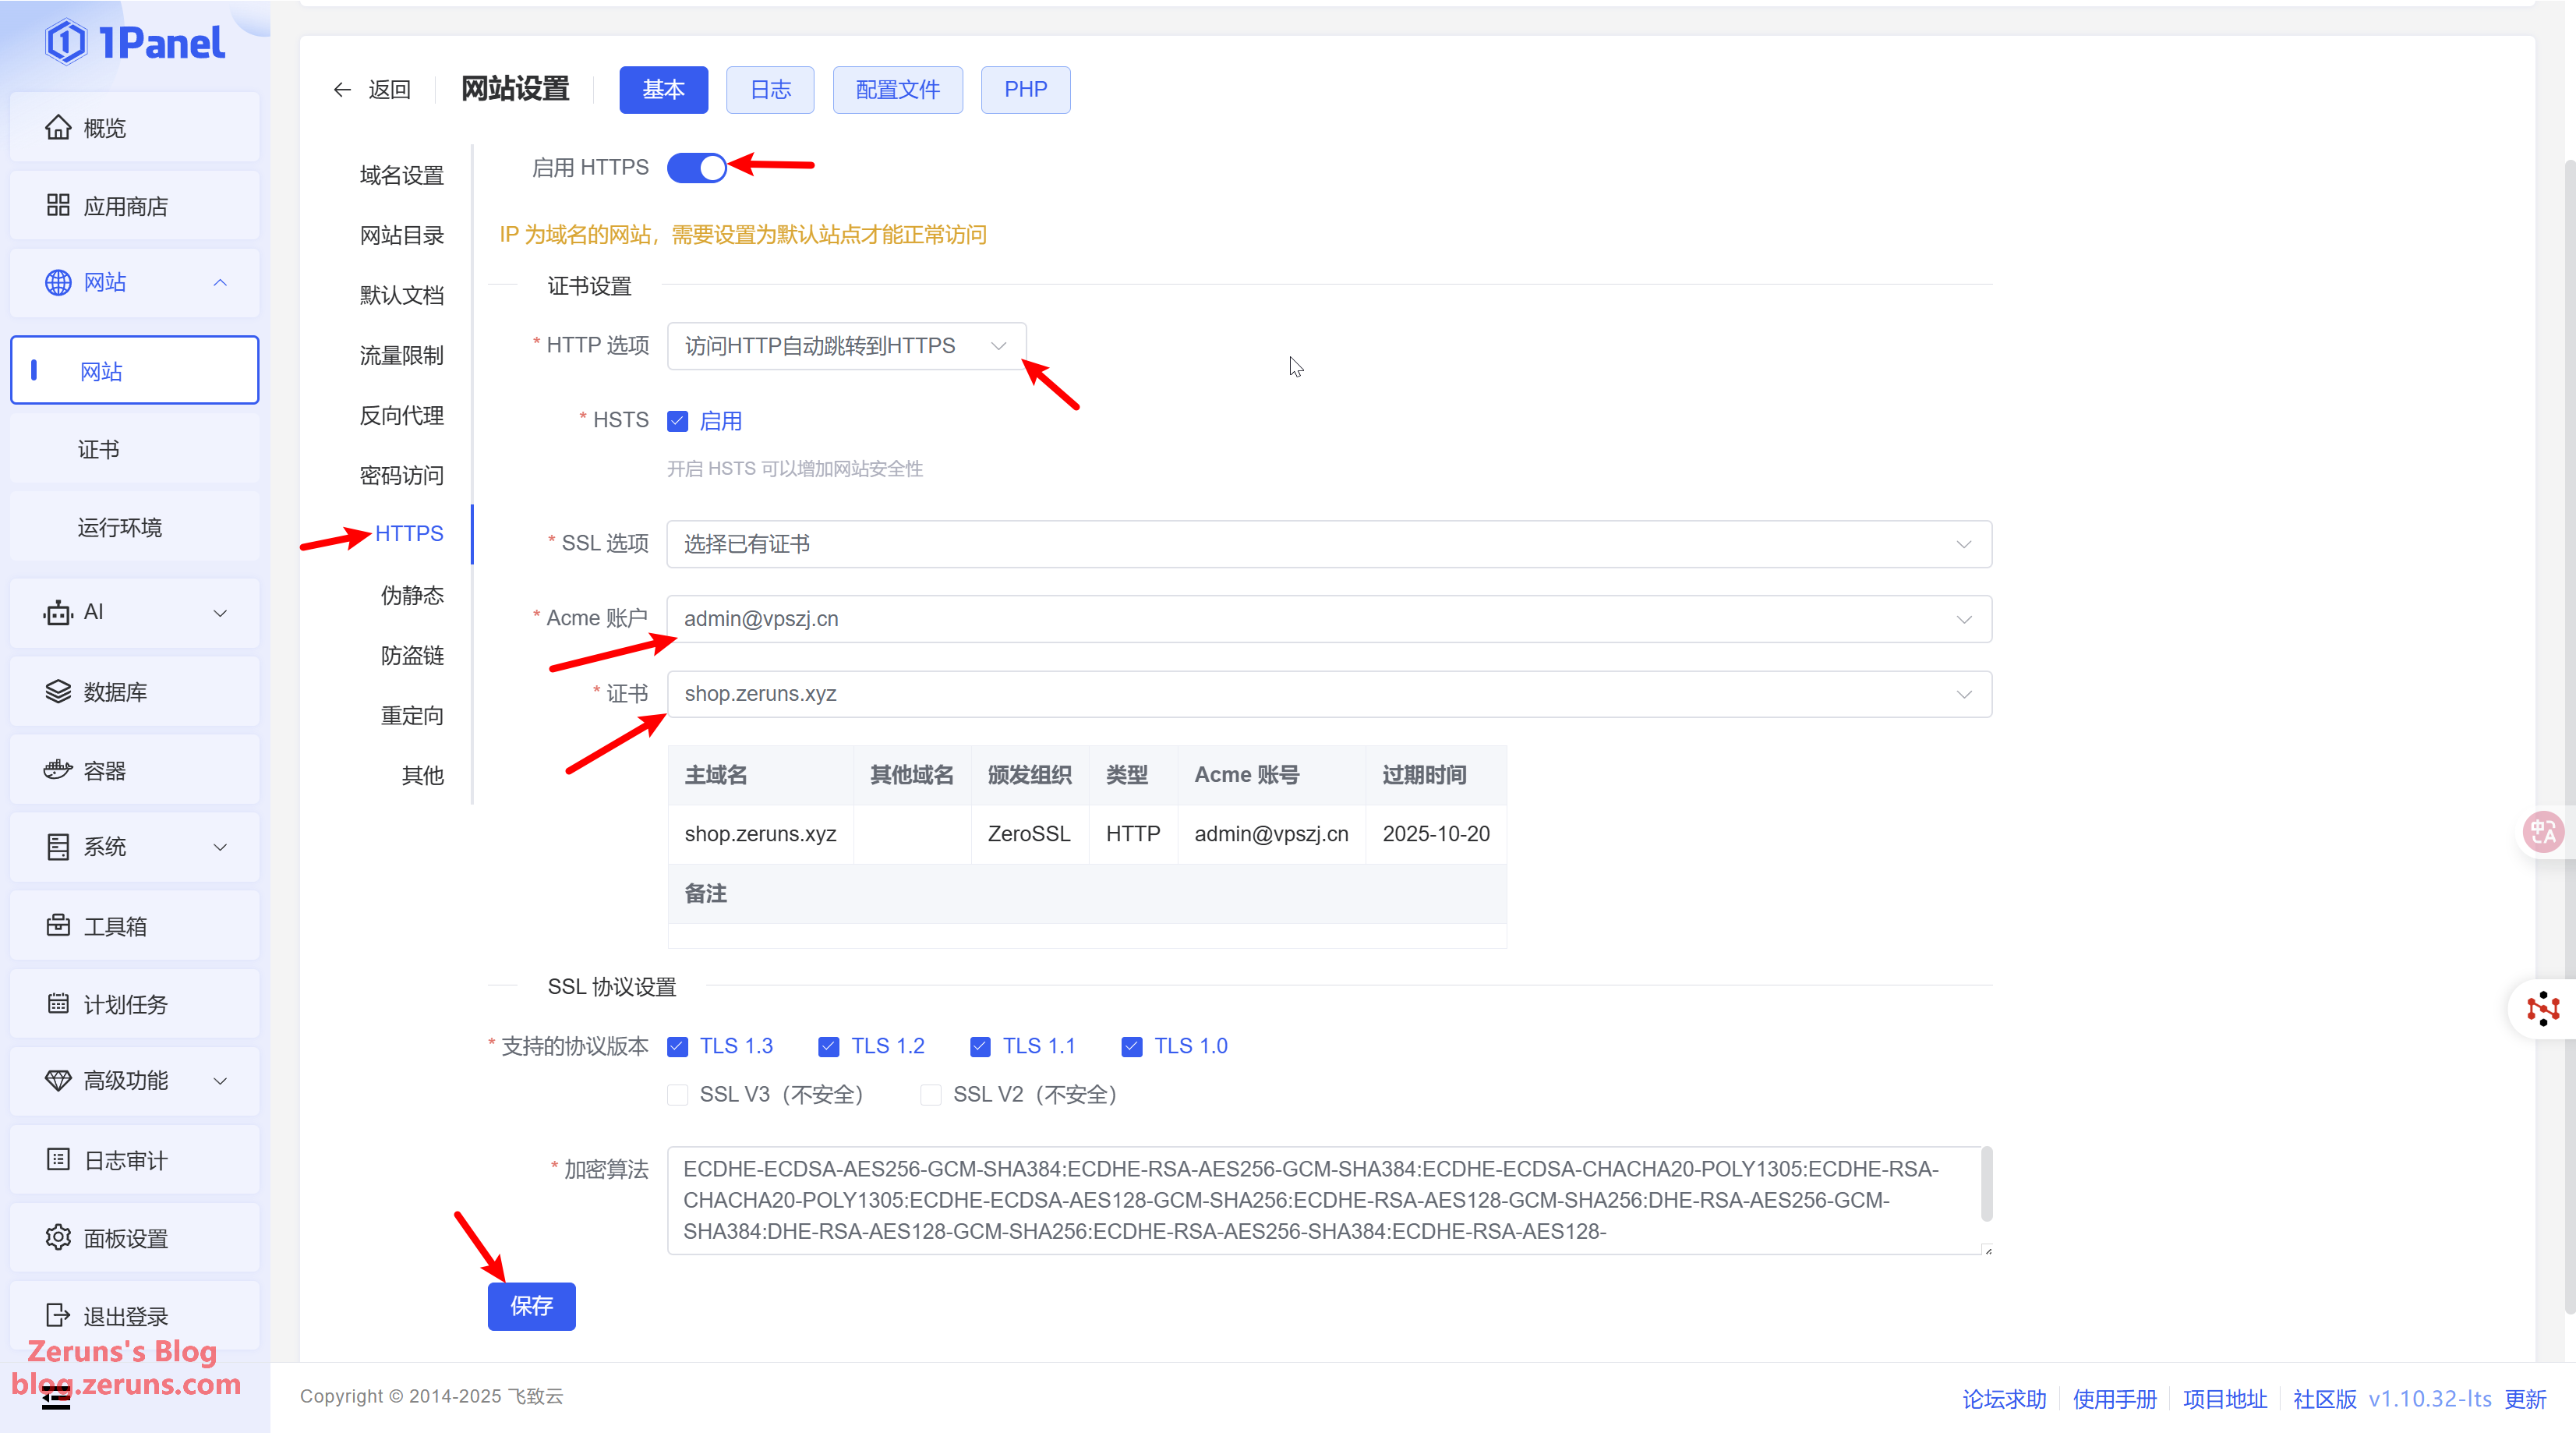
Next, go to Websites → Settings → HTTPS, check Enable HTTPS, choose the SSL certificate you just applied for, and click Save.
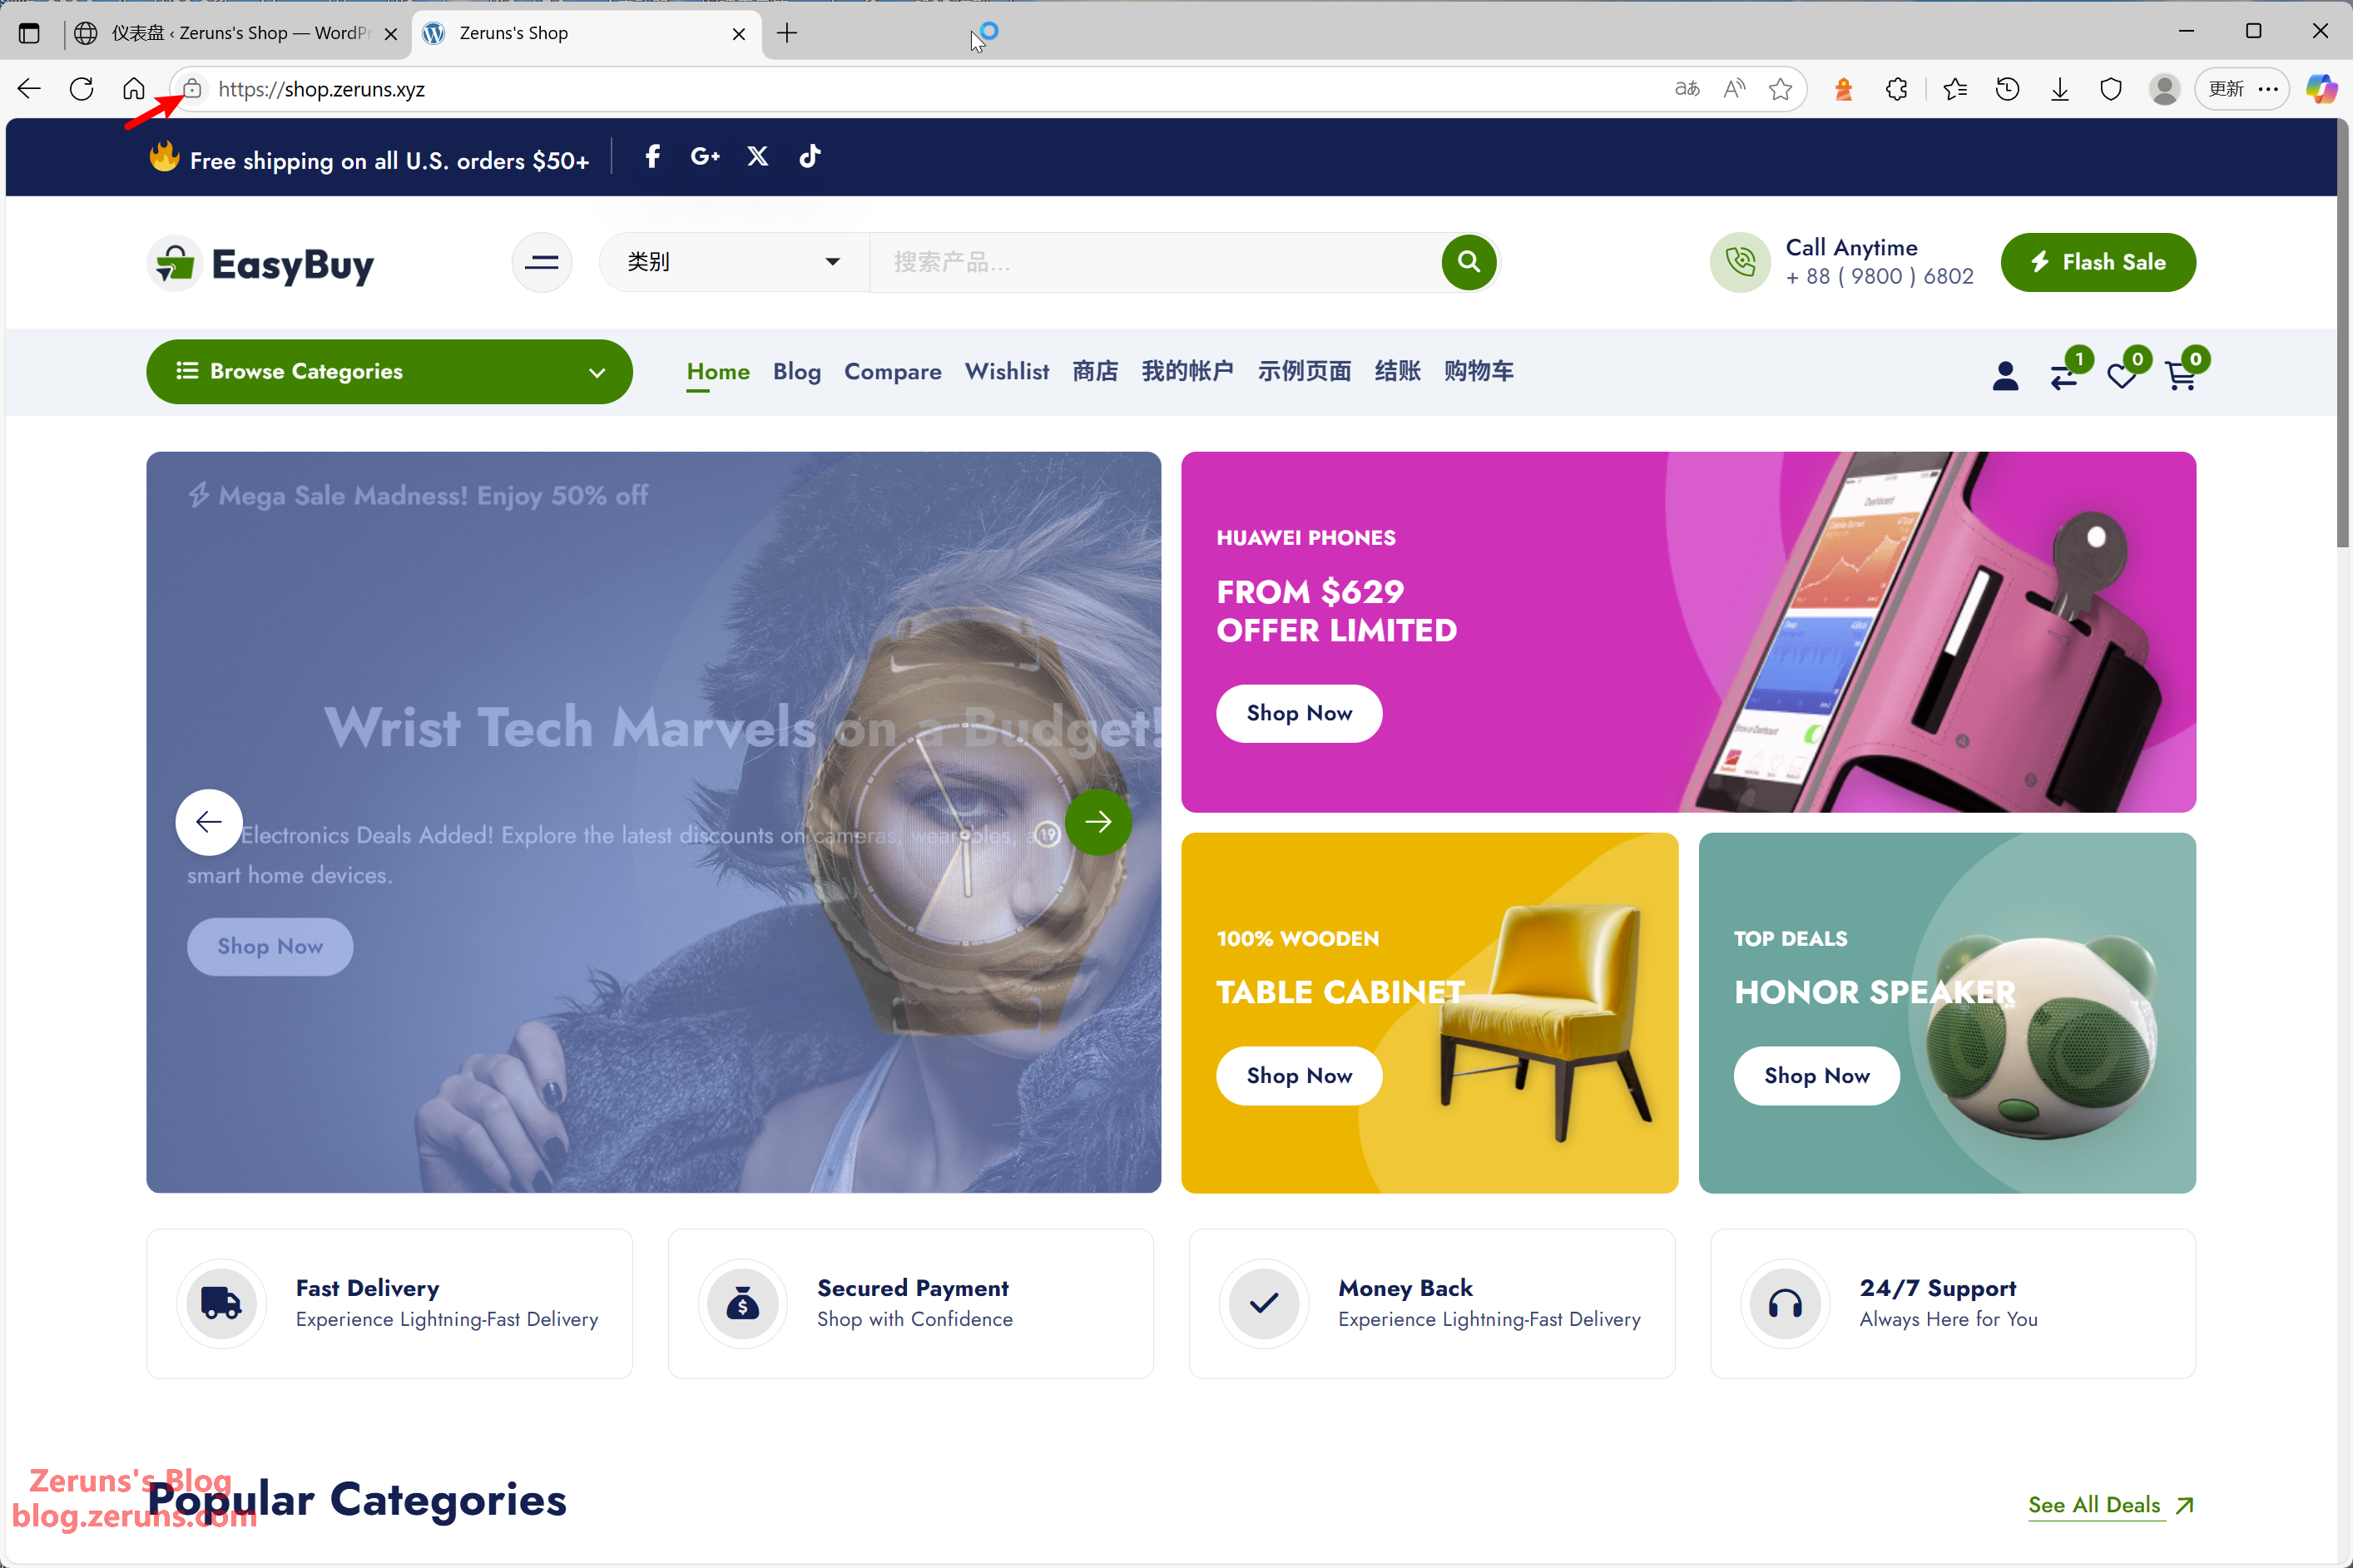
Visit your site again, and you should see a padlock icon in the address bar.
That's the end of the tutorial. You're now free to explore and enjoy the site-building process! For example, you could use CDN services to speed up your site.
Recommended Reading
- Cost-effective VPS/Cloud Server Recommendations:https://blog.zeruns.com/archives/383.html
- Minecraft Server Setup Tutorial: https://blog.zeruns.com/tag/mc/
- Installing a Coulomb Meter on an E-bike: https://blog.zeruns.top/archives/60.html
- ZGRL-80 Photography Light Teardown & Circuit Analysis: https://blog.zeruns.top/archives/62.html
- Review of a ¥88,000 Server Featuring Intel Xeon 6980P, 128 Cores, 256 Threads: https://blog.zeruns.top/archives/63.html
- Open-source 140W+65W Buck-Boost PD3.1 Fast Charging Module (2C+1A Ports), IP6557+IP6538: https://blog.zeruns.top/archives/11


Comment Section