


Recently, I installed a Coulomb counter on my electric bike and wanted to share the installation process and the results. A Coulomb counter accurately displays the remaining battery percentage and provides real-time data such as charging/discharging power.
My e-bike is a Yadea M16-H, equipped with a 48V 23Ah lead-acid battery.
- Built a small solar power station with three panels, generating 4 kWh per day: https://blog.zeruns.top/archives/55.html
- Showcasing my home network cabinet and setup: https://blog.zeruns.top/archives/48.html
- NanoKVM hands-on and teardown, enabling BMC/IPMI-like remote control on regular PCs: https://blog.zeruns.top/archives/26.html
What is a Coulomb Counter?
A Coulomb counter (also known as an ampere-hour meter) is a device that calculates battery capacity through current integration. The core principle involves placing a measuring device in series with the battery circuit to monitor the charge/discharge current in real time and integrate it over time (i.e., Q = \int i , dt ), thereby determining the total charge flow (in Ah).
- How it works:
- Set the battery's total capacity during installation (e.g., 20Ah);
- Track energy input during charging and energy output during discharging;
- Remaining capacity (SOC) is calculated as:
\text{SOC} = \frac{\text{Total Capacity} - \text{Used Capacity}}{\text{Total Capacity}} \times 100\%
- Display features: Real-time display of voltage, current, remaining battery percentage, power input/output, and estimated time remaining.
- Compared to traditional voltmeters: Regular voltmeters estimate charge based on open-circuit voltage, which is easily affected by load and temperature—causing false readings. Coulomb counters directly measure charge, offering much higher accuracy.
Why Use a Coulomb Counter?
1. No More "Phantom Battery Anxiety"
Traditional e-bike gauges estimate charge based on voltage:
- Shows 100% full, but actual usable capacity may be only 80% (due to aging or temperature);
- Sudden drops during rides: voltage plummets, making the battery gauge plunge, while actual remaining range might be under 5 km.
A Coulomb counter smooths out the display using current integration, reducing the risk of getting stranded.
2. Accurate Range Estimation
With past charge/discharge data (like charge amount, riding power, temperature), Coulomb counters can estimate remaining range. For example:
- At 50% battery, with 200W discharge power and 48V battery:
Remaining runtime ≈ (50%×20Ah×48V)/200W ≈ 2.4 hours (approx. 50 km).
This feature is especially valuable for long-distance or frequent riders.
3. Battery Health Management
- Overcharge/over-discharge protection: By monitoring current direction (positive for charge, negative for discharge), you can set warning thresholds (e.g., alert when under 20%).
- Capacity degradation alerts: Over time, it compares initial and current capacity to indicate when a battery replacement might be needed.
4. Modding Flexibility & Cost-Effectiveness
- Non-invasive installation: Most Coulomb counters connect via battery terminals or in parallel with existing lines—no rewiring required.
- Affordable: Entry-level devices cost around ¥100, offering professional-level monitoring without needing a new battery or high-end BMS.
Display Examples
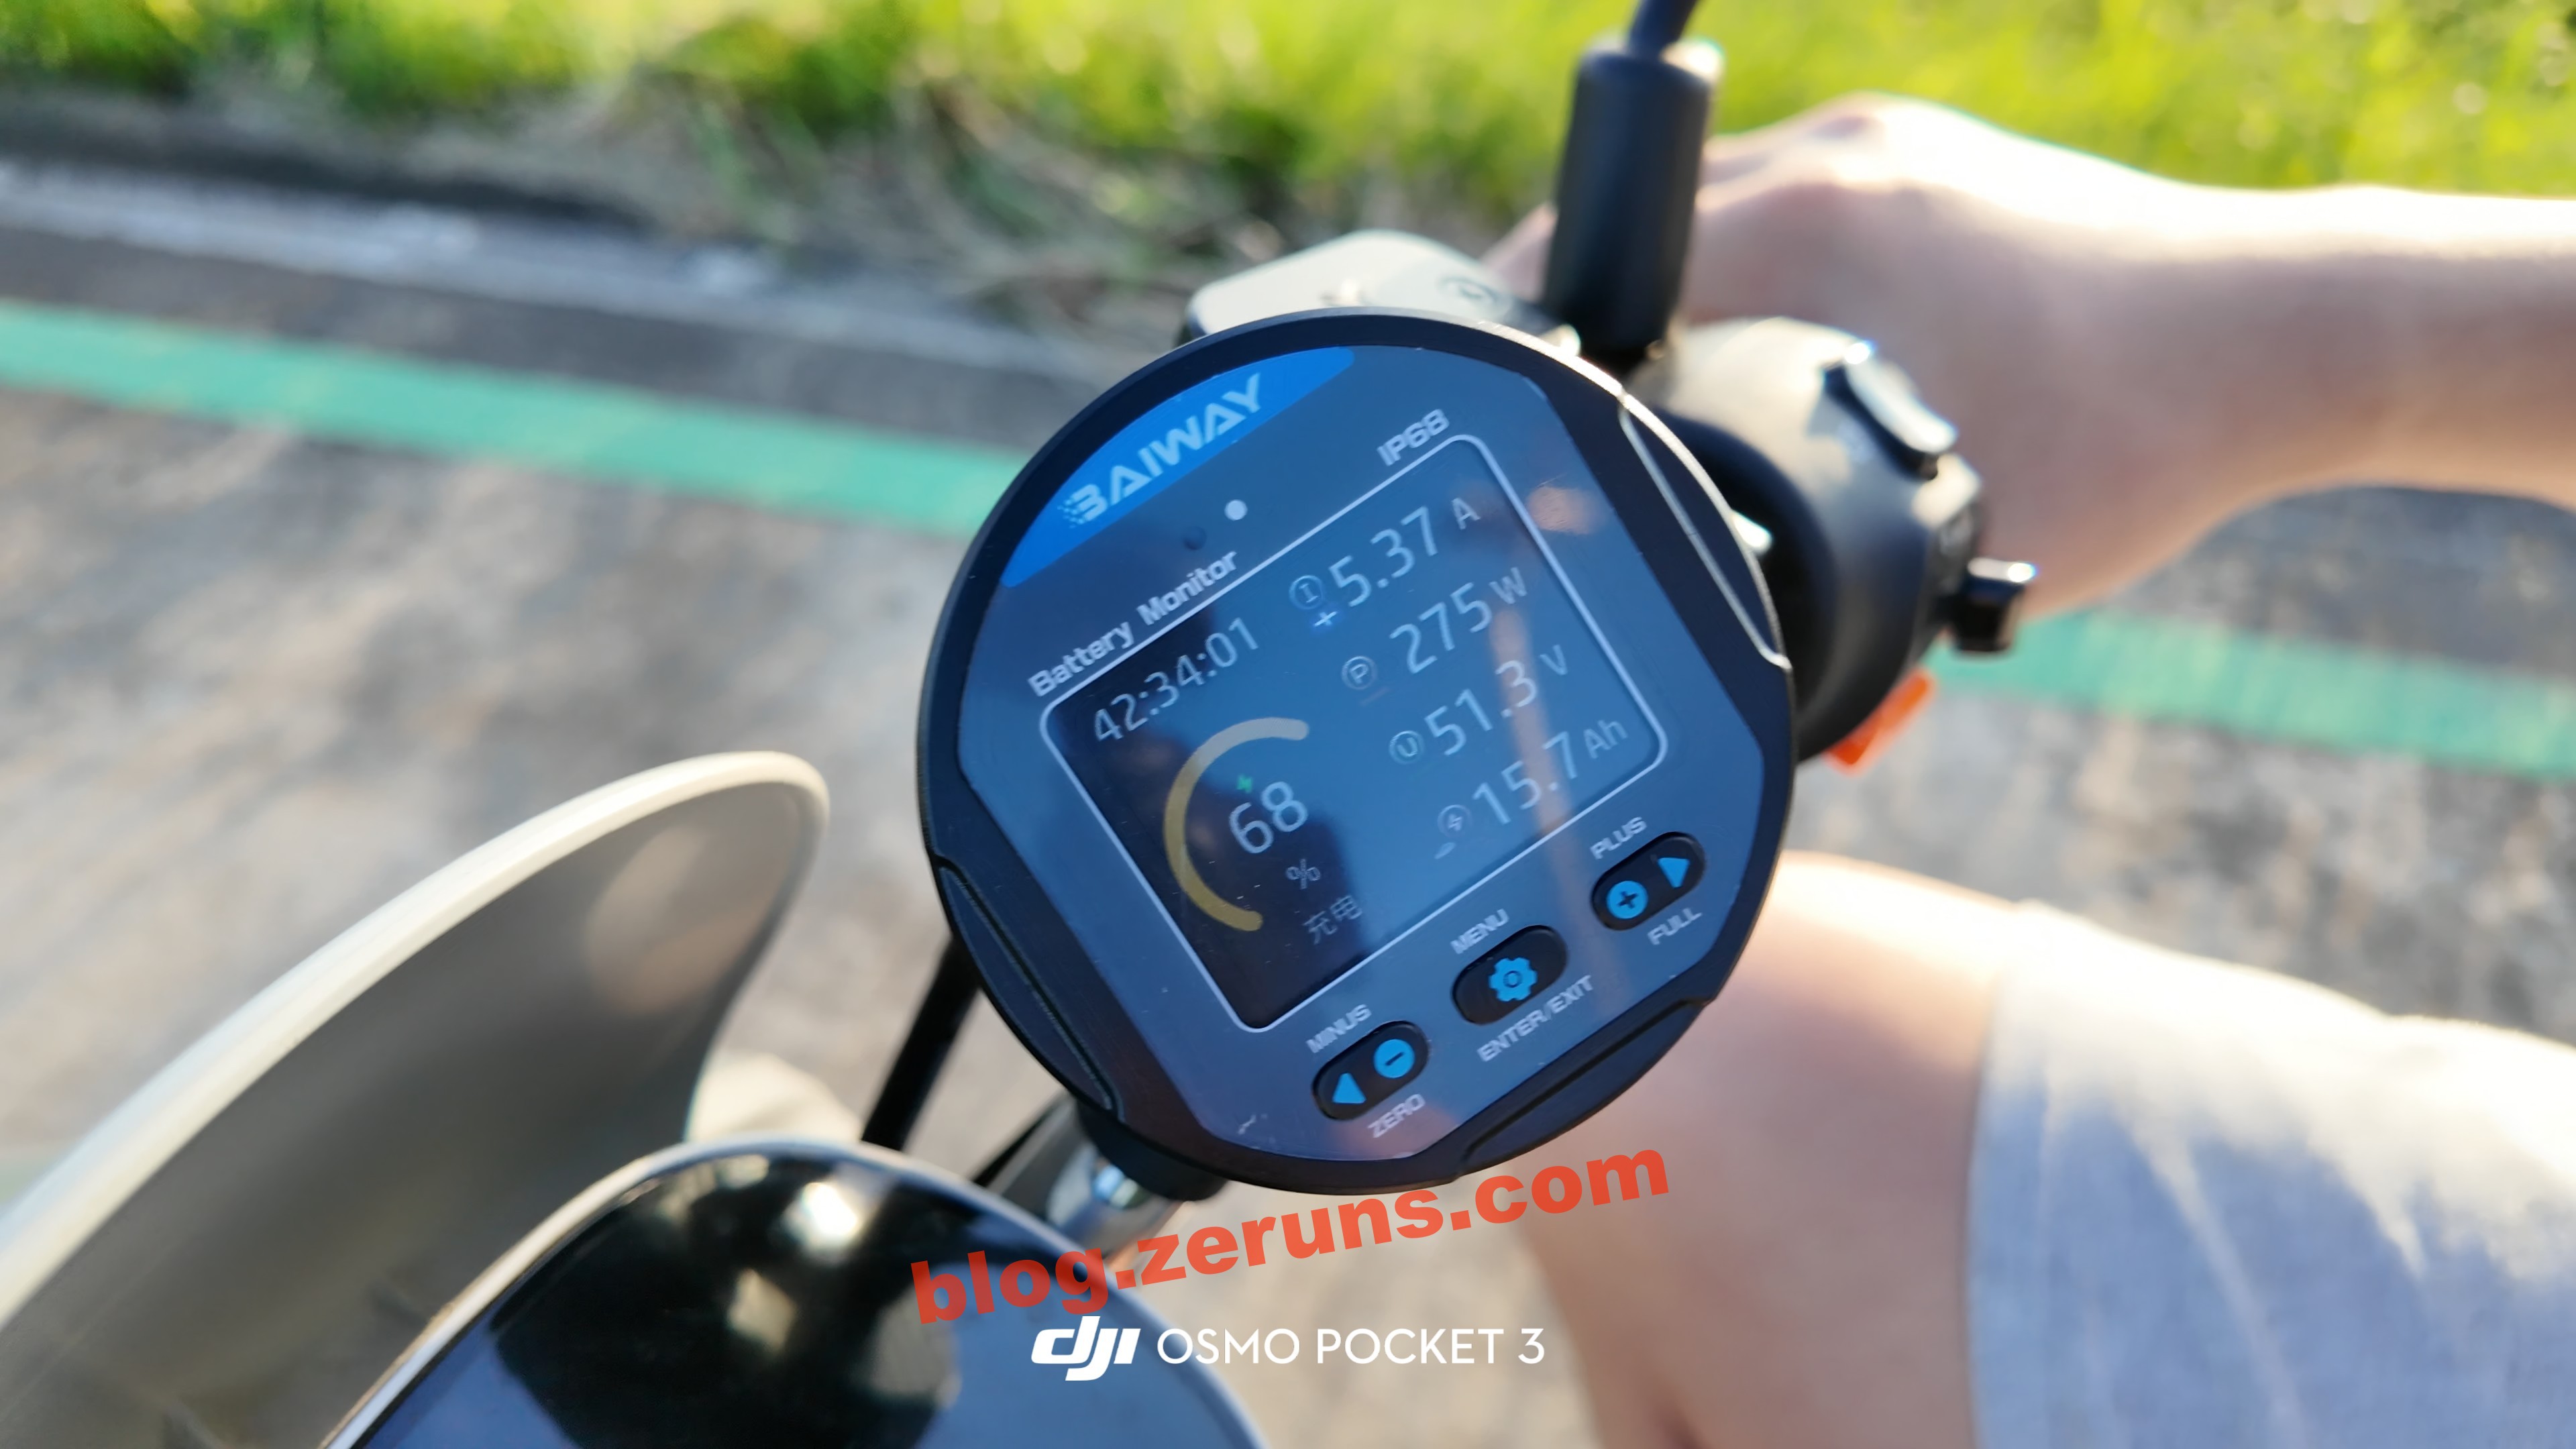
During riding, the display shows remaining battery percentage, discharge current, power output, battery voltage, and remaining capacity in Ah. My bike's motor reaches up to 1.4 kW under full load.


When braking, the regenerative braking kicks in, showing about 275W of charging power.

Charging via wall charger:

Where to Buy
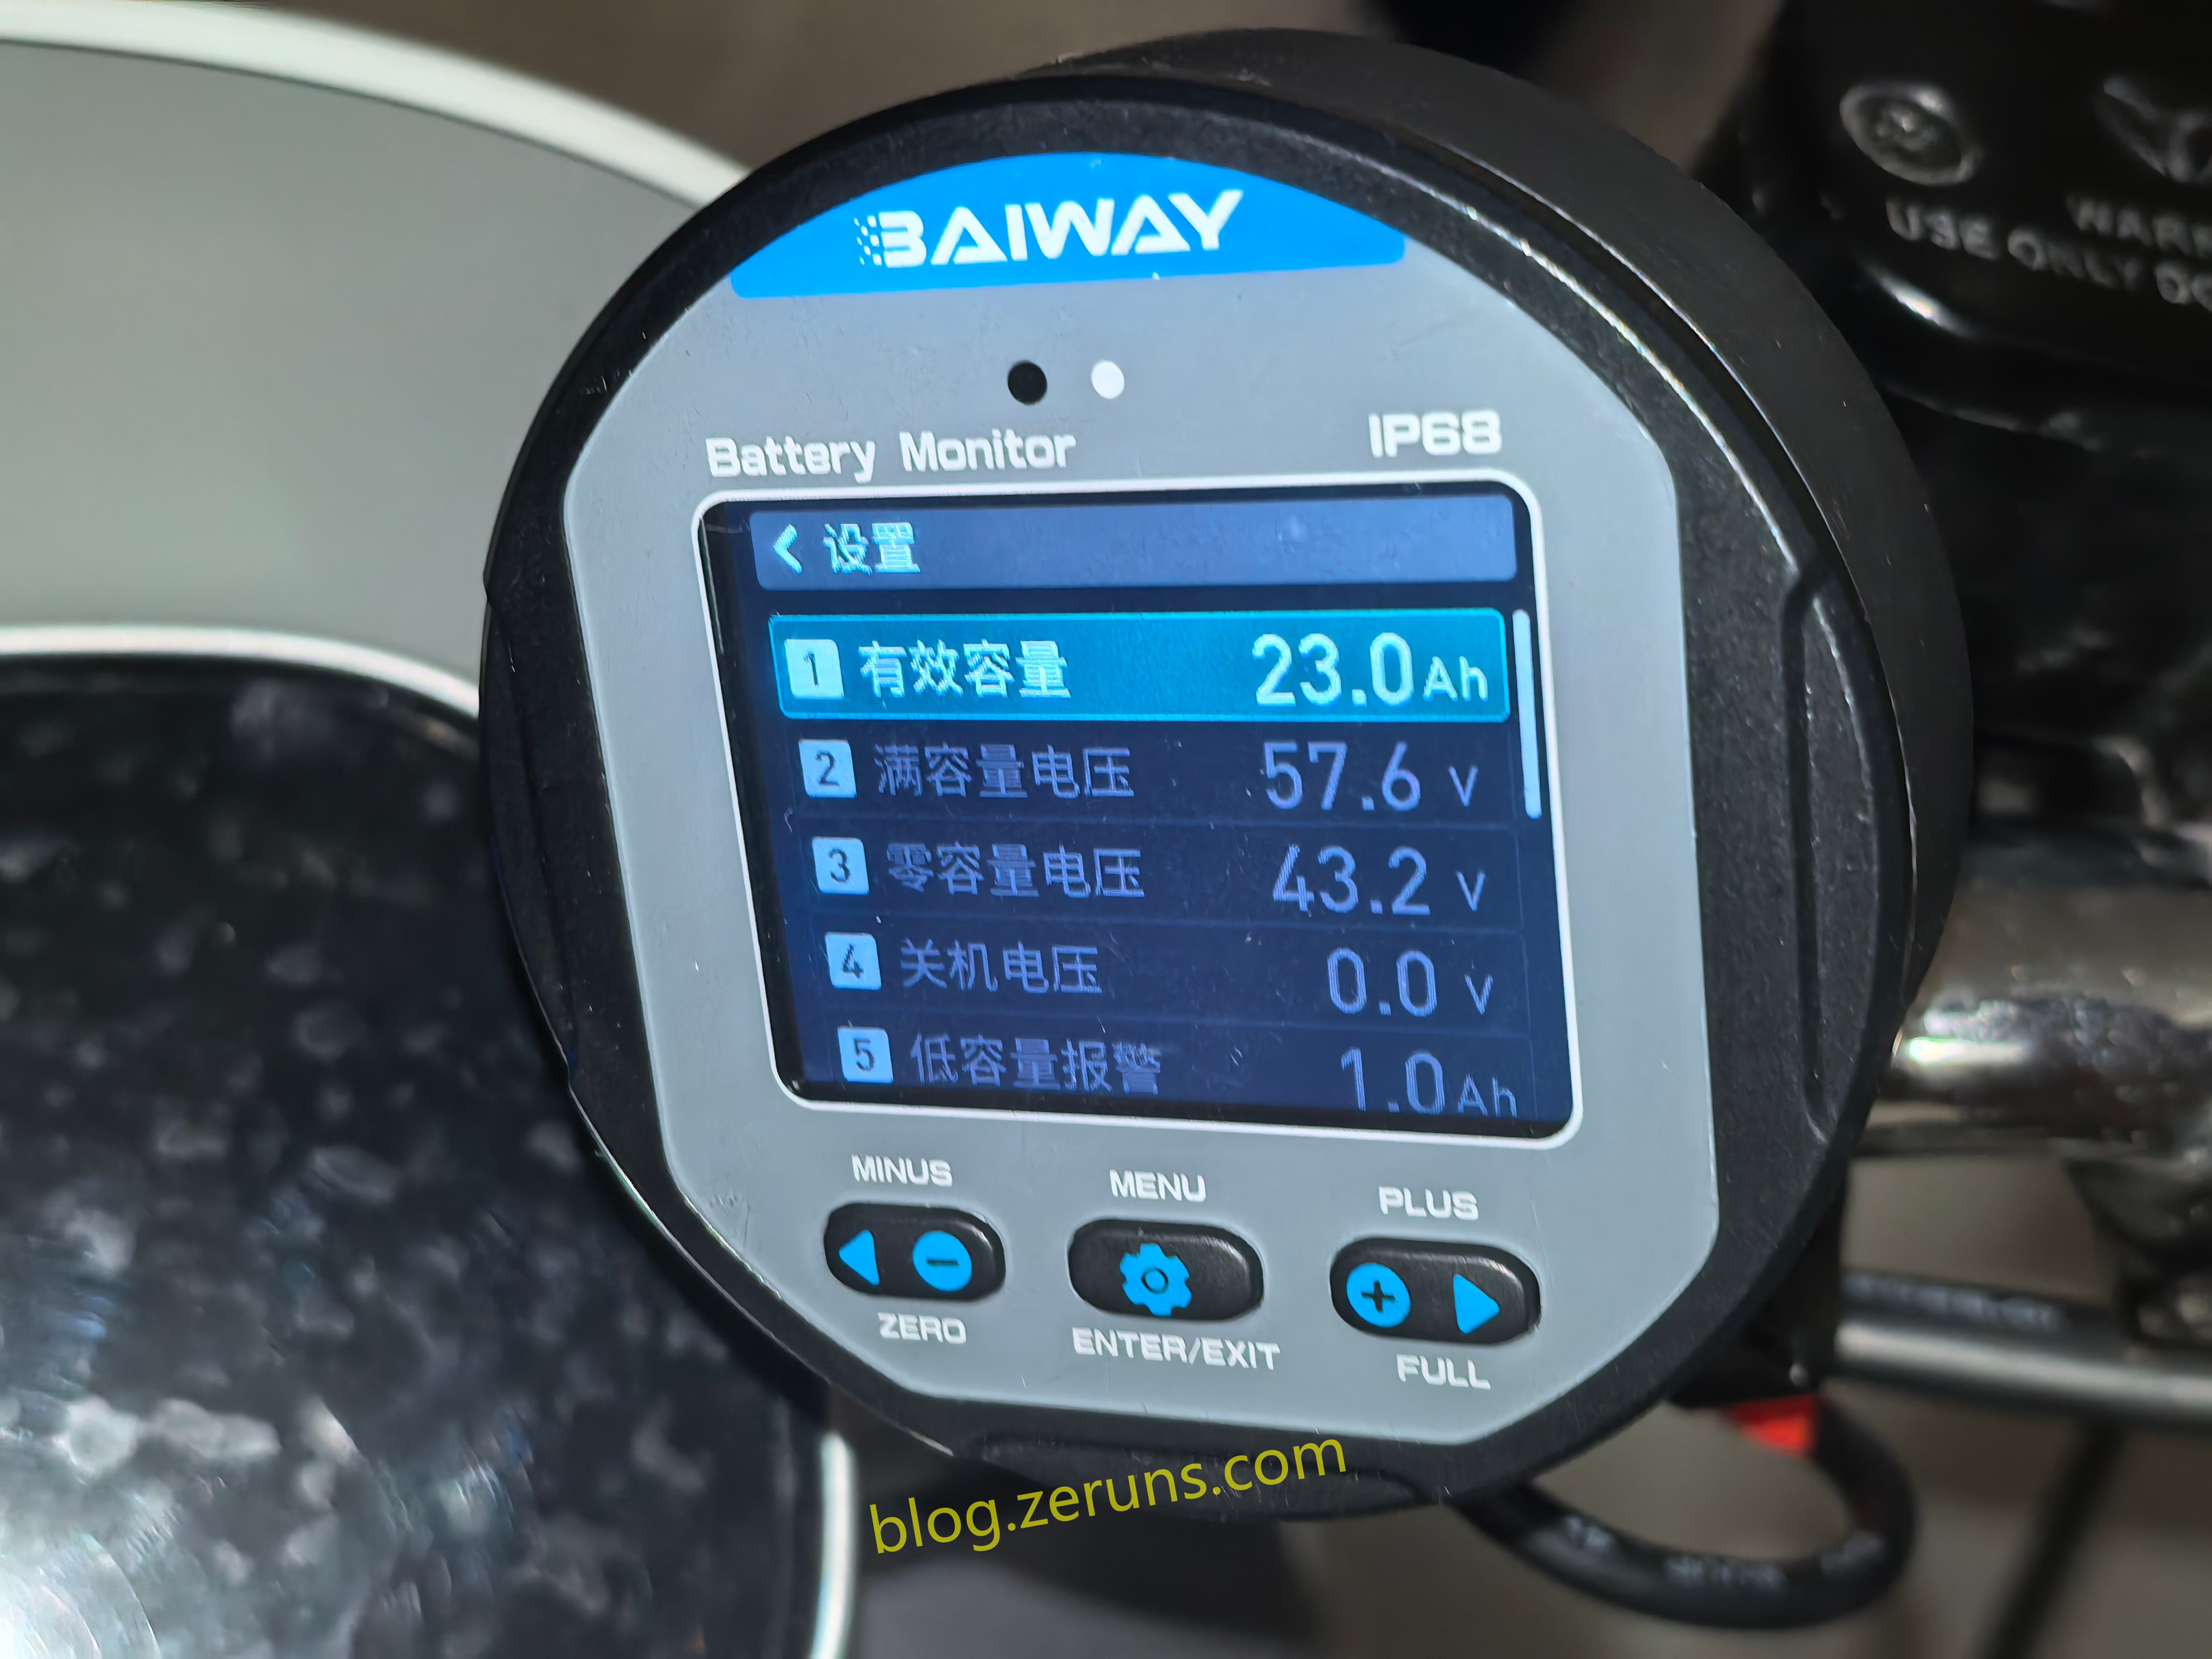
I bought the TR24 Coulomb counter from Baiway. It works well overall, although the one I received has a bug—it tends to crash and go black when entering the settings menu. Everything works fine as long as I stay out of the settings. The seller already sent me a replacement, which hasn't arrived yet.
- Baiway TR24库仑计:https://s.click.taobao.com/C1SY6Er
- KM100A库仑计:https://u.jd.com/2OqUzxe
- BL105F蓝牙防水库仑计:https://u.jd.com/26zCtO7
- 炬为库仑计:https://s.click.taobao.com/nprZhPr
- H56CH霍尔库仑计:https://s.click.taobao.com/6eD36Er
Installation Process
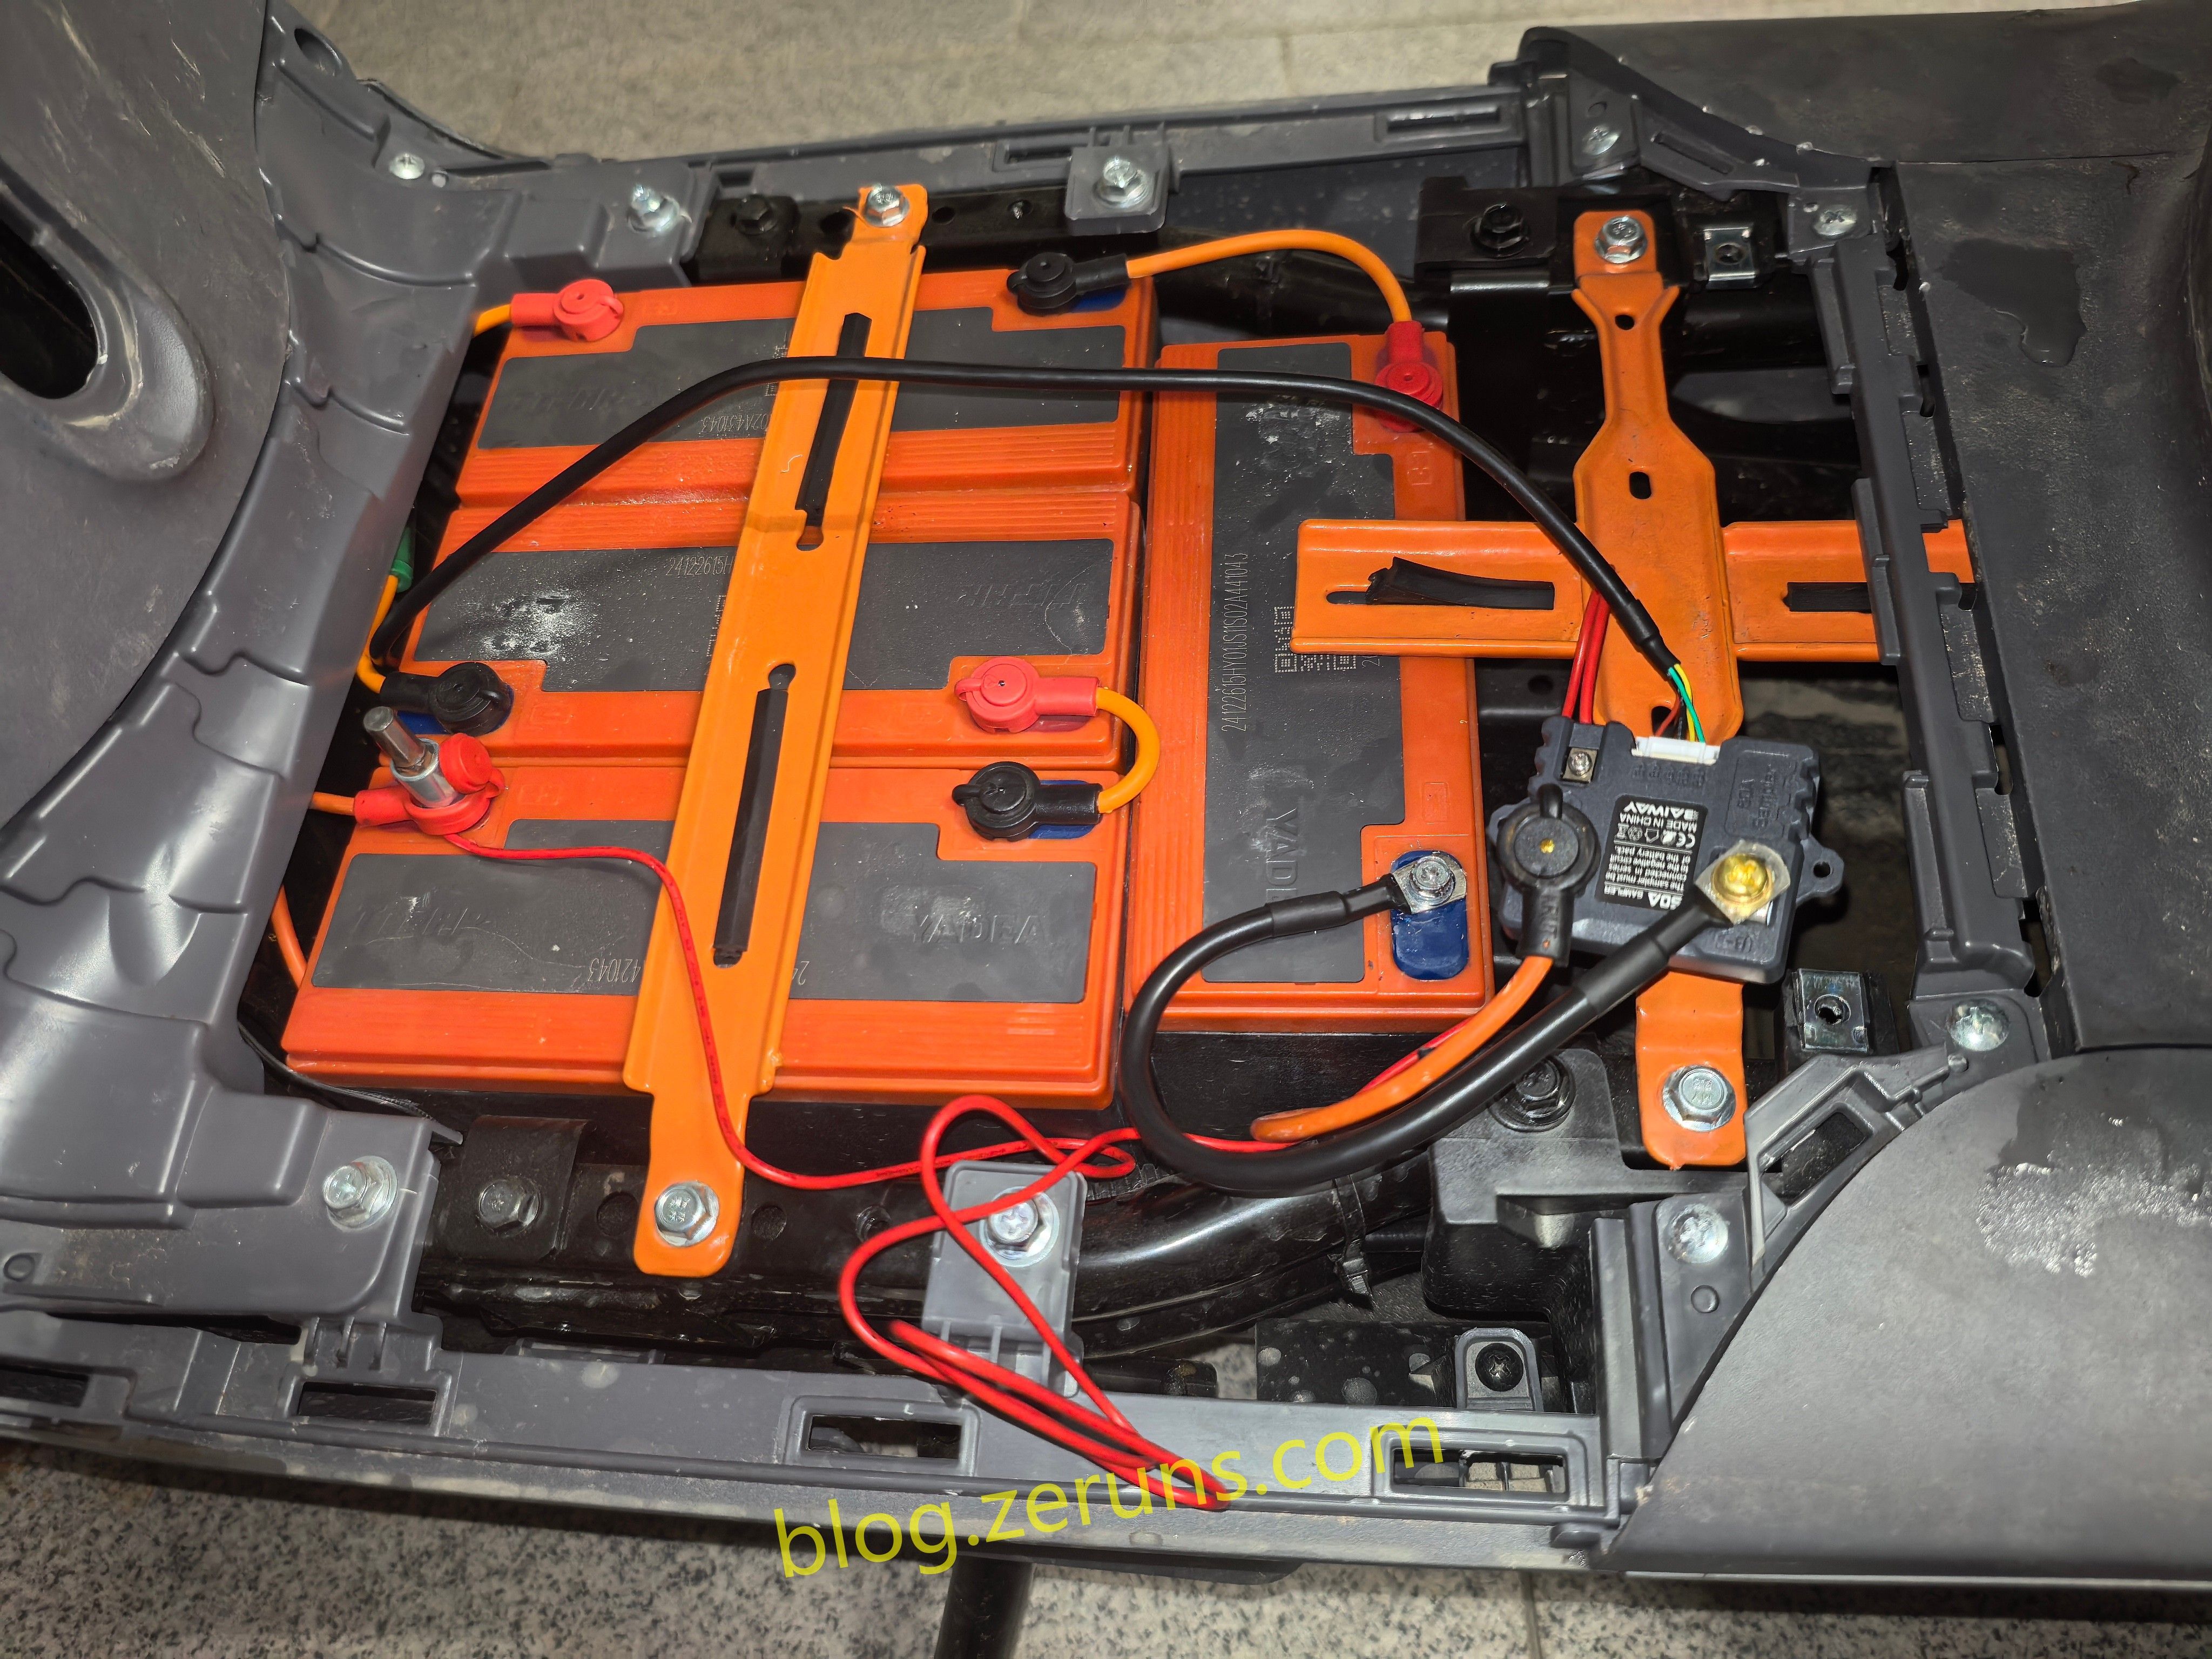
Unscrew the bolts securing the battery compartment cover.

Remove the battery cover.

Unscrew and remove the front panel of the e-bike.
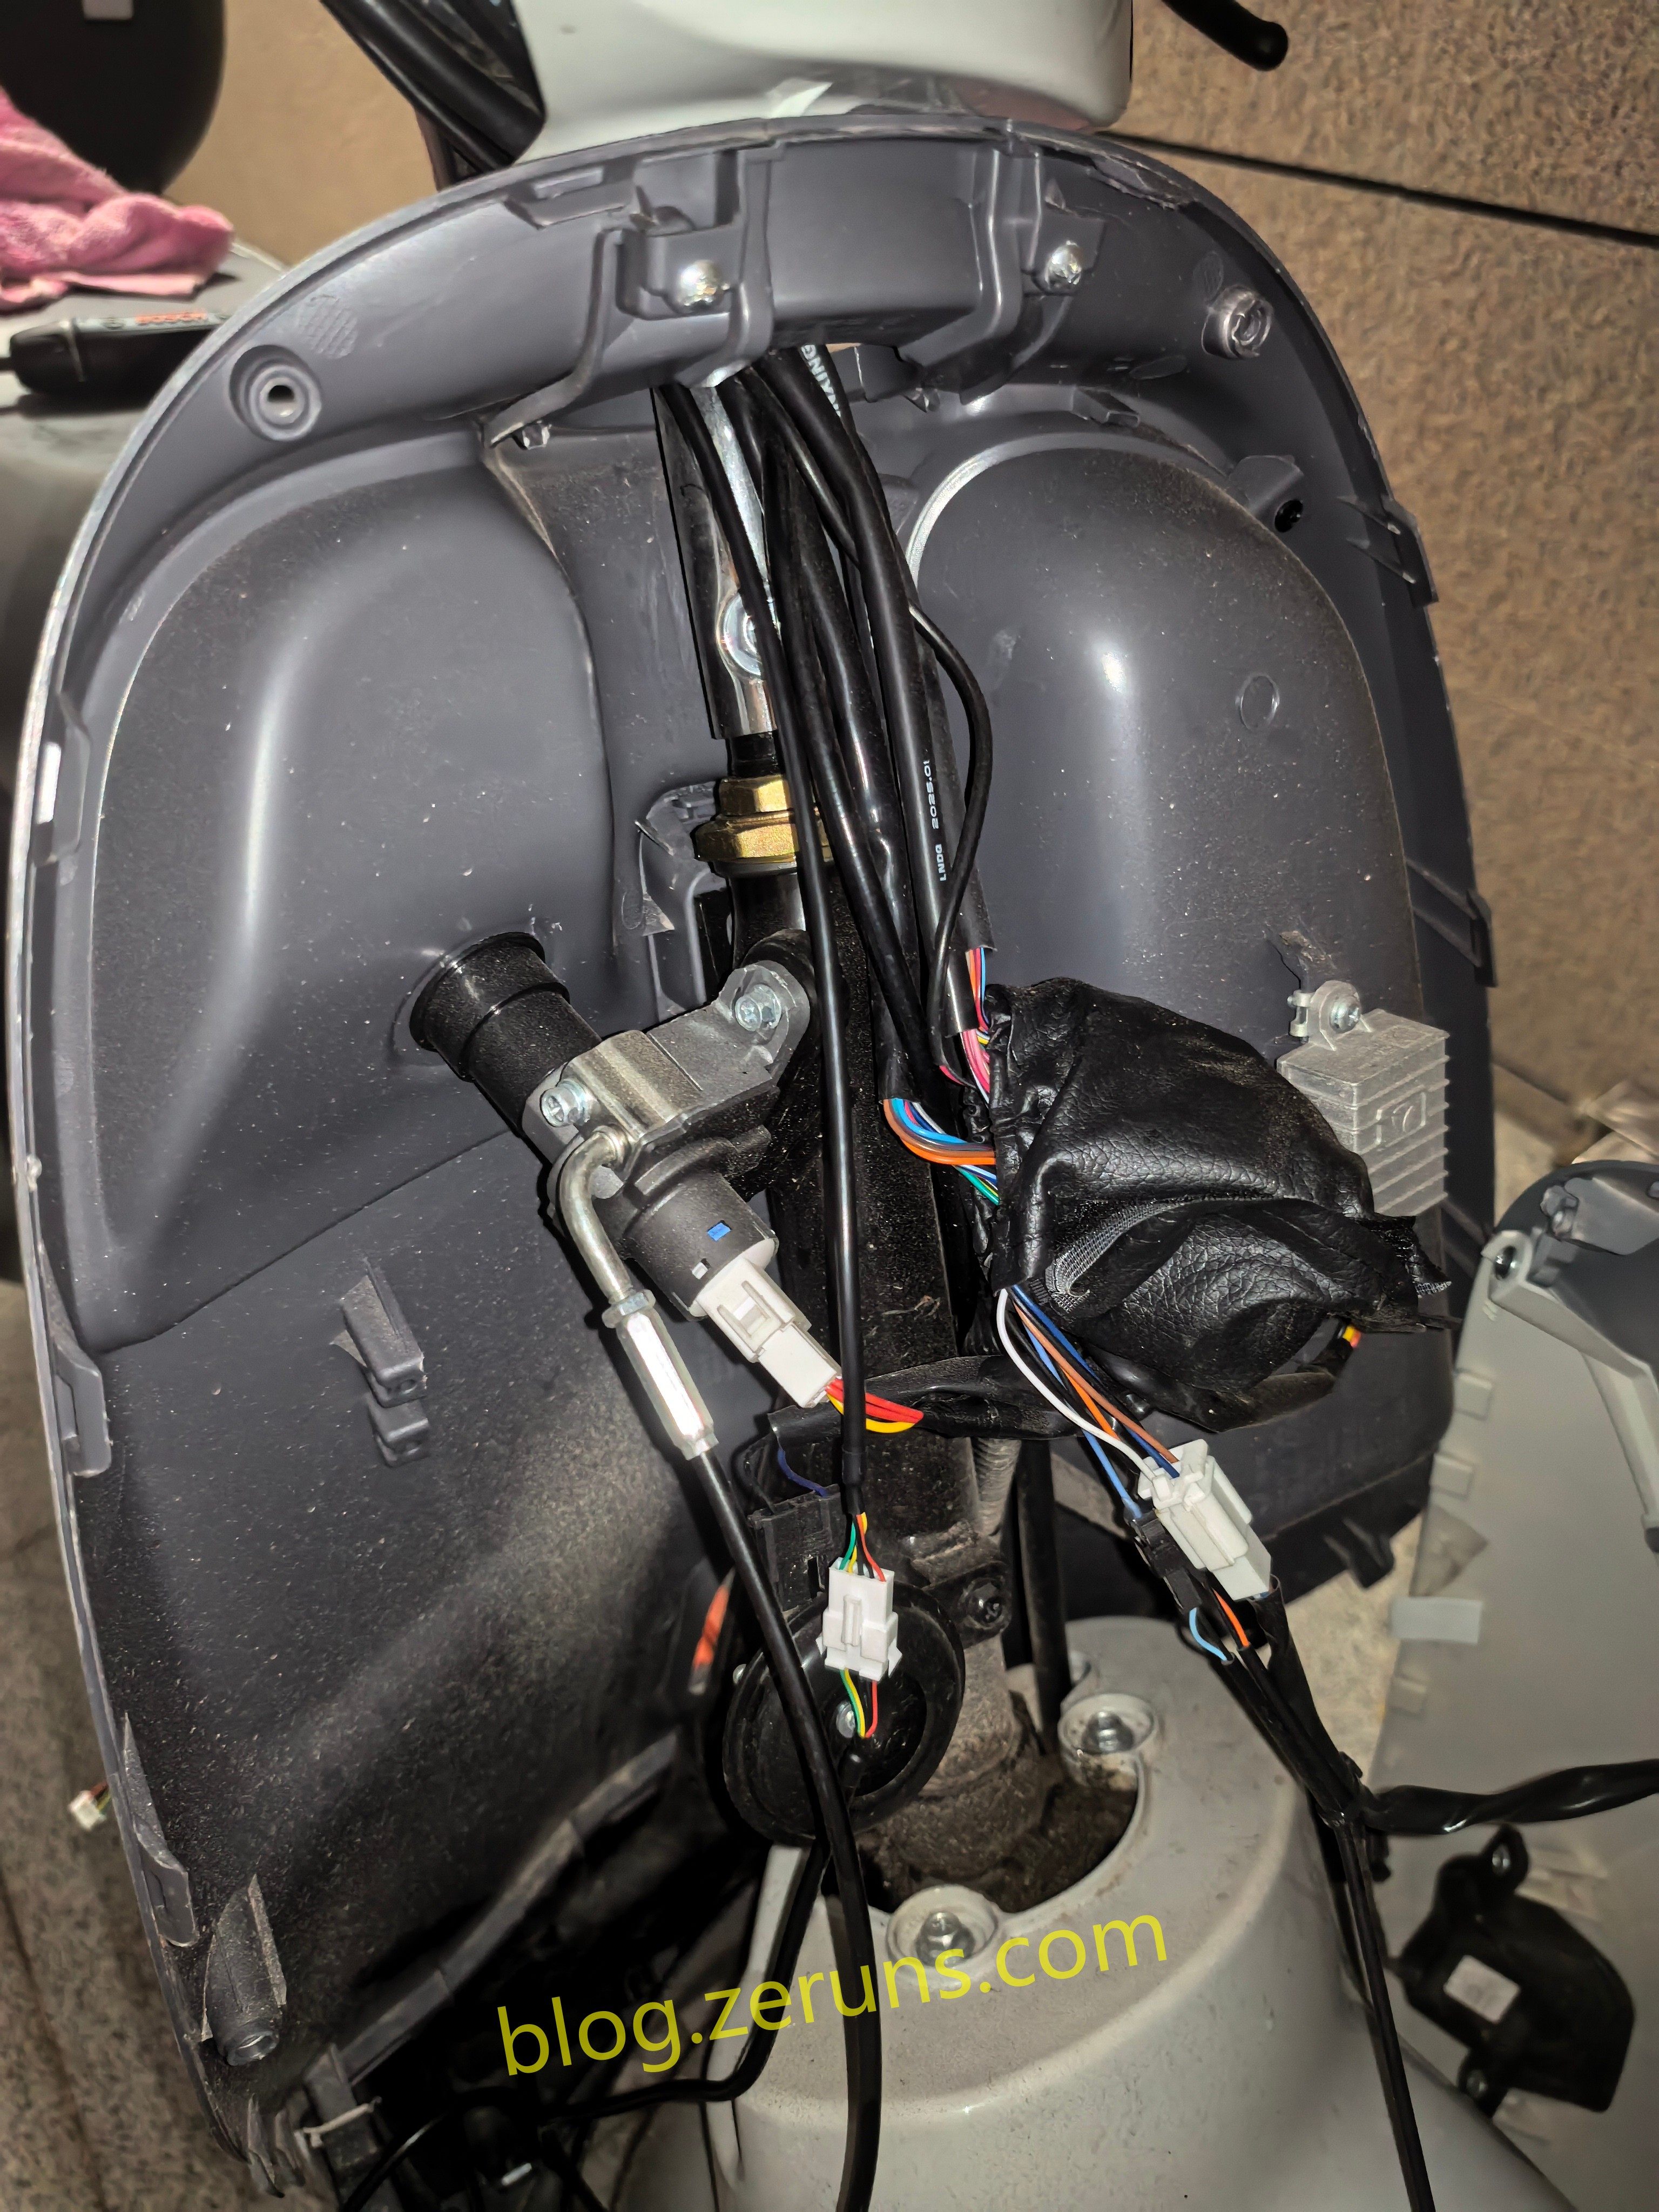
Following the wiring diagram provided by the seller, connect the current sensor—typically by wiring it in series with the battery’s negative terminal.

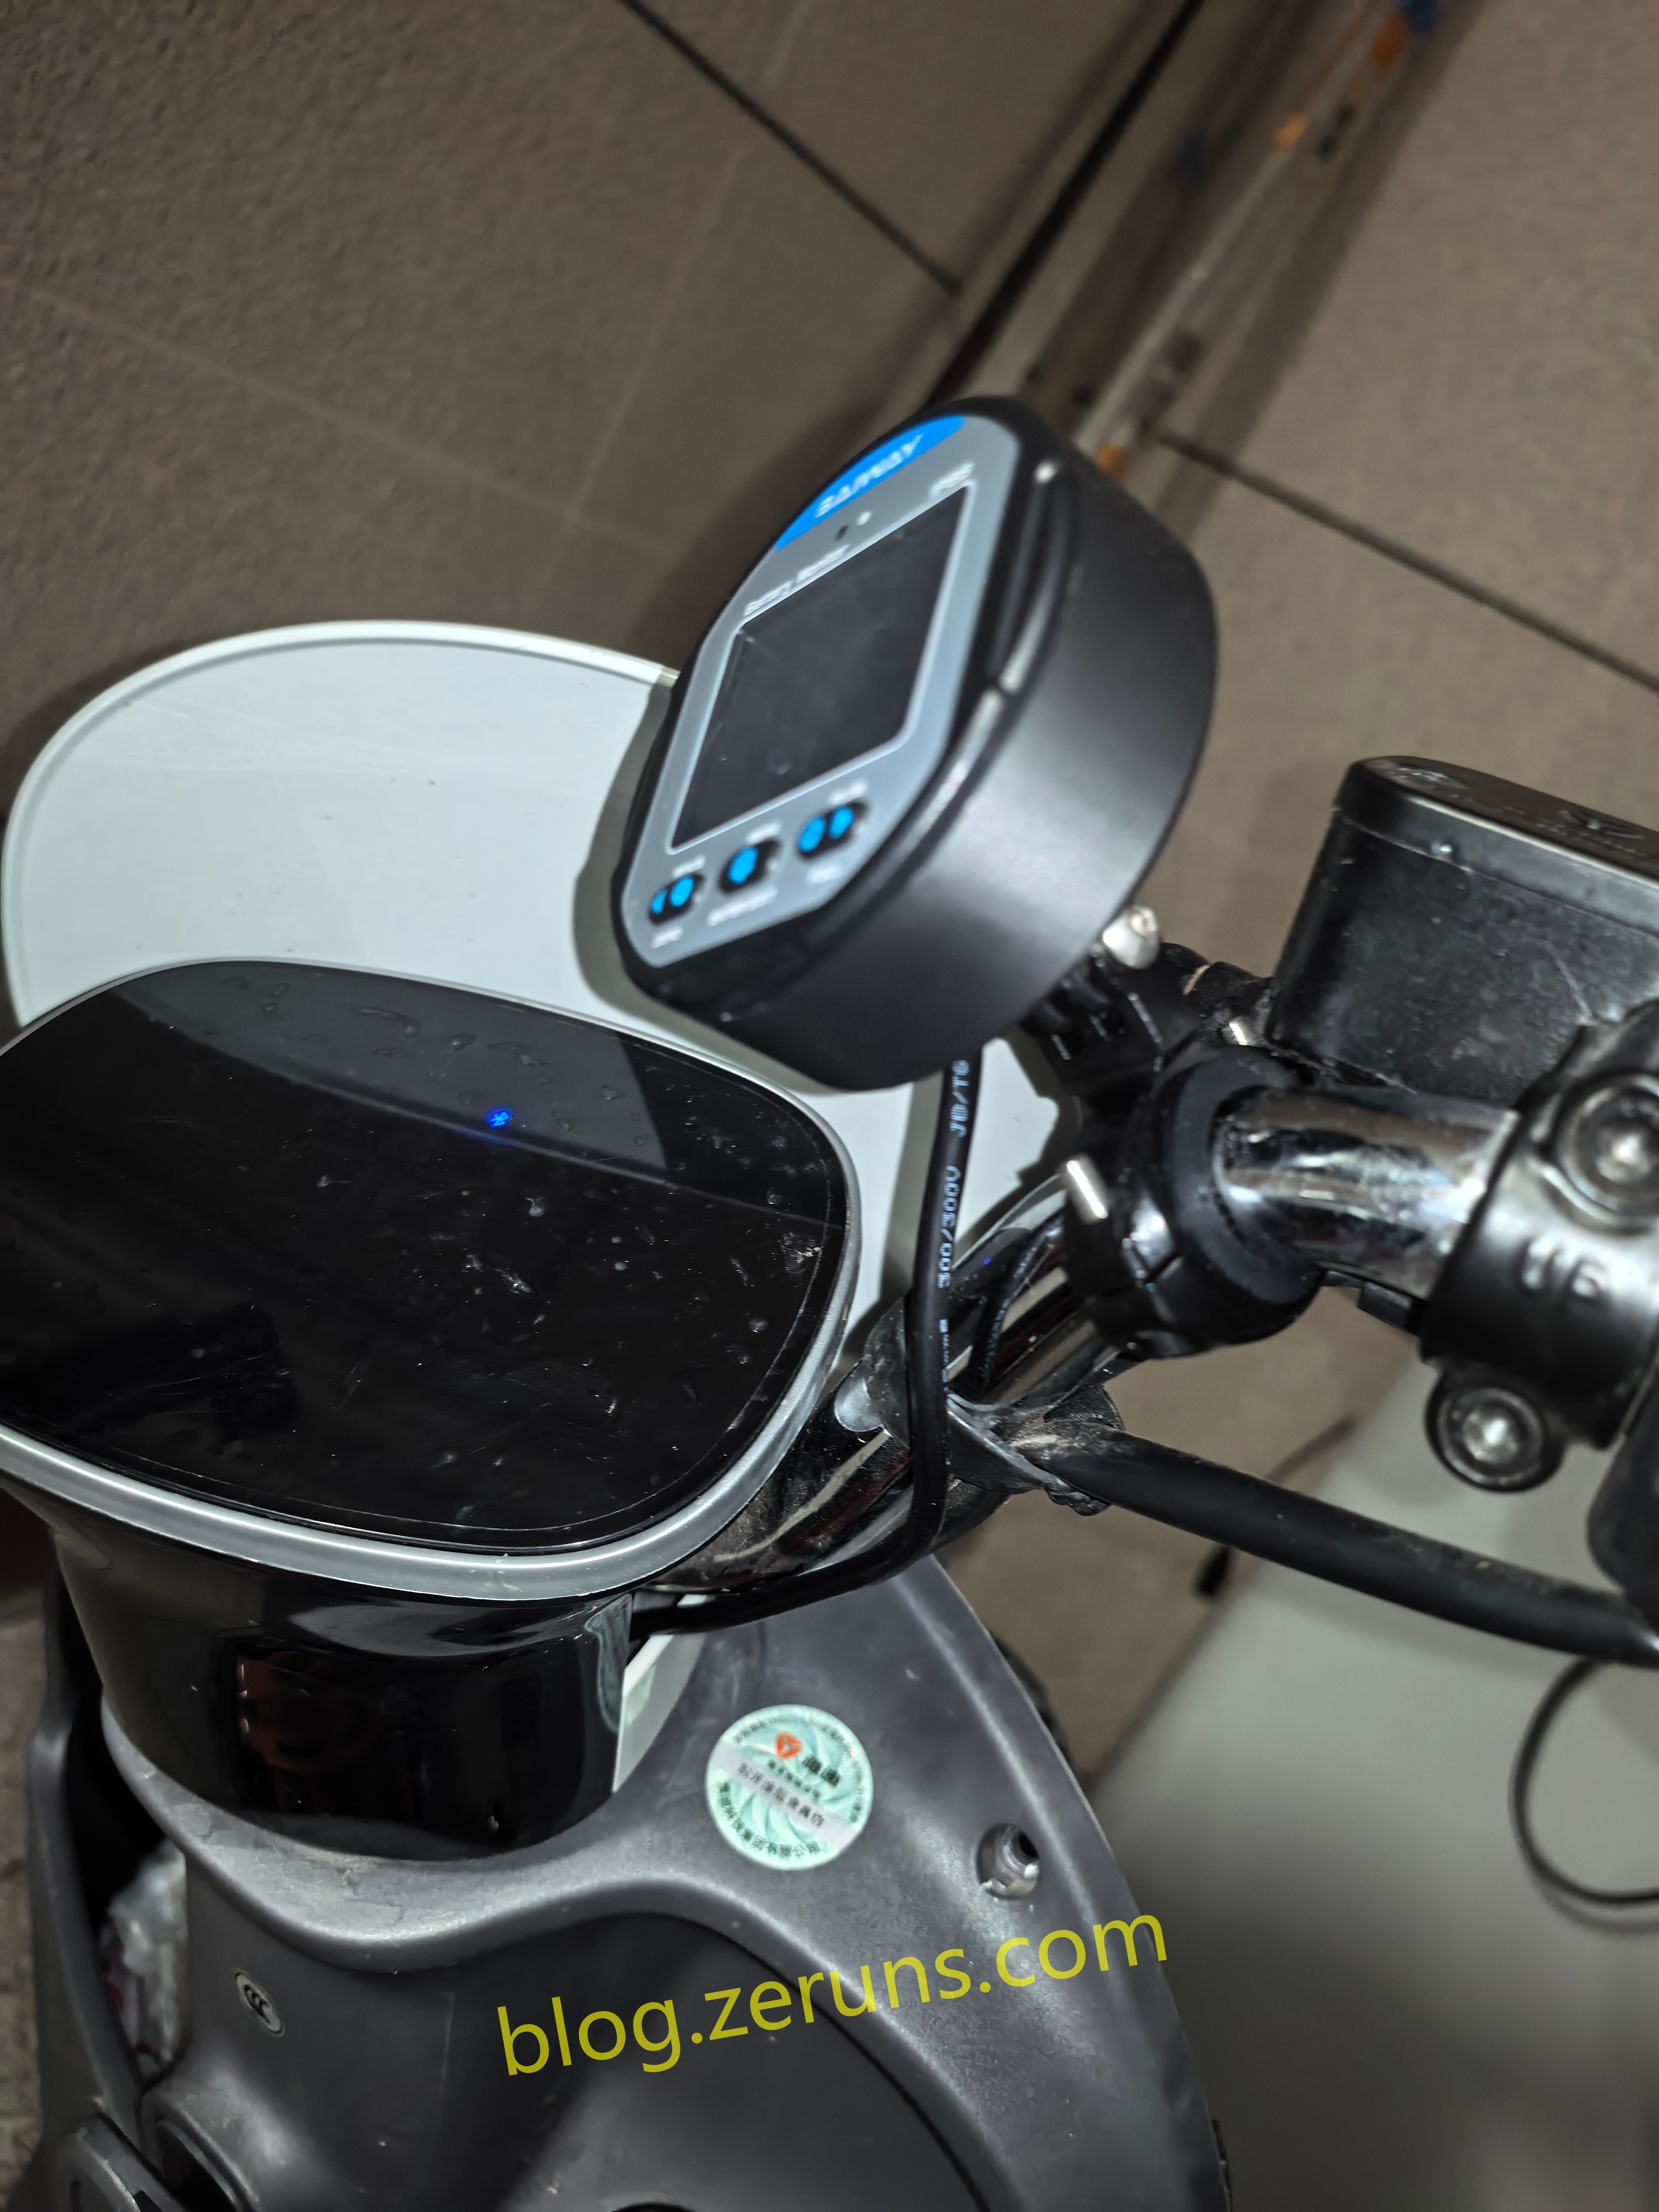
Mount the Coulomb meter at the front of the bike, then route the connecting cables through the frame to the battery compartment and hook them up to the sensor.

After installation, access the settings menu and enter your battery parameters: total capacity, full-charge voltage, and cut-off voltage. Once fully charged, set the current capacity to 100%.
Recommended Reading
- Affordable and cost-effective VPS/cloud server recommendations:https://blog.zeruns.com/archives/383.html
- Minecraft server setup tutorials: https://blog.zeruns.com/tag/mc/
- Open-source USB-C docking station with 4x 10Gbps USB-A ports, 2.5G Ethernet, and SD card reader: https://blog.zeruns.top/archives/53.html
- ALLinSSL deployment and usage tutorial – automated SSL certificate issuance, renewal, deployment, and monitoring: https://blog.zeruns.top/archives/58.html
- Deploying a PHP site using Rainyun RCA (K8s-based cloud app platform): https://blog.zeruns.top/archives/54.html
- Travel diary and photo sharing: Haikou - Beijing - Macau: https://blog.zeruns.com/archives/849.html


Comment Section