


How to Migrate macOS to an External Drive for Mac Mini (Keep Your Data & Apps Intact)
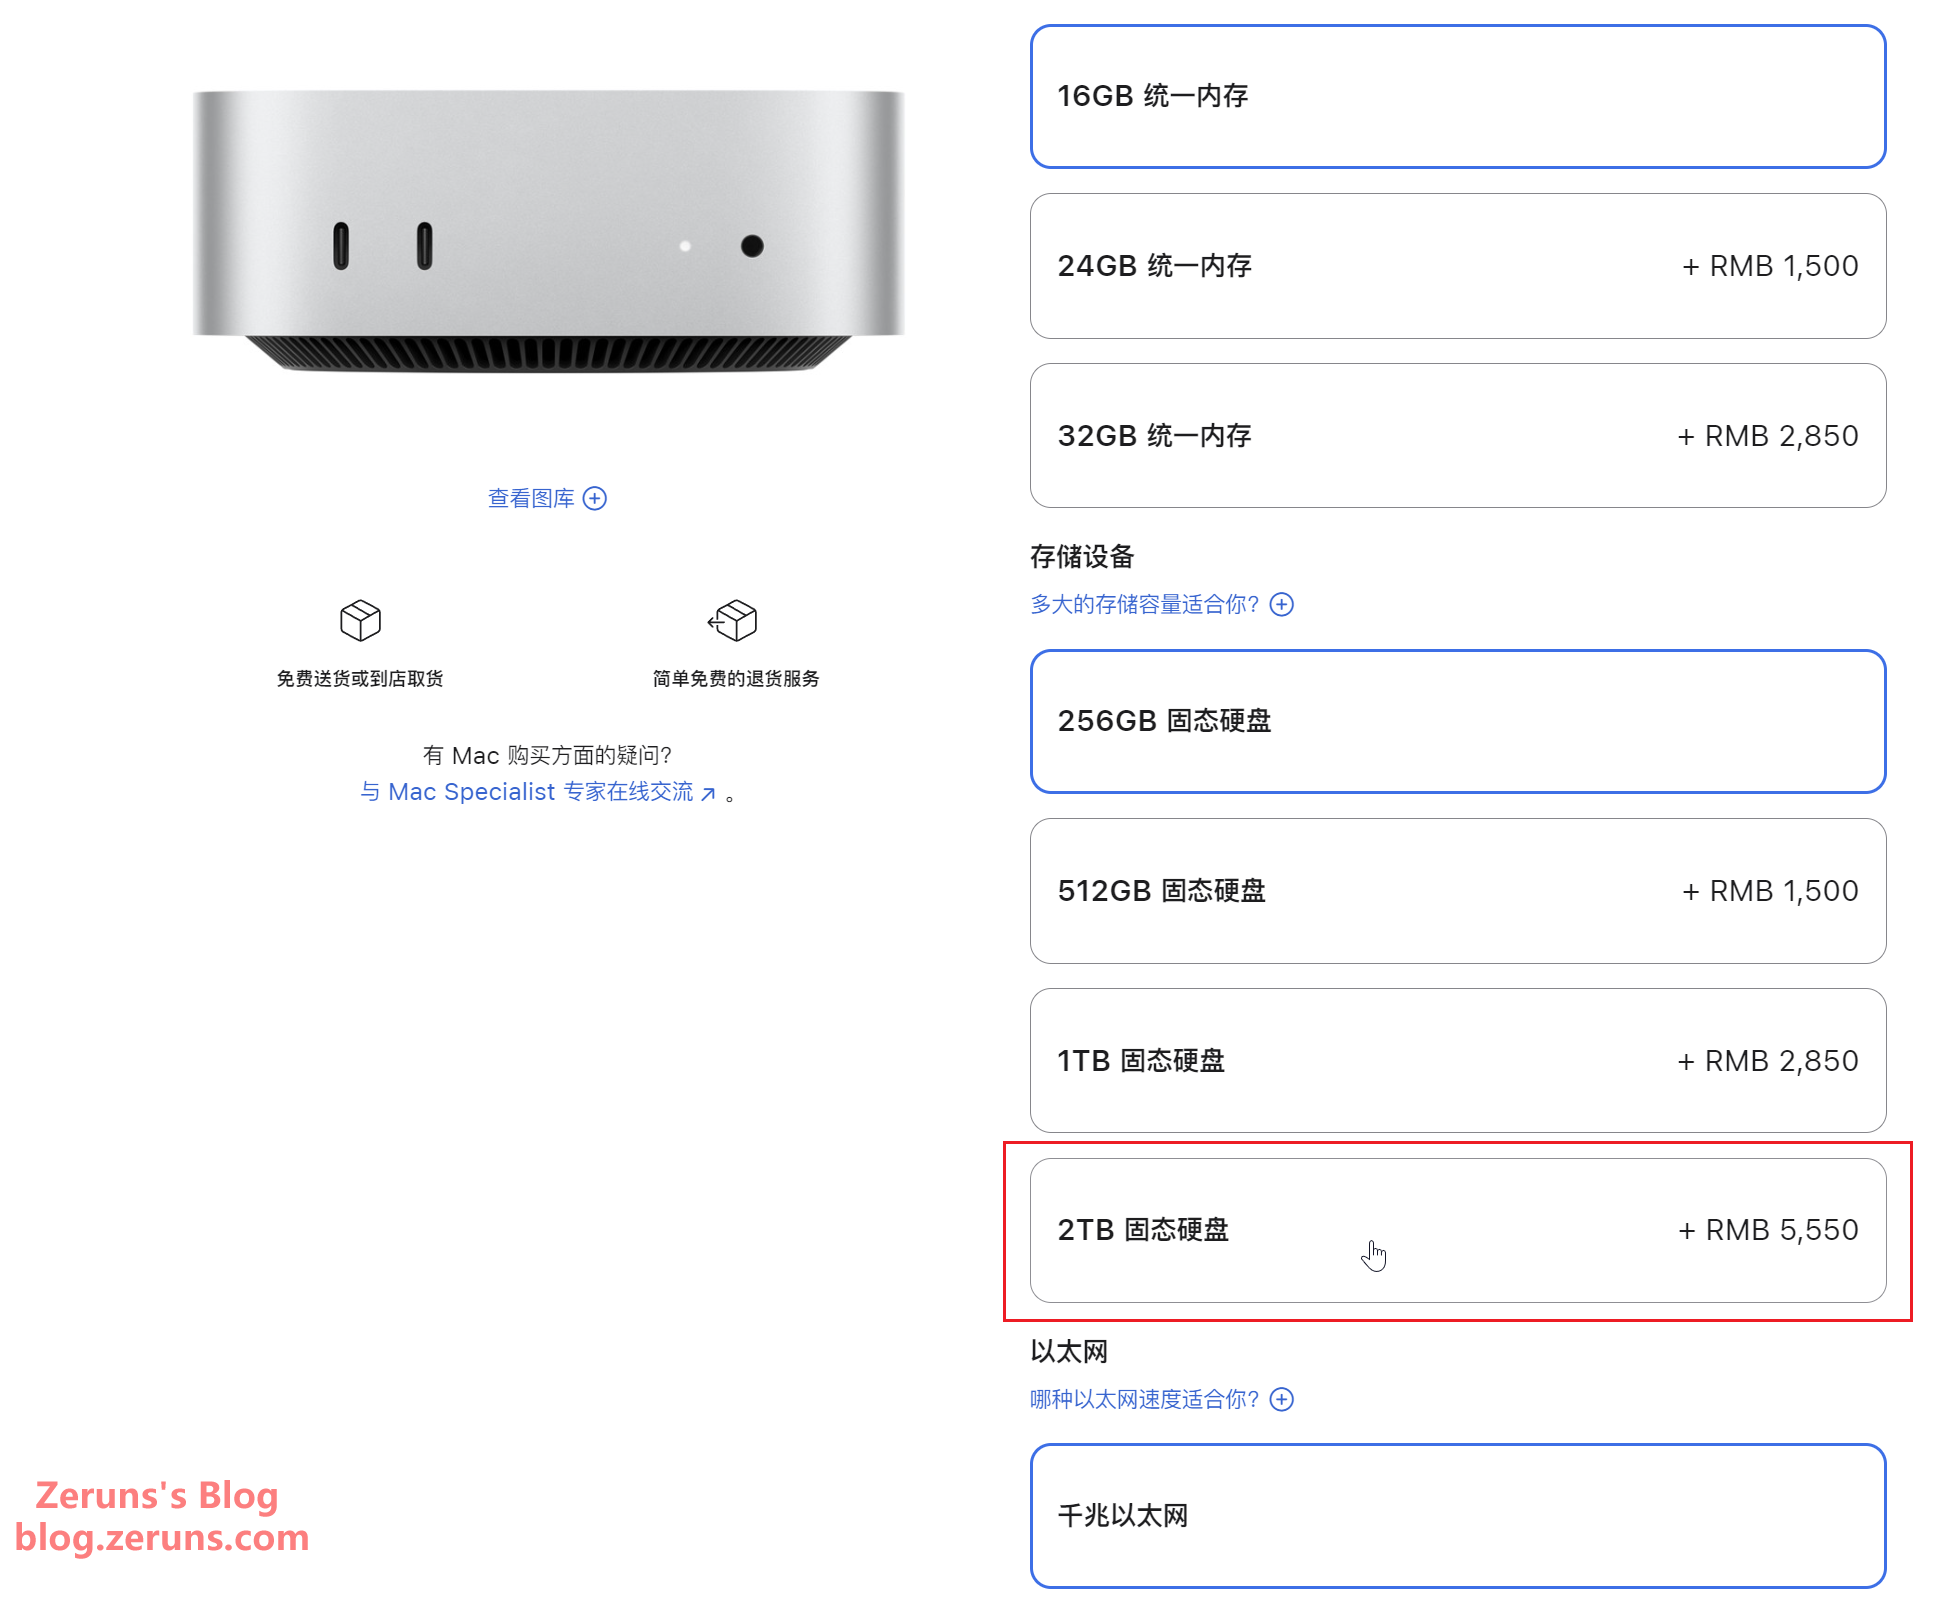
Since Apple's SSD upgrades are notoriously expensive—going from 256GB to 2TB costs an extra 5550RMB—buying a separate 2TB NVMe SSD and a USB4 enclosure for around 1000RMB is a much more cost-effective solution. Therefore, I decided to install macOS on an external drive instead of upgrading the internal storage. (For reference, the 2024 Mac Mini's SSD is a removable module, and you can buy a 2TB replacement for about 1000RMB on platforms like Taobao. However, I opted for an external drive as it allows for more flexibility in the future—if I stop using Mac, the external SSD can still be used elsewhere.)
- Apple Mac Mini M4 Mini PC Review & Teardown: https://blog.zeruns.com/archives/851.html
- RIHAO USB4 Enclosure + HP FX900Pro 2TB SSD Review: https://blog.zeruns.com/archives/842.html
For this setup, I chose the RIHAO USB4 enclosure and a TiPlus7000 2TB NVMe SSD.
- Buy the RIHAO USB4 Enclosure: https://s.click.taobao.com/iyFIIos
- Buy the TiPlus7000 2TB SSD: https://u.jd.com/8DICIpQ
Now, let's get started!
Formatting the External SSD
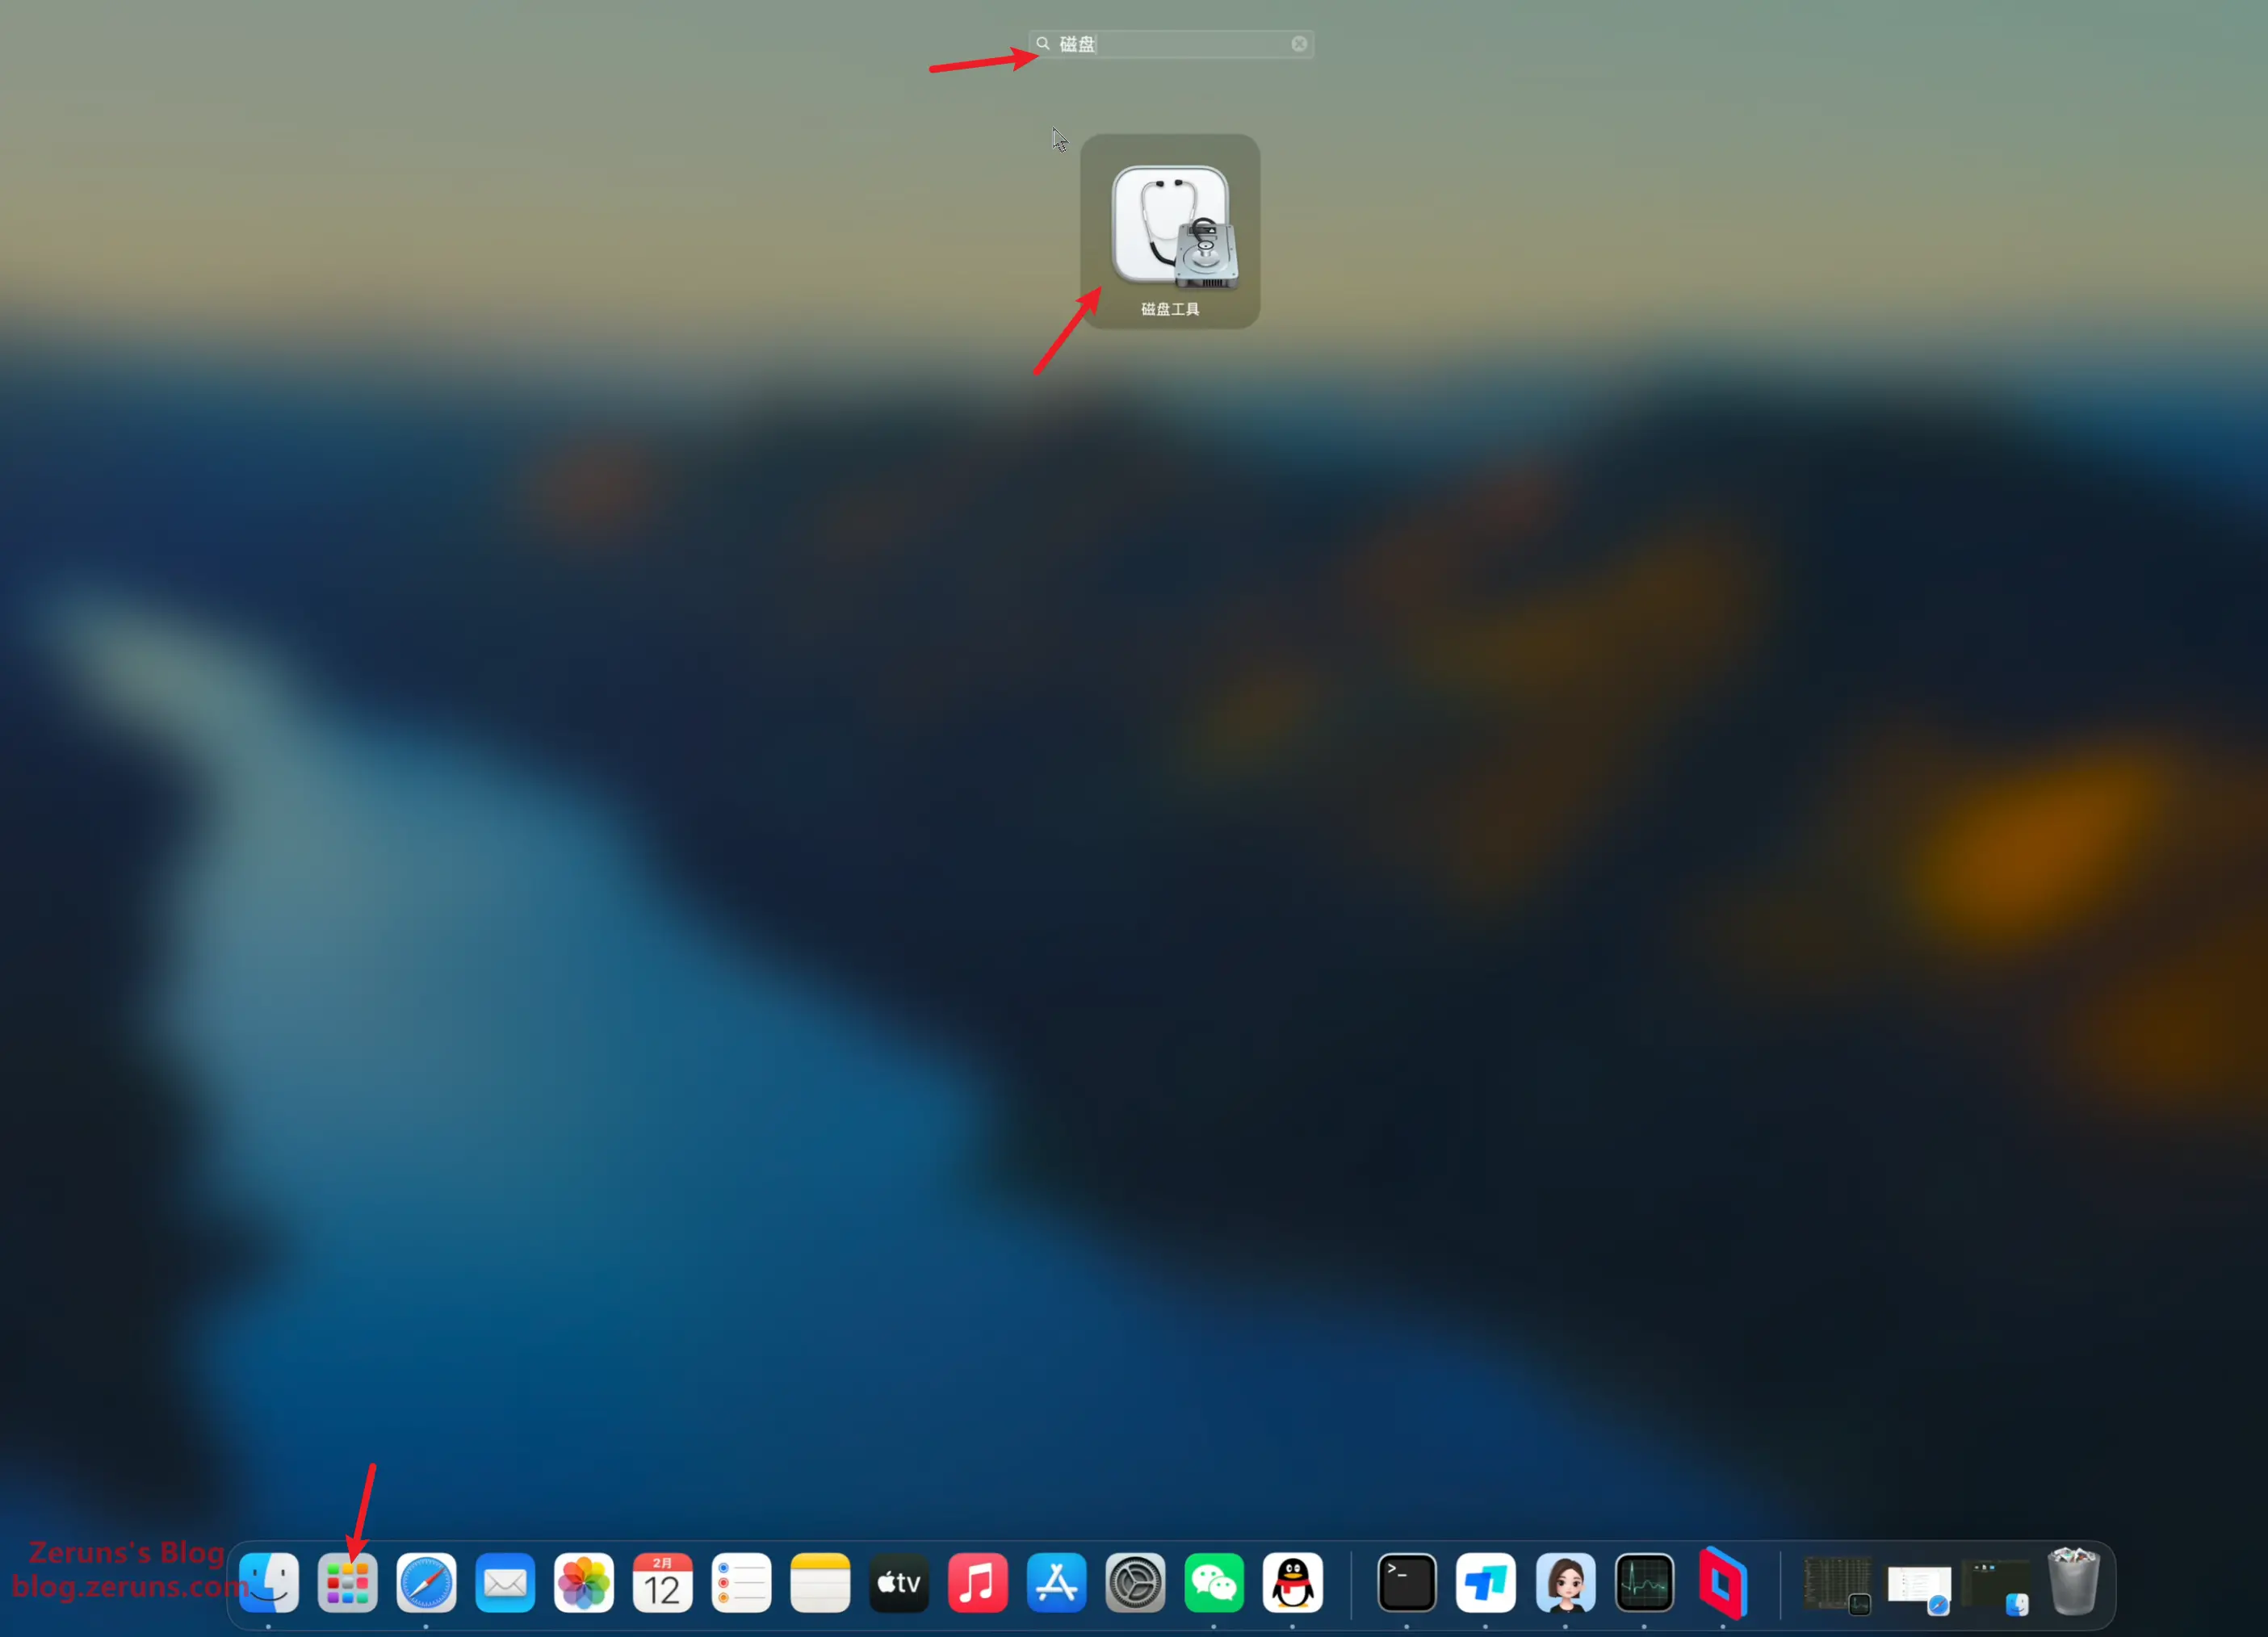
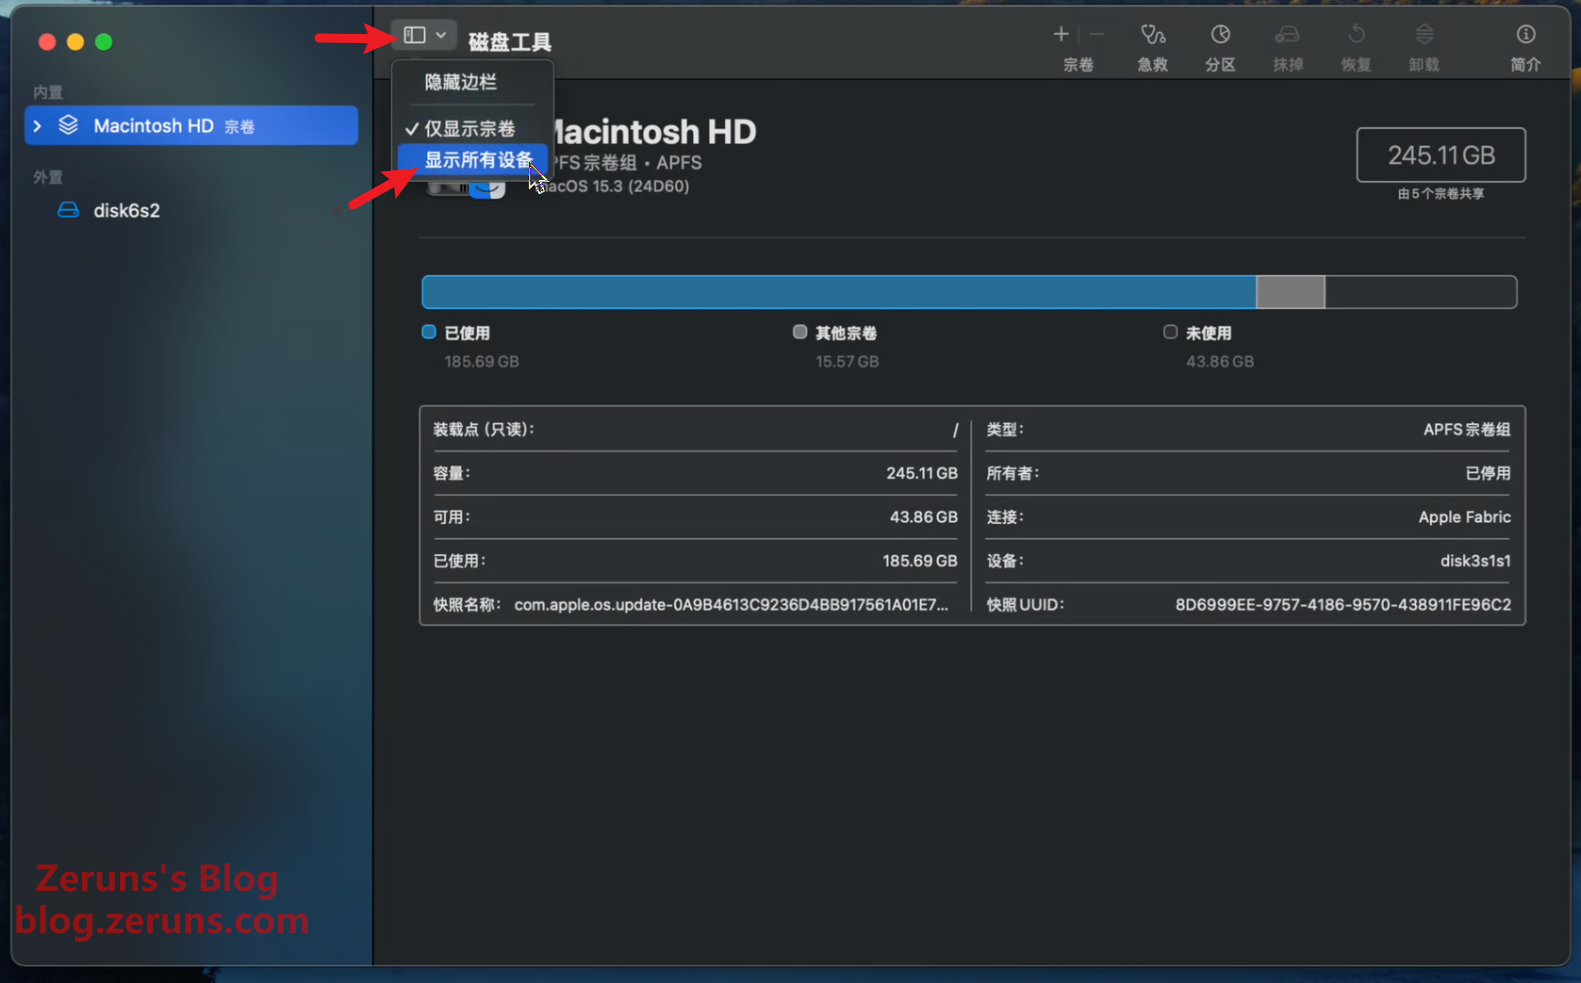
Once the external SSD is connected to your Mac, open Disk Utility from Launchpad. In the top menu, select Show All Devices:
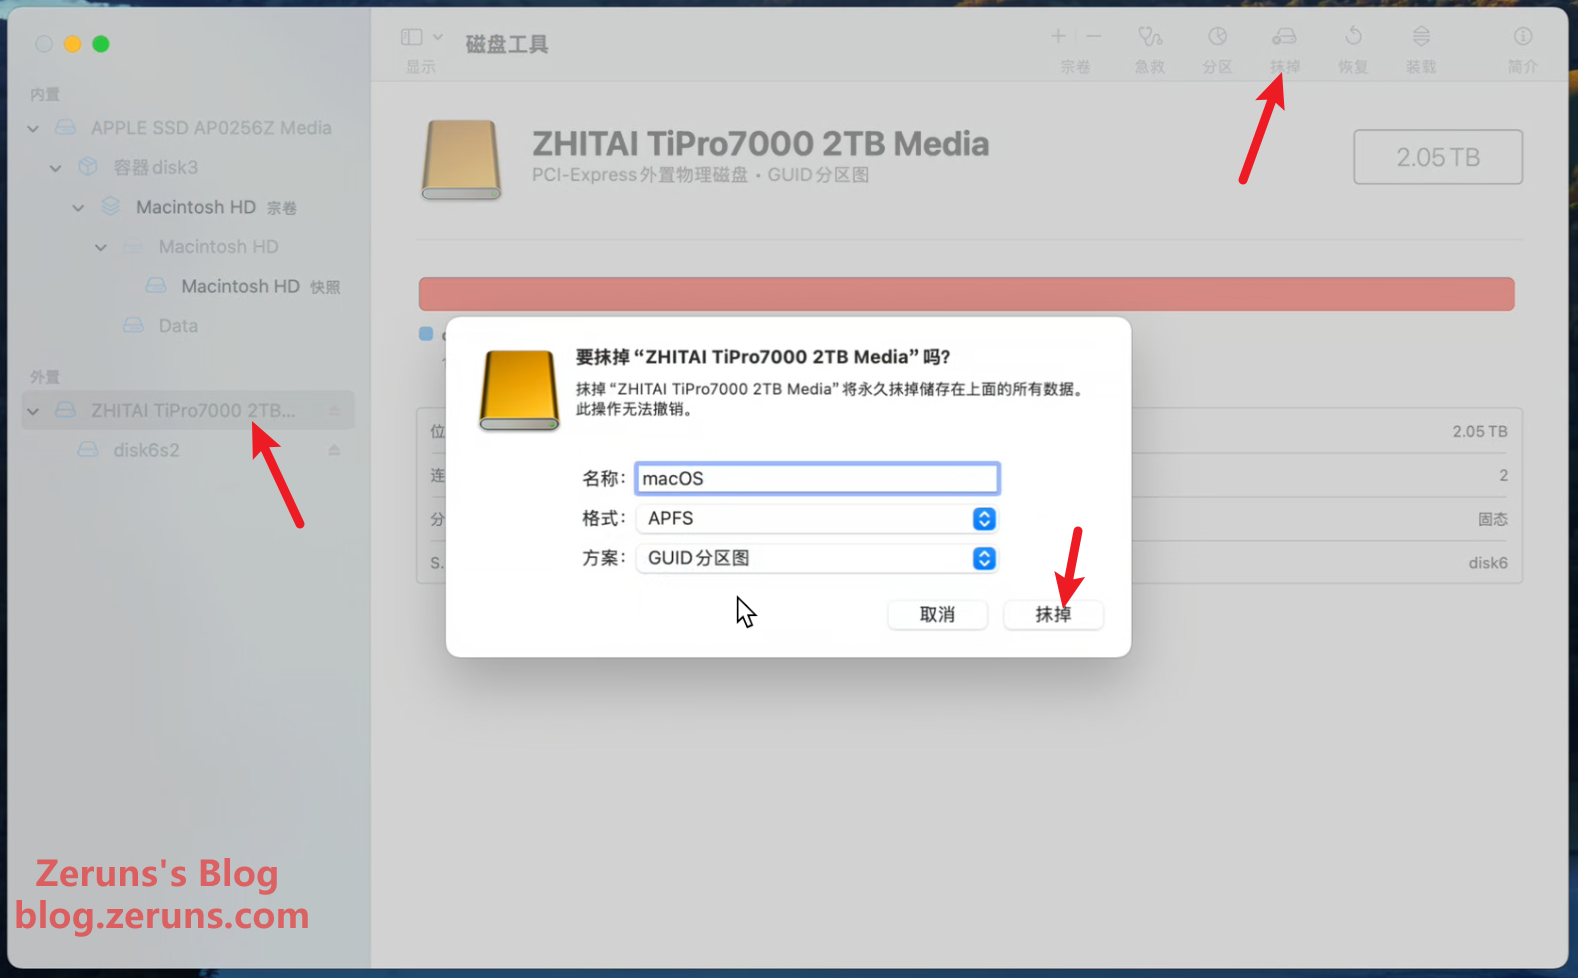
Select your external SSD and click Erase. Be careful not to select your internal system disk! Set the following options:
- Name:
macOS - Format:
APFS - Scheme:
GUID Partition Map
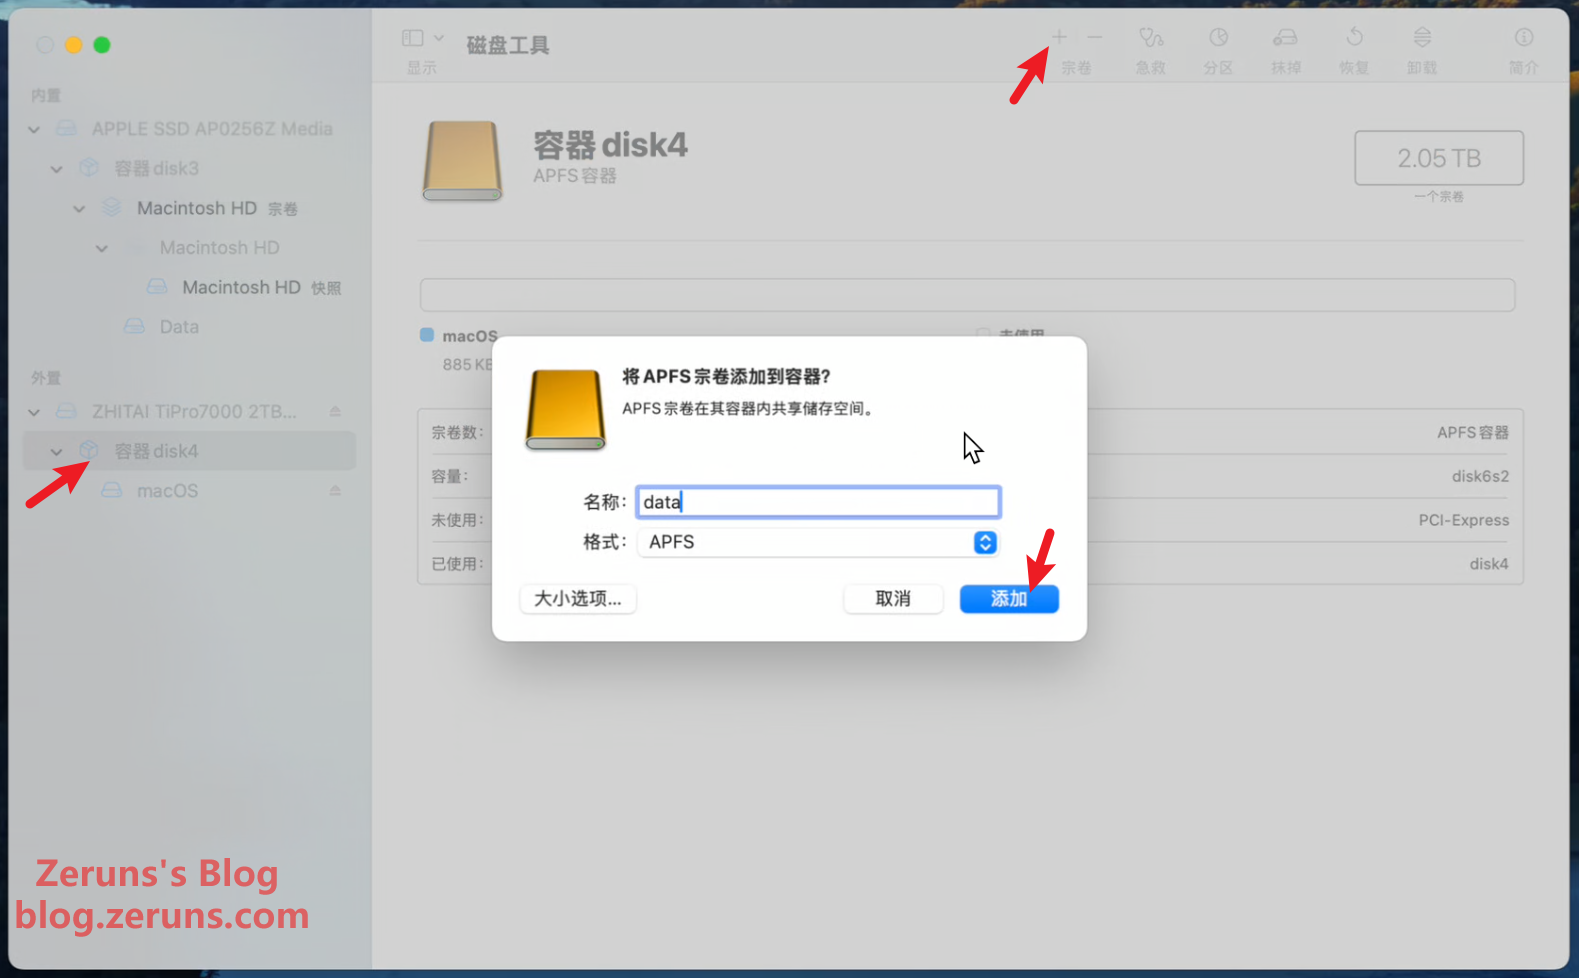
Next, create an additional volume (similar to partitioning in Windows) to store personal data and files. The system volume is read-only for users, so a separate volume is necessary for other files. I named mine data, but you can choose any name you prefer. Both volumes share the total SSD capacity dynamically.
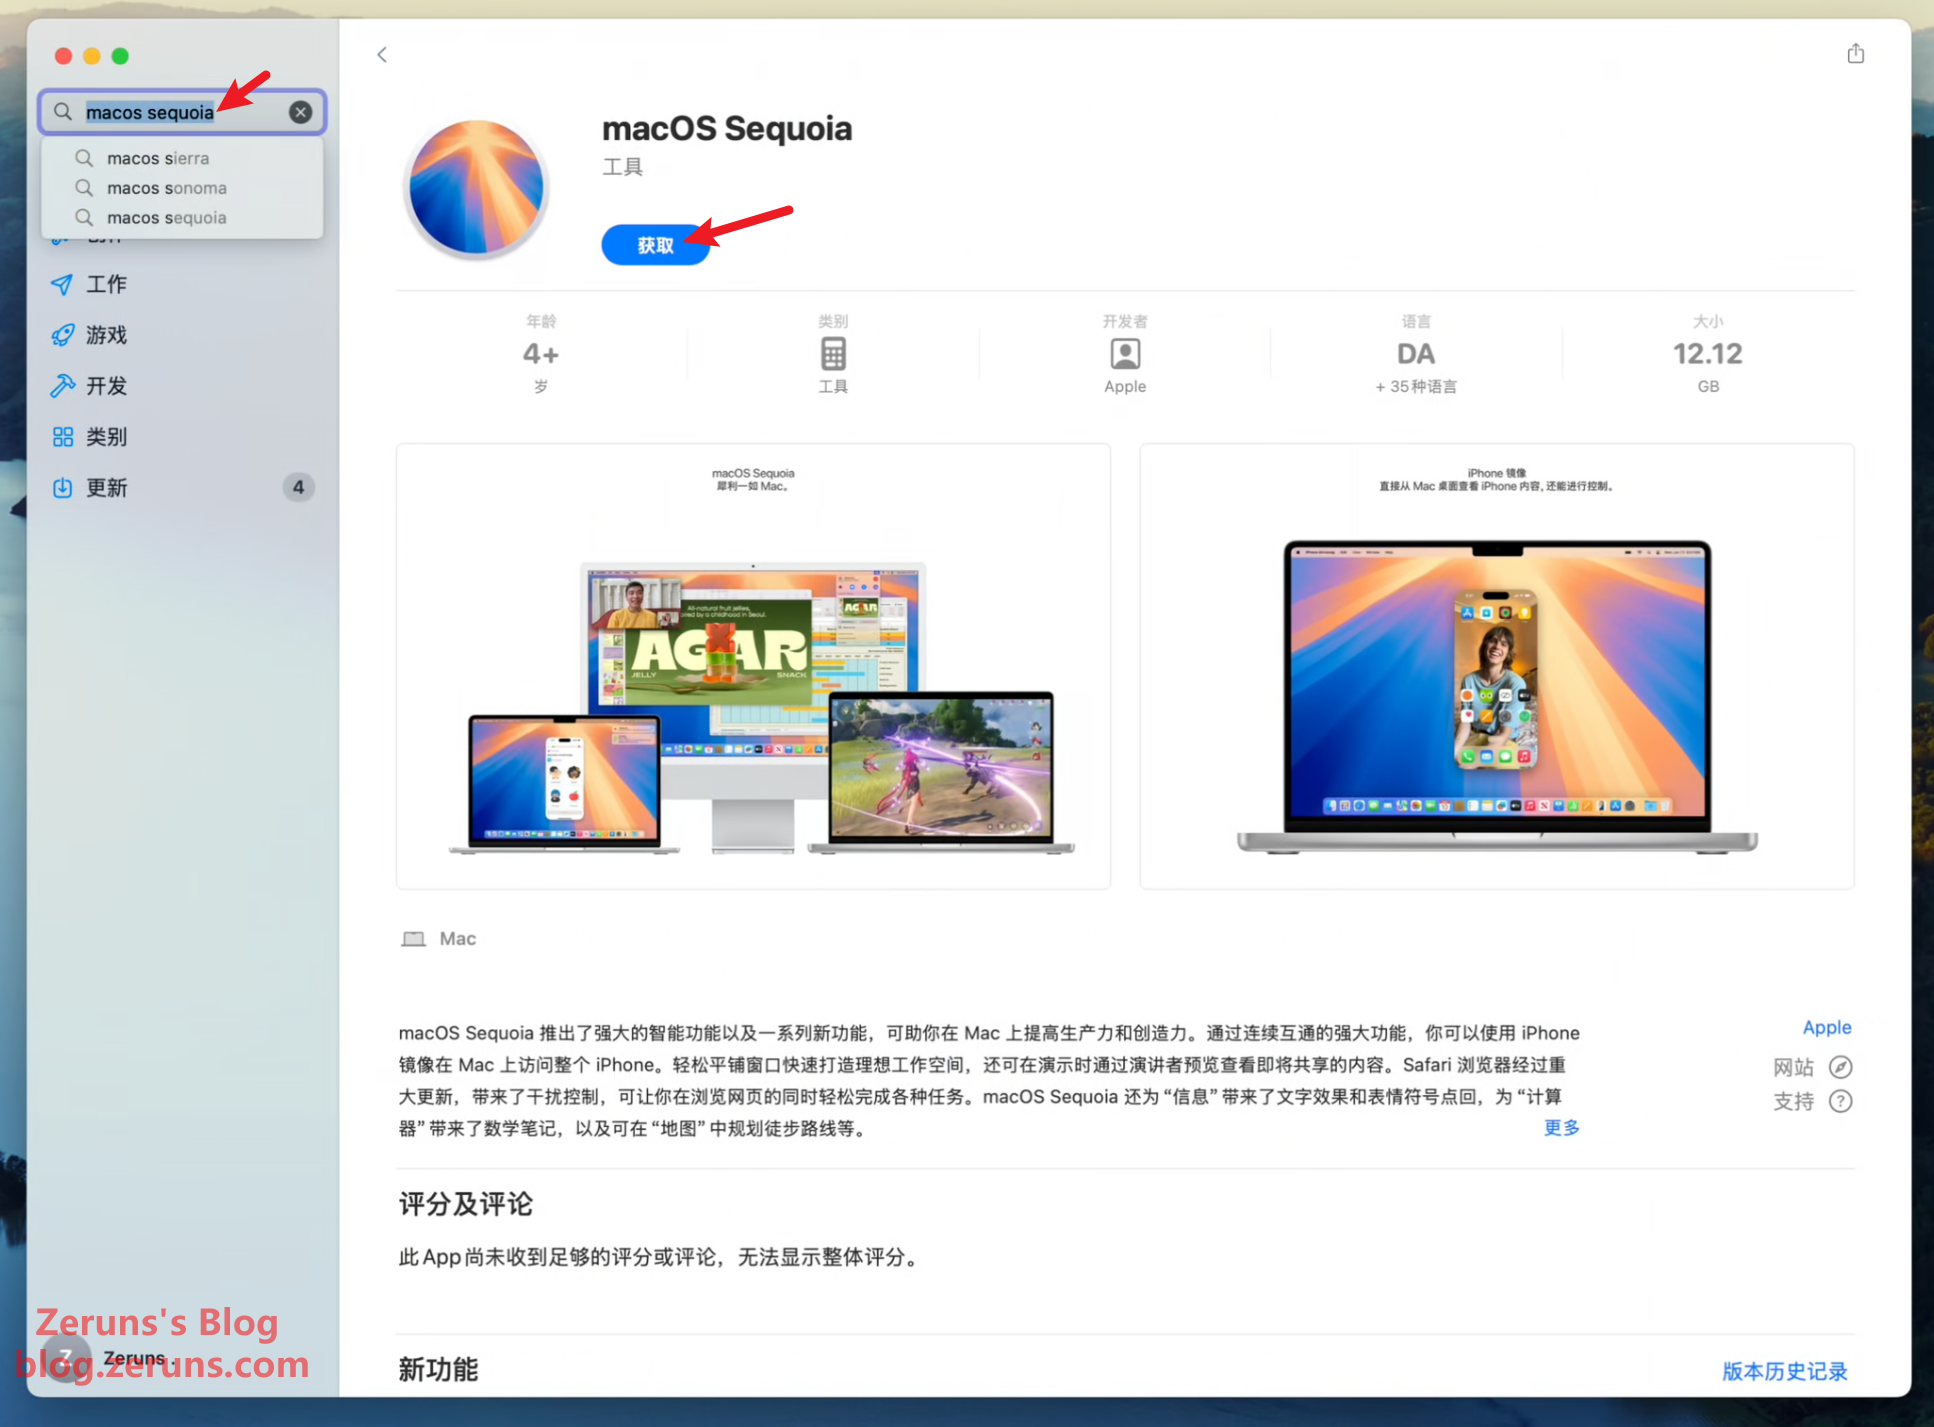
Downloading macOS
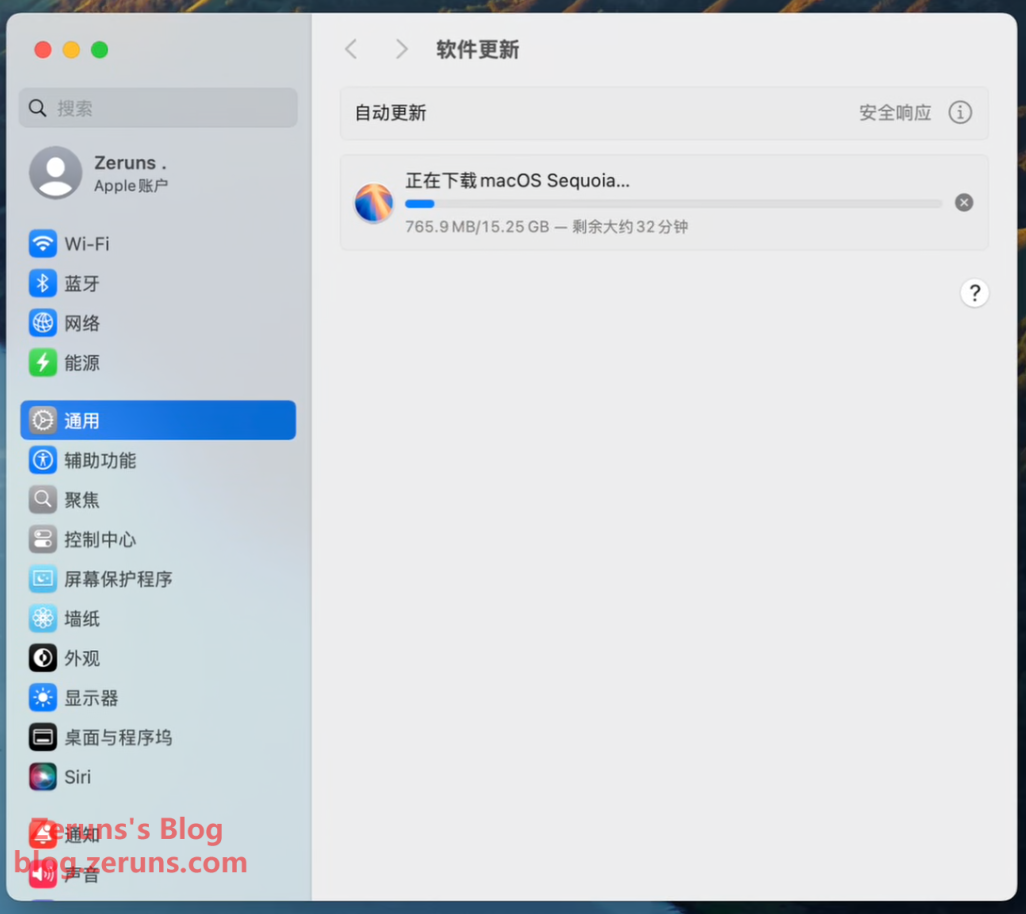
Open the App Store, search for macOS, and download the latest version (macOS Sequoia). Click Get → Download and wait for the process to complete.
Installing macOS & Migrating Data
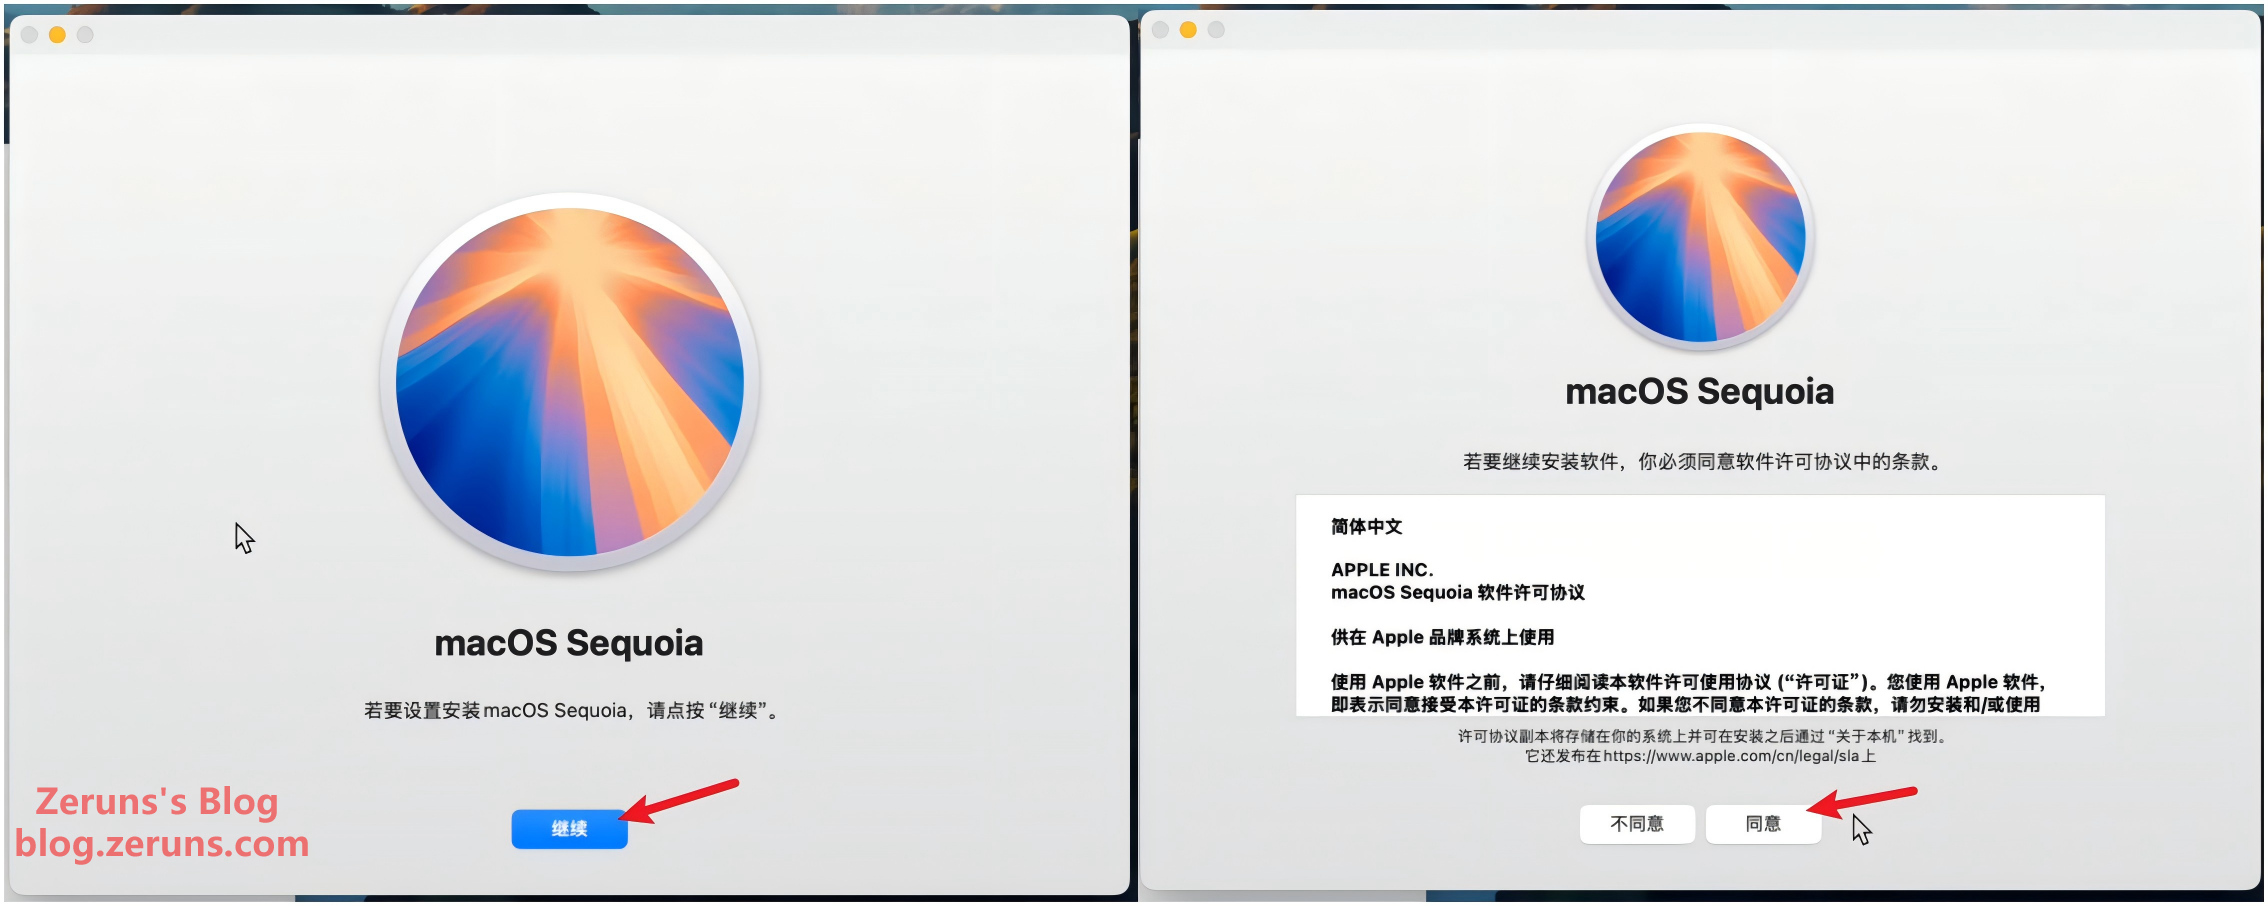
Once the download is complete, the installation guide will launch automatically. Click Continue and agree to the terms.
Click Show All Disks, select the external SSD's macOS volume, choose a user, and proceed with Install. Wait for the installation to complete.

After installation, your Mac will restart and boot from the external SSD.

Follow the setup prompts, and when you reach the Migration Assistant, select From Mac, Time Machine Backup, or Startup Disk, then click Continue.
Choose your old system disk and continue.
Once migration is complete, restart your Mac.
After booting into the system, check Storage—you should now see the full 2TB available.
Tutorial Complete!
Your internal macOS installation remains intact. You can switch between the internal and external system disks by modifying Startup Disk Settings.
Recommended Reads
- Affordable VPS & Cloud Server Recommendations: https://blog.zeruns.com/archives/383.html
- Minecraft Server Setup Guide: https://blog.zeruns.com/tag/mc/
- Haikou-Beijing-Macau Travel Log & Photo Gallery: https://blog.zeruns.com/archives/849.html
- Step-by-Step Guide: Setting Up a Typecho Blog on a Cloud Server: https://blog.zeruns.com/archives/749.html
- DeepSeek-R1 Private Deployment Guide | Hosting AI LLM on Linux: https://blog.vpszj.cn/archives/2534.html
- IK-Q6000 WiFi 6 Router Review & Teardown: https://blog.zeruns.com/archives/835.html
📖 English Version of the Article: https://blog.zeruns.top/archives/42.html


Comment Section