


Deploying the DeepSeek-R1 large language model (LLMs) on a cloud server using Linux+Docker+Ollama+OpenWebUI, a tutorial for local deployment of DeepSeek (this tutorial can also be referenced for deployment on your own computer). Super detailed tutorial, step-by-step.
In today's digital age, the application of large language models (LLMs) is becoming increasingly widespread. This article will provide a detailed guide on how to deploy the DeepSeek-R1 large language model on a cloud server using Docker, Ollama, and OpenWebUI, enabling its local deployment for more convenient use of this powerful language model.
Video Tutorial: https://www.bilibili.com/video/BV1GpNee9EPJ/
- Tutorial for setting up SD (Stable Diffusion) on Rainyun GPU cloud server to build your own AI painting website, AIGC: https://blog.zeruns.com/archives/768.html
- Tutorial for setting up "ChatGPT"—GPT4All local deployment on Rainyun GPU cloud server: https://blog.zeruns.com/archives/767.html
Webmaster exchange Group: 767557452
Introduction to Ollama
Ollama is an open-source tool for local deployment of large language models (LLMs), supporting quick deployment of AI models via command-line interaction. Its core advantages include:
- Lightweight Deployment: No complex environment configuration required, start the model service with a single command
- Multi-model Support: Built-in HuggingFace model library, supports mainstream models such as Llama 2, Mistral, DeepSeek
- Cross-platform Operation: Provides support for Linux/macOS/Windows
- Docker Integration: Supports containerized deployment to ensure environment isolation and consistency
- REST API: Provides standardized interfaces for easy integration with various front-end UIs
Ollama Official Website: https://url.zeruns.com/Ollama
Introduction to DeepSeek
DeepSeek-R1 is a new generation of open-source large language models developed by DeepSeek Company, with the following characteristics:
- Complex Reasoning Ability: Excellent performance in scenarios such as mathematical derivation and code generation
- Long Context Support: Supports a context window of up to 128k tokens
- Multi-turn Dialogue Optimization: Uses RLHF technology to improve dialogue coherence
- Enterprise-level Adaptation: Provides quantized versions (4-bit/8-bit) to meet different hardware requirements
- Flexible Deployment: Supports local private deployment and API cloud invocation
DeepSeek Official Website: https://url.zeruns.com/DeepSeek
Preparing the Server
You need a server to deploy the model (you can also use your own computer, but it must run Linux). I recommend using Haoliang Yunqing lightweight application servers, which offer an 8-core, 16GB RAM plan for just 60 RMB/month.
Haoliang Yunqing Discount Registration Link:
https://www.haoliangyun.com/?aff=zeruns&source=blog-en
Invitation Code: zeruns (Using this link or code grants you 50% and 20% discount coupons)
Other cost-effective server recommendations:
https://blog.zeruns.com/archives/383.html
- Haoliang Yunqing Ningbo Lightweight Application Server Performance Review:
https://blog.vpszj.cn/archives/2390.html - Laika Cloud Ningbo Telecom Cloud Server Performance Review, IPv4 & IPv6 Dual Stack:
https://blog.zeruns.com/archives/807.html - Rain Cloud Ningbo E5-2650v4 Dedicated Server Review, 48 Cores, 64GB RAM, 300Mbps Bandwidth, 588 RMB/month:
https://blog.vpszj.cn/archives/2364.html
Purchasing a Server
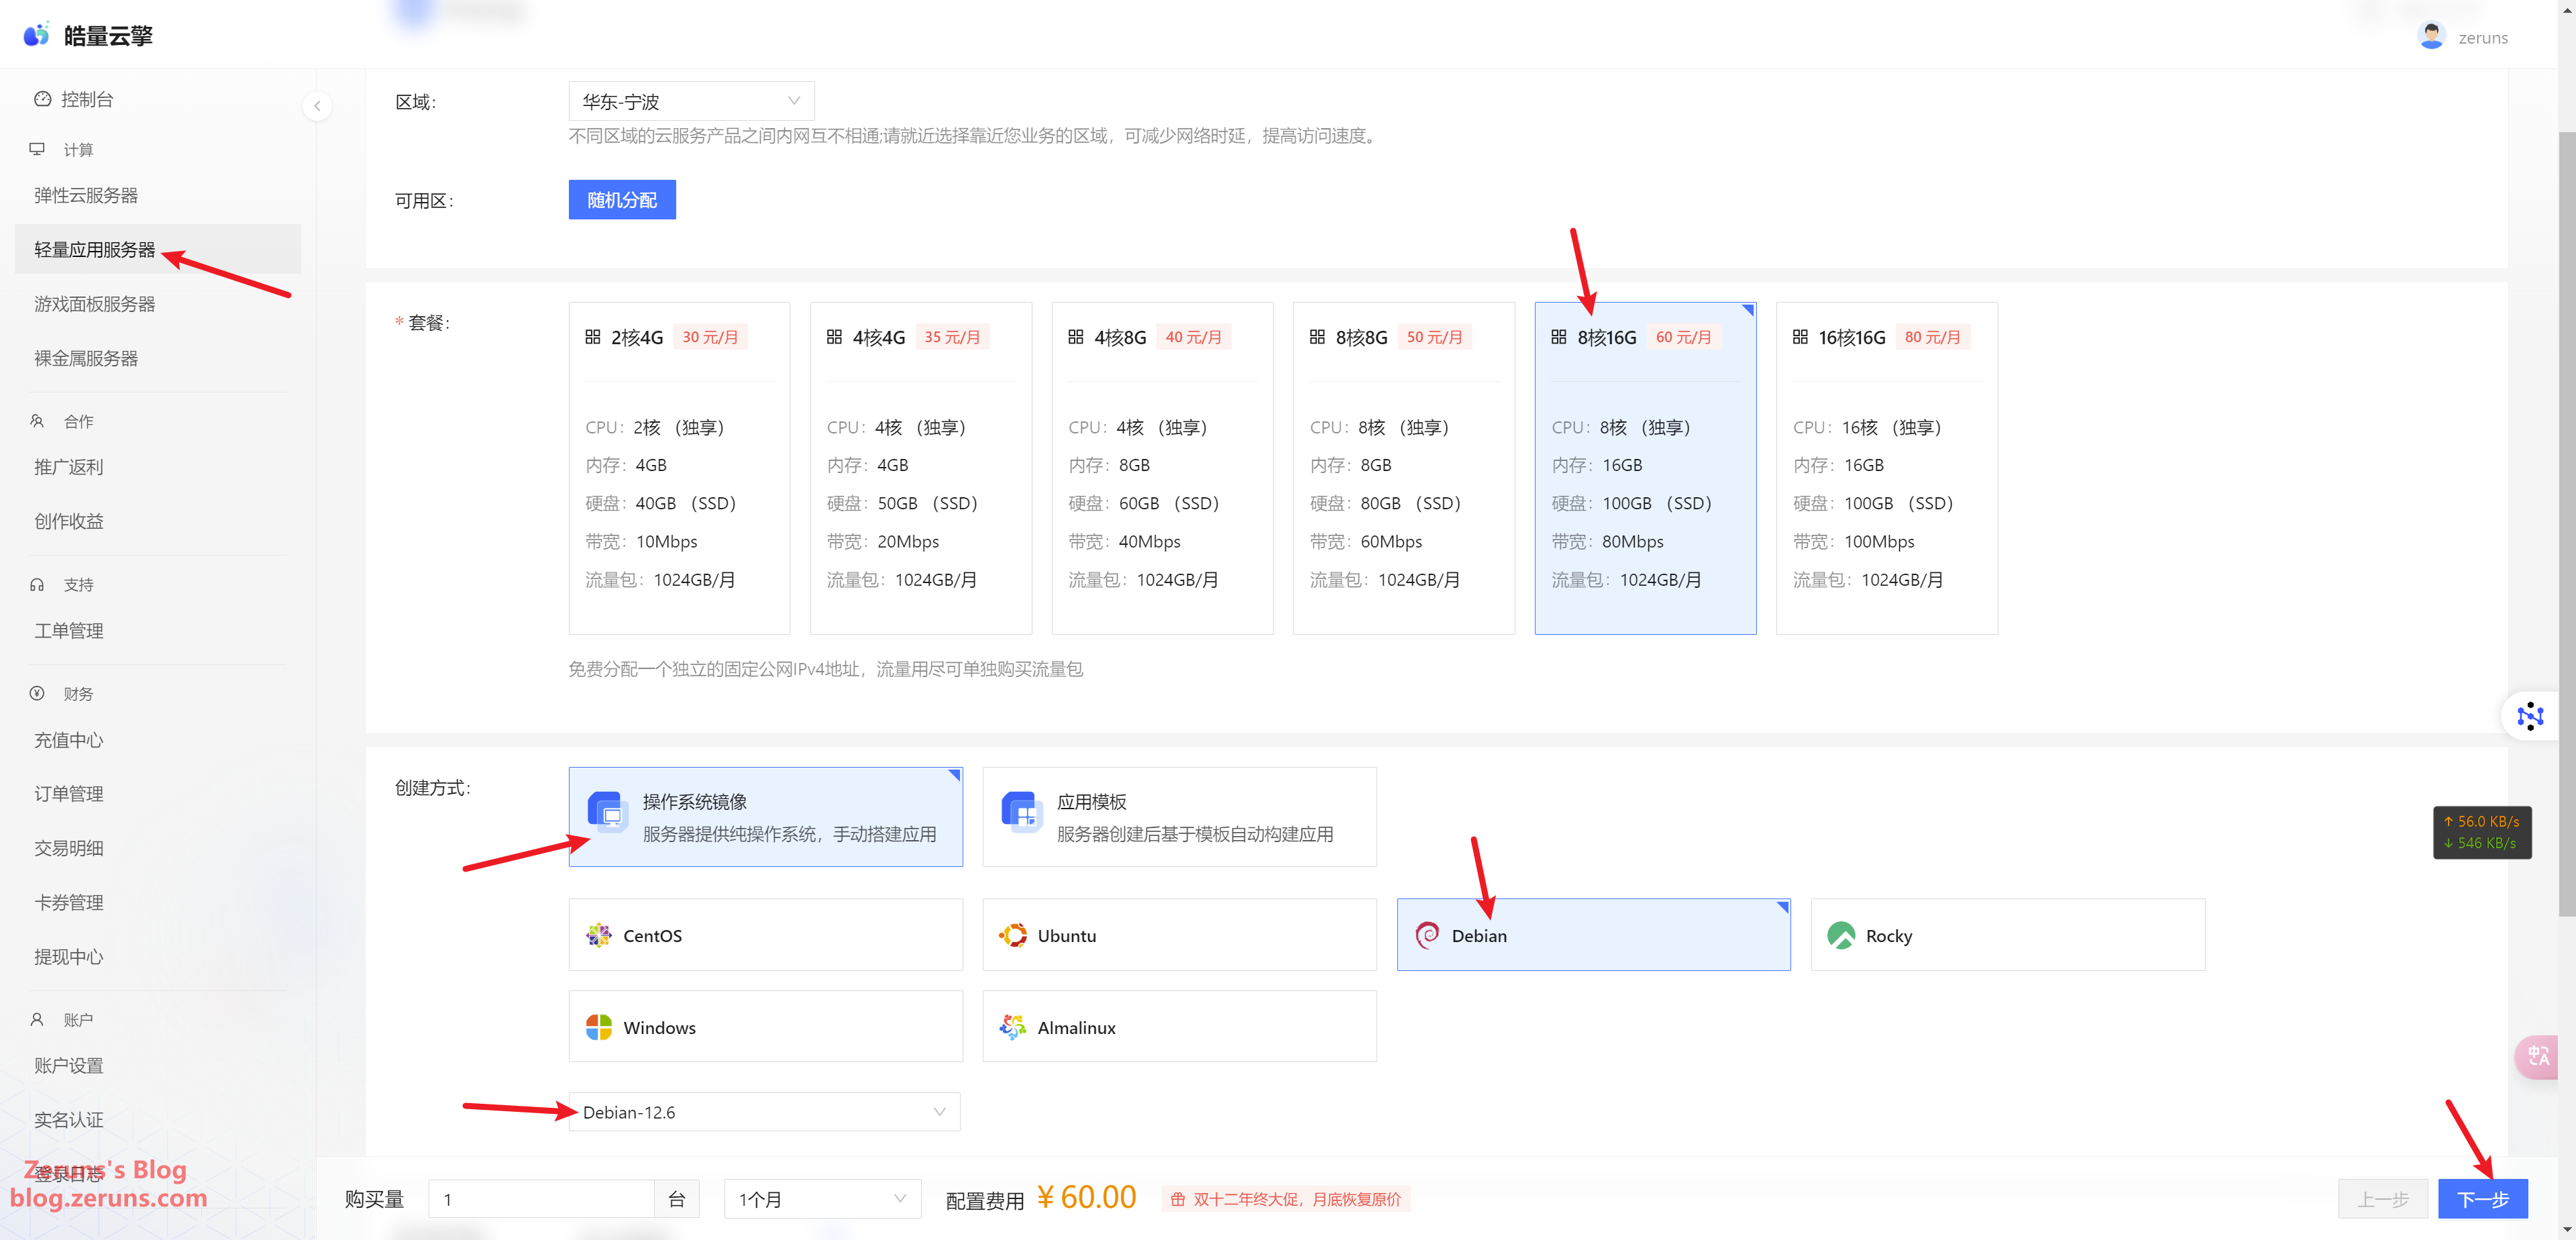
After registering, go to the Haoliang Yunqing control panel and click Lightweight Application Server → Buy Now.
I recommend choosing 8-core, 16GB RAM (4-core, 8GB is also an option, but it can only handle models up to 7B).
Set the system to Debian 12, then click Next.
Review the information and click Submit Order.

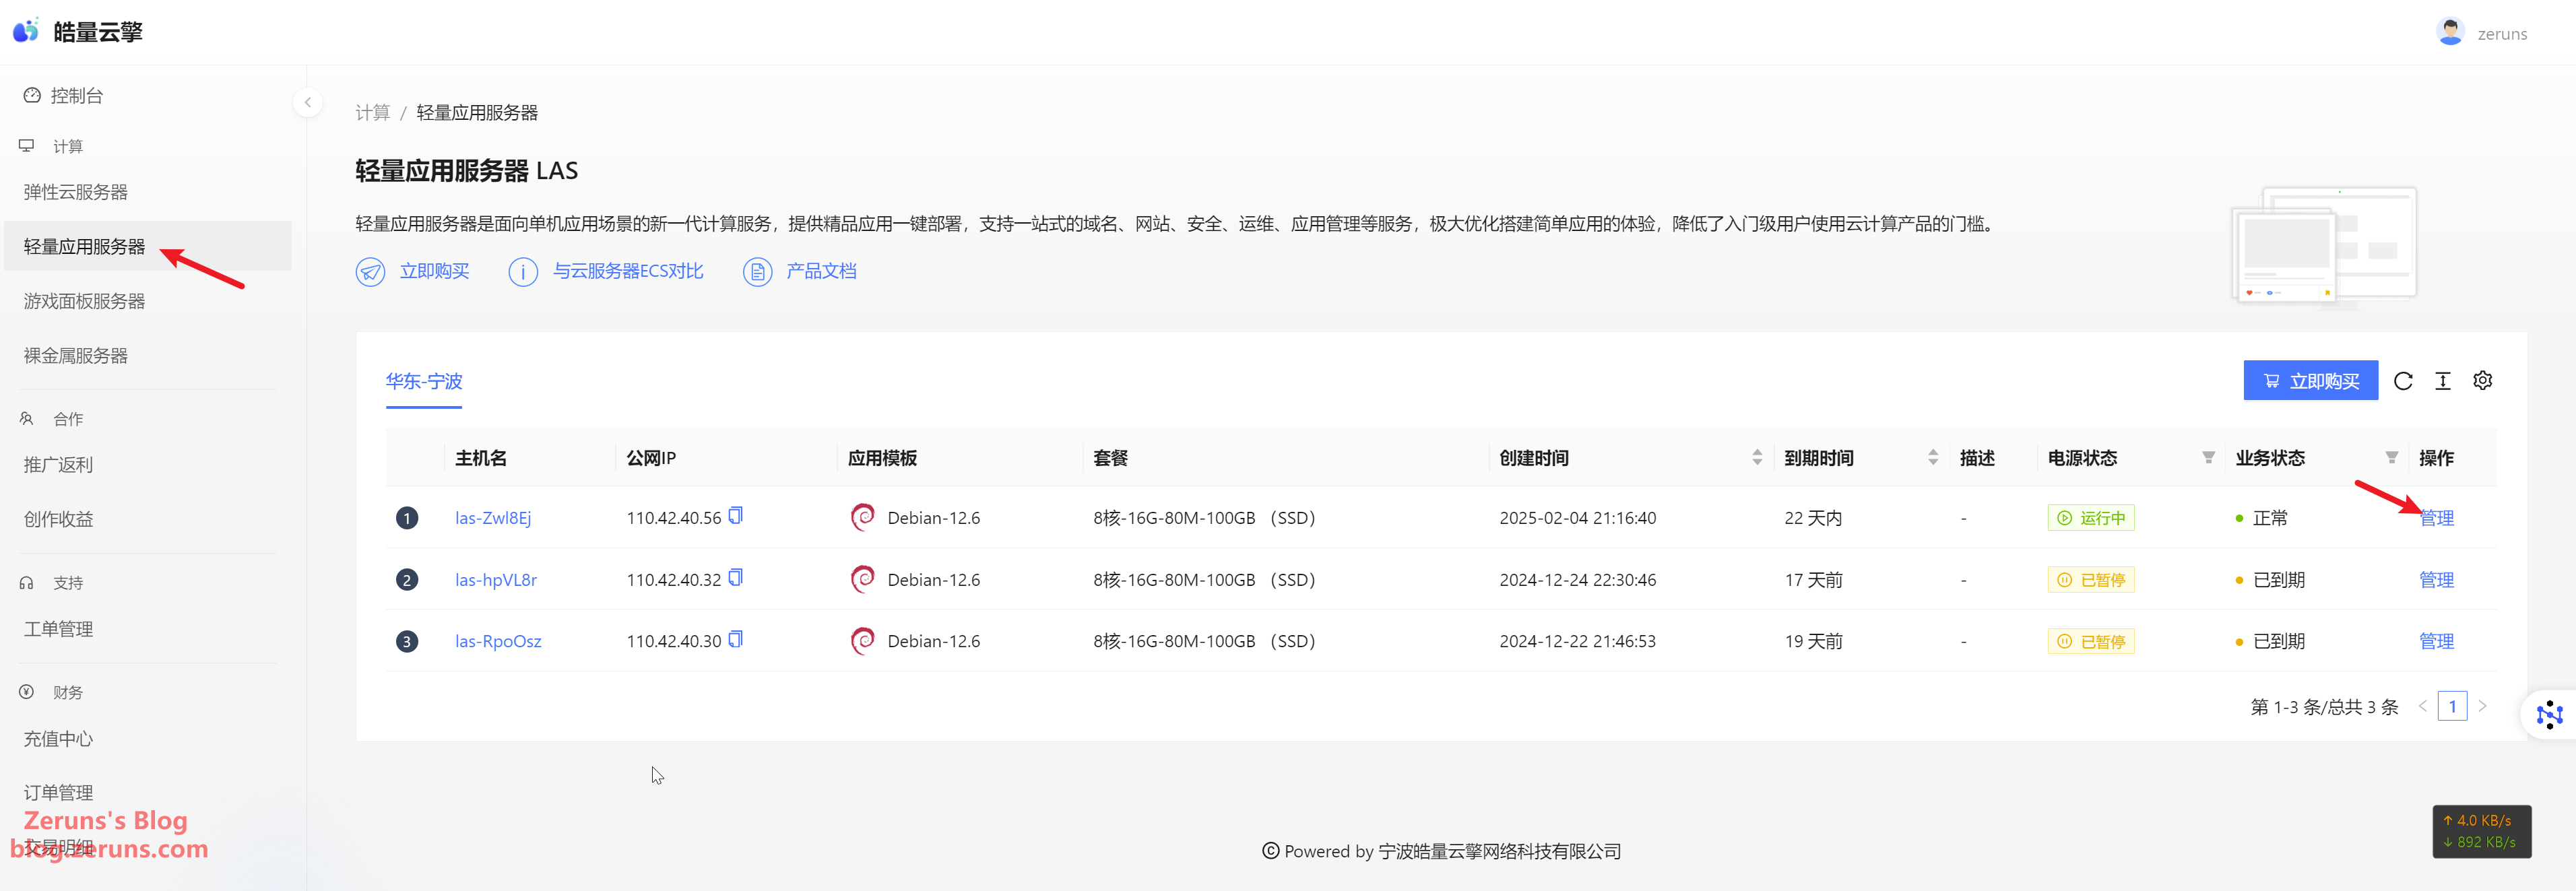
Click Manage to enter the server control panel.
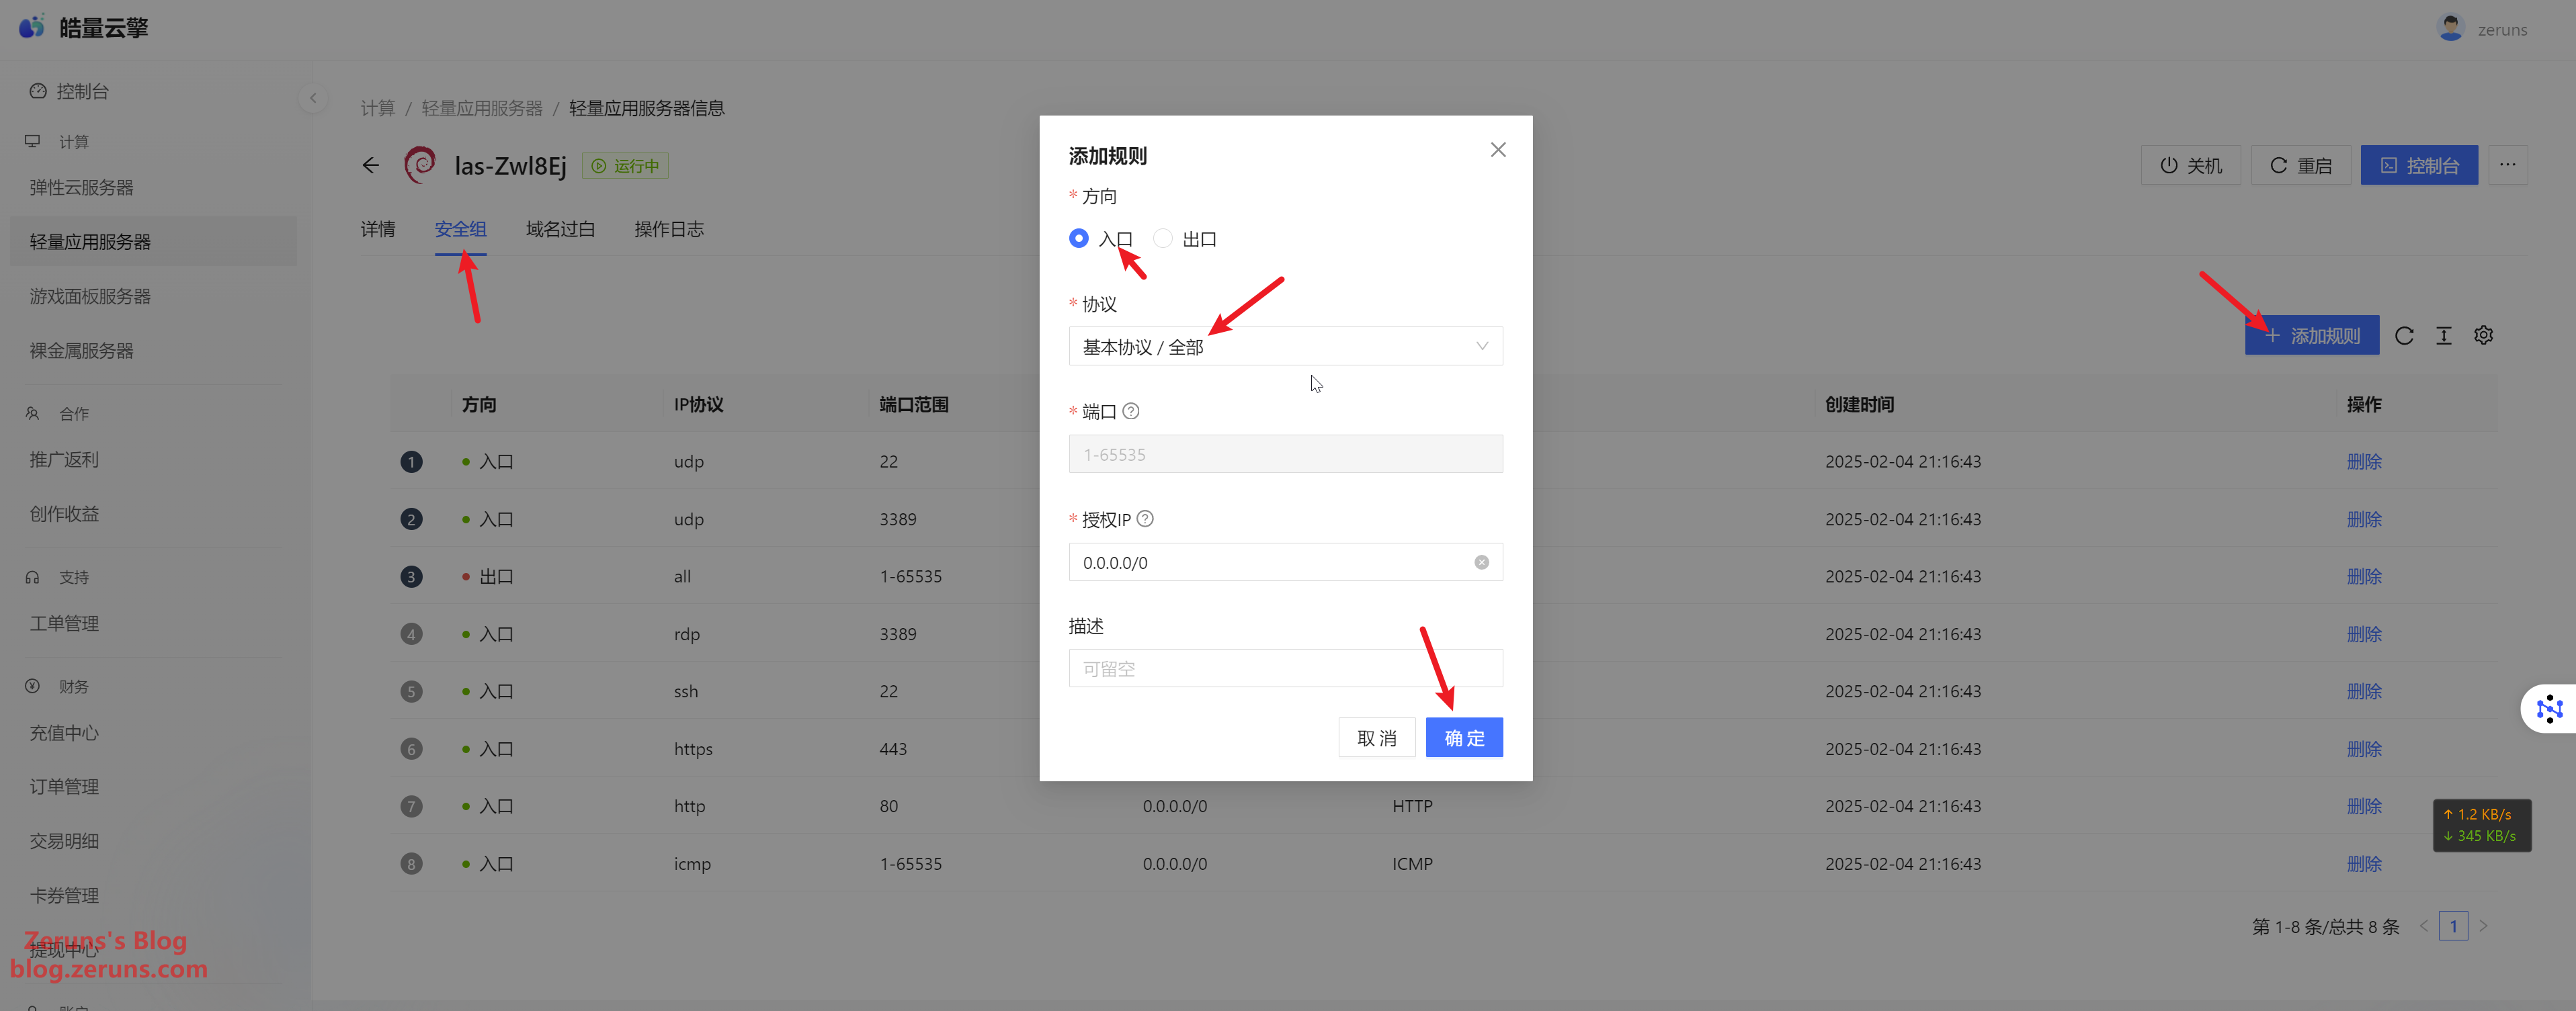
Go to Security Group → Add Rule → Inbound, and open all ports (or only the necessary ones).
Connecting to the Server
Download and install an SSH client software. I recommend PuTTY or MobaXterm.
SSH Client Download Link:
https://www.123pan.com/ps/2Y9Djv-UAtvH.html
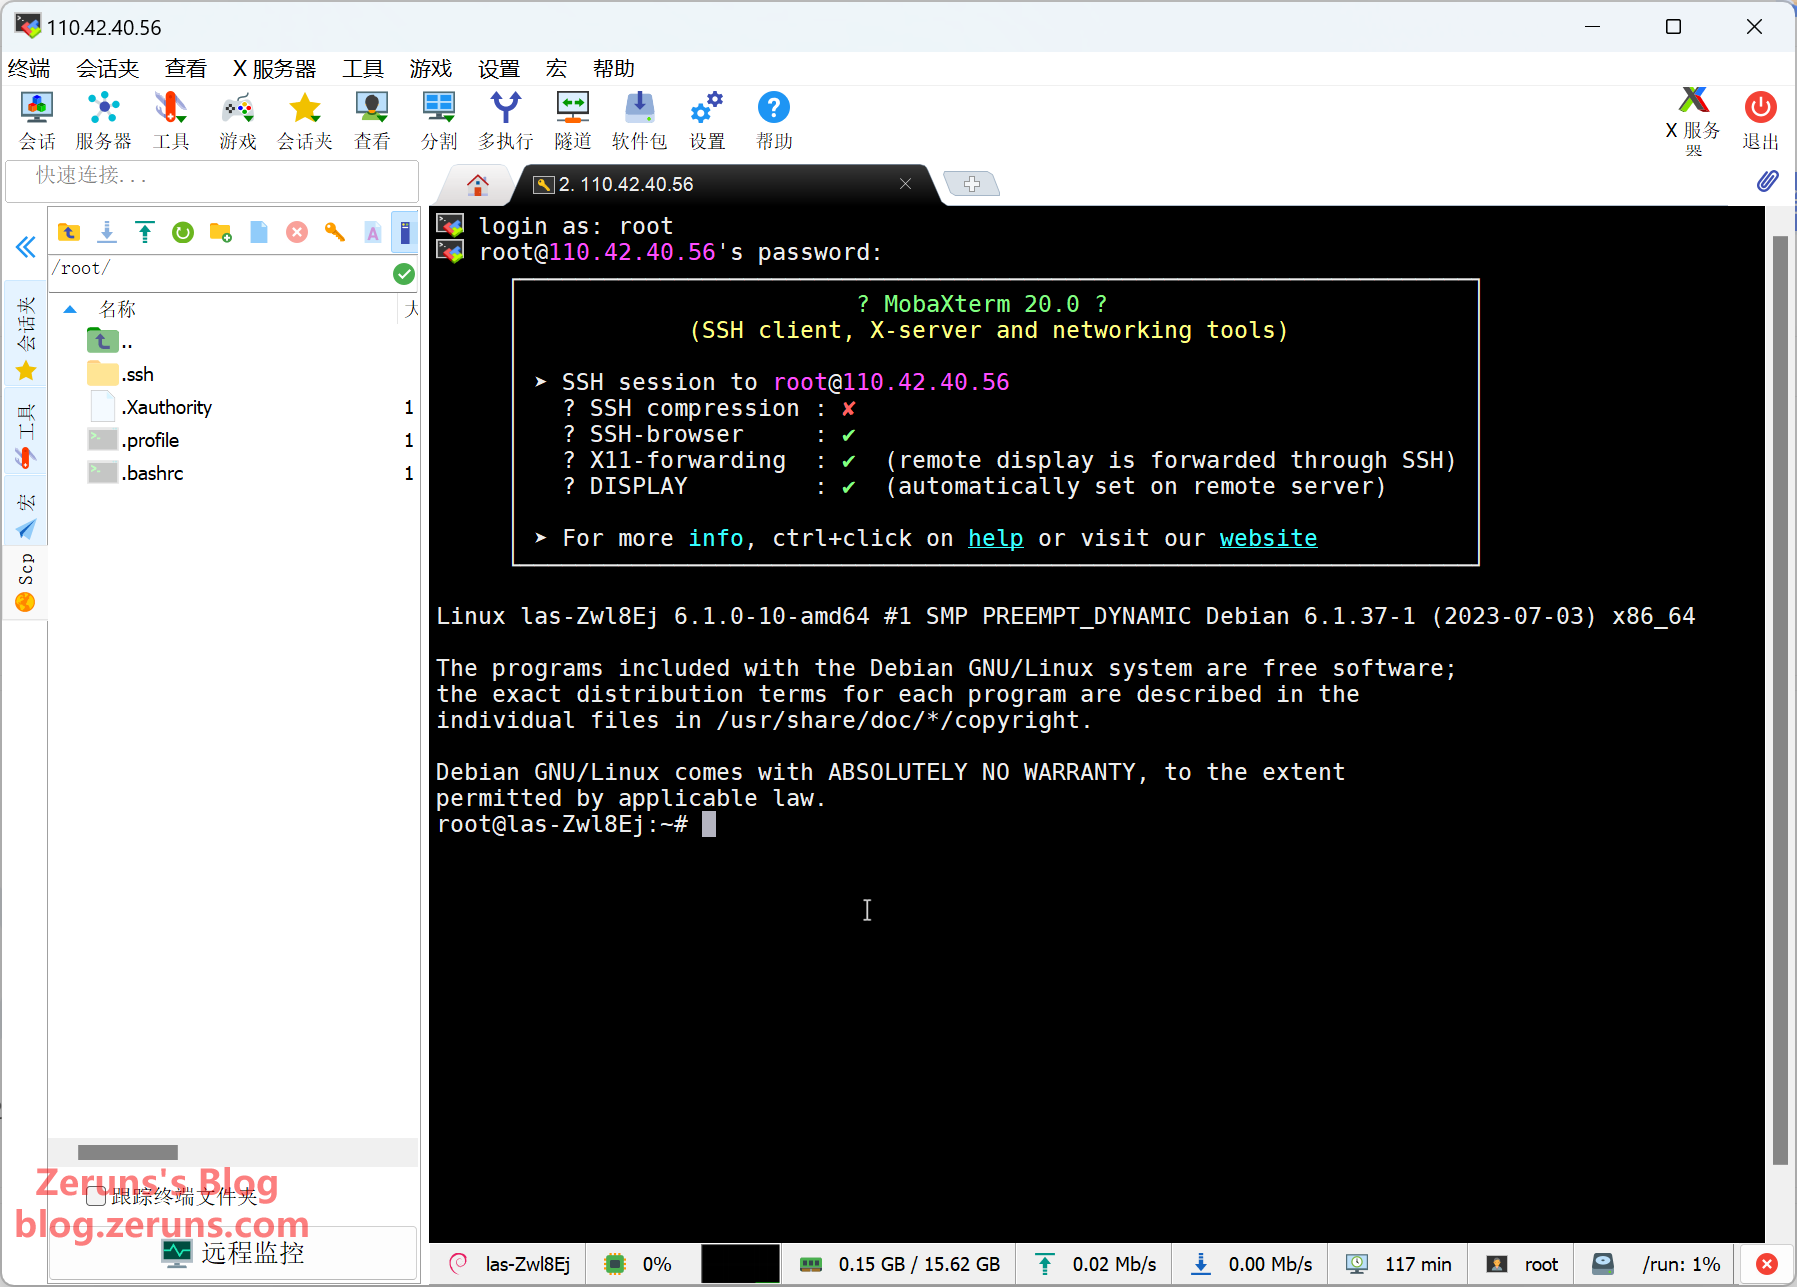
I'll use MobaXterm here. In the SSH client, enter your server's IP address (found in the control panel) and SSH port (default is 22), then click OK or Open.
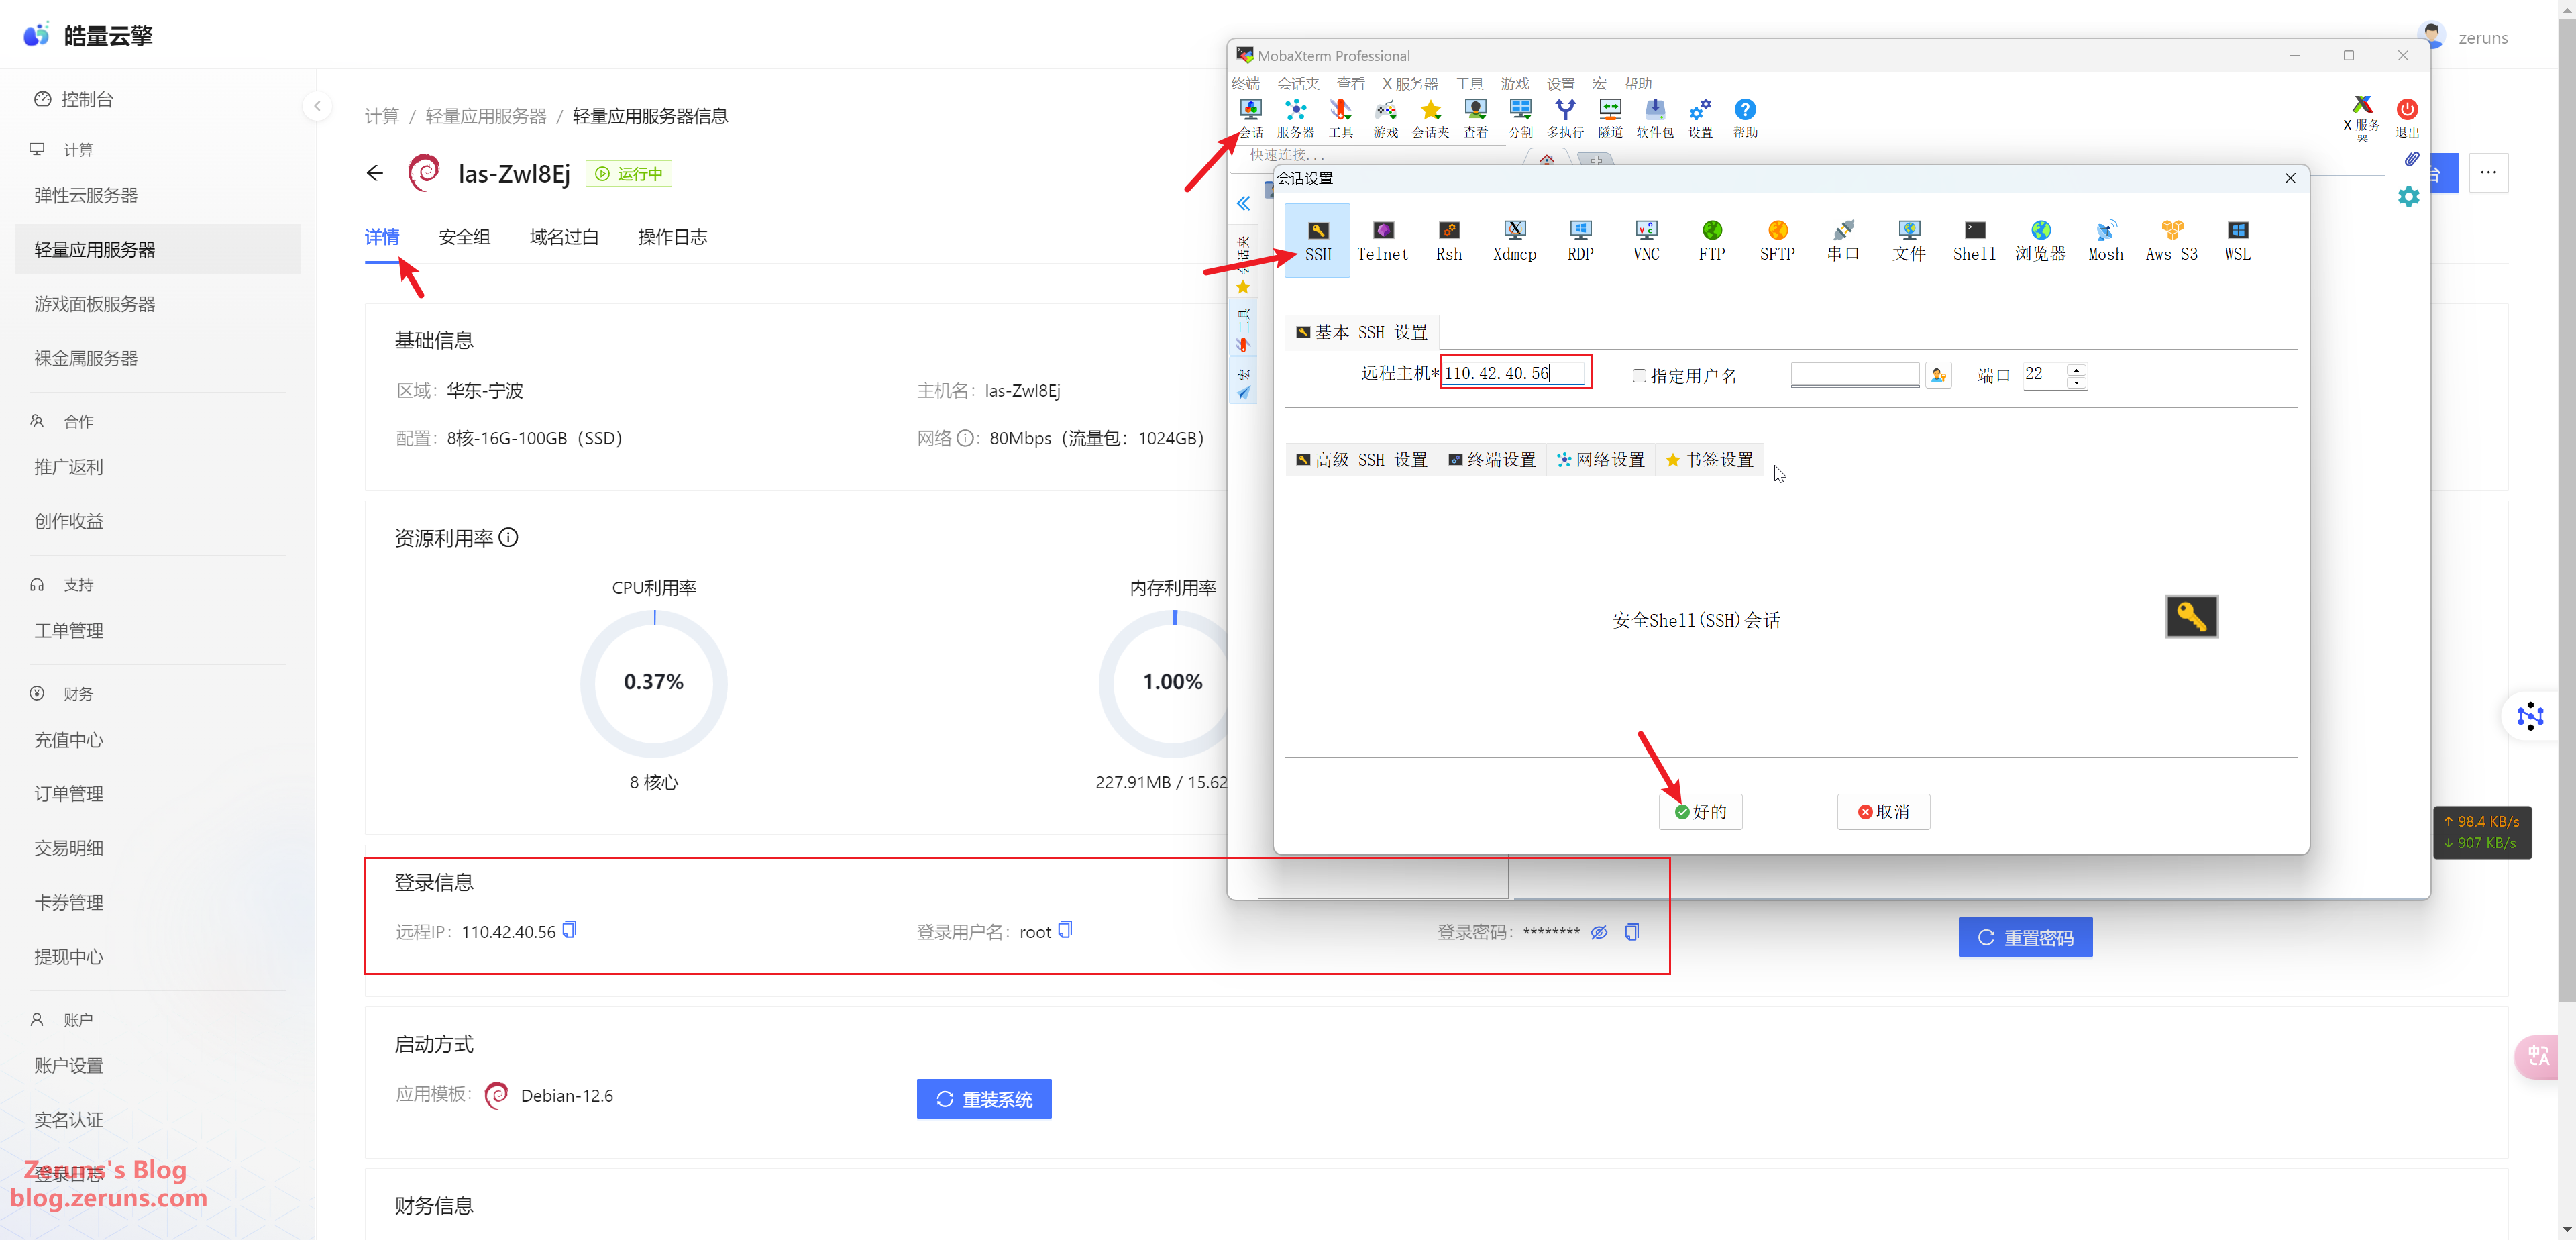
Enter your username and press Enter. The default username is usually root. Then, enter your password (found in the control panel) and press Enter again. Note that the password input will not be displayed.
Quick Tip
To copy text in the SSH terminal, hold the left mouse button and select the text, then release the button. To paste, right-click in the terminal.
Changing APT Sources
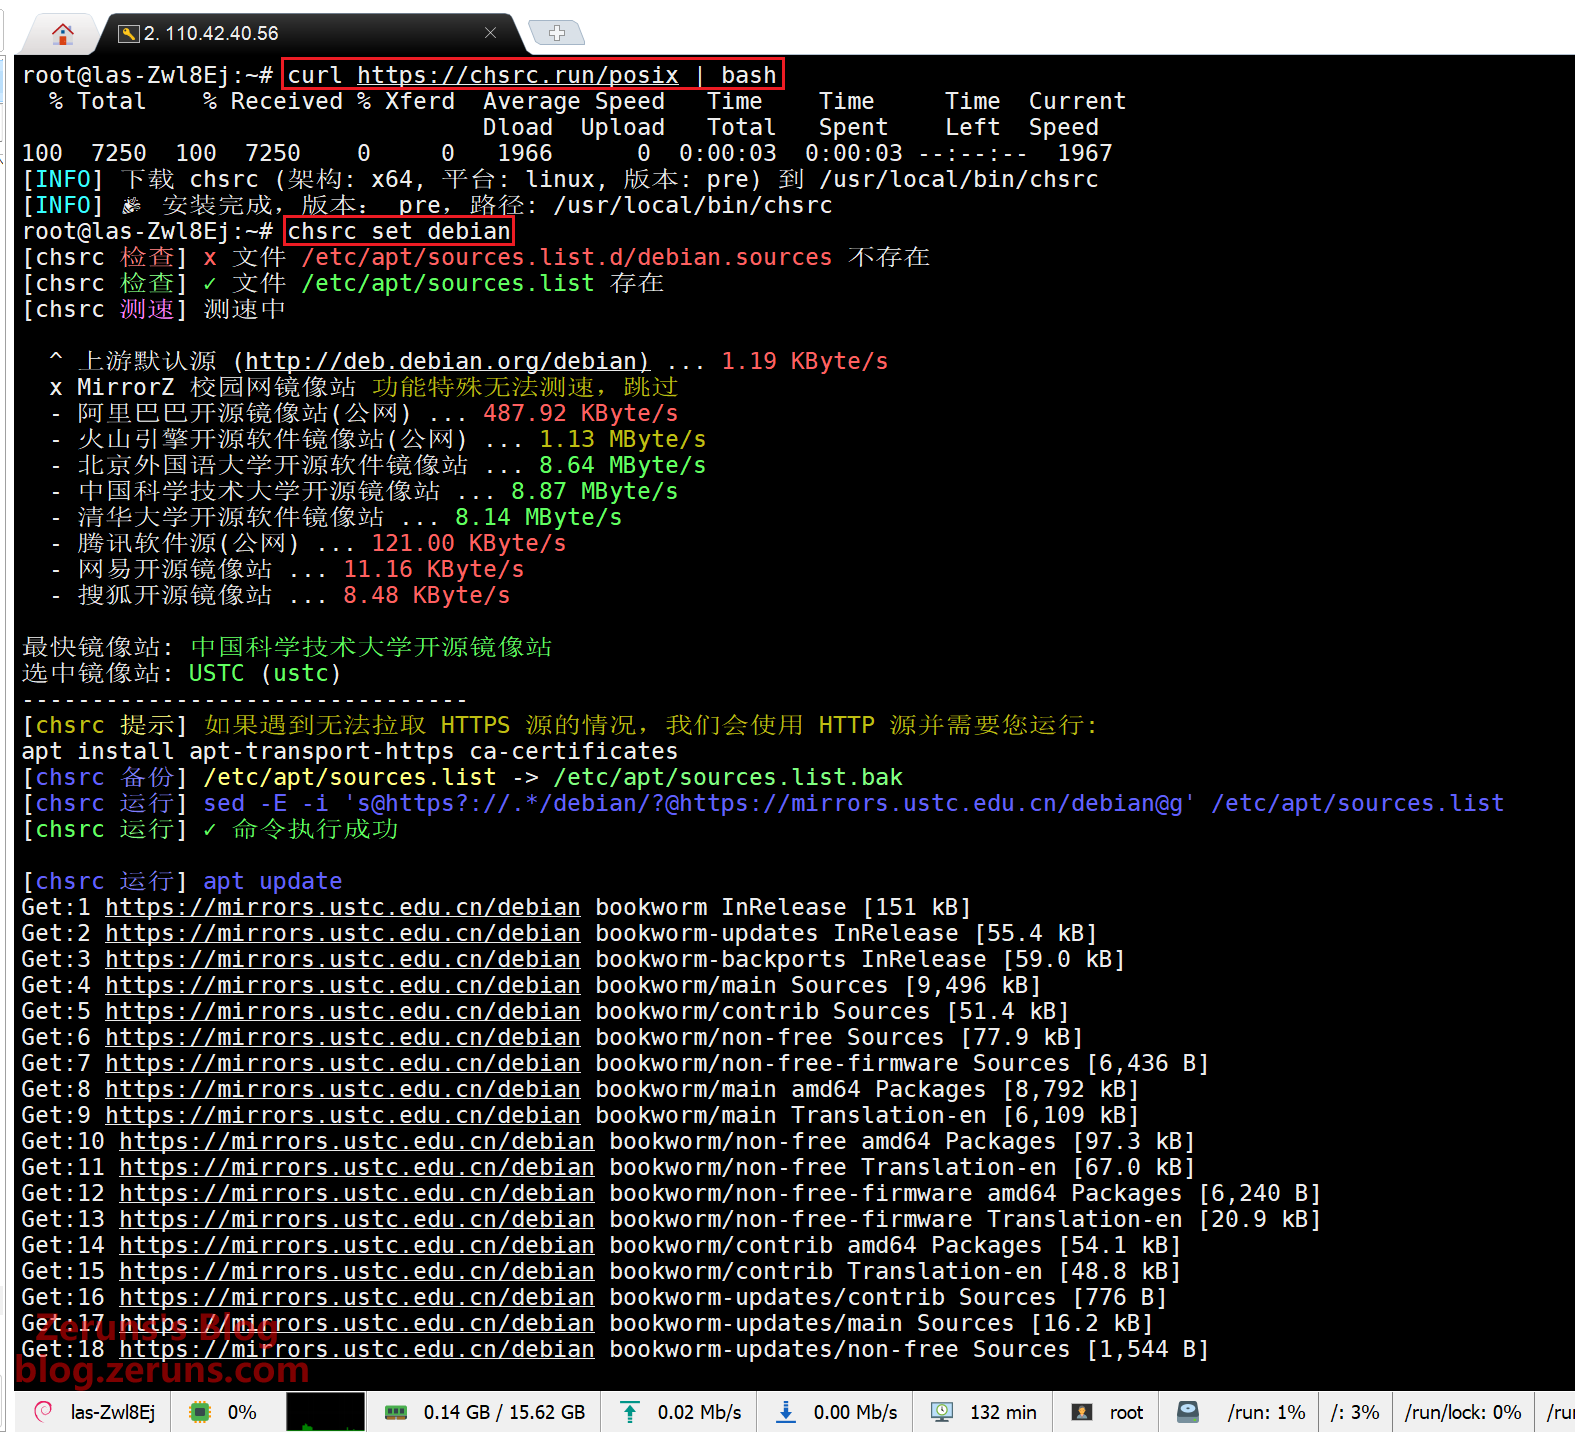
By default, the system uses APT sources from overseas servers, which can be slow. We will switch to a faster domestic mirror using chsrc.
Run the following commands in the SSH terminal (# lines are comments, do not enter them):
# Install chsrc
thecurl https://chsrc.run/posix | bash

# Automatically test and select the fastest mirror
chsrc set debian
Setting Up SWAP
SWAP (swap space) is an area on the disk that acts as virtual memory when RAM is insufficient. When physical memory is exhausted, the OS moves some inactive data to SWAP space, freeing up RAM for active processes. This prevents system crashes or failures due to memory shortages.
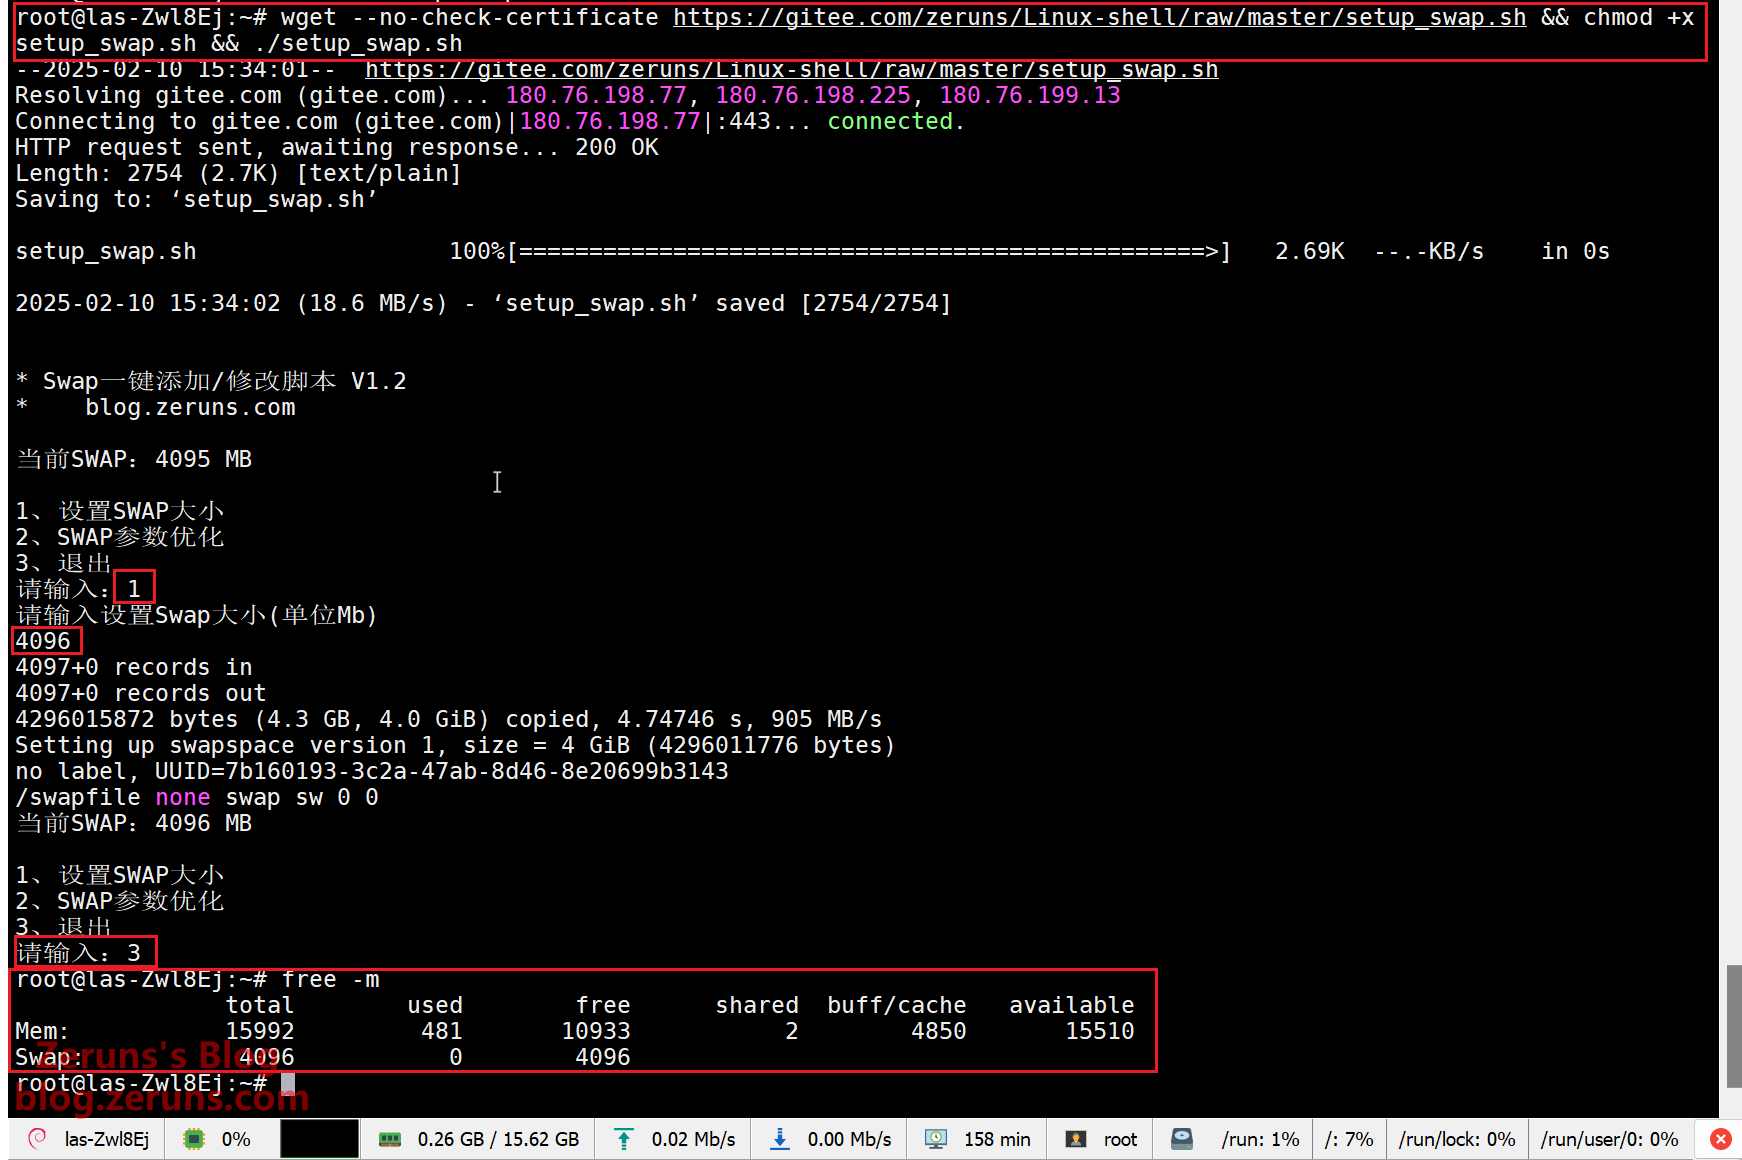
Run the following commands to set up SWAP:
# Use a script to set up SWAP (set it to 4096MB as prompted)
wget --no-check-certificate https://gitee.com/zeruns/Linux-shell/raw/master/setup_swap.sh && chmod +x setup_swap.sh && ./setup_swap.sh

# Check if the SWAP is successfully configured
free -m
Install Docker
In the SSH terminal, enter the following commands.
Using the apt package manager:
# Install Docker; if prompted to continue, enter 'y' to confirm
apt update && apt -y install docker.io

# Set Docker to start on boot and launch Docker
systemctl enable docker && systemctl start docker

# Verify installation; if successful, it will display Docker version x.x.x
docker -v

If the installation fails, try the following script:
# Required for users in China
export DOWNLOAD_URL=https://mirrors.ustc.edu.cn/docker-ce

# Docker installation script
curl -fsSL https://get.docker.com -o get-docker.sh && sudo sh get-docker.sh

# Verify installation; if successful, it will display Docker version x.x.x
docker -v
If the above methods do not work, refer to the manual installation guide:
Docker Manual Installation Guide
Switch Docker to a Chinese mirror source
# Change Docker mirror
echo '{"registry-mirrors": ["https://docker.1ms.run","https://docker.1panel.live","https://9uy9qgvj.mirror.aliyuncs.com"]}' | sudo tee /etc/docker/daemon.json > /dev/null
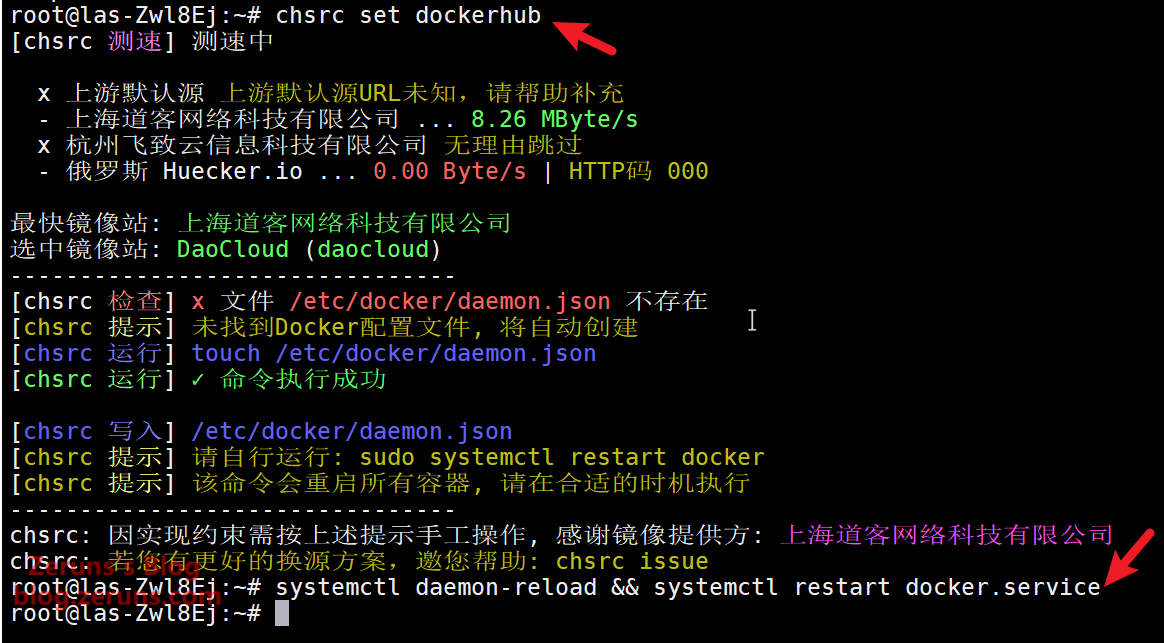
# Use chsrc to change the Docker source (use this if the above method fails)
chsrc set dockerhub
# Restart Docker
systemctl daemon-reload && systemctl restart docker.service
Install Ollama
This tutorial uses Docker to install Ollama, which only supports CPU execution and does not support GPU acceleration.
You can change /data/ollama in the command below to another directory. This directory is used to store model data, but you can keep it as is—just ensure there is enough storage space.
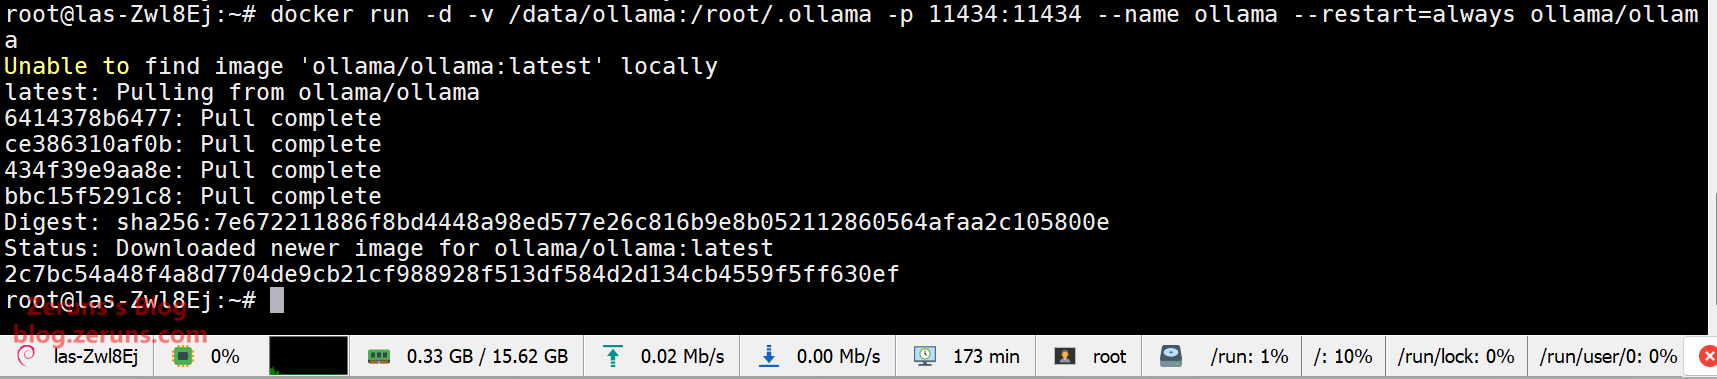
# Create an Ollama container
docker run -d -v /data/ollama:/root/.ollama -p 11434:11434 --name ollama --restart=always ollama/ollama
If you encounter the error error: exec: "apparmor_parser": executable file not found in $PATH, run the following command in the SSH terminal:
apt -y install apparmor apparmor-utils
Then re-run the command to create the Ollama container. If you receive a message stating that the container already exists, run:
docker start ollama
Deploying the DeepSeek-R1 Model
This tutorial demonstrates deploying the DeepSeek-R1-14B model. 14B indicates that the model has 14 billion parameters (B stands for "Billion"). A minimum of 16GB RAM is recommended. If you only have 8GB RAM, it is recommended to deploy the 1.5B or 7B version (approximately 1GB RAM is required per 1B parameter).
Additionally, the 14B version requires about 10GB of disk space, so ensure your server has enough free space!
# Download and run the deepseek-r1:14b model
docker exec -it ollama ollama pull hf.co/lmstudio-community/DeepSeek-R1-Distill-Qwen-14B-GGUF:Q6_K
# Alternative method if the above does not work
docker exec -it ollama ollama pull deepseek-r1:14b

# 7B model (recommended for 8GB RAM)
docker exec -it ollama ollama pull hf.co/lmstudio-community/DeepSeek-R1-Distill-Qwen-7B-GGUF:Q4_K_M
# Alternative method if the above does not work
docker exec -it ollama ollama pull deepseek-r1:7b

Replace pull in the above commands with run to directly launch the model and interact with it via the command line.
Install OpenWebUI
Open WebUI is an extensible, feature-rich, and user-friendly self-hosted WebUI designed for fully offline operation. It supports various LLM runtimes, including Ollama and OpenAI-compatible APIs.
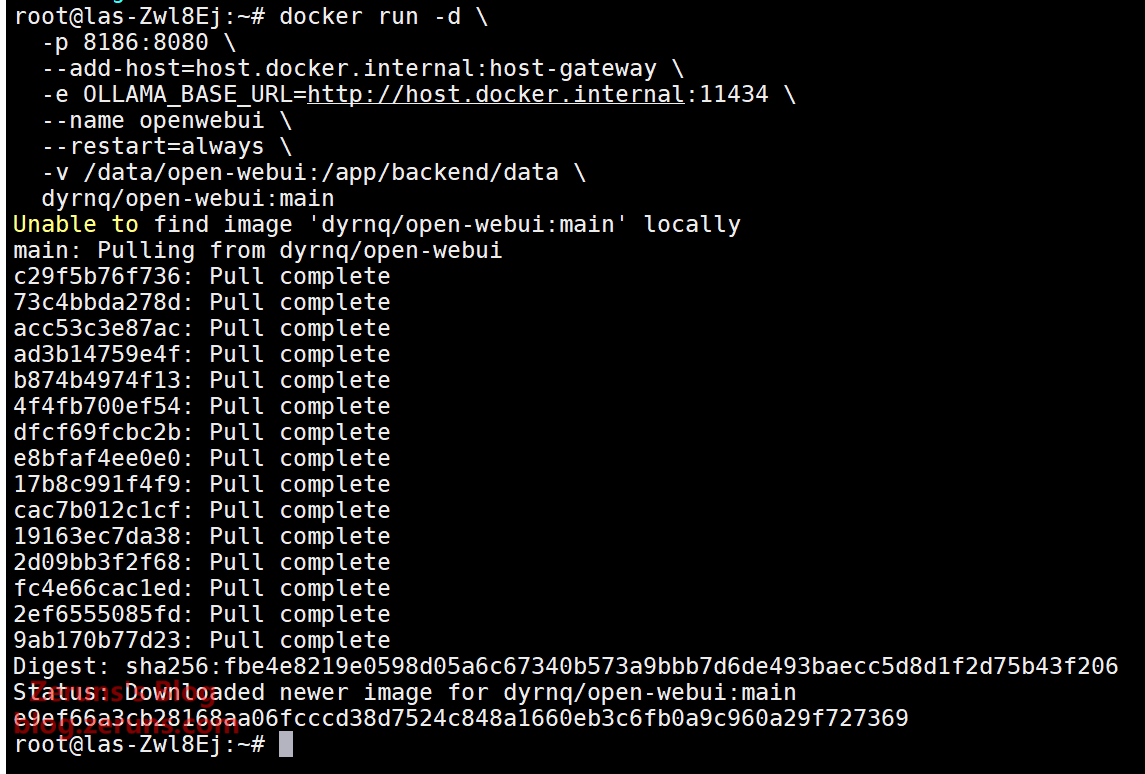
Copy the following command block and run it in your SSH terminal as a whole (do not execute line by line):
docker run -d \
  -p 8186:8080 \
  --add-host=host.docker.internal:host-gateway \
  -e OLLAMA_BASE_URL=http://host.docker.internal:11434 \
  --name openwebui \
  --restart=always \
  -v /data/open-webui:/app/backend/data \
  dyrnq/open-webui:main
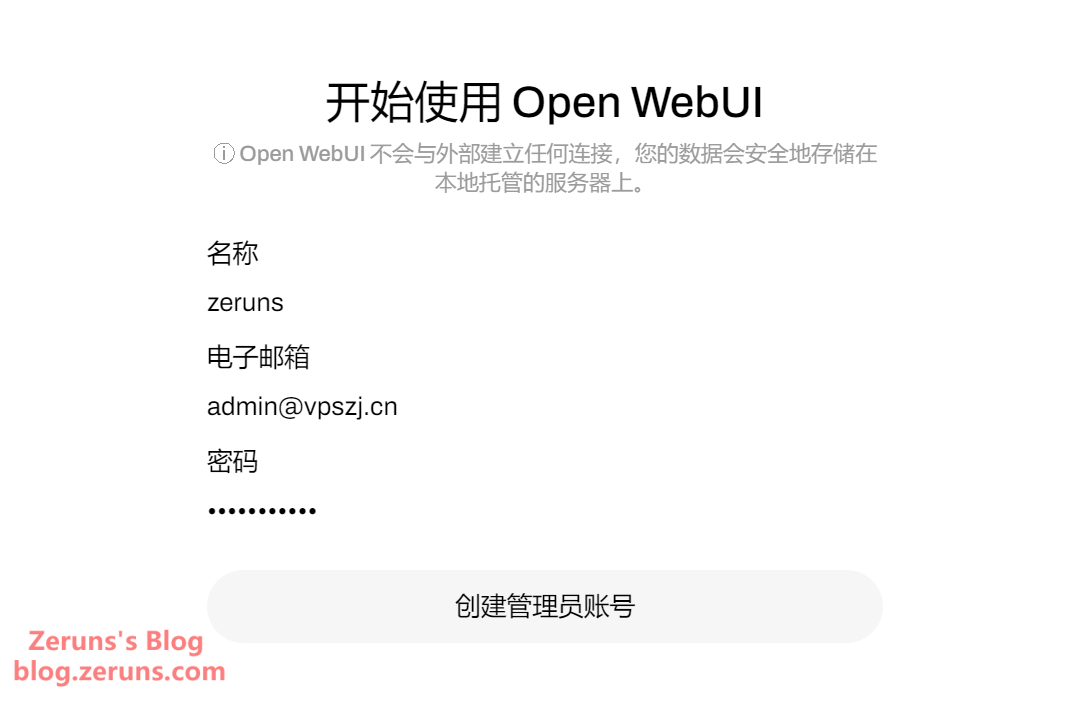
Open your browser and visithttp://<server_public_IP>:8186to start using Open WebUI. Simply register with an email.
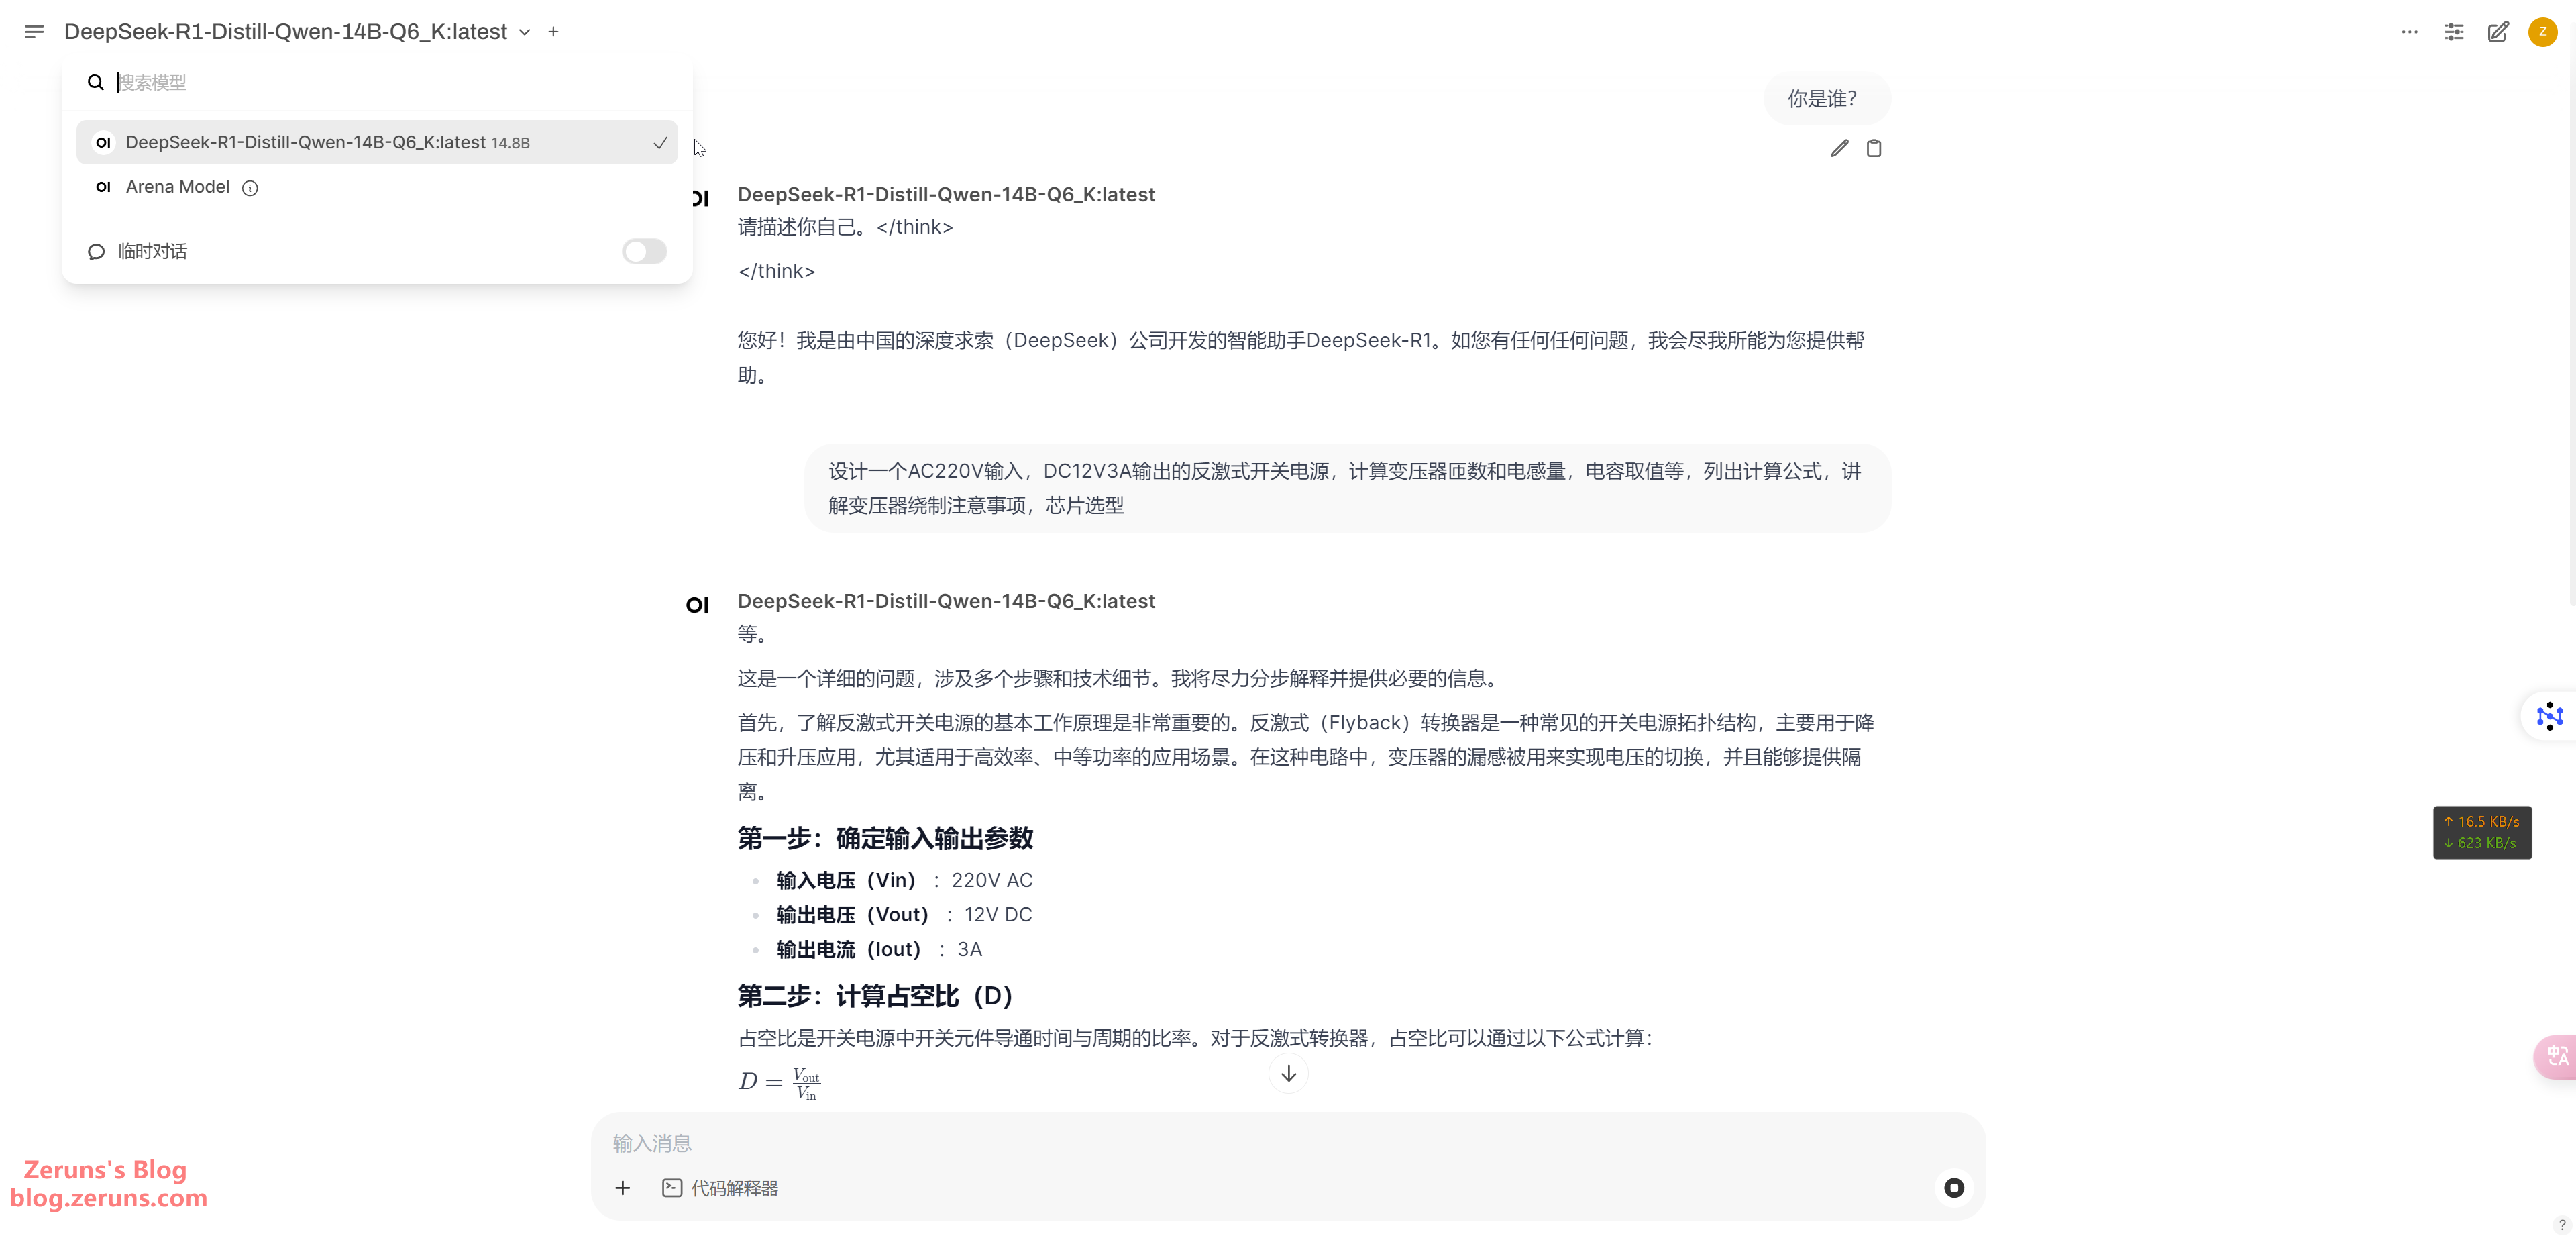
If no models are downloaded yet, you need to download one first. If you have already downloaded a model in Ollama, you can directly select it here and start chatting.
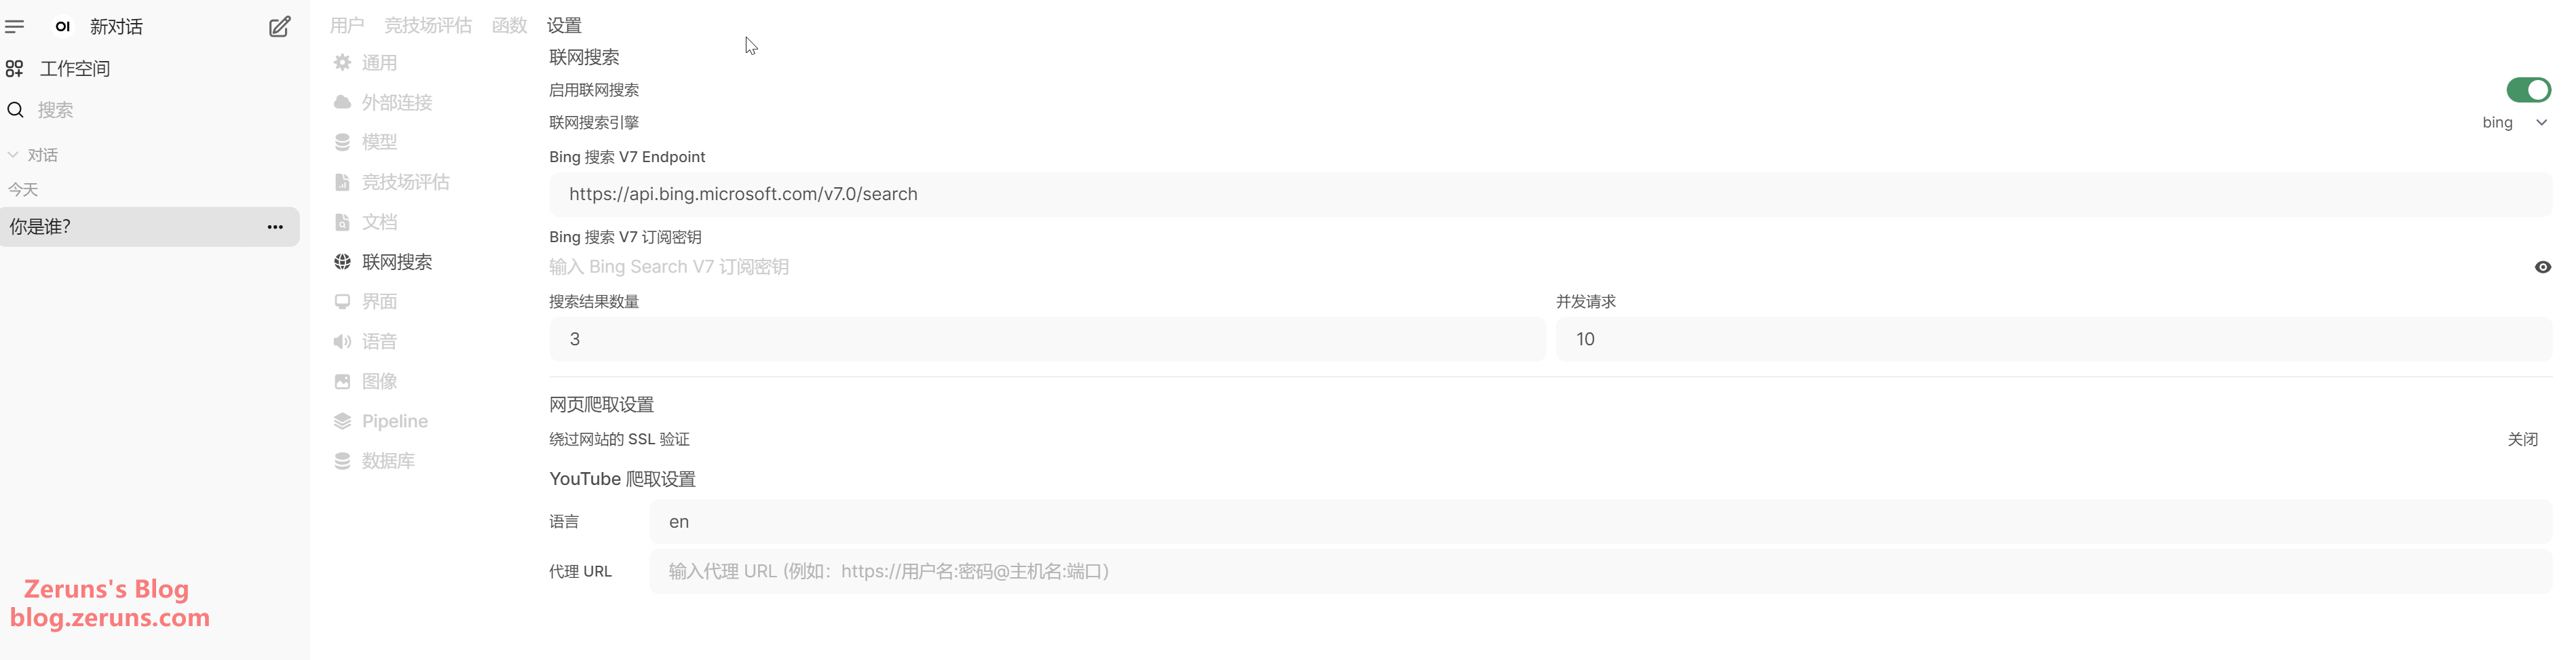
You can also enable web search functionality.
If you want to access it via a domain name, you can set up an Nginx reverse proxy.
Recommended Reading
- High-performance and budget-friendly VPS/cloud server recommendations:https://blog.zeruns.com/archives/383.html
- Minecraft server setup tutorial: https://blog.zeruns.com/tag/mc/
- Haikou-Beijing-Macau travel logs and photos: https://blog.zeruns.com/archives/849.html
- Apple Mac Mini M4 mini PC review and teardown: https://blog.zeruns.com/archives/851.html
- Setting up a Typecho personal blog on a cloud server – a beginner-friendly guide: https://blog.zeruns.com/archives/749.html


Comment Section