


Minecraft [Better MC] modpack server setup and multiplayer tutorial, BMC4 Chinese version download, Minecraft server deployment guide using Linux + MCSM.
Video Tutorial: https://www.bilibili.com/video/BV1uSNRzKEuB/
Rainyun Cloud App (K8s-based) Free One-Click Bedrock Server Hosting Tutorial: https://blog.zeruns.com/archives/875.html
What is a Modpack?
A Minecraft modpack is a customized game version that includes multiple mods and configuration files, allowing players to experience various gameplay styles and content. Modpacks are typically created and released by community players or teams, and some are even official or partner releases. There are many types of modpacks: tech, magic, adventure, survival, and more, each offering unique features and gameplay.
- Linux Minecraft Modpack Server Tutorial (ATM9): https://blog.zeruns.com/archives/775.html
- Pokehaan Craft 2 Server Setup Guide: https://blog.zeruns.com/archives/755.html
- Utopia Adventure 3.2 Linux Server Setup: https://blog.zeruns.com/archives/796.html
- Dragon Adventure: New Journey 2.0 Linux Server Setup: https://blog.zeruns.com/archives/852.html
Introduction to the "Better MC" Modpack
Basic Info
- 📦 Modpack Name: Better MC [FORGE] BMC4
- 🧑💻 Creator: LunaPixelStudios
- 🔖 Version: 1.20.1, 1.20
- 🚀 Mod Loader: Forge
- 🎮 Genre: Adventure and RPG, Exploration, Vanilla+, Multiplayer, Quests
- 📜 License: All Rights Reserved
BMC4 Modpack on CurseForge: https://url.zeruns.com/wEpA6
Join the Minecraft Server Hosting Group 2:966038270
MC Server Hosting QQ Channel: https://pd.qq.com/s/ckmpr5e63
Minecraft Hosting Telegram Group: https://t.me/Minecraft_zeruns
Content Overview
📝 Summary
Better MC [FORGE] BMC4 is an adventure and RPG-focused Minecraft modpack ideal for players who enjoy challenges and exploration.
✨ Key Features
- Over 270 mods
- 100+ quests
- Rich exploration and quest content
- Supports multiplayer mode — perfect for playing with friends
📦 Notable Mods Included
Core Mods:
- Biomes o' Plenty
- Geophilic
- Mowzie's Mobs
- Cataclysm
- When Dungeons Arise
- AdoraBuild: Structures
- The Aether
- Deep Aether
- Aether Redux
- Aether Villages
- Waystones
- XP Tomes
- Xaero's Minimap
- Rideable Dragons
- Free World Sharing
About MCSM10
MCSManager is an open-source, distributed, one-click deployment server control panel supporting Minecraft and Steam game servers.
MCSManager is widely used in the Minecraft and other gaming communities. It allows you to centrally manage multiple physical servers, dynamically deploy game servers on any host, and offers a secure, reliable multi-user permission system — ideal for managing multiple servers with ease.
Official Docs: https://url.zeruns.com/FhpqL
Linux Installation Guide for MCSManager 10: https://blog.zeruns.com/archives/787.html
Download the Modpack
You need both the server and client versions of the Better MC modpack. You can download them from CurseForge, or from my prepackaged versions below which include a Chinese language patch.
The server version includes a Windows-compatible JDK21. Simply double-click run.bat to launch on a Windows server.
The client package includes JDK21 and the PCL2 launcher — download and play directly.
BMC4_v43 Chinese Client and Server Download Links:
- Baidu Cloud: https://pan.baidu.com/s/1pFF32OJDCMWSSGpK-r6ocw?pwd=1b1u Code: 1b1u
- 123 Cloud (fast download, no login): https://www.123684.com/s/2Y9Djv-ItyvH
Preparation
You'll need a server to host the game. I'm using Rainyun's game VPS, specifically the 13900K model with 4 cores and 8GB RAM.
The server must have at least 4 cores and 8GB RAM! Also, the CPU should have high single-thread performance (CPU-Z single-thread score 600+ recommended) — ideal CPUs include 14900K, 13900K, 7950X, 9950X, etc. Java servers, especially high-version ones and large modpacks, are very performance-intensive.
- Rainyun Discount Registration:https://www.rainyun.com/zeruns_?s=blog-en
- Rainyun Discount Code:
zeruns(bind your WeChat after registering to get a 50% coupon. I also often release 20% off coupons via the reward store.)
More affordable VPS recommendations:https://blog.zeruns.com/archives/383.html
- Rainyun 14900K Ningbo Anti-DDoS VPS Benchmark:https://blog.vpszj.cn/archives/2115.html
- Top 4 Panel-based Hosting Options for one-click MC modpacks, Palworld, 7 Days to Die, CSGO servers: https://blog.zeruns.com/archives/808.html
- Haoliang Yunqing Inner Mongolia lightweight VPS — 16C32G 100M only ¥120/month: https://blog.vpszj.cn/archives/2536.html
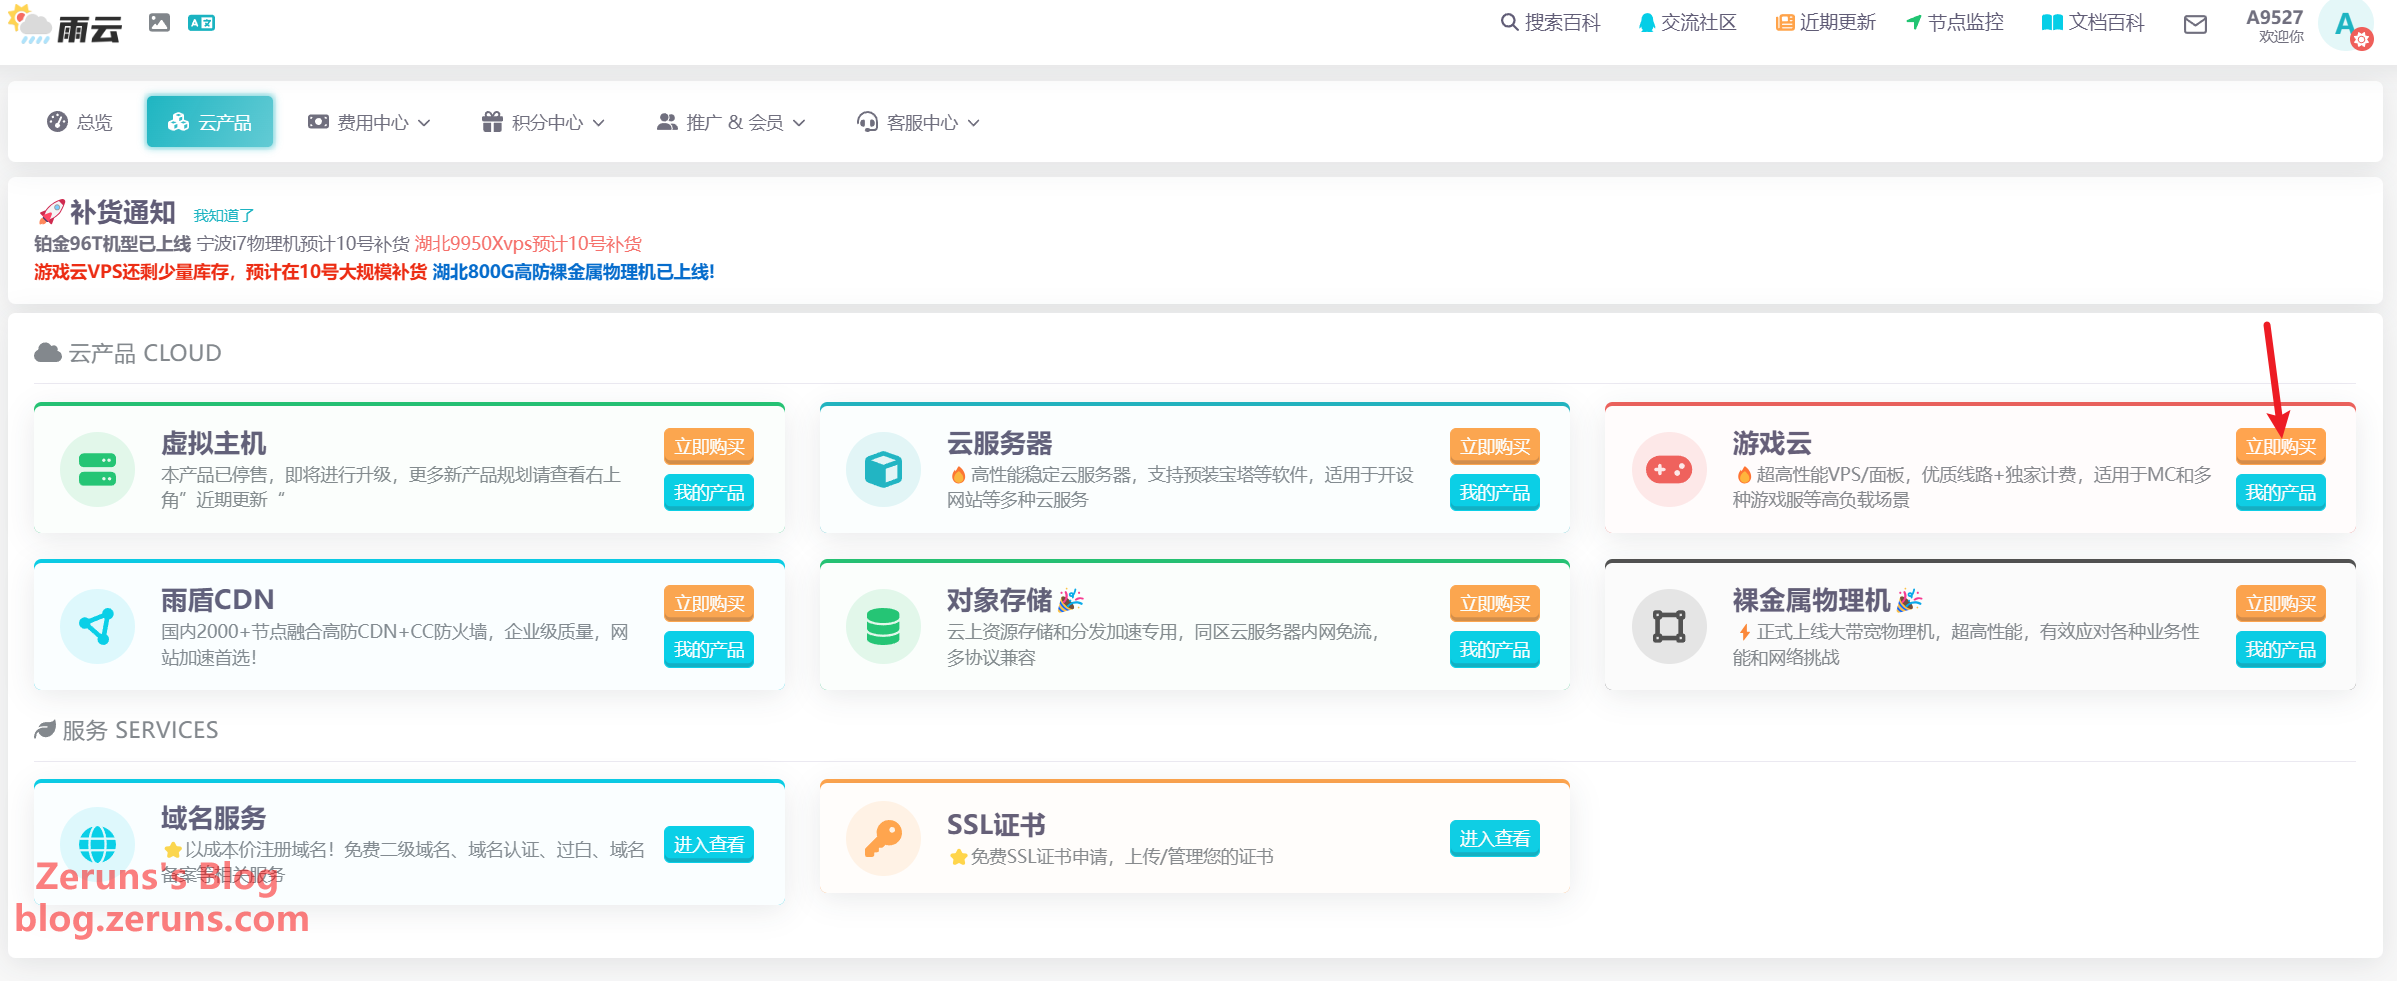
After registering, go to the Rainyun console, then click Cloud Products → Game Cloud → Buy Now:
Select VPS Server, choose a model — here, I chose 13900K — select a region, e.g., Zhejiang Ningbo.
Note: Jiangsu Suqian uses a NAT network — port forwarding is required with 15 ports provided. Zhejiang Ningbo has a dedicated public IP.
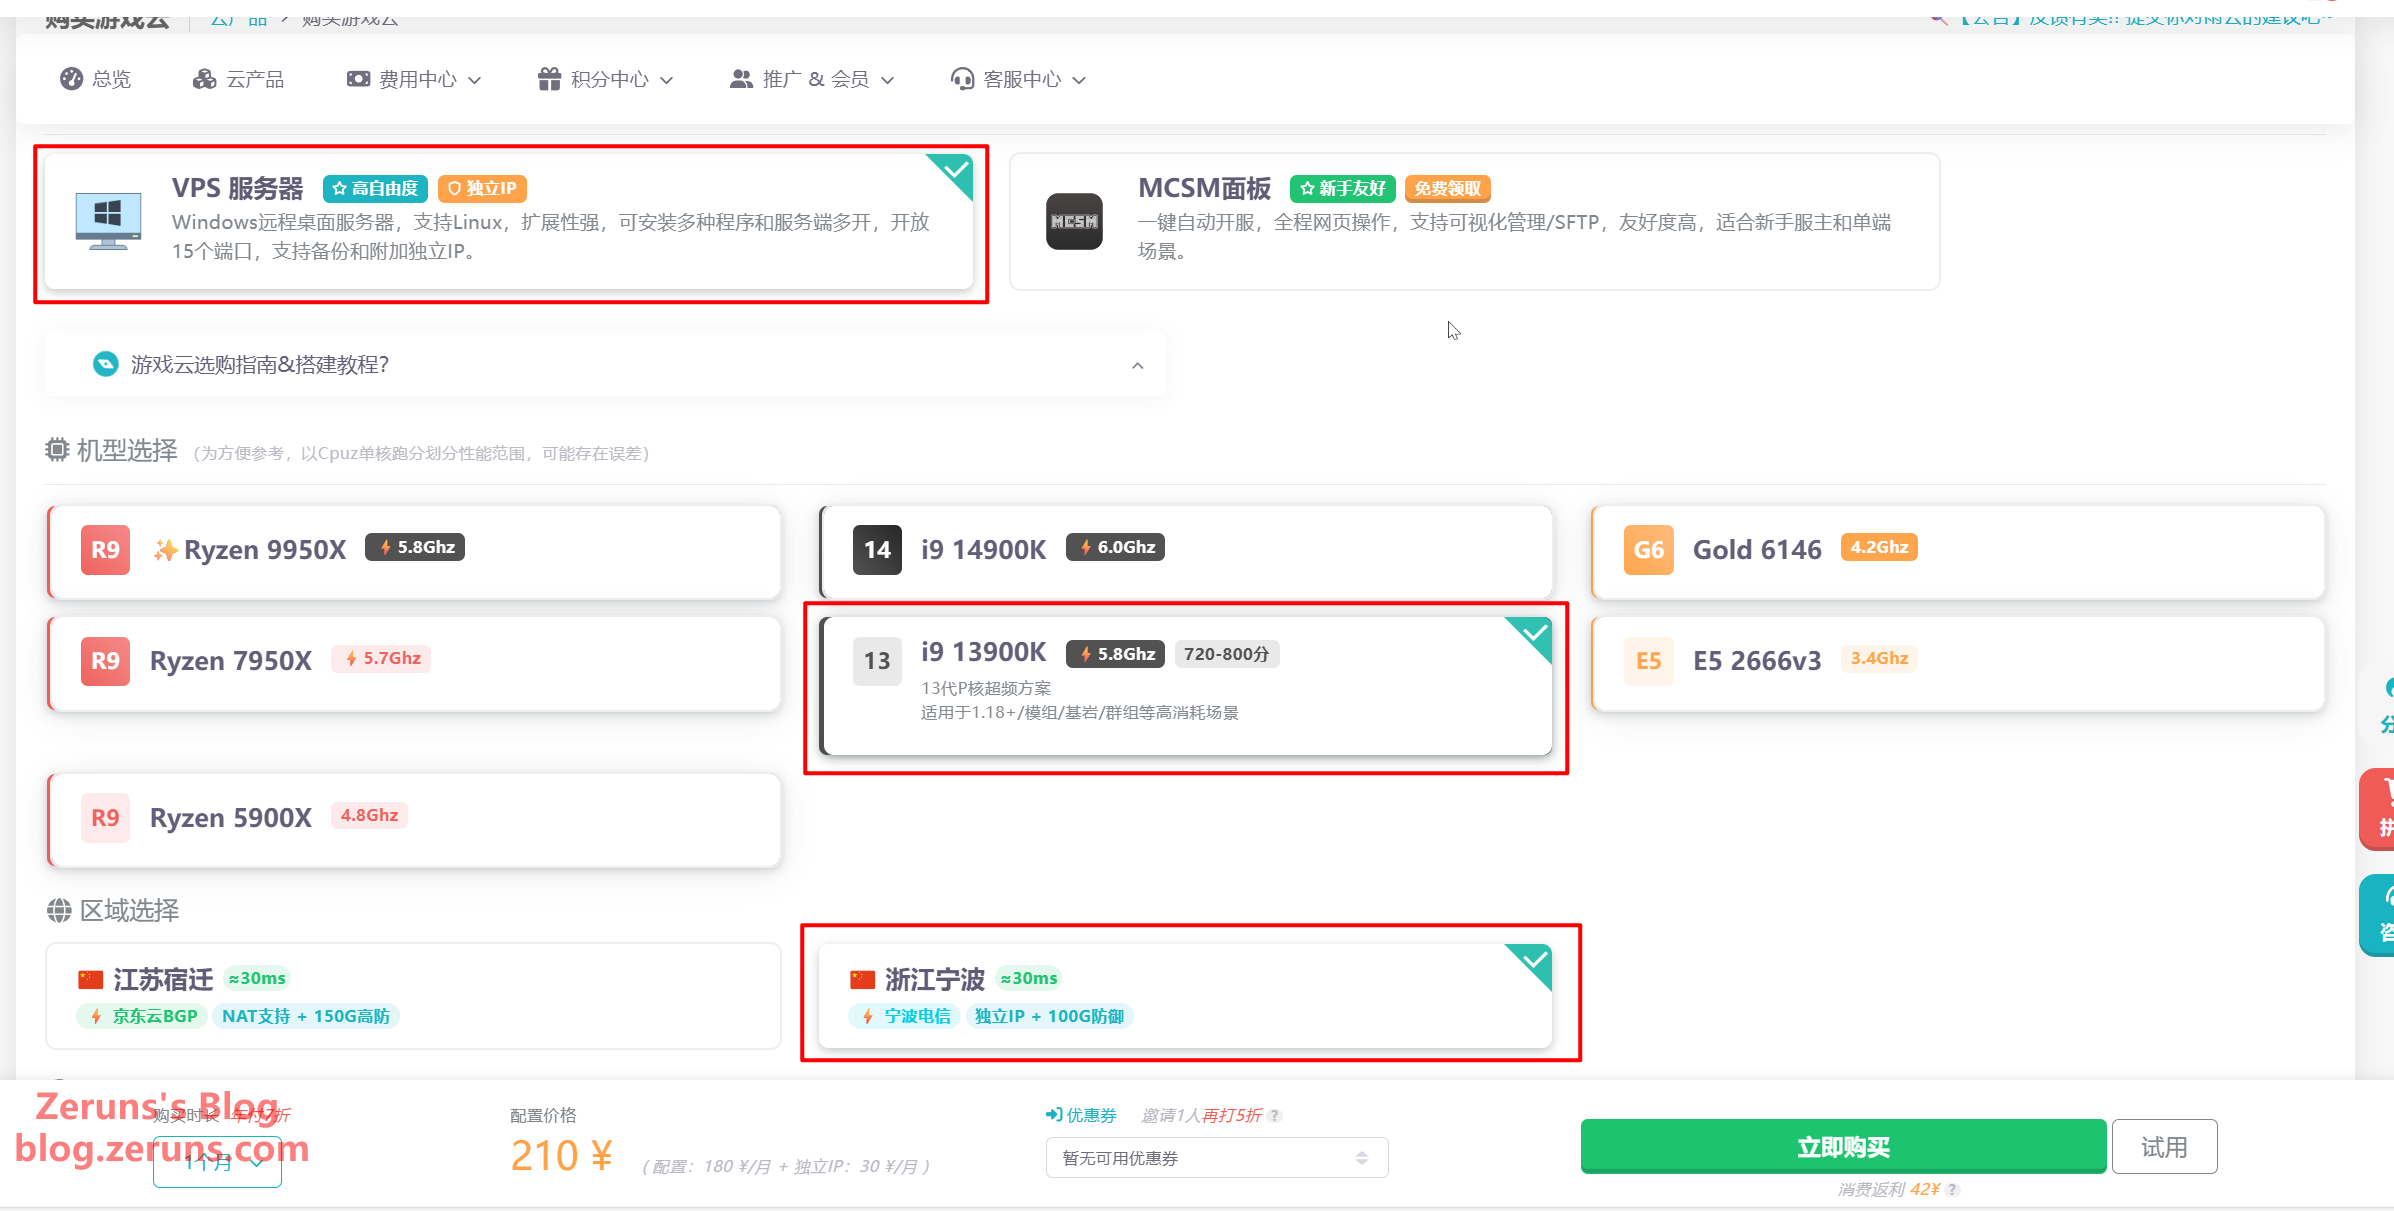
Choose a billing mode — dynamic or fixed. For casual use, choose dynamic billing (extra charges apply if CPU usage exceeds 20%). Select a config of 4C8G or higher. You can upgrade later. Keep the default IP type. If both you and your players support IPv6, you can select the free IPv6 option to save ¥30/month.

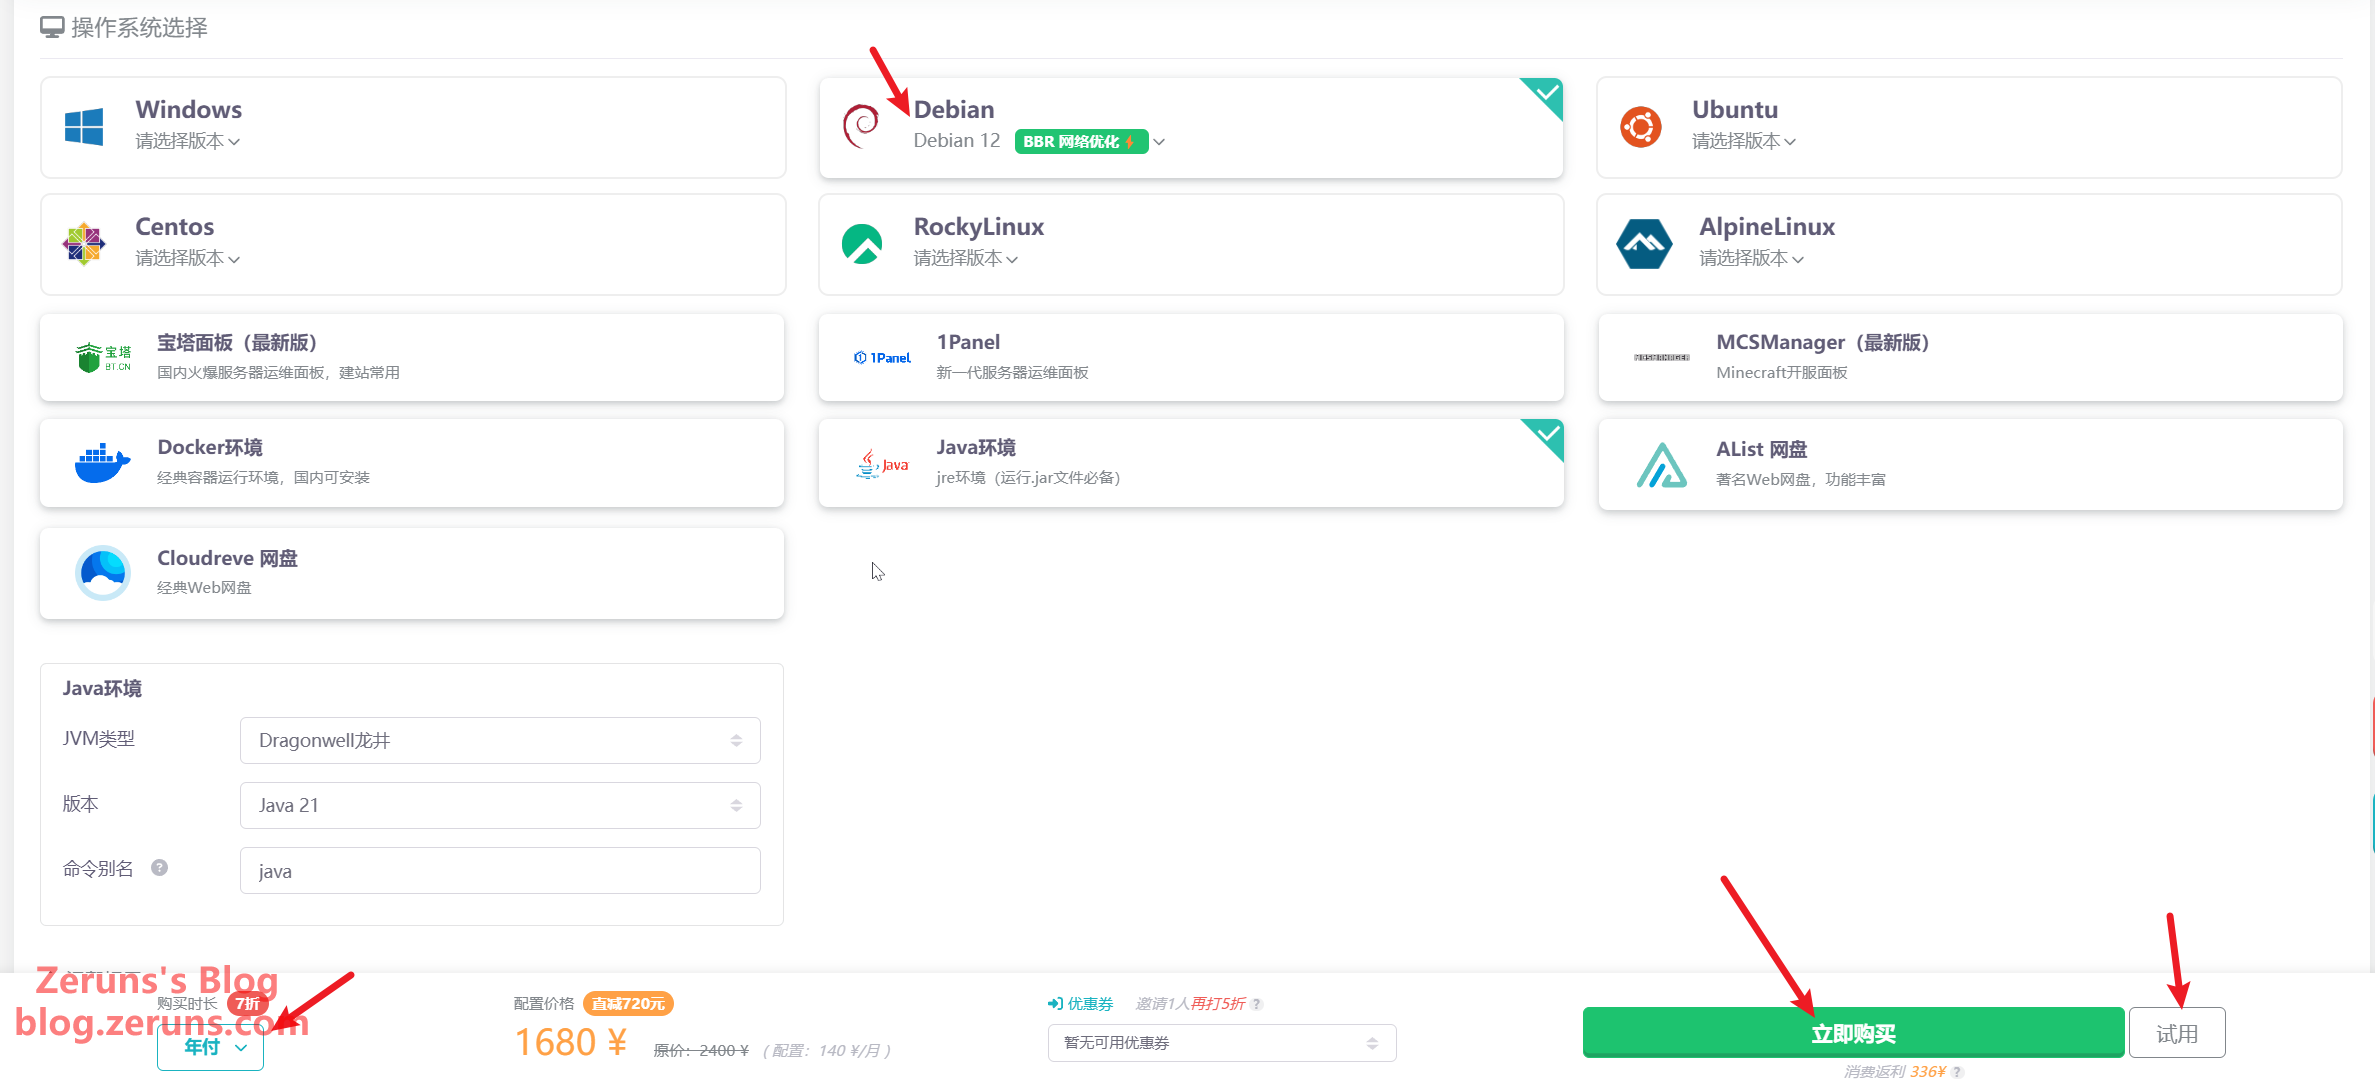
Set the OS to Debian12, then choose your billing duration. Annual plans get 30% off (can be combined with 20% off coupons from the reward store — only available through my referral link). You can also trial for 2 CNY/day.
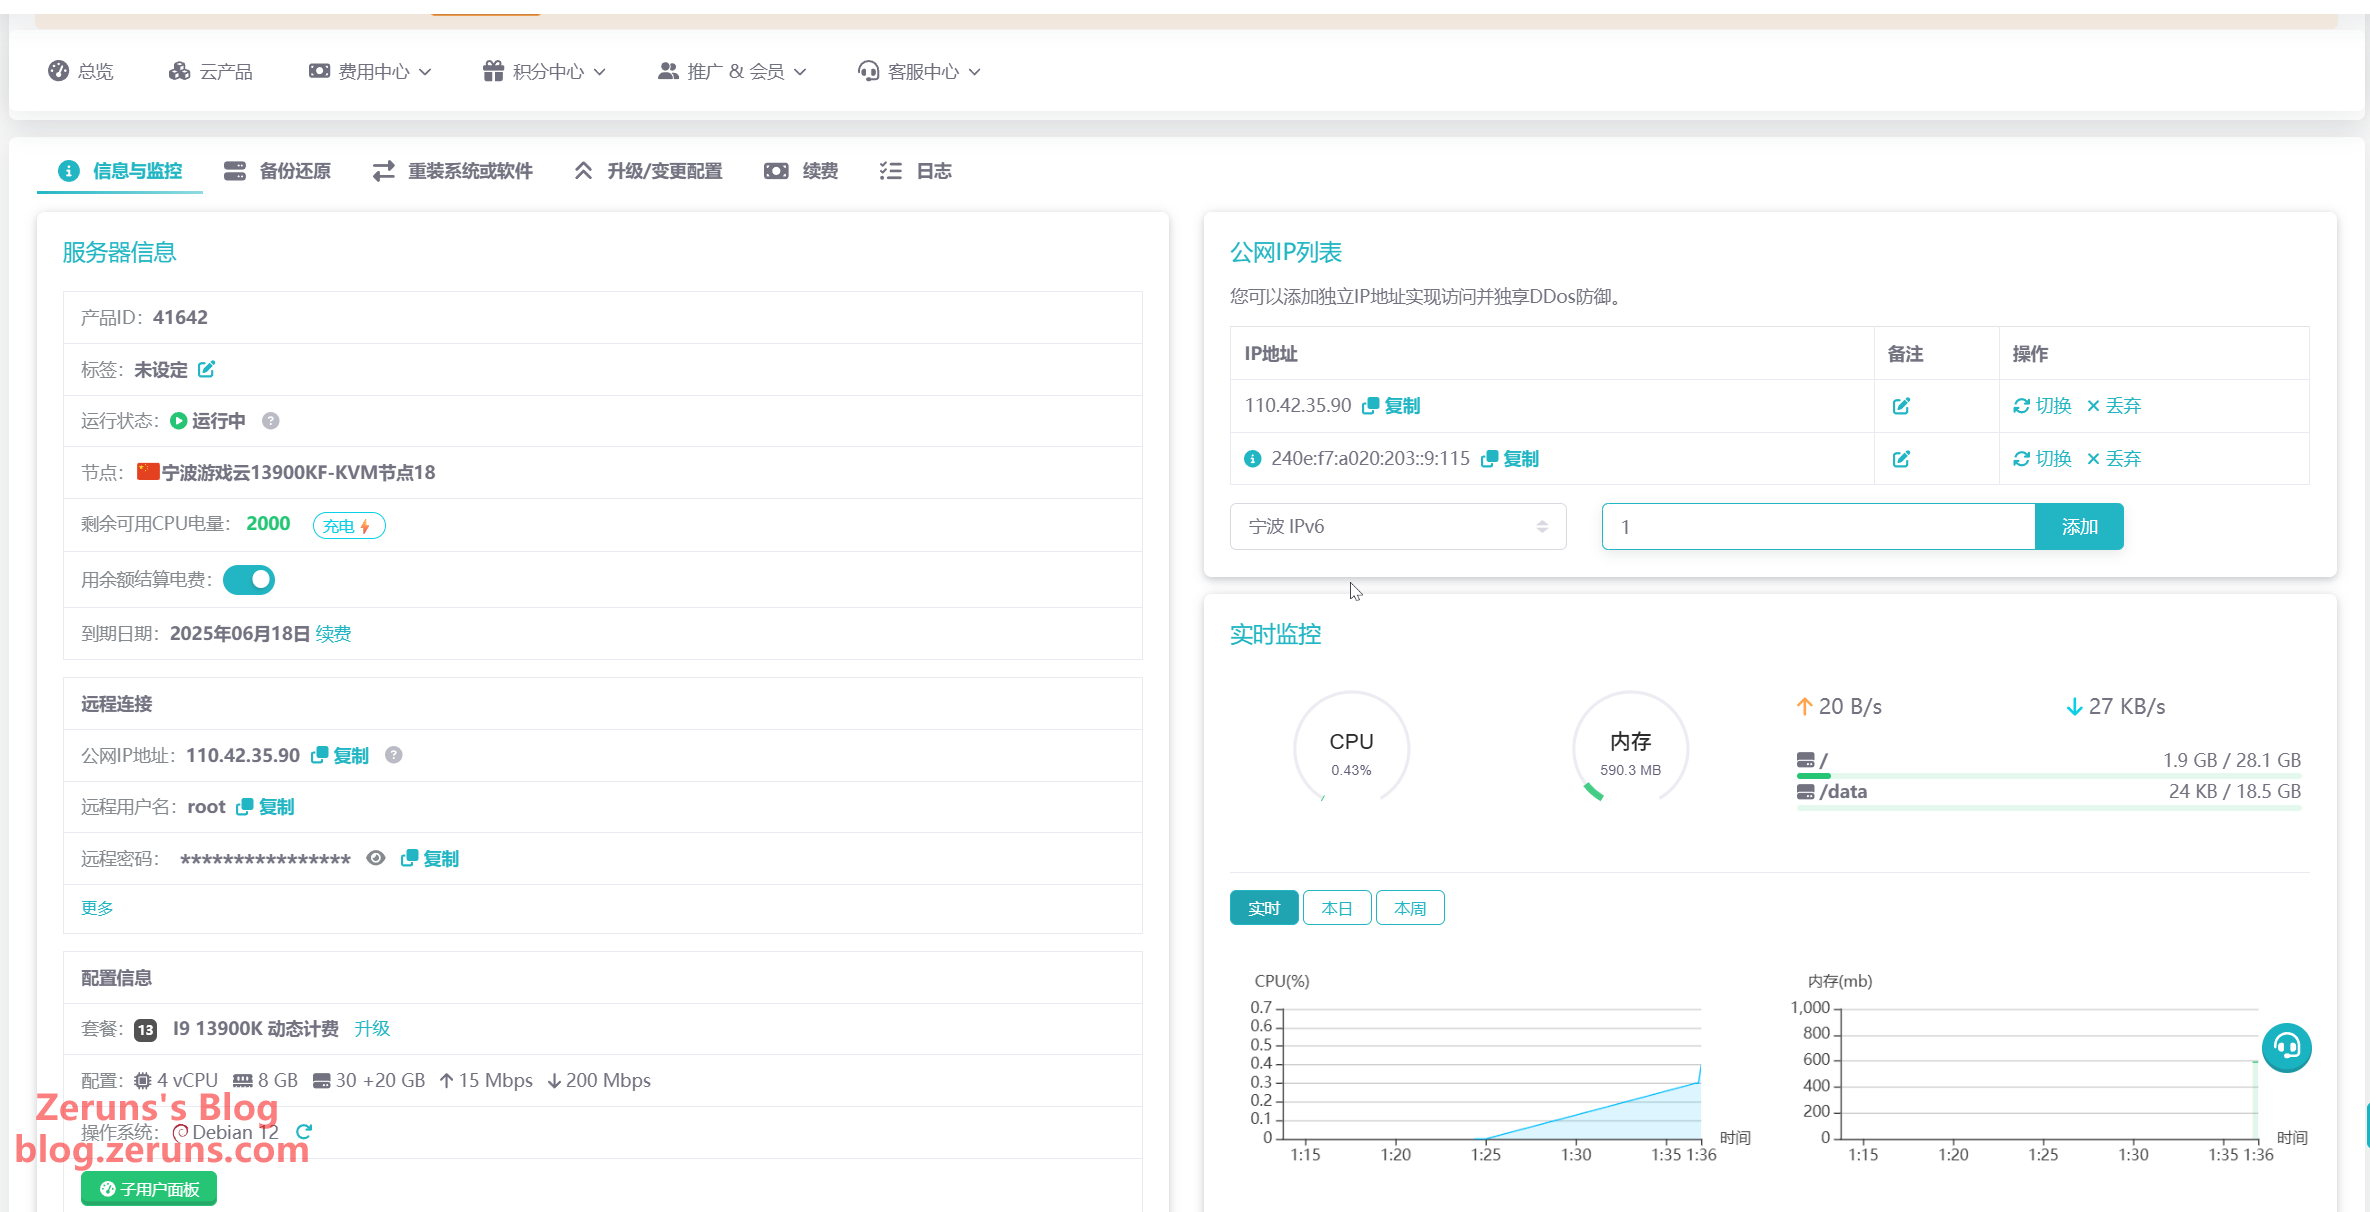
After purchase, you'll see the VPS in "My Game Cloud". Click the card or the Manage button.
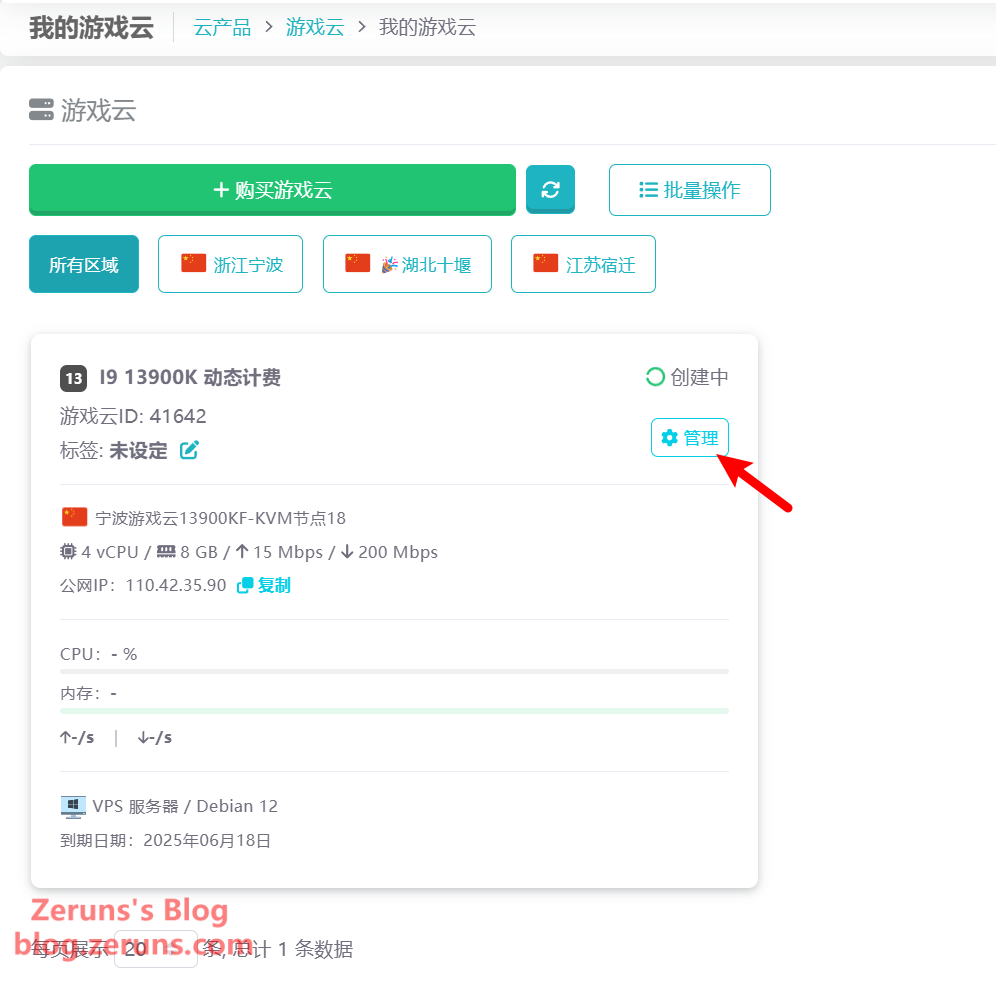
You'll now see the VPS details — you can reinstall/switch the OS, upgrade resources, and add a free IPv6 address.
Connecting to the Server
Download and open an SSH client. Recommended SSH clients include PuTTY or MobaXterm.
SSH client download link: https://www.123pan.com/ps/2Y9Djv-UAtvH.html
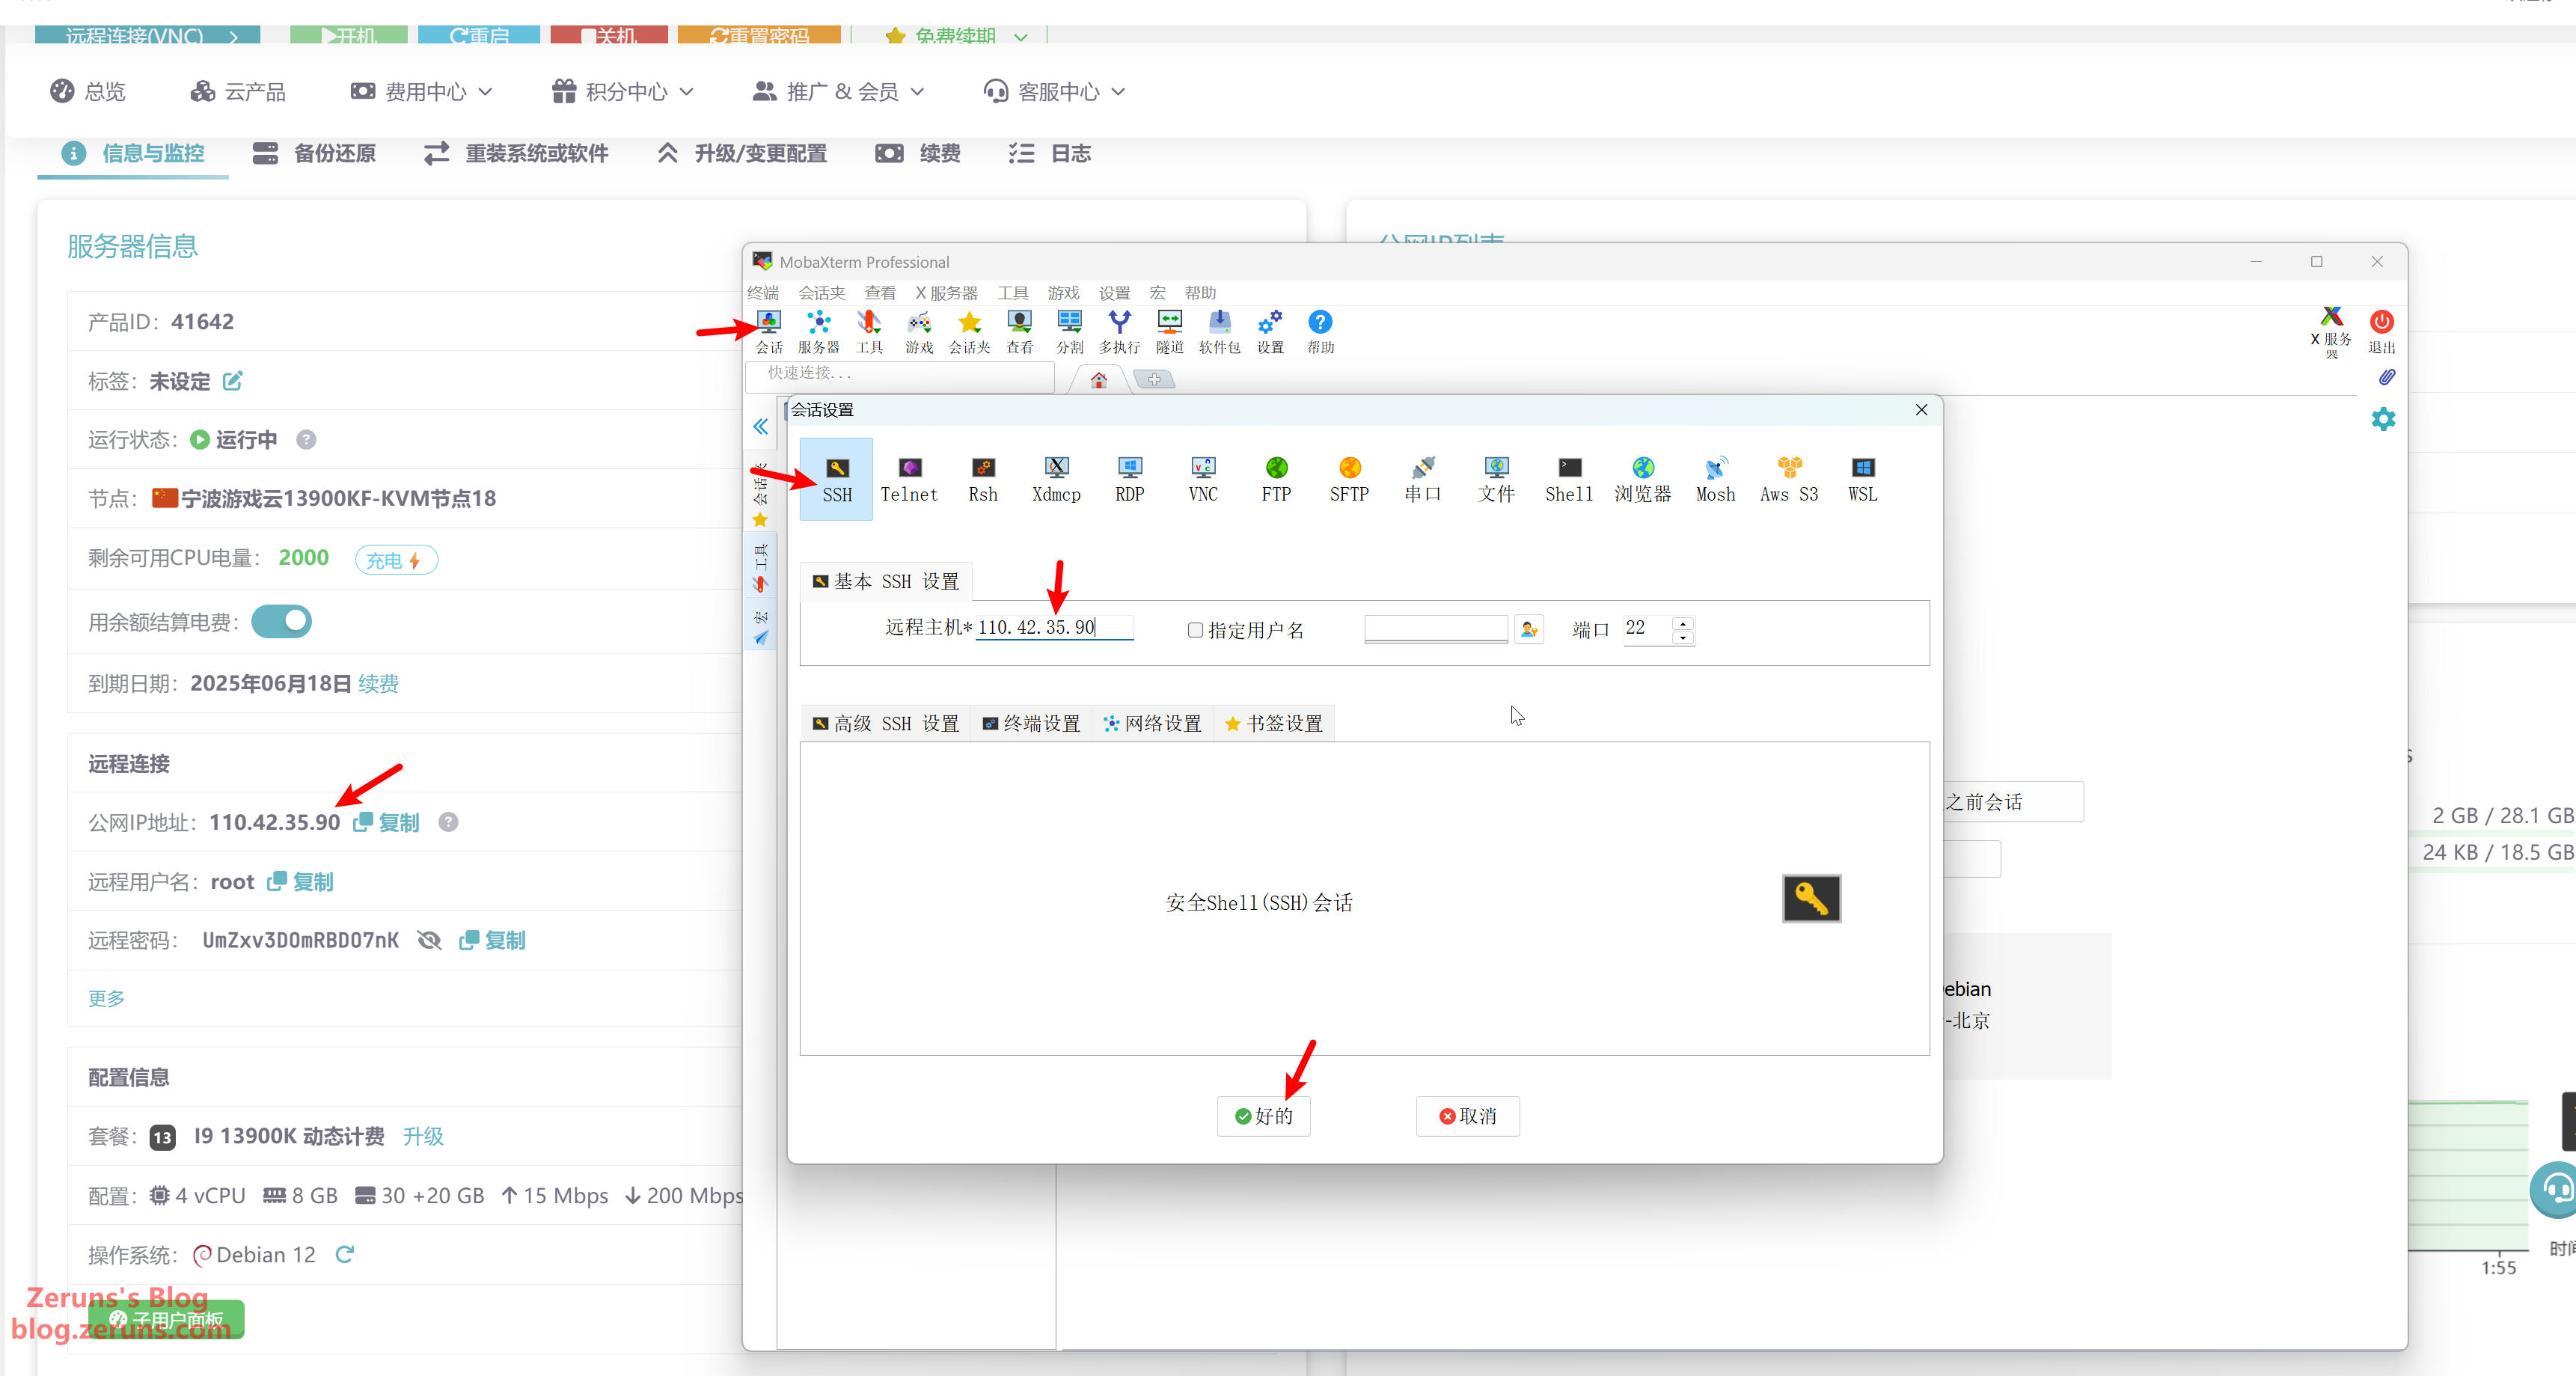
Here we use MobaXterm. After launching the software, click Session → SSH, then enter your server's IP address in the Remote Host field and click OK.
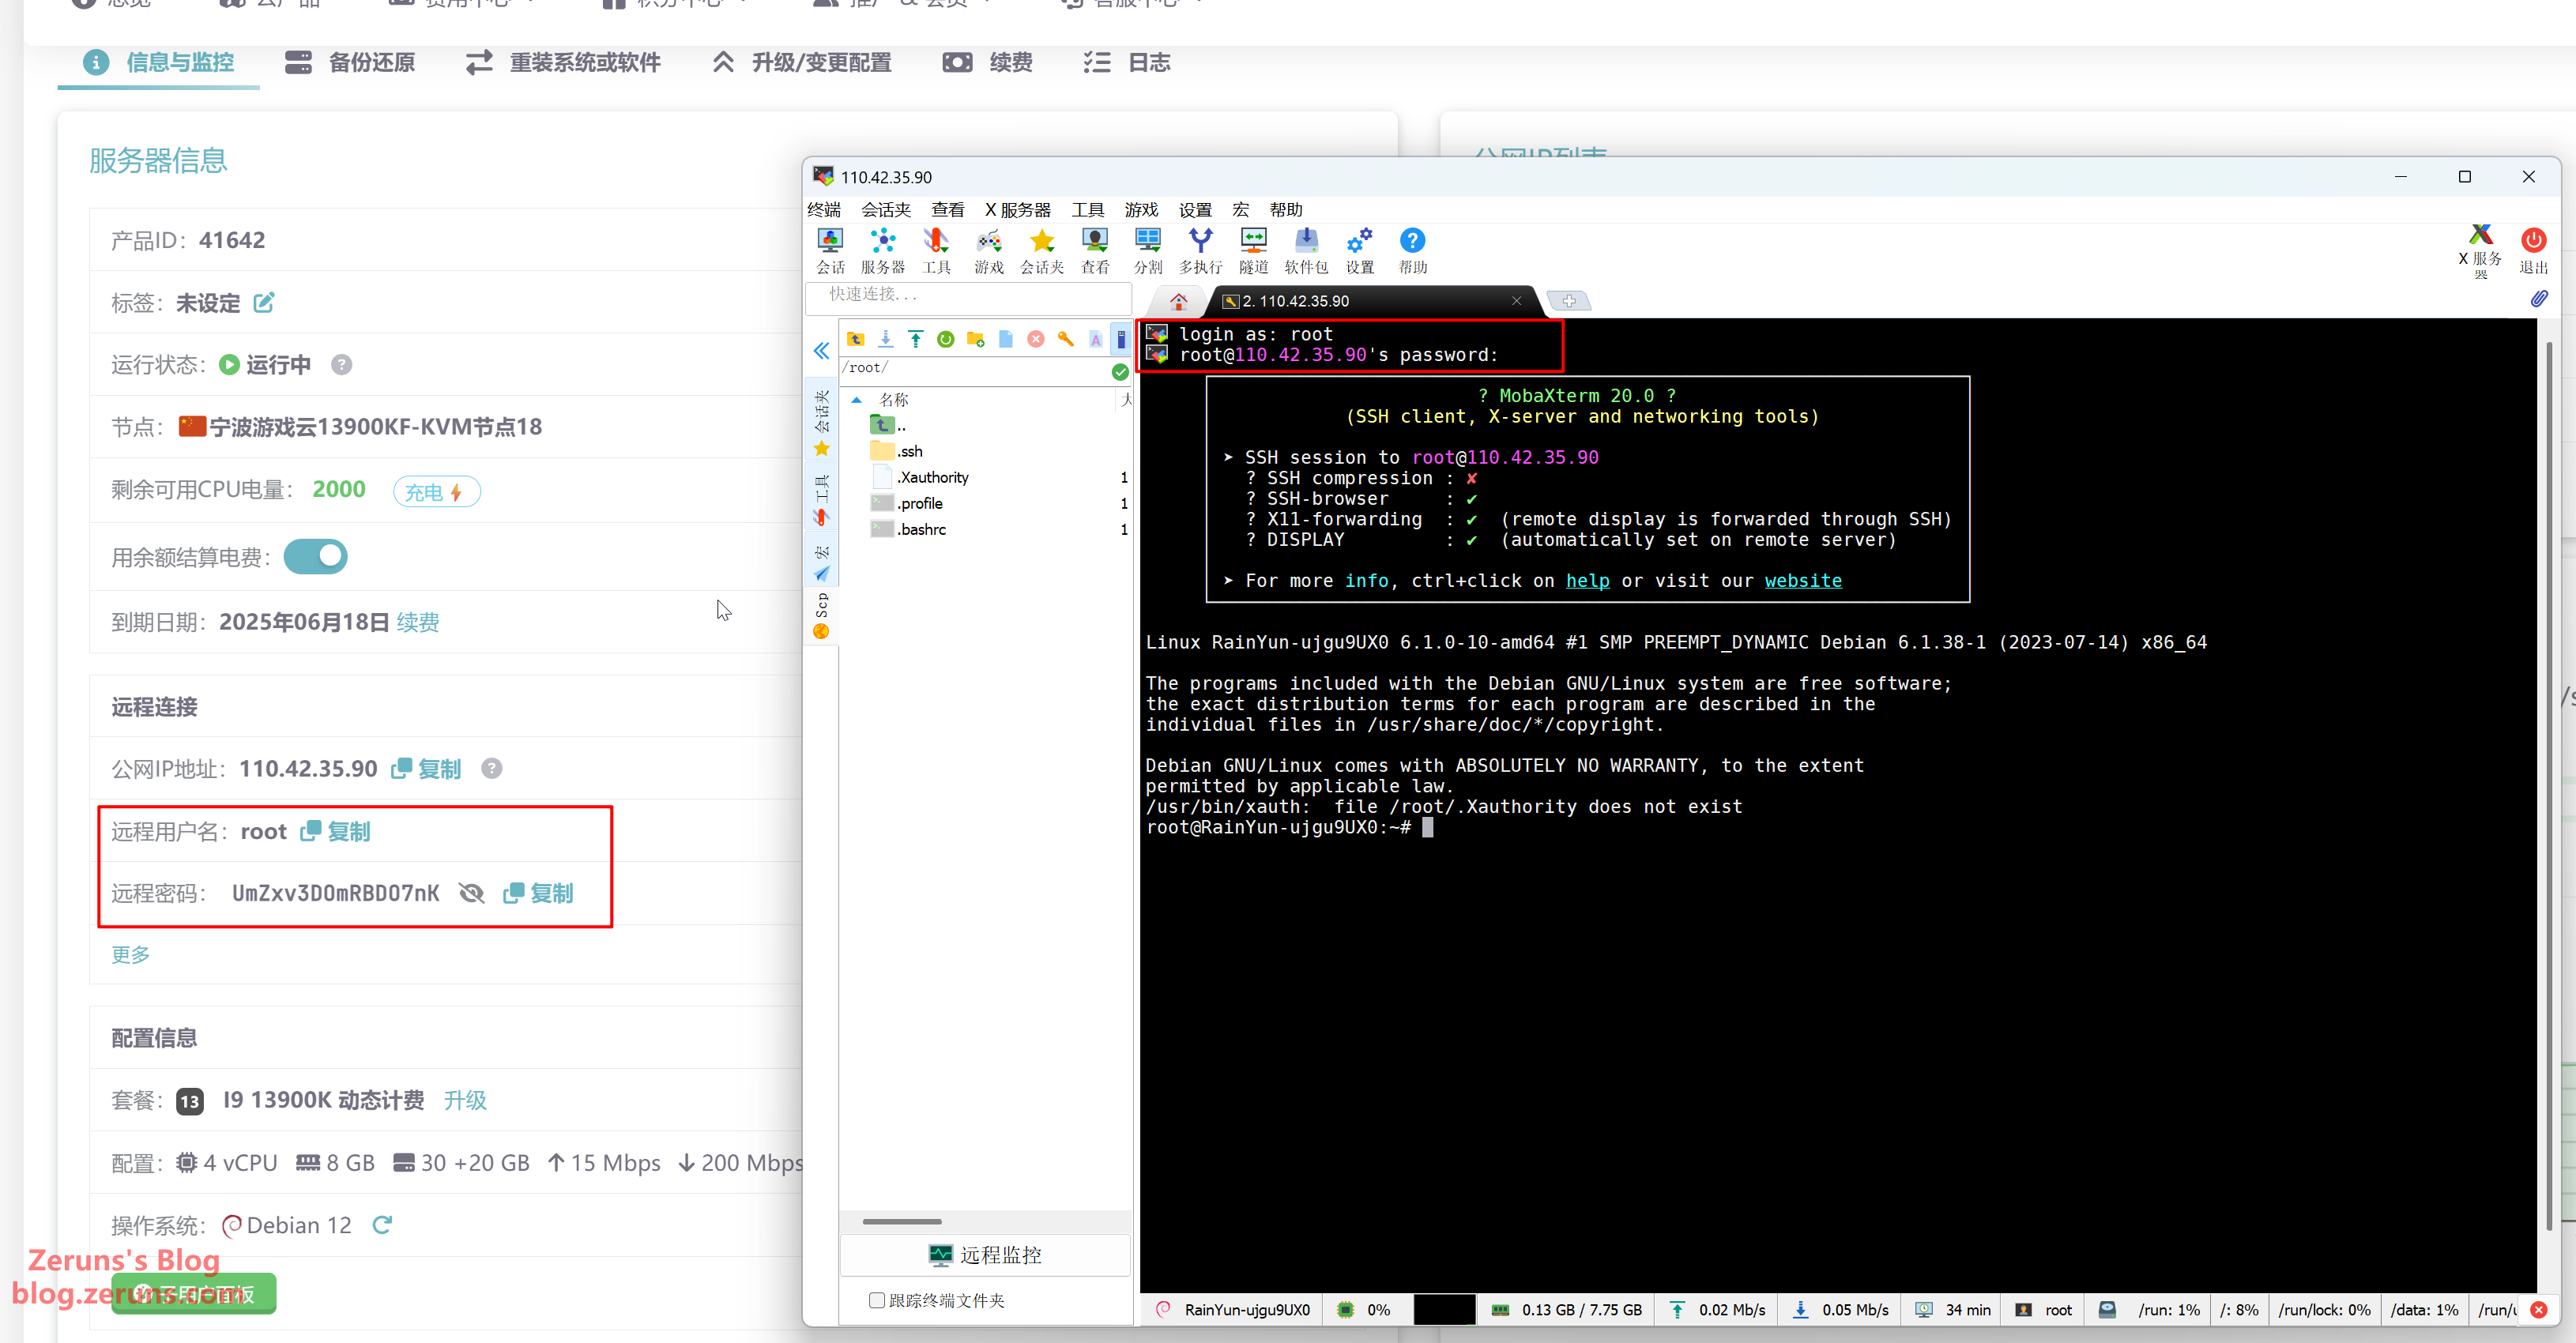
Next, enter the username and press Enter. The default username is usually root. Then enter the password and press Enter. The password will not be visible as you type.
Tip: In the SSH terminal, click and drag to select text, then click once in a blank area to copy it. Right-click in the terminal to paste.
Changing APT Sources
The default APT download sources are overseas servers, so it's recommended to switch to a local (China-based) mirror using chsrc.
In the SSH terminal, run the following commands (lines beginning with # are comments and should not be typed):
# Install chsrc
curl https://chsrc.run/posix | bash

# Automatically test and switch to the fastest mirror
chsrc set debian

Installing the MCSM Panel
Quick Install Script
Run the following command. If prompted to continue, type y to confirm.
apt update && apt -y install wget && apt -y install git && sudo su -c "wget -qO- https://script.mcsmanager.com/setup_cn.sh | bash"
- This script is only compatible with AMD64 architecture (Ubuntu/CentOS/Debian/Archlinux).
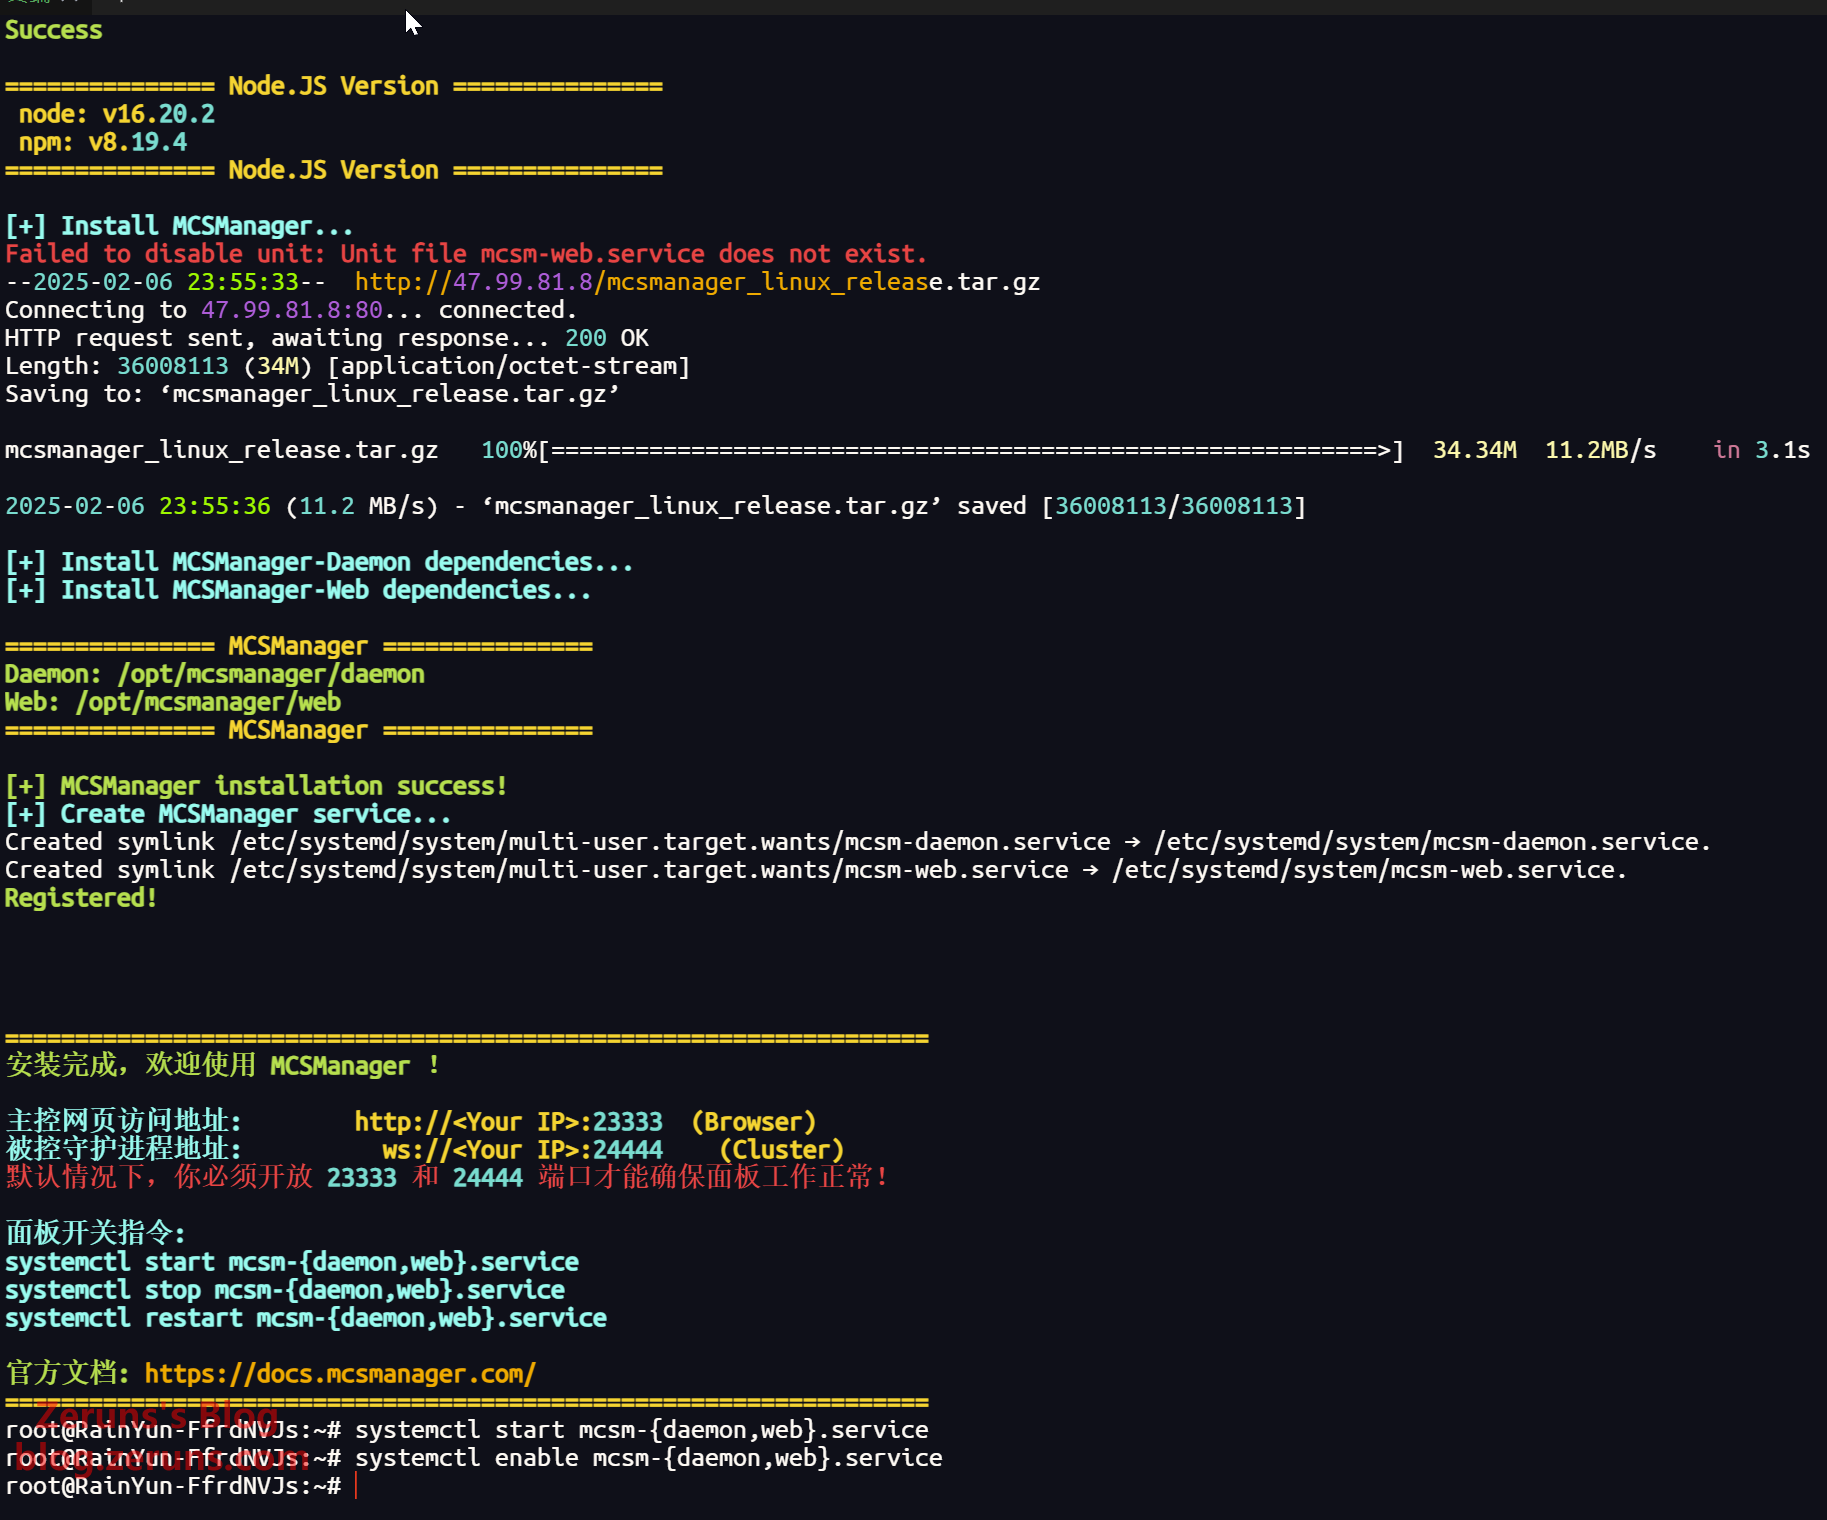
- After completion, start the panel services with:
systemctl start mcsm-{daemon,web}.service - Enable startup on boot with:
systemctl enable mcsm-{daemon,web}.service - The panel code and runtime will be installed at
/opt/mcsmanager/- Config files:
data/SystemConfig/config.json - User data files:
data/User/*.json - Remote daemon configs:
data/RemoteServiceConfig/*.json
- Config files:
If you see output like the image below, the installation was successful.
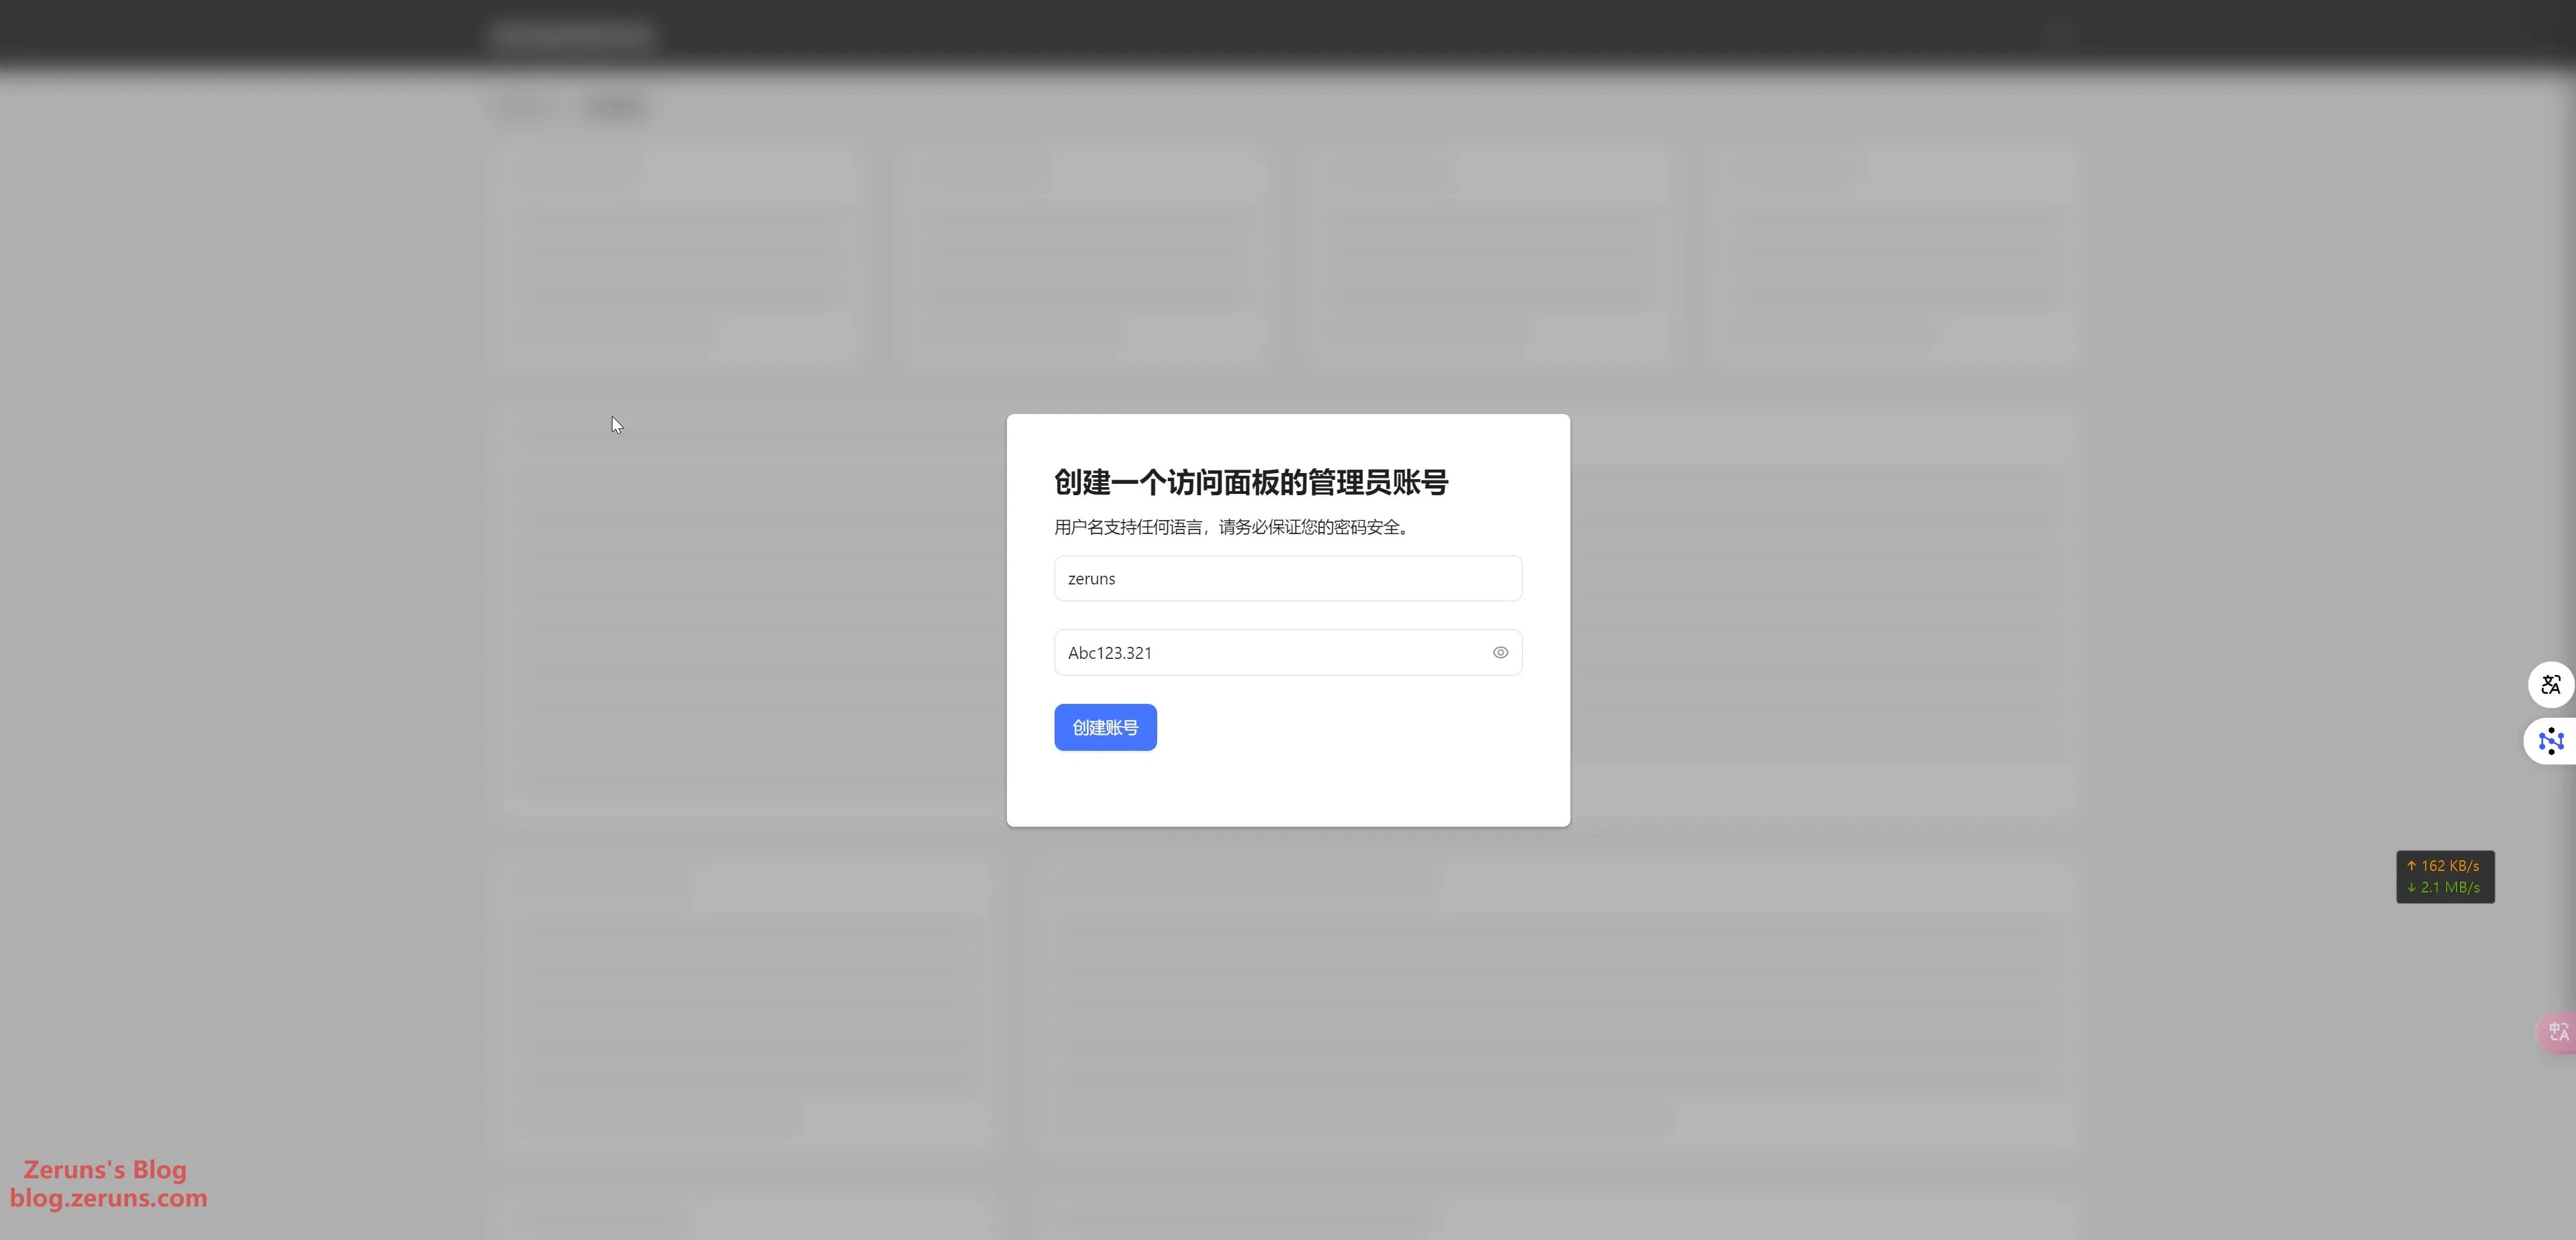
After installation, go to http://your-server-ip:23333/ to access the panel.
Follow the prompts to create your admin account.
Installing Docker
Back in the SSH terminal, enter the following commands:
Install Docker using APT:
# Install Docker
apt -y install docker.io

# Enable Docker on boot and start the service
systemctl enable docker && systemctl start docker

# Check if Docker is installed successfully
docker -v

If Docker fails to install, try the script below:
# For users in China
export DOWNLOAD_URL=https://mirrors.ustc.edu.cn/docker-ce

# Docker install script
curl -fsSL https://get.docker.com -o get-docker.sh && sudo sh get-docker.sh

# Check Docker version
docker -v
Still not working? Try this manual installation tutorial:
Manual Docker installation: https://www.runoob.com/docker/ubuntu-docker-install.html
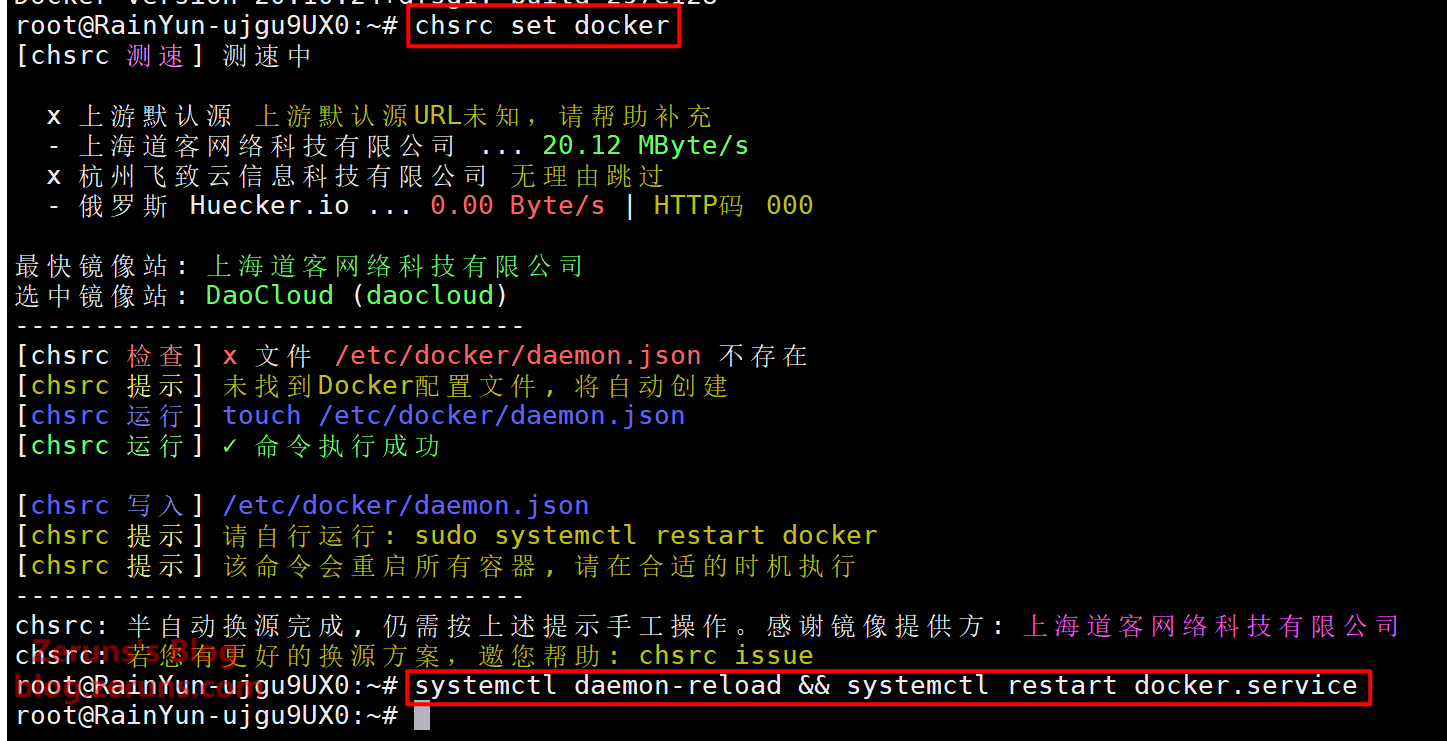
Switch Docker to Chinese mirrors:
chsrc set docker

# Restart Docker
systemctl daemon-reload && systemctl restart docker.service
Installing Java Runtime
Before running any Java-based Minecraft server, you must install the correct Java runtime. Here's a reference list for which Java version supports which Minecraft versions:
| Required Java Version | Supported Minecraft Versions |
|---|---|
| Java 8 | 1.7.x, 1.8.x, 1.9.x, 1.10.x, 1.12.x, 1.13.x, 1.15.x, 1.16.x |
| Java 16 & 17 | 1.17.x |
| Java 17 | 1.18.x |
| Java 17 or above | 1.18.x, 1.19.x, 1.20.x and newer |
Do not use Java 20+ with Minecraft 1.17.x as it may cause compatibility issues.
Always check which Java versions your plugins support. If unsure, consult the plugin developers to avoid issues.
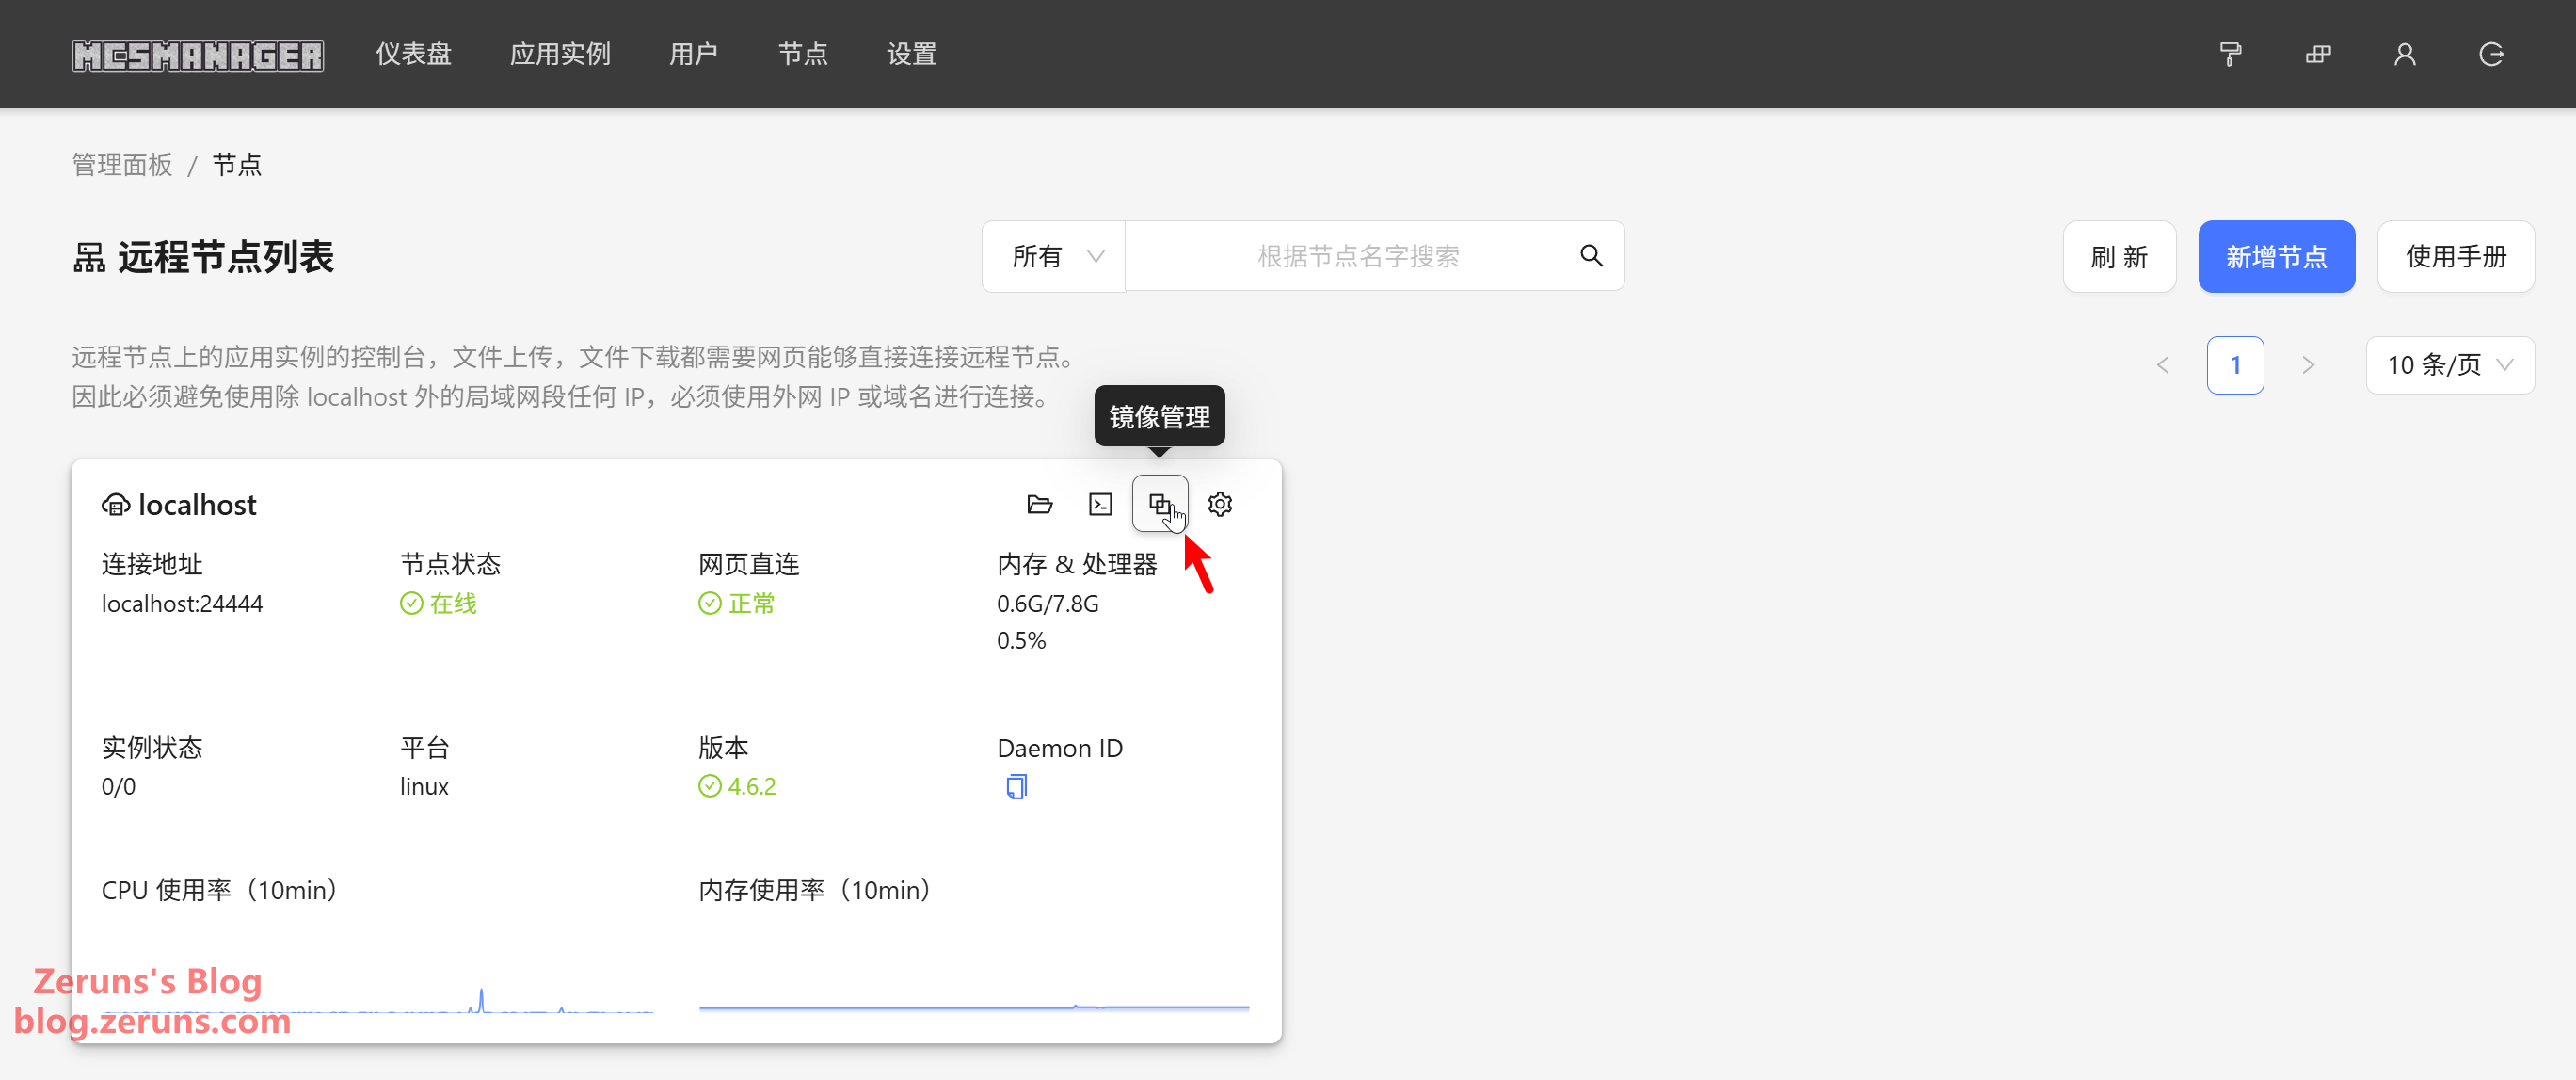
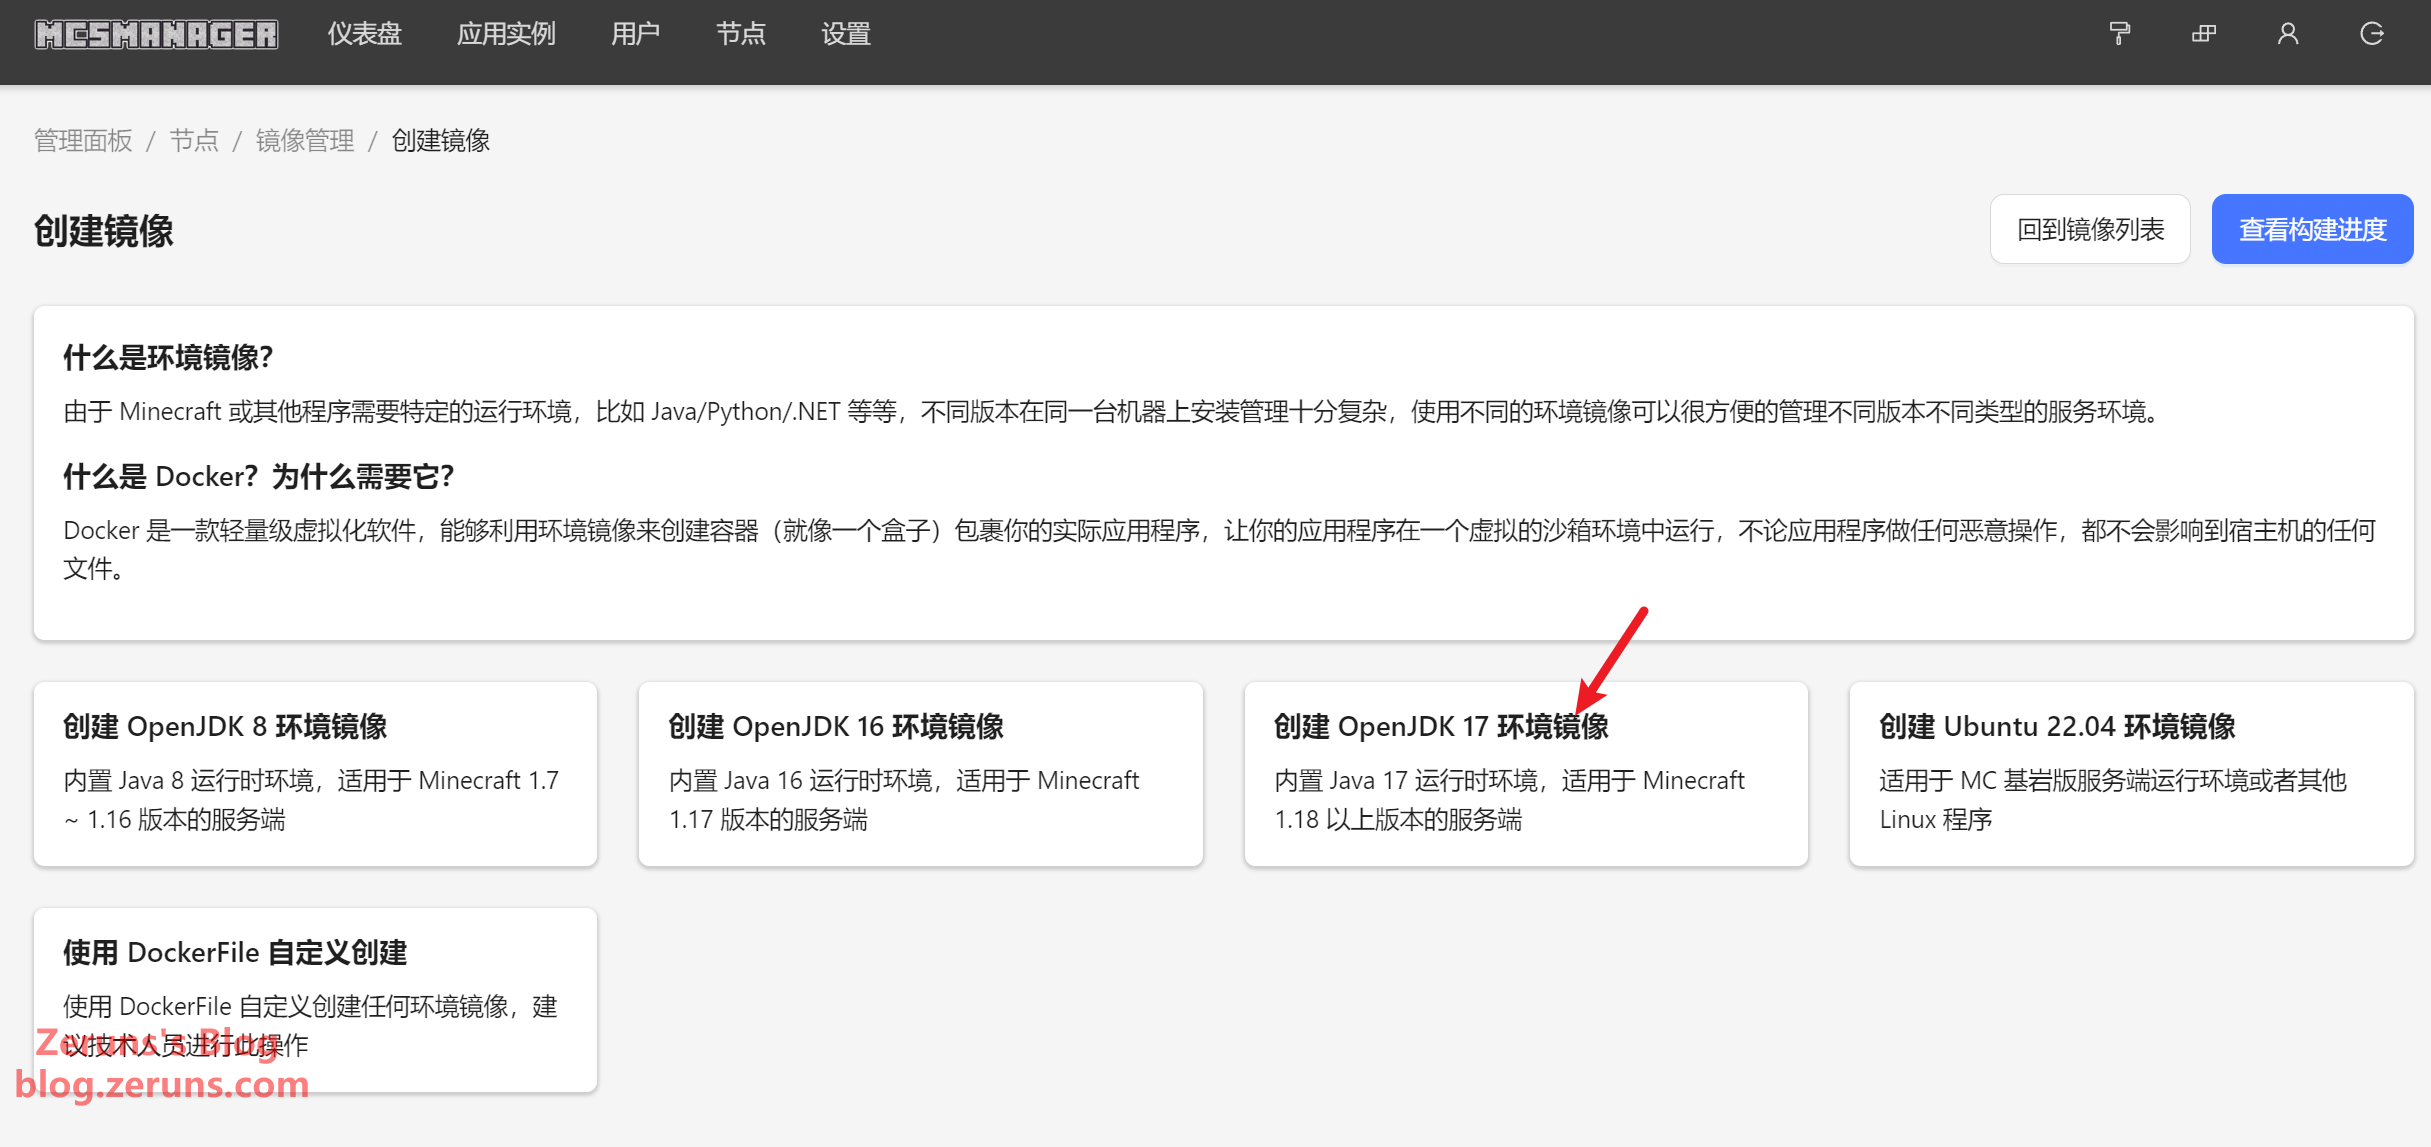
Go to the MCSM panel, find Node Management, then click Image Management.
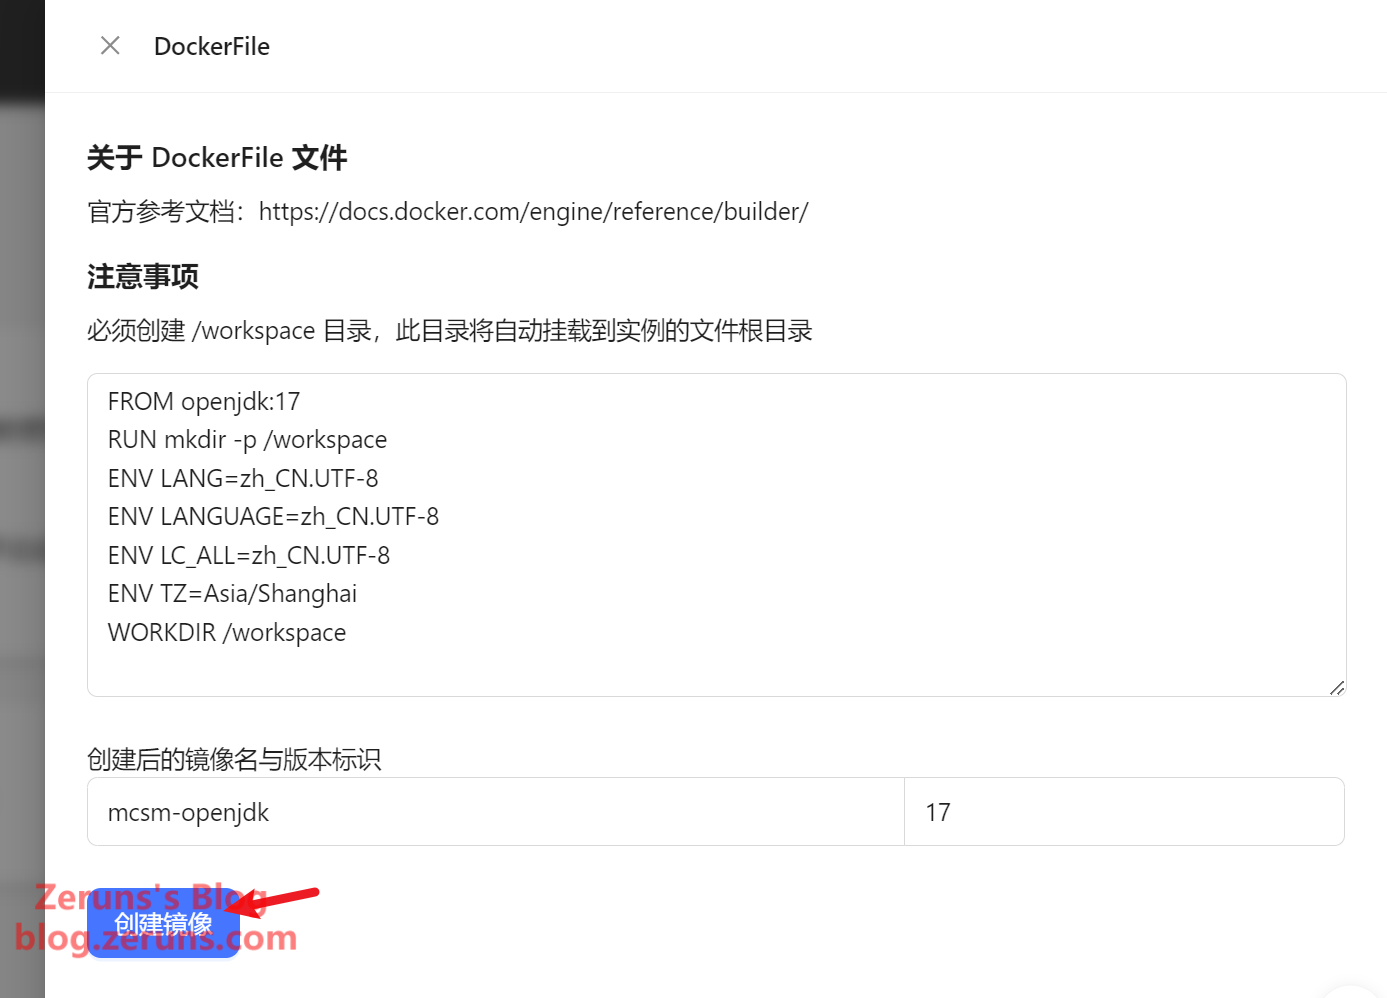
Click Create Image, then choose to create an OpenJDK 17 image (choose JDK8 for Minecraft 1.16 or earlier; JDK17 for 1.16+).
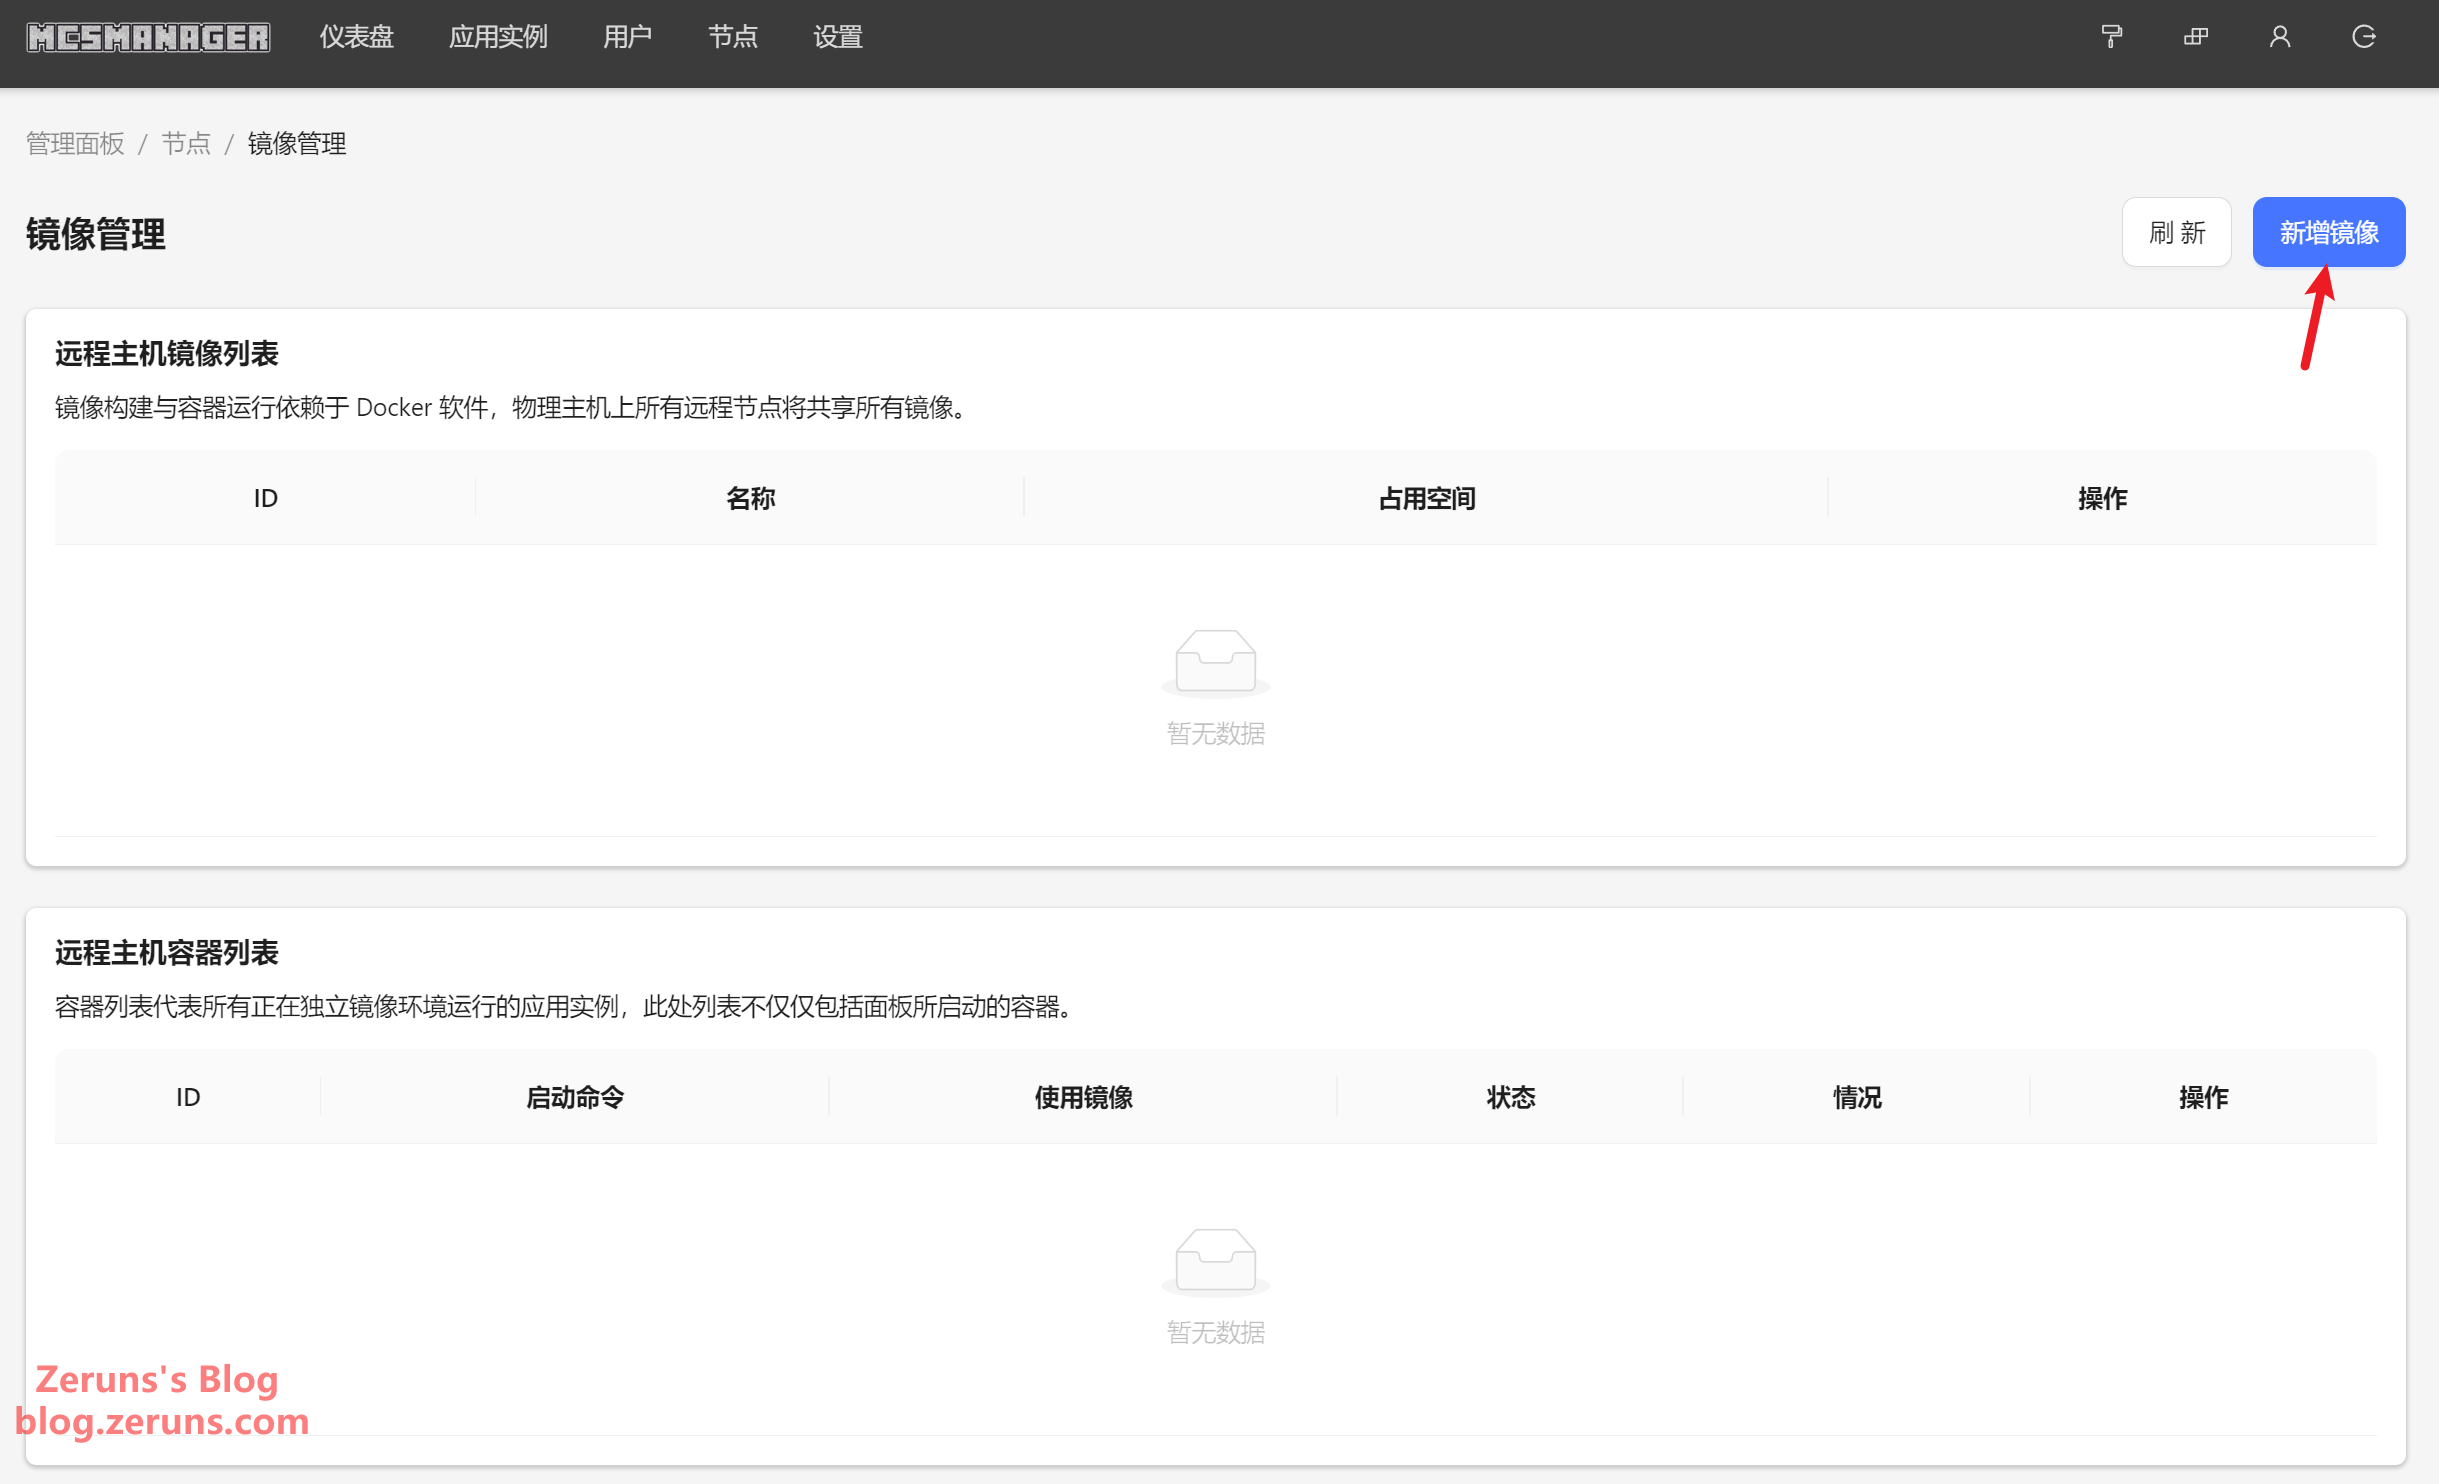
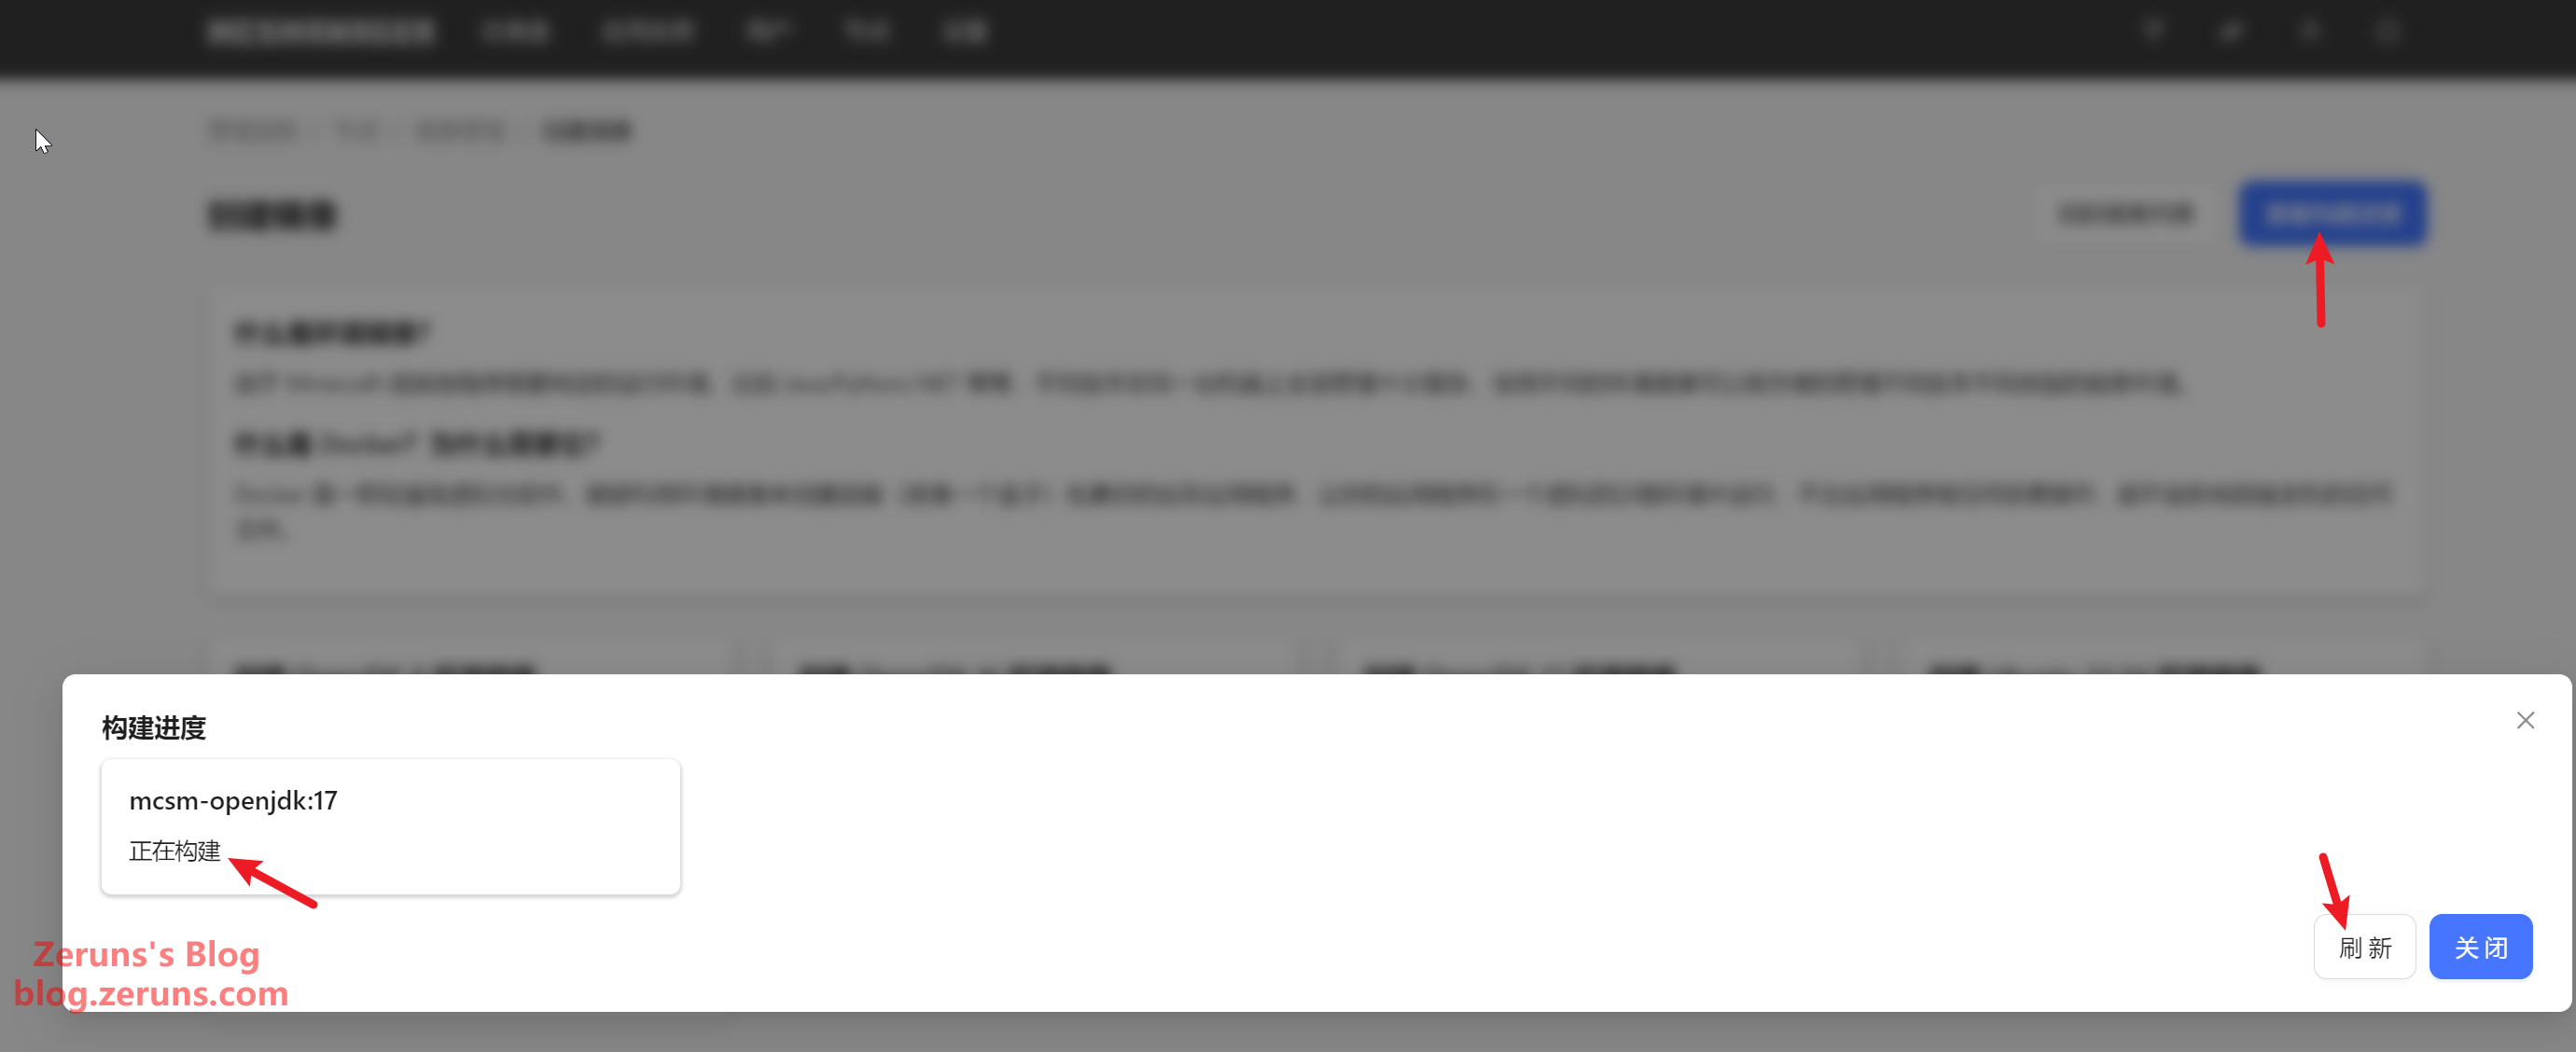
Click Confirm, then wait for the build to finish.
Running the Server
First, download the modpack server files from the provided link above.
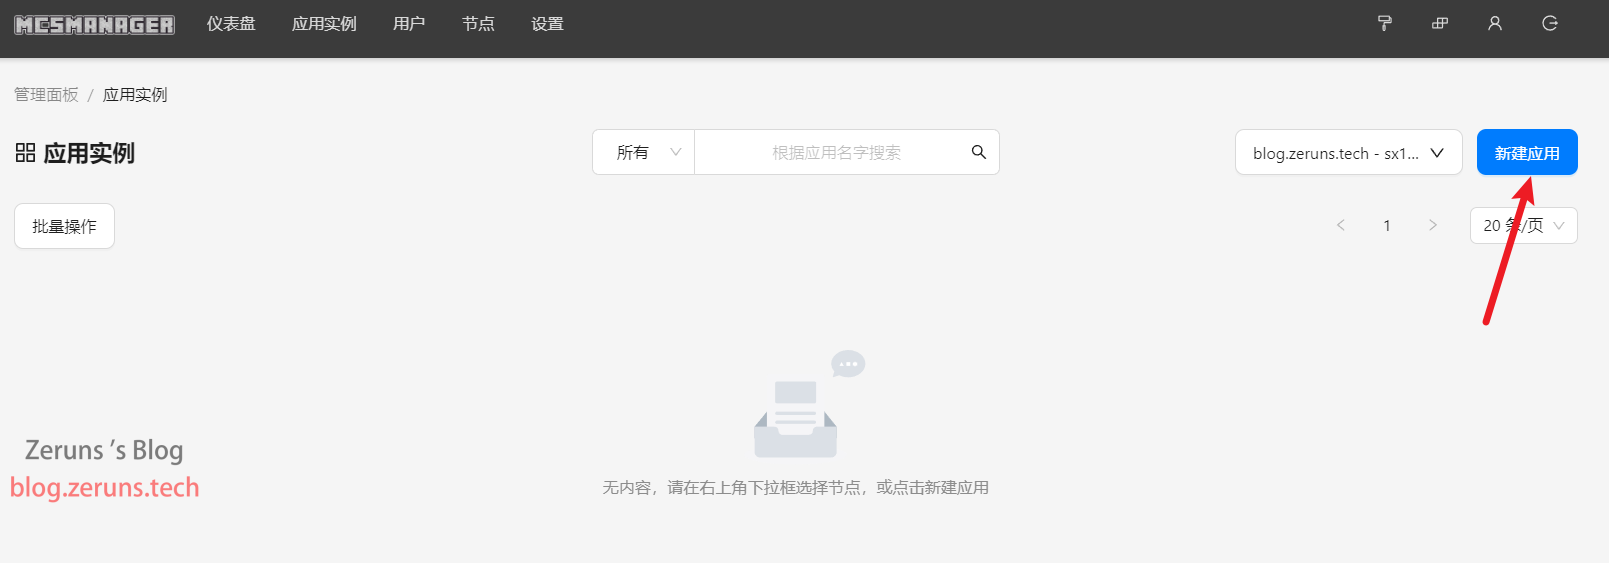
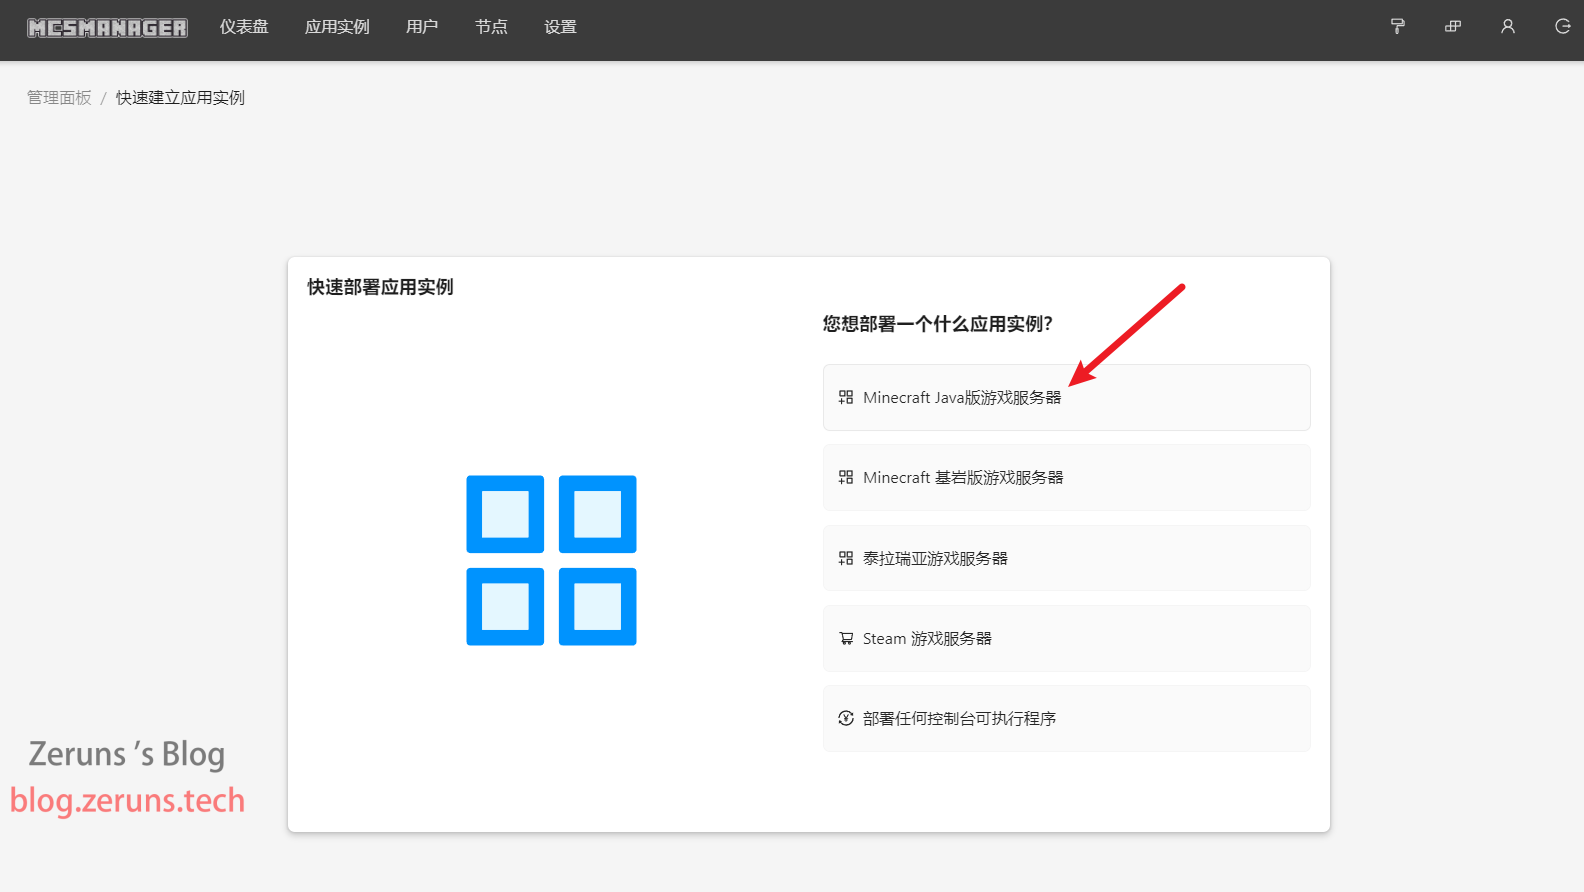
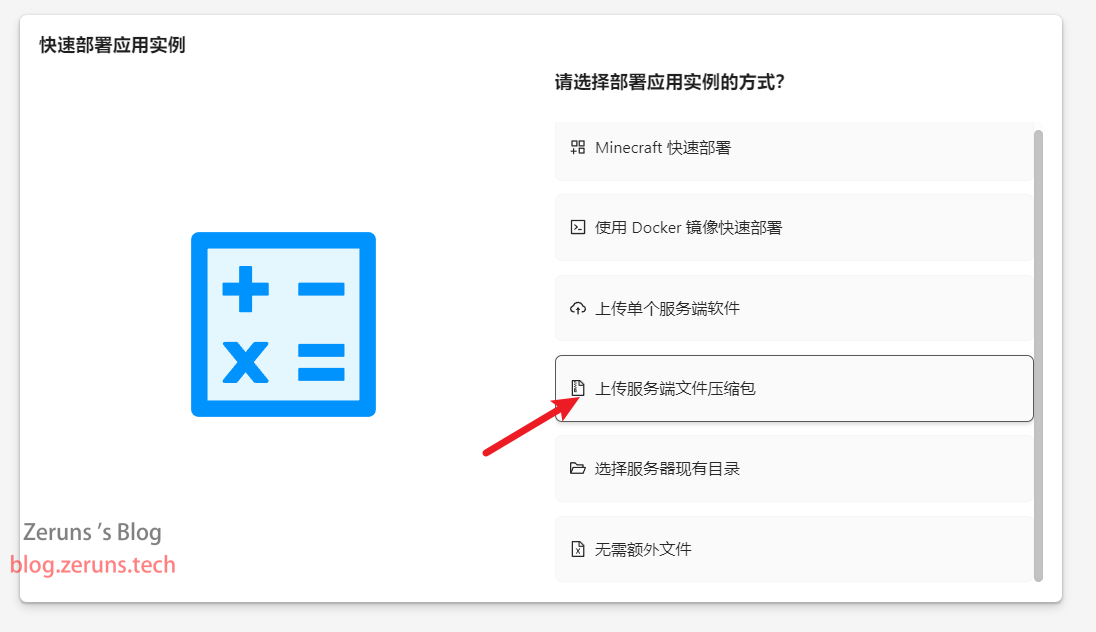
In the MCSM panel, go to Application Instances → Create Application → Minecraft Java Edition Server → Upload Server ZIP Package.
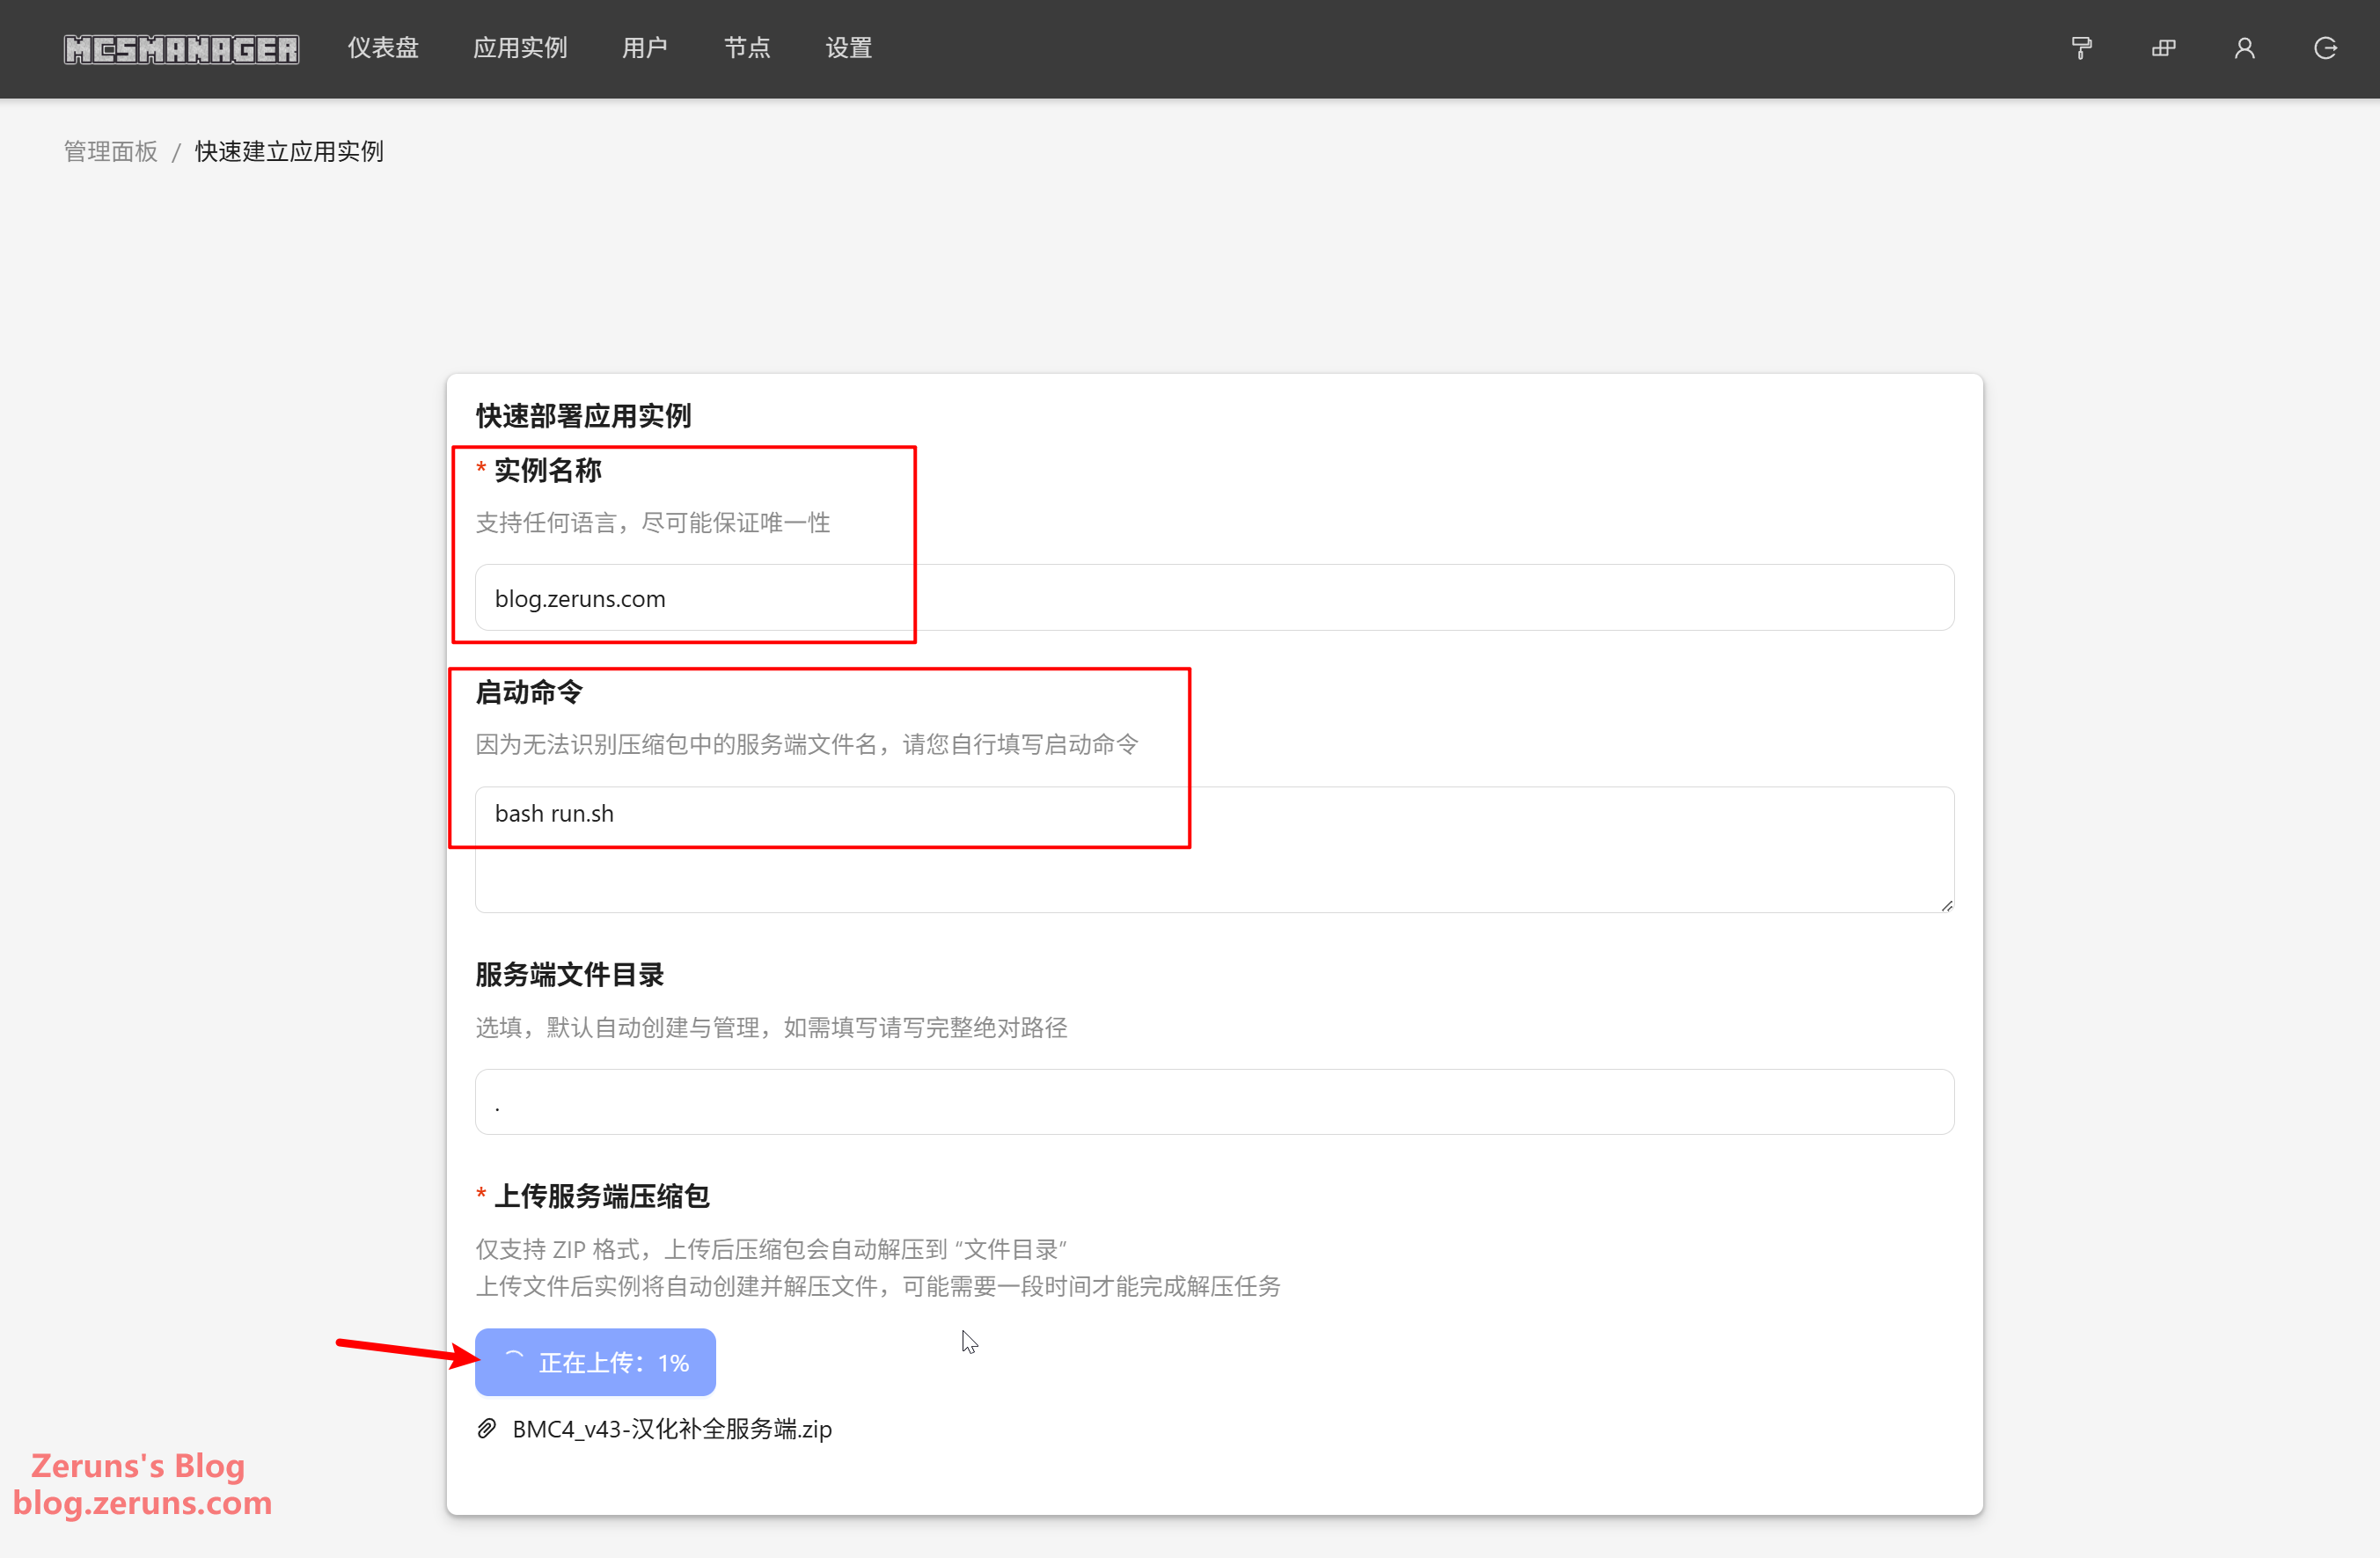
Enter any name under Instance Name, and for the Startup Command, type bash run.sh (this command runs the run.sh script that already contains the startup logic). If you want to modify memory limits or other parameters, edit the user_jvm_args.txt file. Then click Choose ZIP File to upload the modpack server ZIP archive, and set the unzip encoding to GBK.
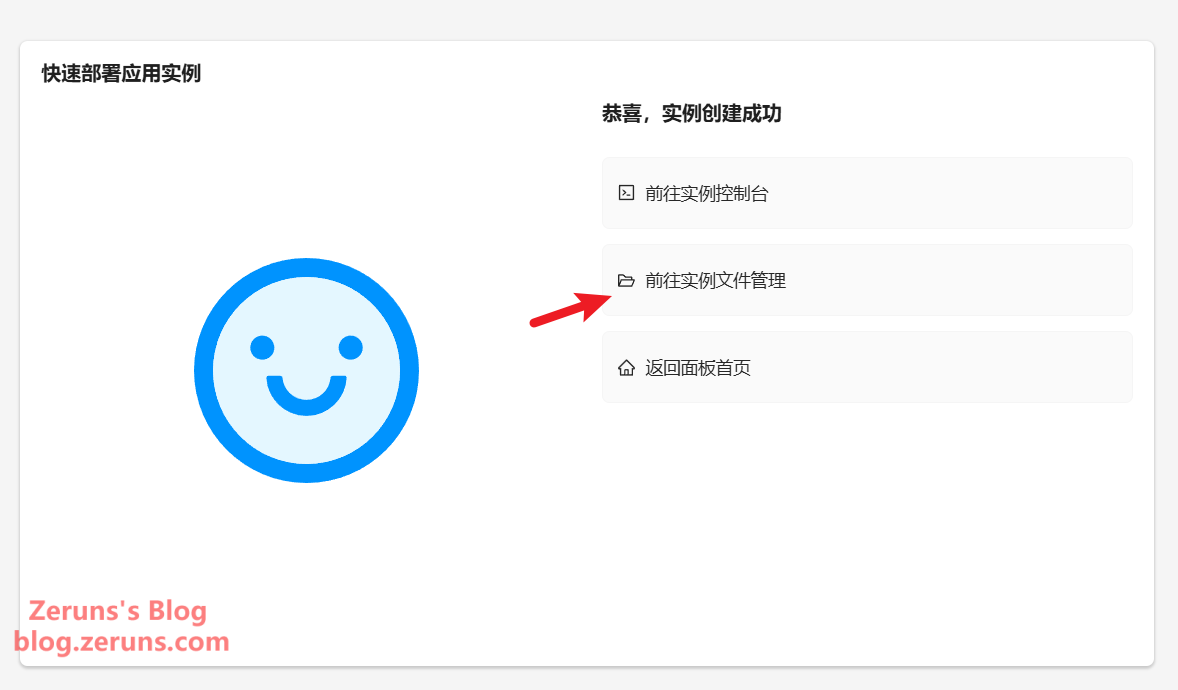
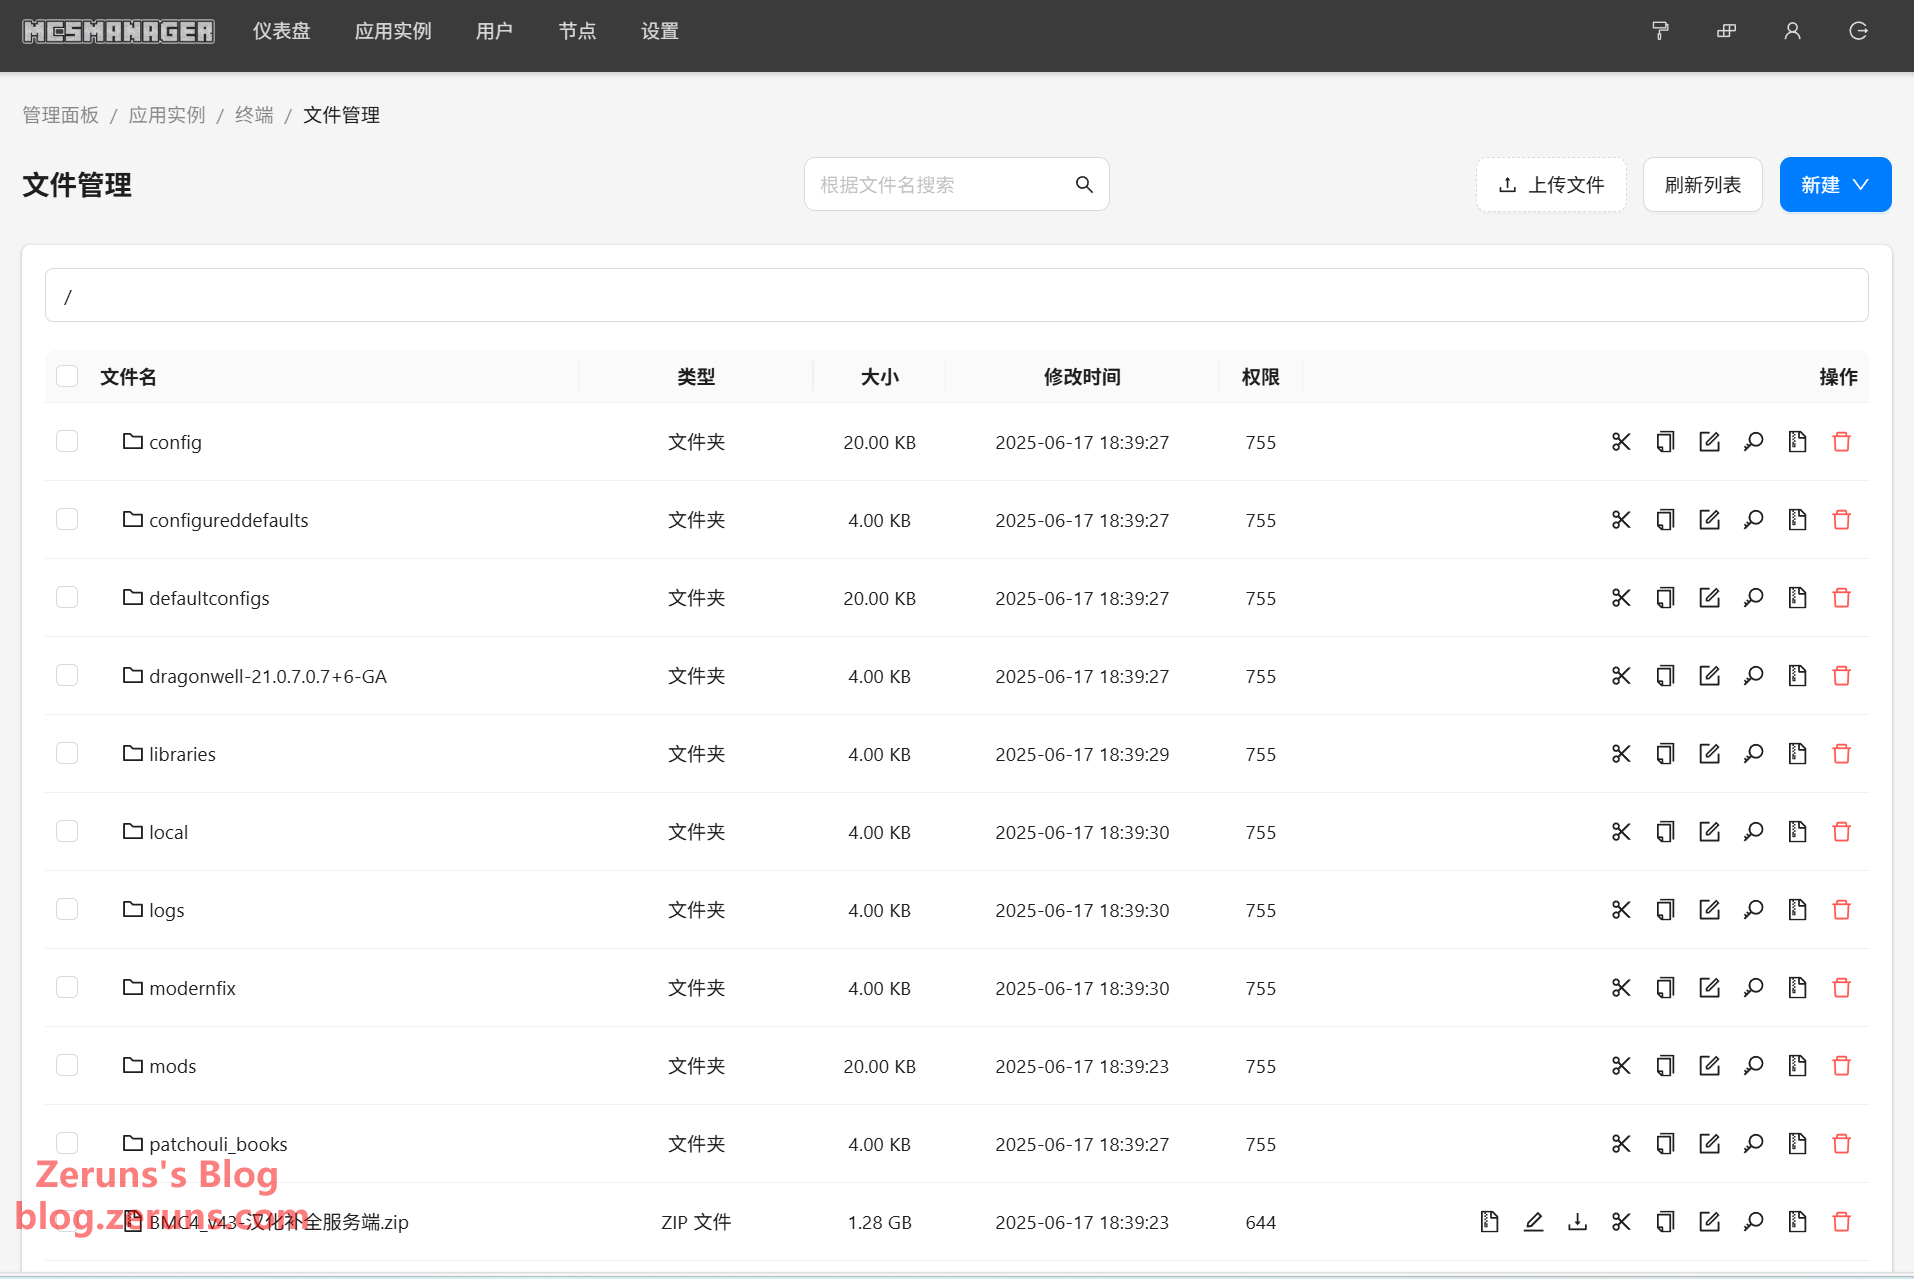
Once uploaded, click Go to Instance File Manager.
If the archive hasn't been extracted, manually click the Unzip button on the right, select Unzip to current directory, and again choose GBK as the encoding. A list of files, as shown below, indicates successful extraction.
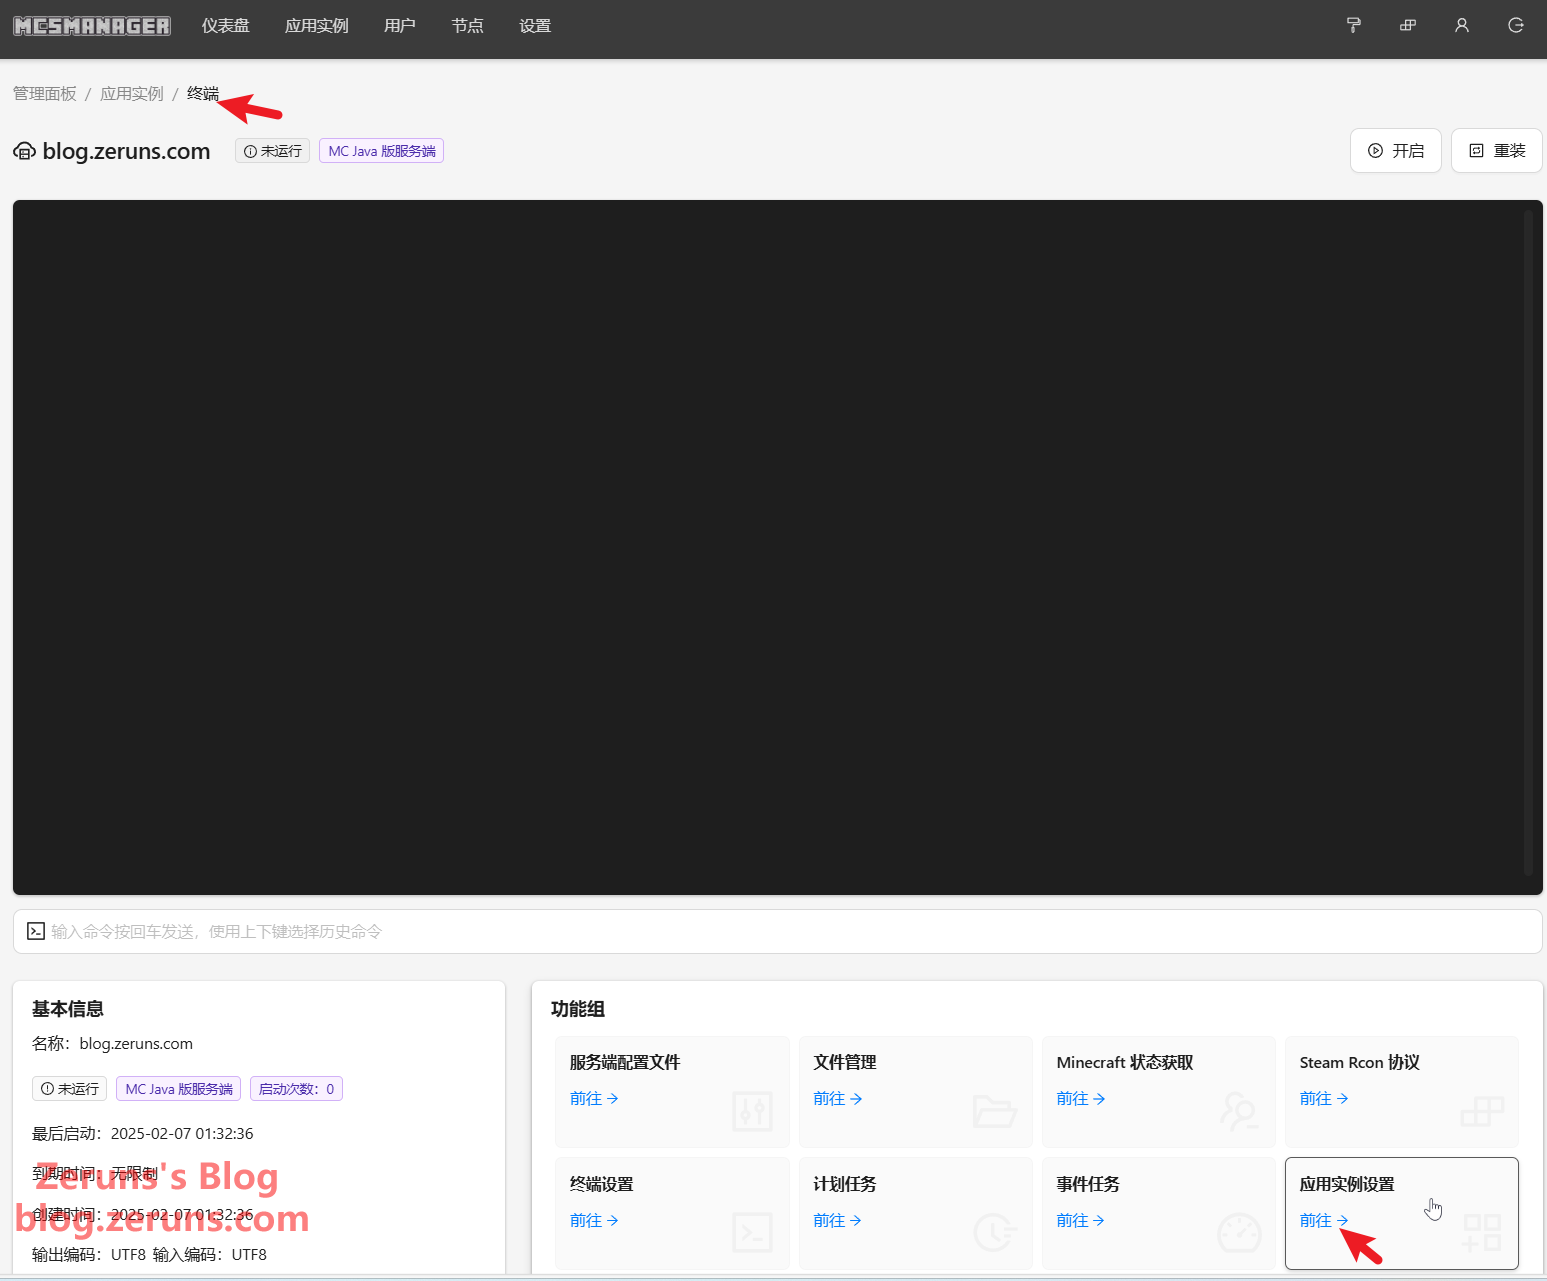
Now go back to Instance Terminal, then click Application Instance Settings.
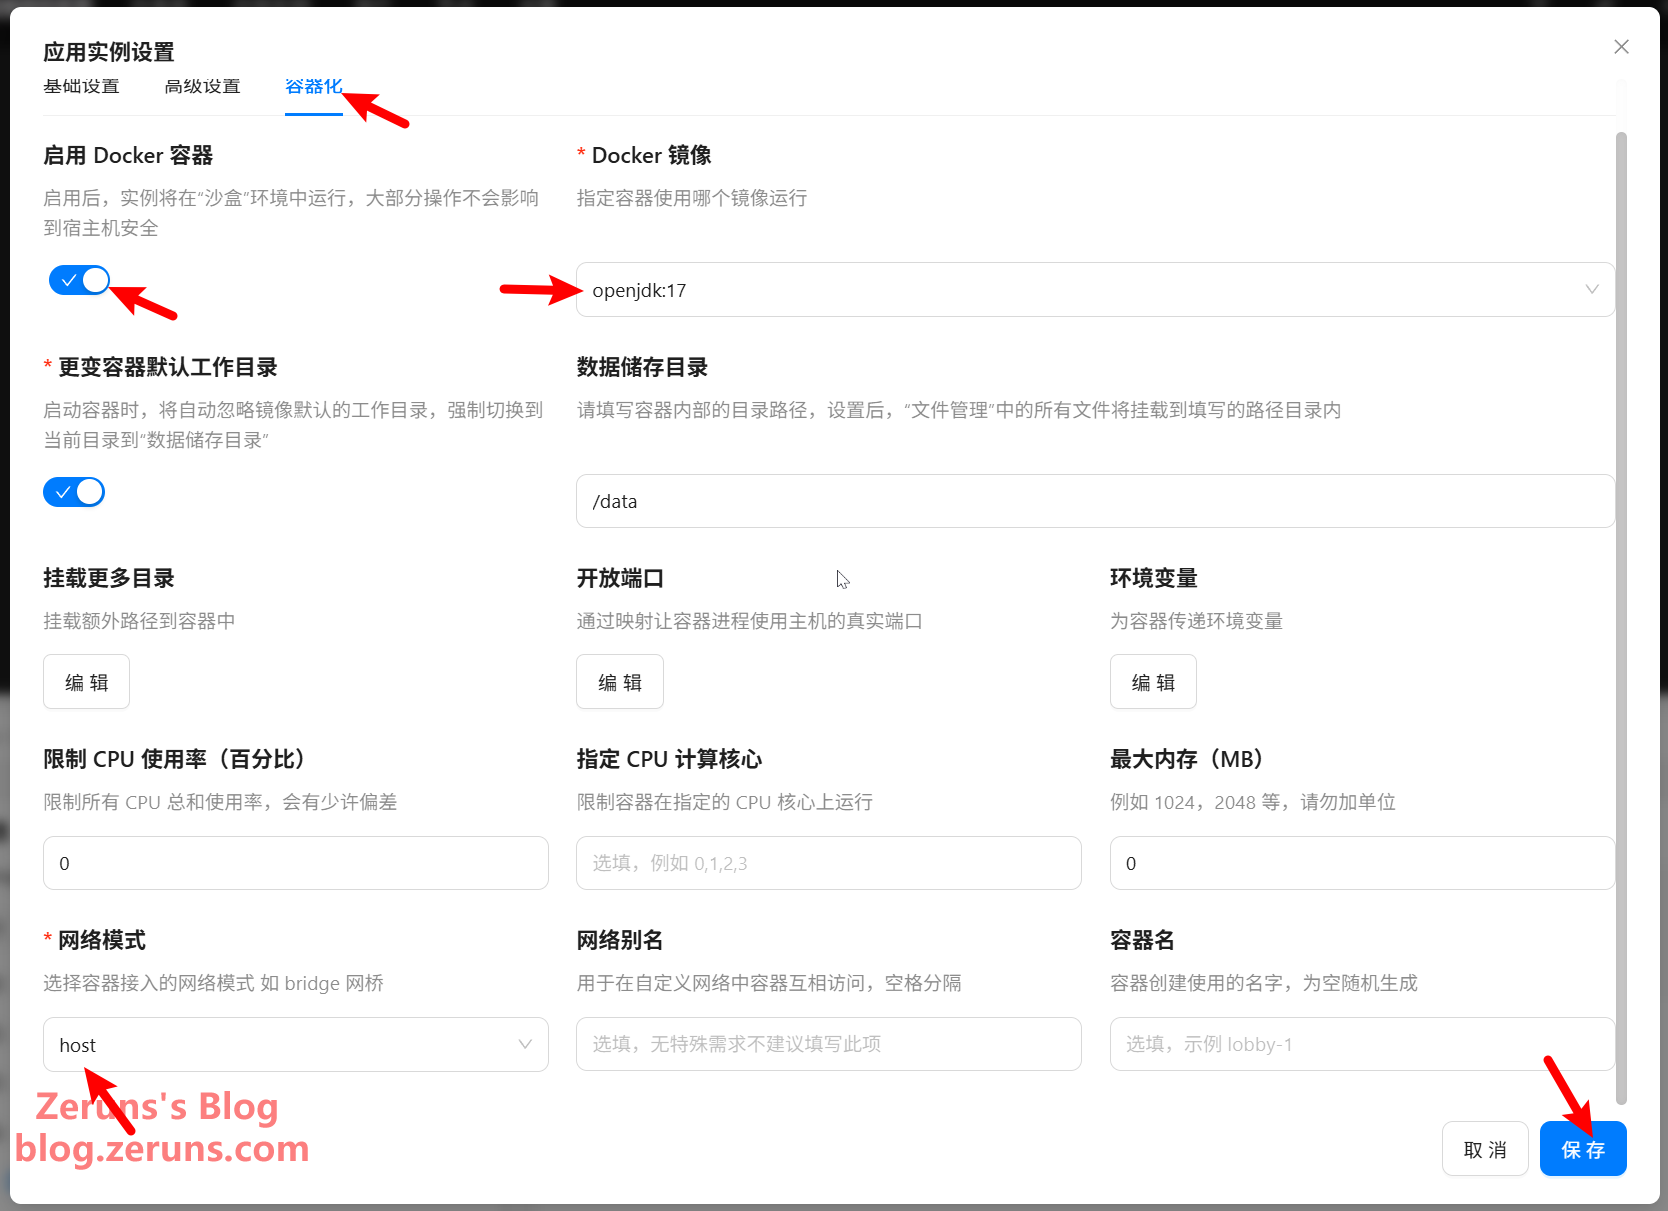
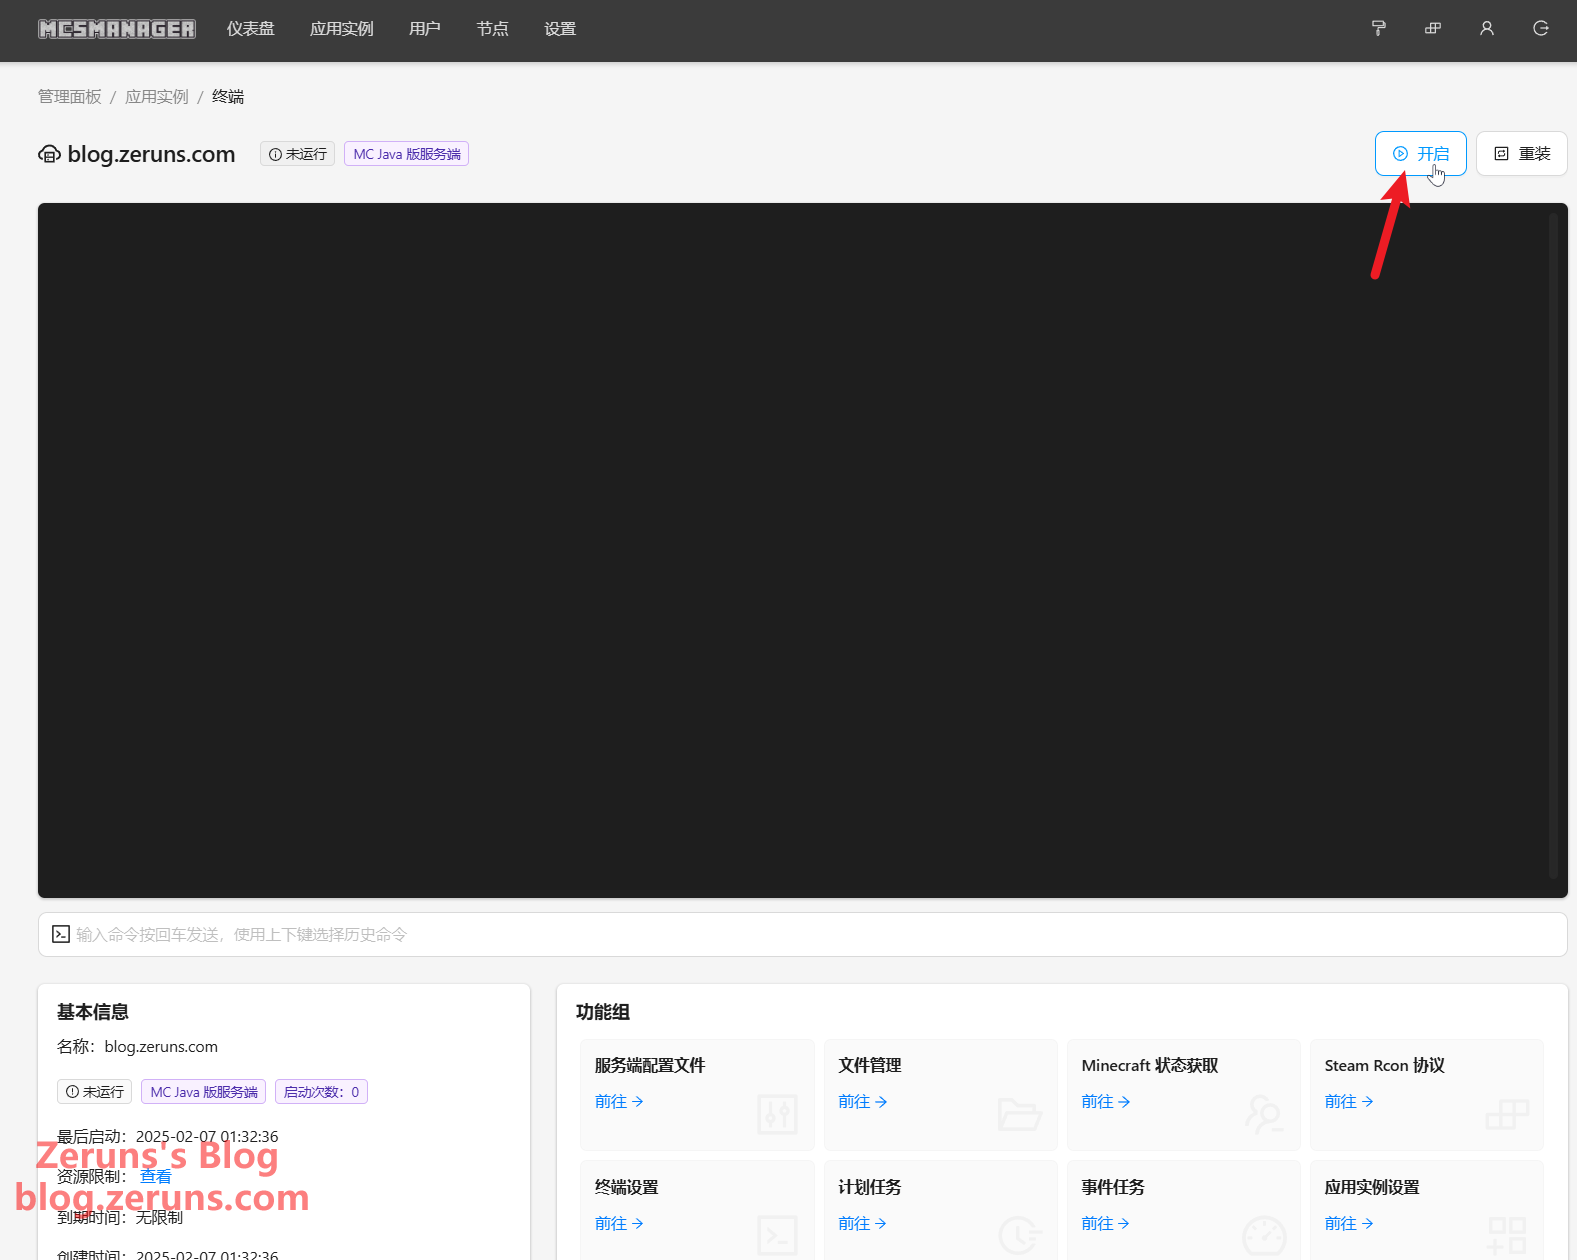
Enable Docker Container, set the Docker Image to openjdk:17, and set Network Mode to host ("host" means the container shares the host's network interface, so ports map directly and there's no need for port forwarding). Optionally, specify the Max Memory Limit at the bottom right. Click Save, then click Start Instance.
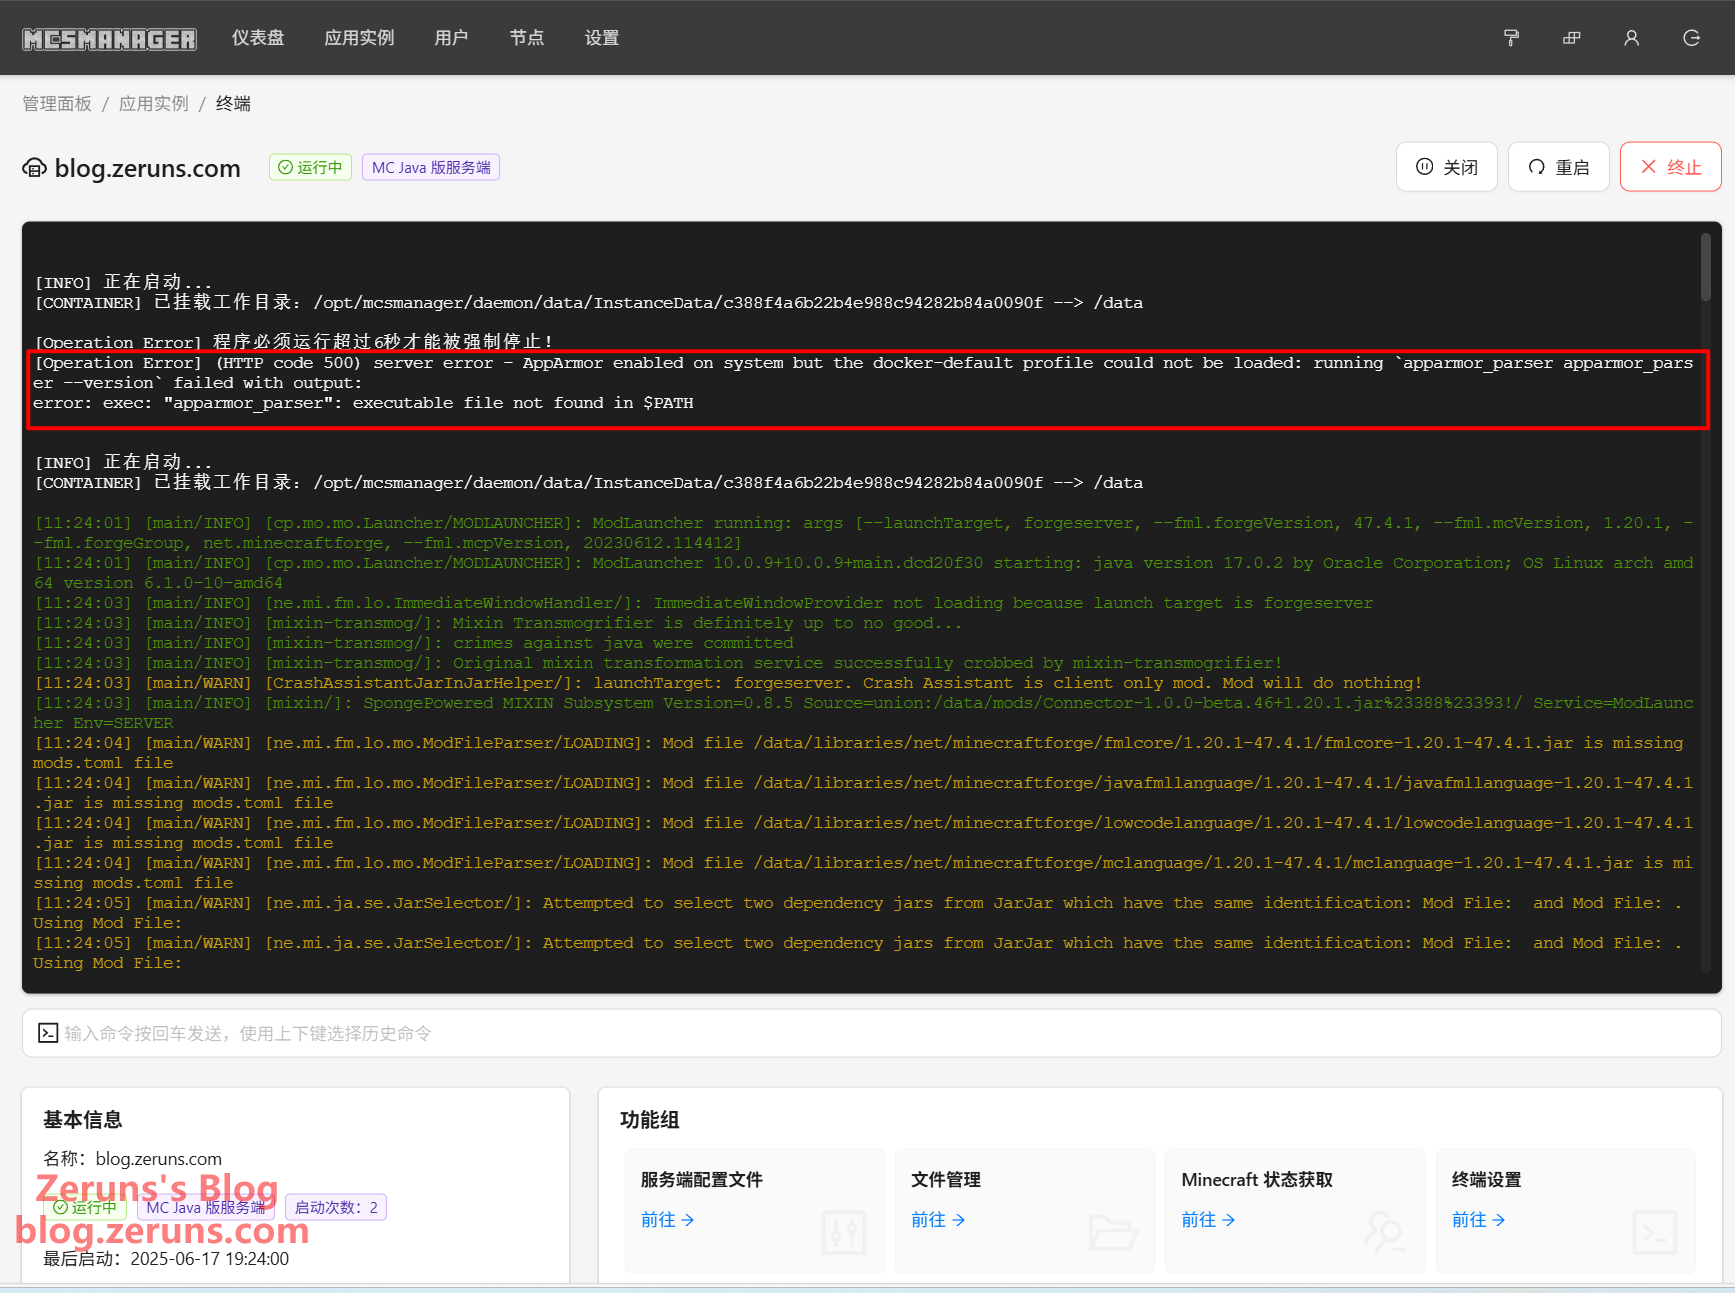
If you encounter the error error: exec: "apparmor_parser": executable file not found in $PATH, switch to your SSH terminal and run:
apt -y install apparmor apparmor-utils
Then click Start again.
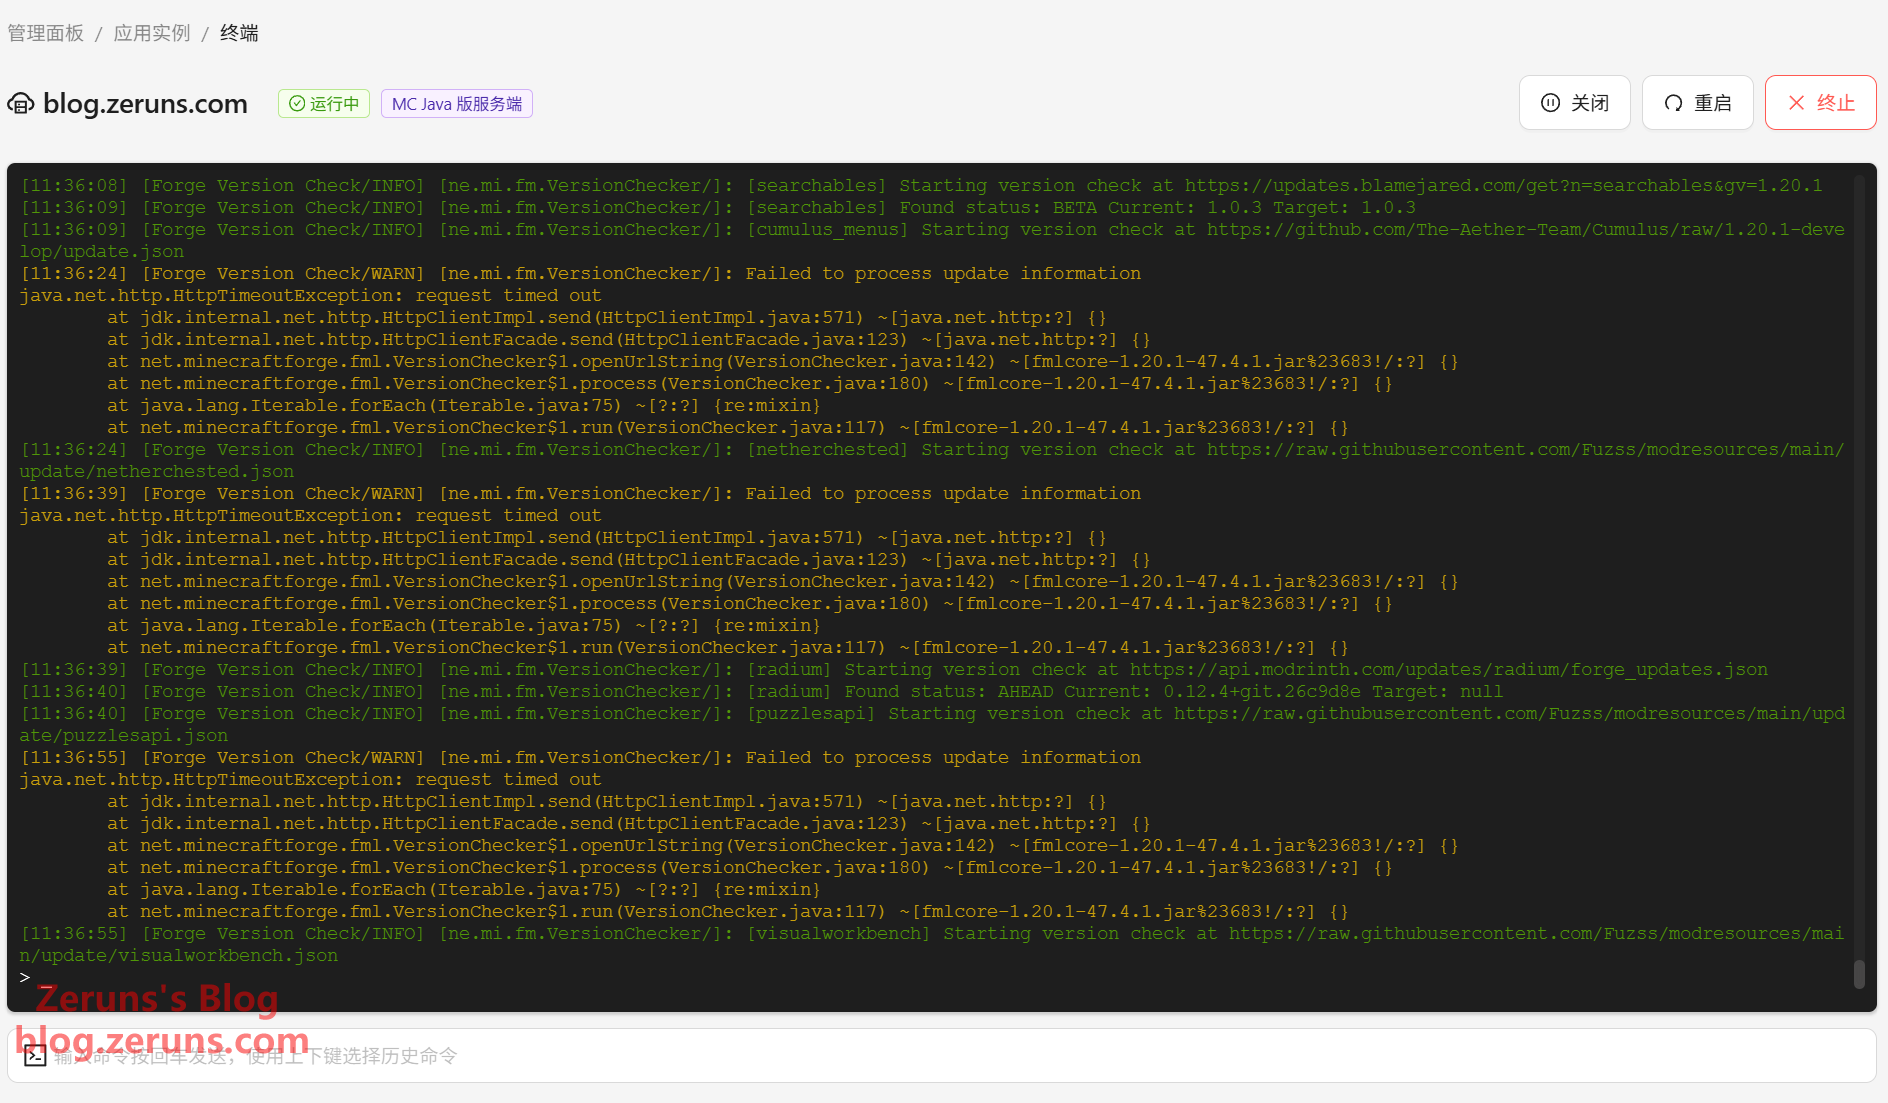
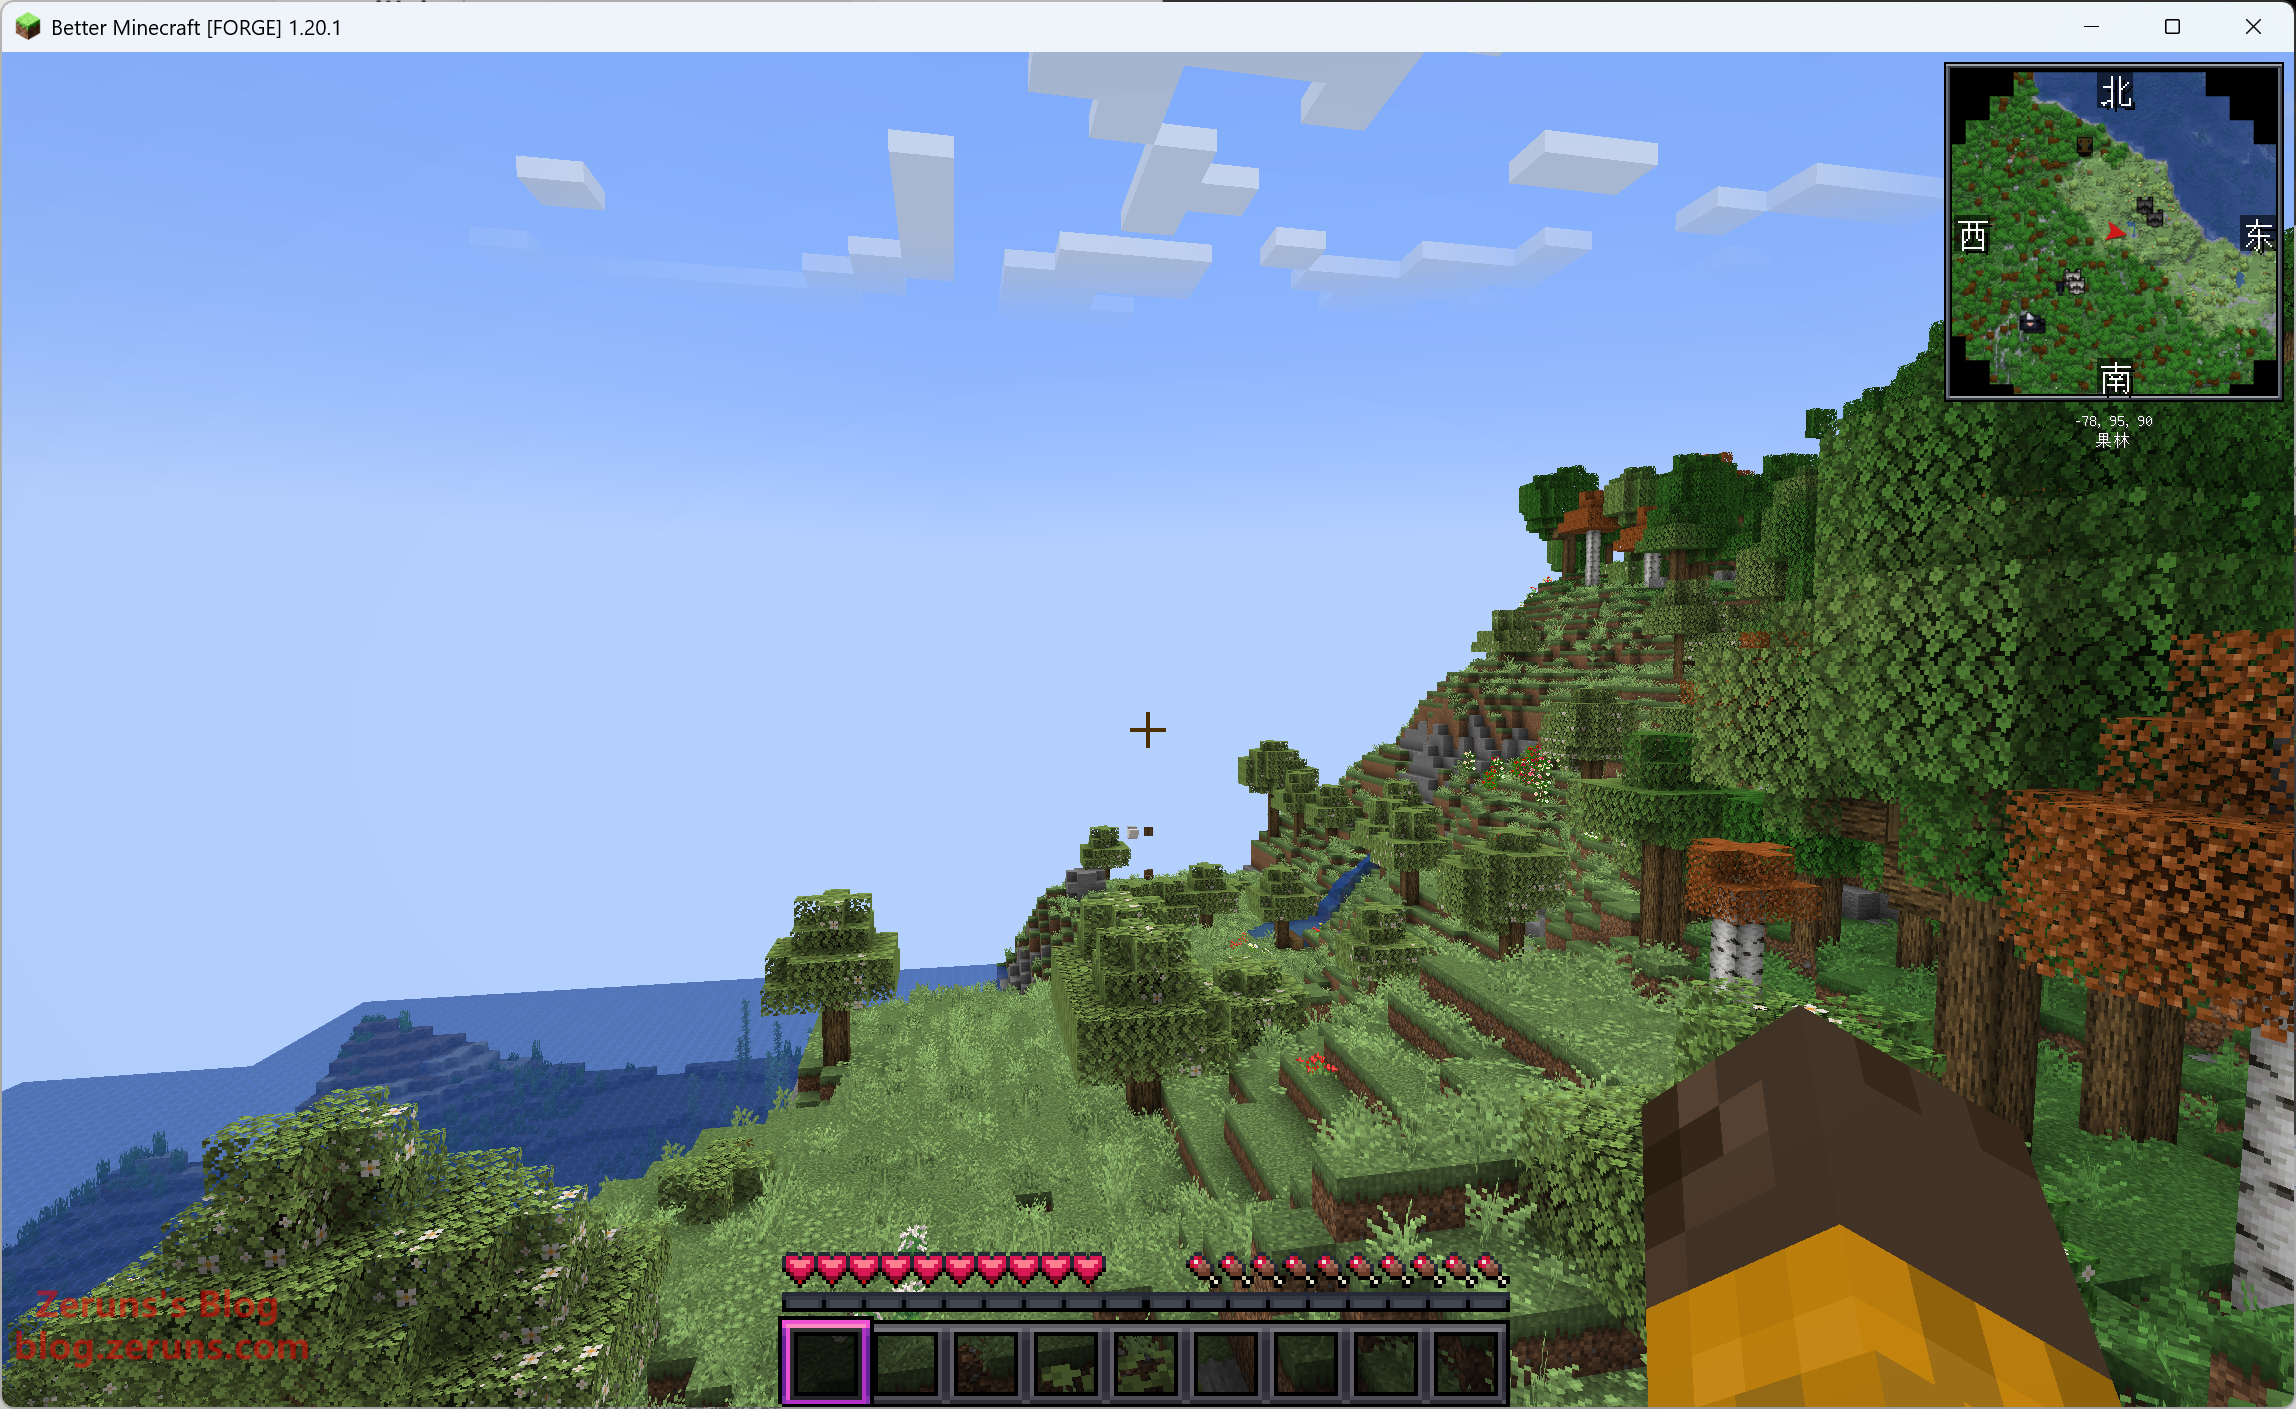
Wait a few minutes for the server to start. You can then launch Minecraft and join your server.
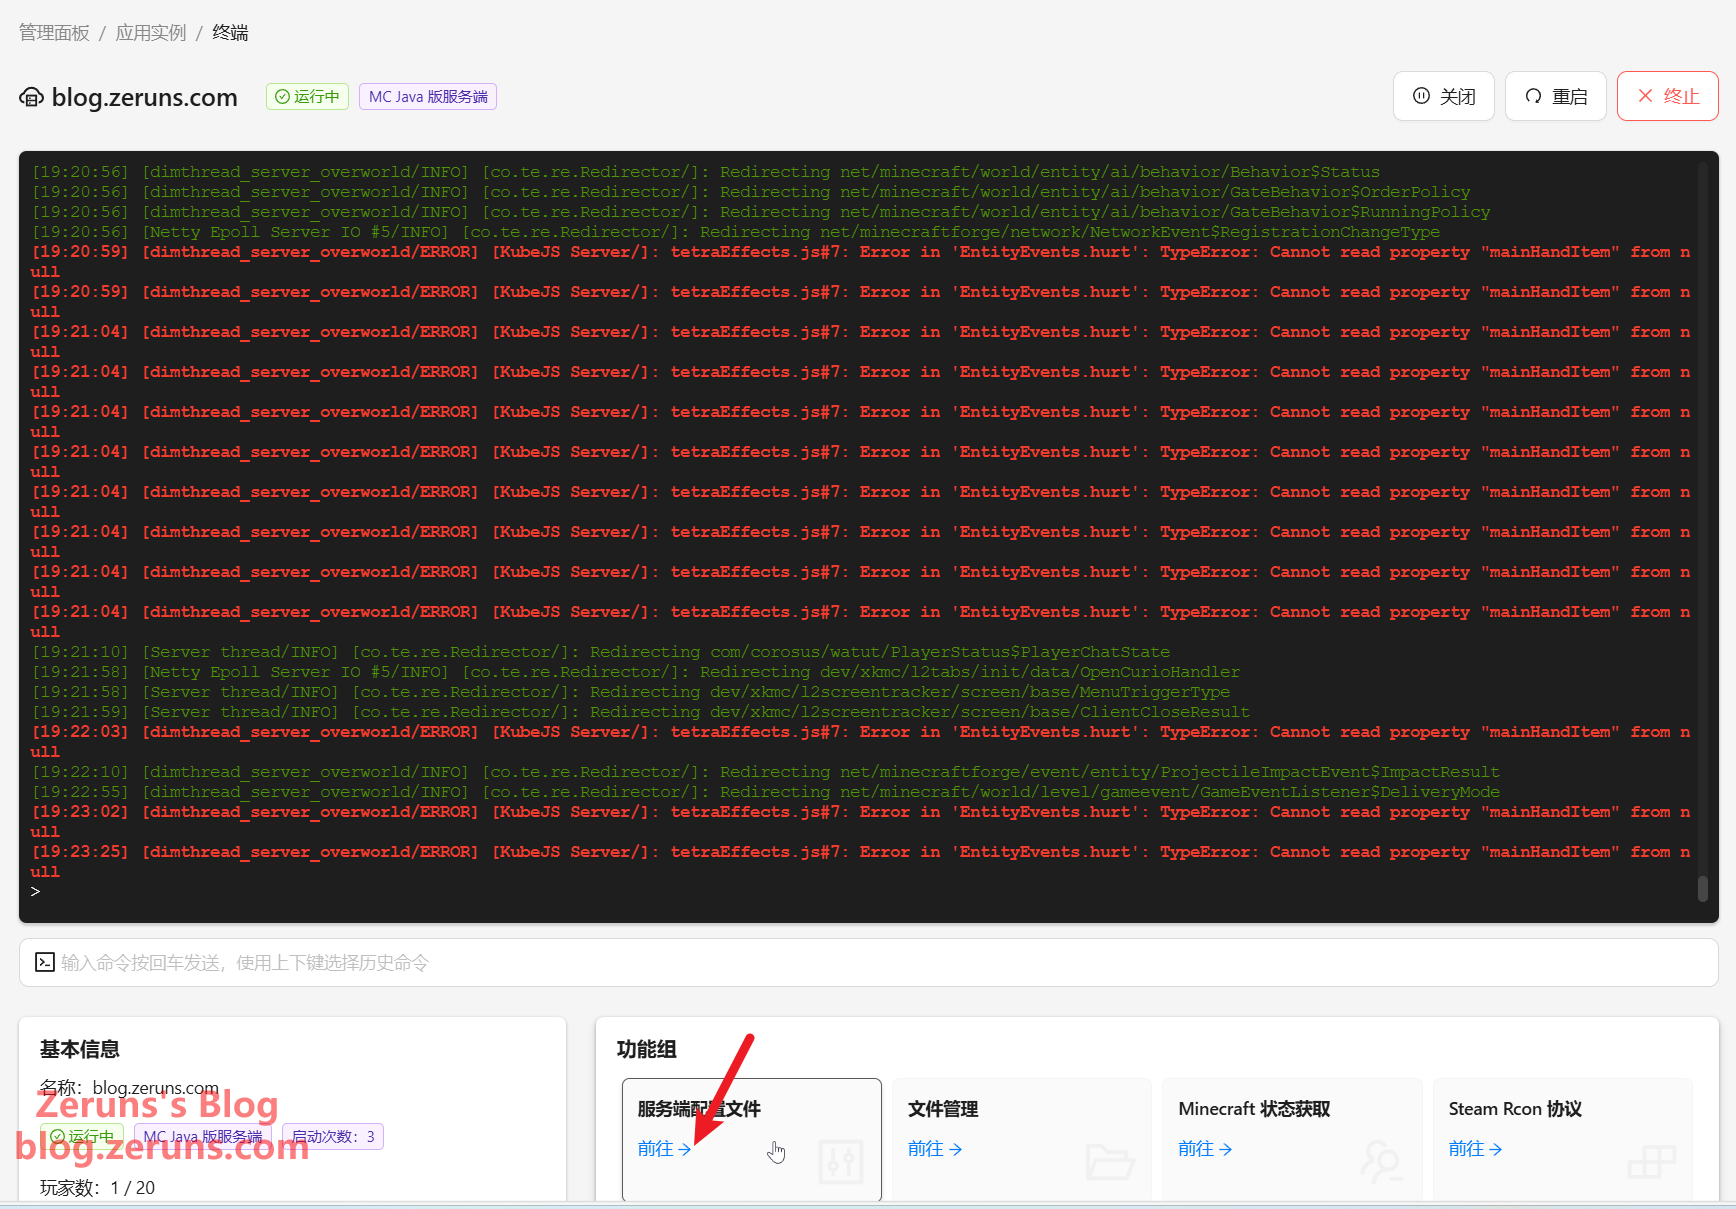
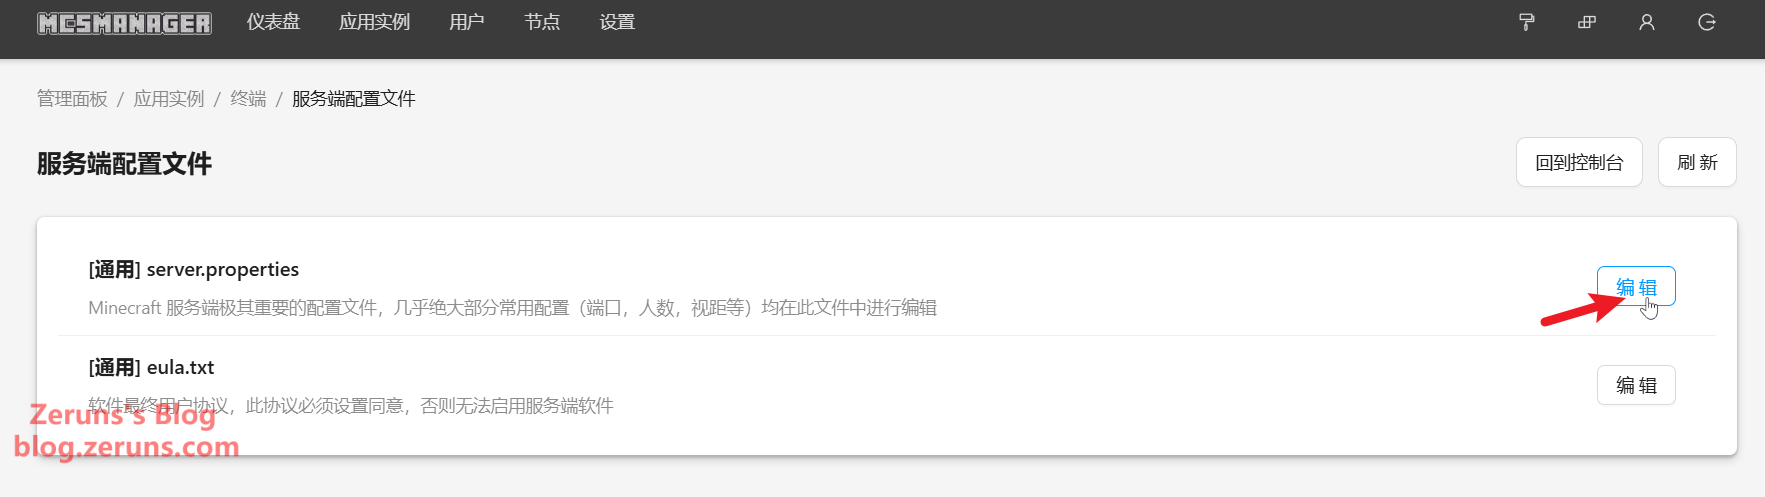
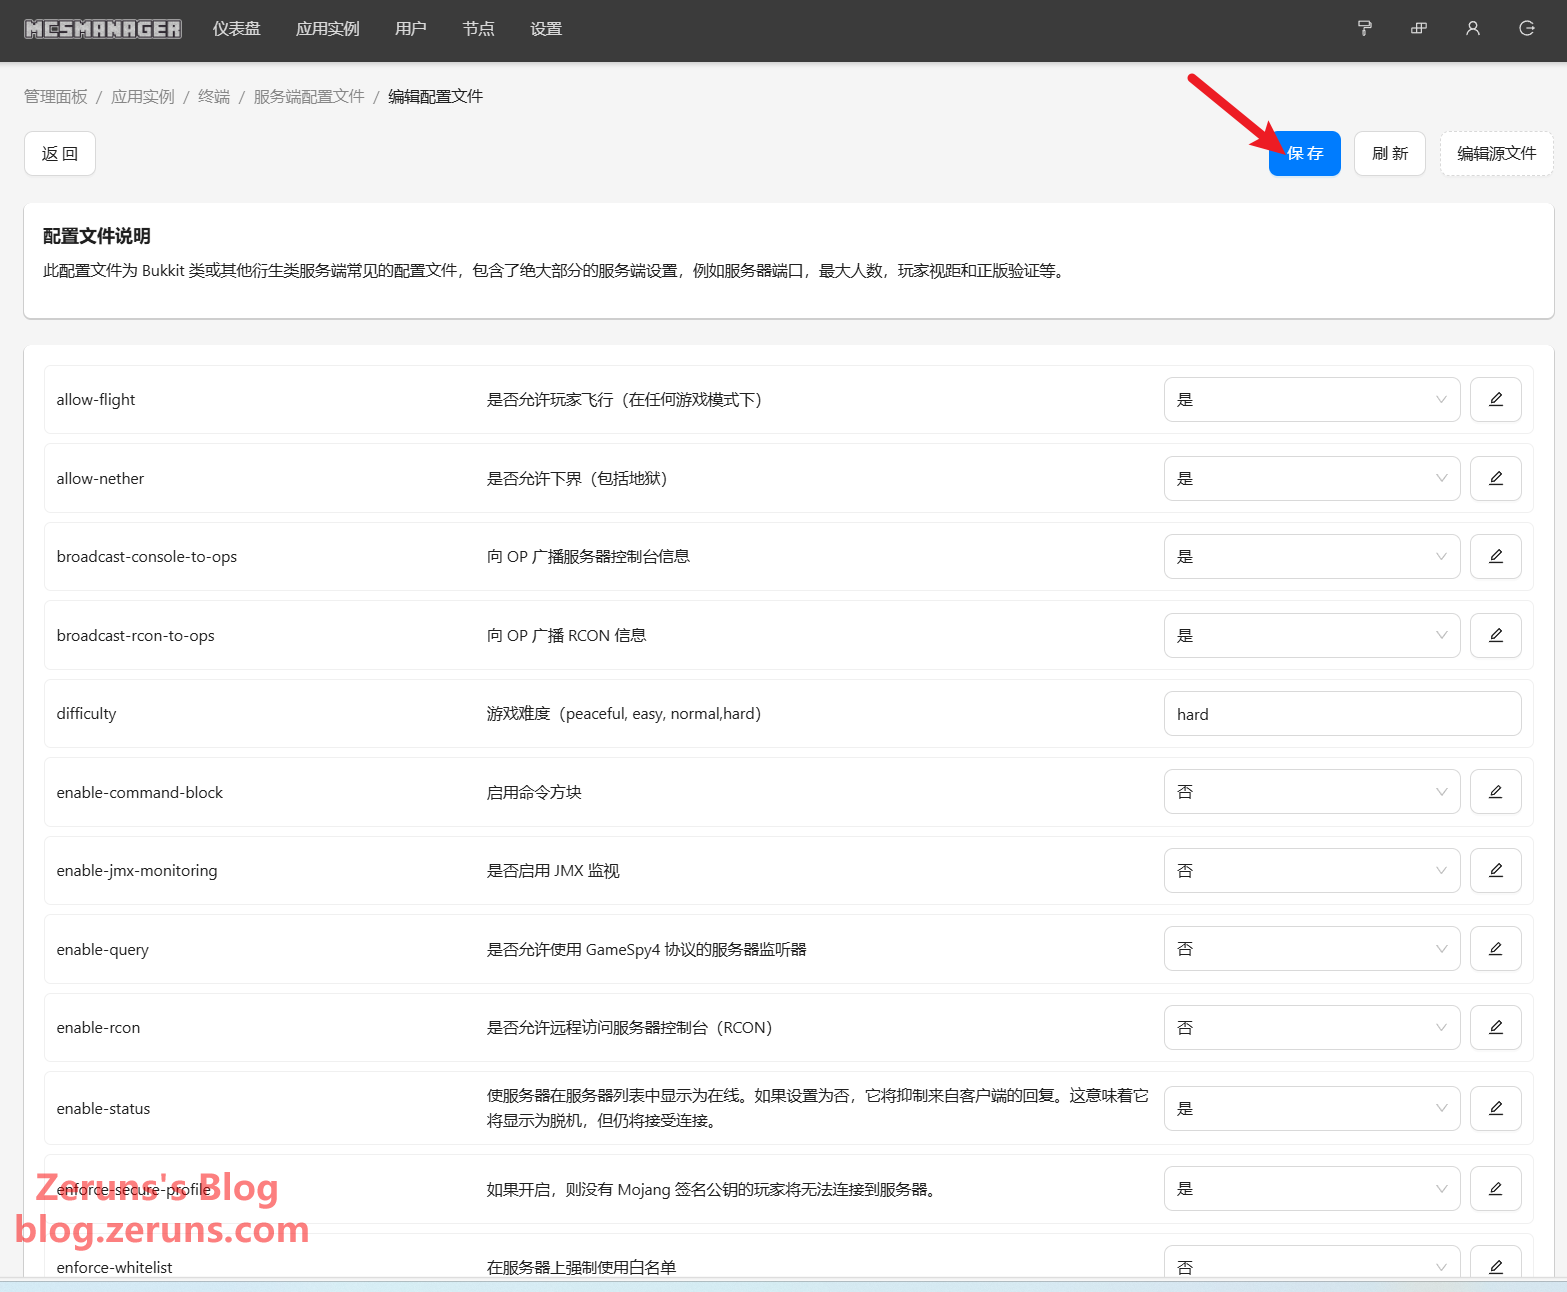
To modify server settings, go to Server Configuration Files → server.properties, where you can adjust settings. If you're using a non-premium (offline) account, set online-mode=false (premium accounts are recommended). Save the file after making changes. You can also change the server port (default is 25565).
Don't forget to restart the instance after making changes!
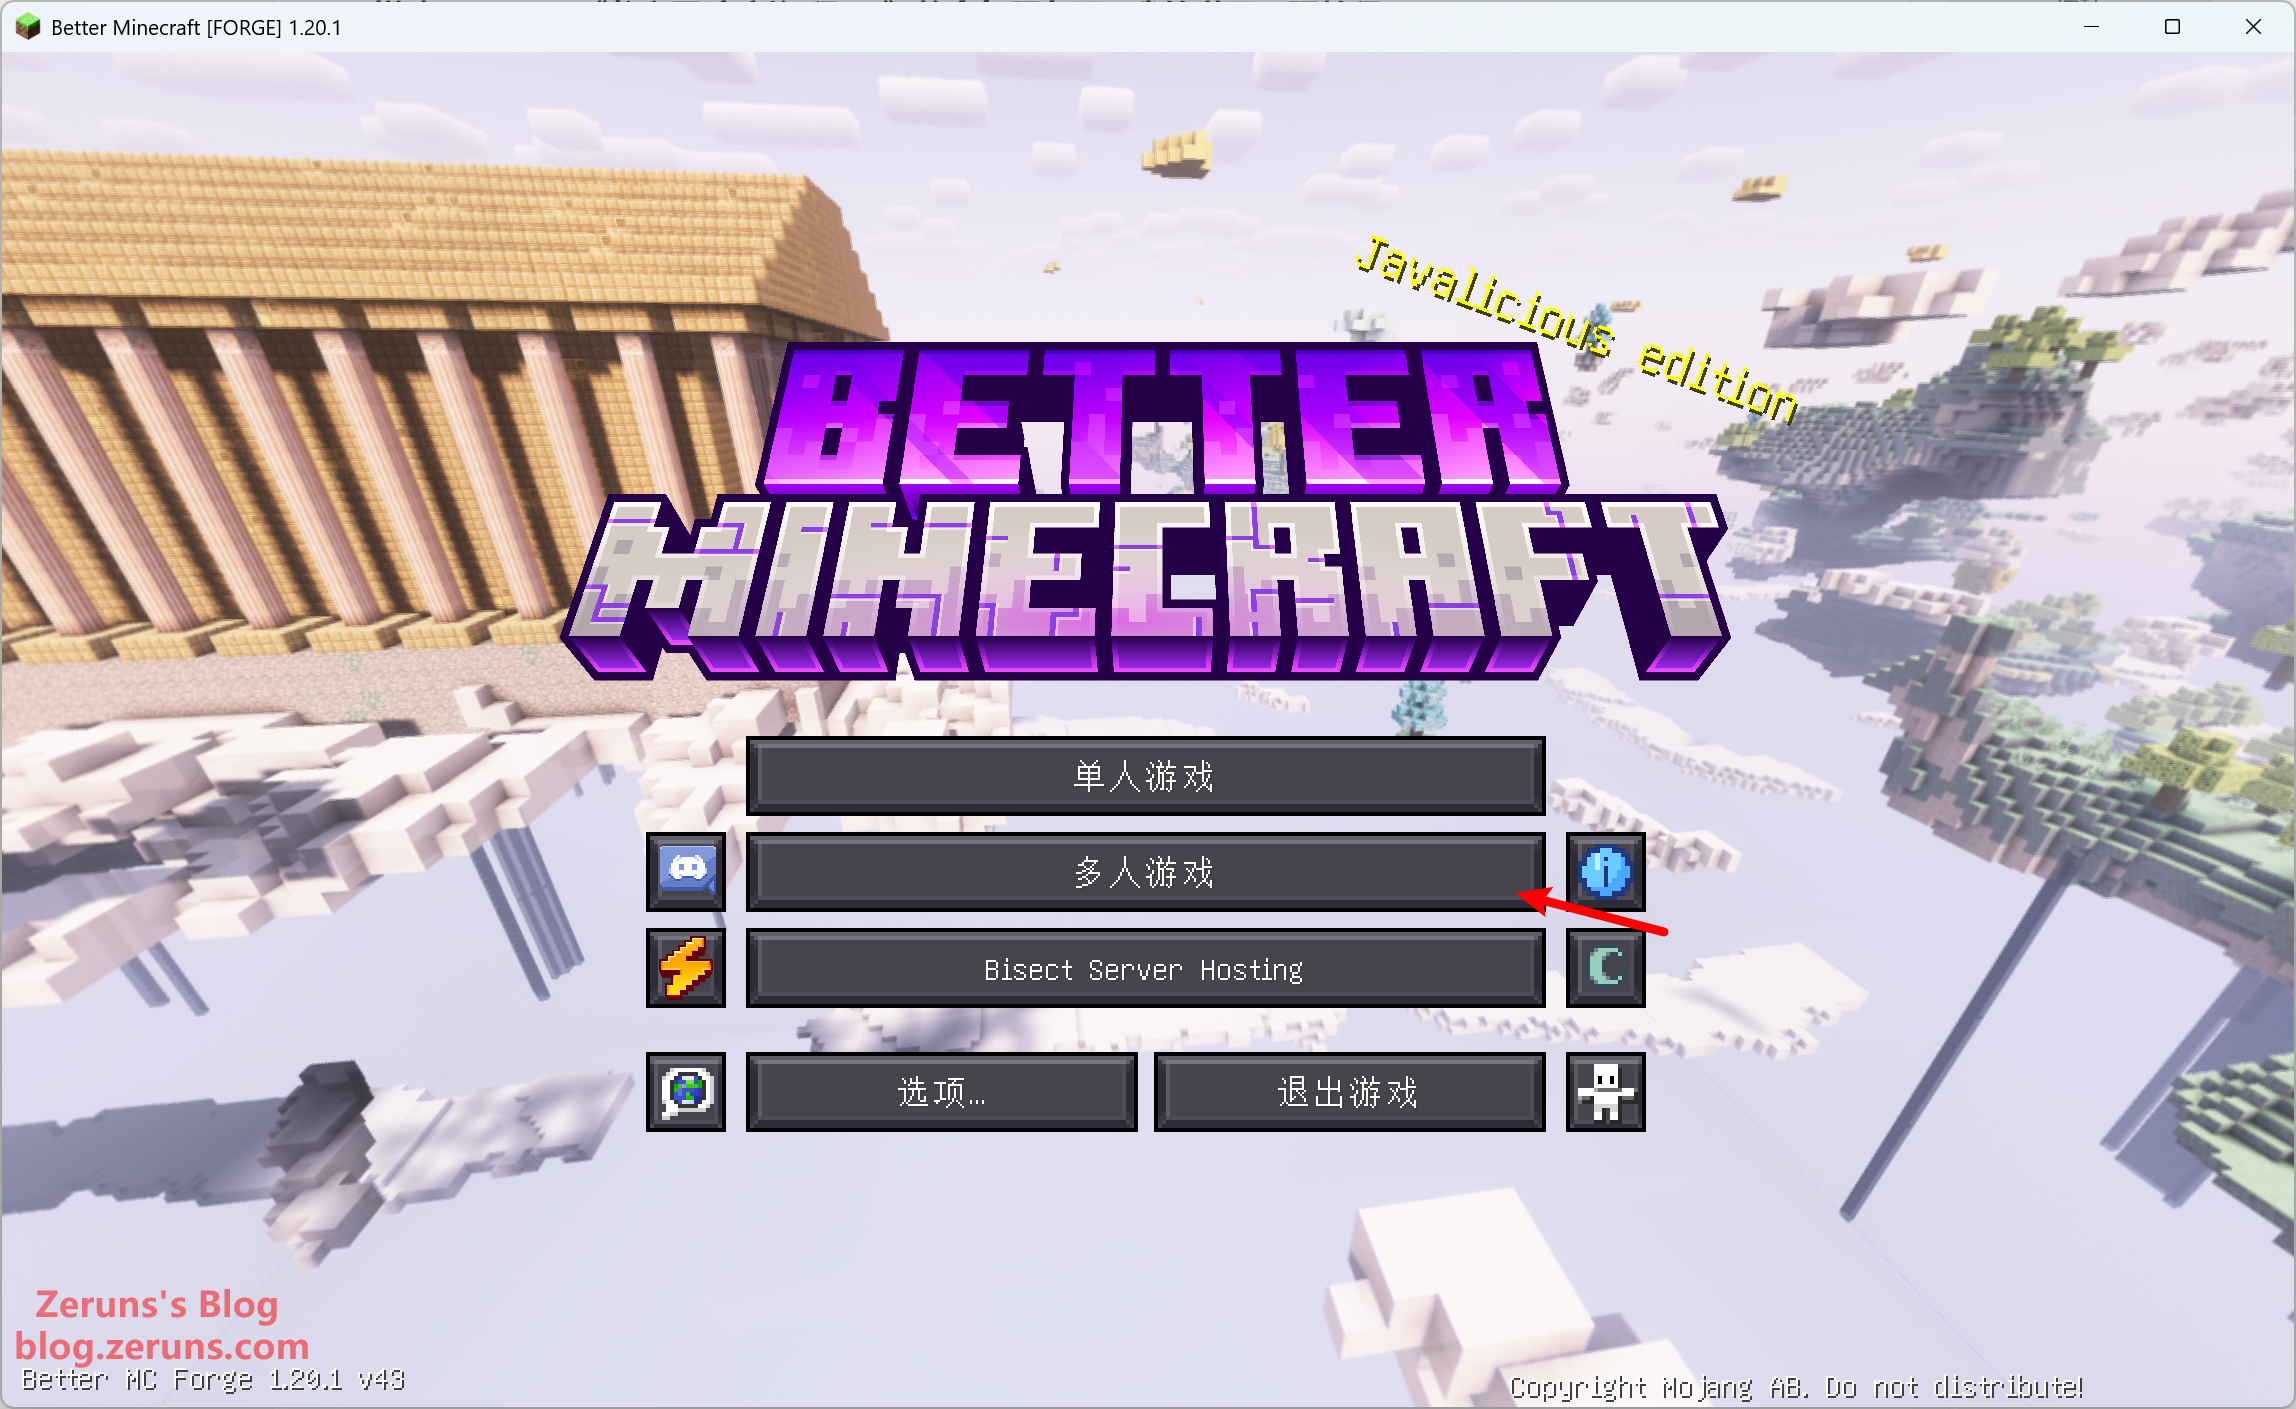
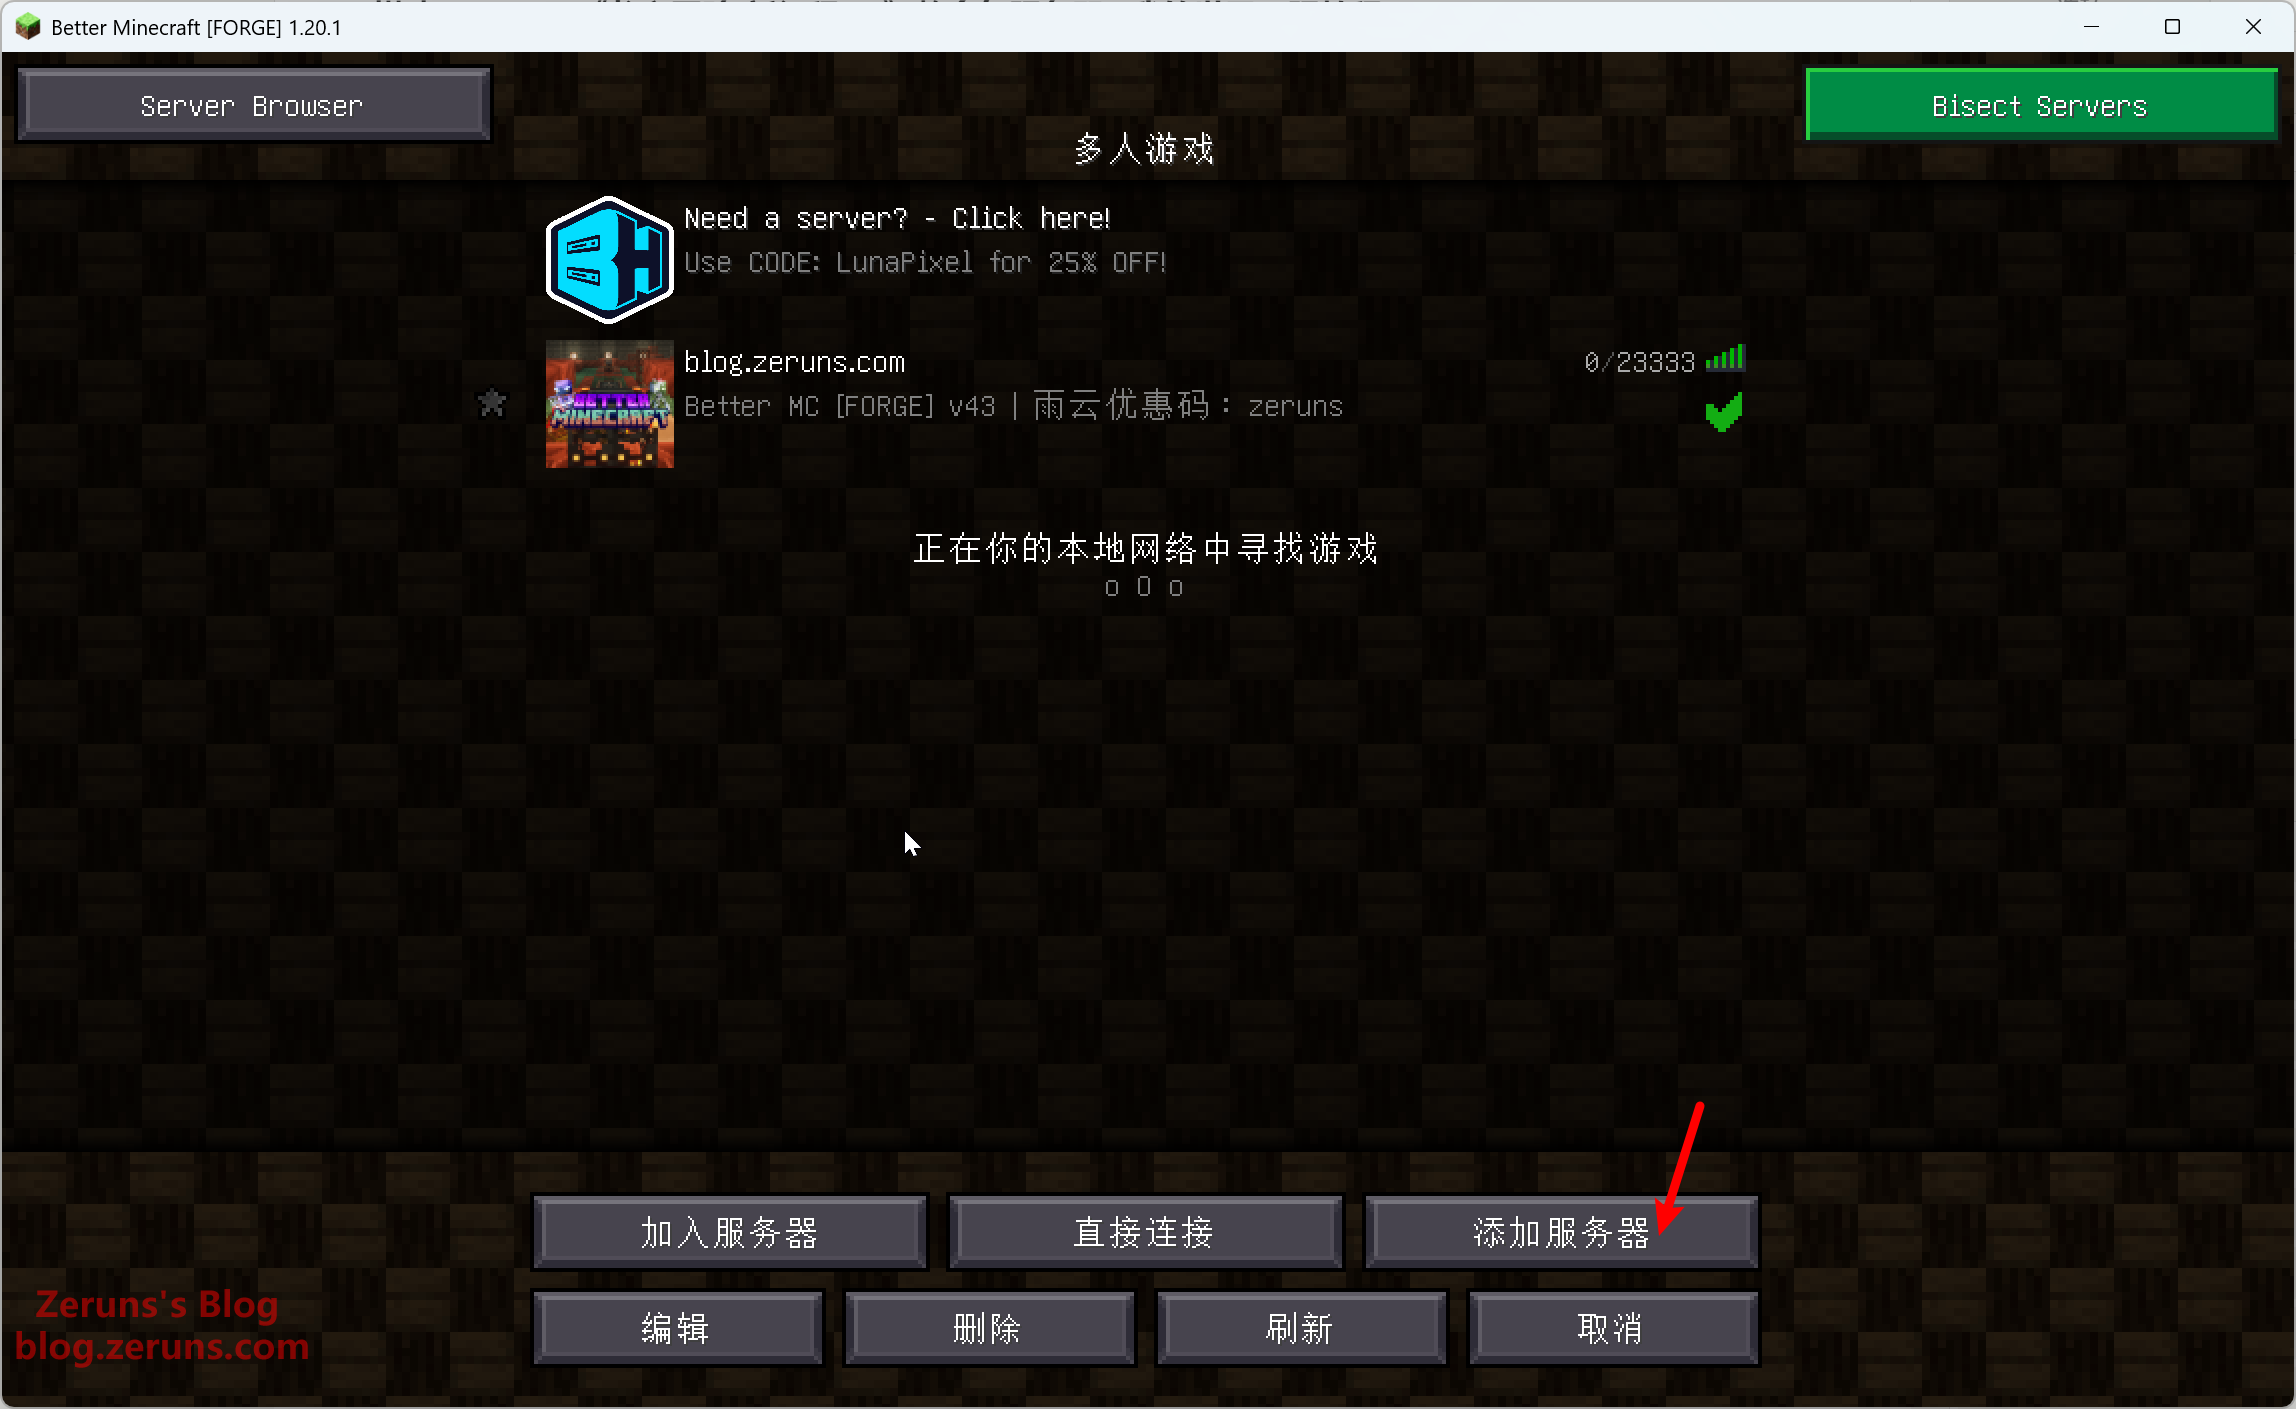
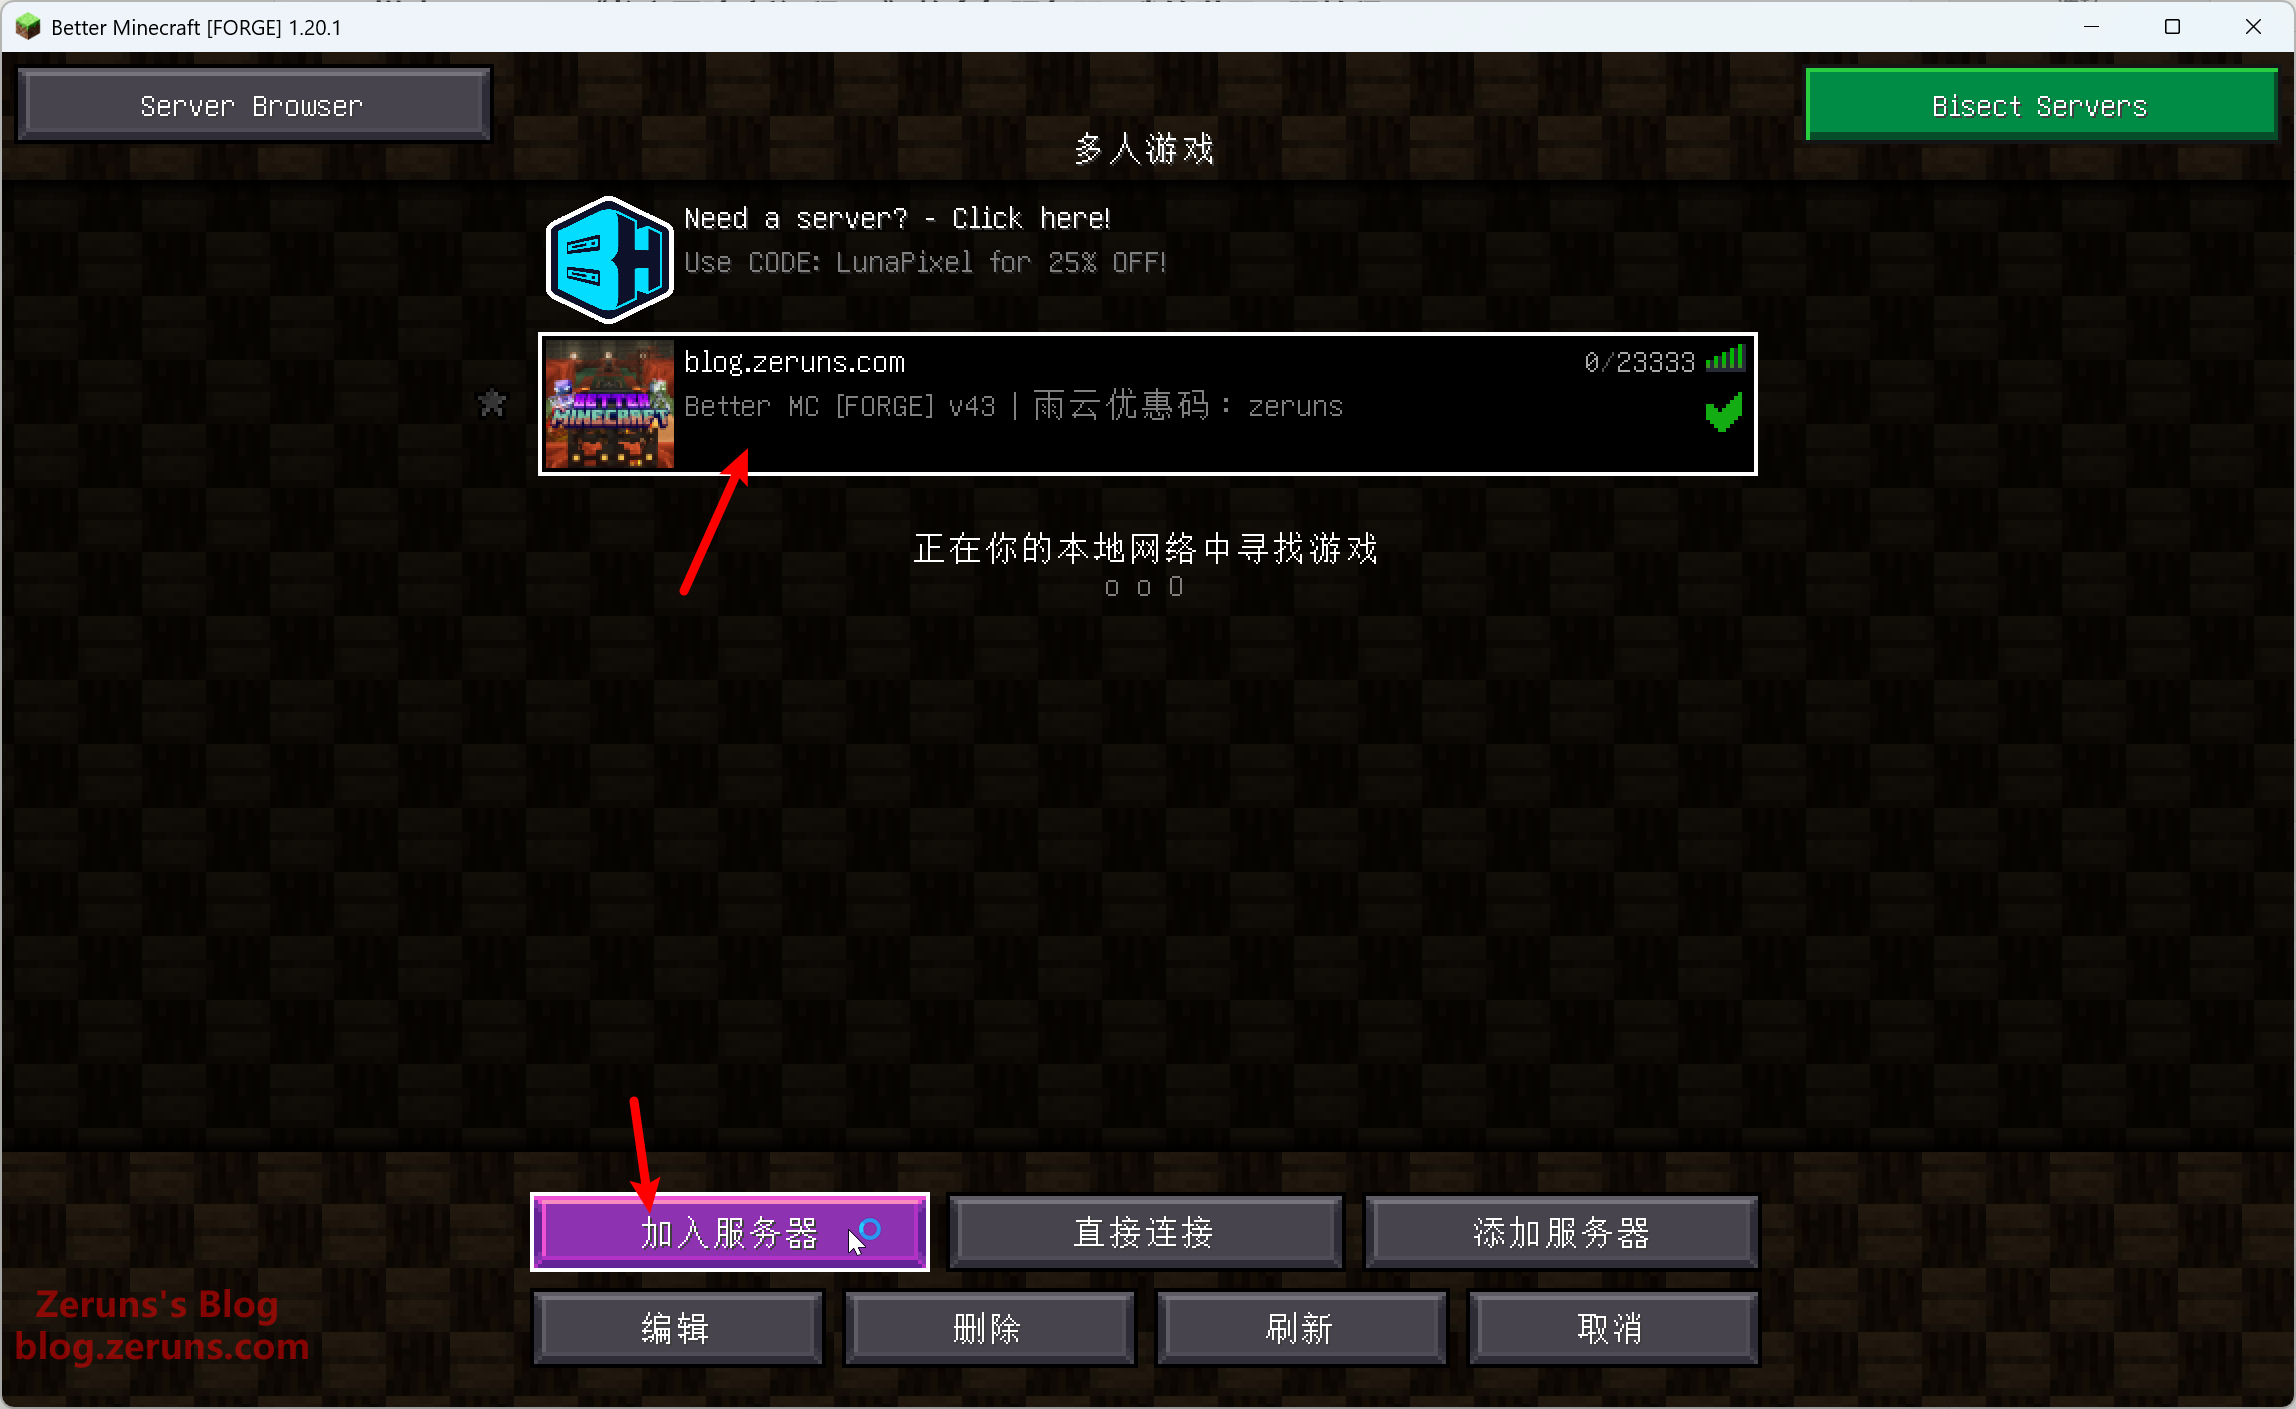
Joining the Game
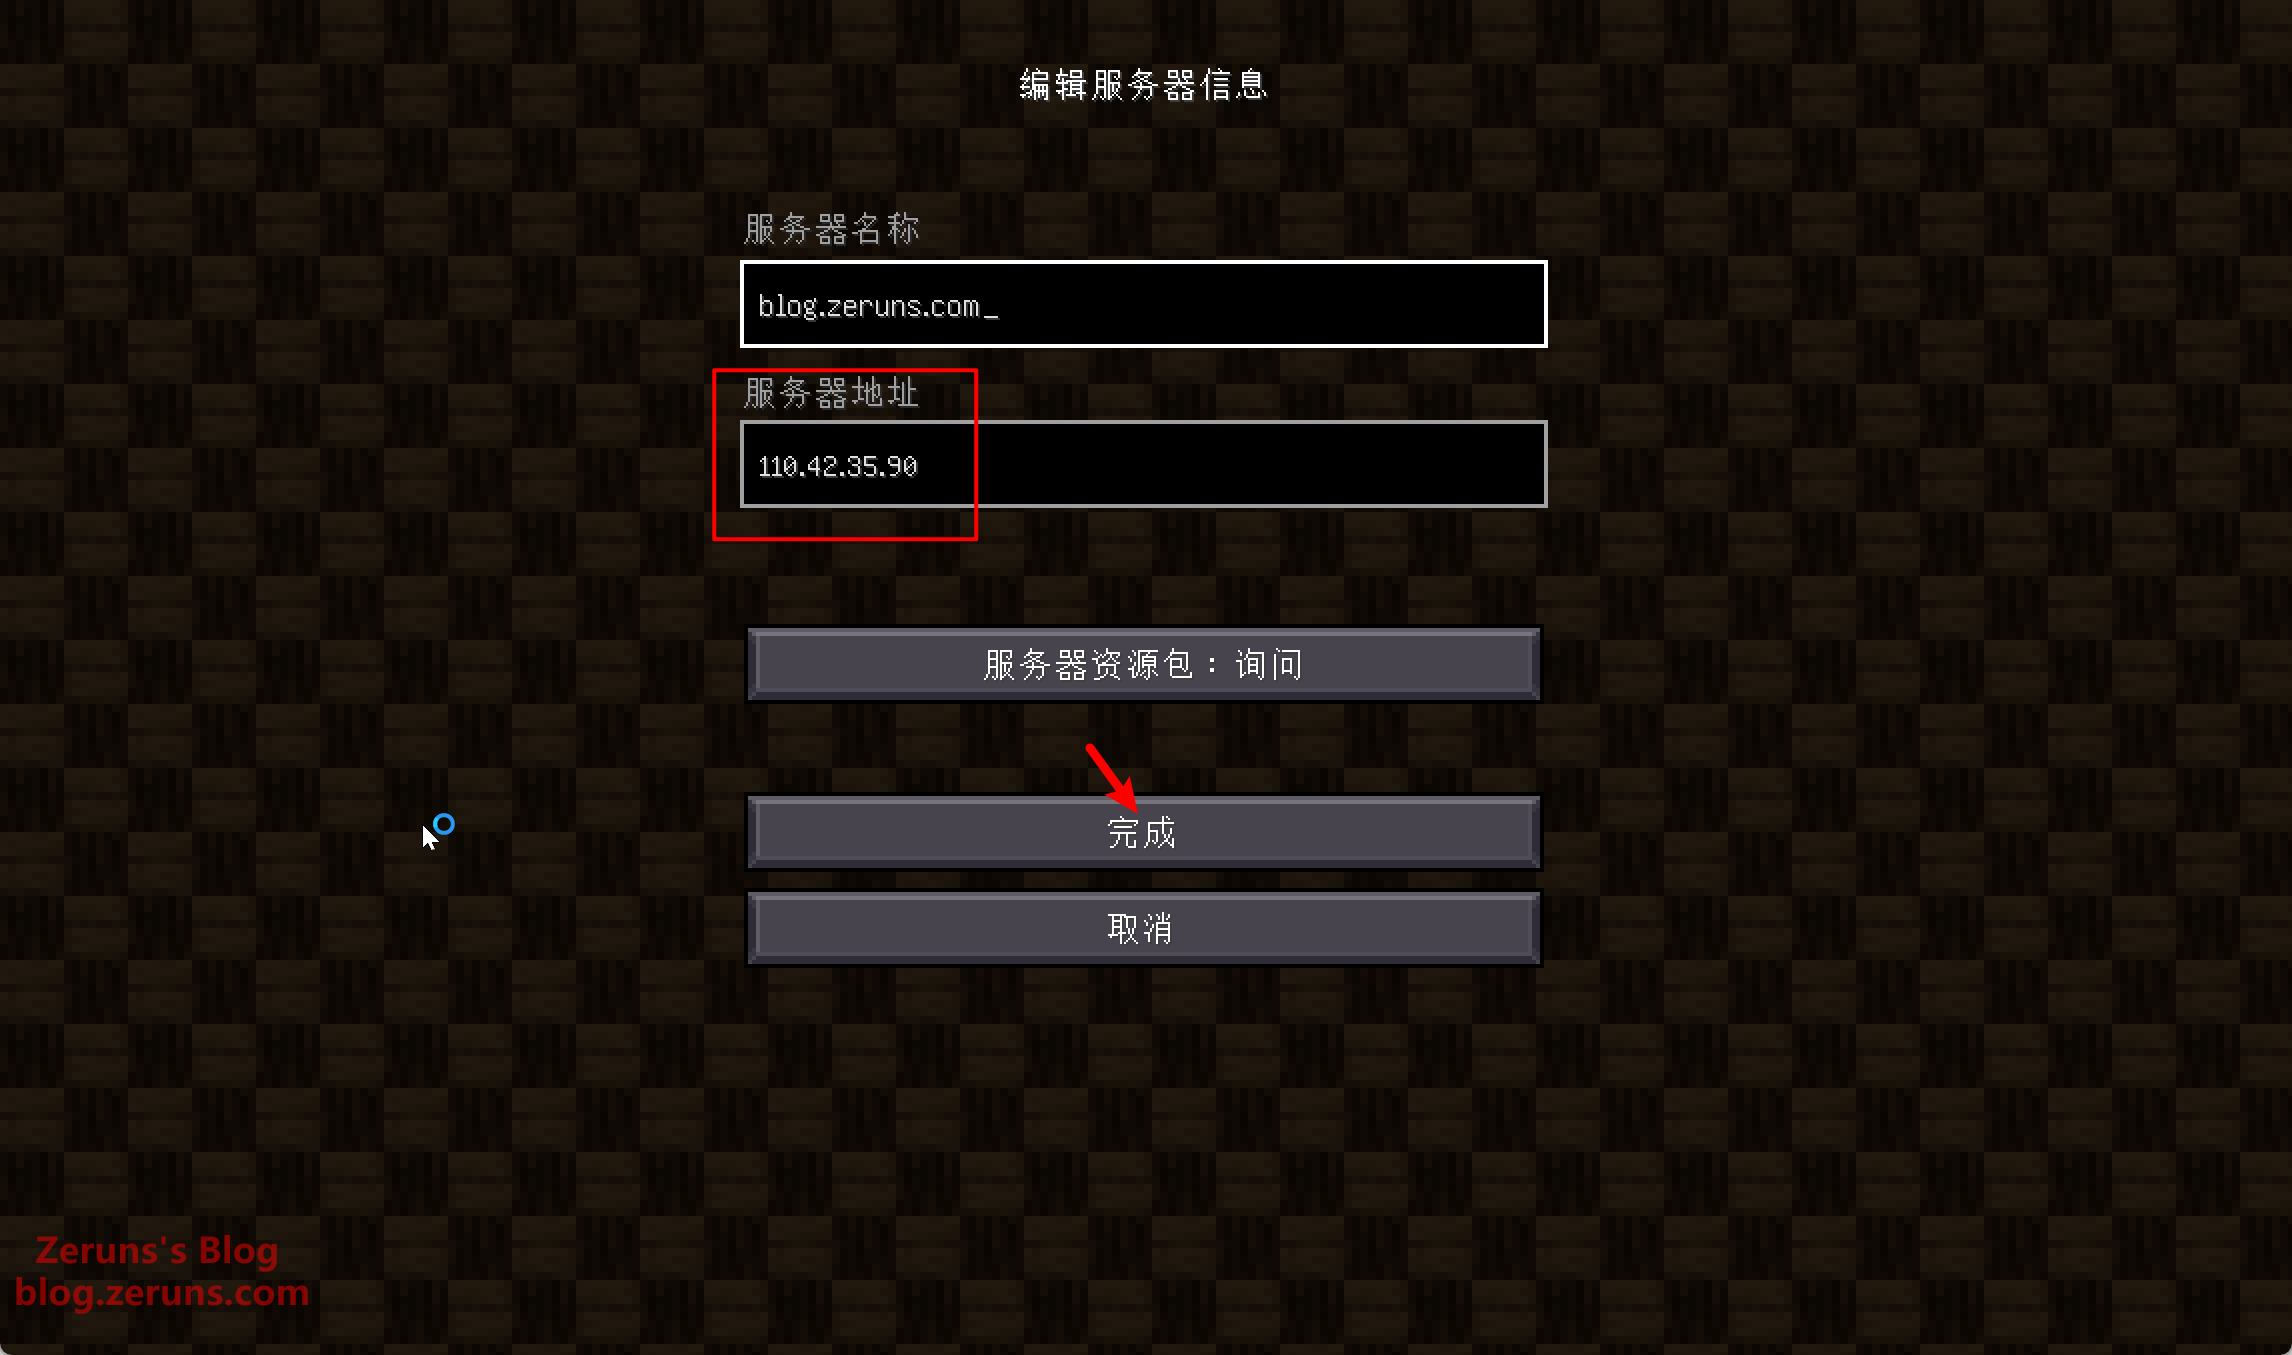
In Minecraft, click Multiplayer and then Add Server. Enter your server's public IP address followed by the port number (default: 25565), separated by a colon:. For example:
110.42.35.90:25565
If you're using the default port 25565, you can omit it and just enter the IP.
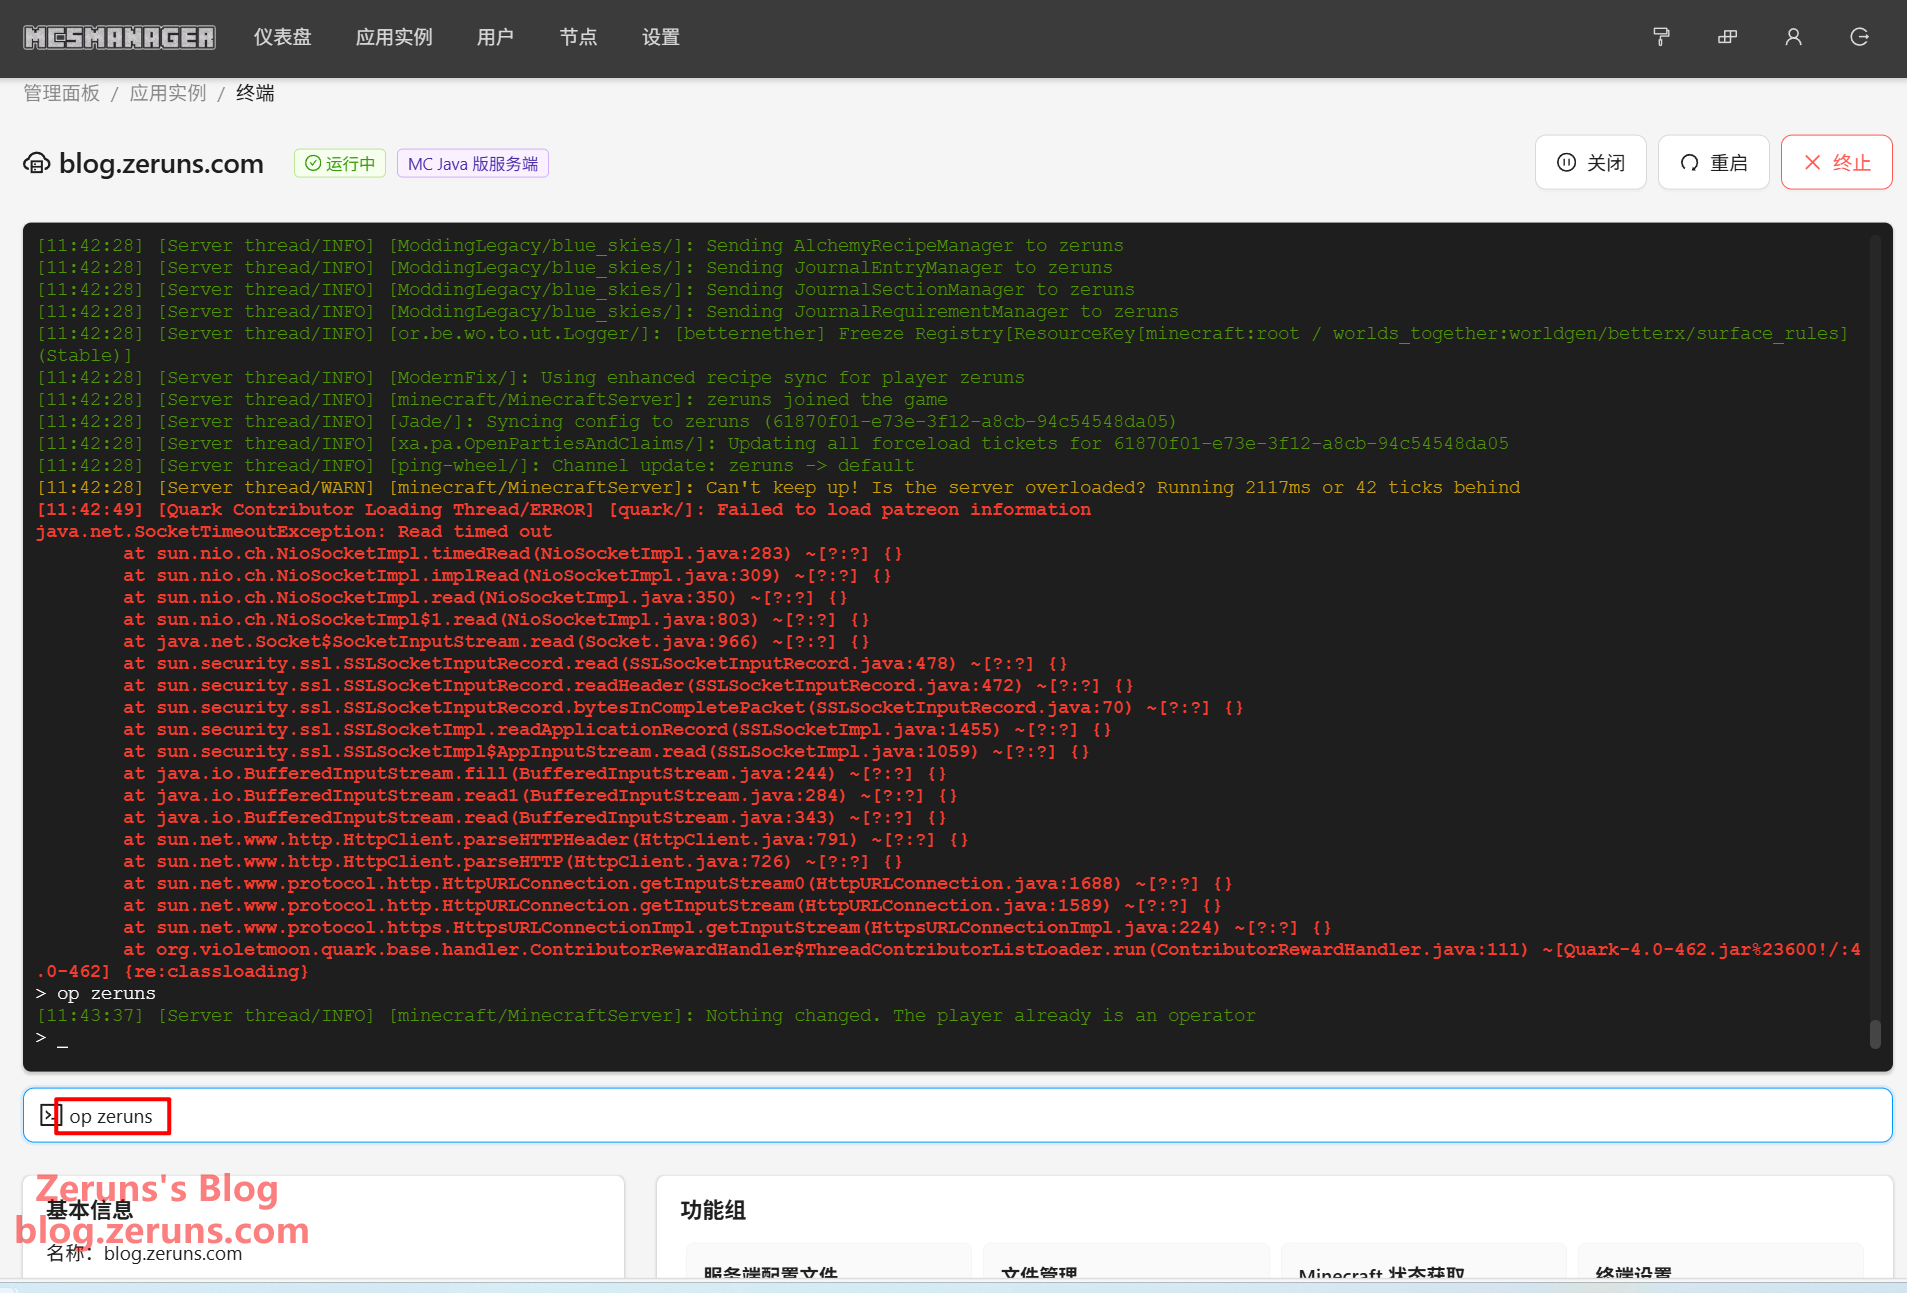
To grant operator (admin) permissions, go to the terminal in the MCSM panel and type:
op YourUsername
Then press Enter.
Recommended Reading
- High-performance and budget-friendly VPS/cloud server recommendations:https://blog.zeruns.com/archives/383.html
- Minecraft server setup tutorials: https://blog.zeruns.com/tag/mc/
- Built a small solar power station with 3 panels generating 4 kWh/day: https://blog.zeruns.top/archives/55.html
- Open-source USB-C dock: 4x 10Gbps USB-A + 2.5G Ethernet + Card Reader: https://blog.zeruns.top/archives/53.html
- ALLinSSL Setup Guide – One-click automated SSL certificate issuance, renewal, deployment & monitoring: https://blog.zeruns.top/archives/58.html


Comment Section