Sipeed has launched the NanoKVM, a true blessing for desktop PCs and workstations lacking BMC functionality. With this device, features once exclusive to servers can now be easily implemented for remote management.
Introduction to NanoKVM
The Lichee NanoKVM is an IP-KVM device based on the LicheeRV Nano, inheriting its compact size and powerful capabilities.
The NanoKVM features an HDMI input that is recognized as a monitor by the connected computer, capturing its display output. A USB 2.0 interface allows the host to identify it as an HID device, such as a keyboard, mouse, or touchpad. Additionally, the remaining storage on the TF card can be mounted as a USB drive. Every model includes a 100 Mbps Ethernet port for video and control signal transmission over the network. The Full version also features an ATX power control interface (via USB-C), enabling remote power control and monitoring of the host's power status. Beneath the Full version's case, there is also an OLED screen that displays the device's IP address and KVM-related status.
To cater to different user needs, NanoKVM is available in two versions:
- NanoKVM Lite: A basic configuration suitable for individual users with some DIY skills and enterprise users with bulk requirements.
- NanoKVM Full: A fully equipped version with a refined enclosure and complete accessories. It comes with a pre-installed system image card, making it plug-and-play and ideal for individual users.
Official NanoKVM Wiki: https://url.zeruns.com/NanoKVM
NanoKVM Purchase Link: https://s.click.taobao.com/JxuH12t
Use Cases
- Server Management: Real-time server monitoring, retrieving operational status, and executing control commands.
- Remote Desktop and Power Control: NanoKVM removes the need for host network connectivity or system software, providing hardware-based remote control functionality.
- Remote Installation: NanoKVM can emulate a USB drive, allowing the mounting of system installation images or accessing the BIOS for configuration.
- Remote Serial Port (currently in beta for the Full version): Equipped with two serial ports for IPMI integration, enabling users to expand functionality with additional accessories.
- Future Features: Additional capabilities, such as streaming or broadcasting, are planned for future updates.
Some cloud server providers have already adopted NanoKVM (with PCIe card versions) for offering physical server rentals with CPUs like Intel i9 or AMD R9. For example, Rain Cloud is using NanoKVM for renting i7-14700HX physical machines: https://blog.zeruns.com/archives/839.html
Specifications
| Product | NanoKVM (Lite) | NanoKVM (Full) | PiKVM V4 |
|---|---|---|---|
| Computing Unit | LicheeRV Nano (RISCV) | LicheeRV Nano (RISCV) | CM4 (ARM) |
| Resolution | 1080P @ 60fps | 1080P @ 60fps | 1080P @ 60fps |
| Video Encoding | MJPEG, H264 (under development) | MJPEG, H264 (under development) | MJPEG, H264 |
| Video Latency | 90–230ms | 90–230ms | 100–230ms |
| UEFI/BIOS | ✓ | ✓ | ✓ |
| USB Keyboard/Mouse Emulation | ✓ | ✓ | ✓ |
| USB Storage Emulation | ✓ | ✓ | ✓ |
| IPMI | ✓ | ✓ | ✓ |
| Wake-on-LAN | ✓ | ✓ | ✓ |
| ATX Power Control | Not included; user-configurable | USB interface IO control board | RJ45 interface IO control board |
| OLED Display | Not included; user-expandable | 128x64 0.96" white | 128x32 0.91" white |
| External Serial Ports | 2 | 2 | 1 |
| TF Card | Not included; user-provided | Included, plug-and-play | Included |
| Expansion Accessories | None | WiFi or PoE | WiFi/LTE |
| Power Consumption | 0.2A @ 5V | 0.2A @ 5V | Peak 2.6A @ 5V |
| Power Input | USB power from PC | USB power from PC, supports auxiliary power | DC 5V 3A |
| Cooling | Silent, fanless | Silent, fanless | Requires active fan cooling |
| Dimensions | 23x37x15mm (~1/30 PiKVM V4 size) | 40x36x36mm (~1/7 PiKVM V4 size) | 120x68x44mm |
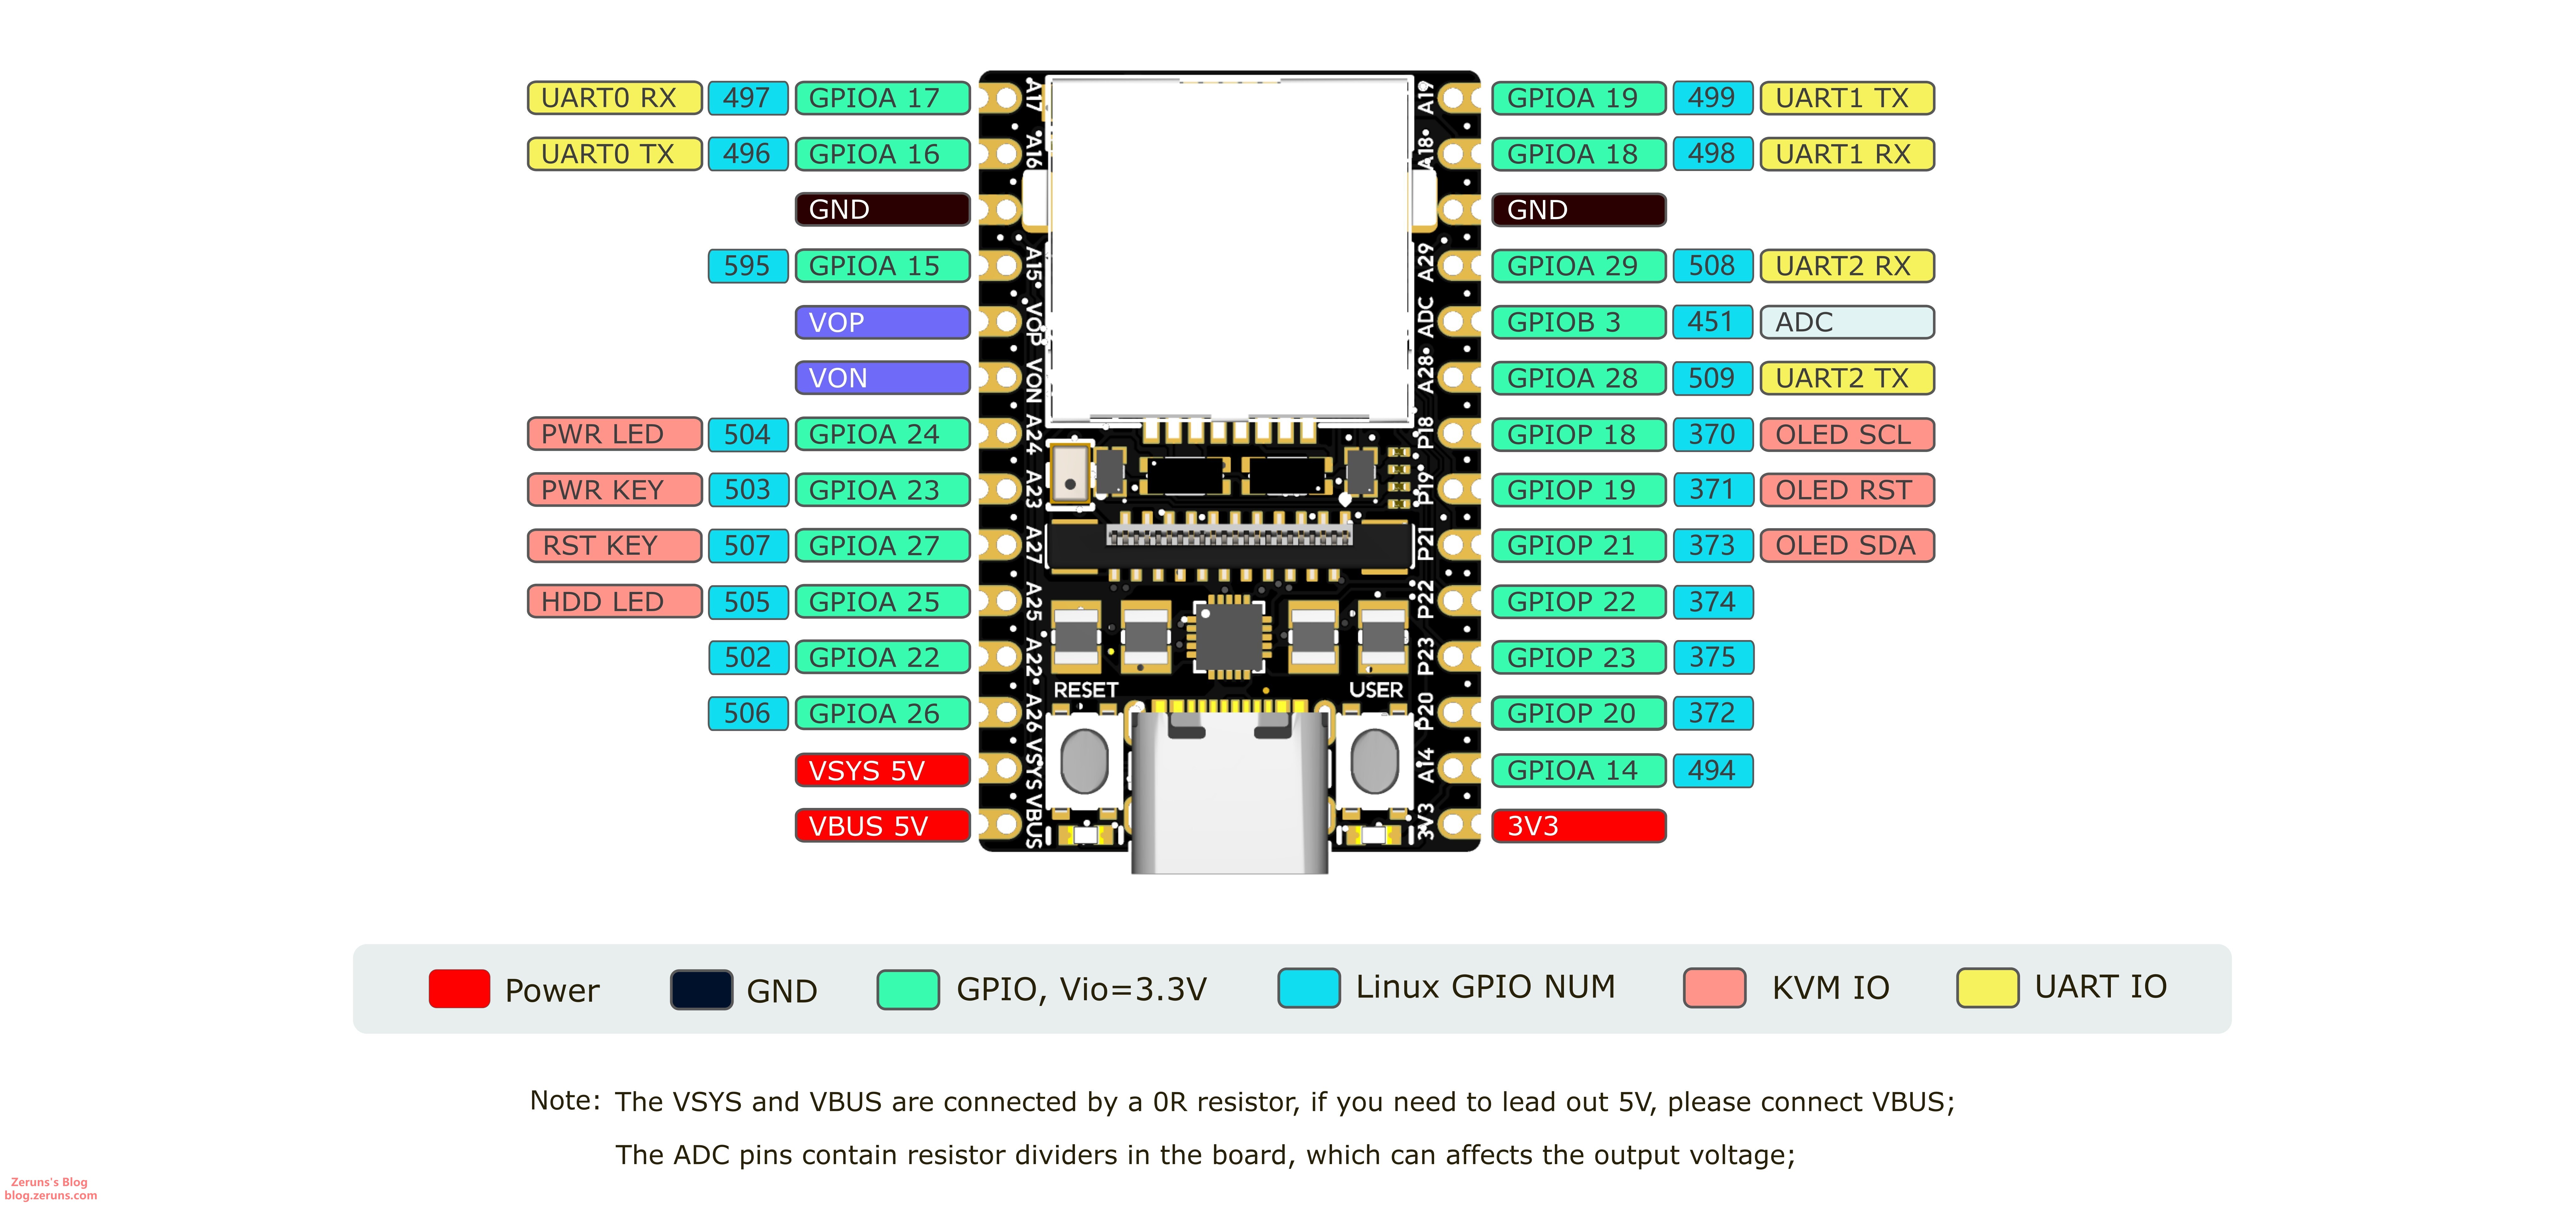
Unboxing
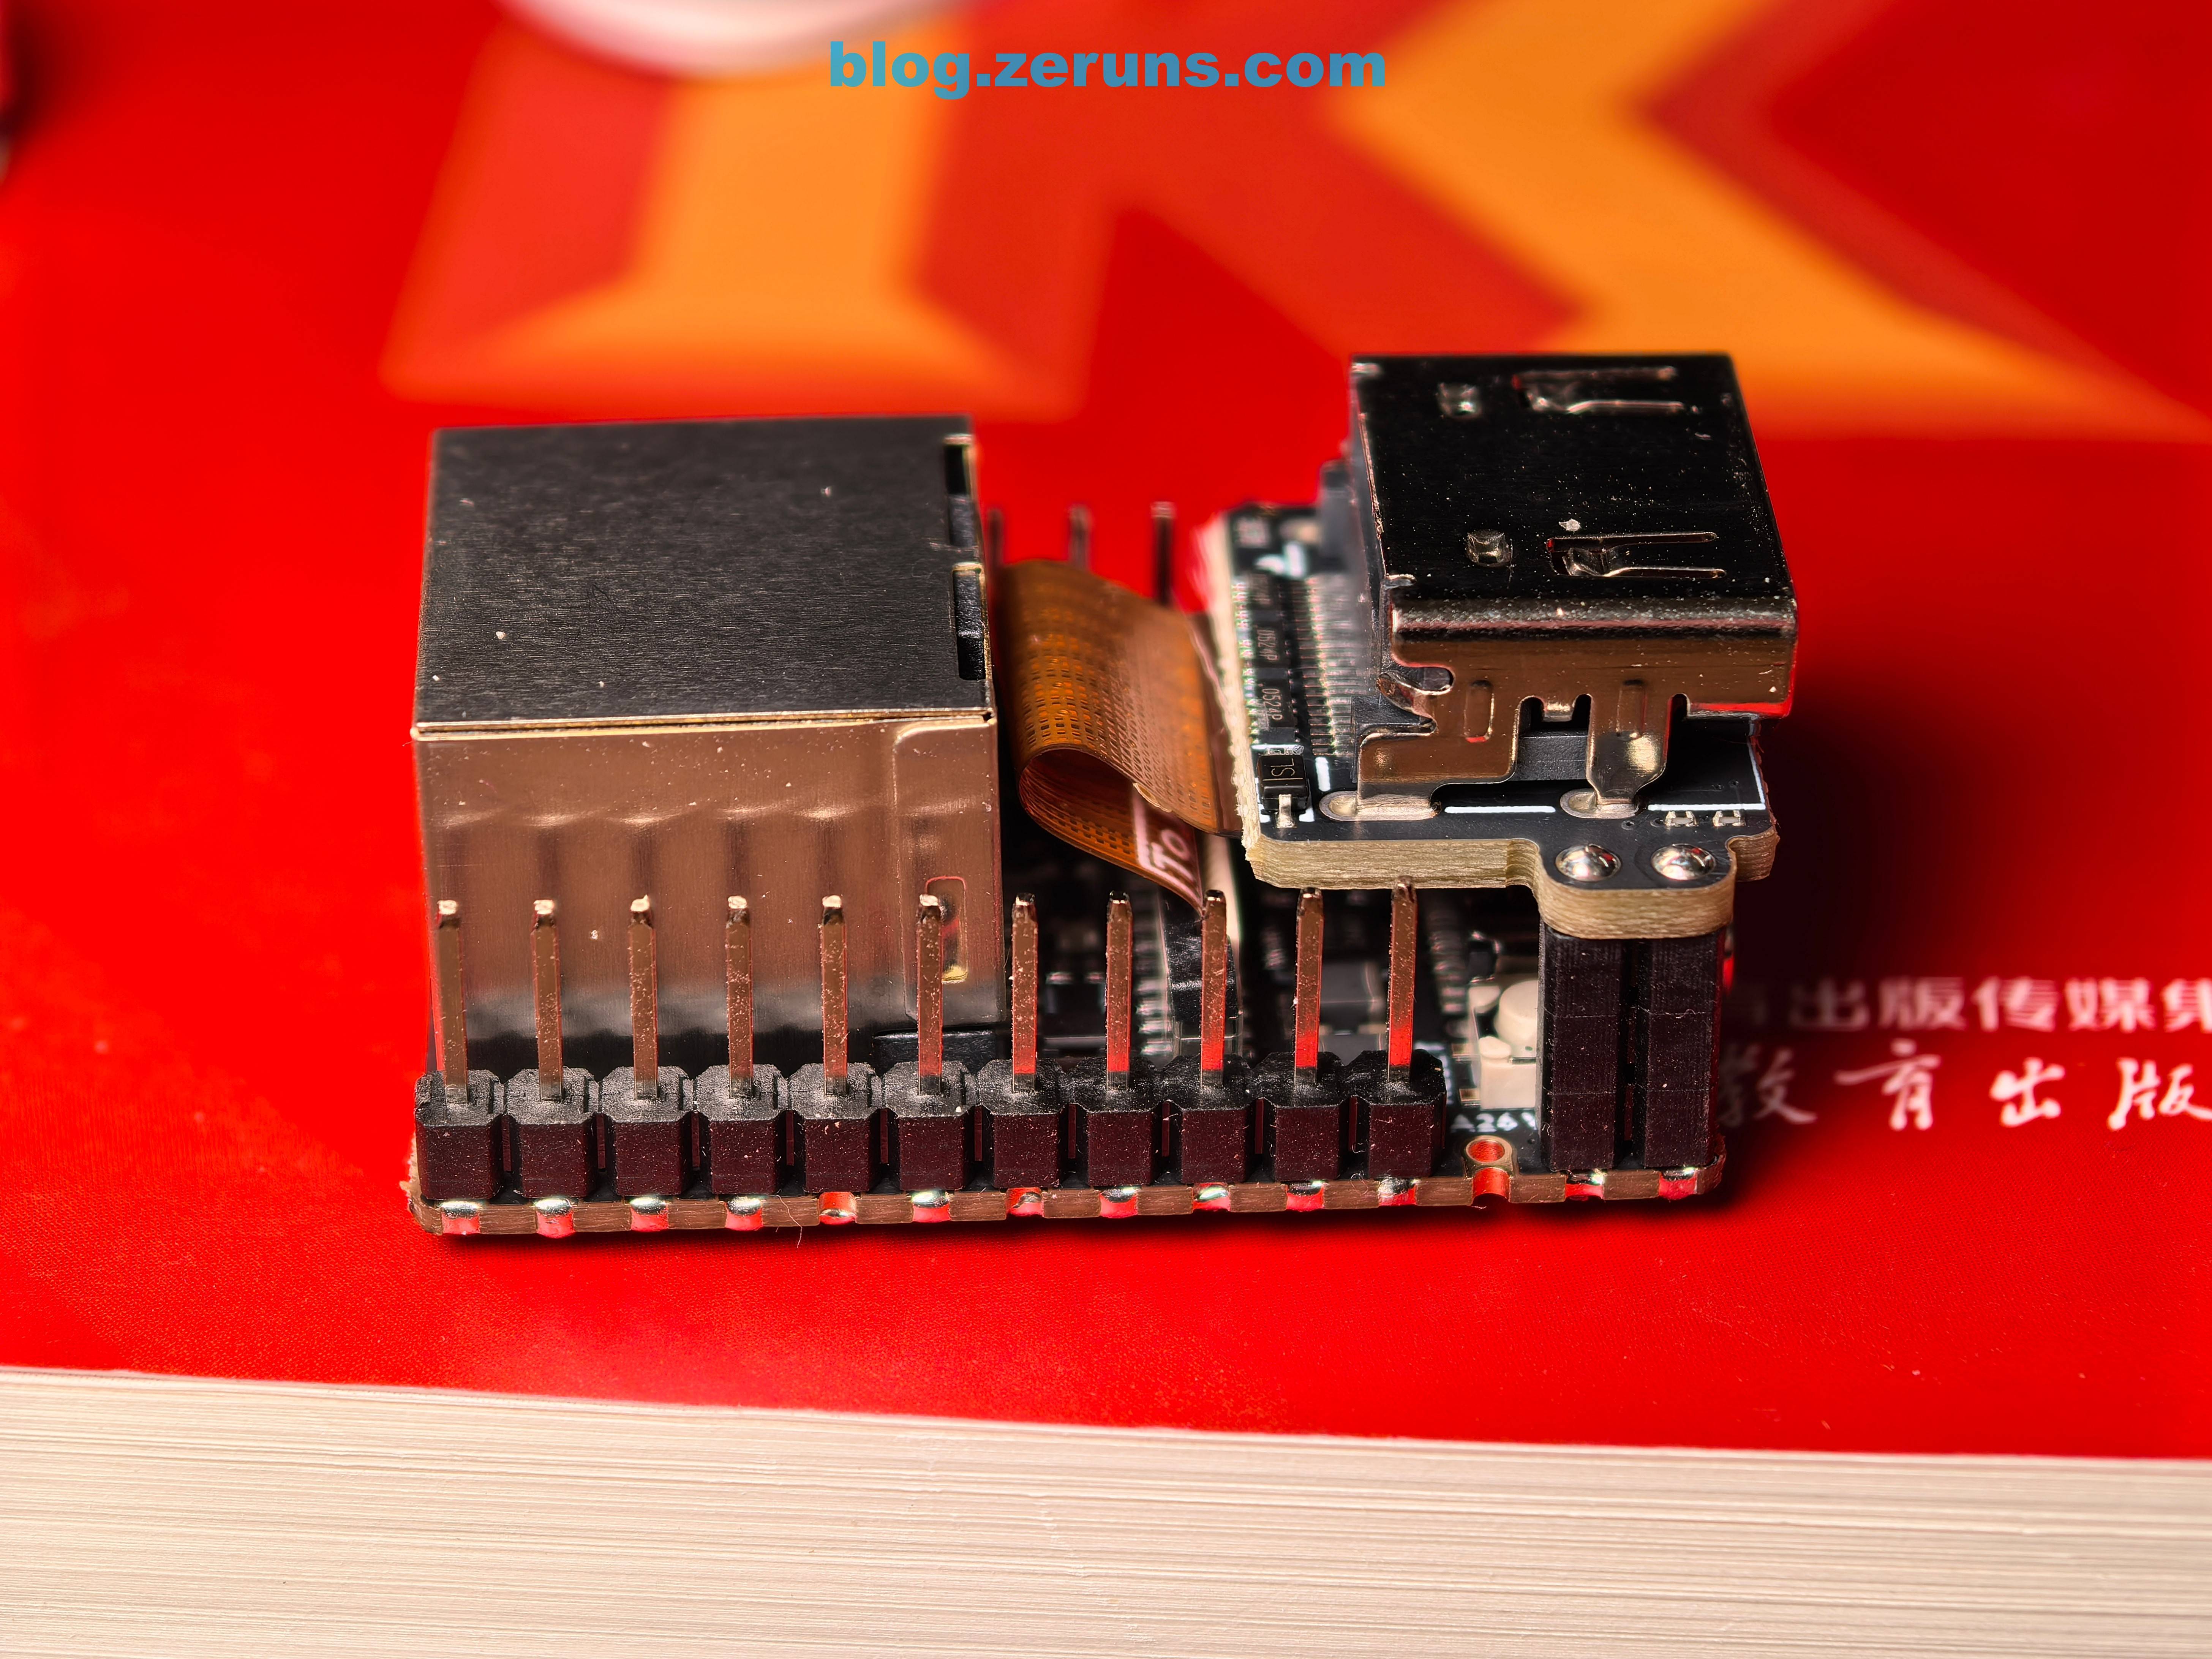
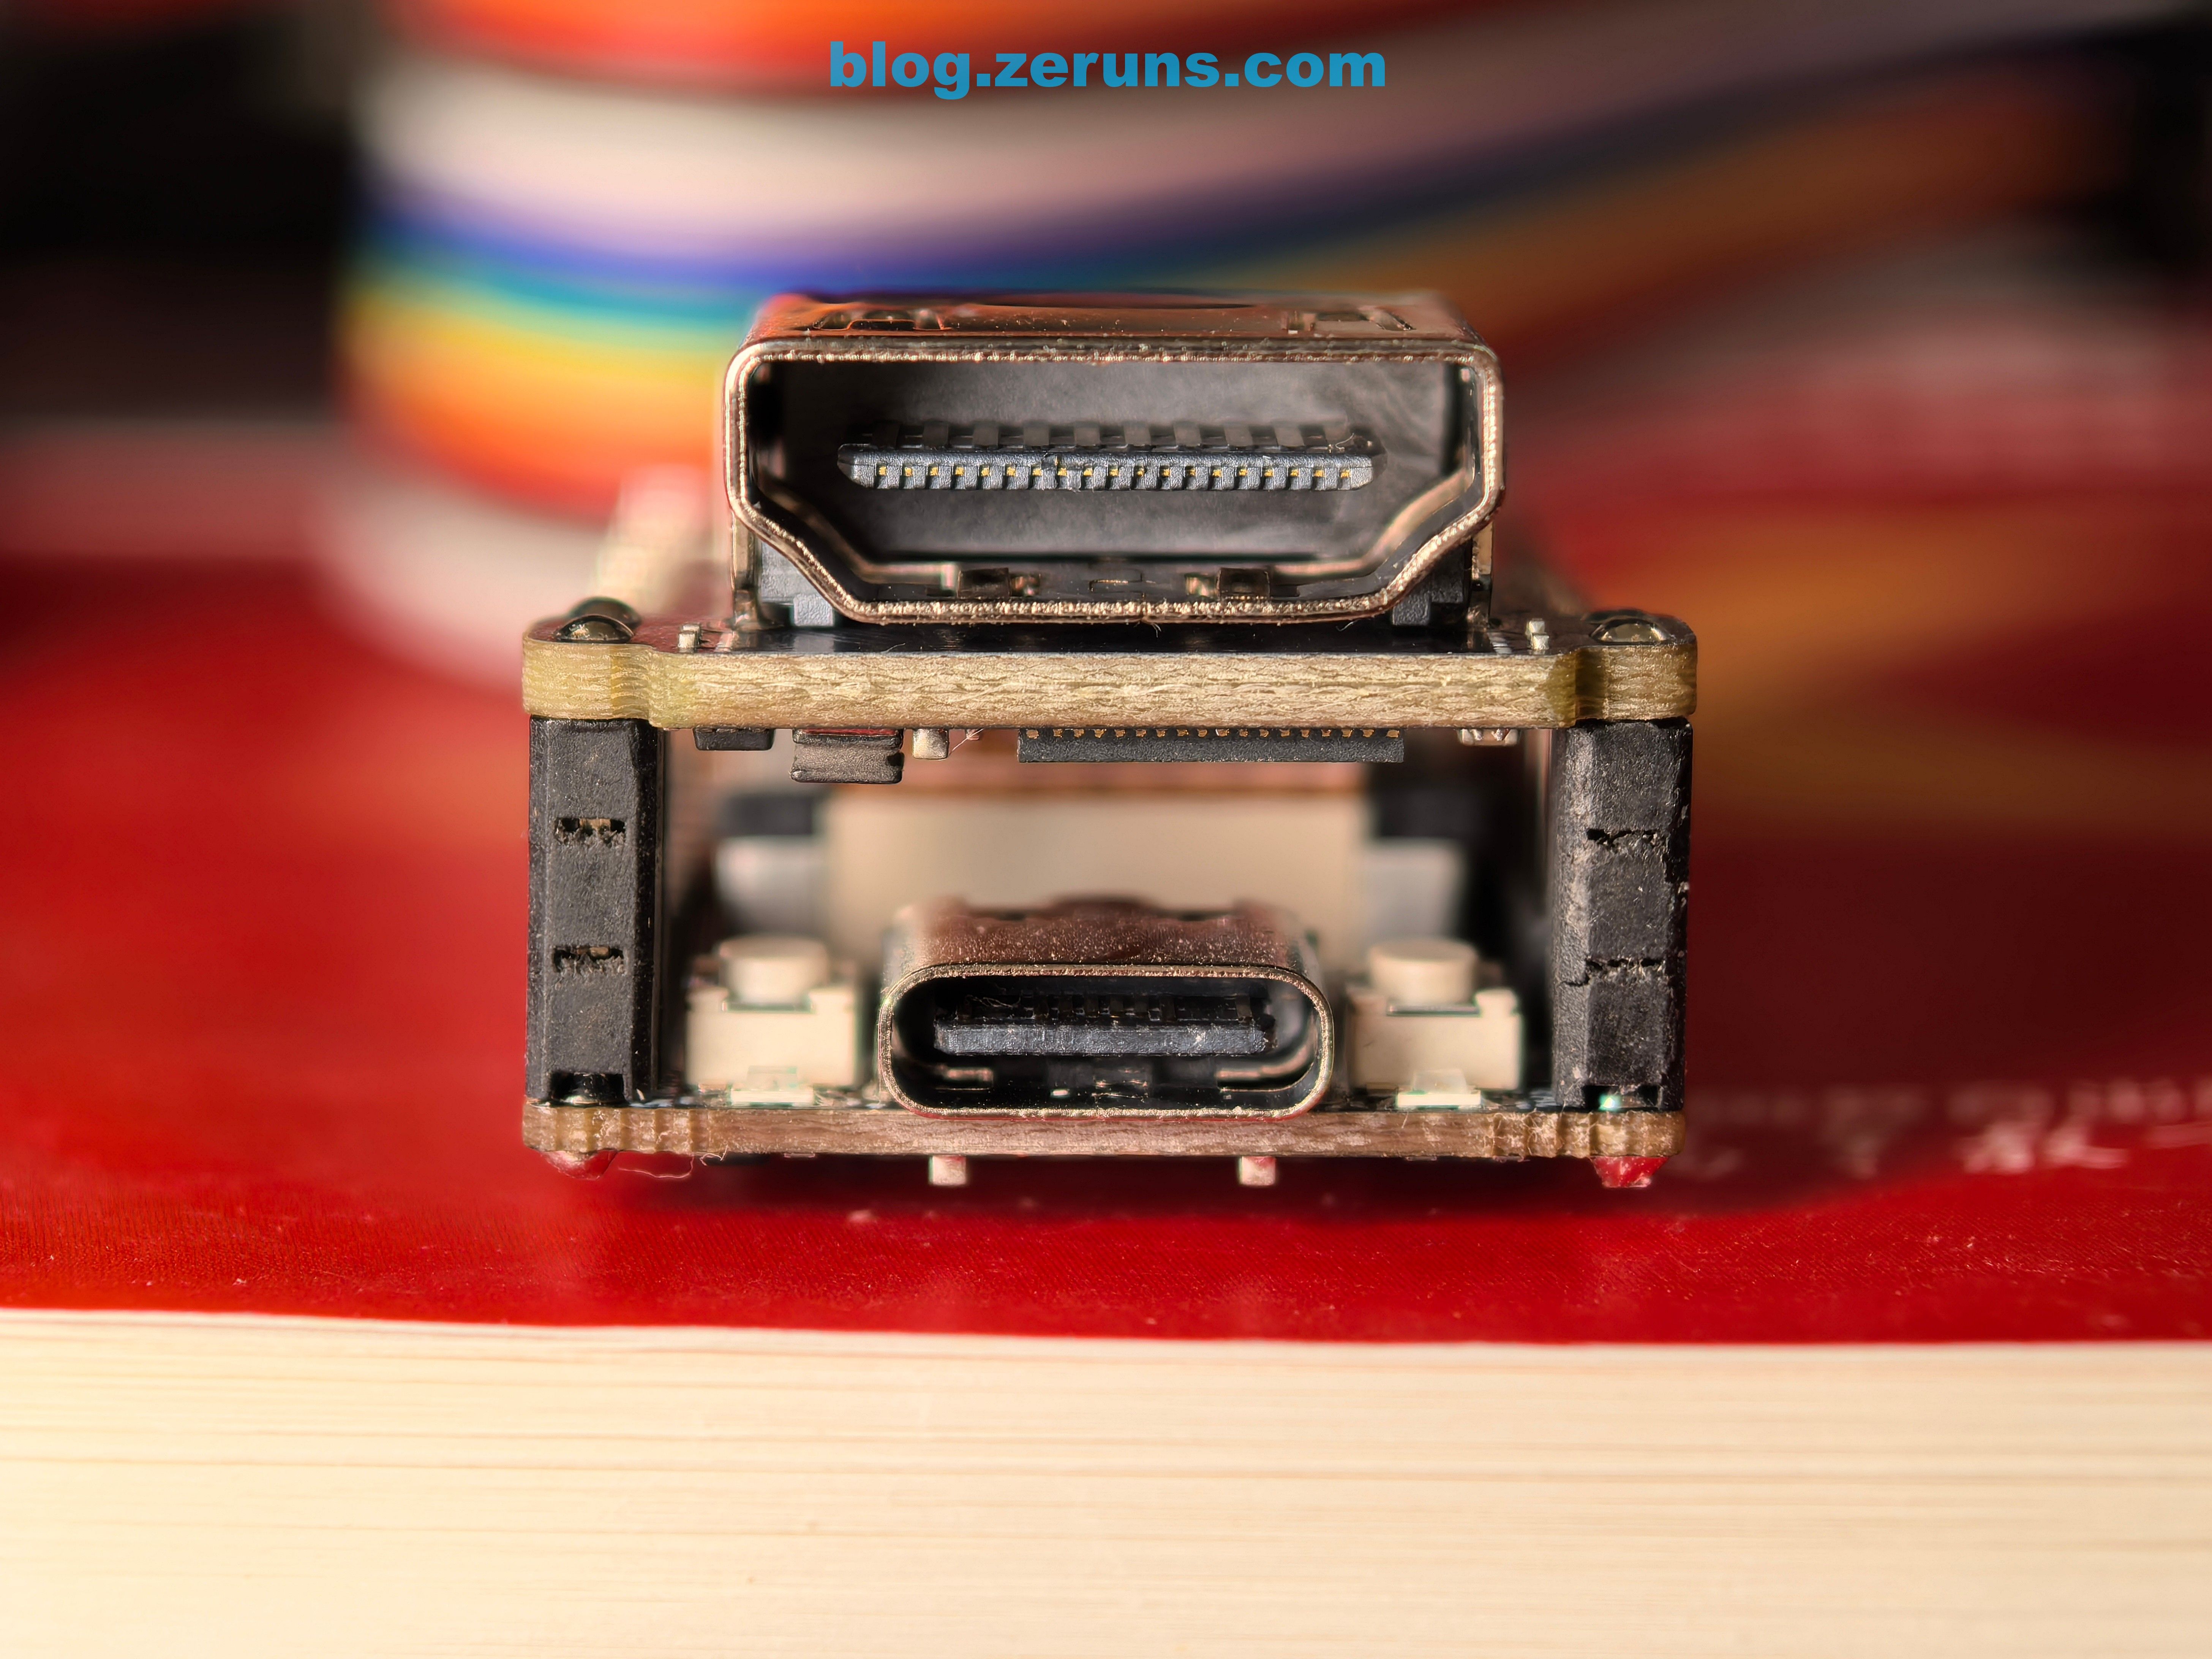
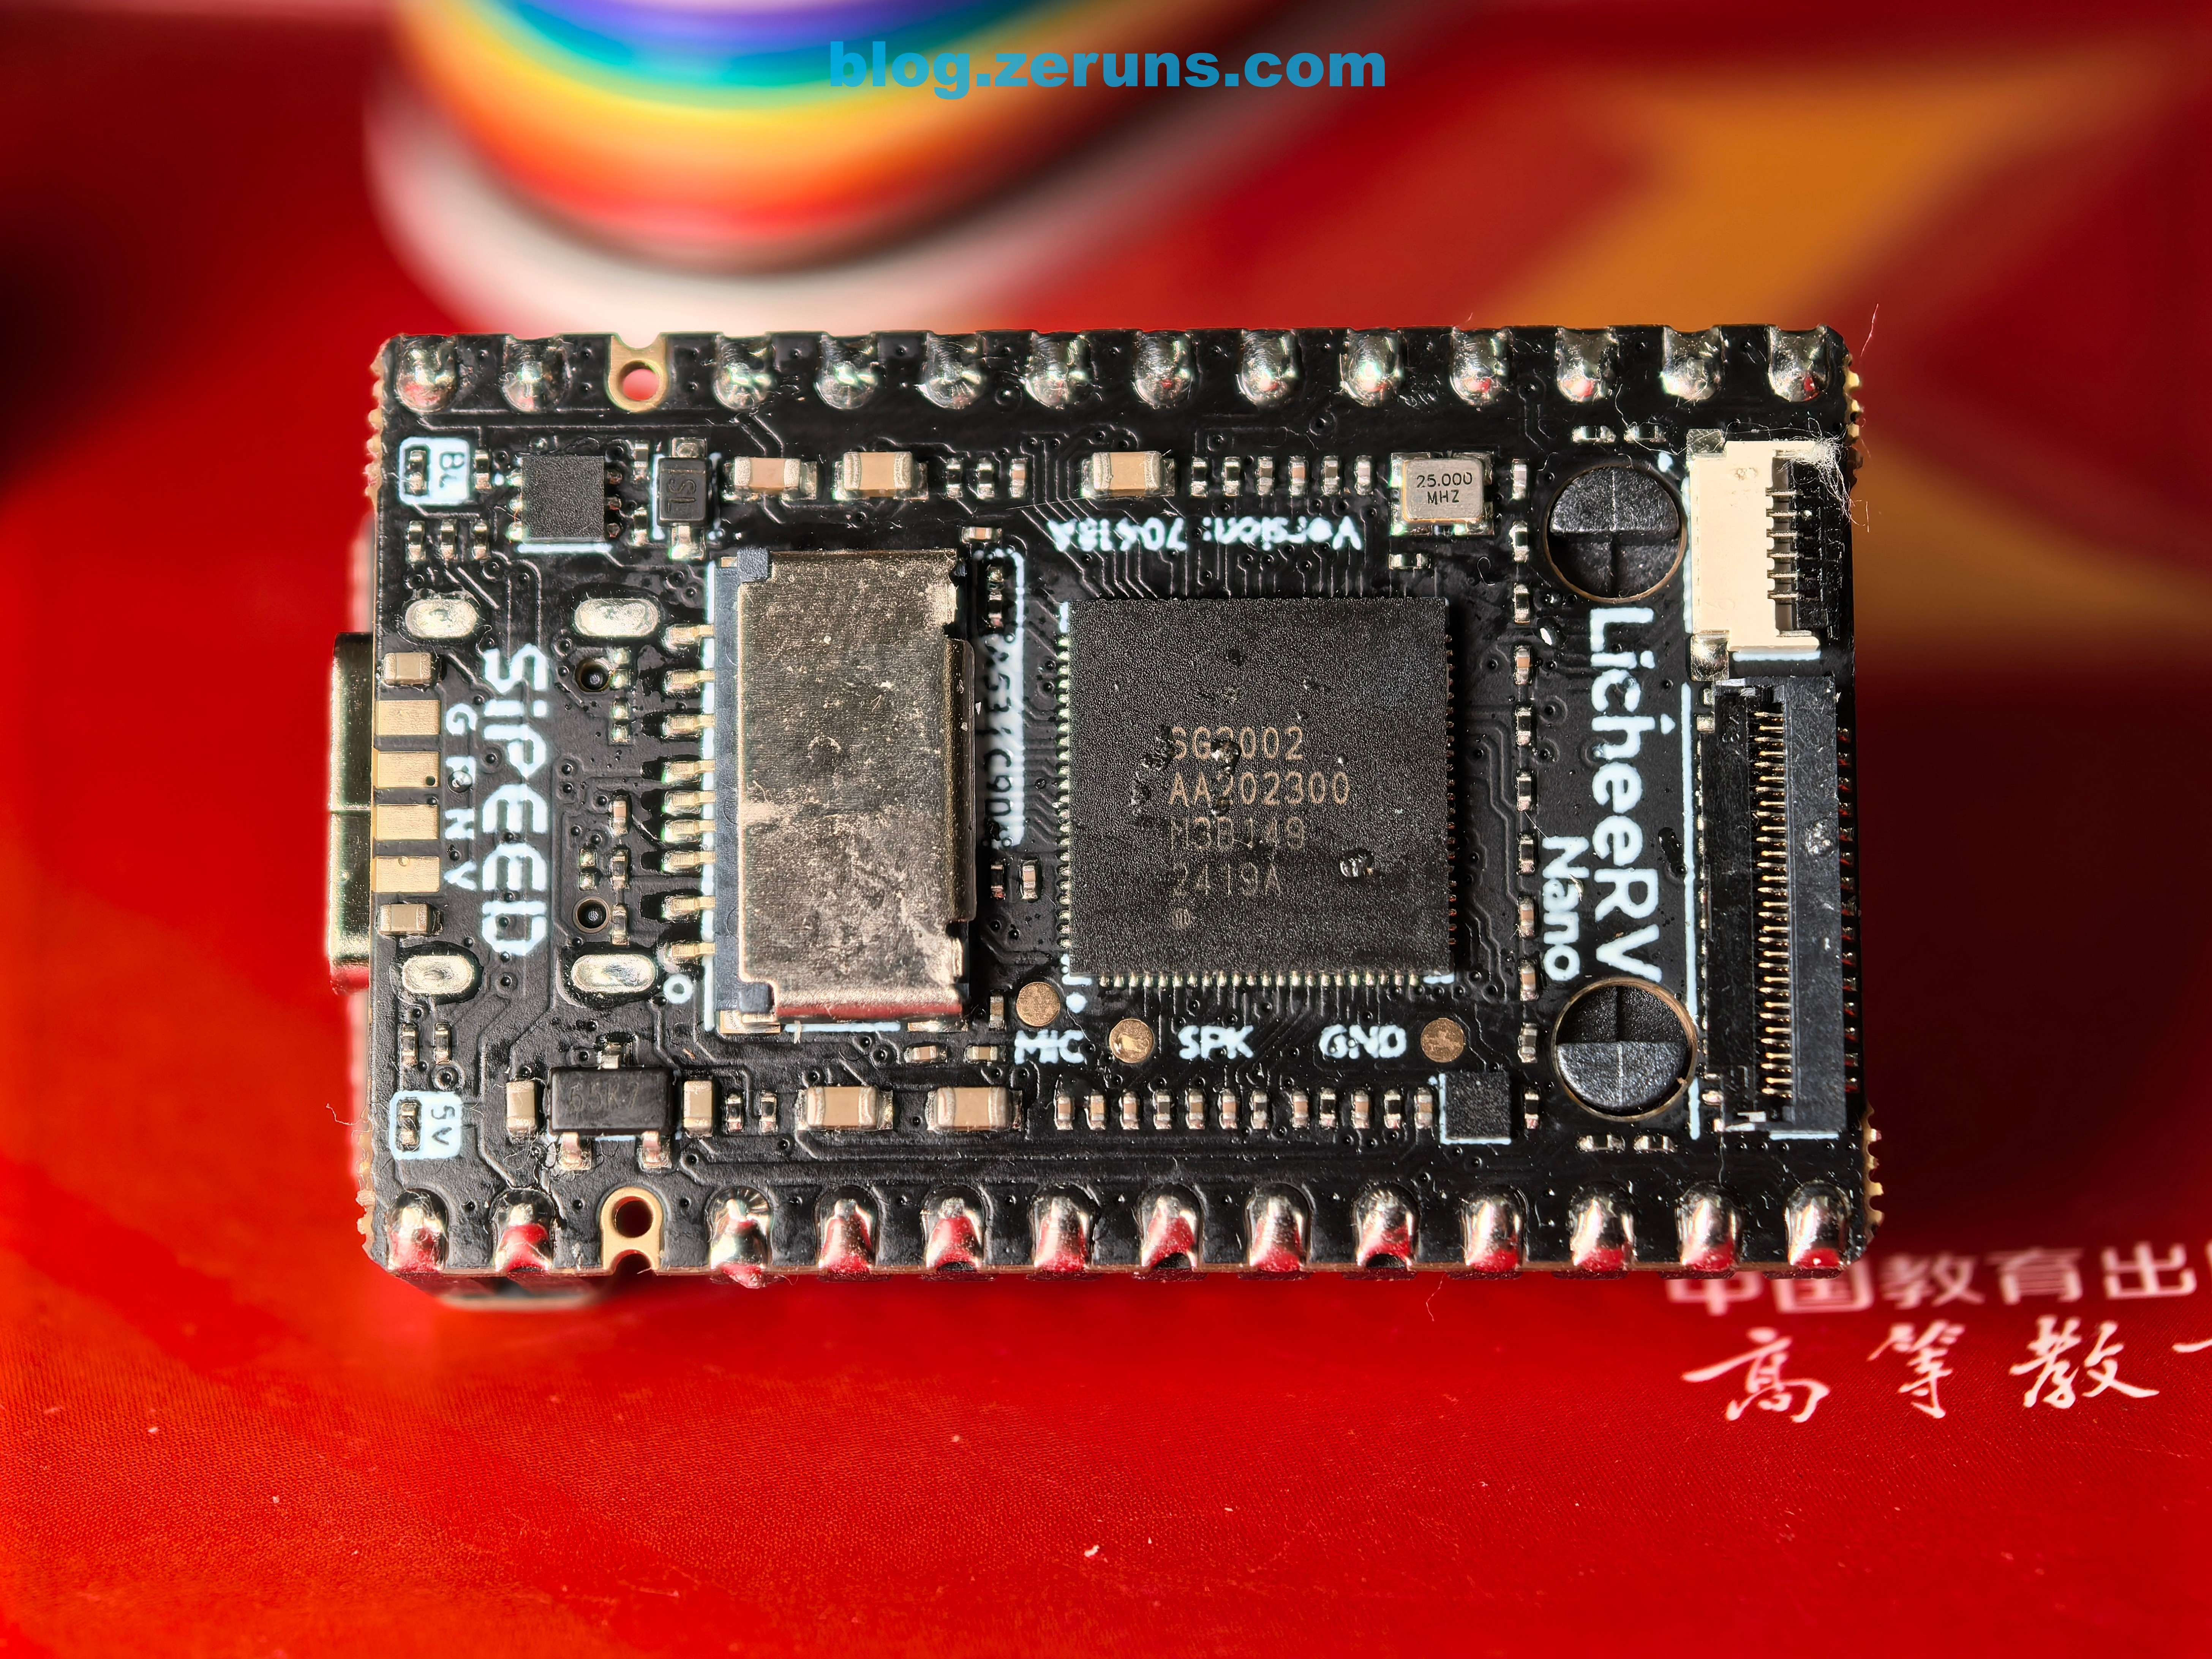
I purchased both the Lite and Full versions. Below is the Lite version, packaged in a small transparent box containing the NanoKVM and a heatsink with double-sided thermal adhesive.
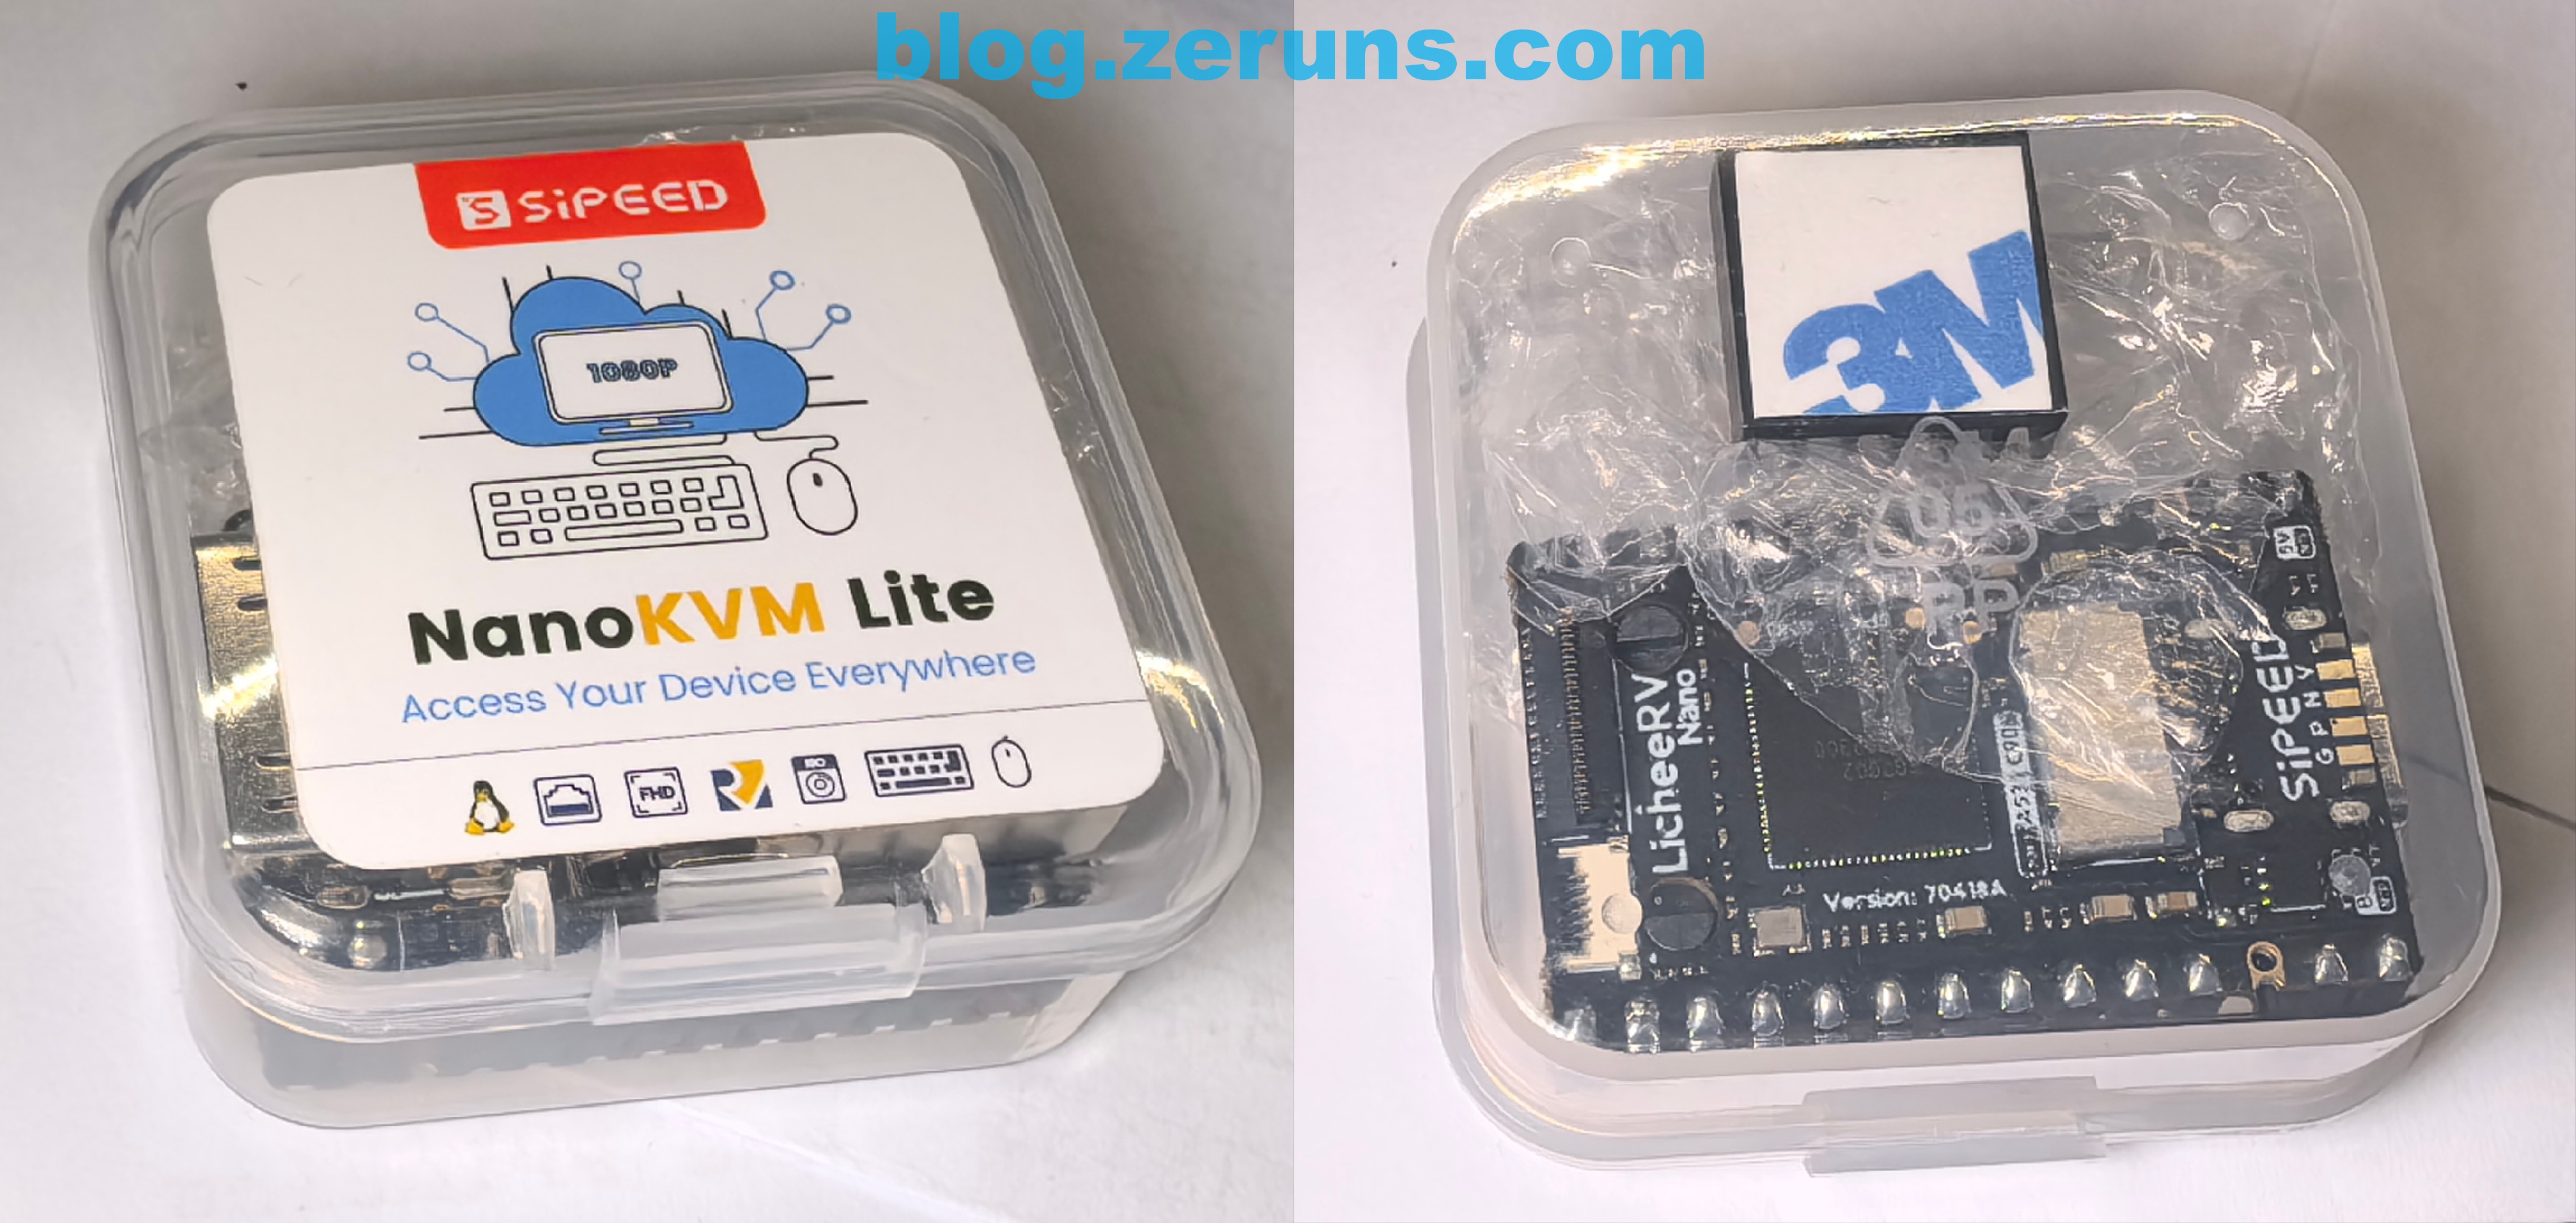
NanoKVM Lite Top View
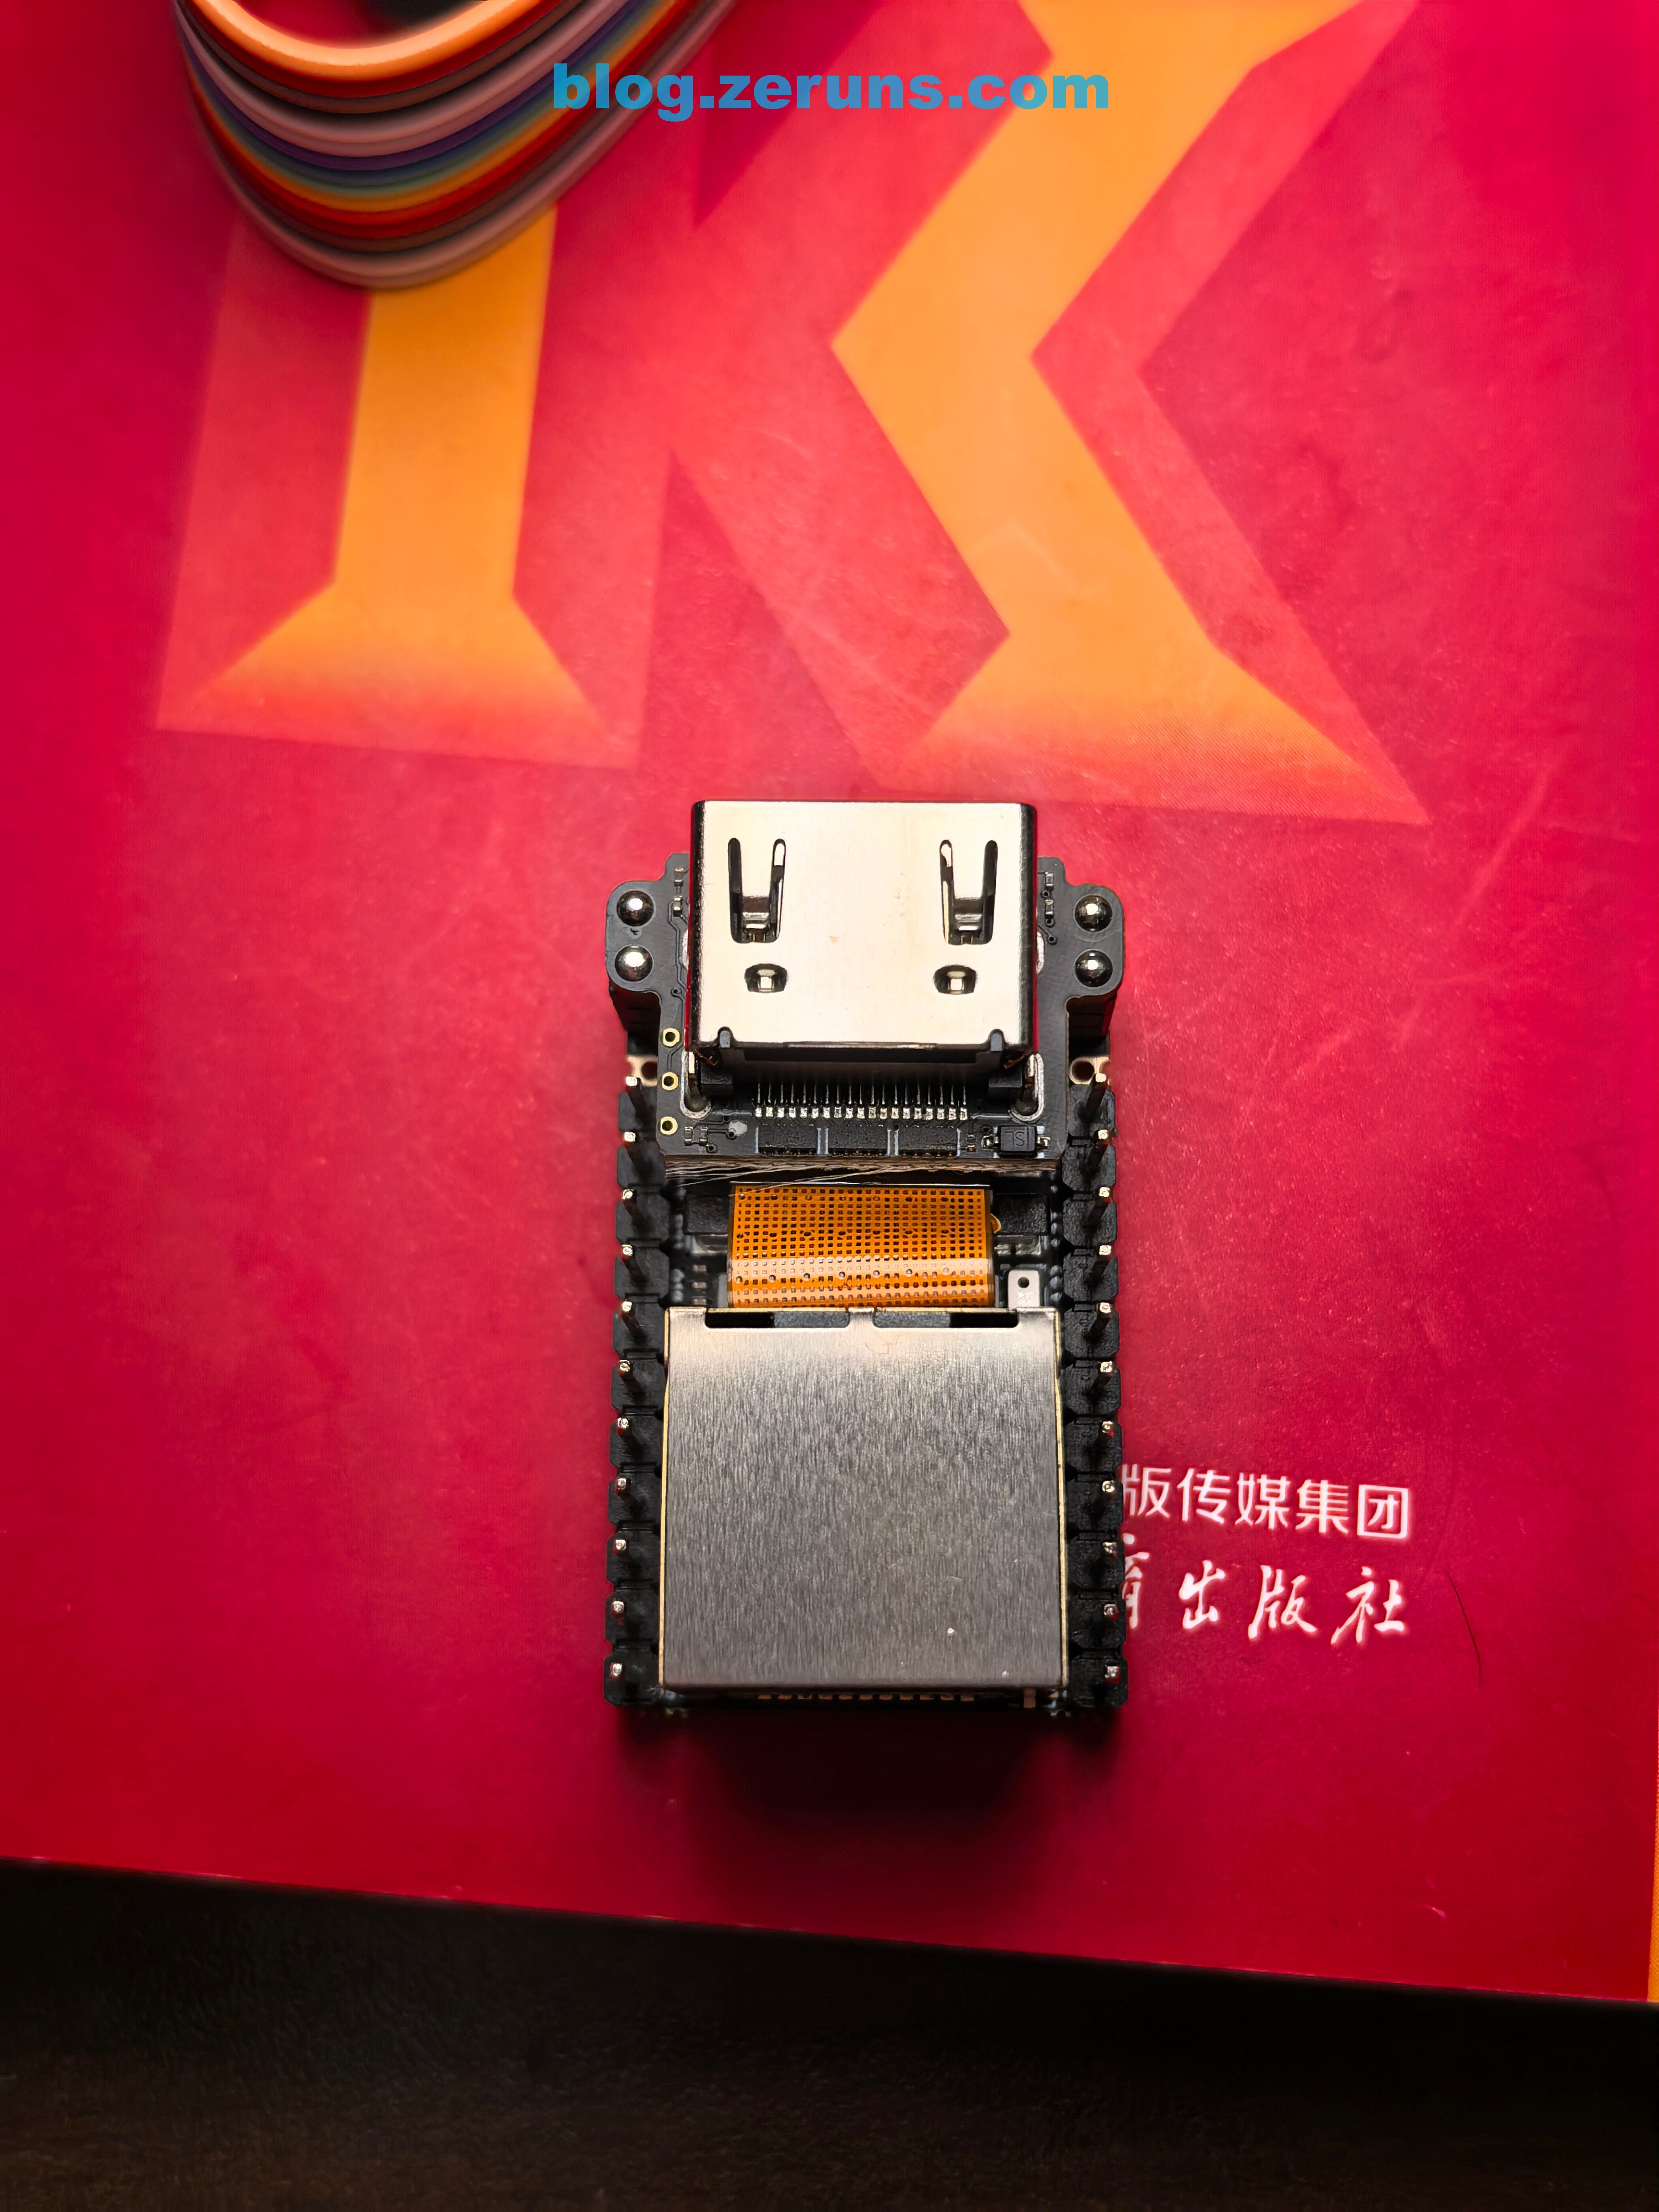
NanoKVM Lite Ethernet Port Side
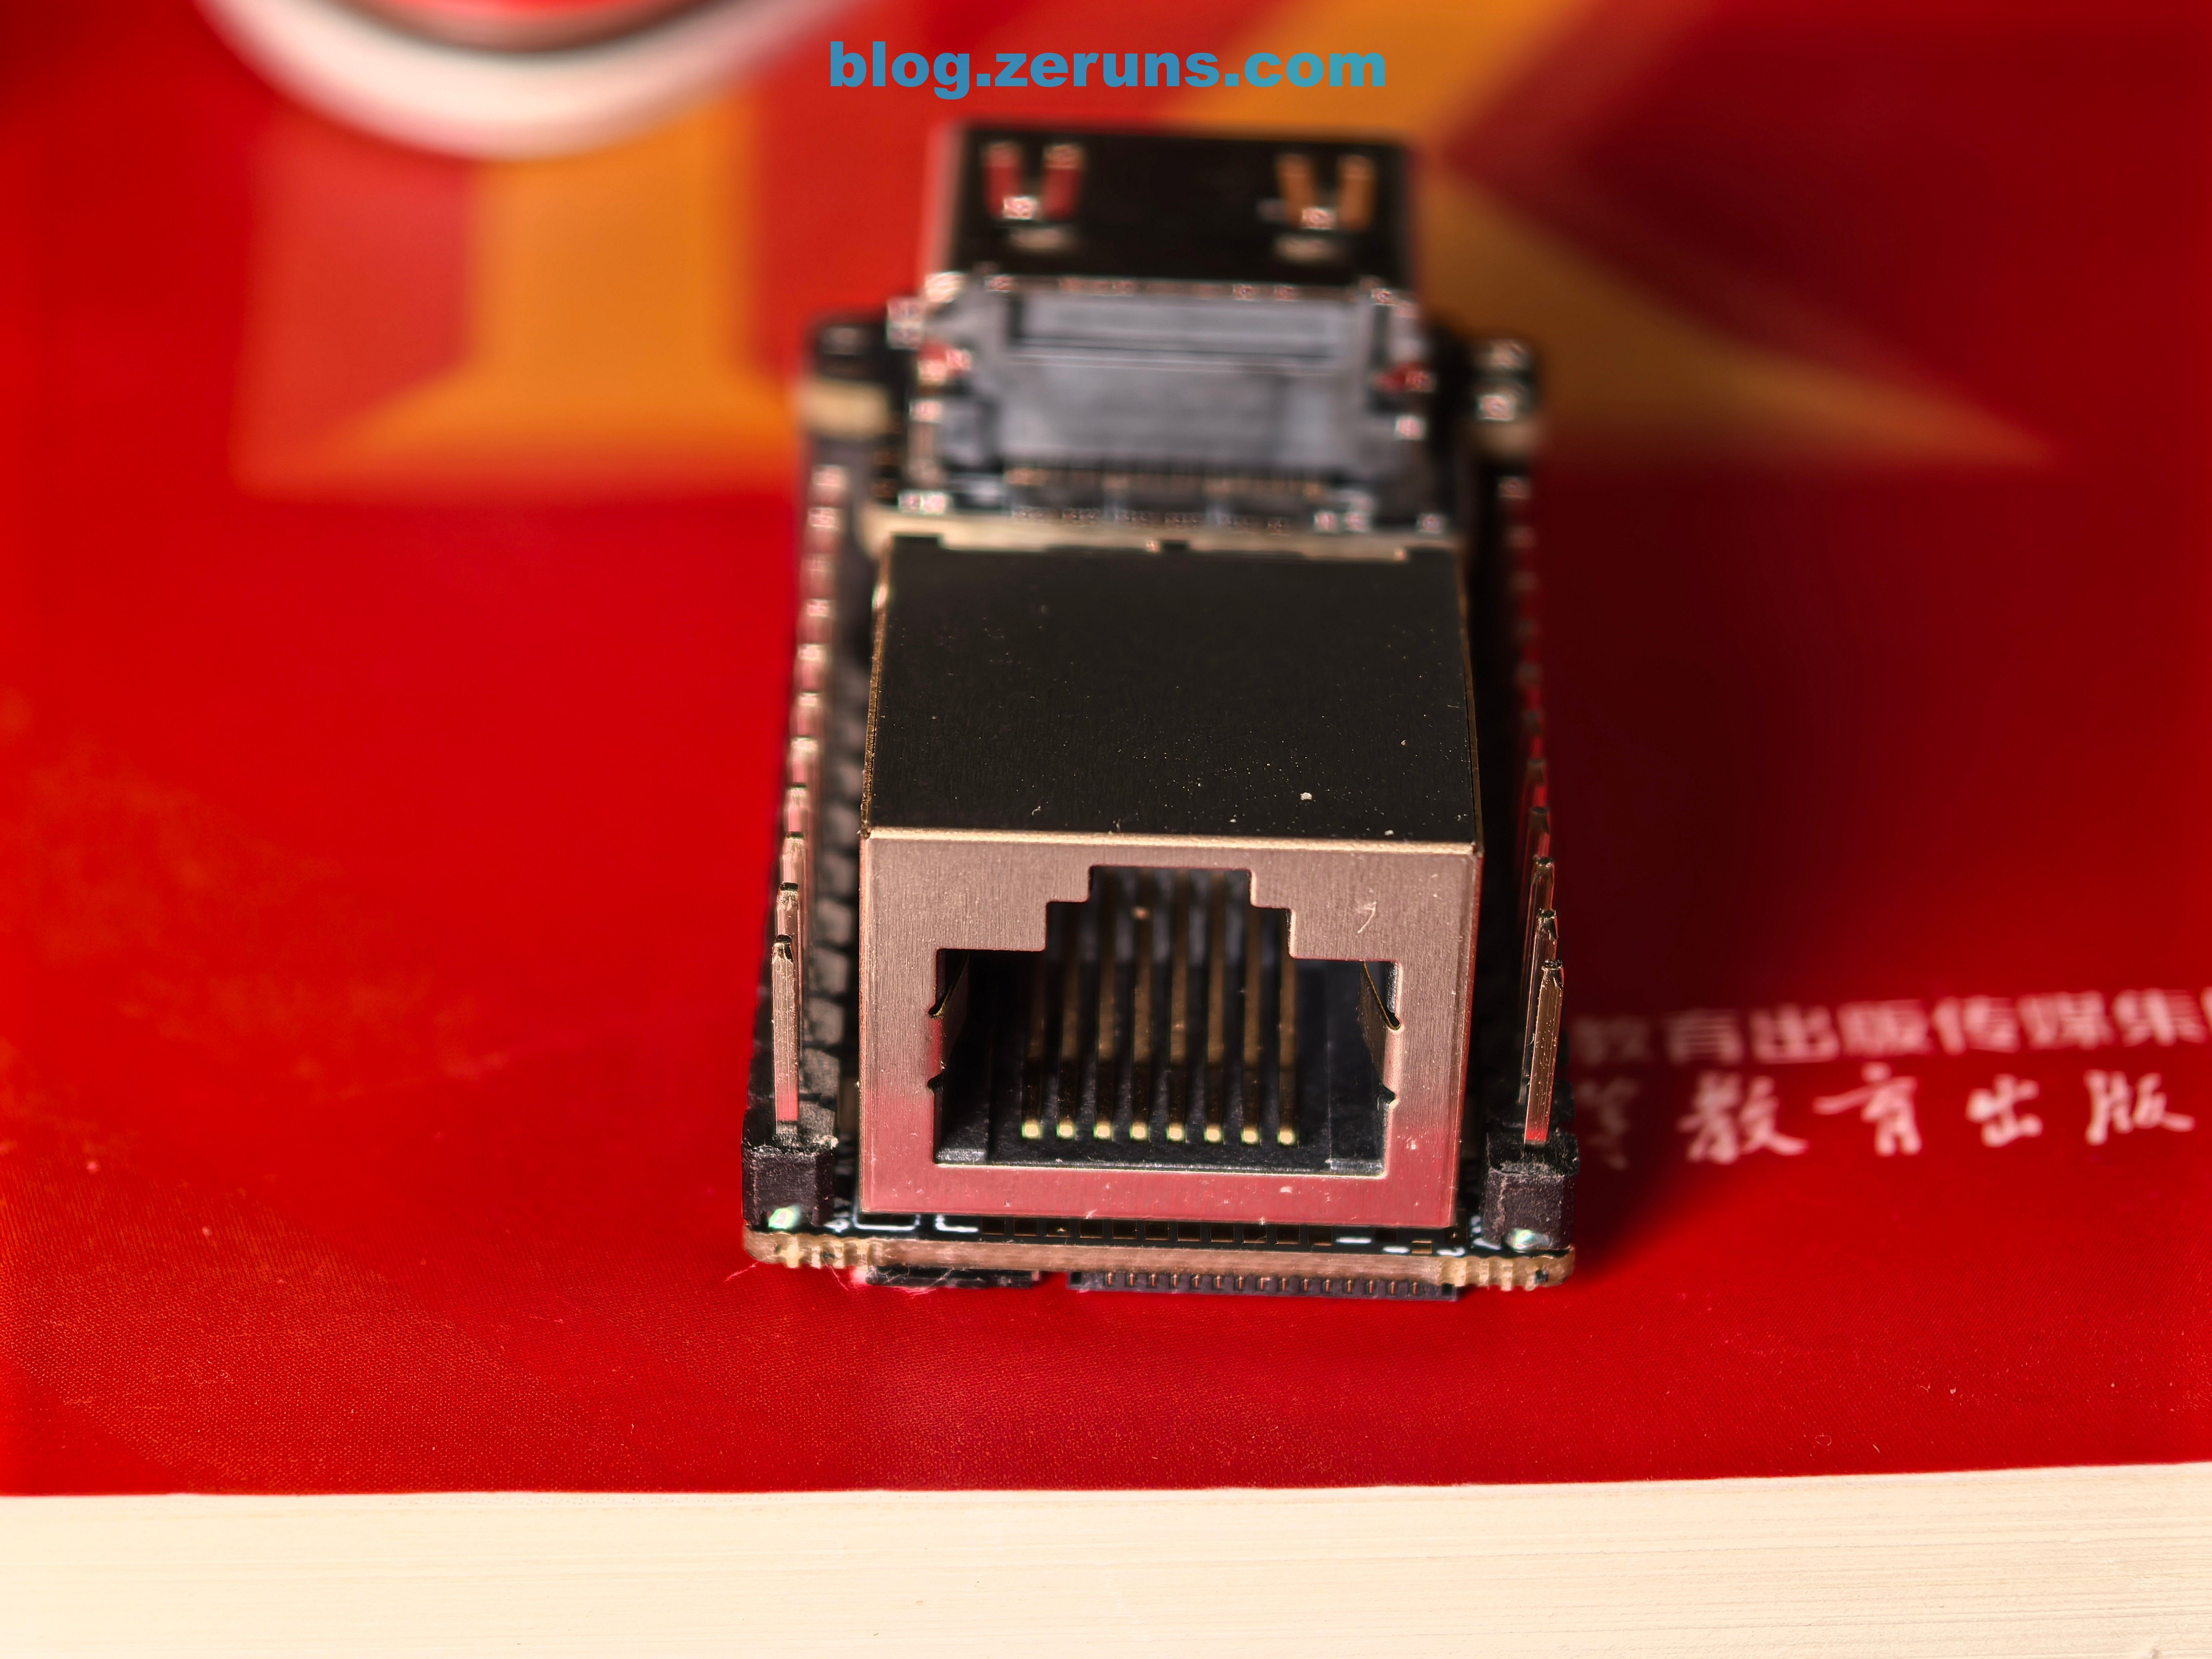
NanoKVM Lite Side View
NanoKVM Lite HDMI Port Side
NanoKVM Lite Bottom View
Below is the Full version, packaged in a cardboard box.
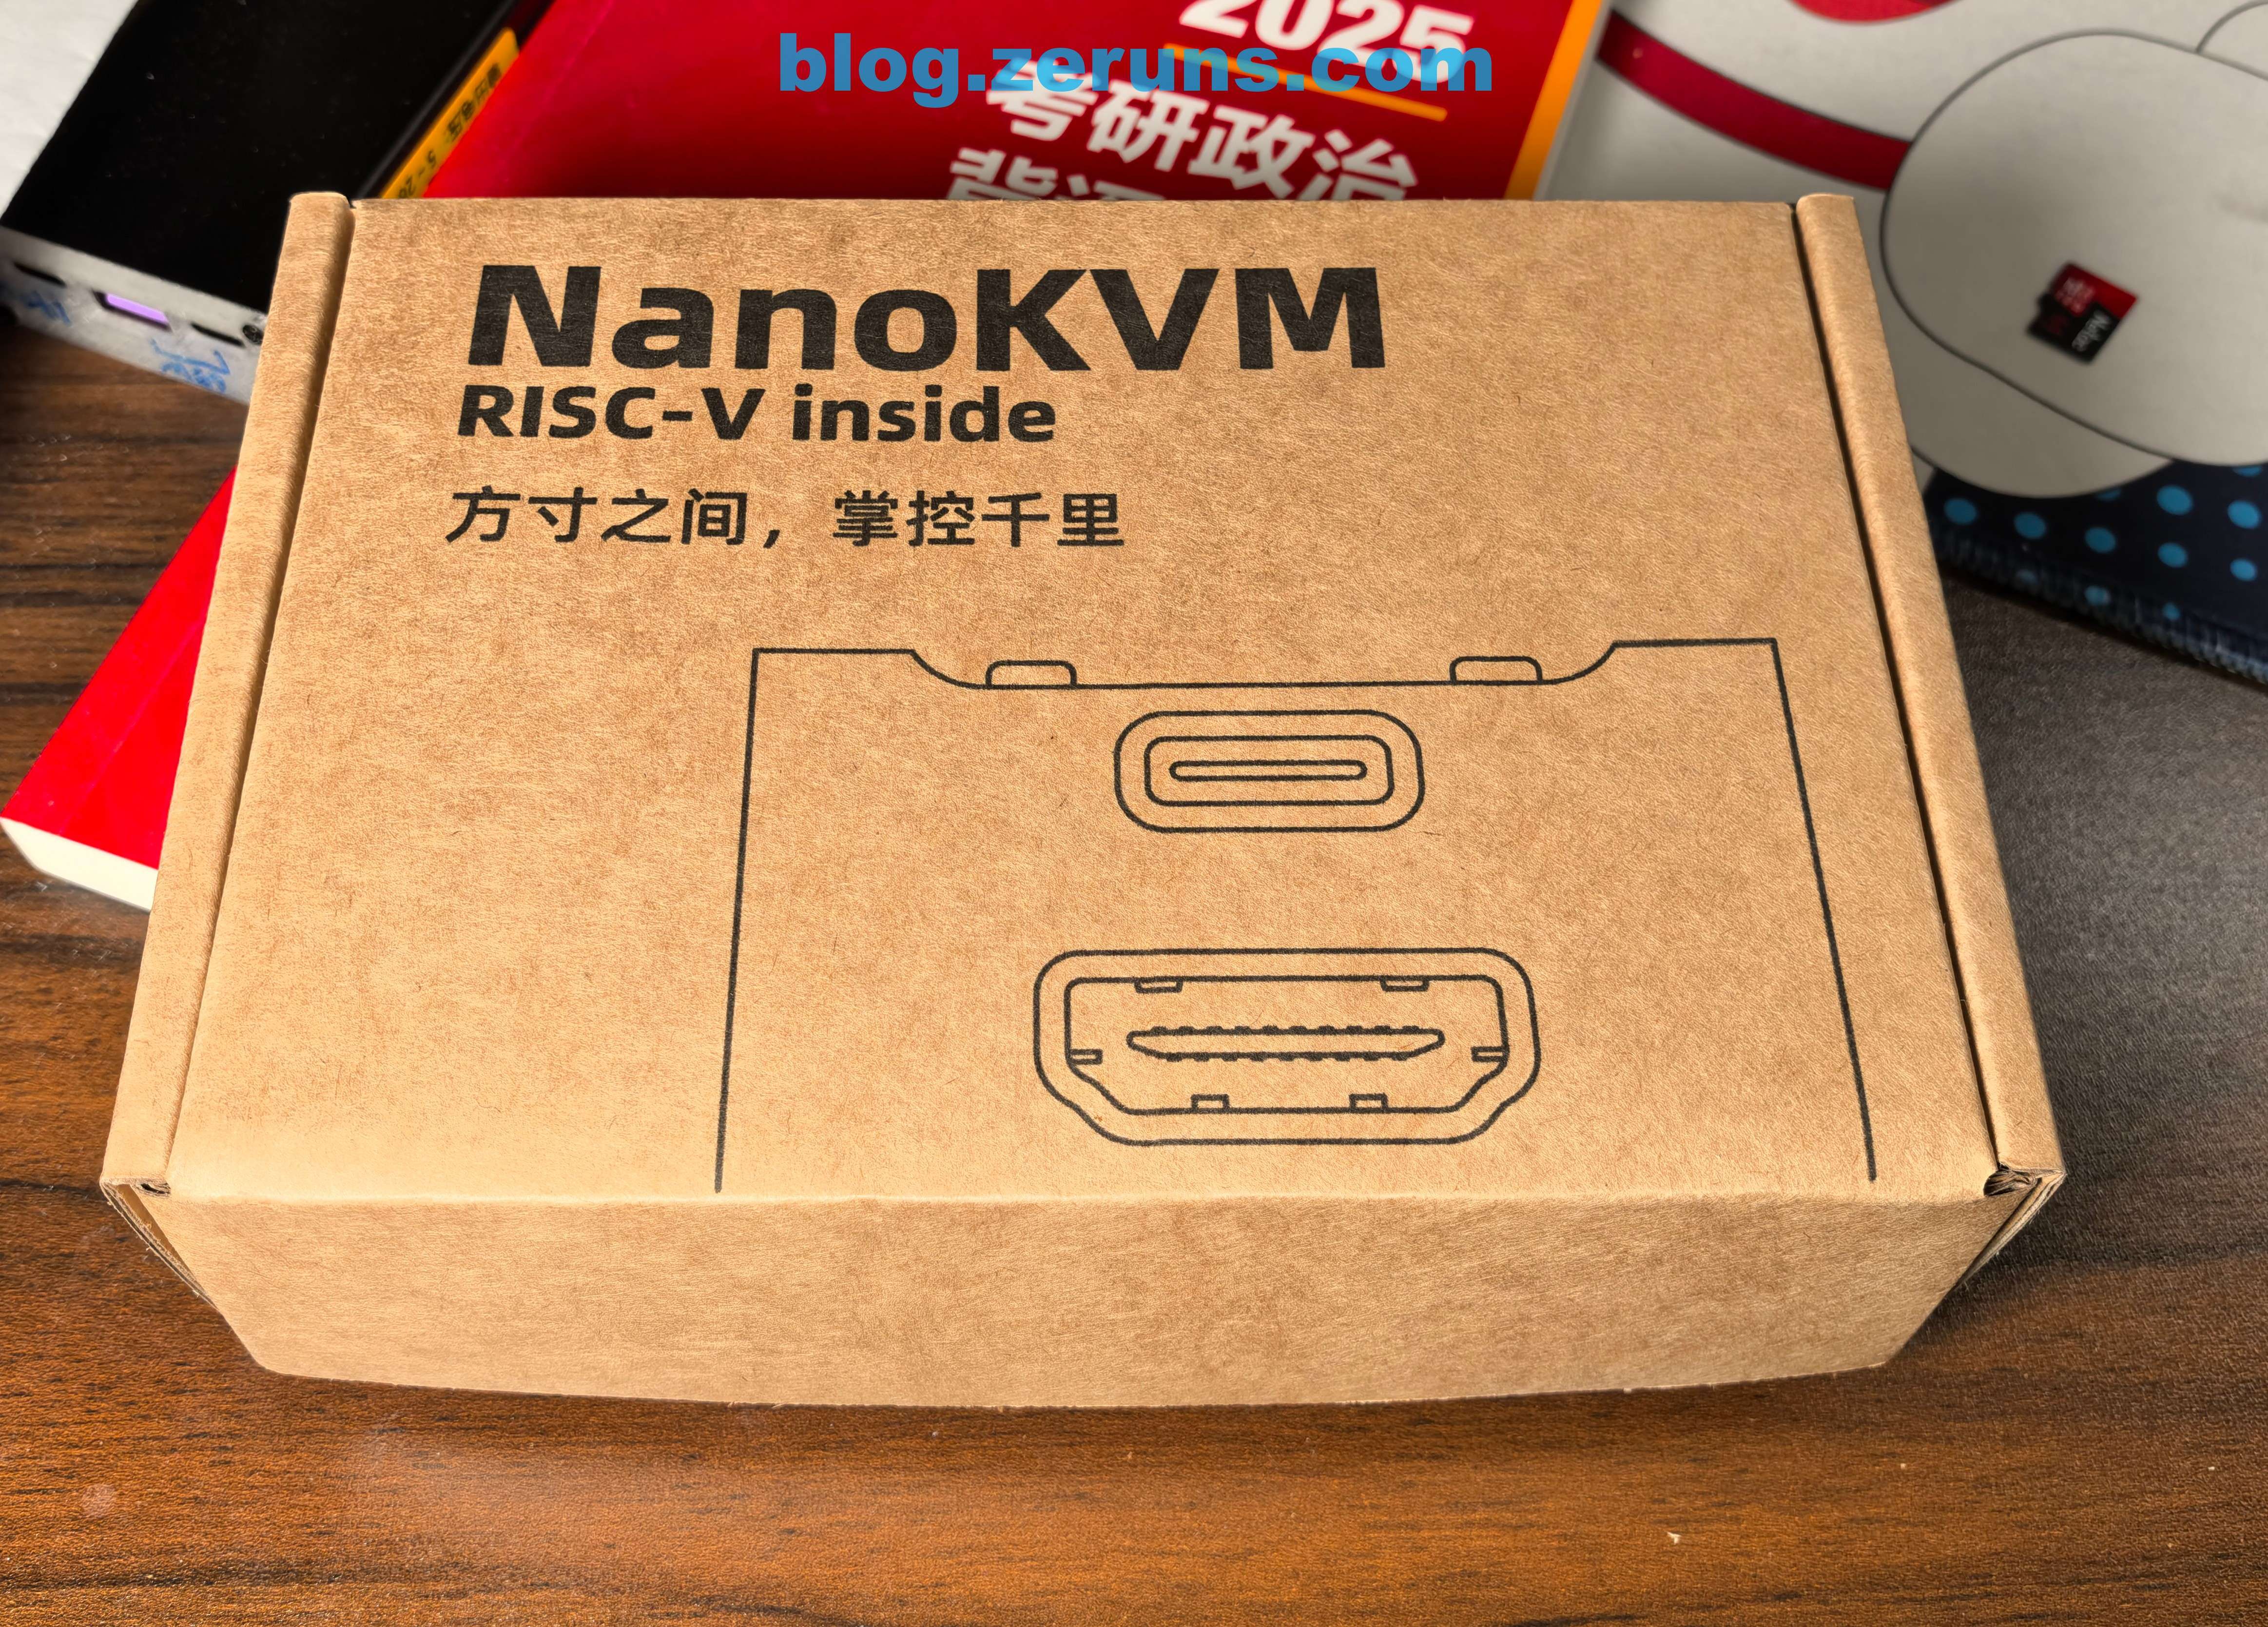
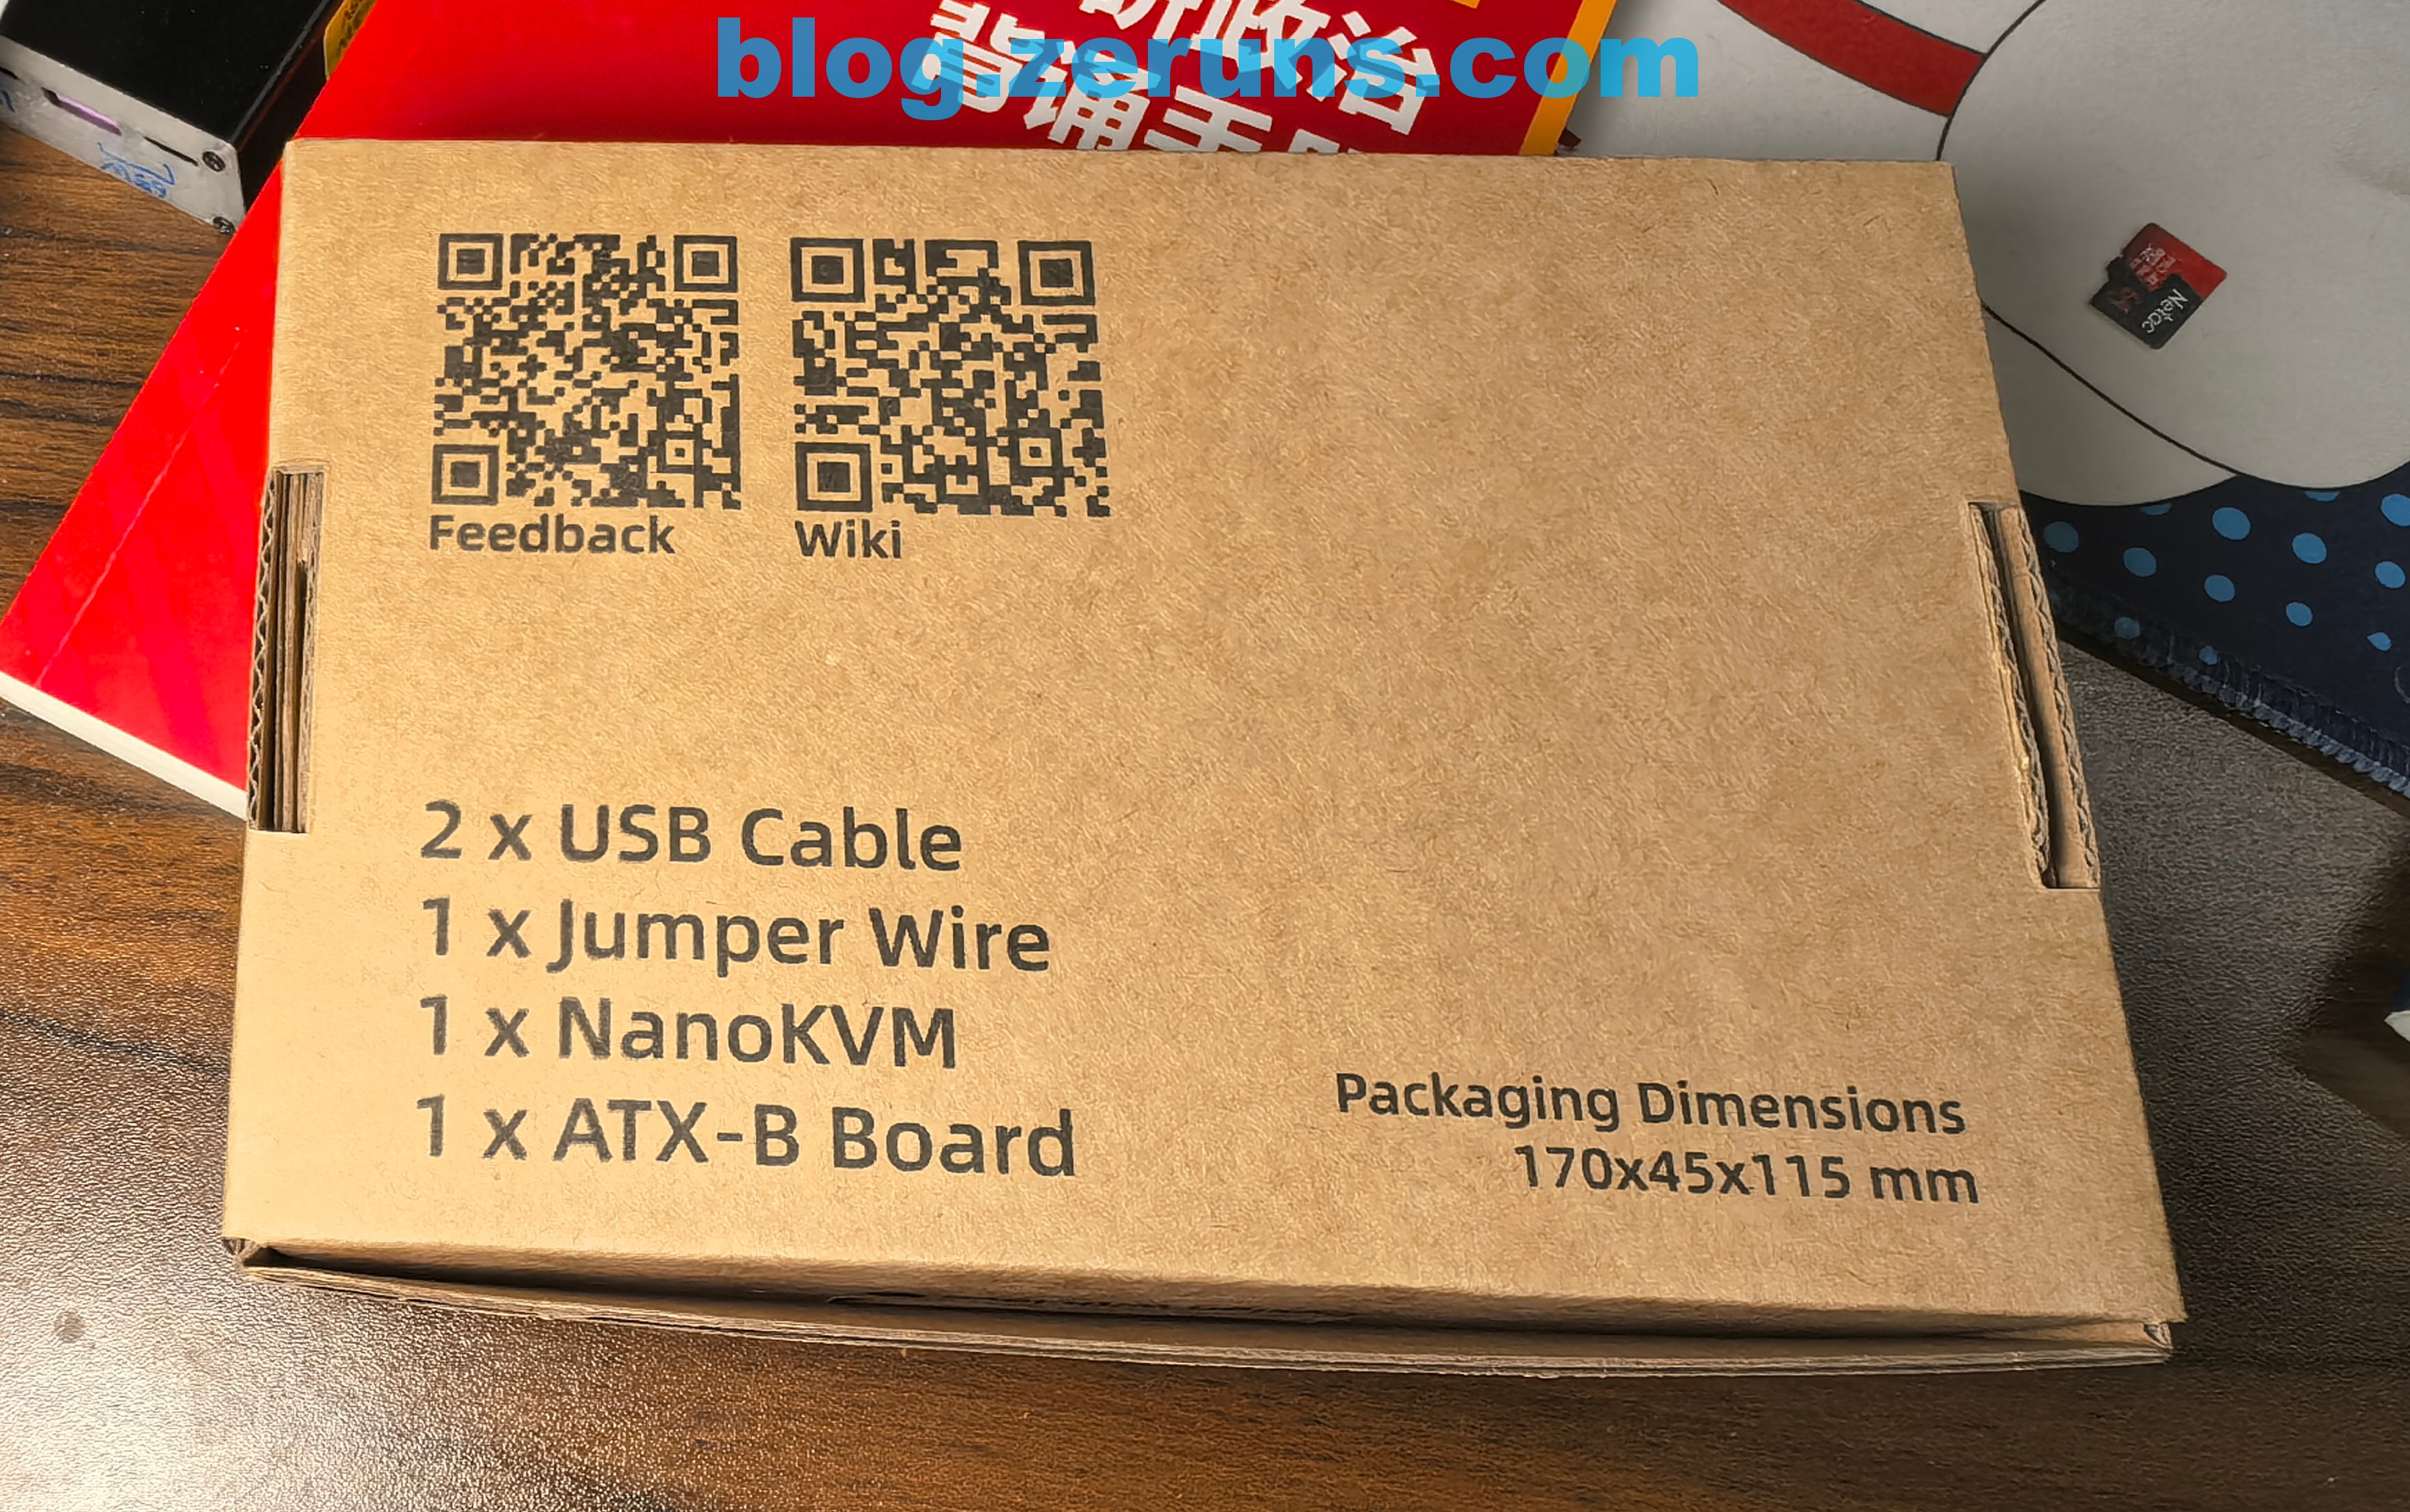
Full Version Box Bottom
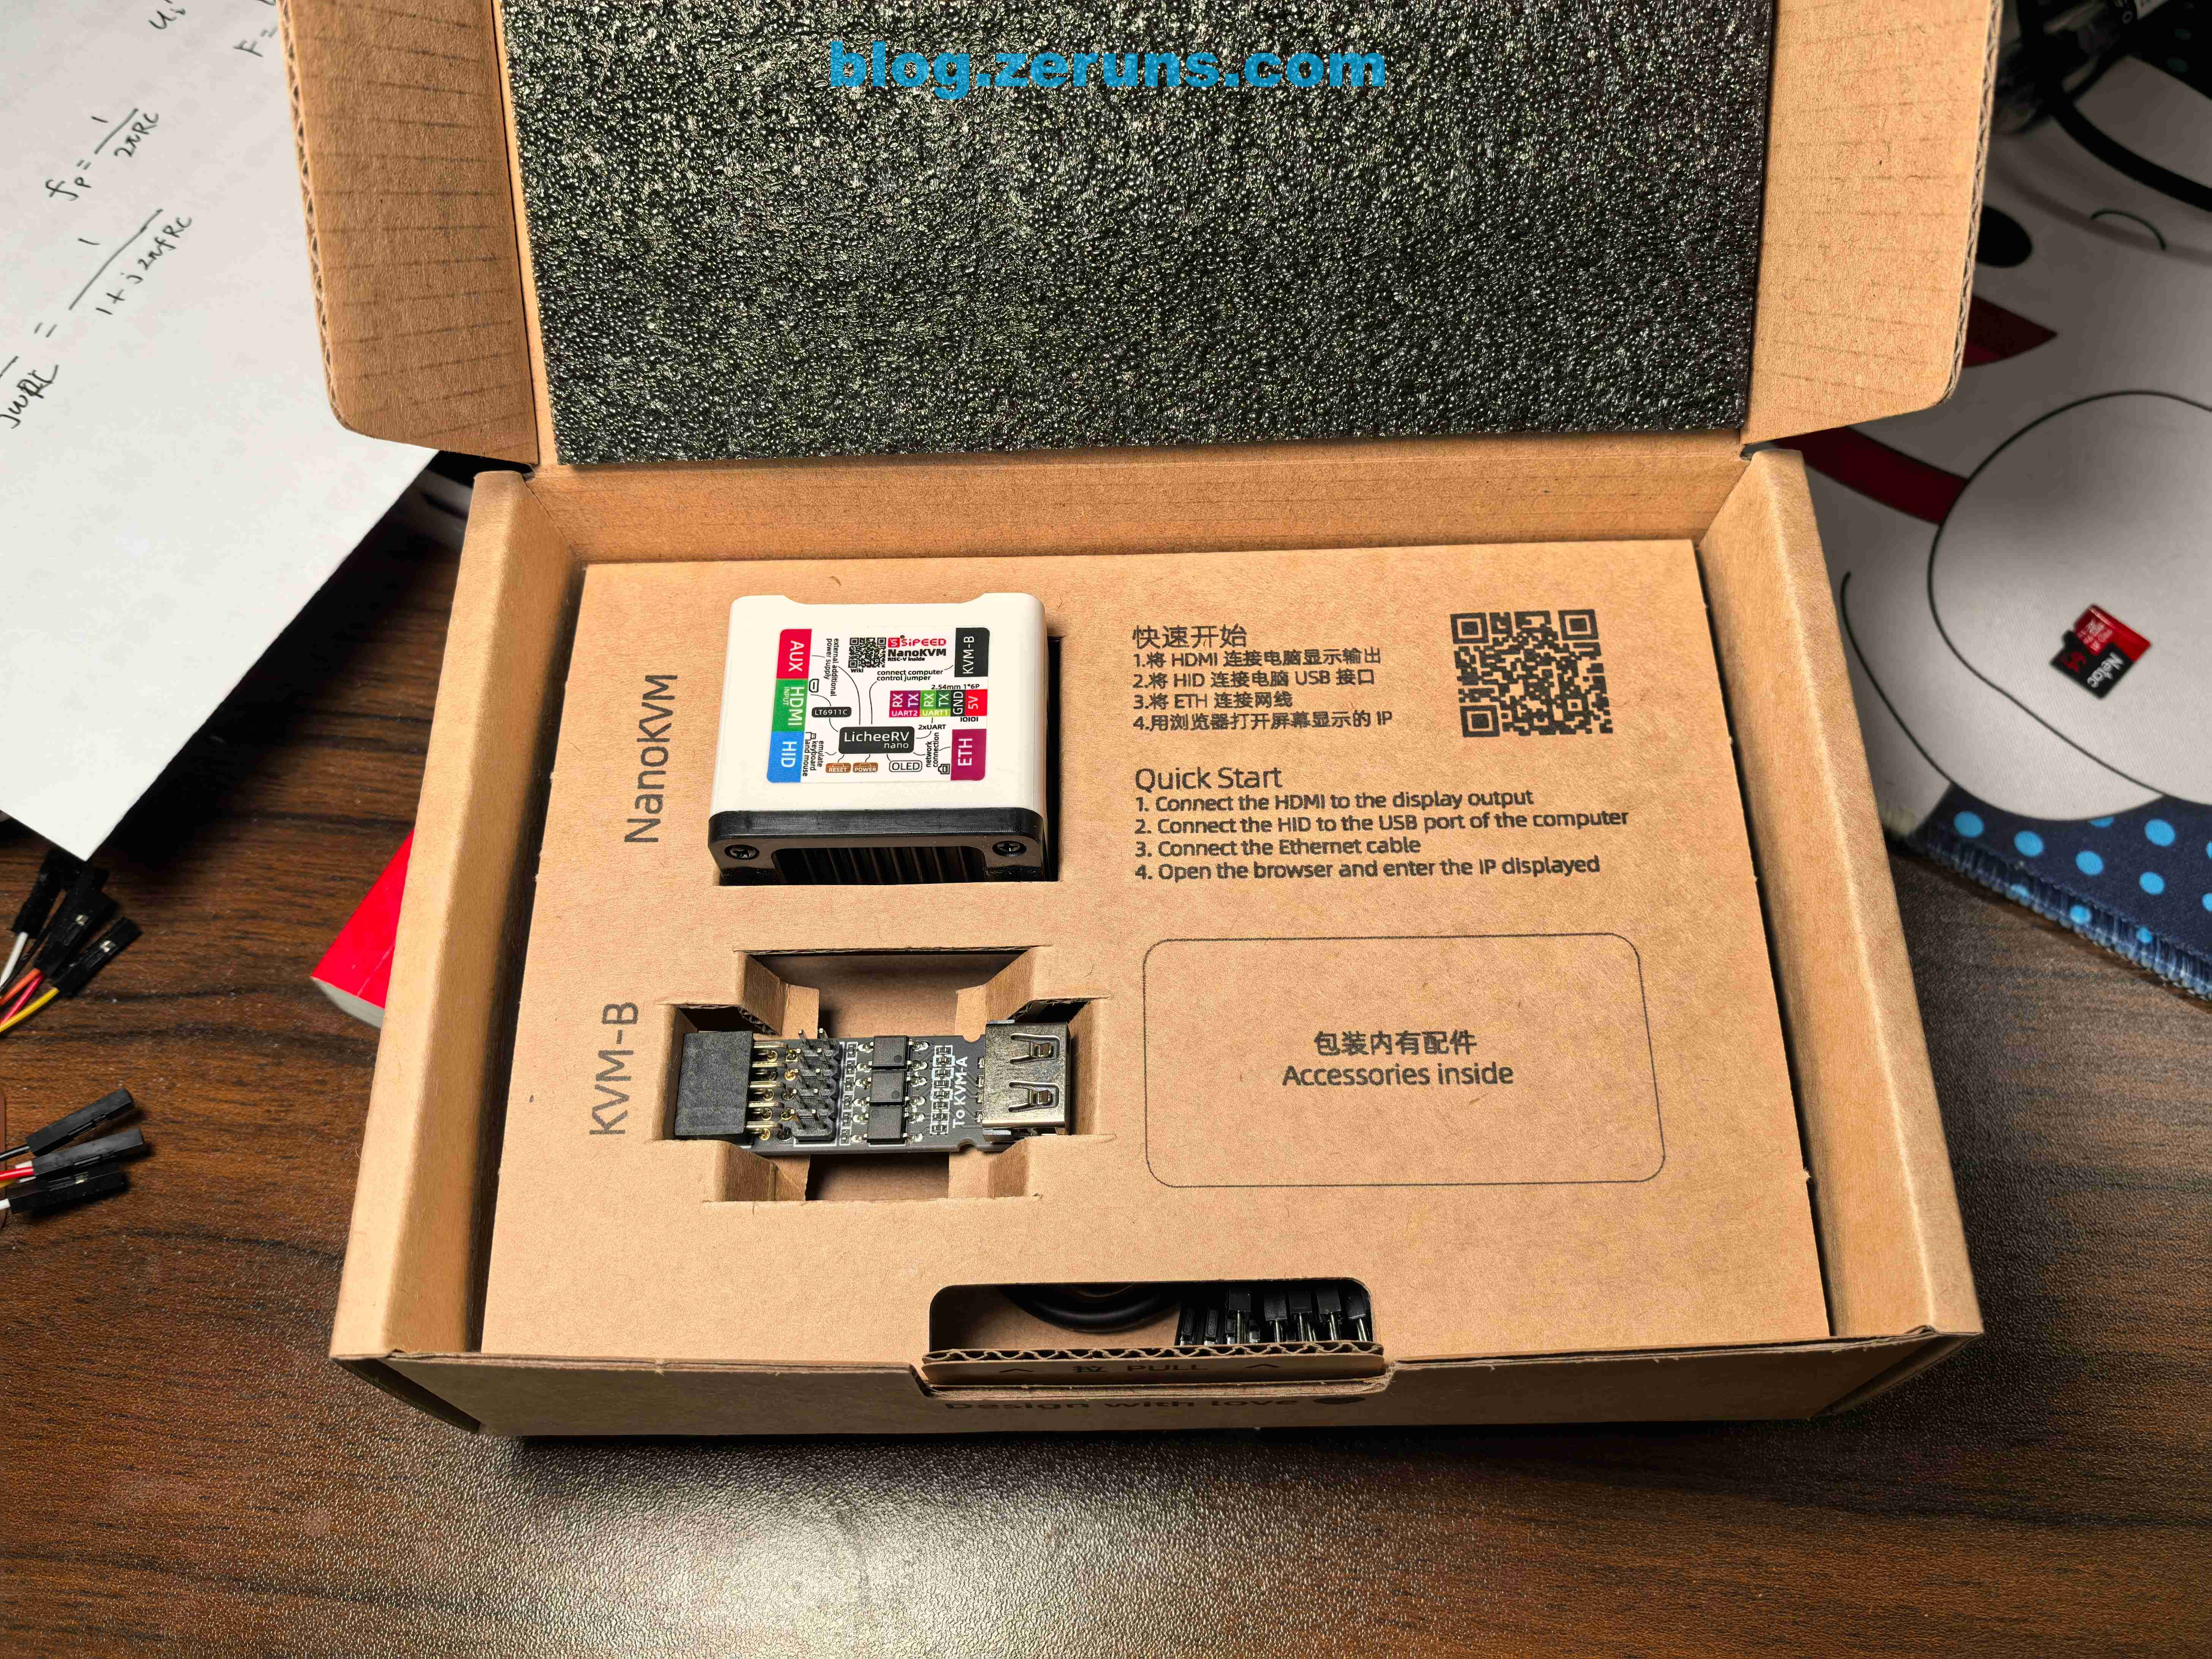
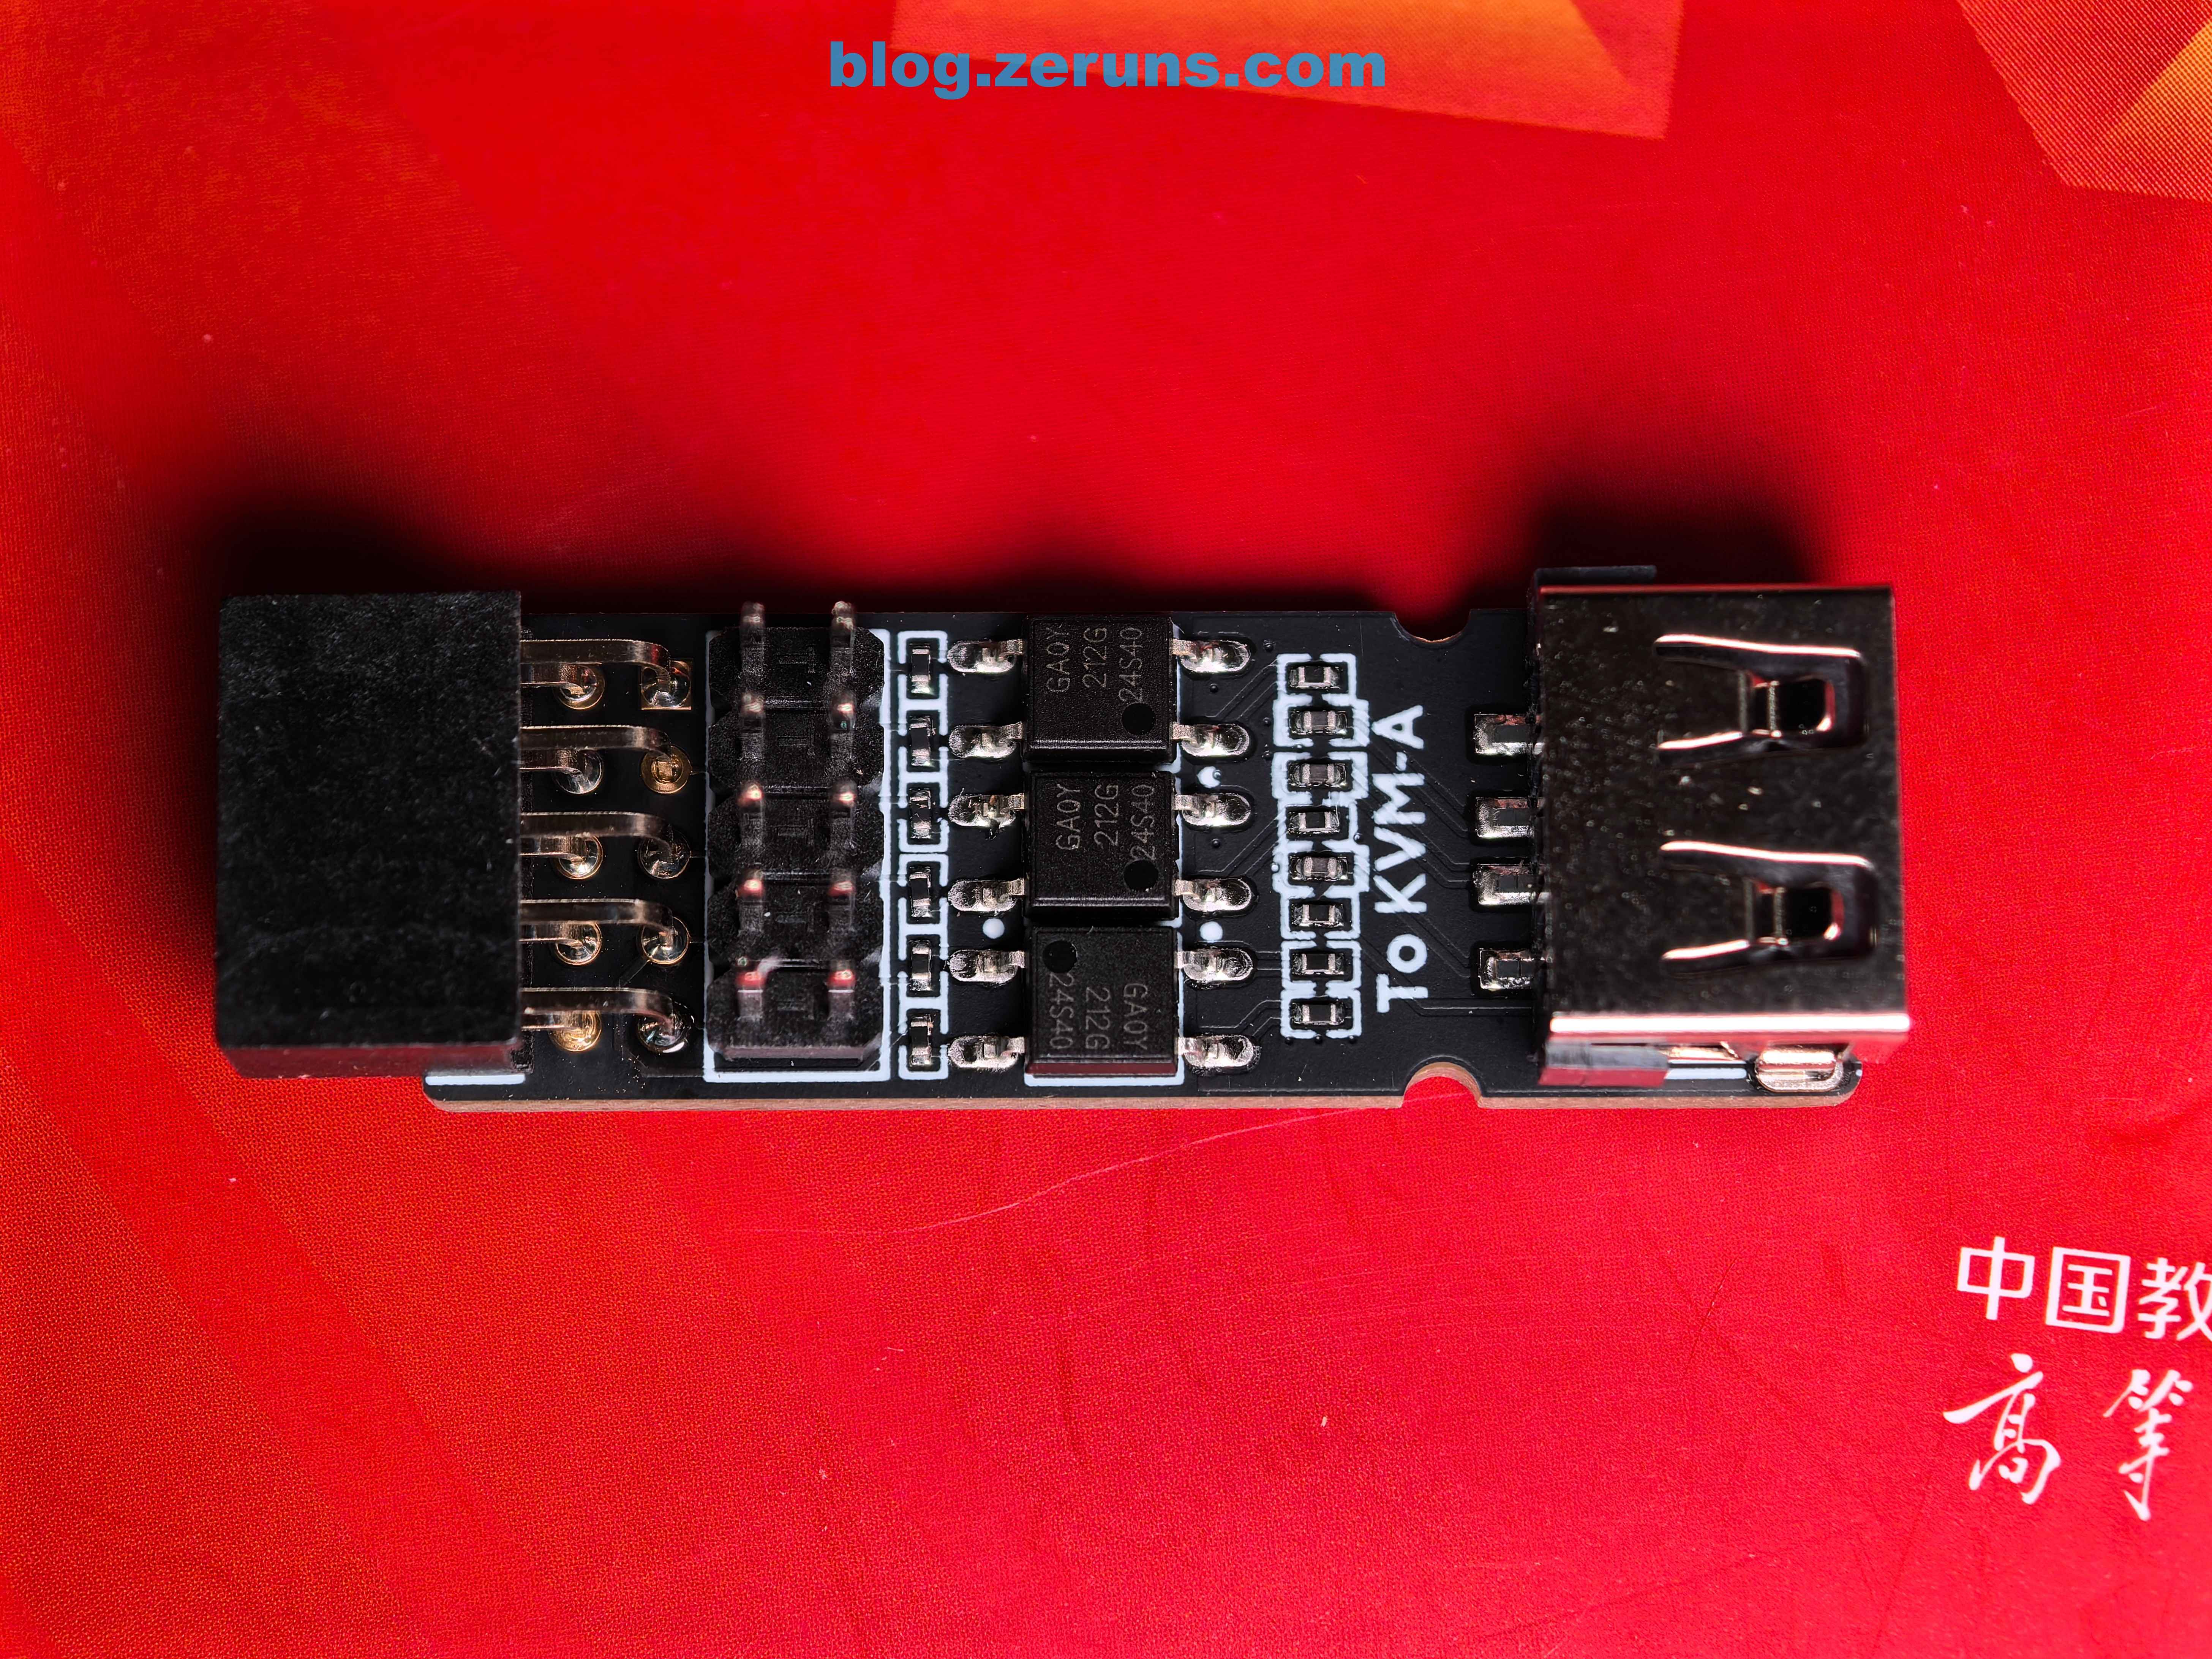
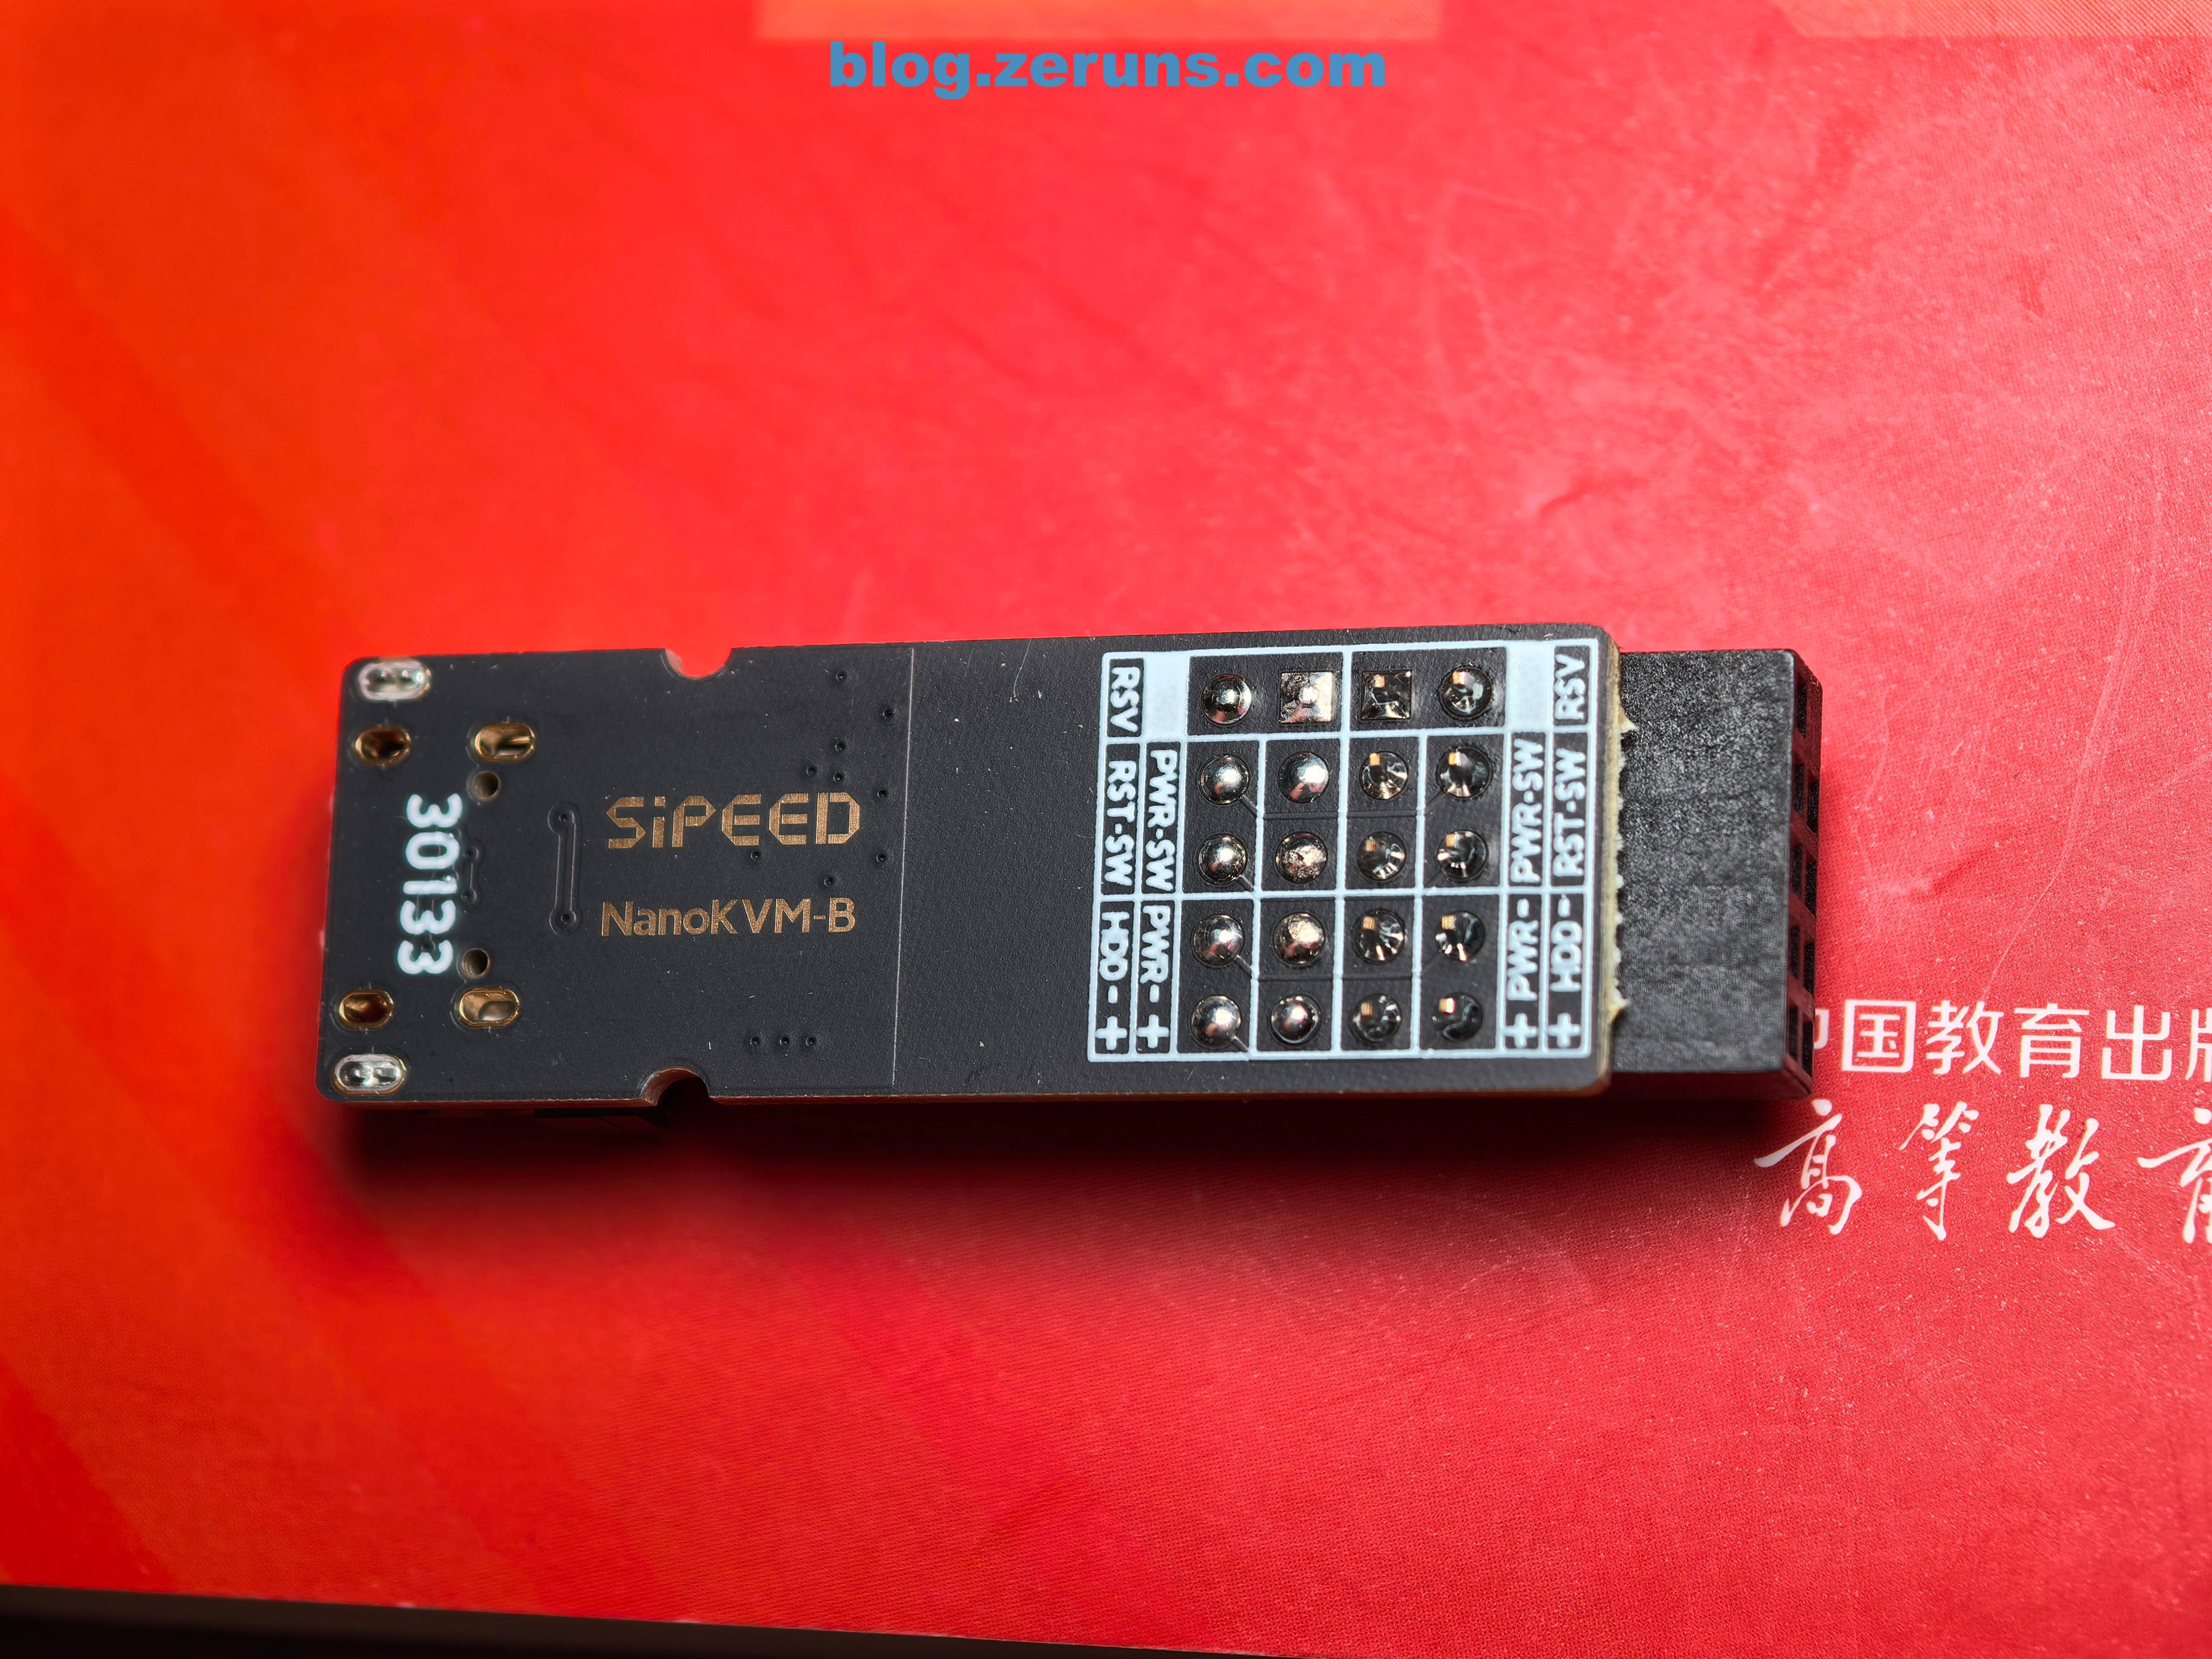
Inside the box, the top layer contains the Full version NanoKVM and an ATX power control IO interface board (KVM-B), which connects to the computer’s ATX pins for remote power control.
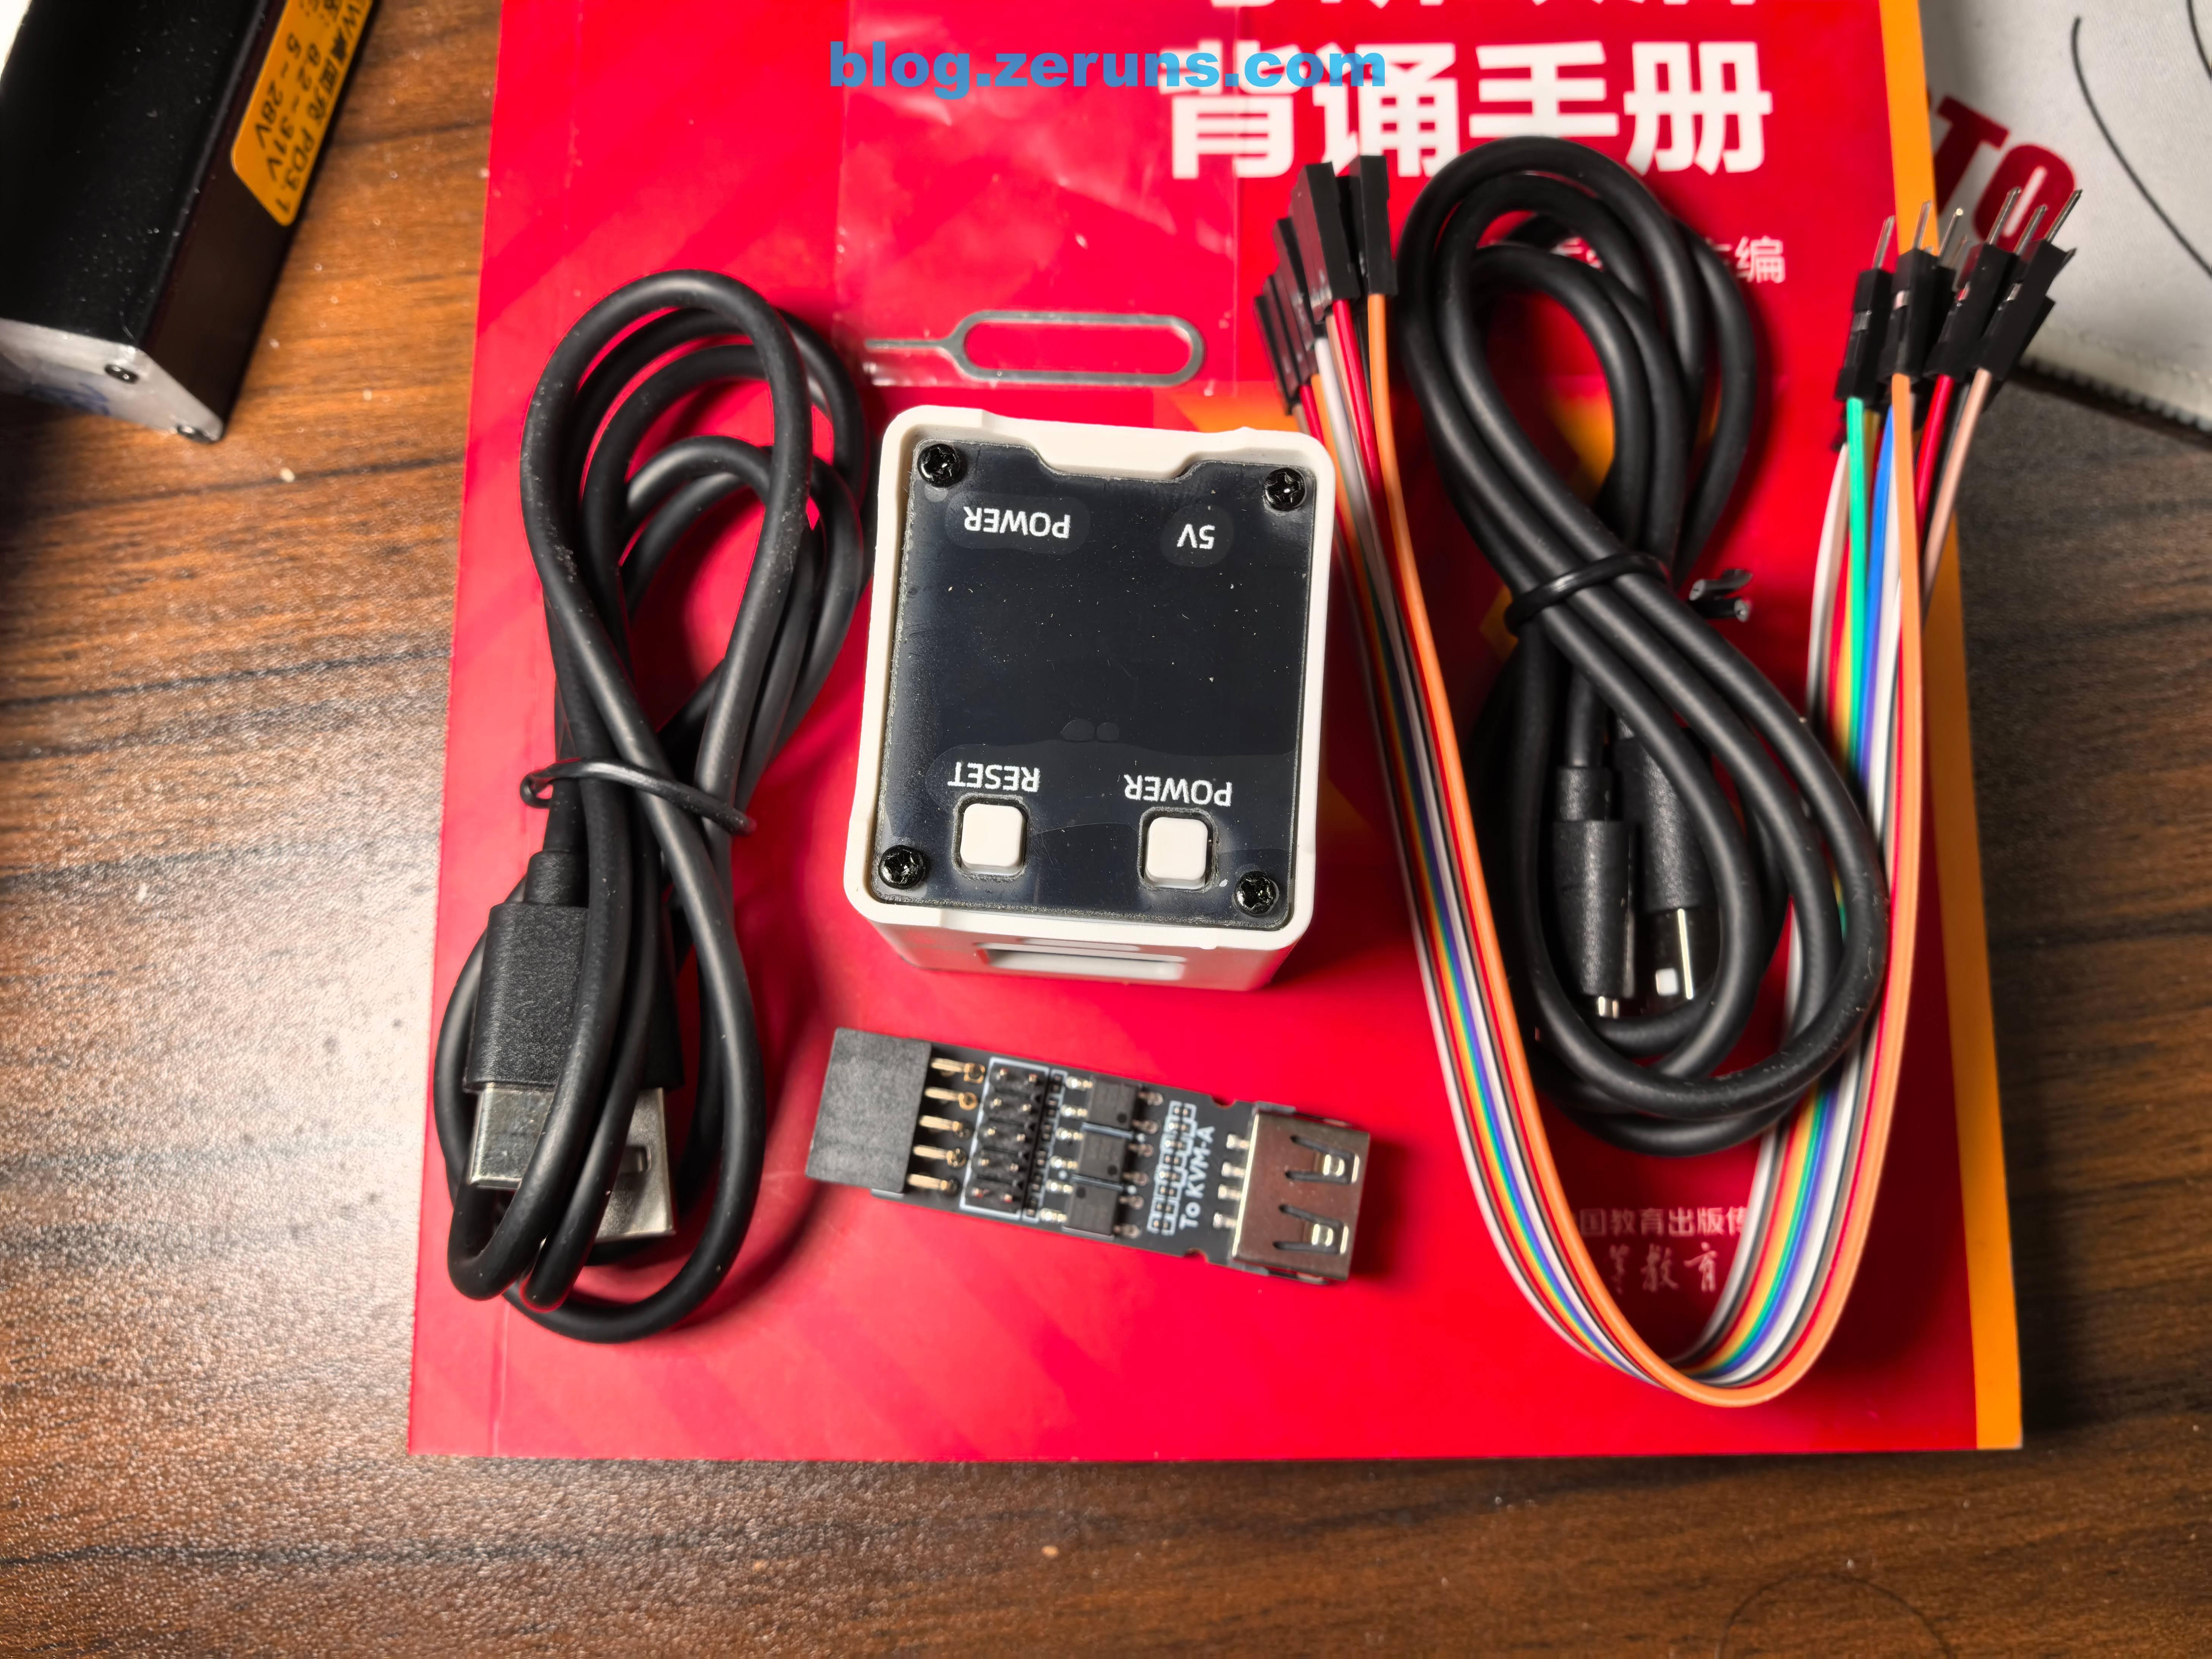
Bottom Layer Accessories
The bottom layer includes: an A-to-C cable, a C-to-C cable, a set of DuPont wires, and a pin ejector tool (usable as a reset button tool).
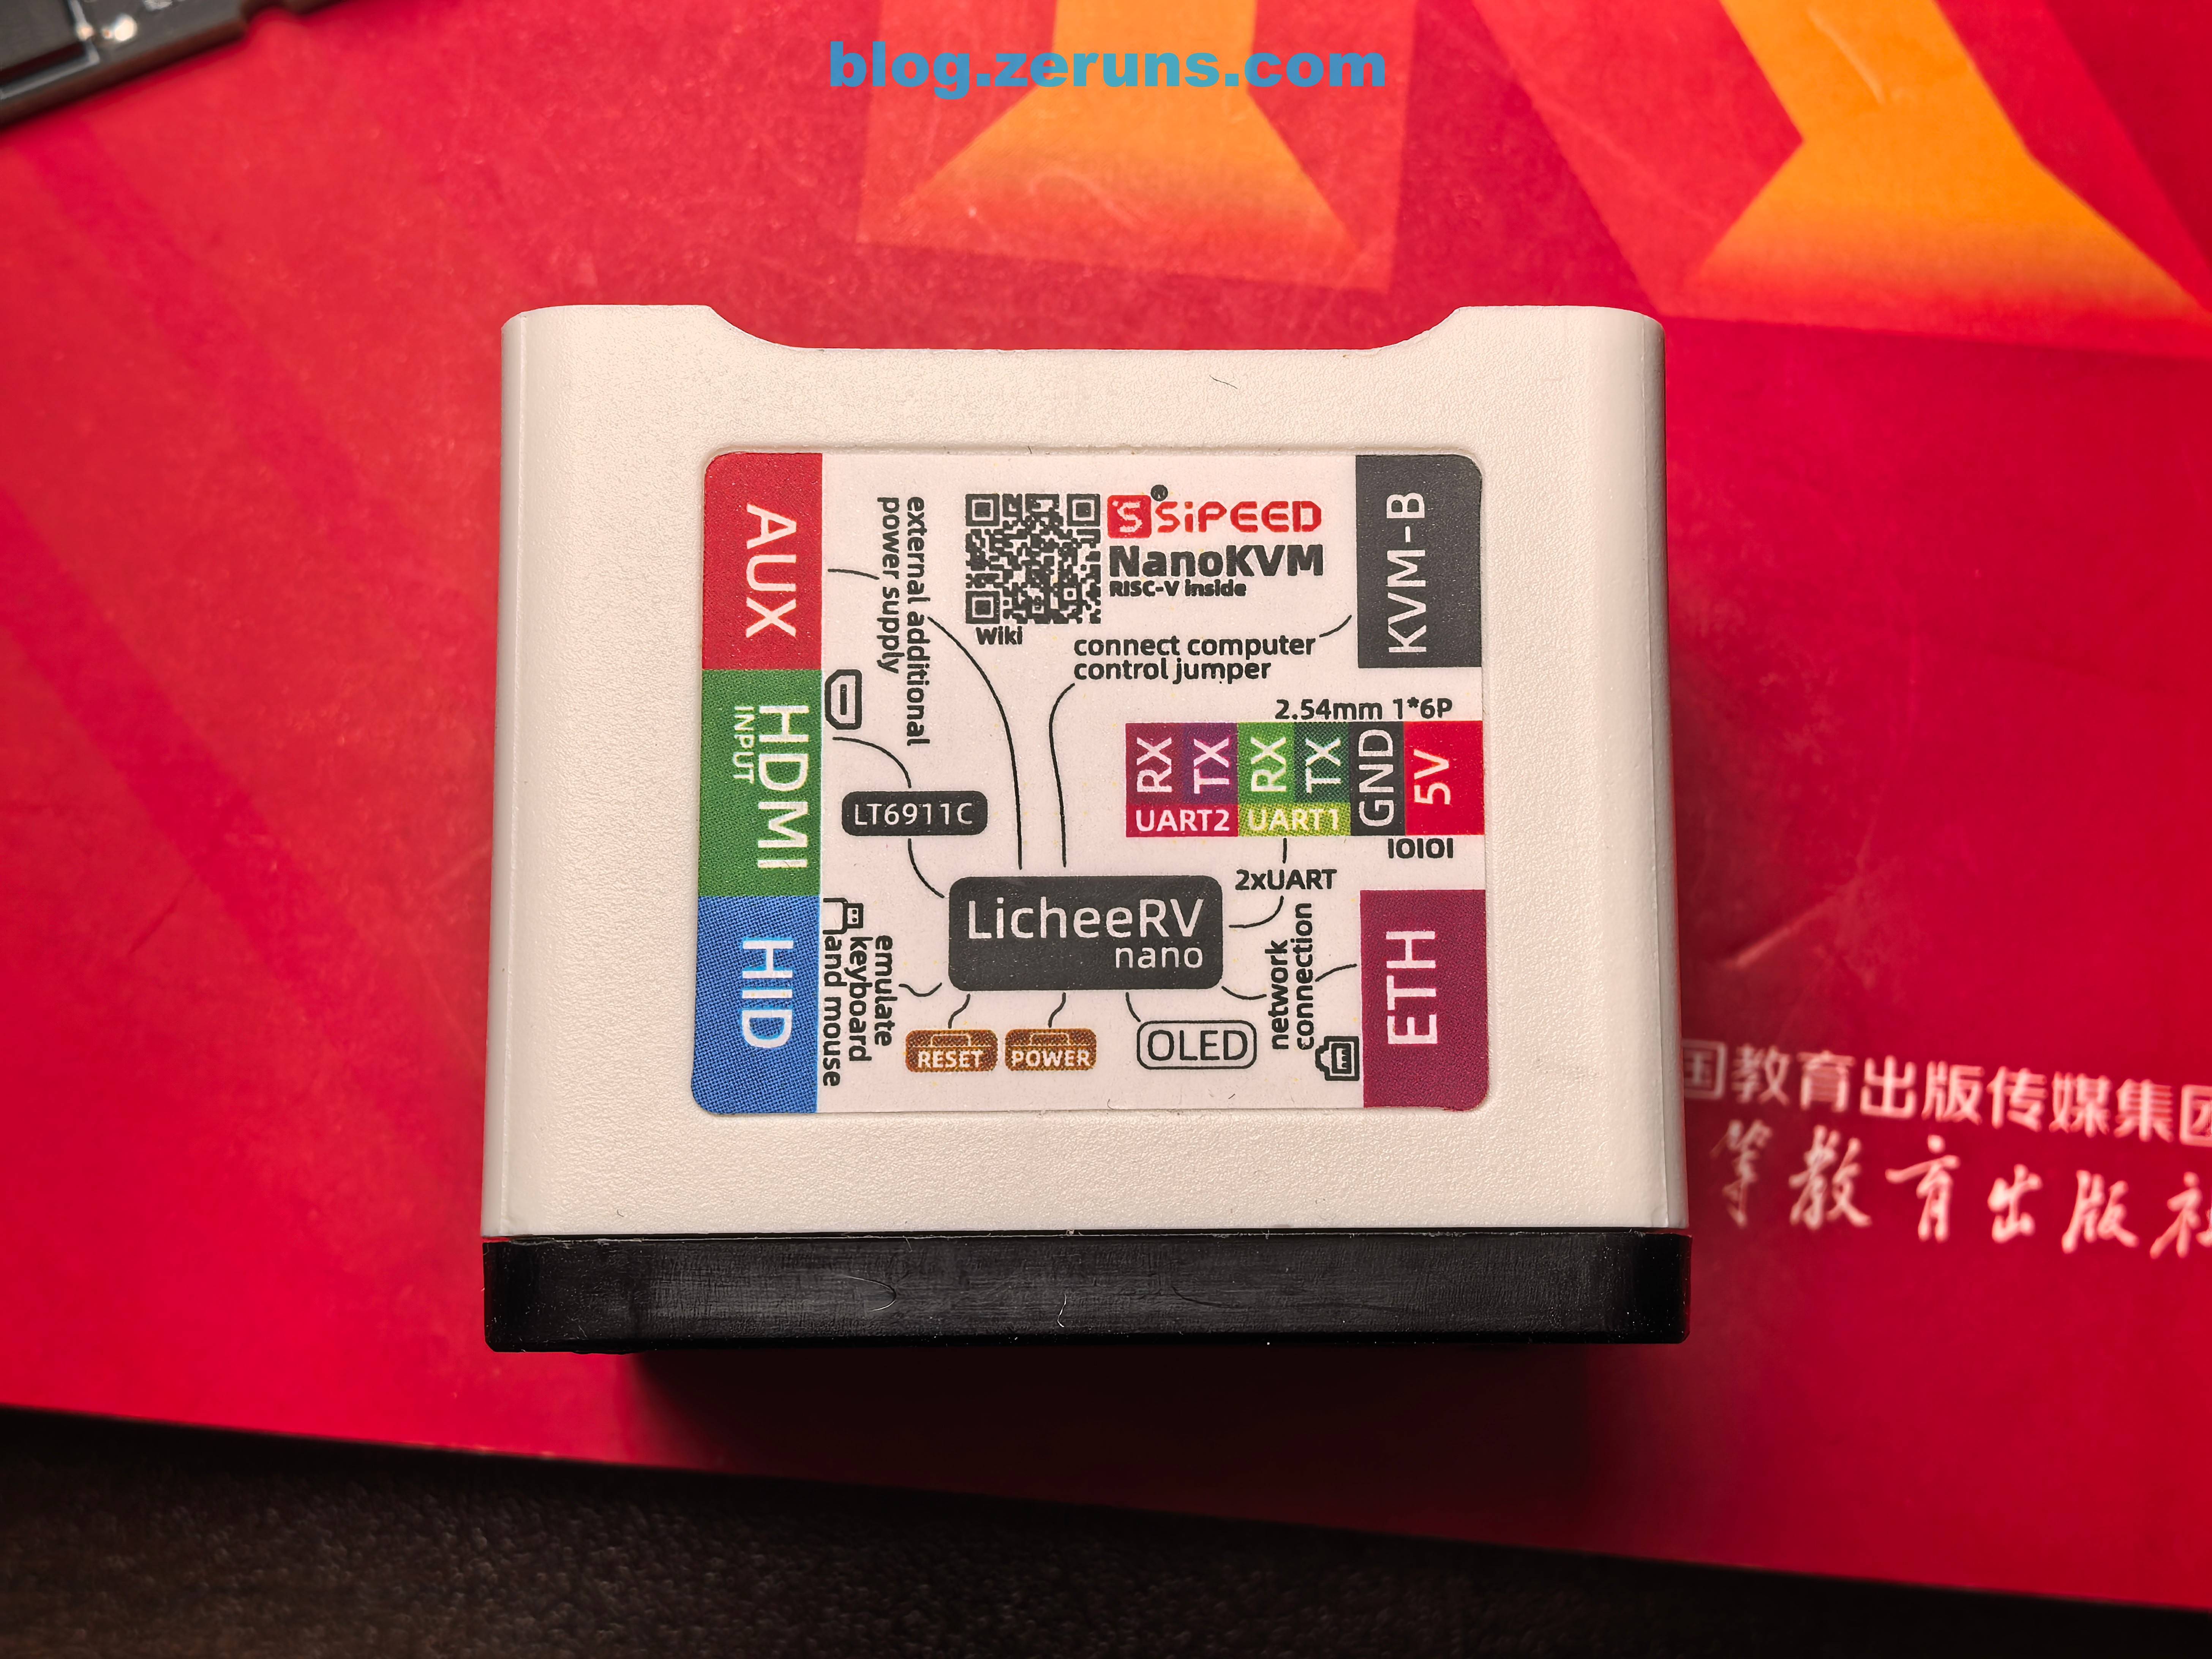
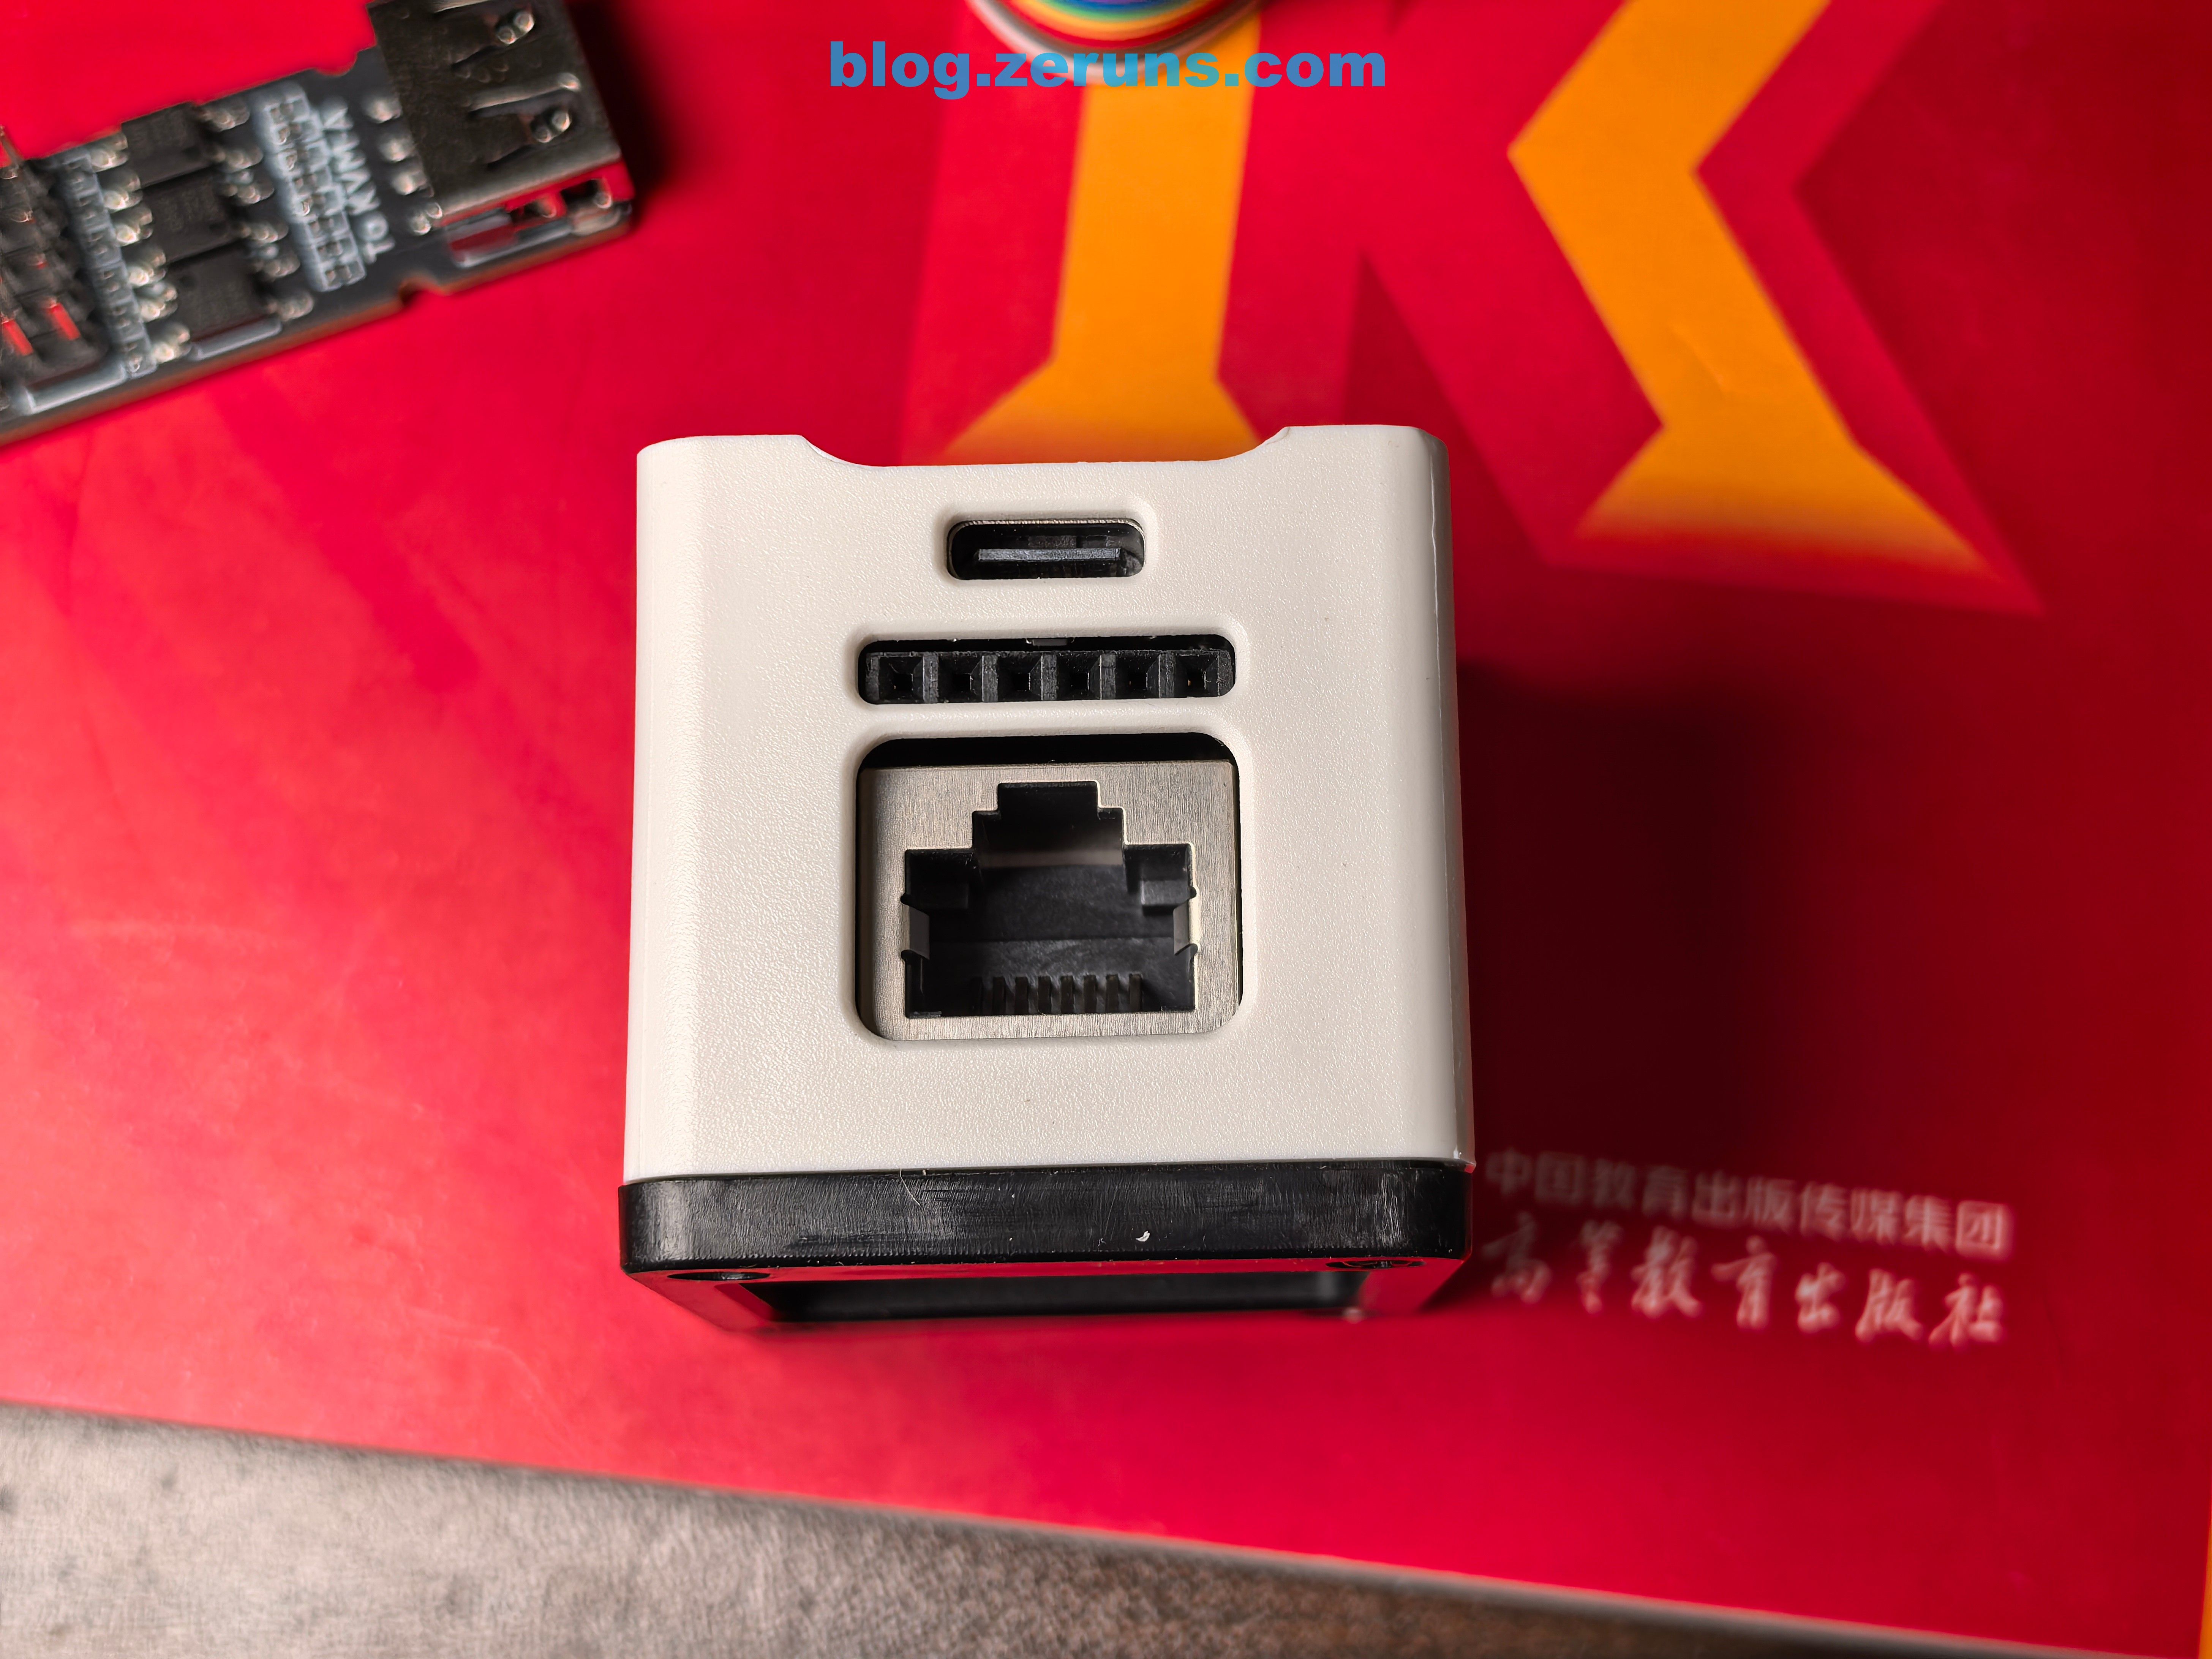
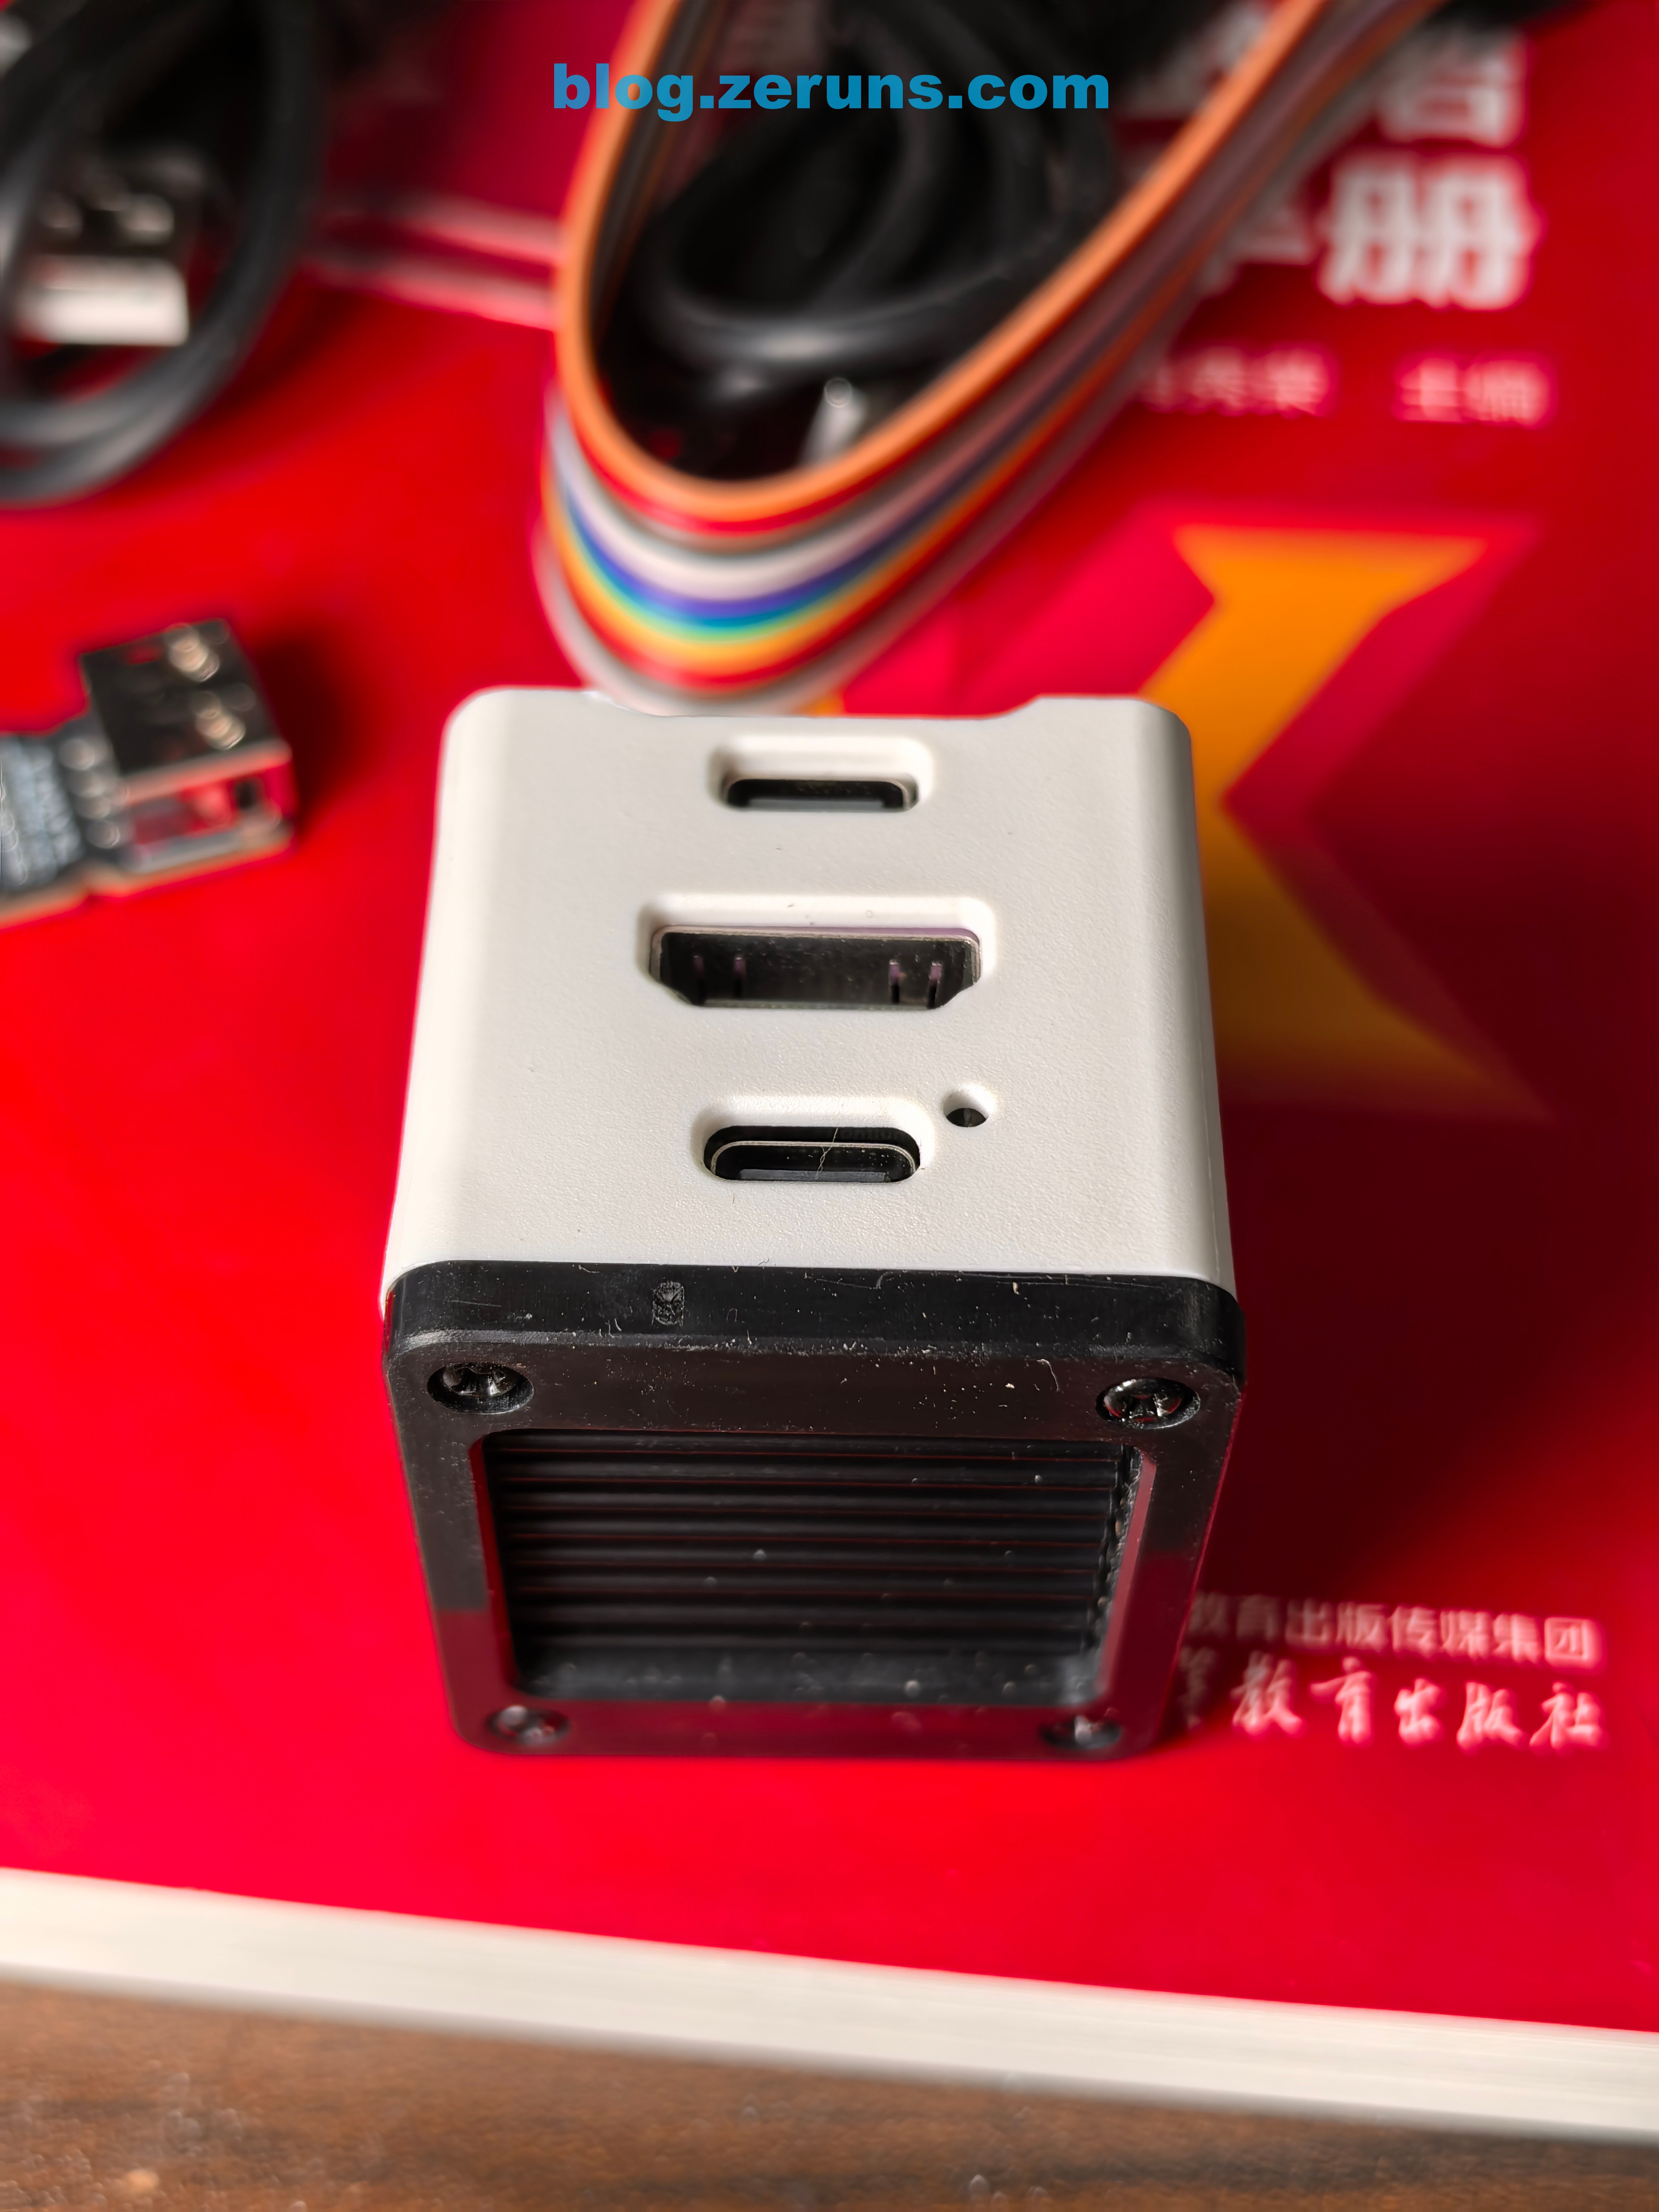
NanoKVM Side View and Port Definitions
Ethernet Port Side
HDMI Port Side and Bottom Heatsink
ATX Power Control IO Board (NanoKVM-B) Front and Back
The board features three 4-pin chips marked "GA0Y 212G 24S40." I couldn't find documentation, but I suspect they are optocouplers.
Disassembly and Analysis
To disassemble the NanoKVM (Full), remove the four screws on the bottom to access the circuit board and heatsink. The heatsink uses a thermal pad to transfer heat from the processor to the heatsink.
The NanoKVM is built around the Sipeed LicheeRV Nano core board. It features the SG2002 processor by Xuantie, with a 1GHz main core (RISC-V C906/ARM A53 optional) and a 700MHz RISC-V C906 secondary core. It is equipped with 256MB DDR3 memory and a built-in 1Tops NPU. The board includes a wide range of interfaces such as MIPI-CSI, MIPI-DSI, SDIO, Ethernet, USB, SPI, UART, and I2C.
The Full version includes a 32GB Kioxia TF card, while the Lite version does not include a TF card. Users need to purchase a card and install the system themselves.
Firmware for NanoKVM v1.3.0 can be downloaded here: https://url.zeruns.com/NanoKVM_1_3_0
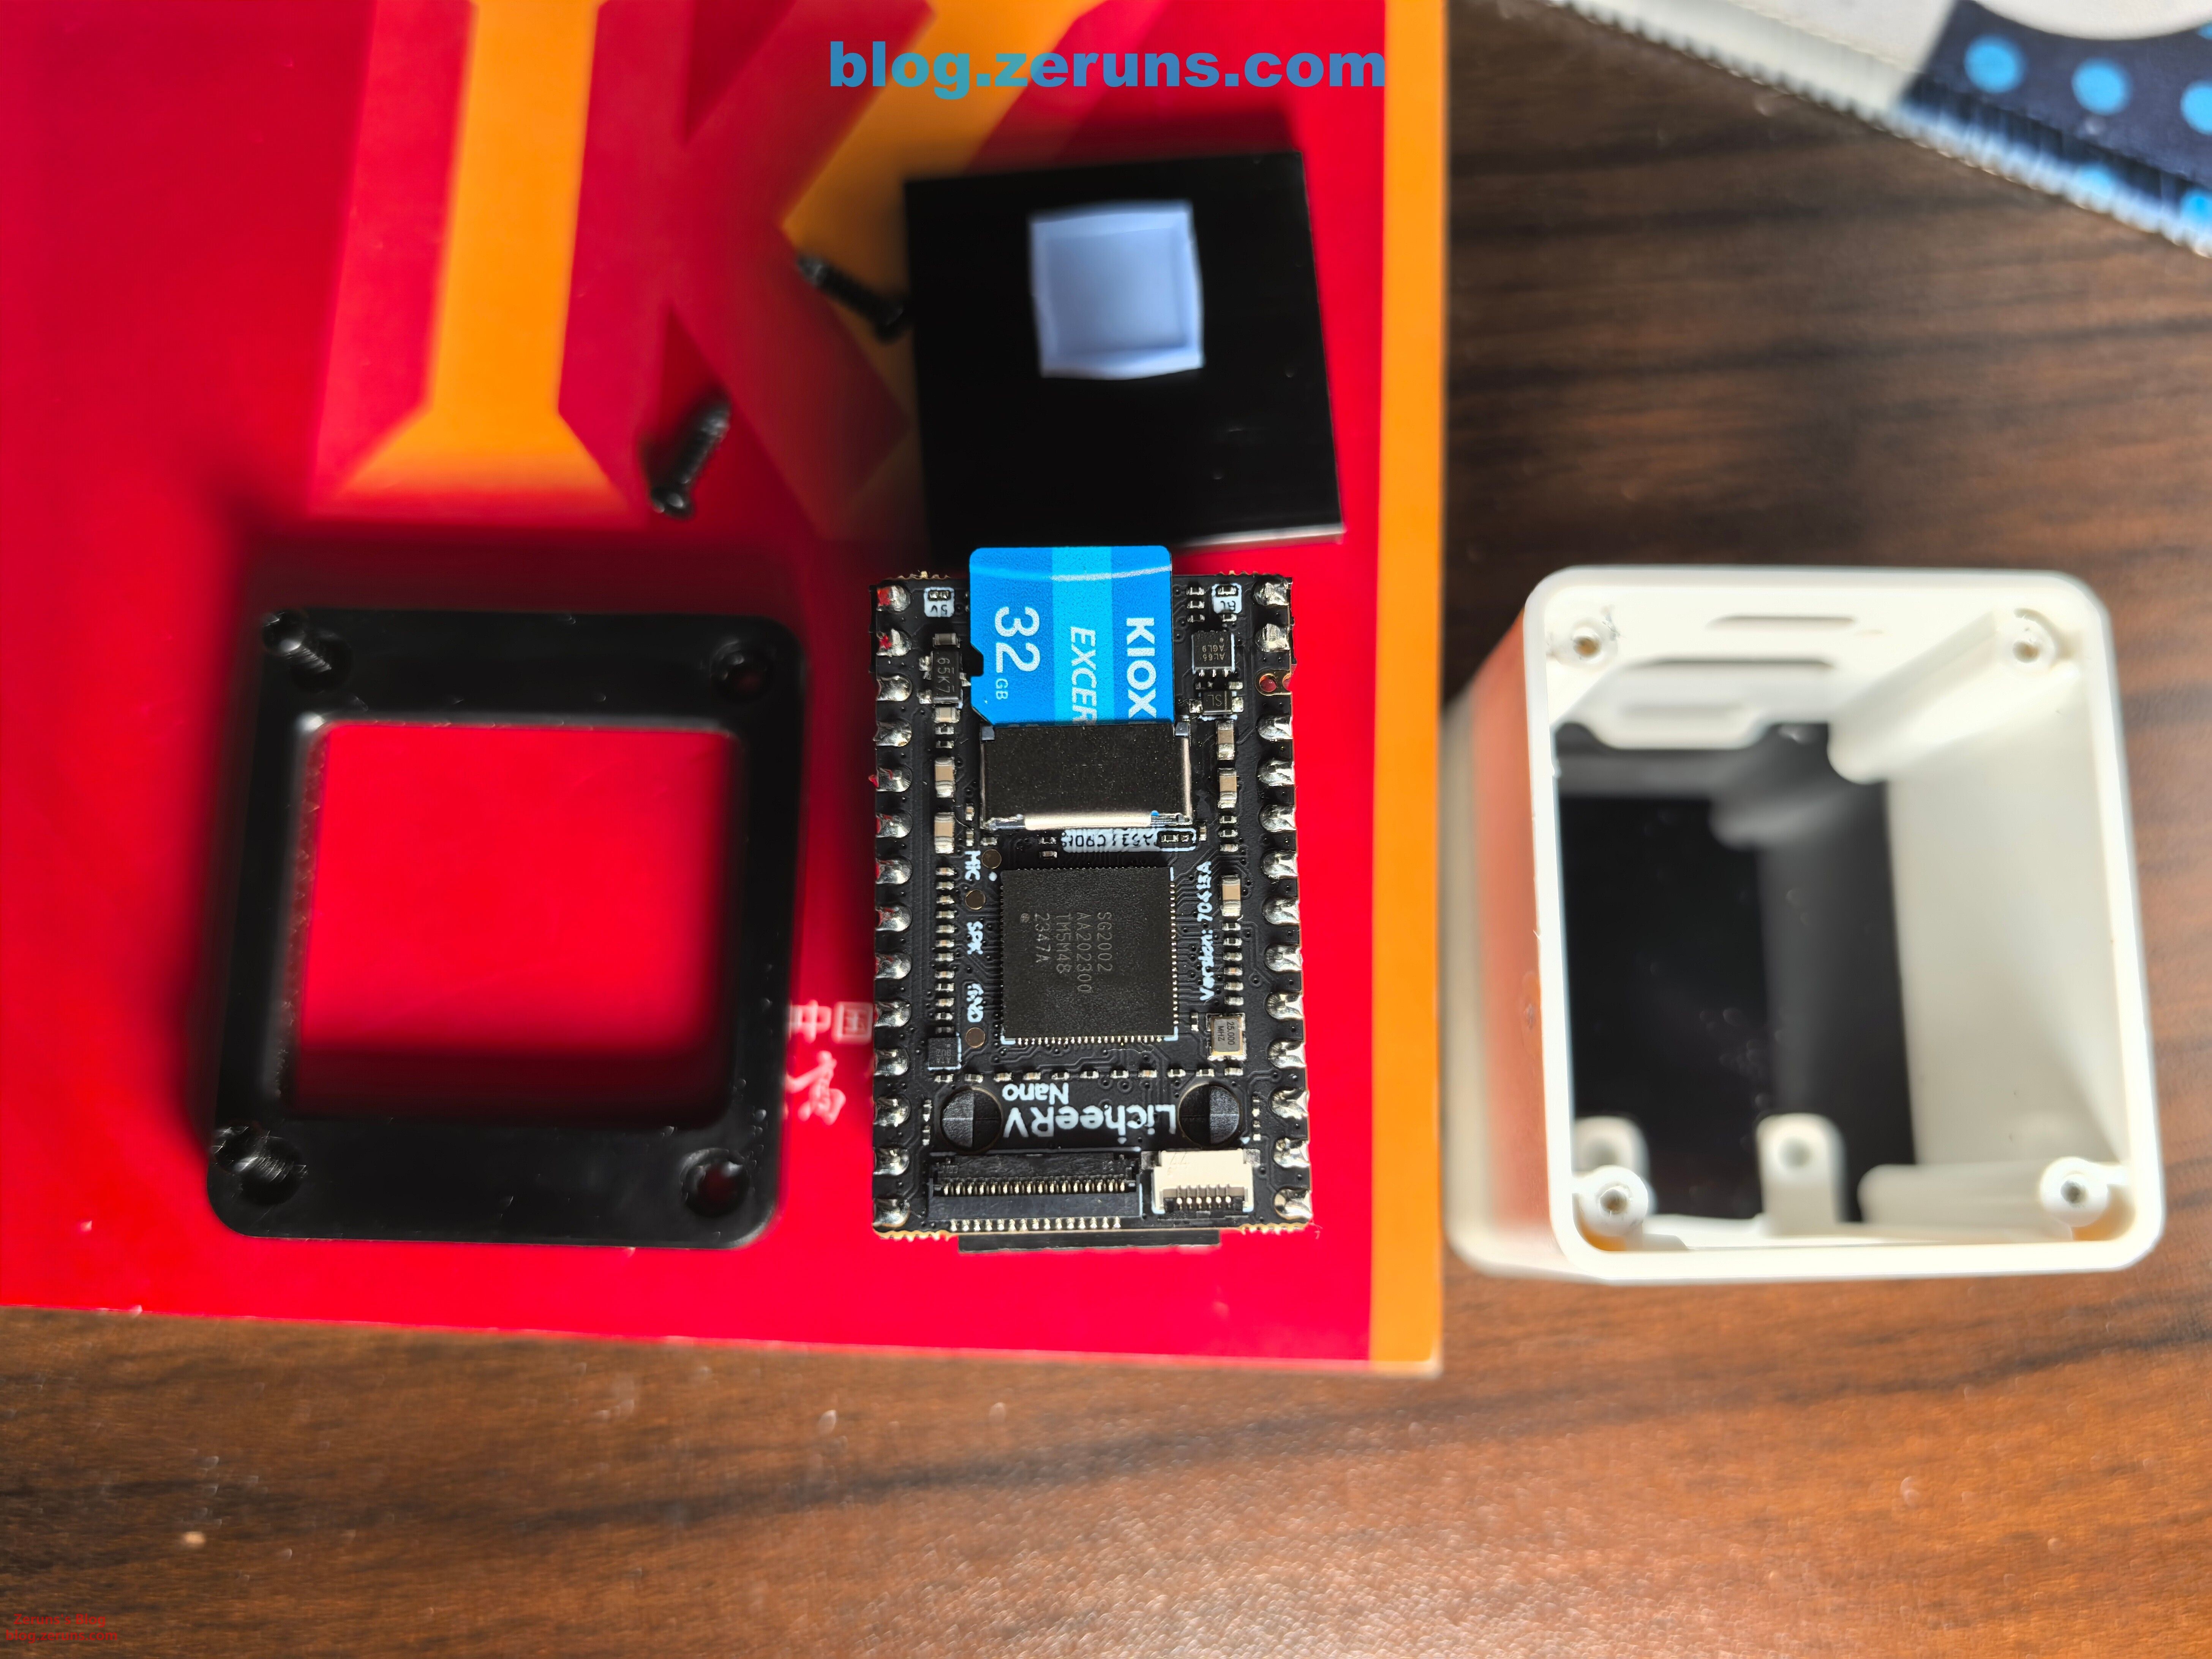
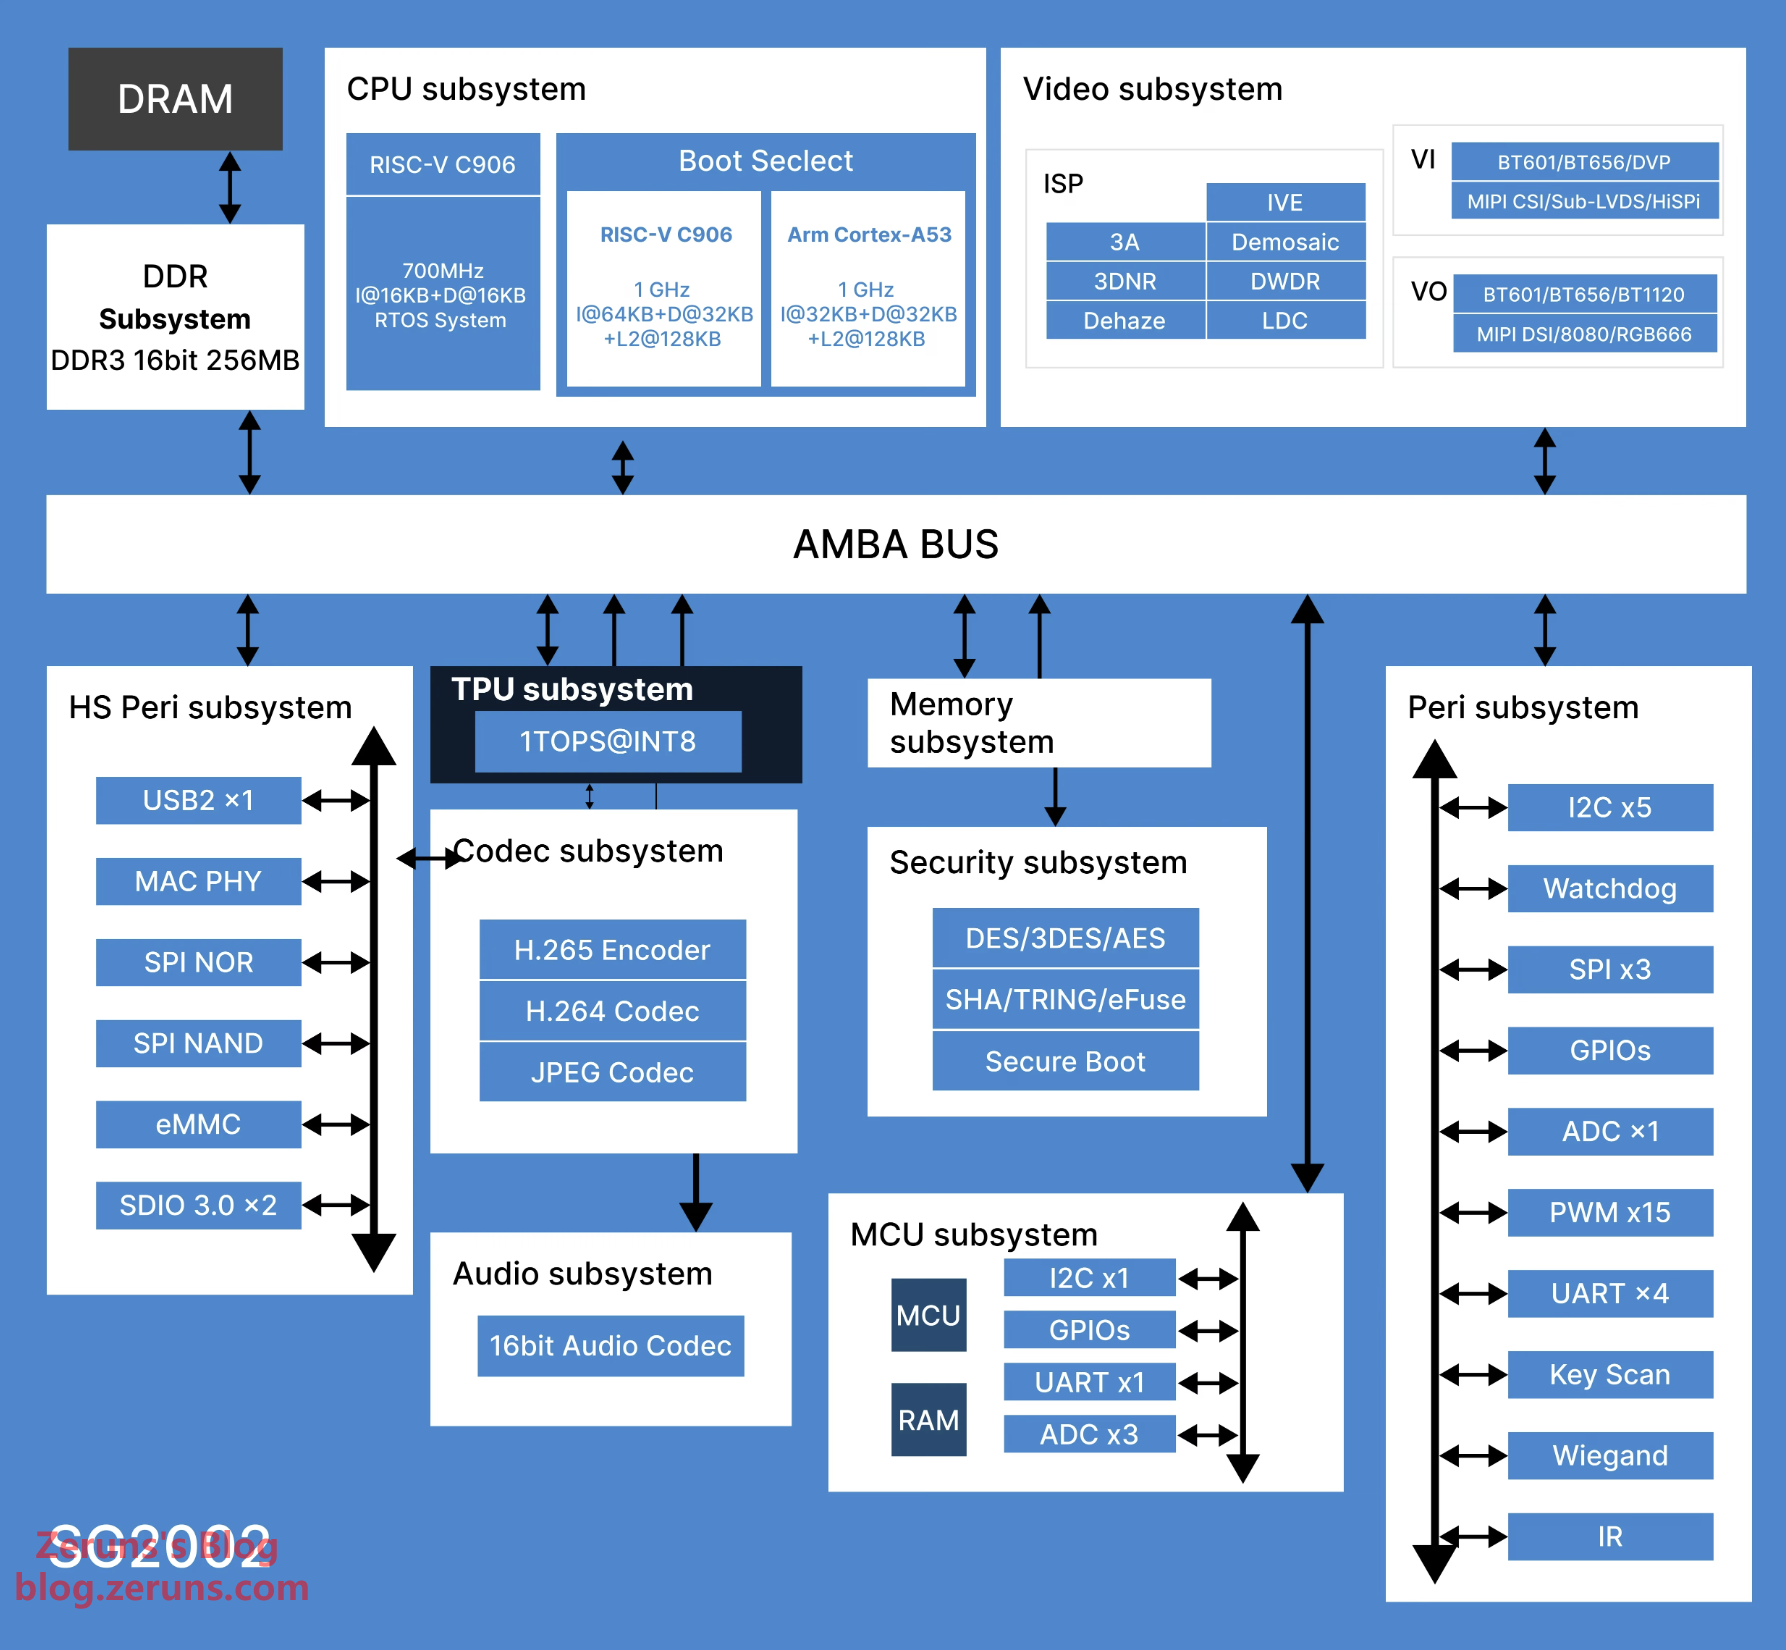
The front side of the Full version features a 0.96-inch OLED screen and RST and PWR buttons for ATX power interface control, functioning as reset and power buttons.
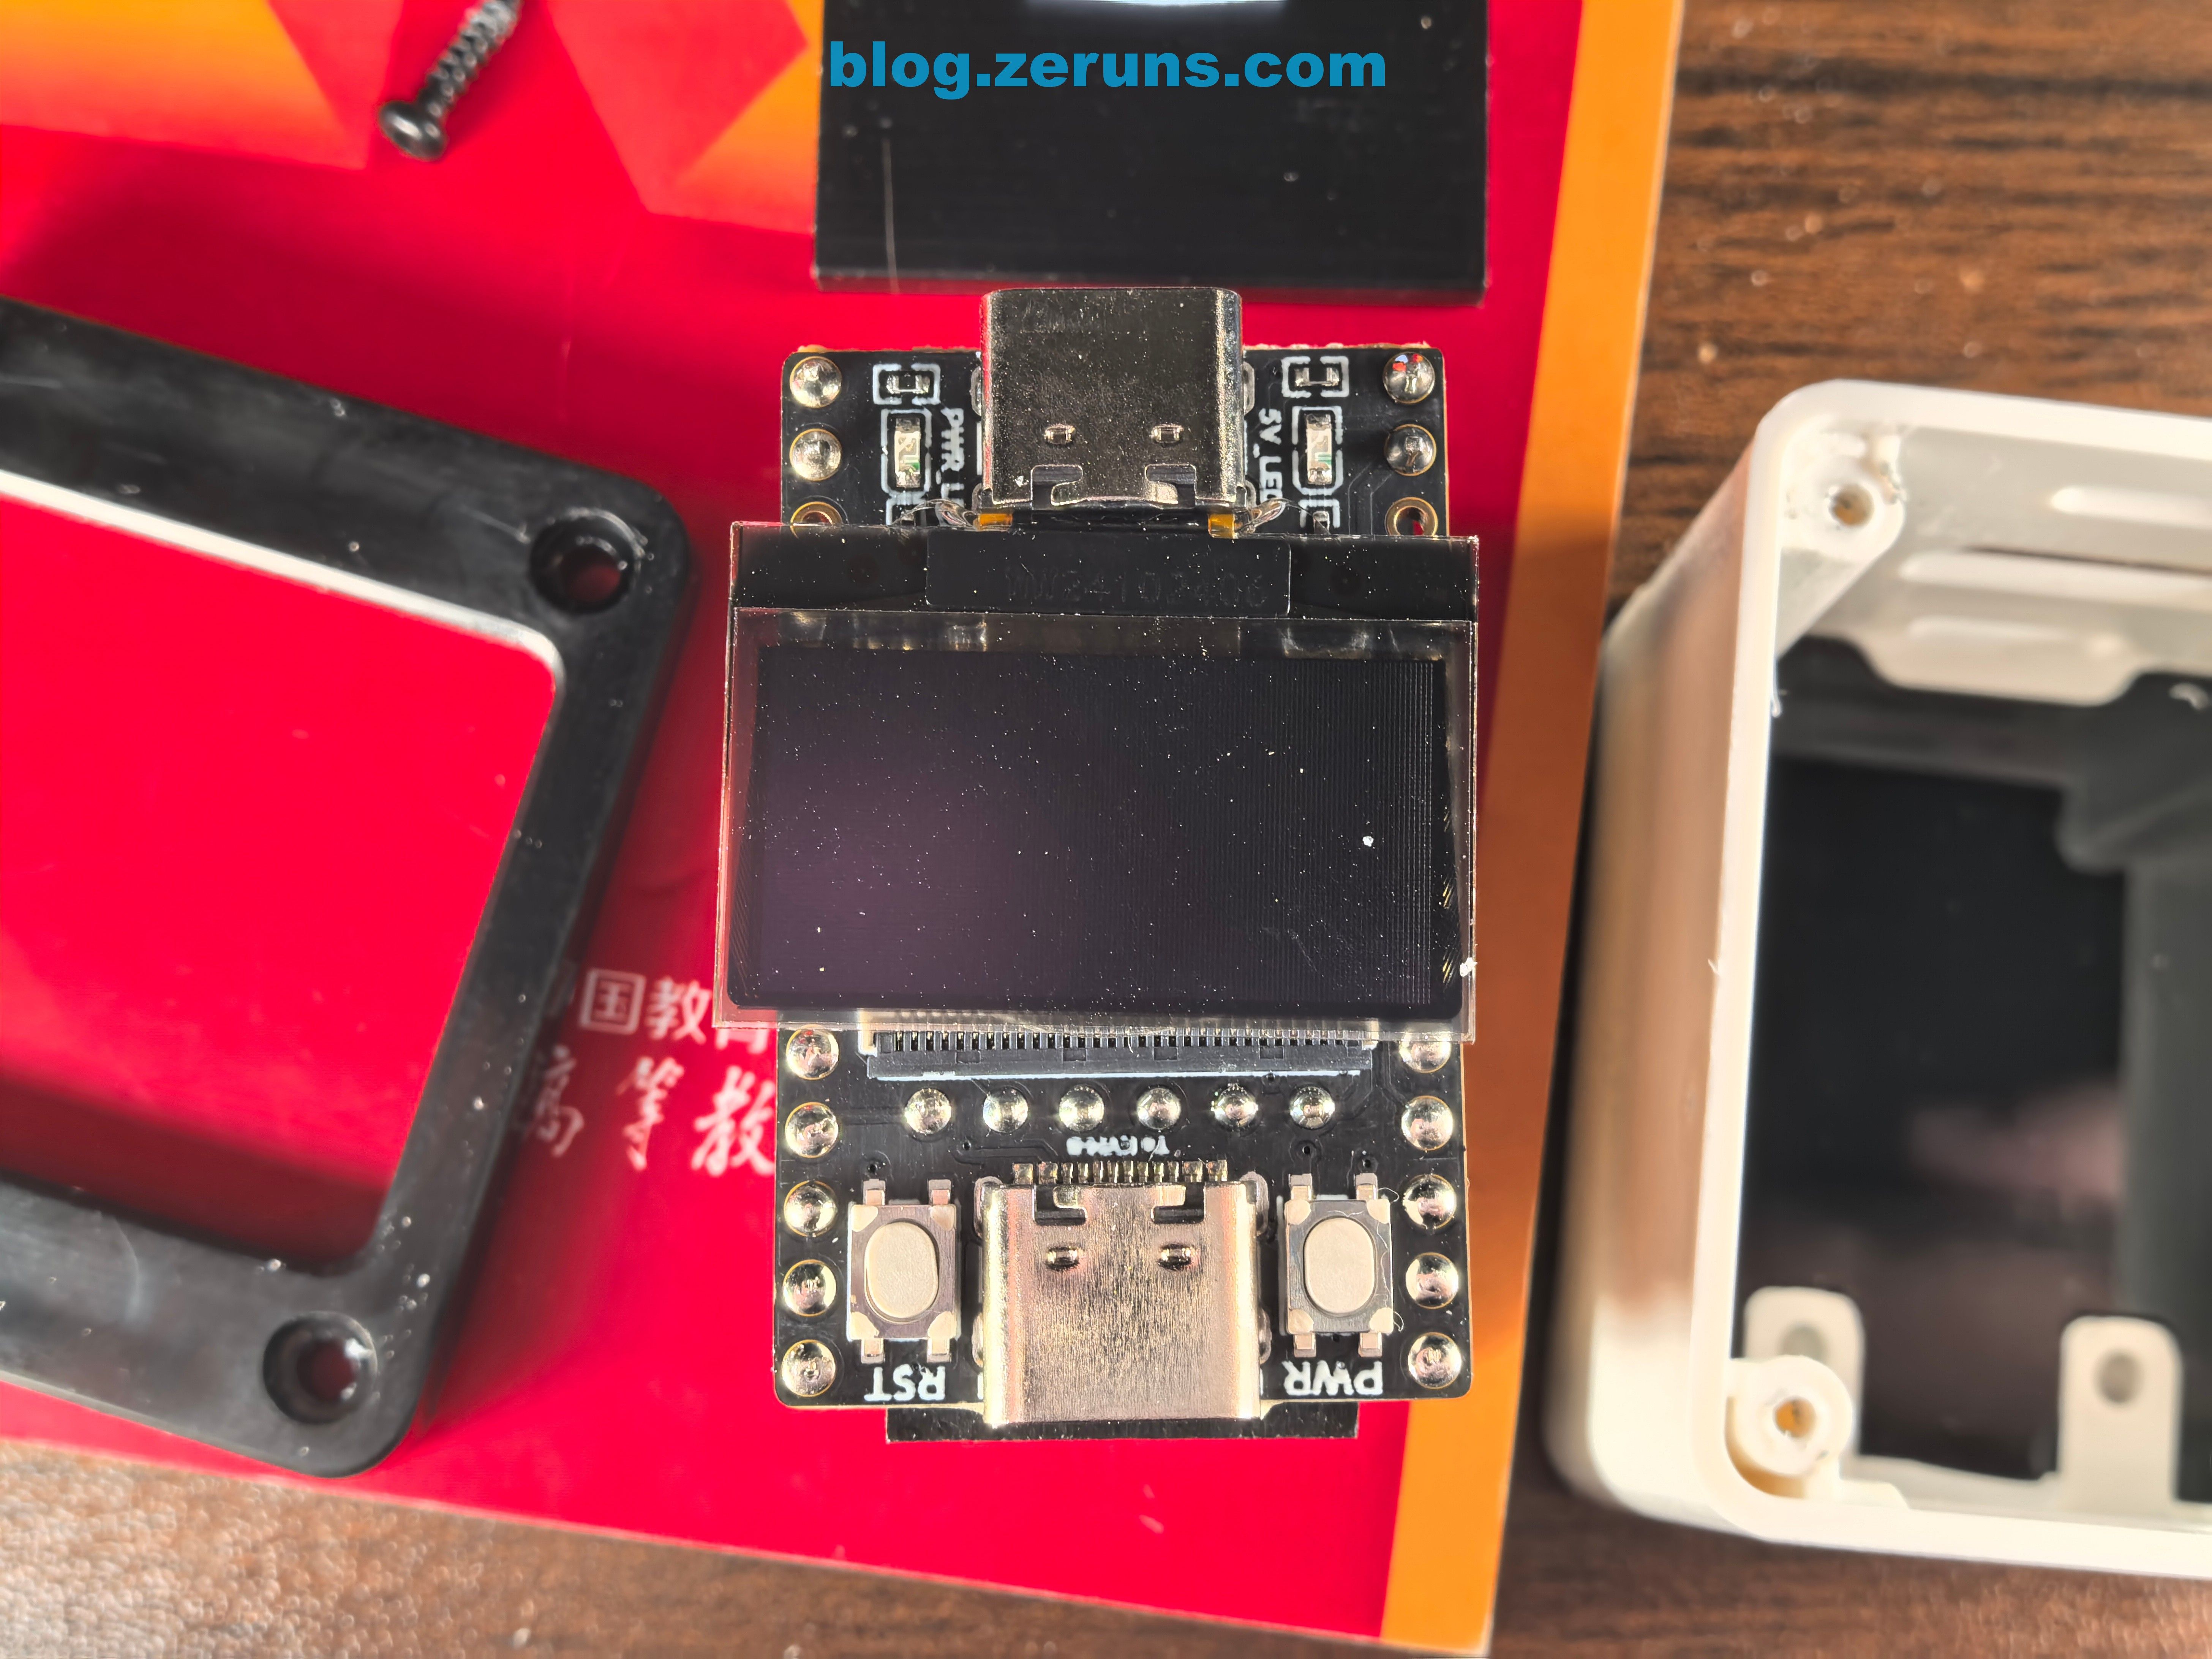
HDMI Interface Side of the Full Version
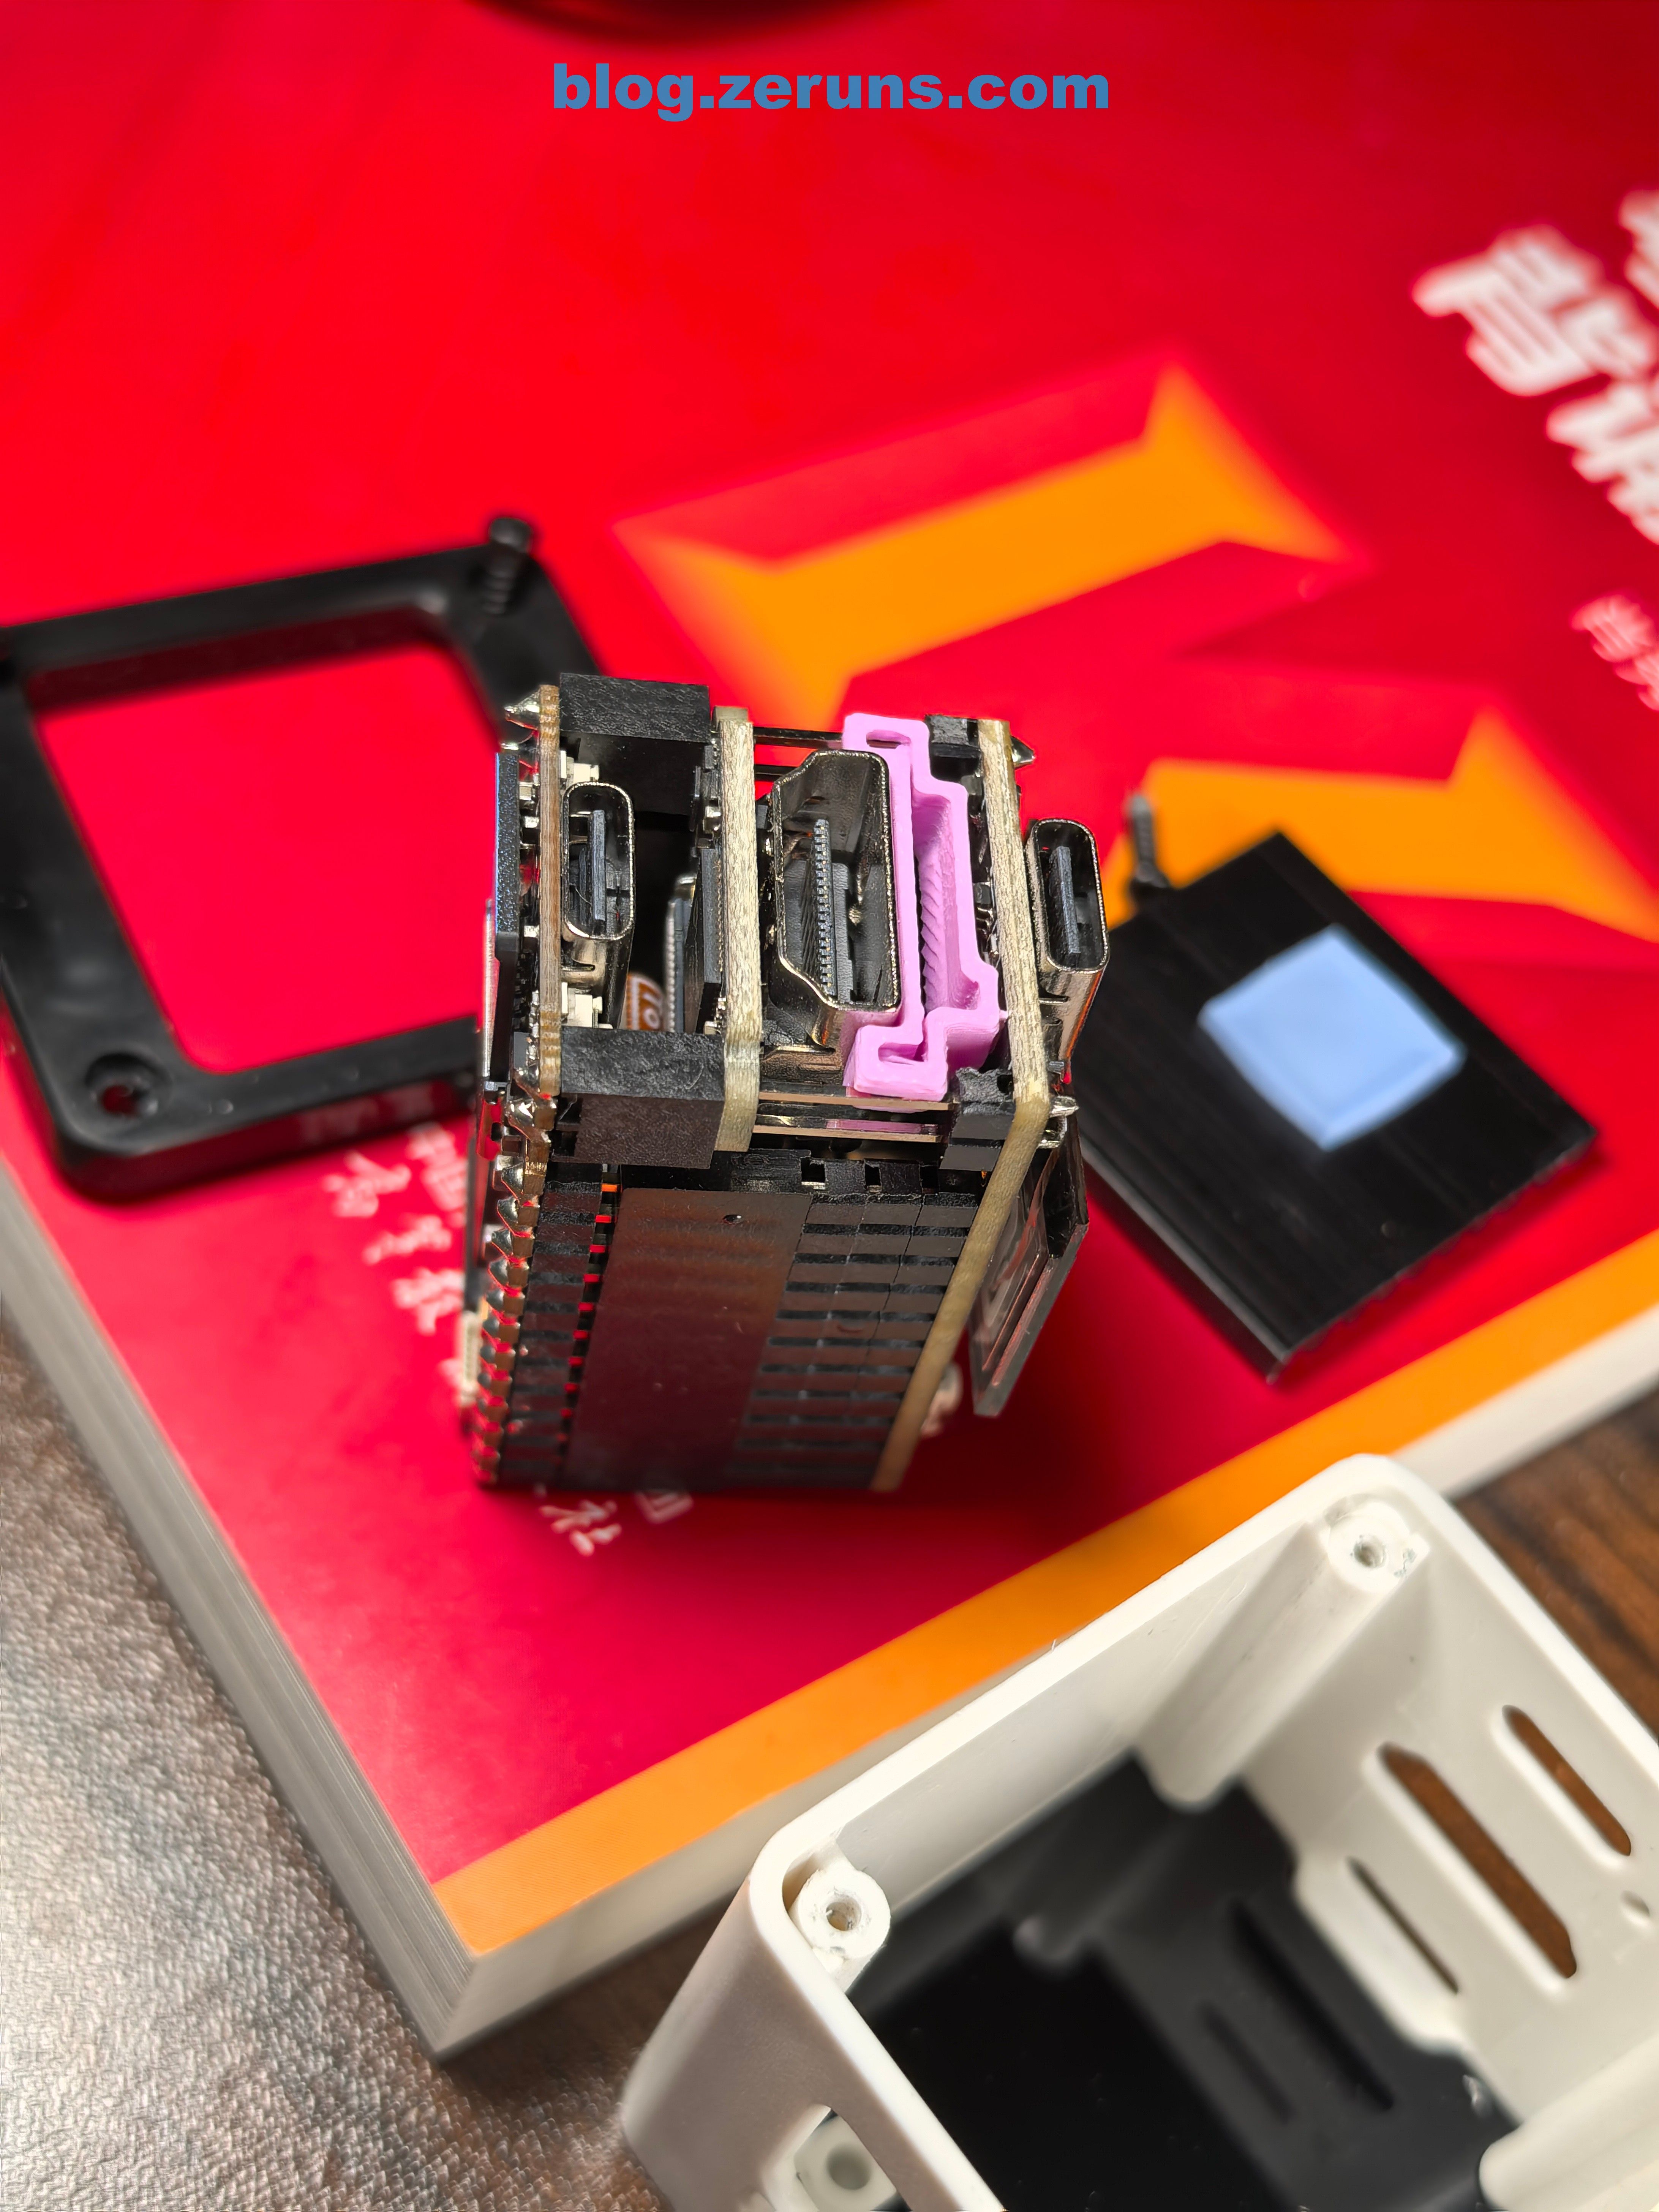
Disassembling the OLED and HDMI Interface Boards
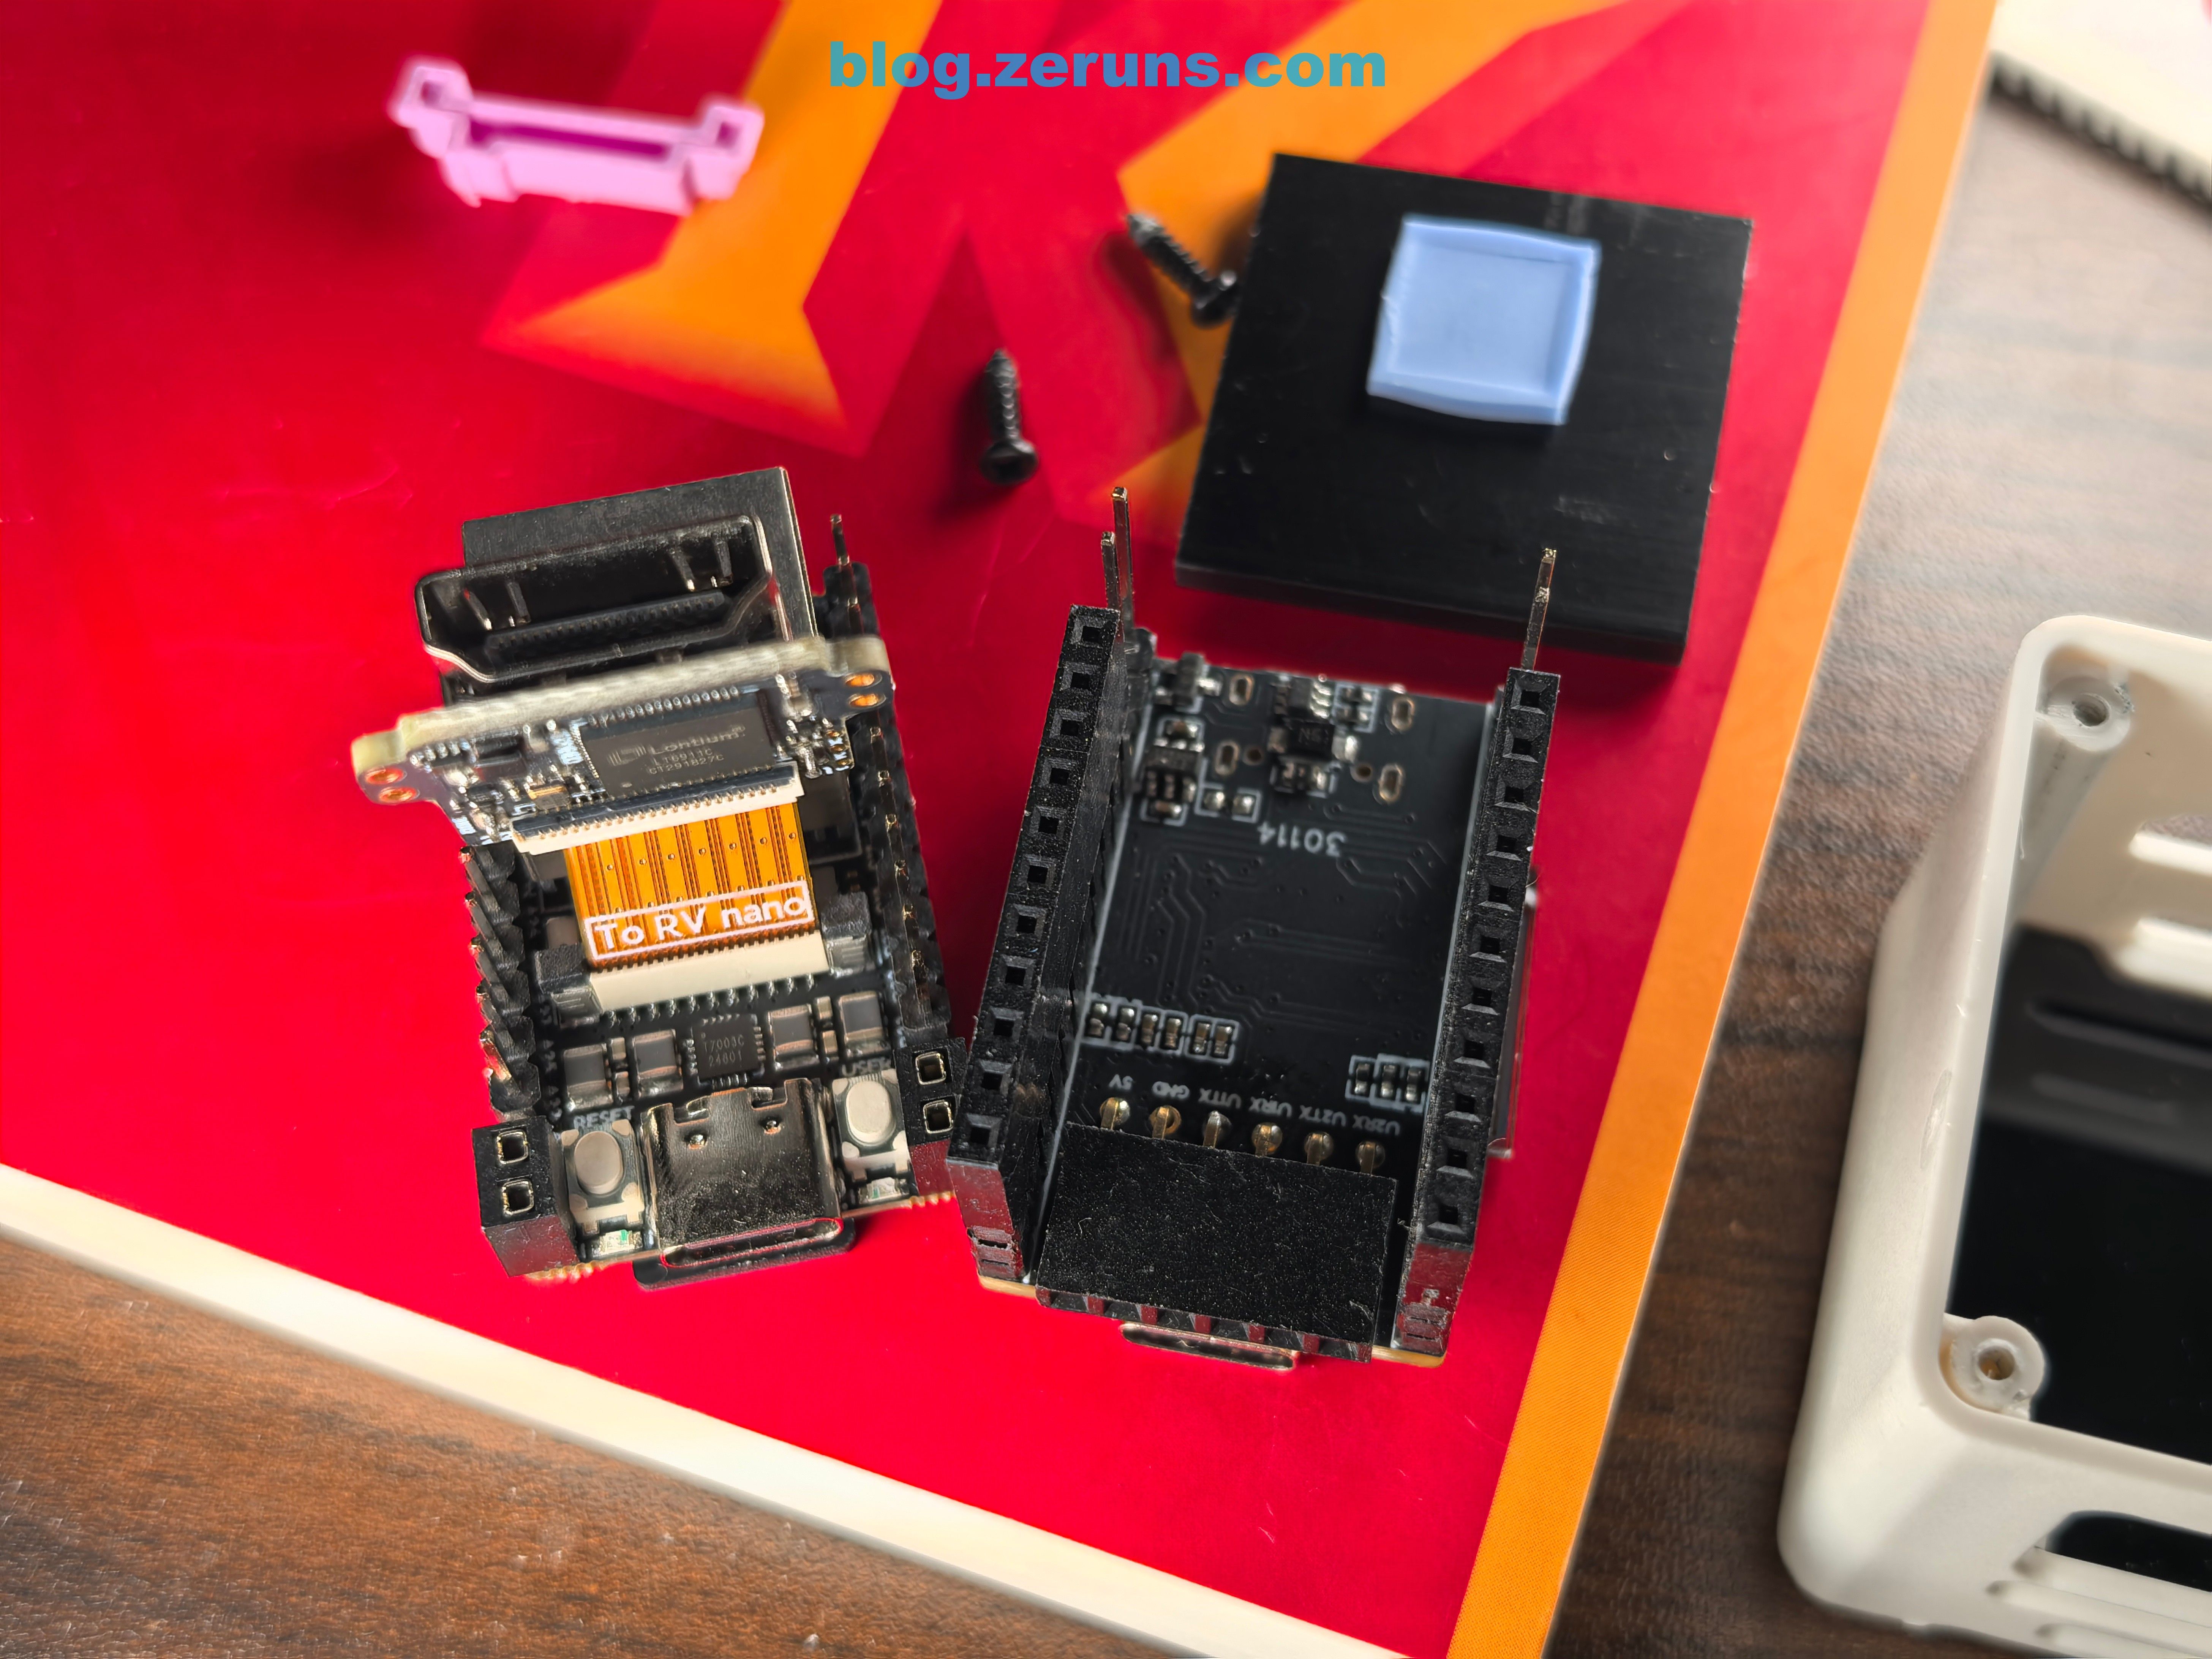
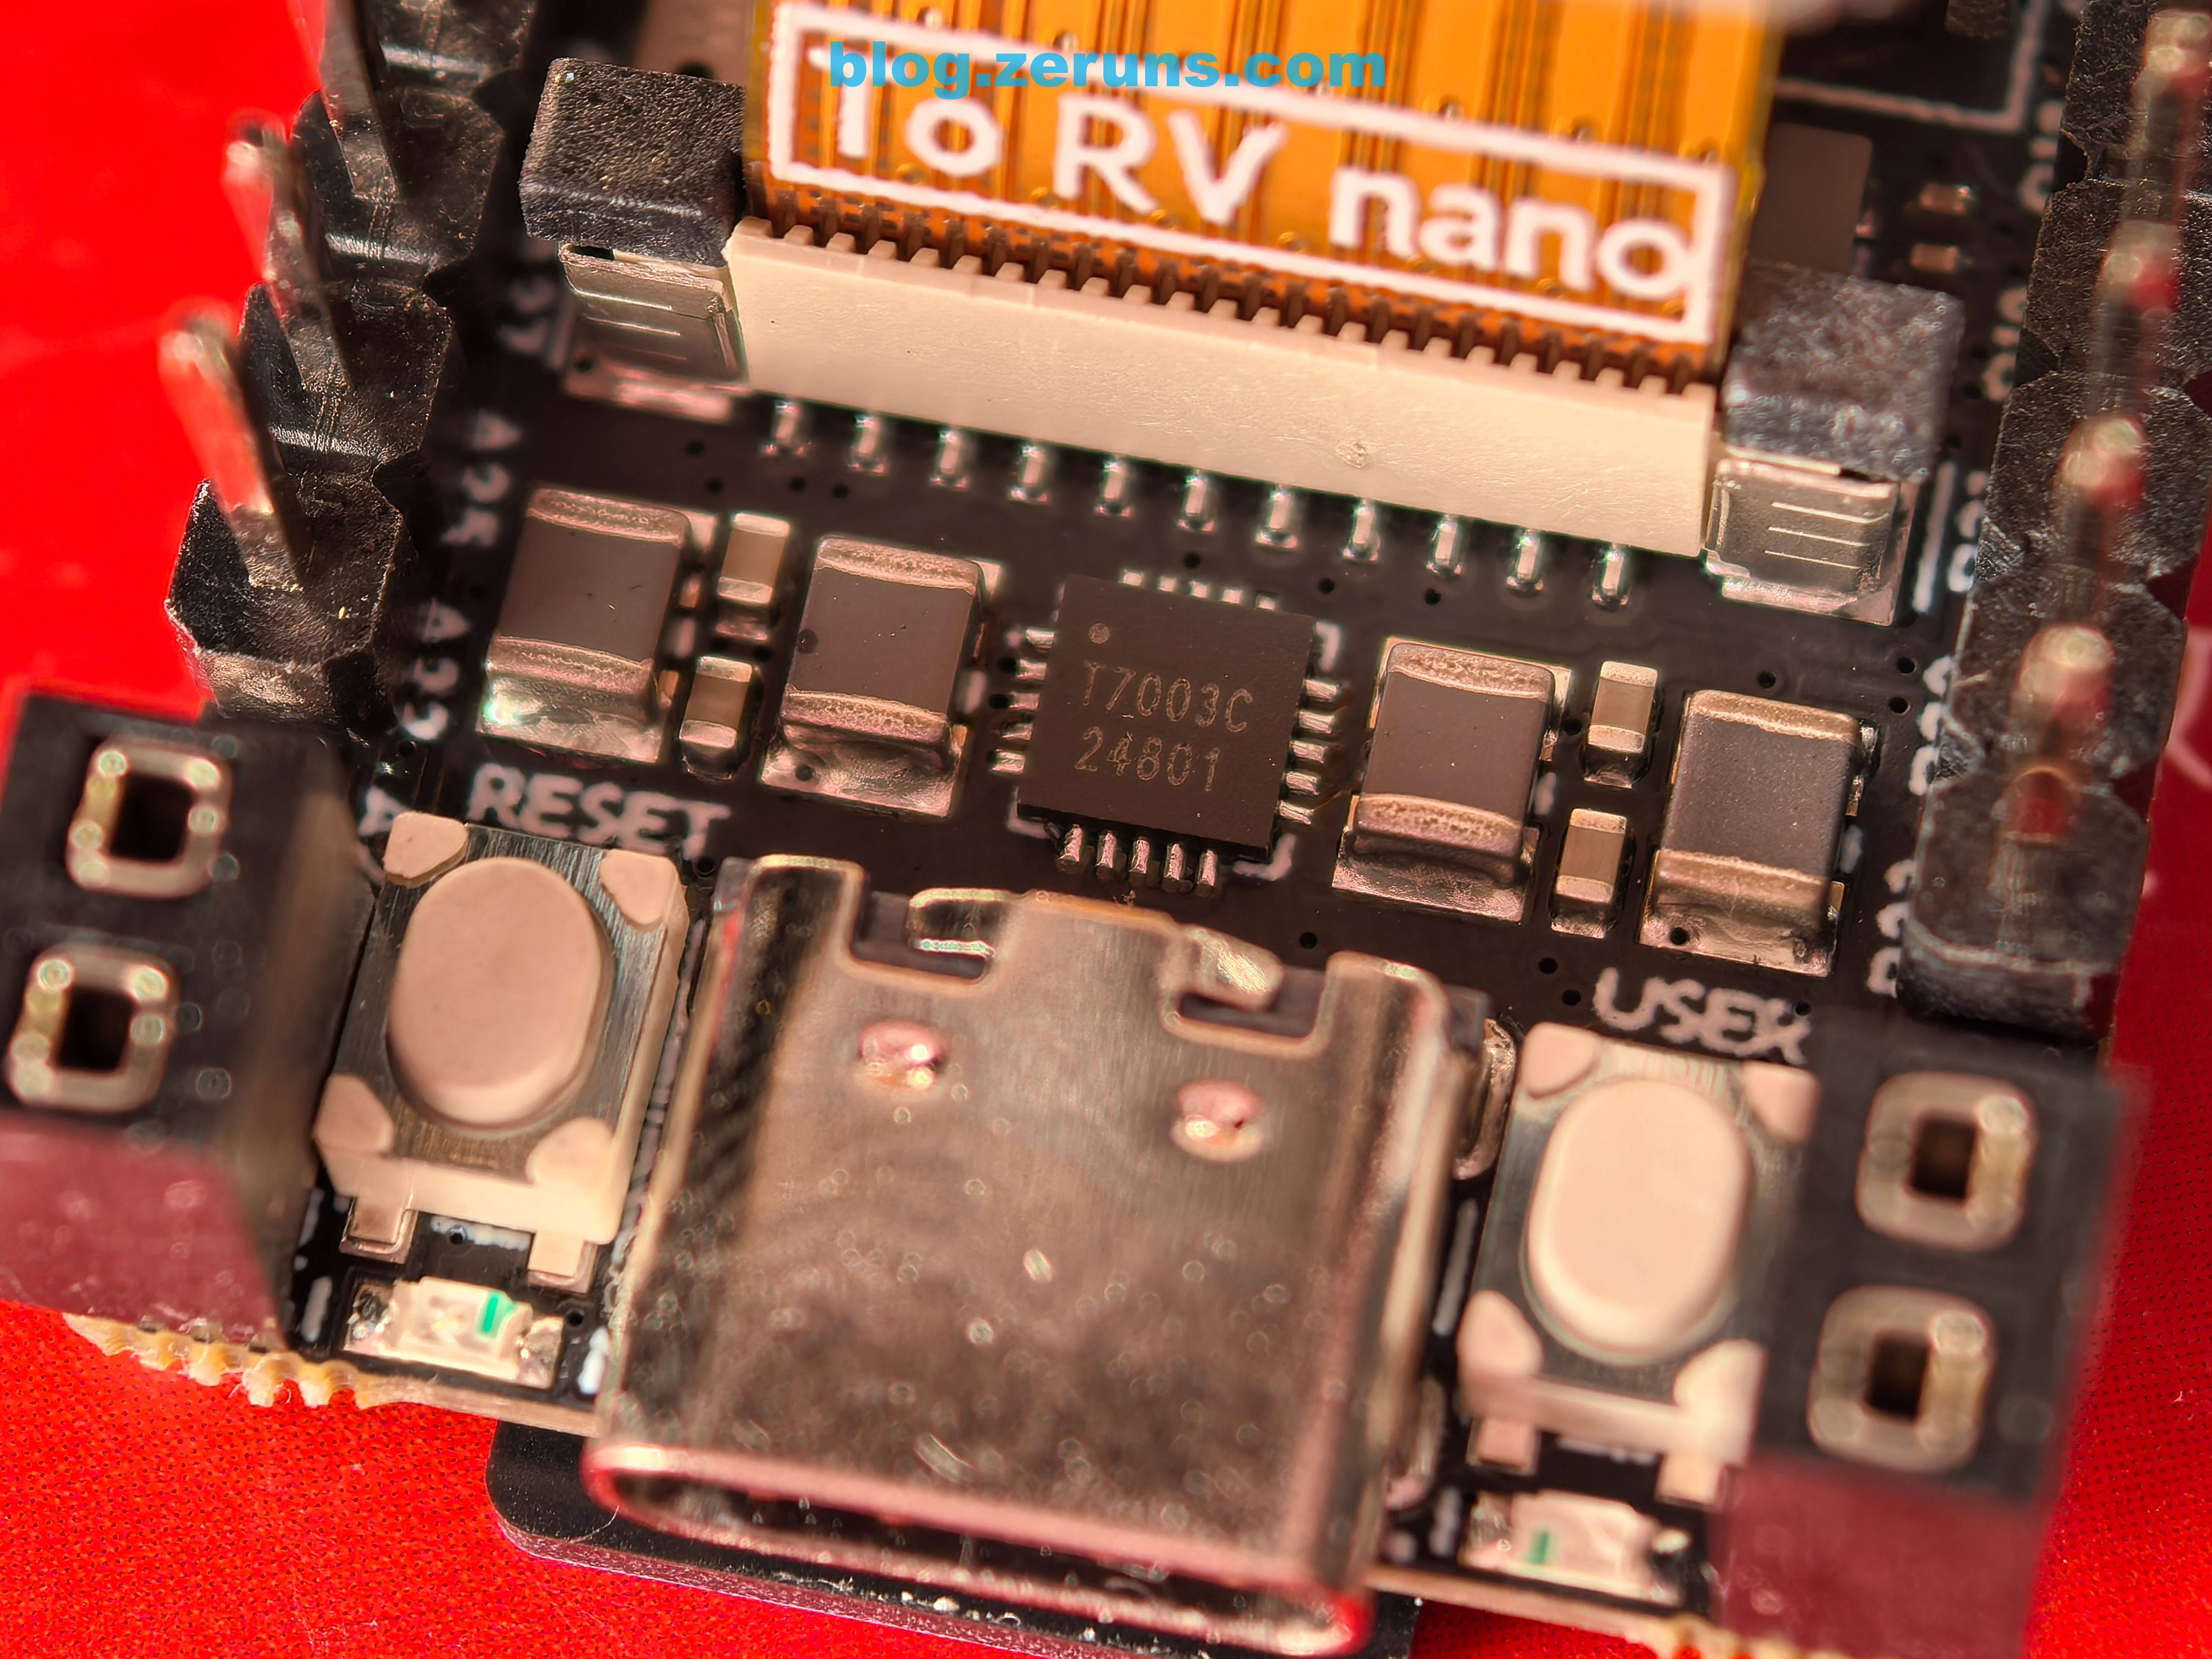
Underneath is a chip labeled T7003C, which is a power management chip with 3 channels, supporting 1.5A and operating at 1.5MHz DCDC buck PMU.
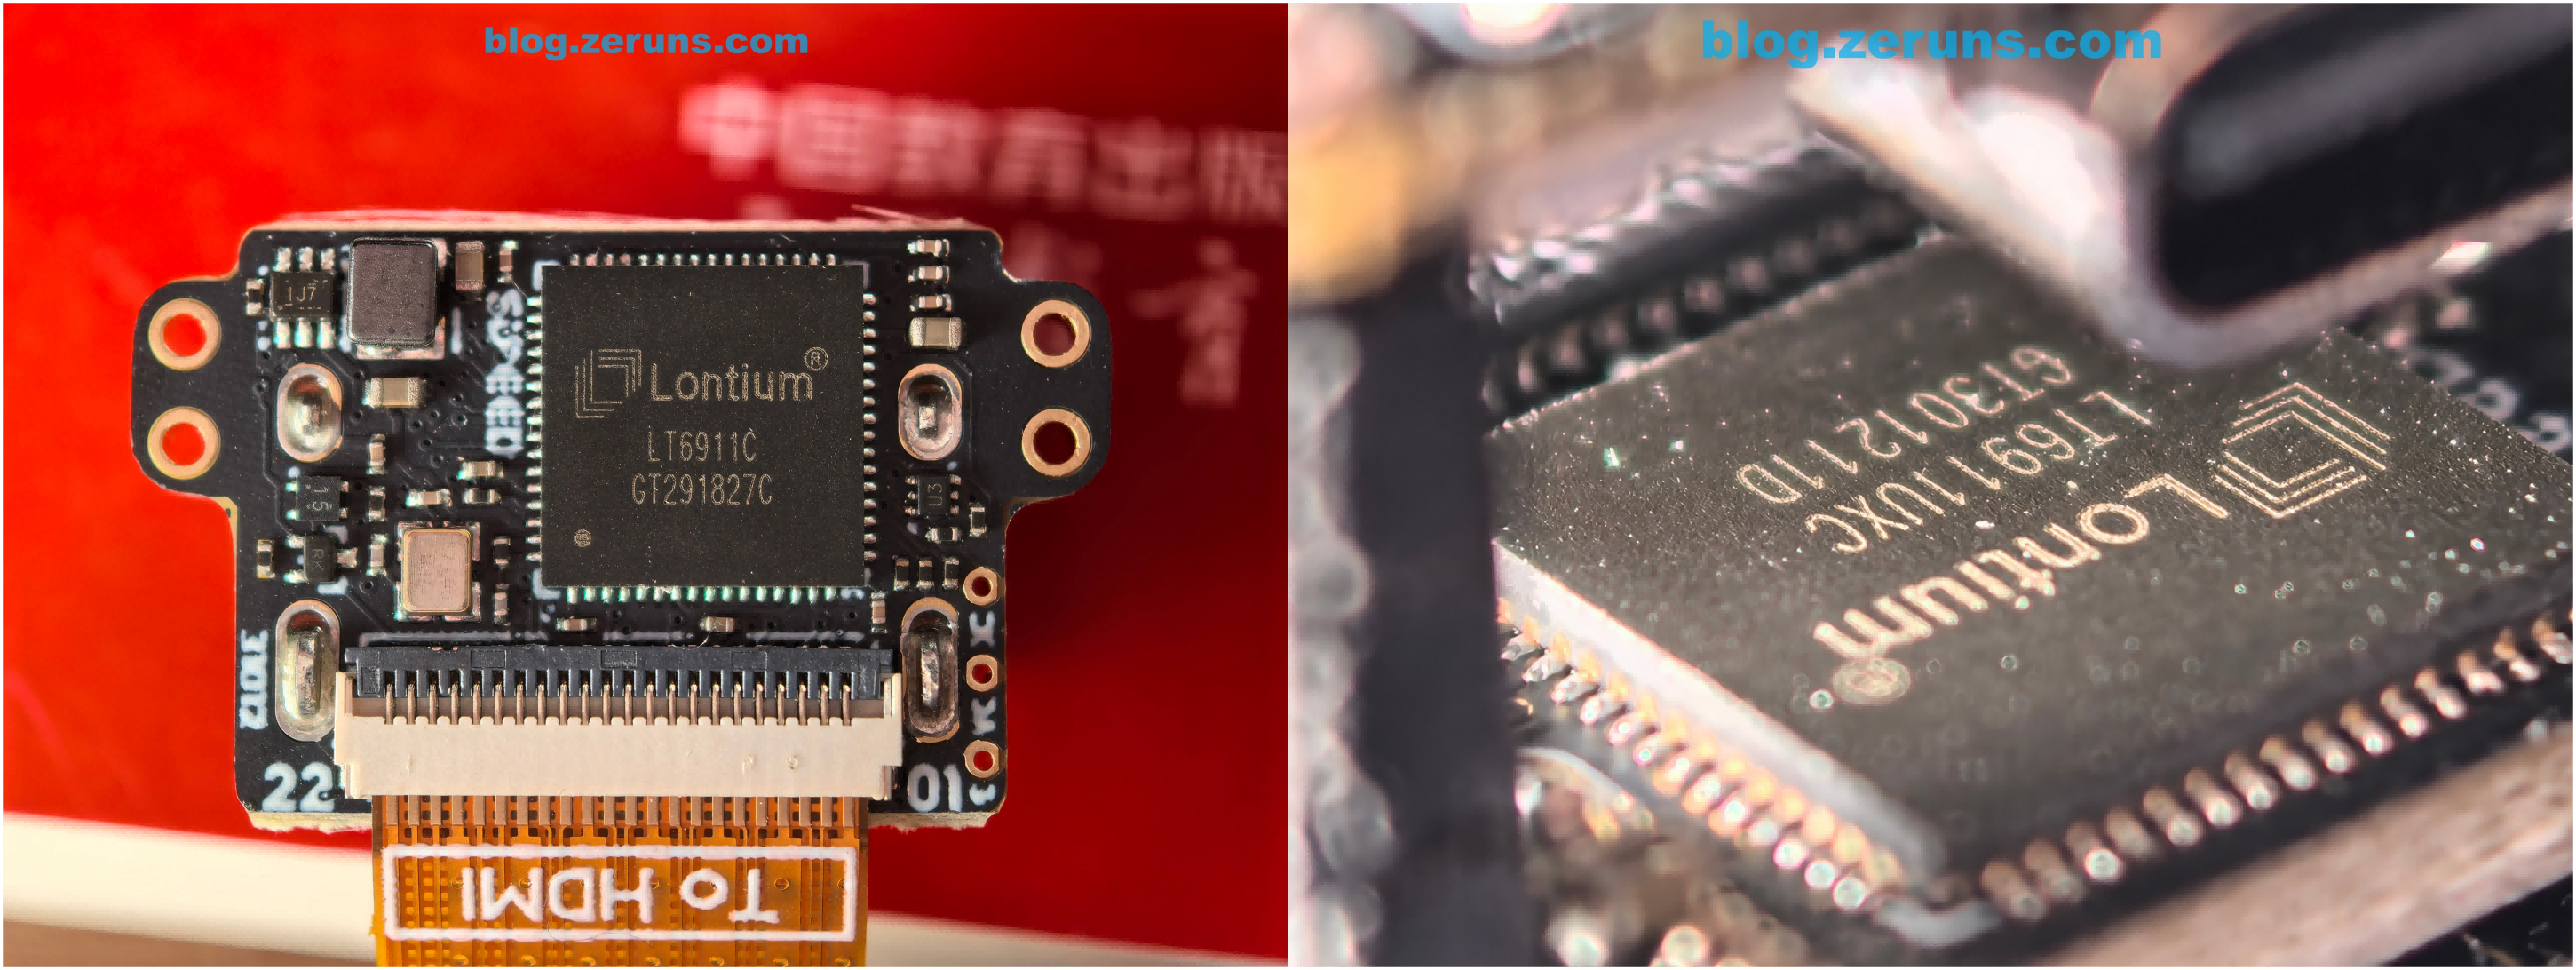
HDMI Interface Board Chip
The Full version uses the LT6911C chip, while the Lite version uses the LT6911UXC. Both are HDMI-to-MIPI/LVDS/CSI chips developed by Lontium Semiconductor.
- LT6911C supports HDMI 1.4.
- LT6911UXC supports HDMI 2.0 and can handle 4K@60Hz HDMI 2.0 signals.
Both chips have comprehensive audio processing capabilities and flexible control interfaces. However, the bottleneck for video performance lies with the SG2002 processor. In actual use, 1080p performance is fairly smooth.
Power Consumption Test
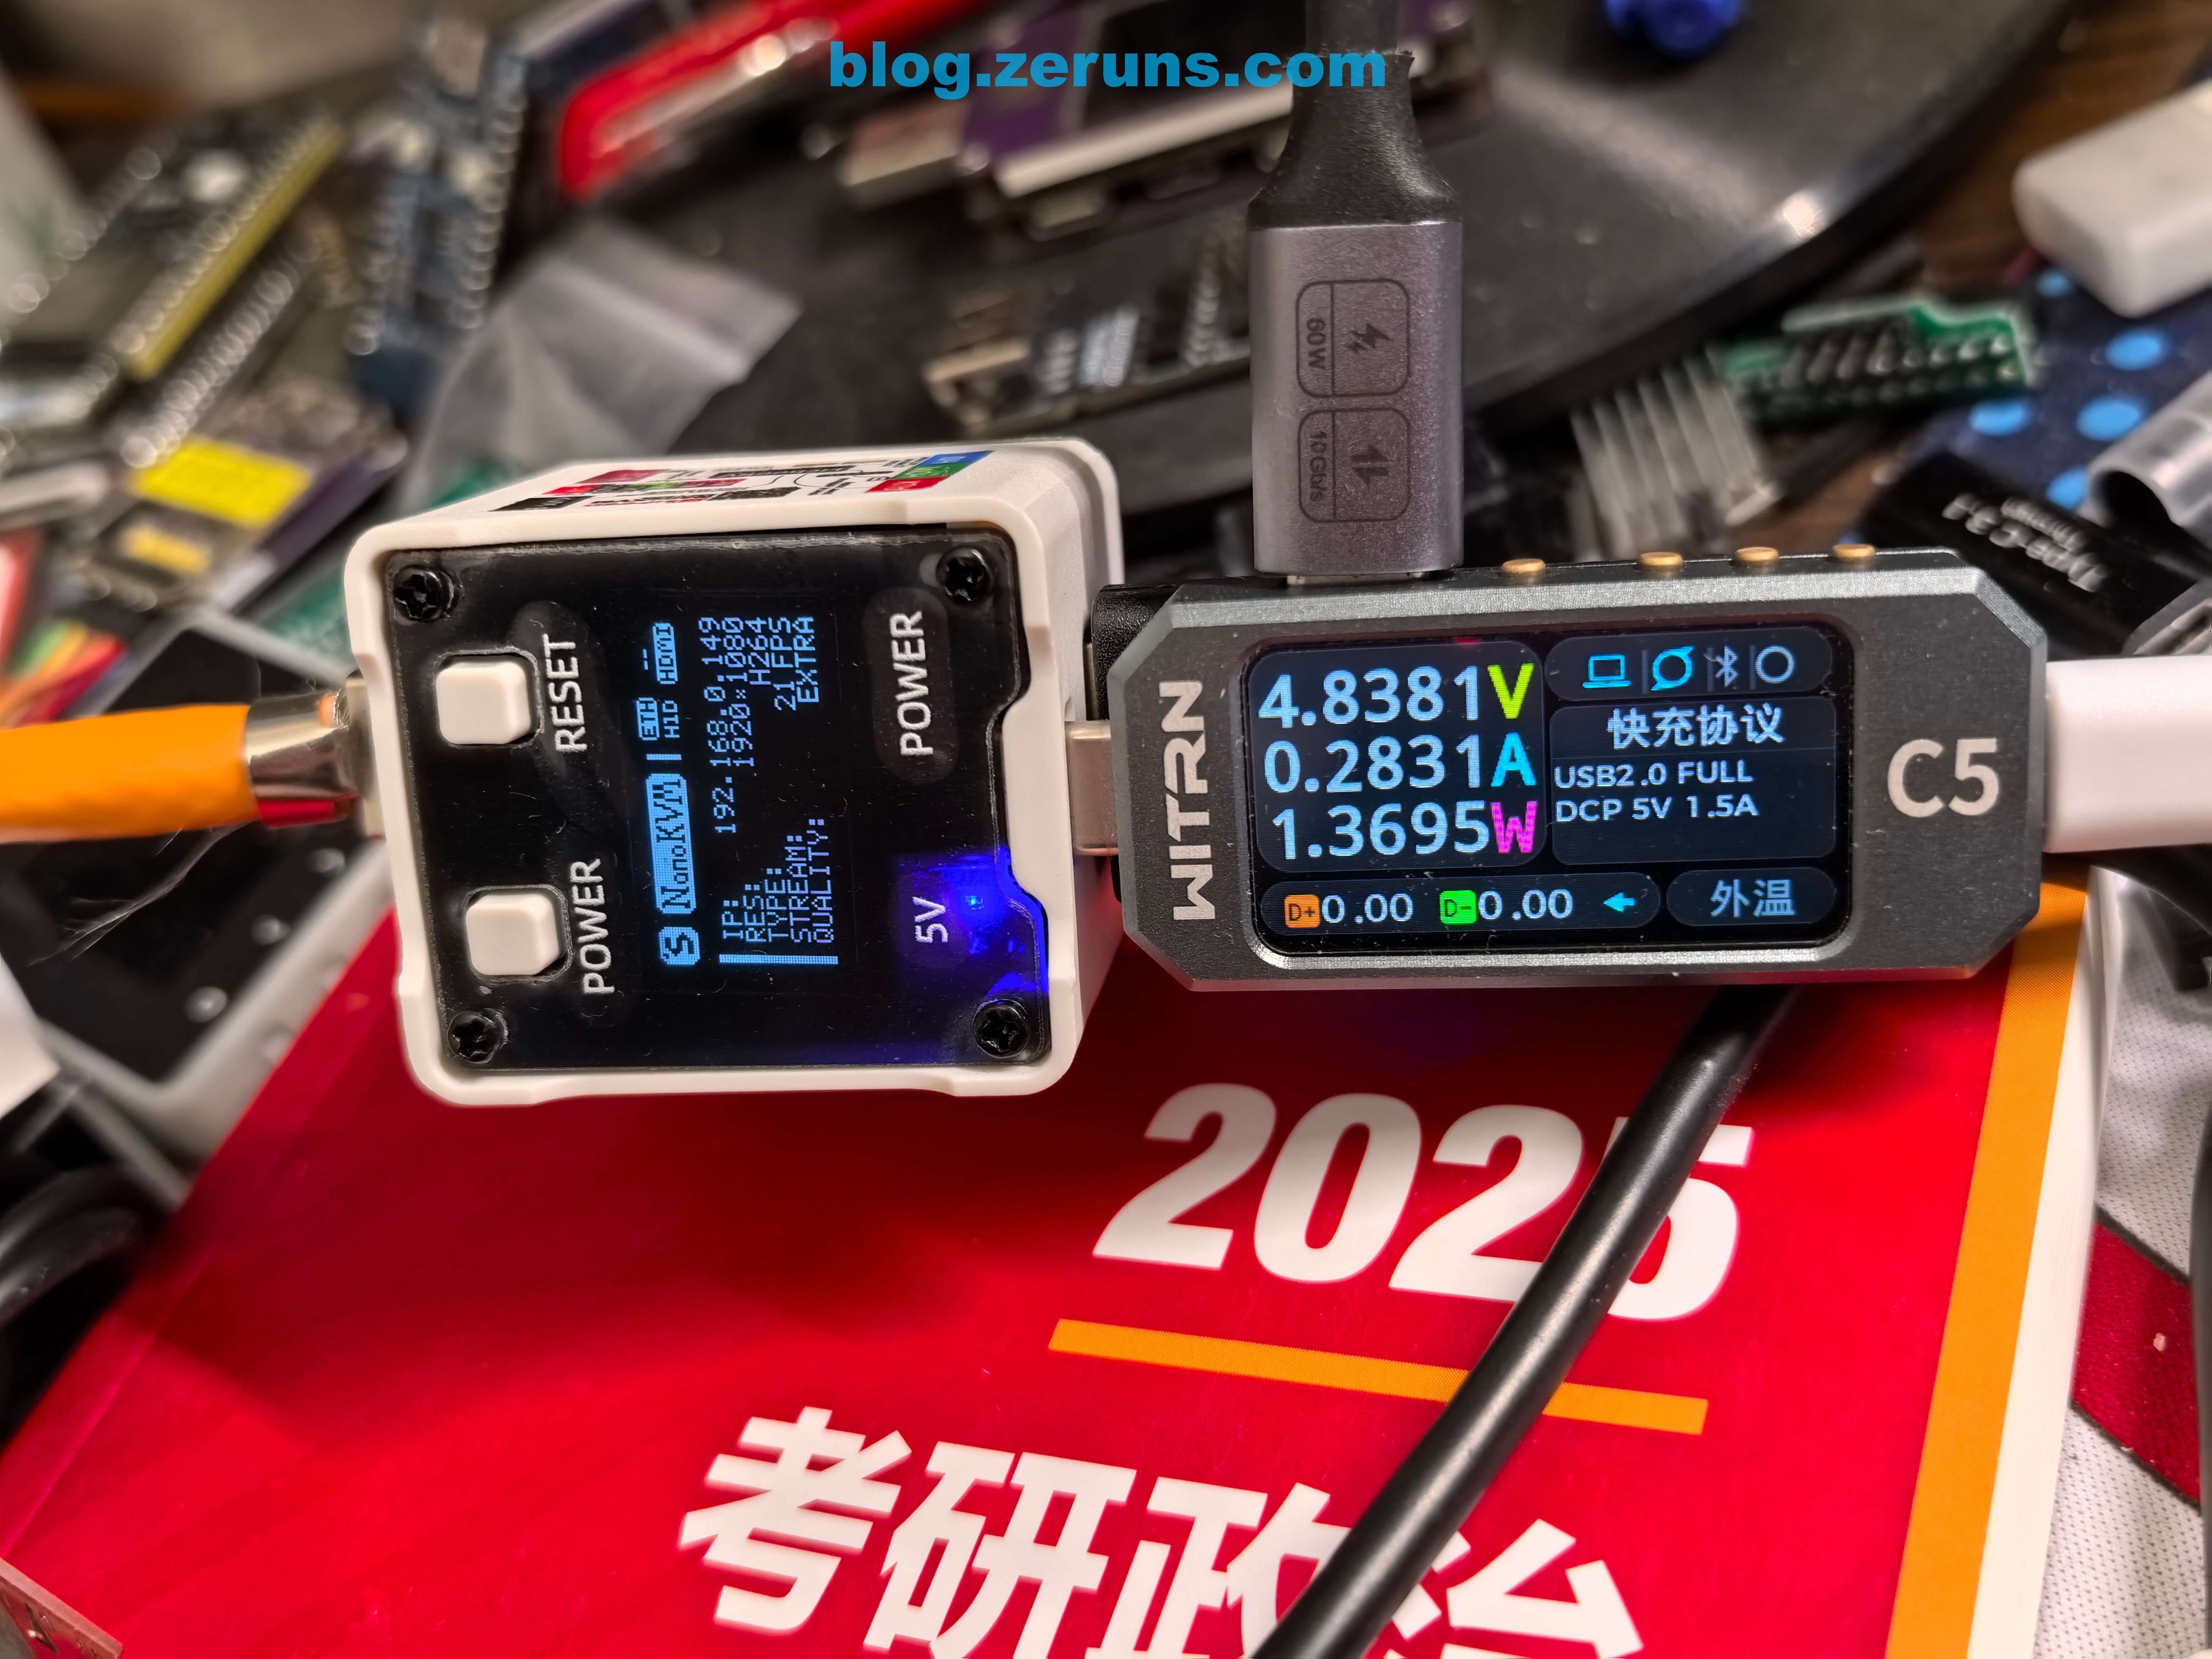
- Idle Consumption: The Full version consumes approximately 0.7W when only connected via Ethernet.
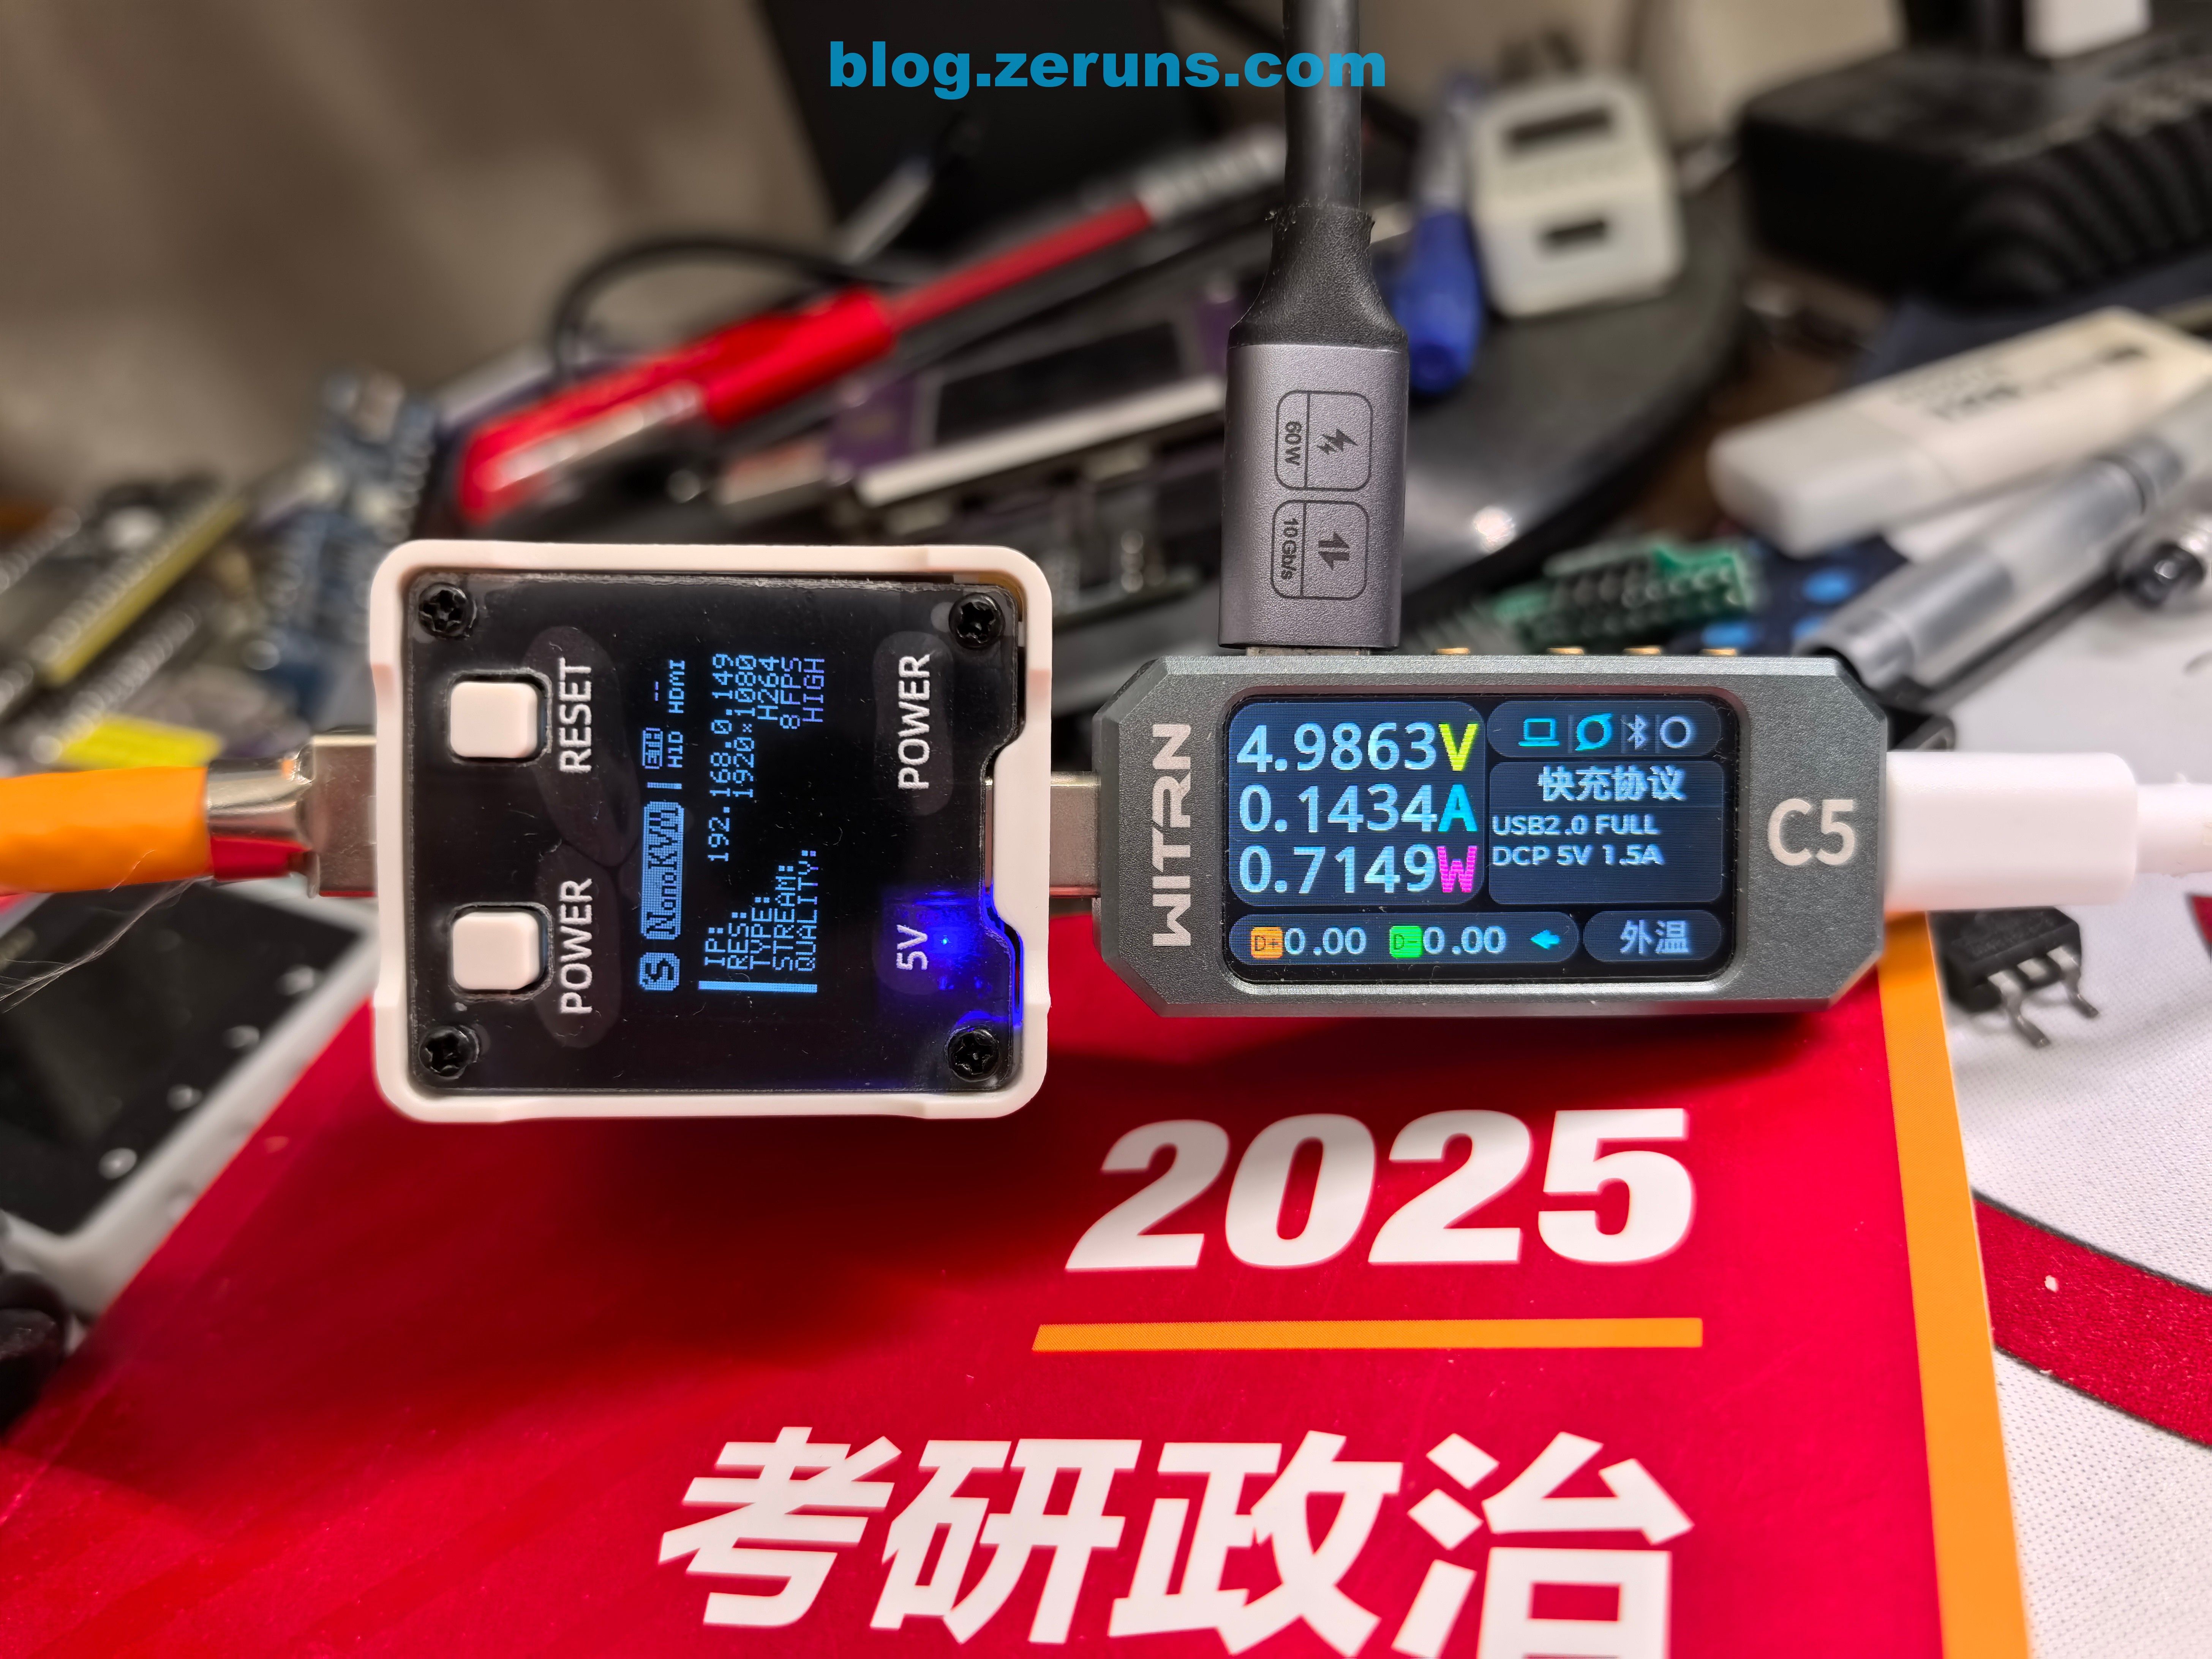
- Operational Consumption: With both Ethernet and HDMI connected, the working power consumption is around 1.3W.
Thermal Imaging
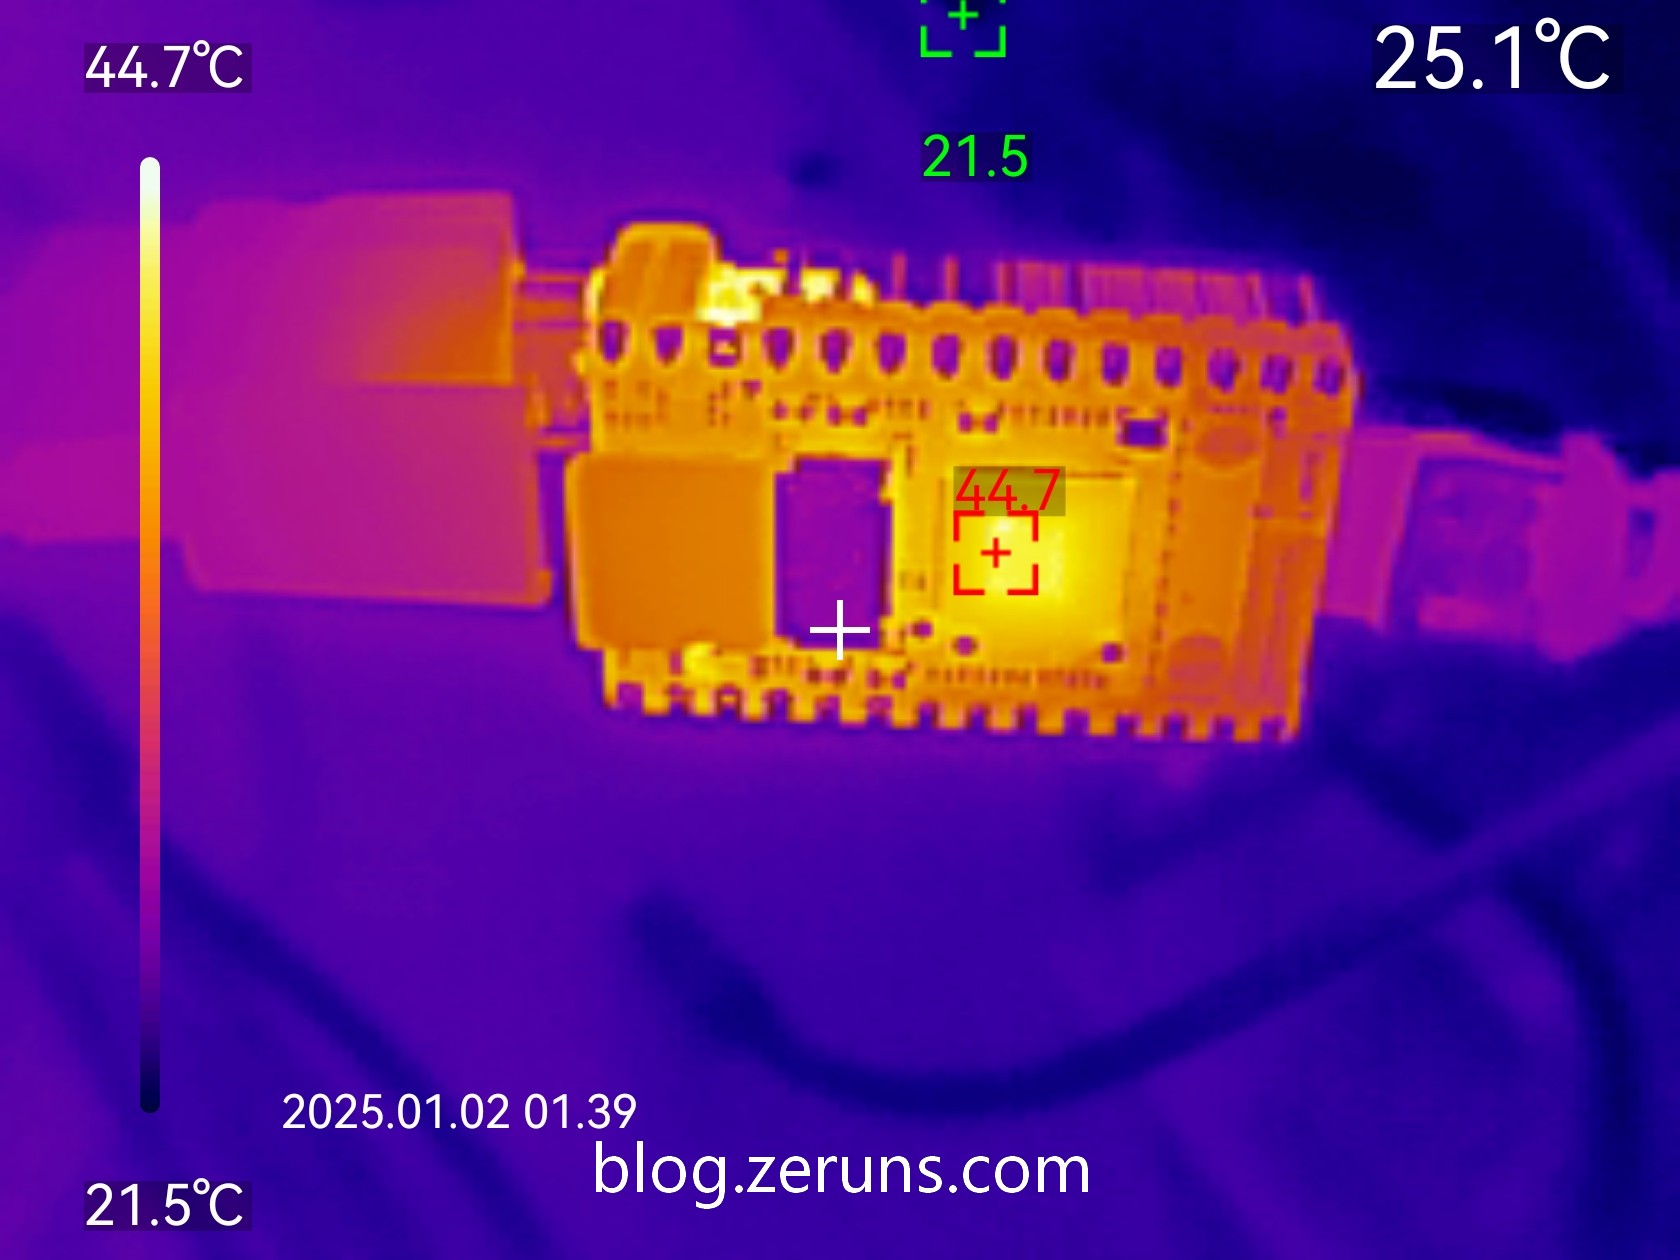
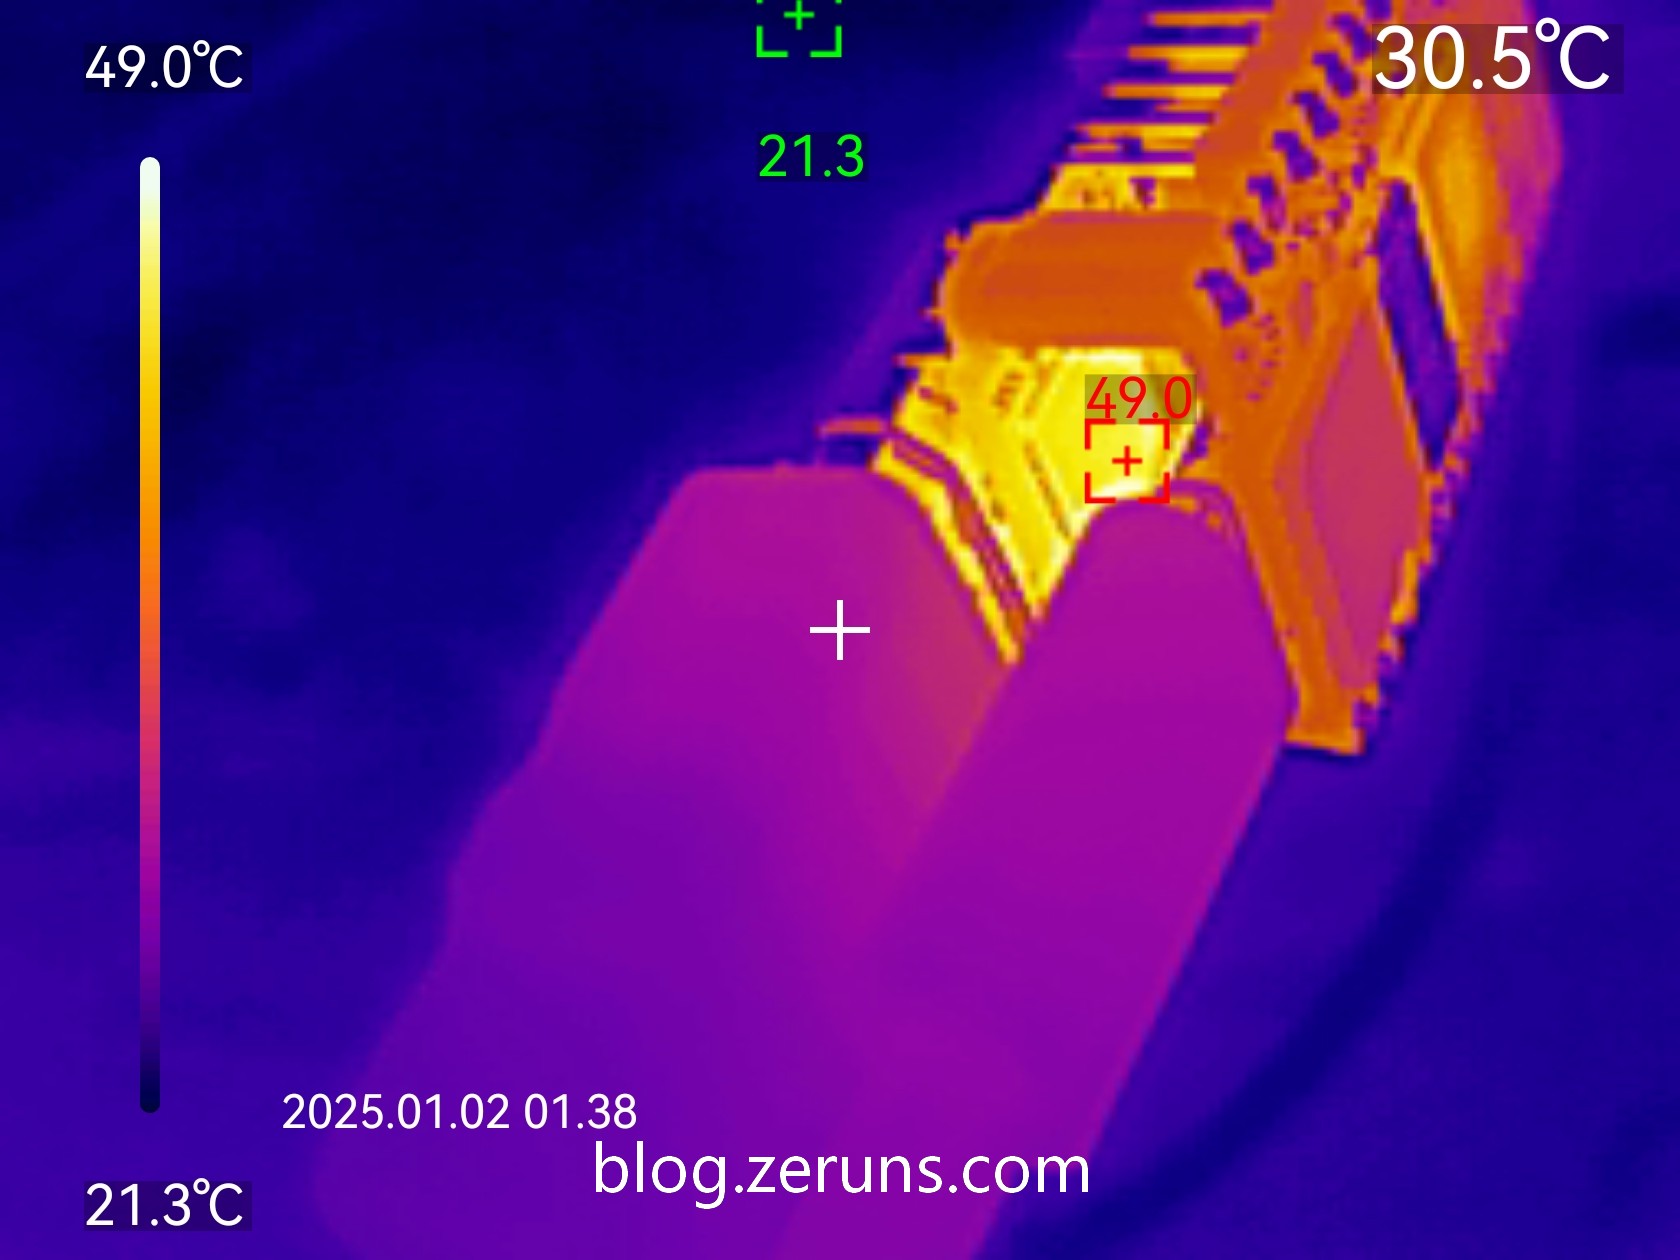
Thermal imaging of the NanoKVM Lite version after operating for some time with Ethernet and HDMI connected. The ambient temperature was around 21°C.
- Processor Temperature: 44.7°C
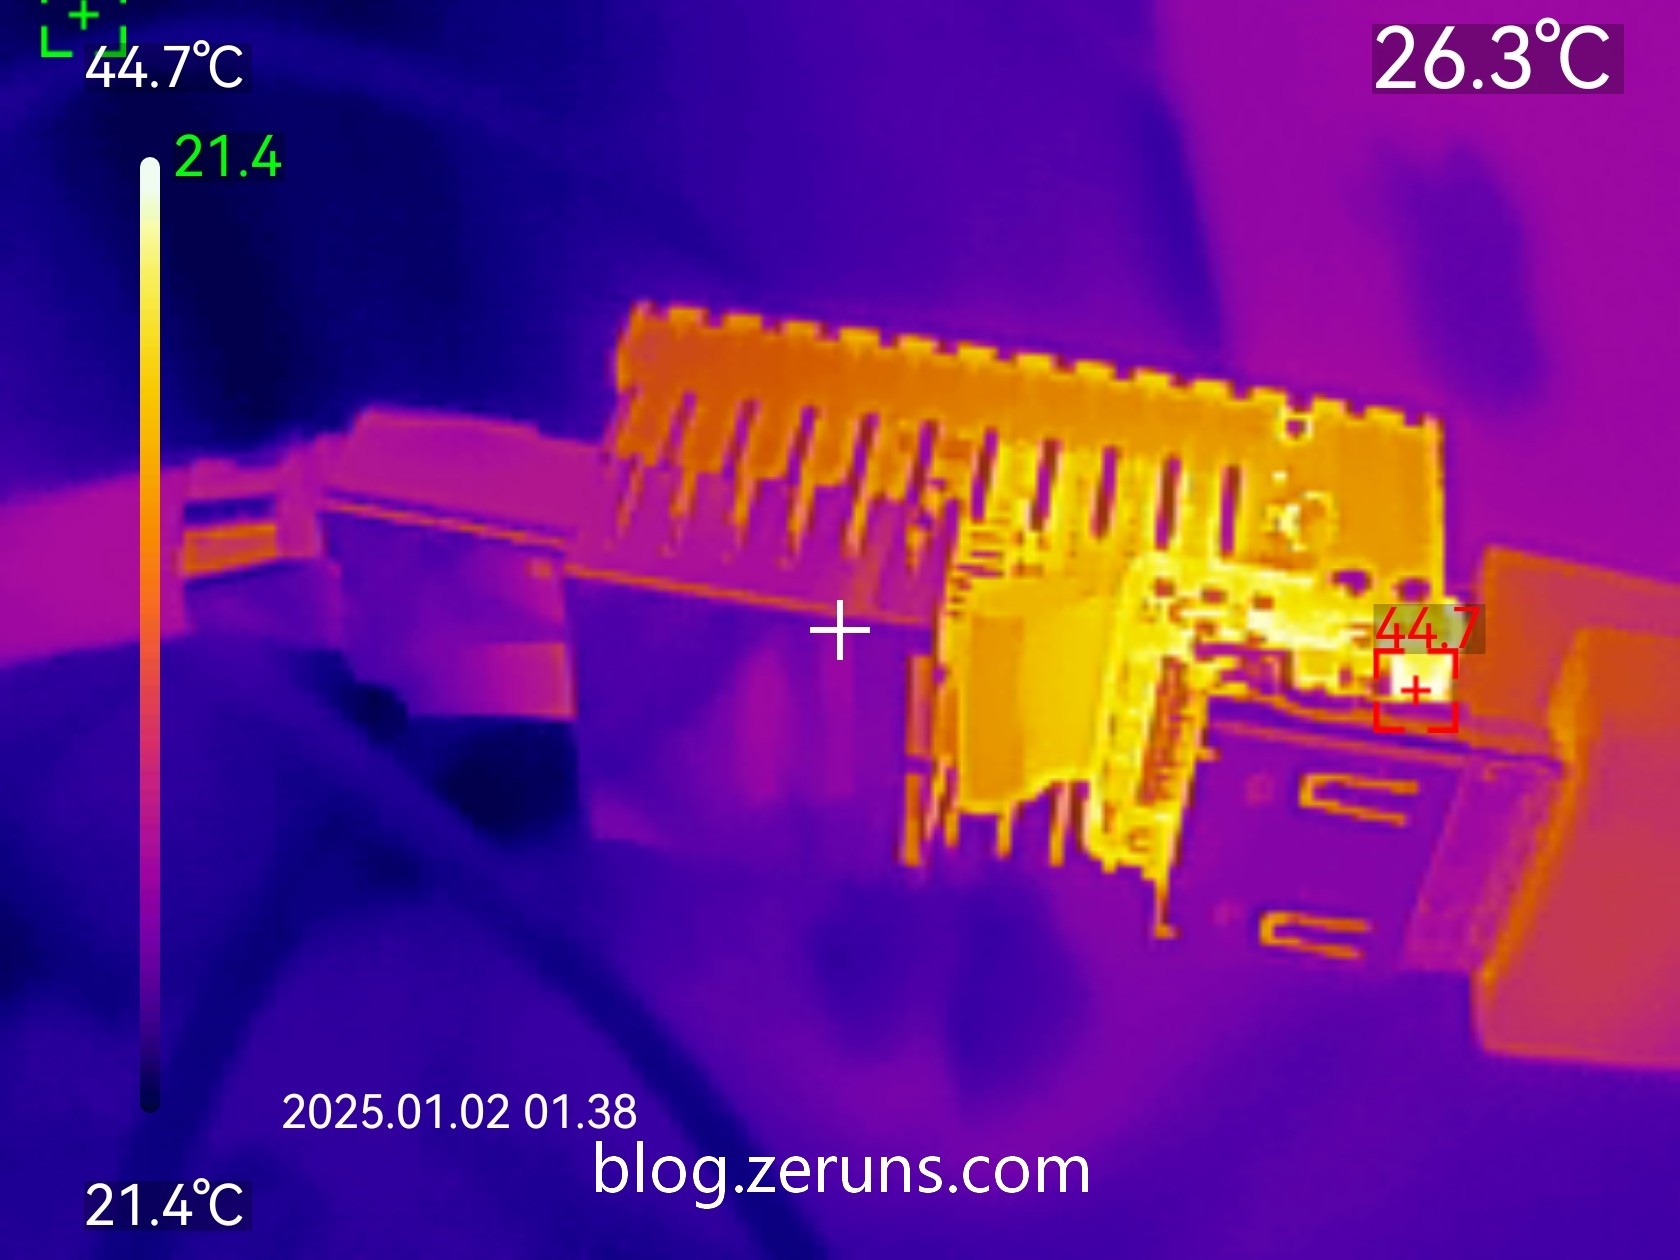
- HDMI Video Conversion Chip Temperature: 49°C
Power-On Test
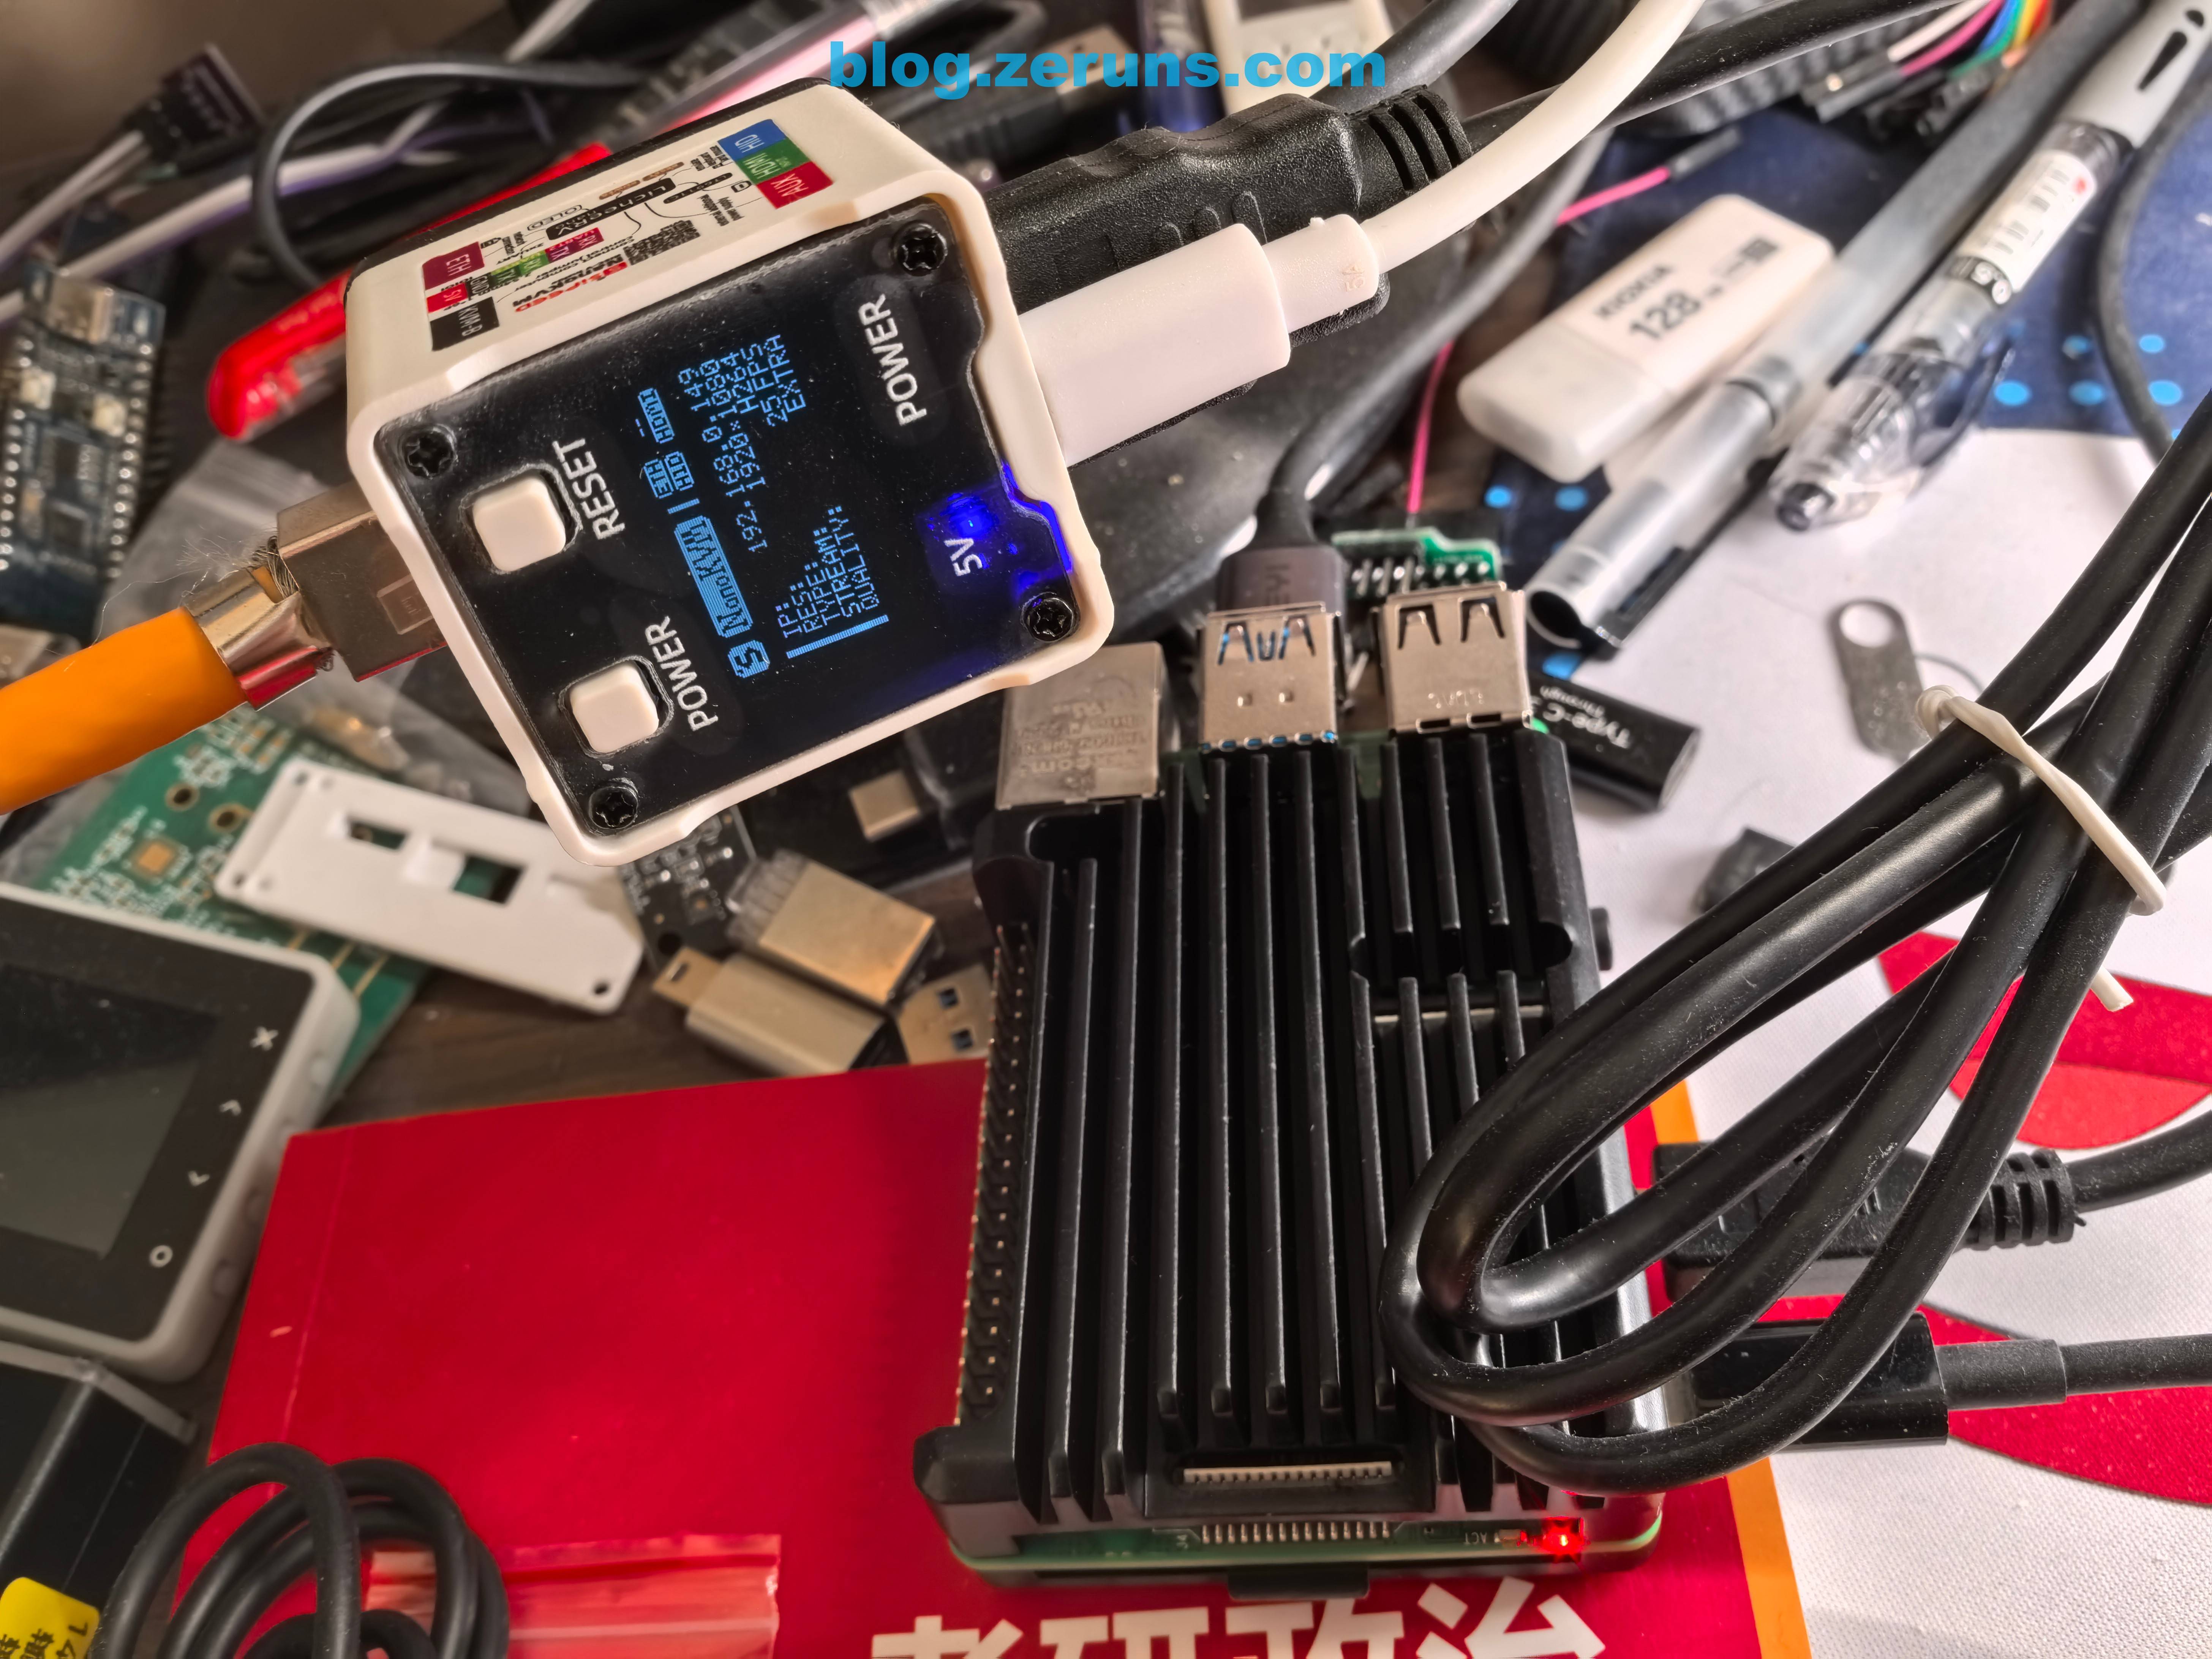
Connect the Ethernet cable, USB, and HDMI, then link the NanoKVM to a Raspberry Pi. Power it on, and once the NanoKVM boots up, the screen will display the IP address. Enter this IP in your browser’s address bar to access the management interface. For the Lite version without a screen, you’ll need to check the IP address in your router's management page.
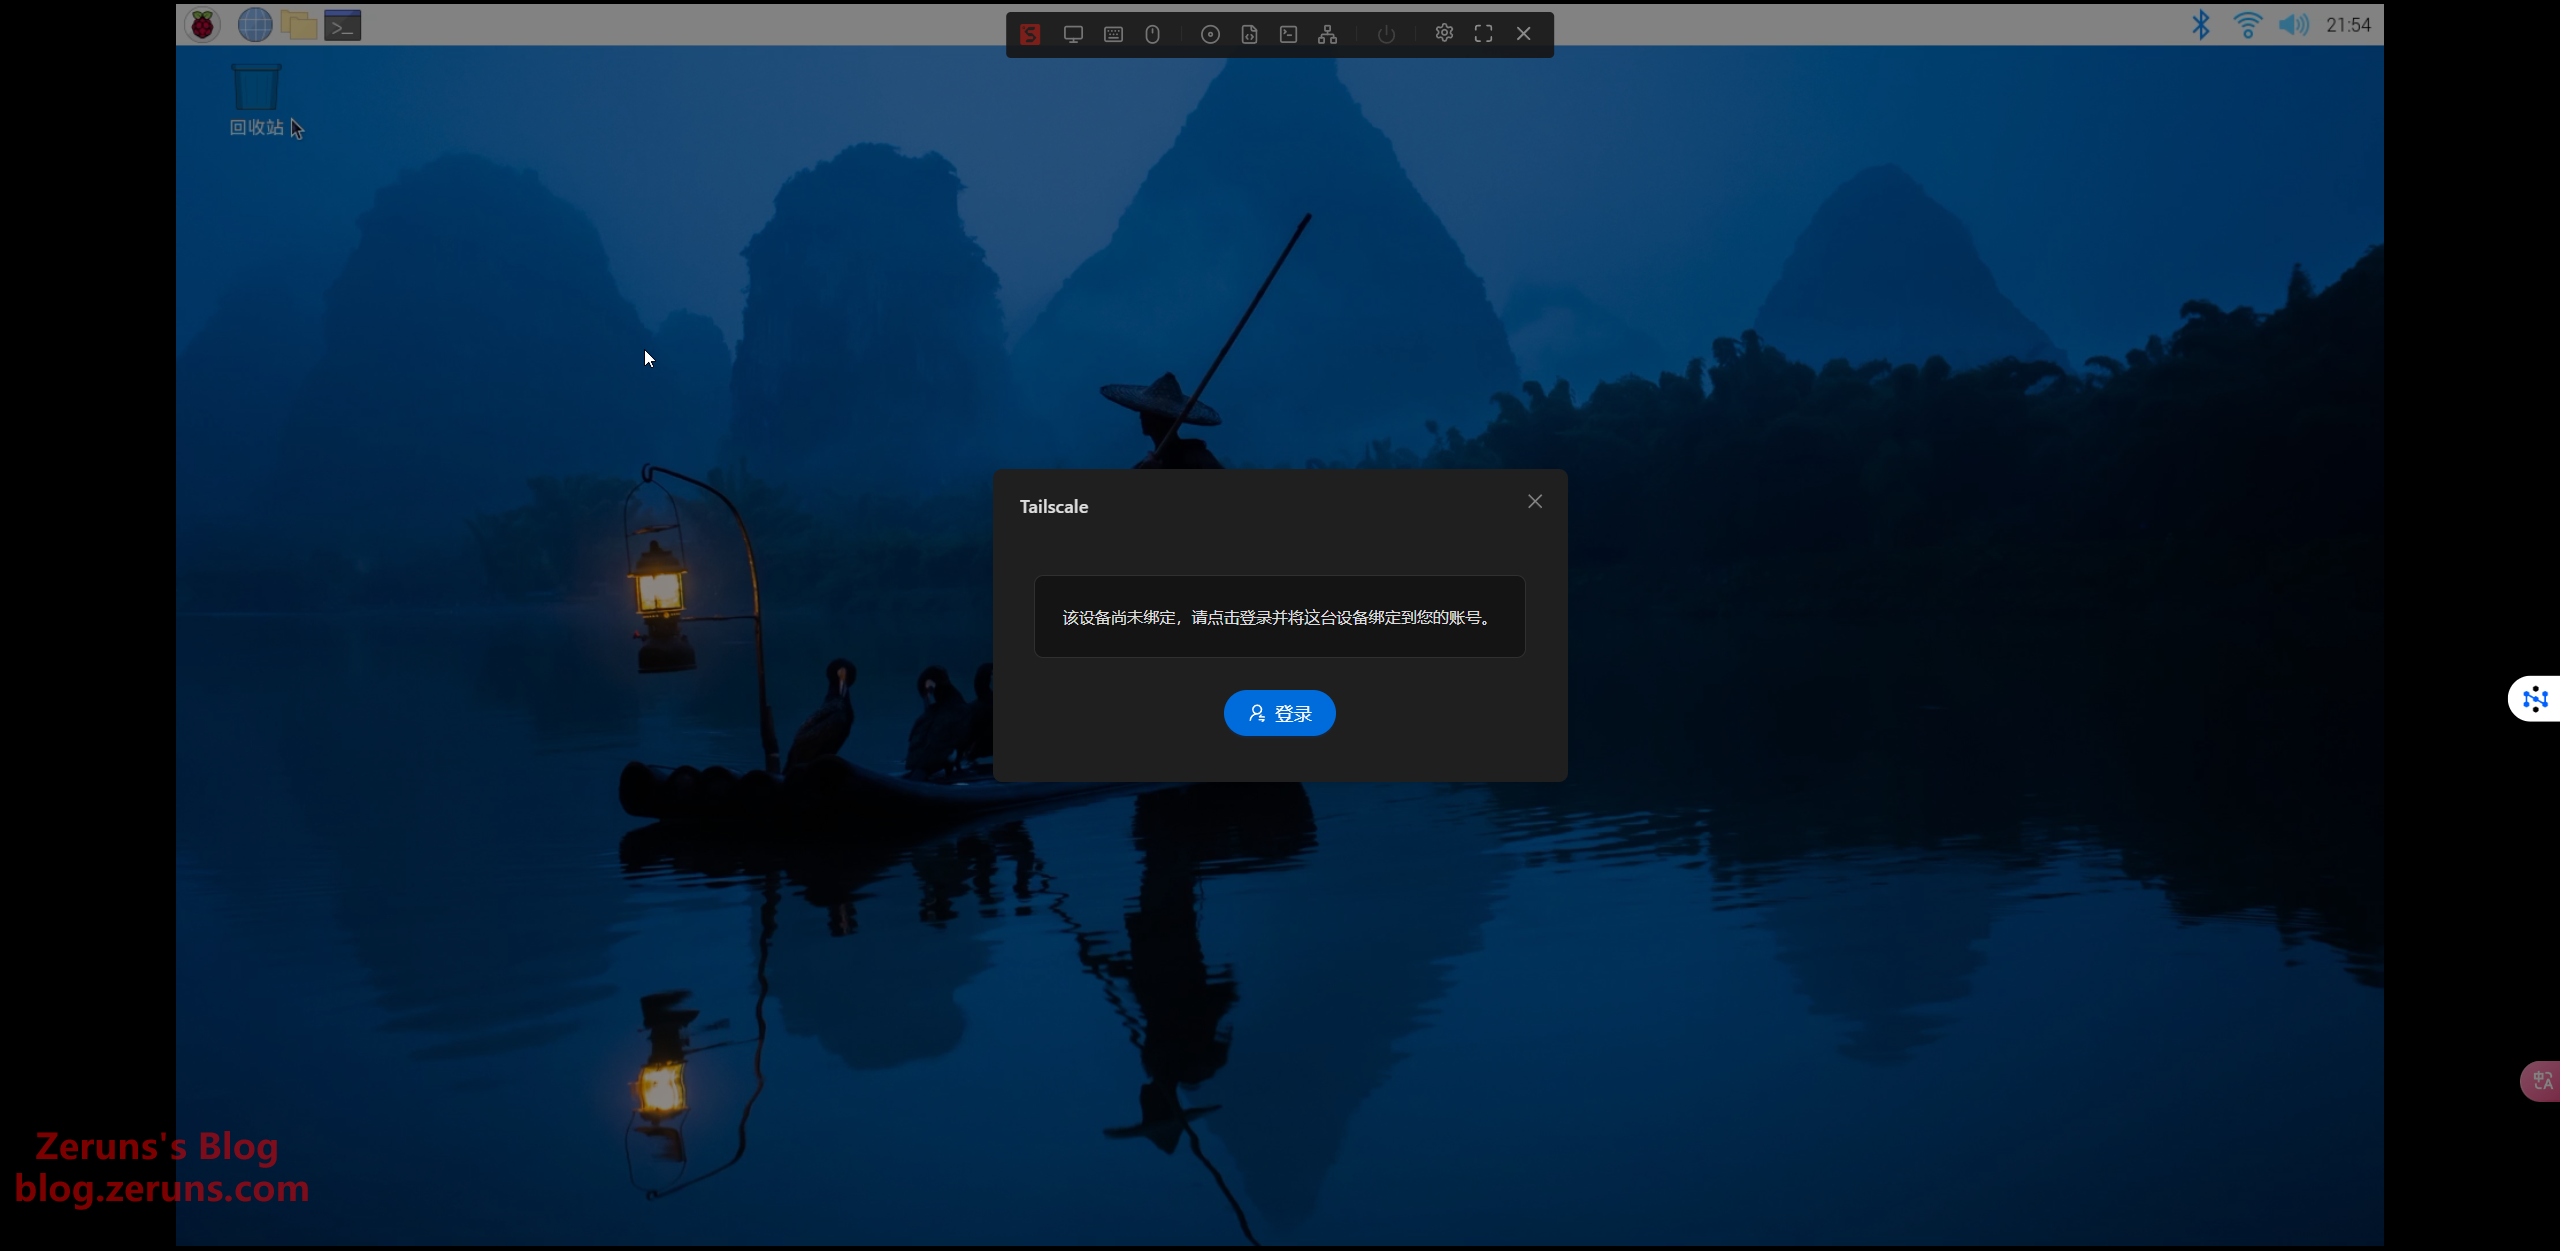
NanoKVM supports Tailscale, enabling remote access and control even without a public IP address.
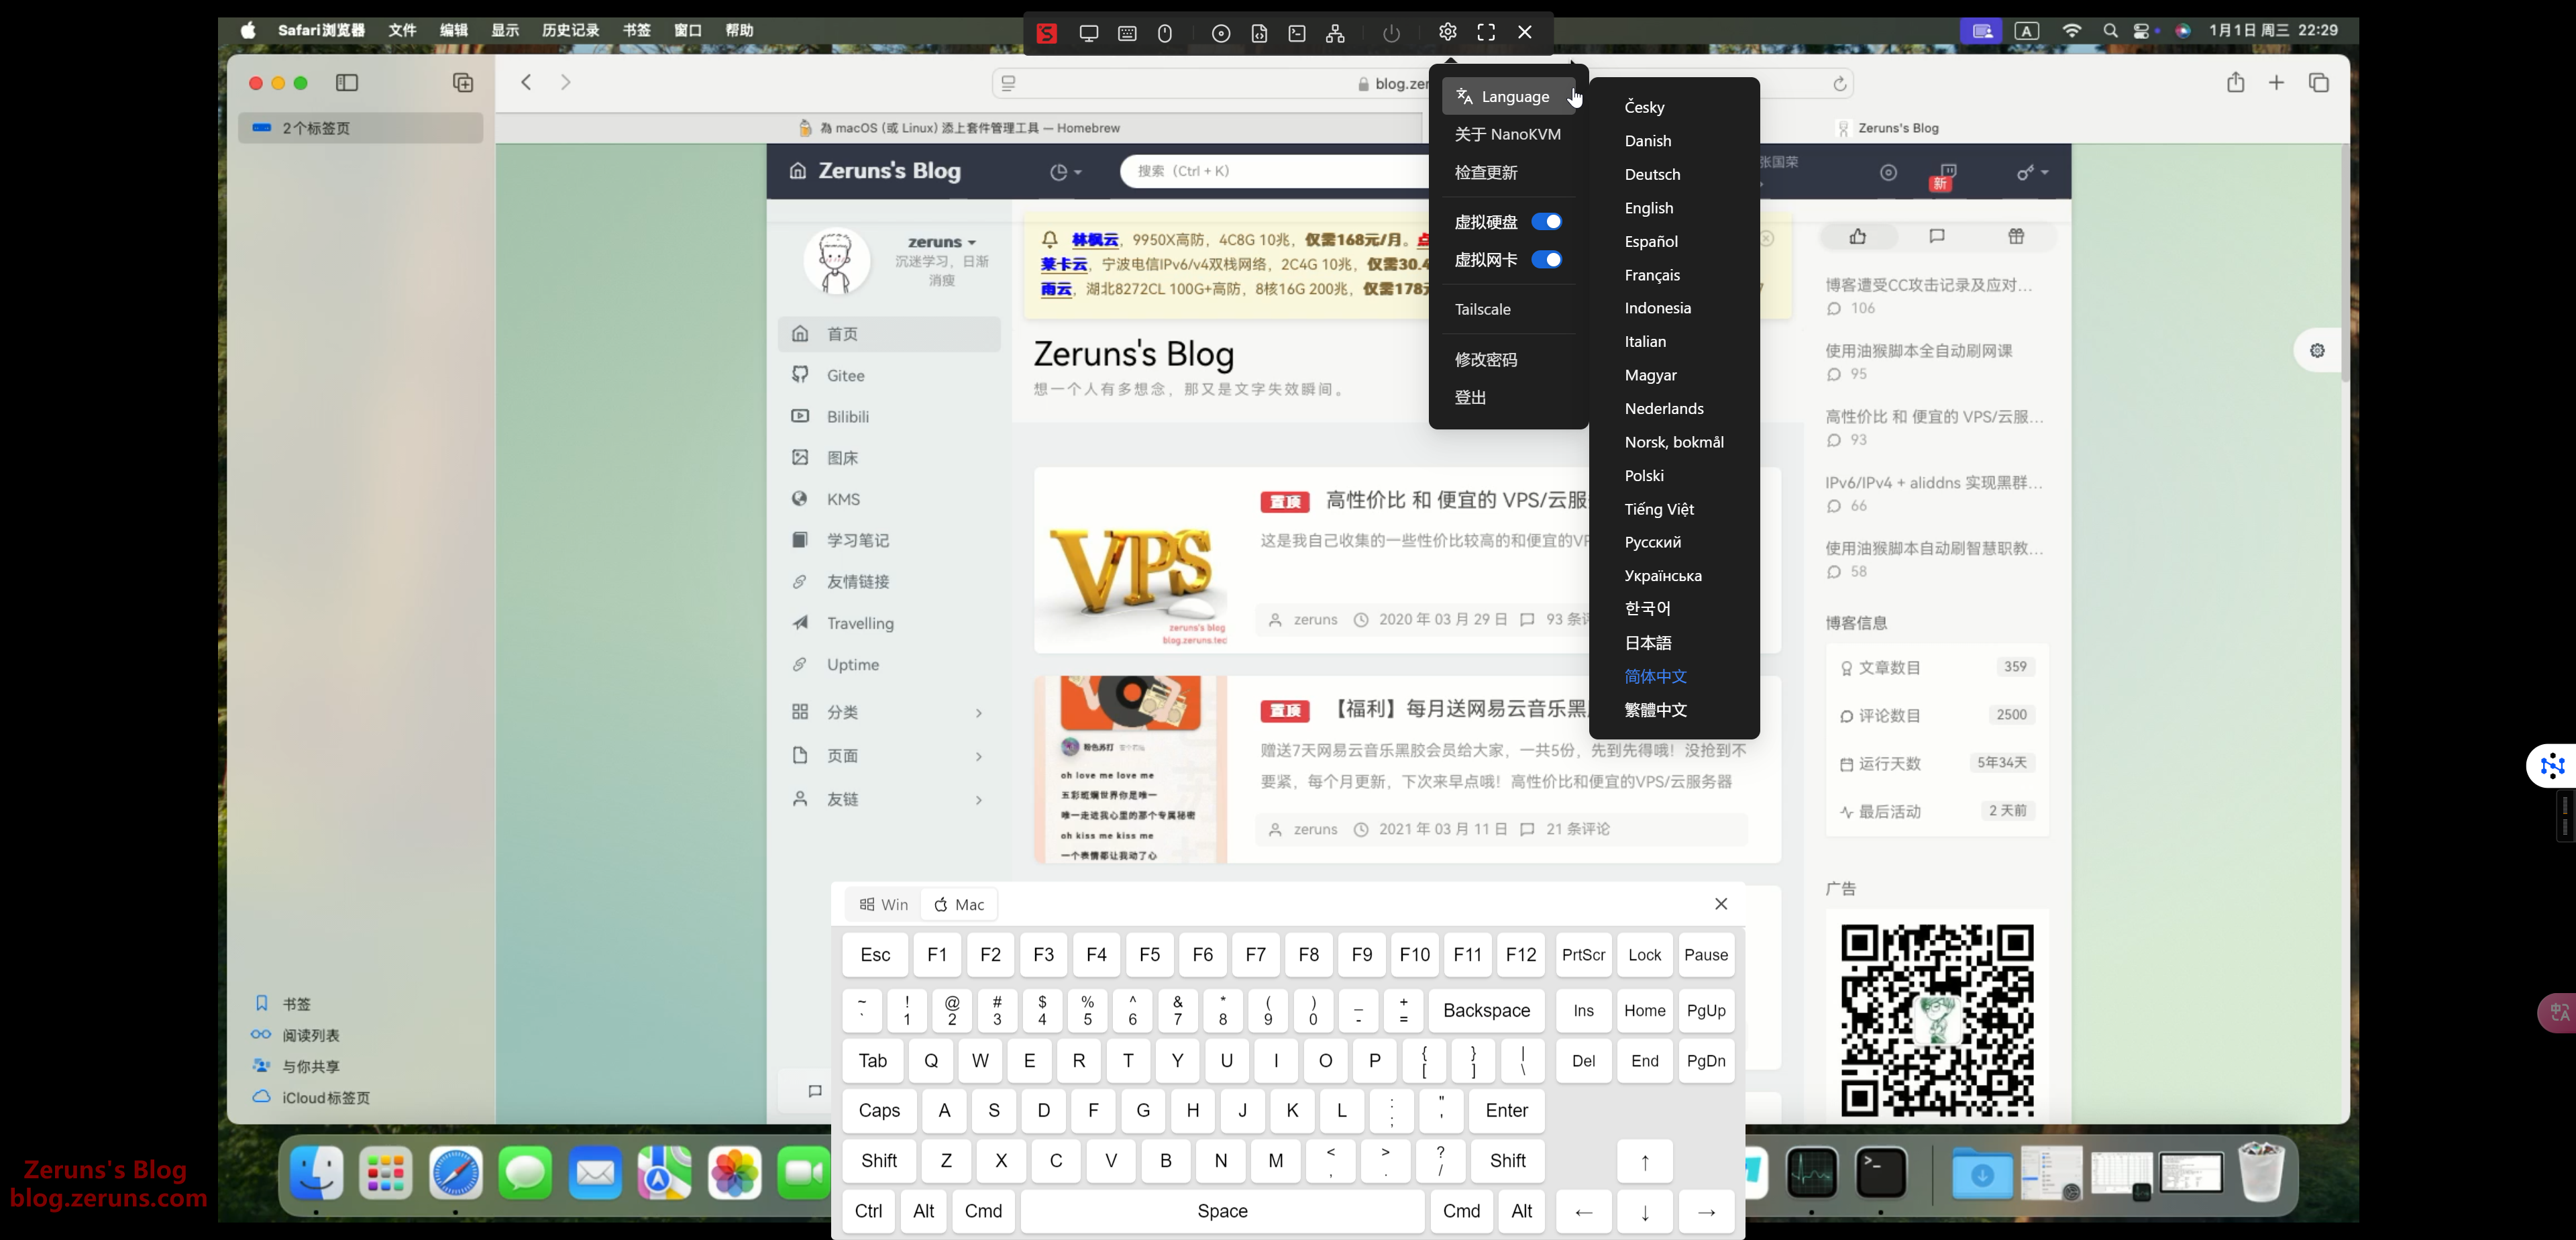
It supports multiple languages and offers features like a virtual keyboard, virtual hard drive, and virtual network card. The virtual hard drive allows users to upload system images for remote system reinstallation and similar tasks.
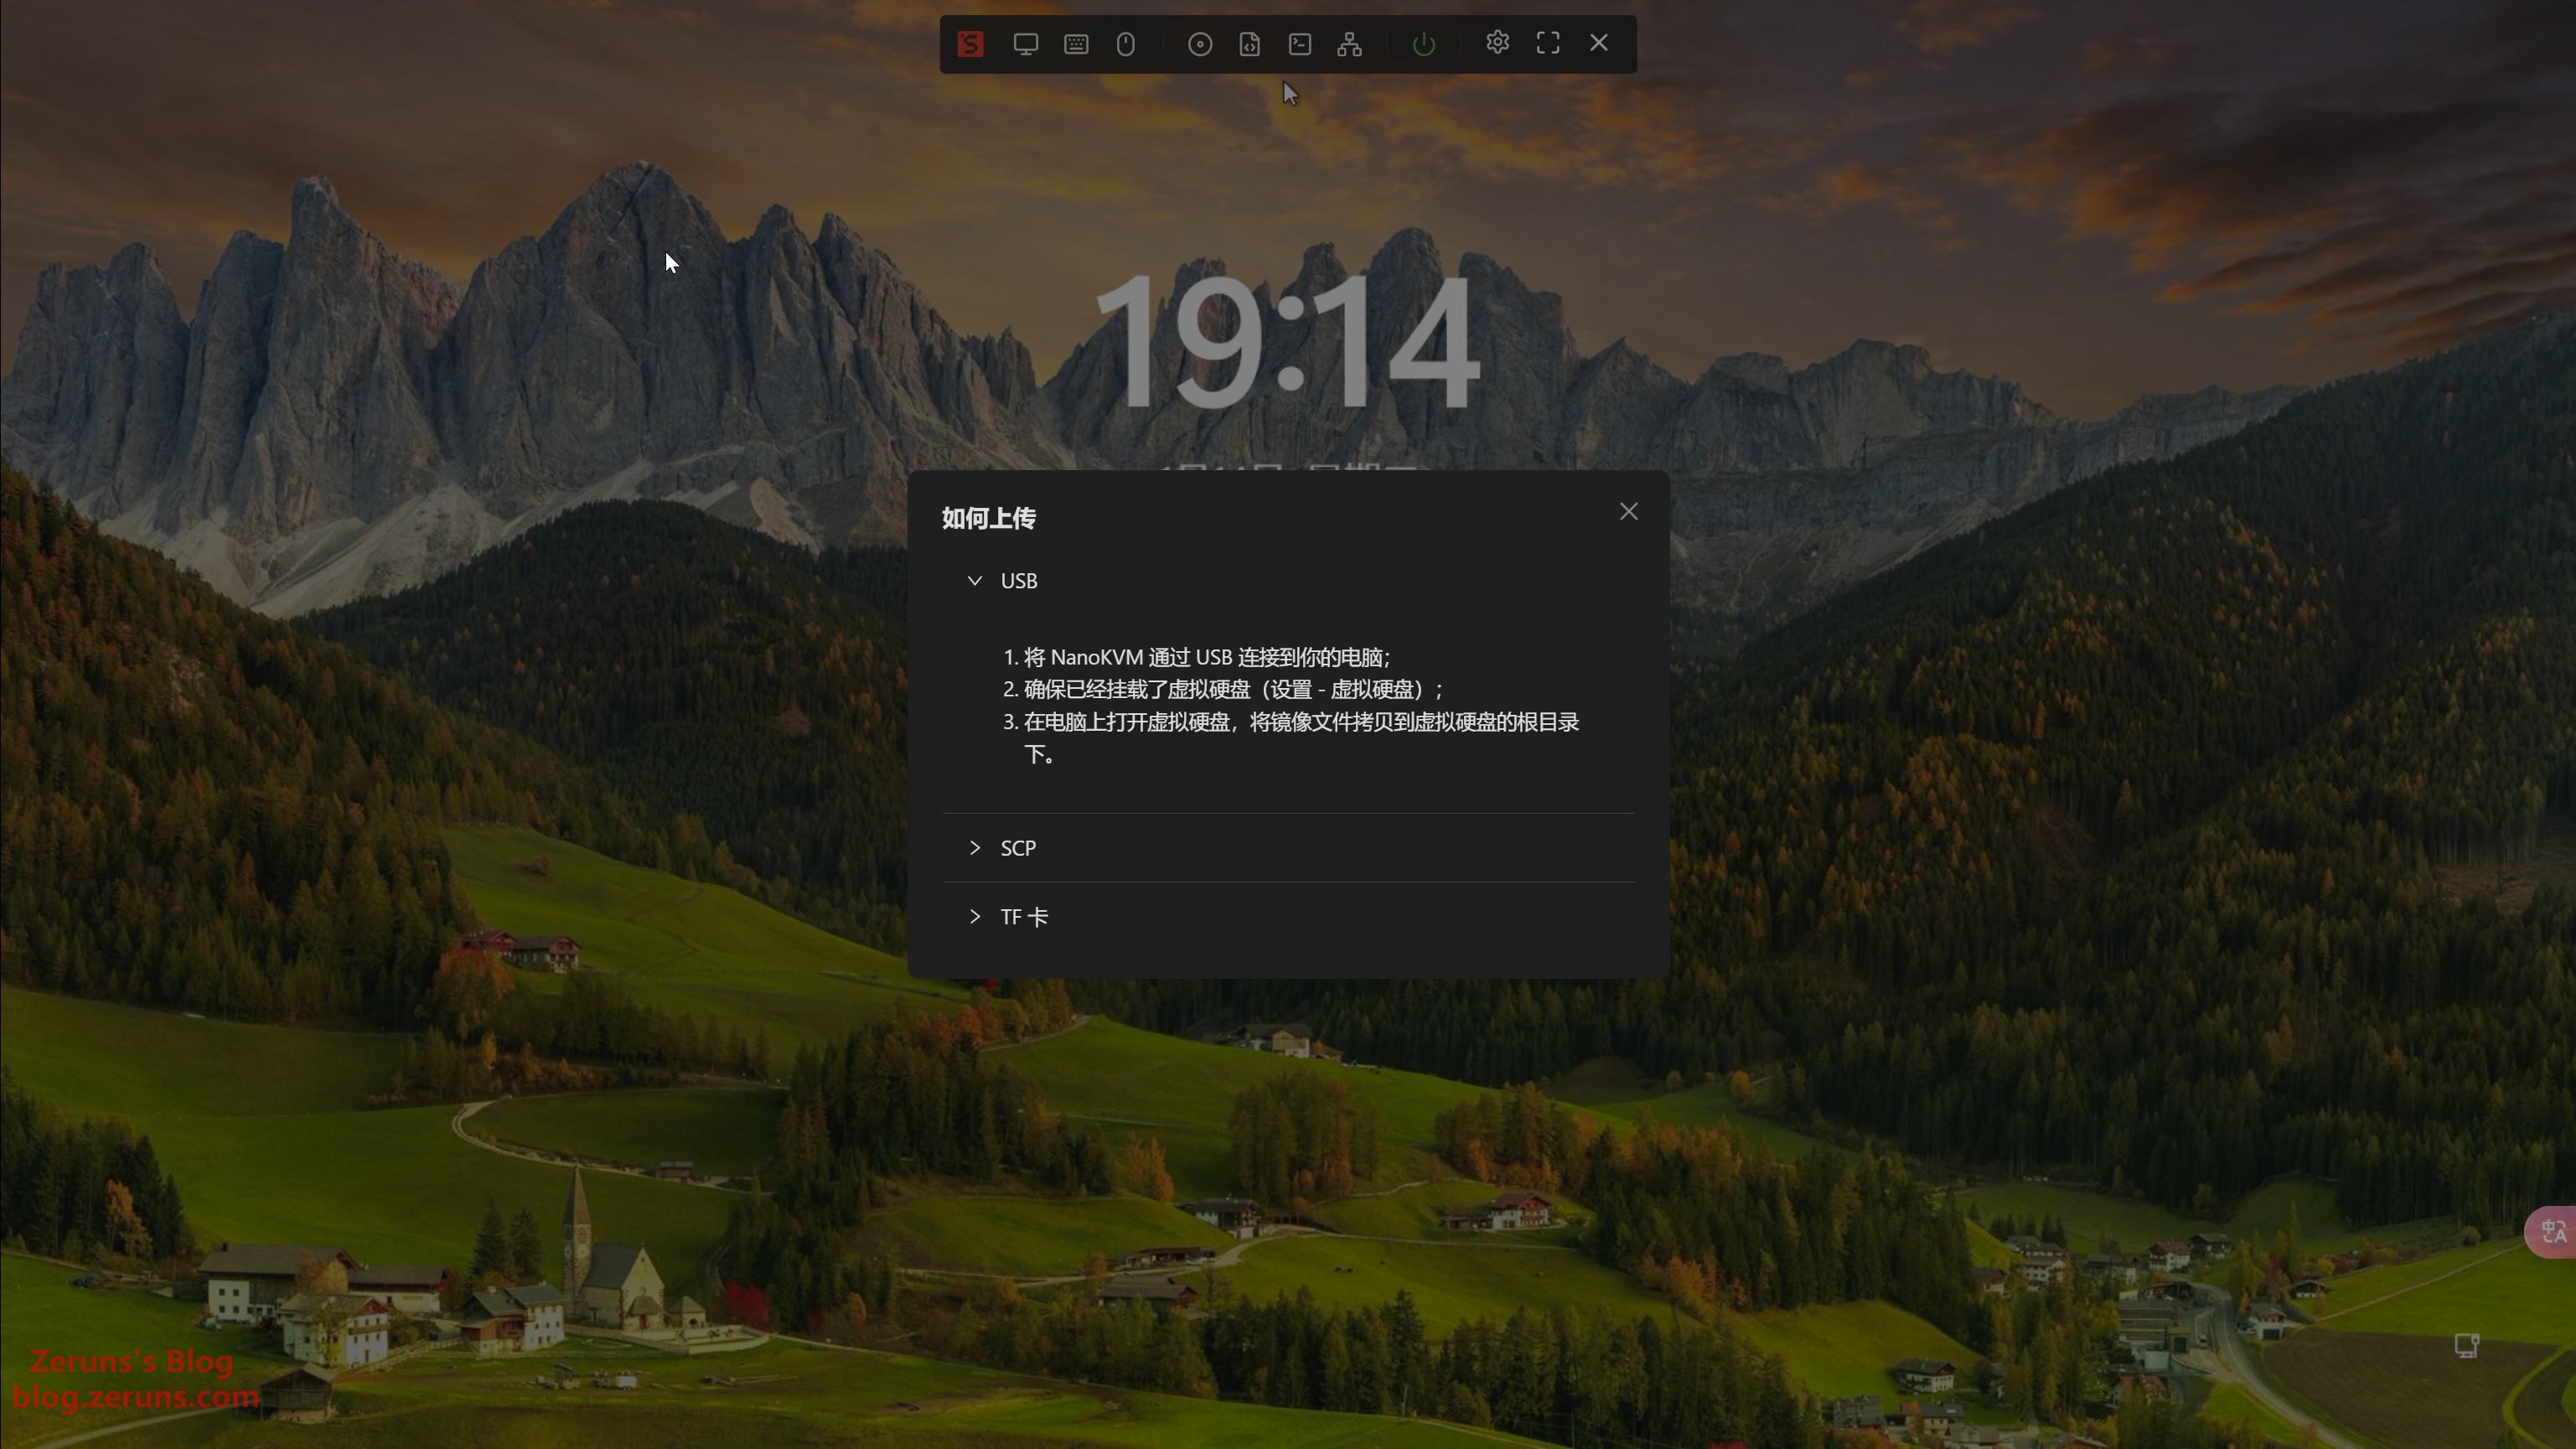
System images can be uploaded via USB, SCP, or TF card.
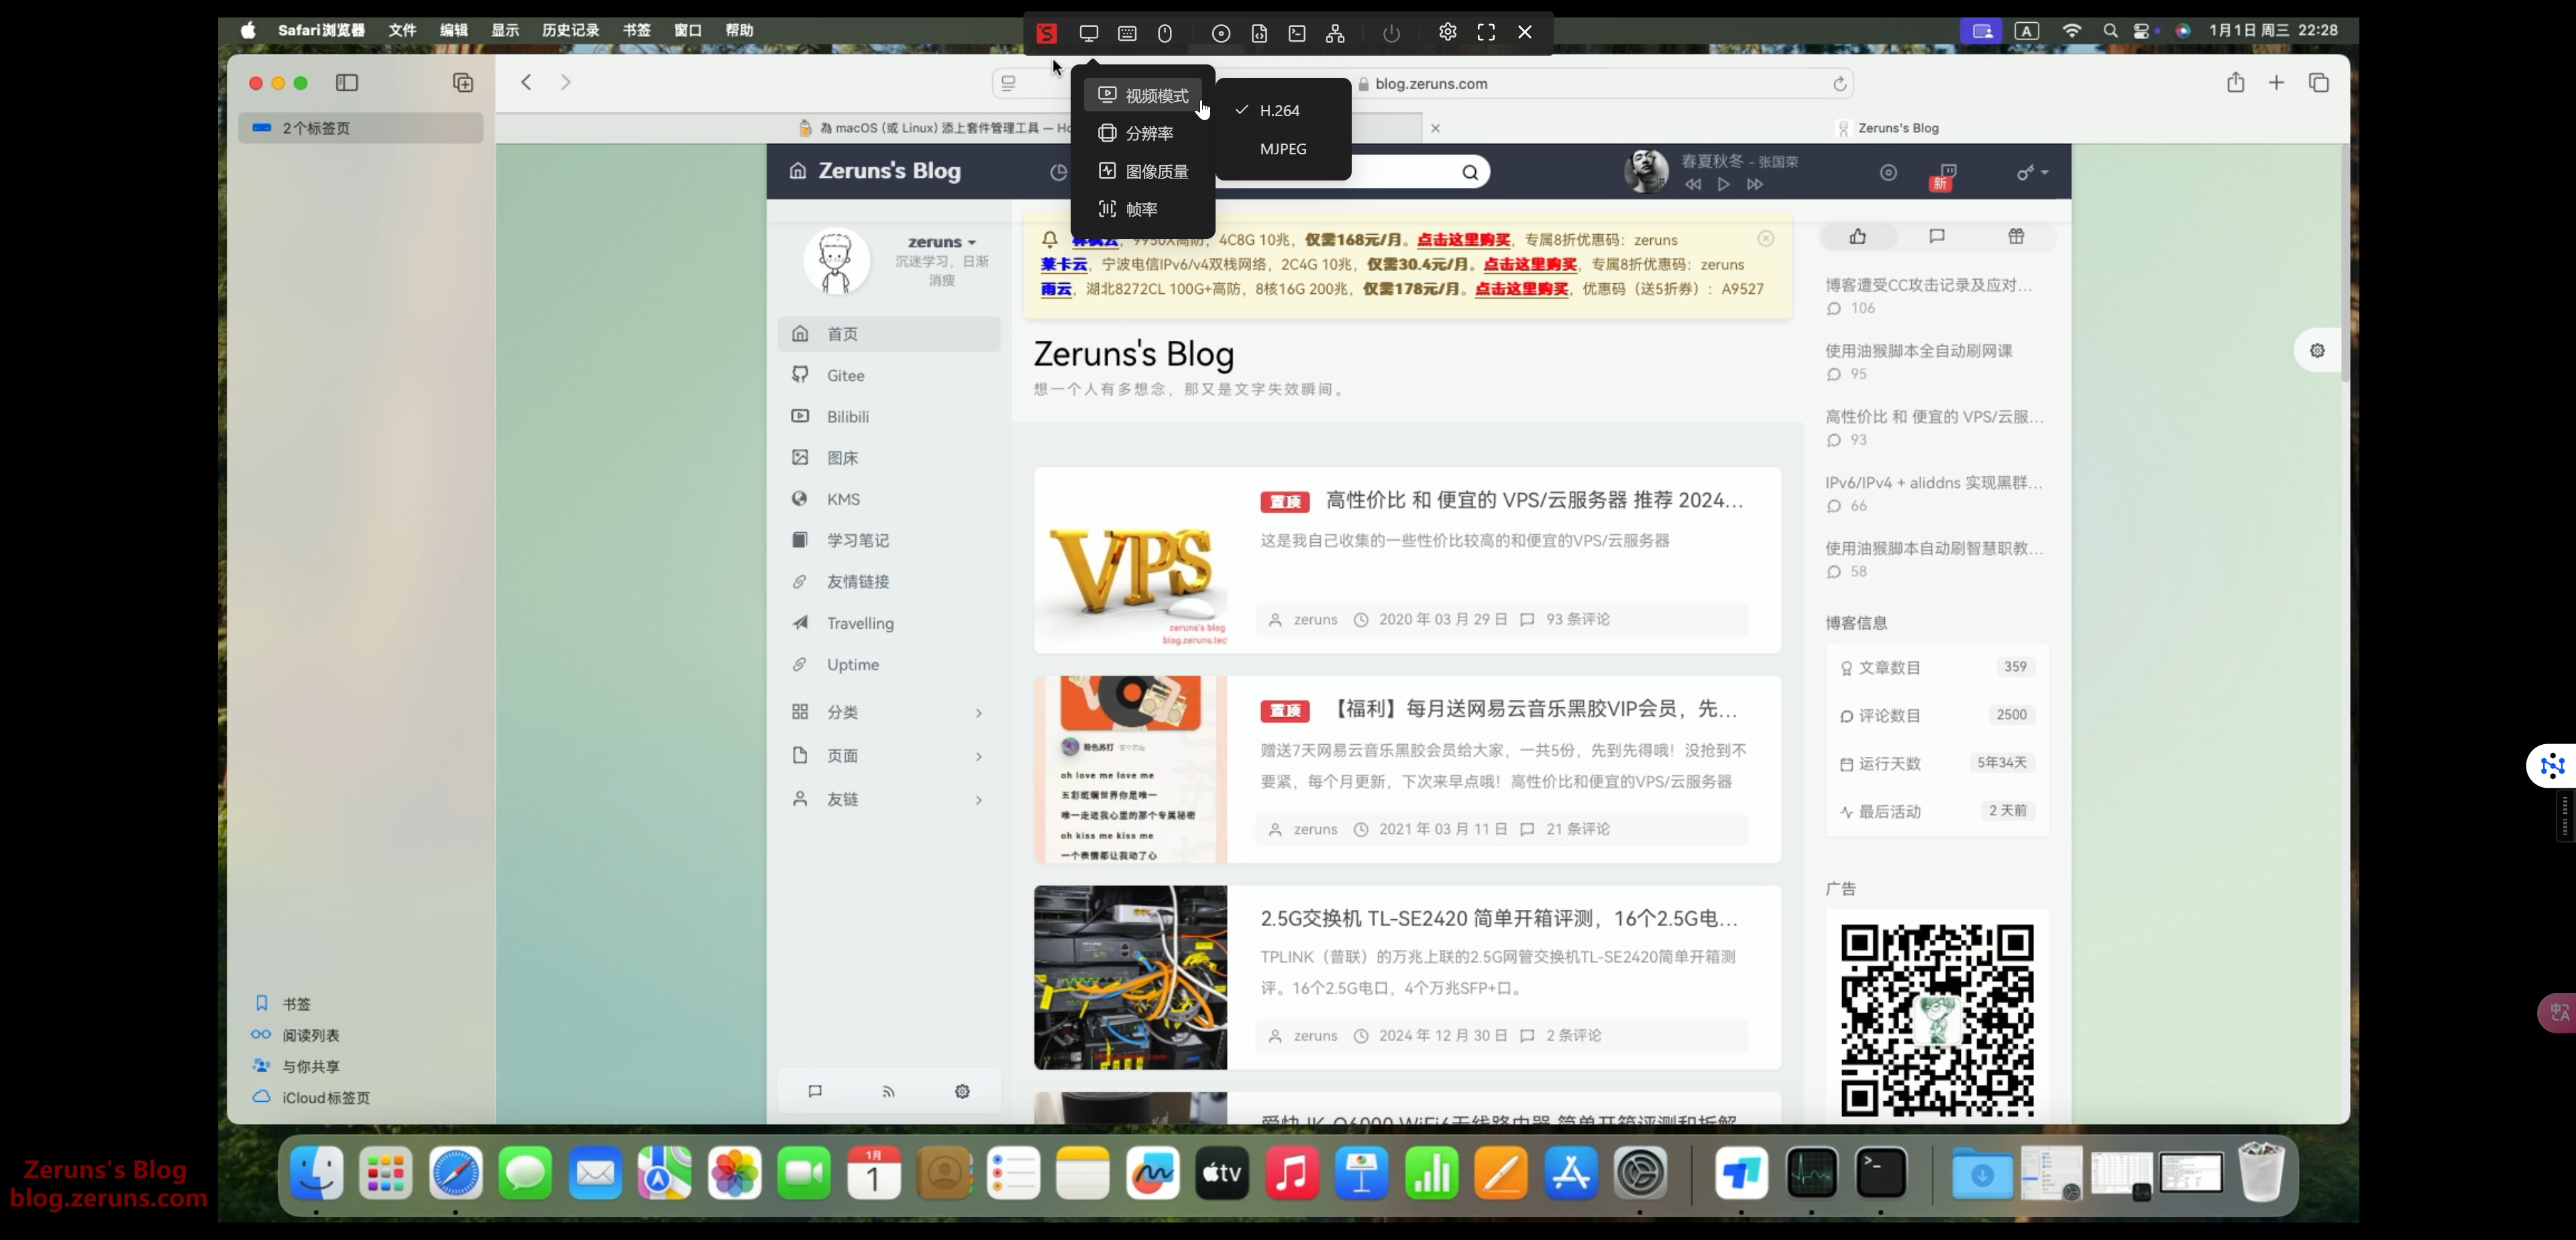
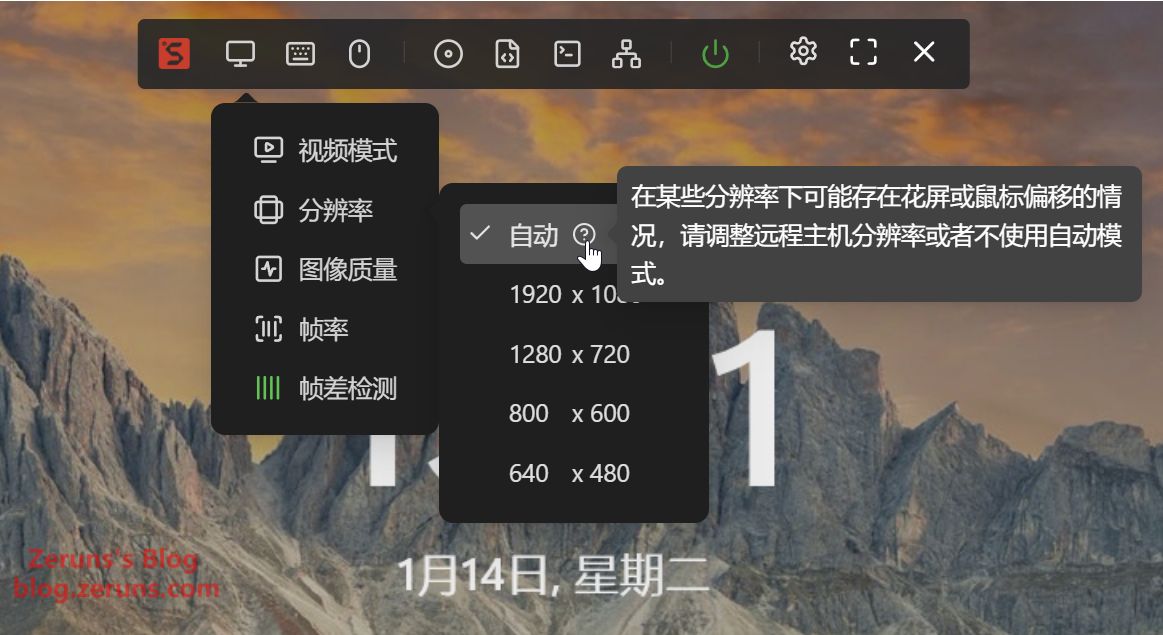
The video encoding supports H.264 and MJPEG formats, with resolutions up to 1920x1080 (16:9), 1280x720 (16:9), 800x600 (4:3), and 640x480 (4:3). Supported frame rates include 60Hz, 30Hz, and 24Hz.
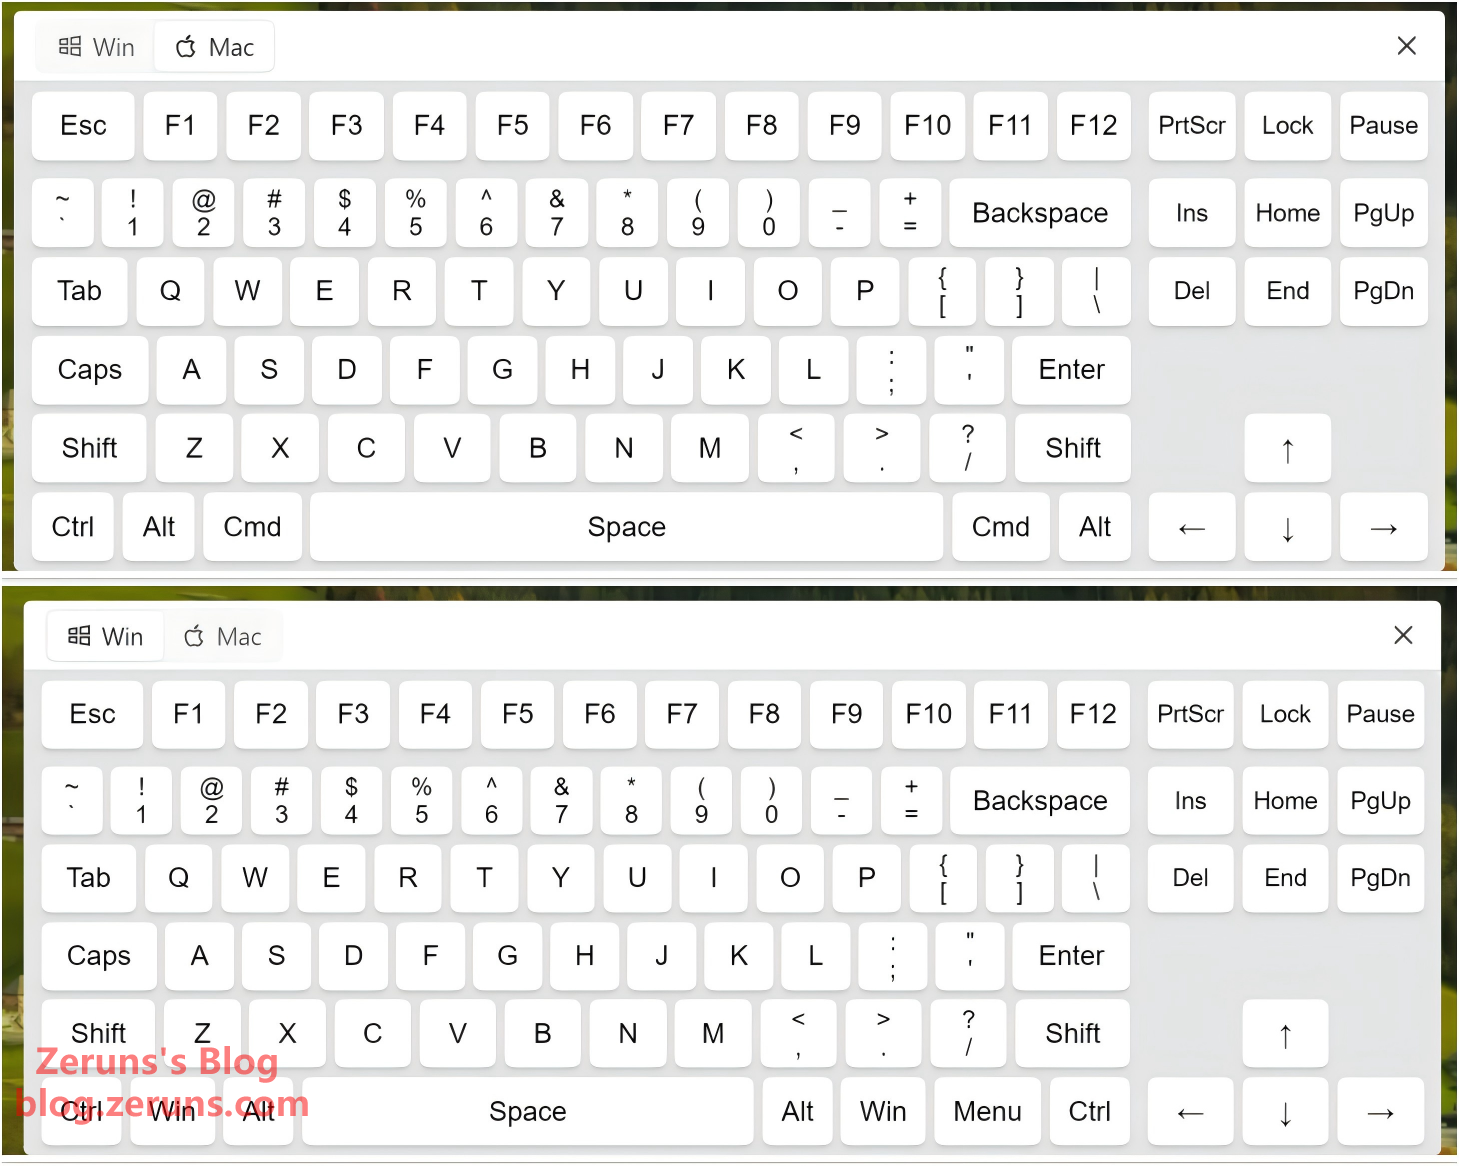
The virtual keyboard offers both Windows and Mac modes. It also supports a paste function, allowing large text blocks to be input (restricted to characters that can be simulated by keyboard input).
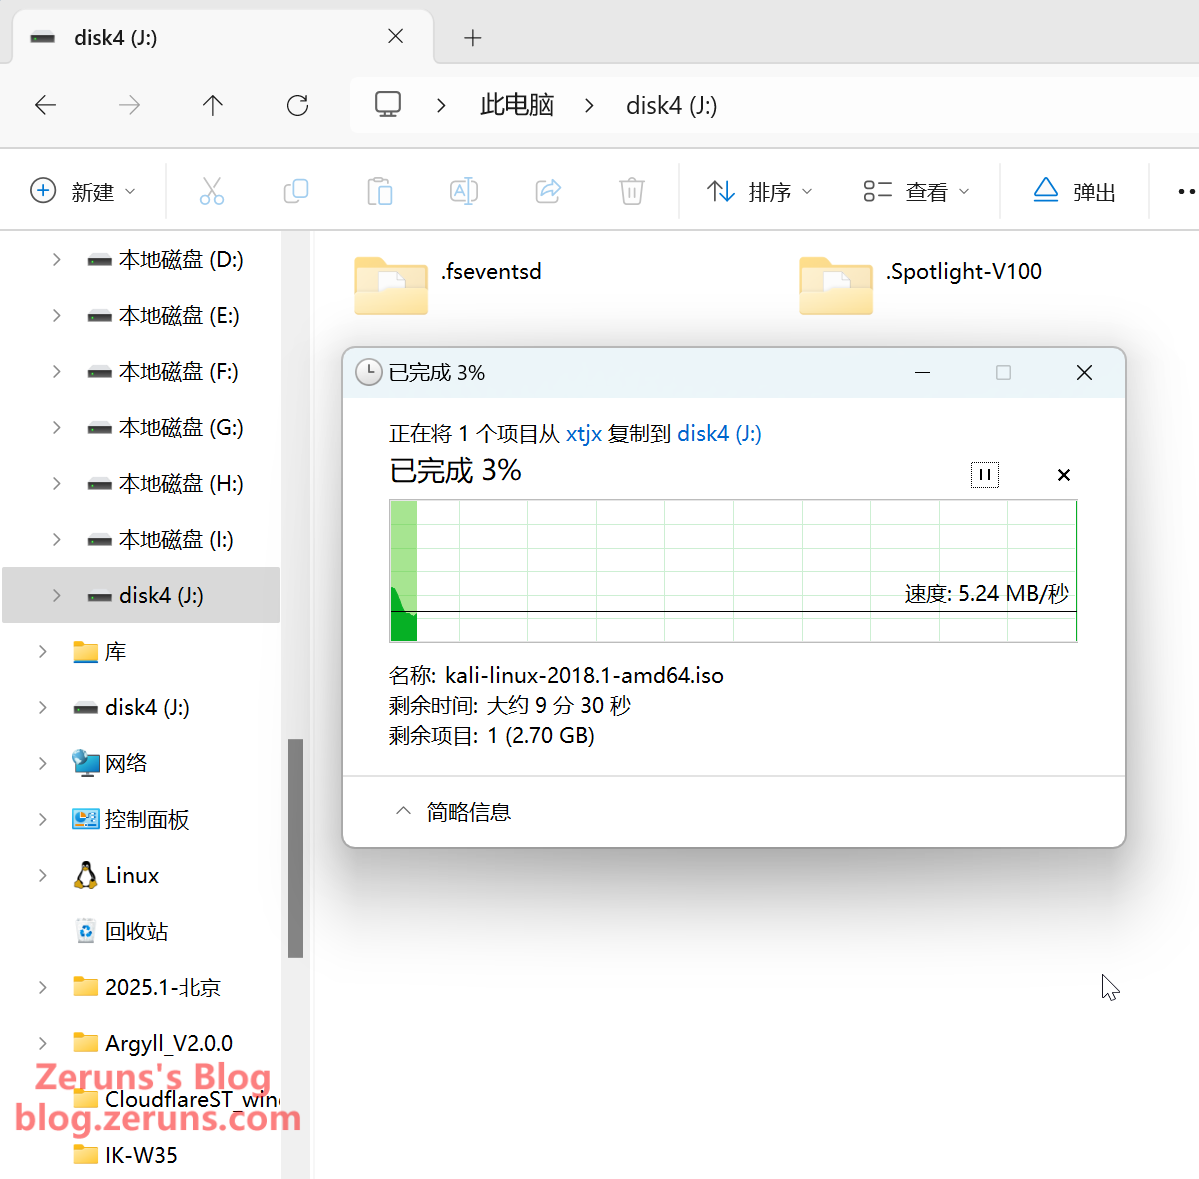
For copying system images, it’s recommended to remove the TF card and use a card reader instead of copying directly through NanoKVM. The USB composite device's speed is relatively slow, resulting in transfer speeds of only around 5MB/s.
Recommended Reading
- High-Value and Budget-Friendly VPS/Cloud Server Recommendations: https://blog.zeruns.com/archives/383.html
- ViewSonic VG2481-4K Monitor Unboxing and Review, 24-inch 4K: https://blog.zeruns.top/archives/21.html
- IKuai IK-Q6000 WiFi6 Router Unboxing, Review, and Teardown: https://blog.zeruns.top/archives/24.html
- 2.5G Switch TL-SE2420 Unboxing and Review: https://blog.zeruns.top/archives/25.html
- MECHREVO iMini Pro820 Mini PC Review and Teardown, 8845H Mini PC: https://blog.zeruns.top/archives/15


Comment Section