


DOCKCASE DSWC1R-3S Smart Display Magnetic Hard Drive Enclosure - Unboxing & Review | MagSafe External Storage for iPhone, ProRes Video Recording, Screen-Equipped Enclosure, 100W PD Charging, 10Gbps Speed.
This hard drive enclosure can provide 100W PD fast charging via another USB-C port when connected to a laptop or phone. This means you can use the hard drive while simultaneously charging your laptop or phone.
Review Video:https://www.bilibili.com/video/BV13ERaYpEci/
- RIHAO USB4 Hard Drive Enclosure + HP FX900Pro 2TB SSD Unboxing & Review: https://blog.zeruns.com/archives/842.html
- Apple Mac Mini M4 Mini PC Review & Teardown: https://blog.zeruns.com/archives/851.html
- ACASIS TBU405Pro Thunderbolt 4/3 Enclosure + WD SN7100 1TB SSD Unboxing & Review: https://blog.zeruns.com/archives/857.html
Product Specifications
| Parameter | Details |
|---|---|
| Model | DSWC1R-3B |
| Power Interface | 100W PD |
| Power-Off Protection Time | 3 seconds |
| Screen Size | 1.54-inch 240×240 LCD |
| Material | Aluminum Alloy, Tempered Glass |
| Dimensions & Weight | 59.3×59.3×14.5mm (53.3g) |
| Included Cable | USB 3.2 Gen 2 Type-C to C Data Cable |
| Interface | USB 3.2 Gen 2 Type-C |
| Transfer Speed | 10Gbps |
| Power Requirements | Max 5V±0.25V 3.0A |
| Controller | RTL9210 |
| Supported SSD Types | M Key M.2 SSD (NVMe/PCIe), B&M Key M.2 SSD (NVMe/PCIe) |
| Supported SSD Sizes | 2230 / 2242 |
| Supported SSD Capacity | Max 2TB |
| System Requirements | Windows 7/8.1/10/11, macOS, iPadOS, Linux,Android, PlayStation 5, ChromeOS, HarmonyOS |
Purchase Links:
- JD.com: https://u.jd.com/61MQoCP
- Taobao: https://s.click.taobao.com/4hSbrUs
- Pinduoduo: https://p.pinduoduo.com/IbwVq5Jb
Unboxing & Teardown
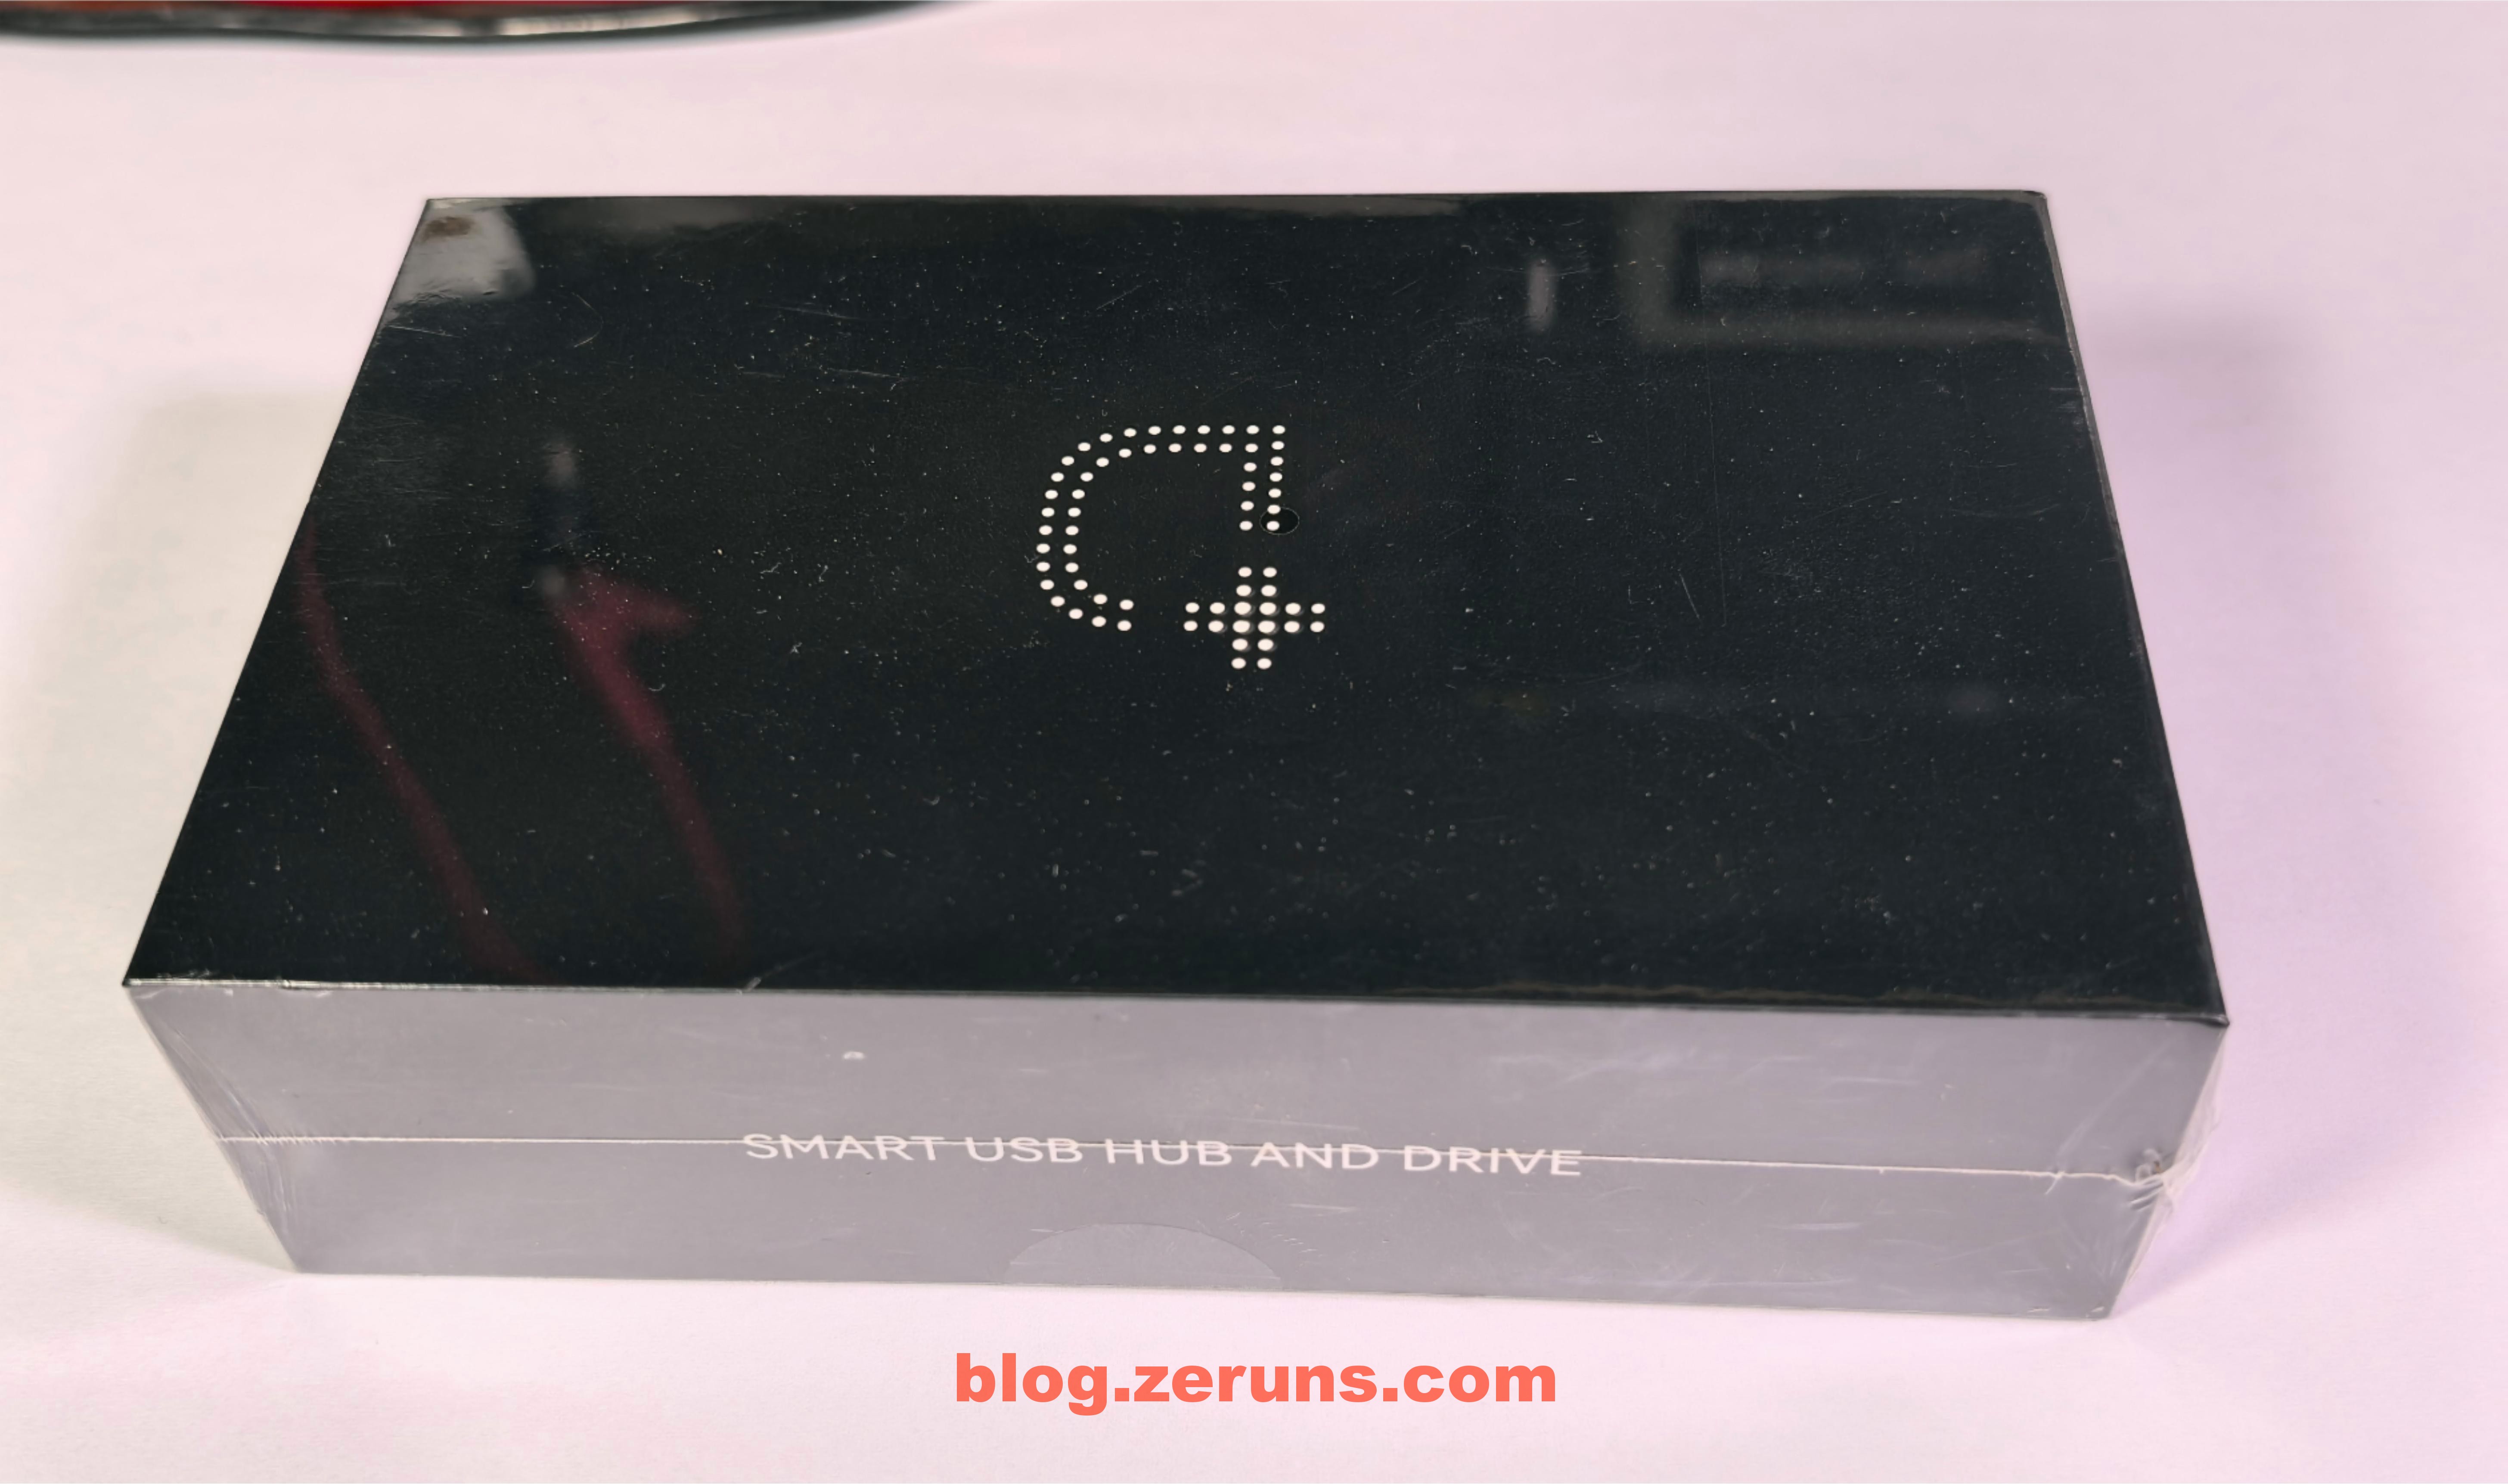
Front of the Packaging
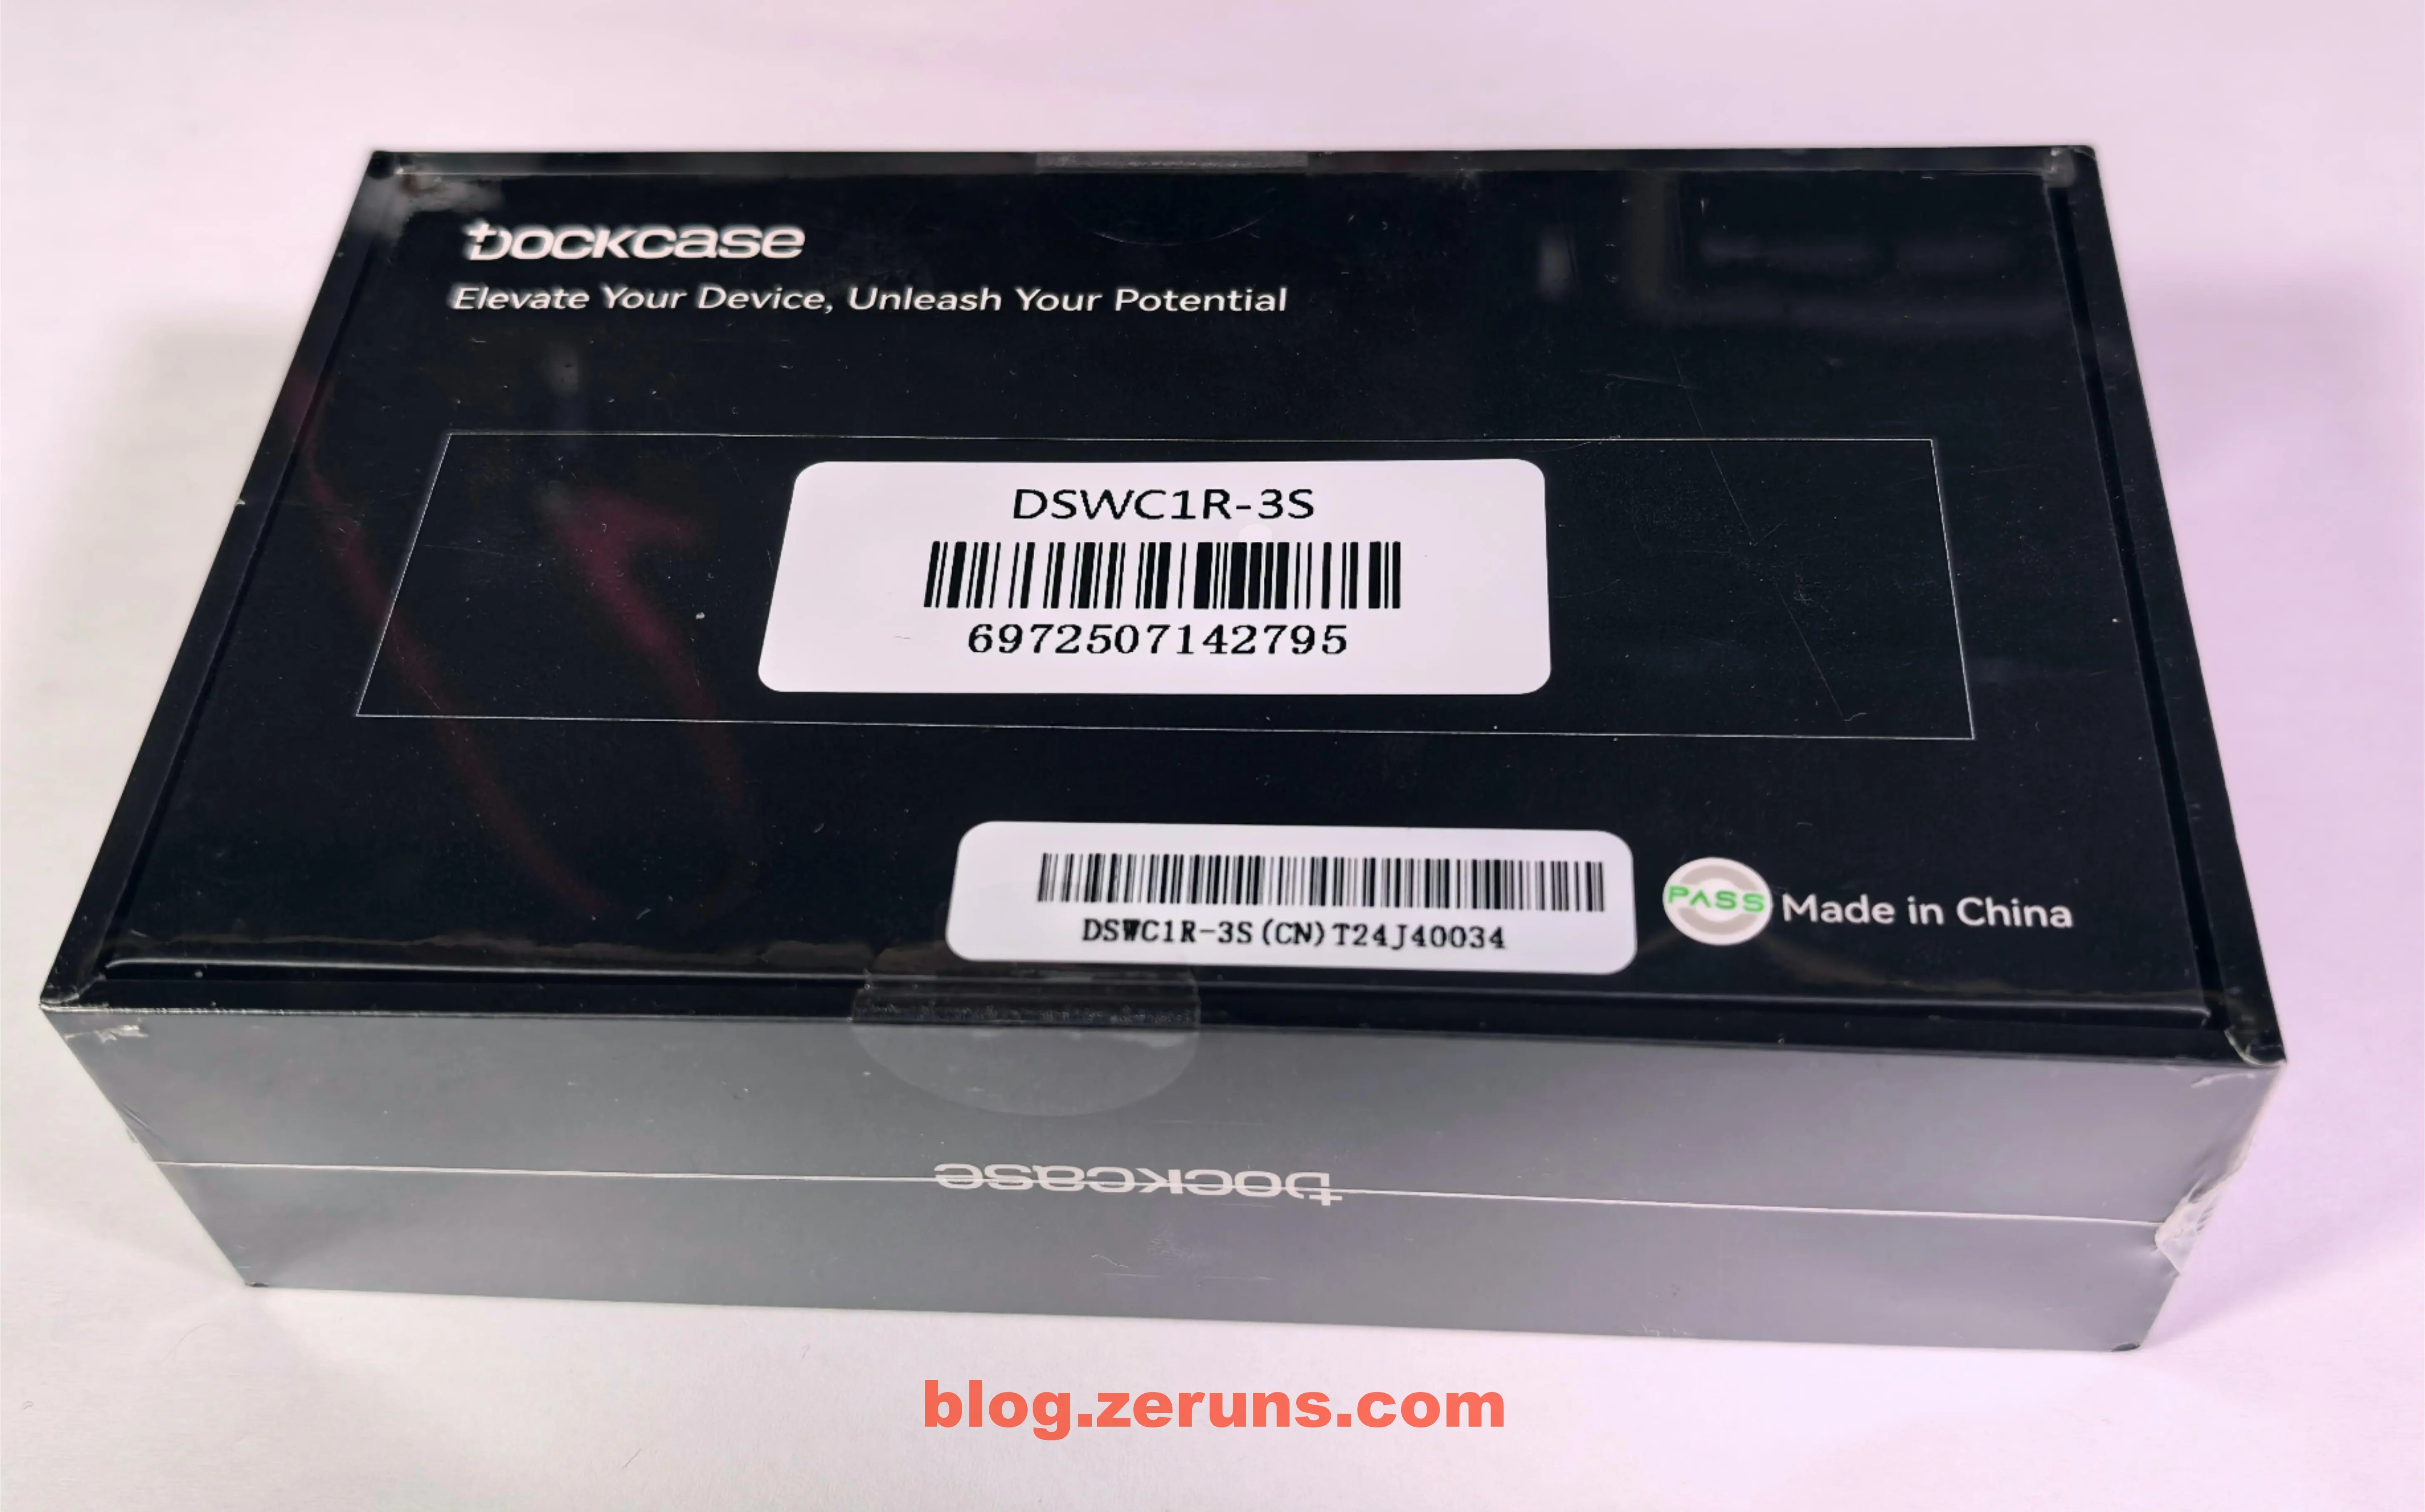
Back of the Packaging
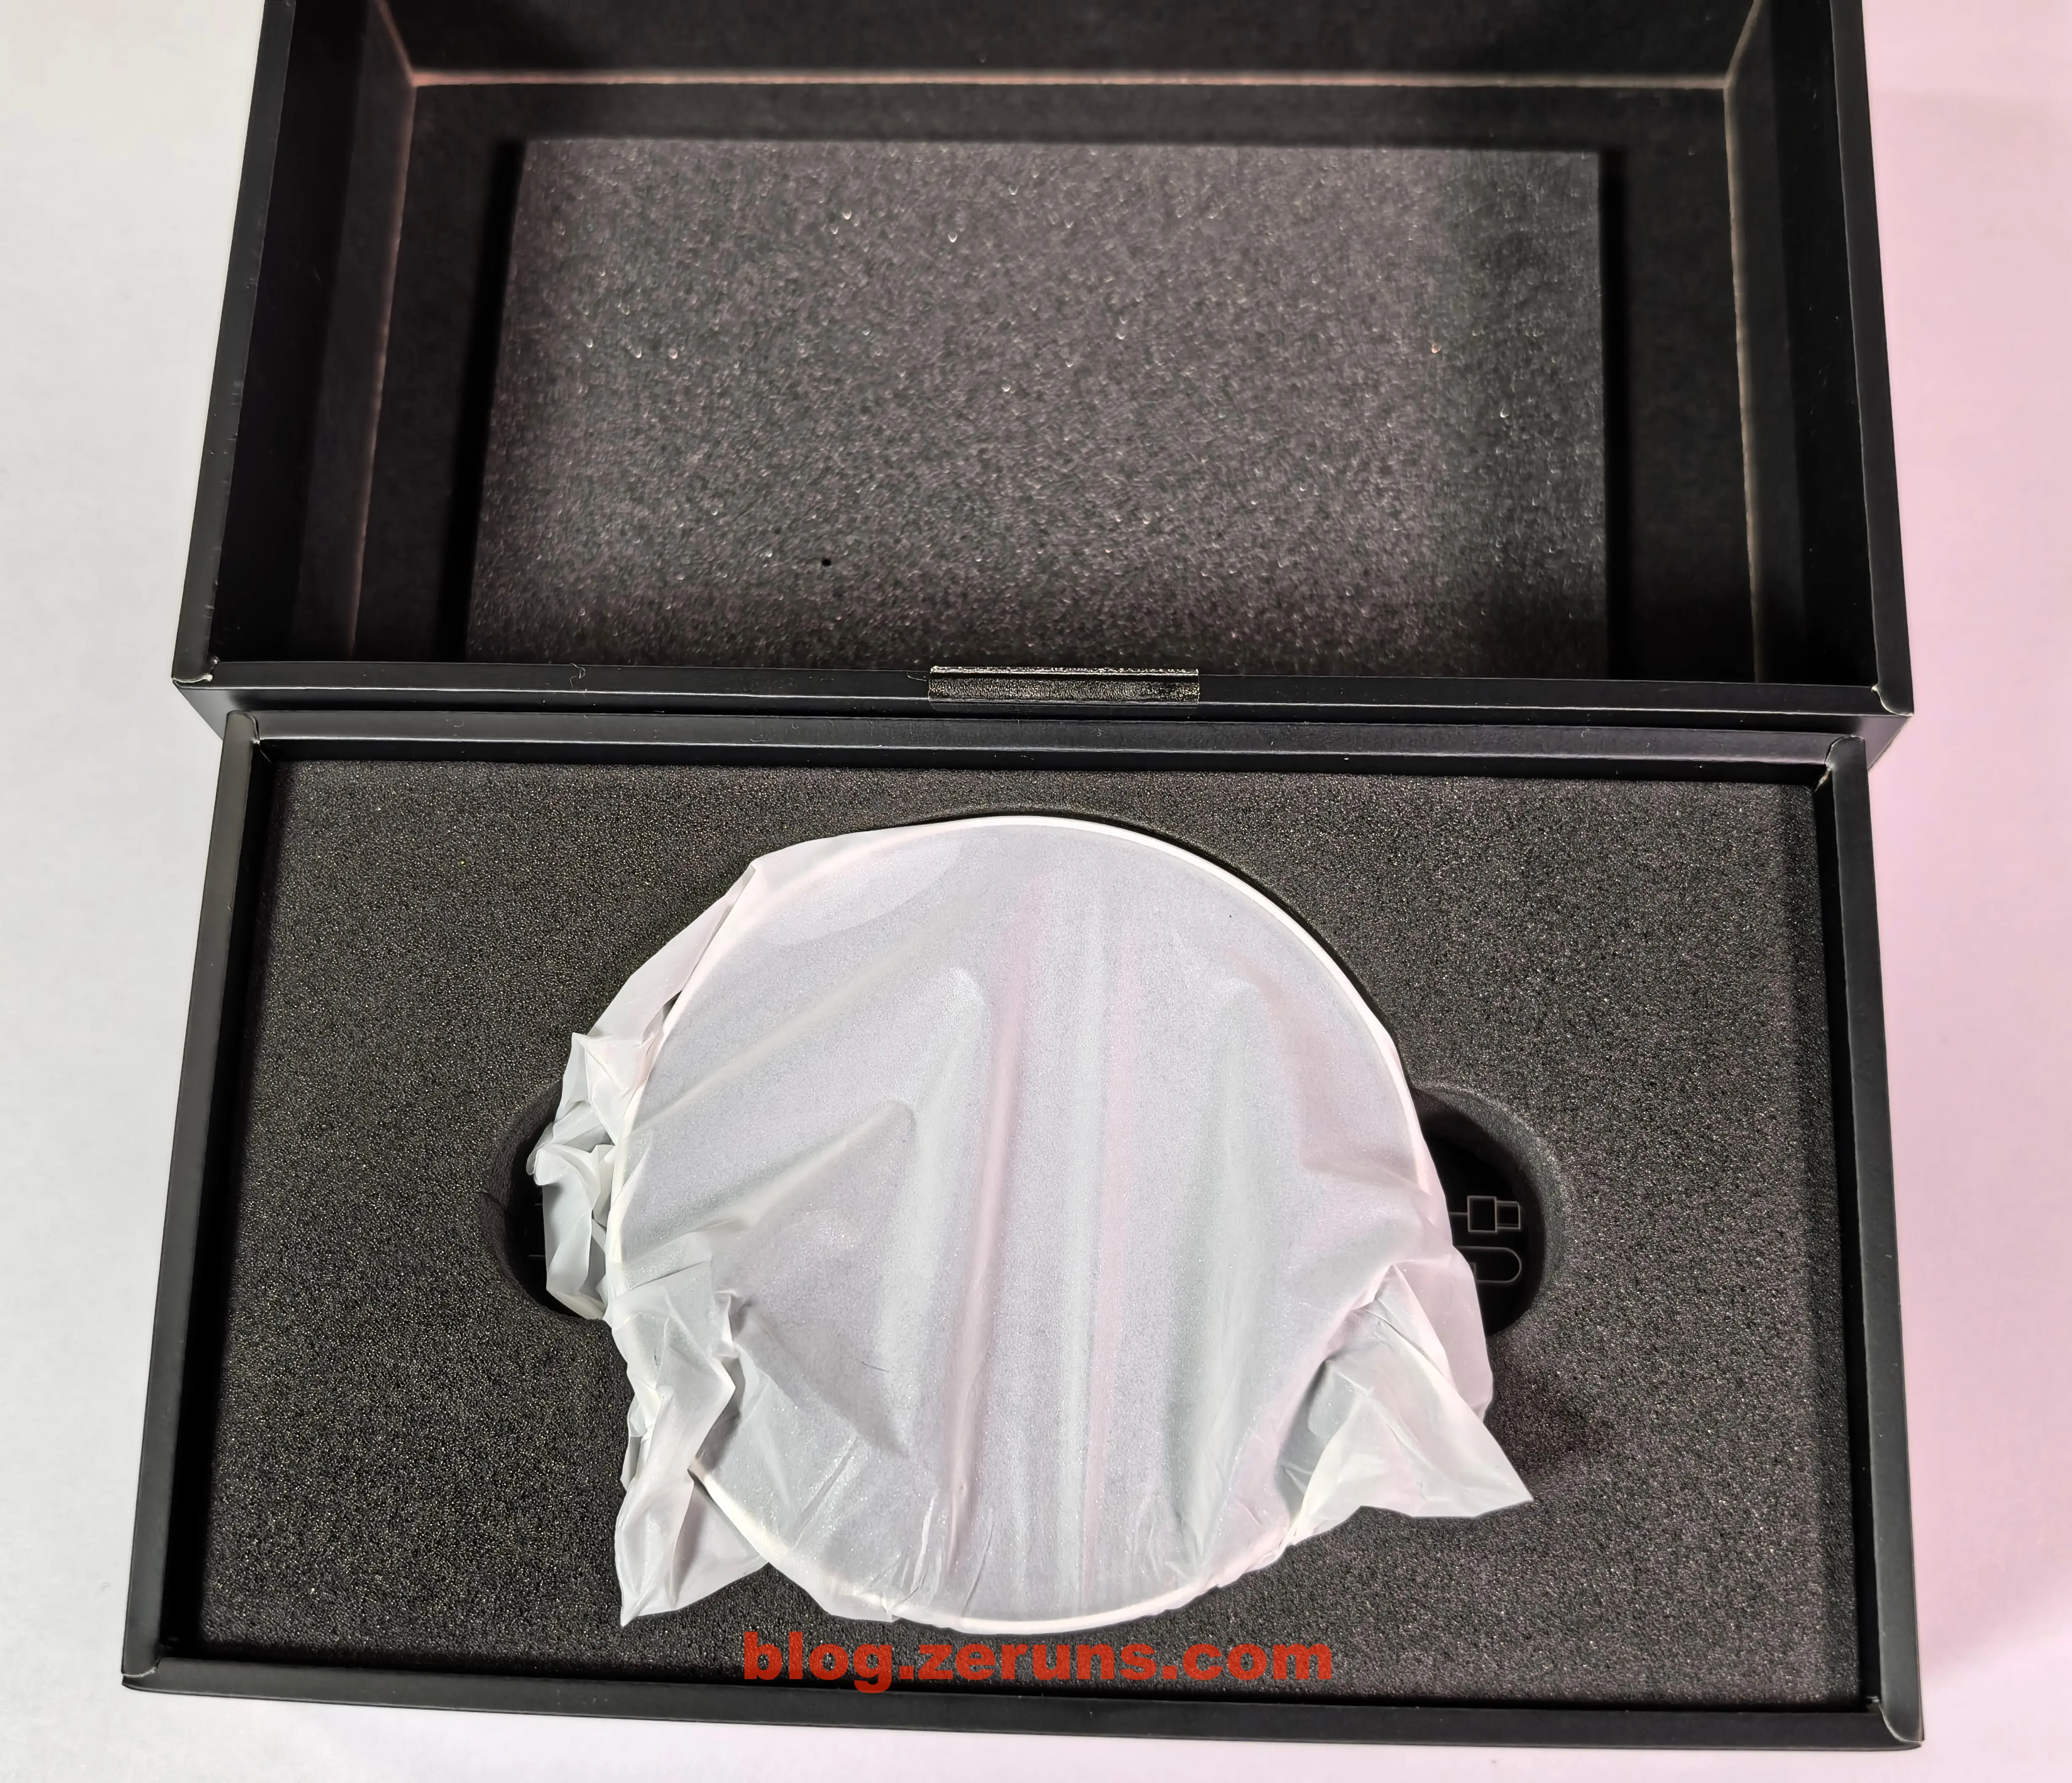
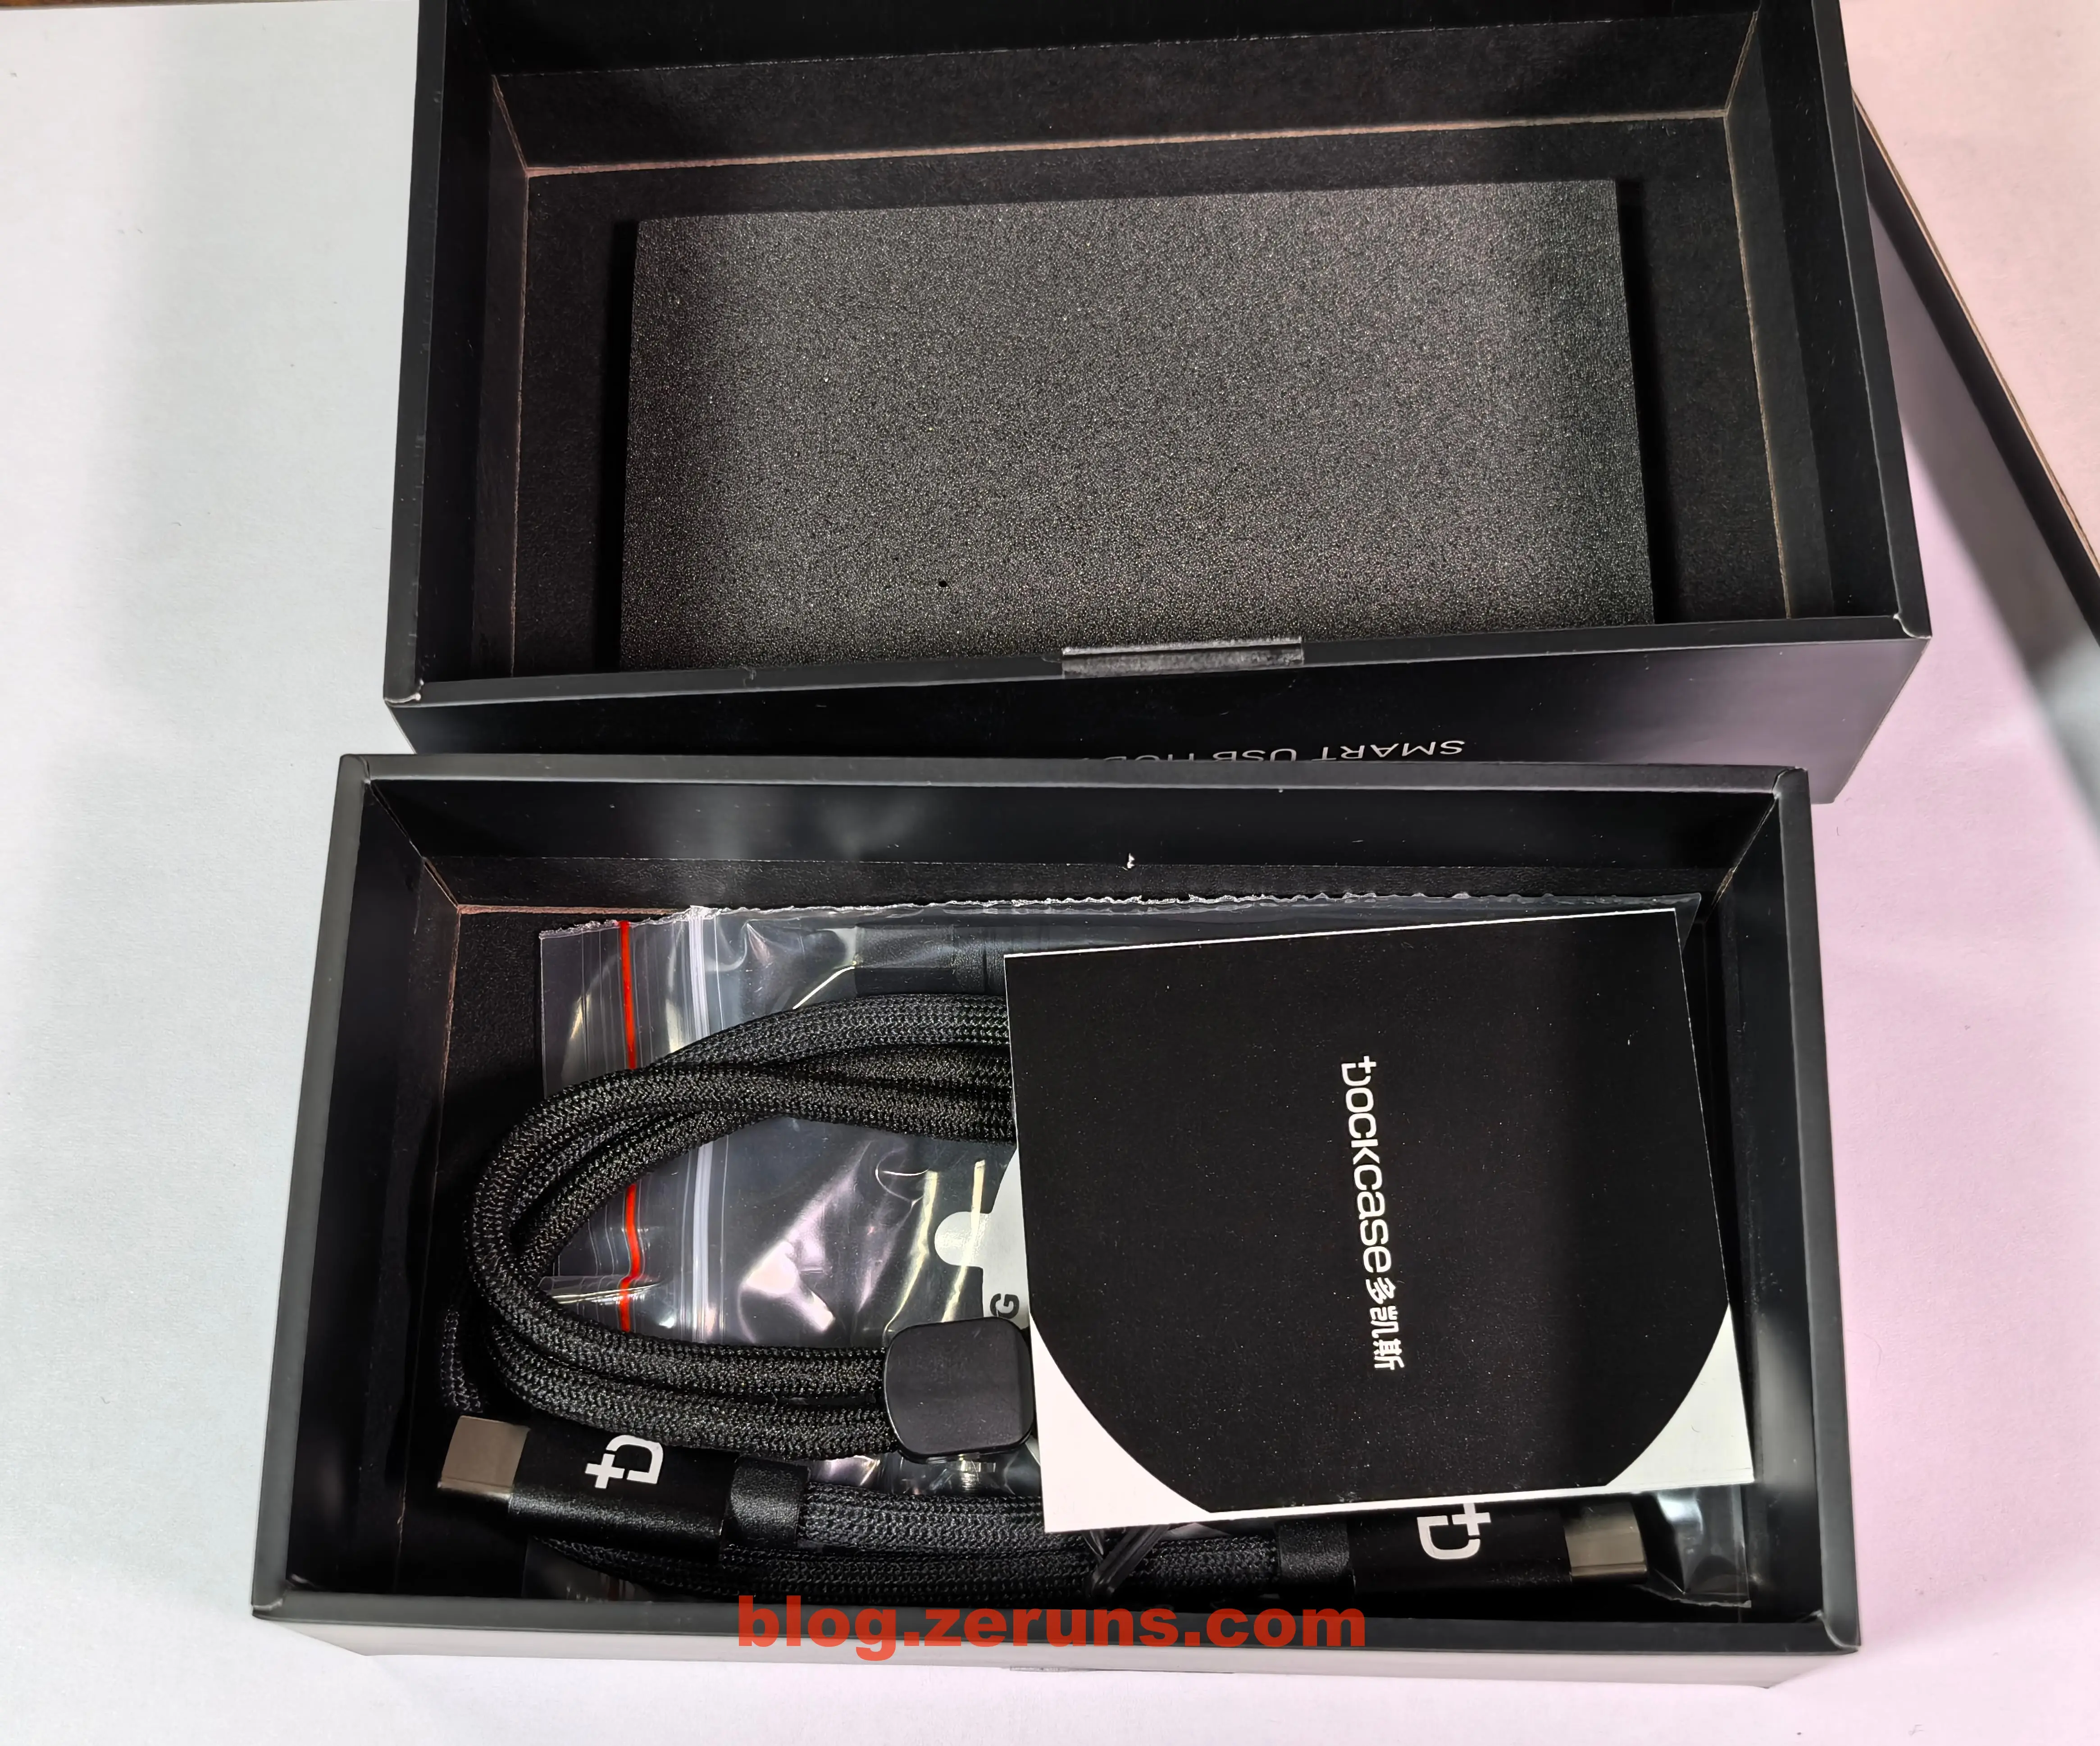
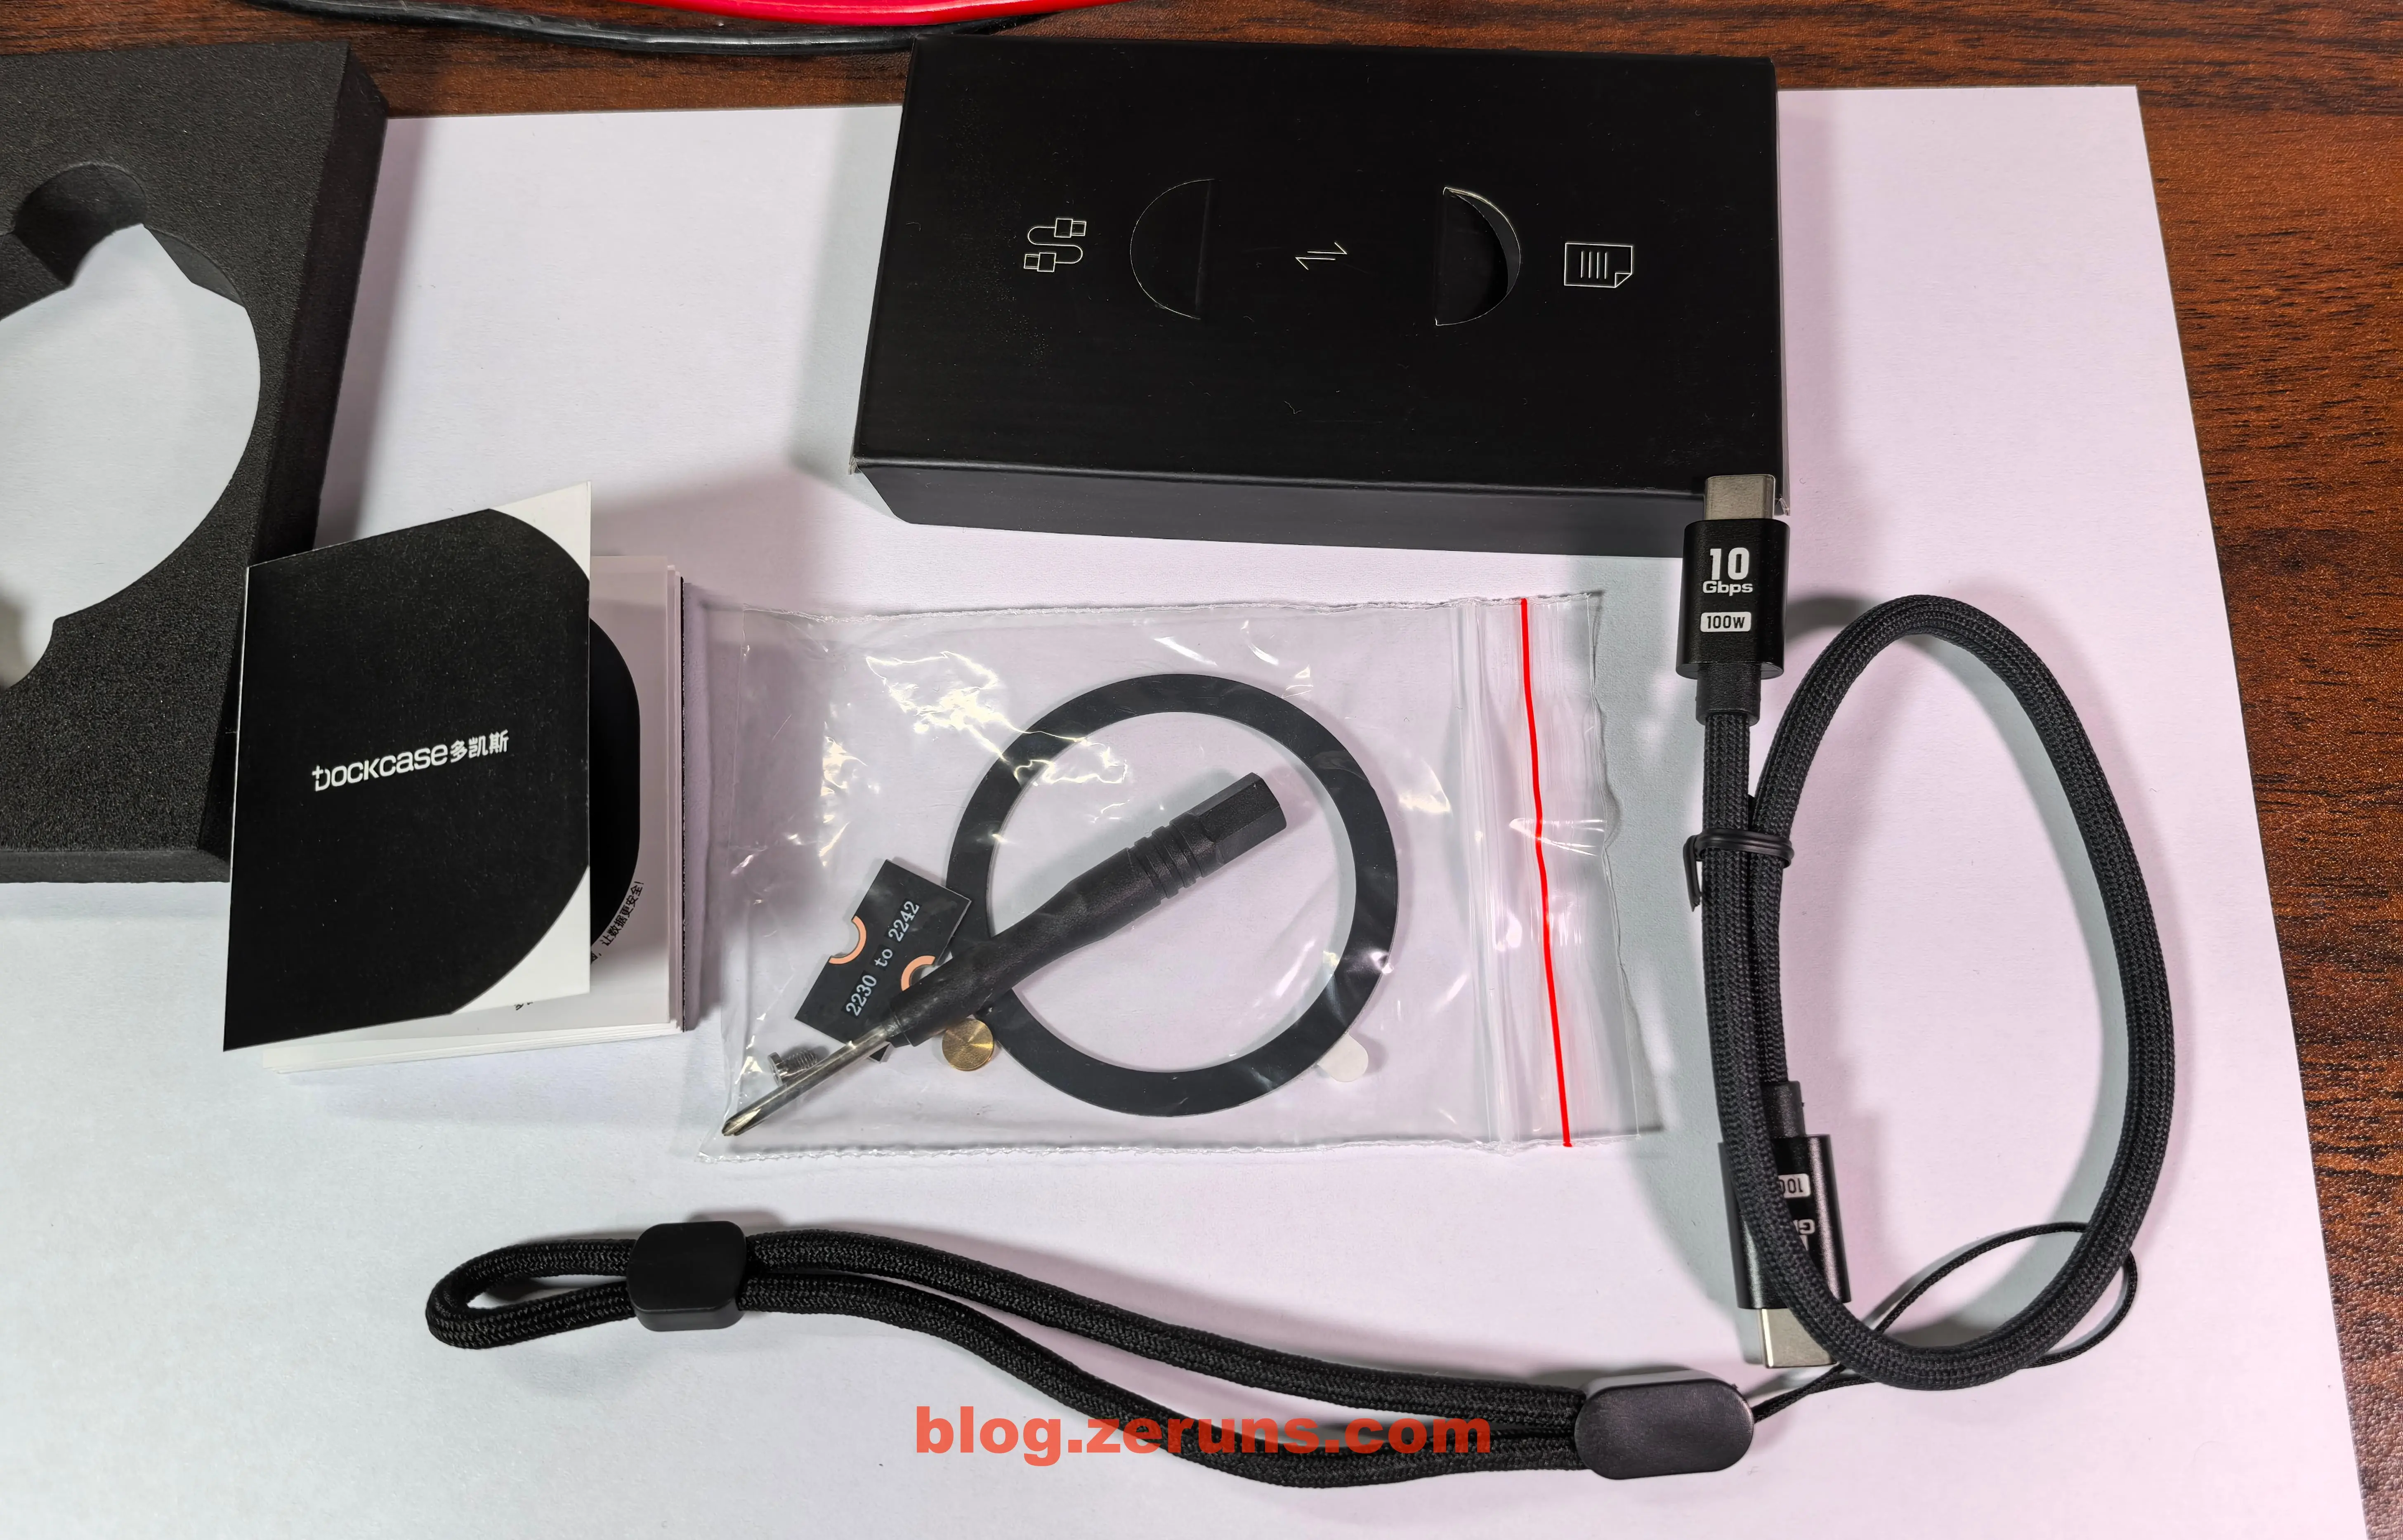
Upon opening the package, you'll find the SSD enclosure, a USB-C to USB-C data cable, a lanyard, a user manual, a screwdriver, screws, an SSD extension board (2230 to 2242), and a magnetic ring (for Android phones without MagSafe functionality—you can attach this ring to the back of your phone to enable magnetic attachment for the enclosure).
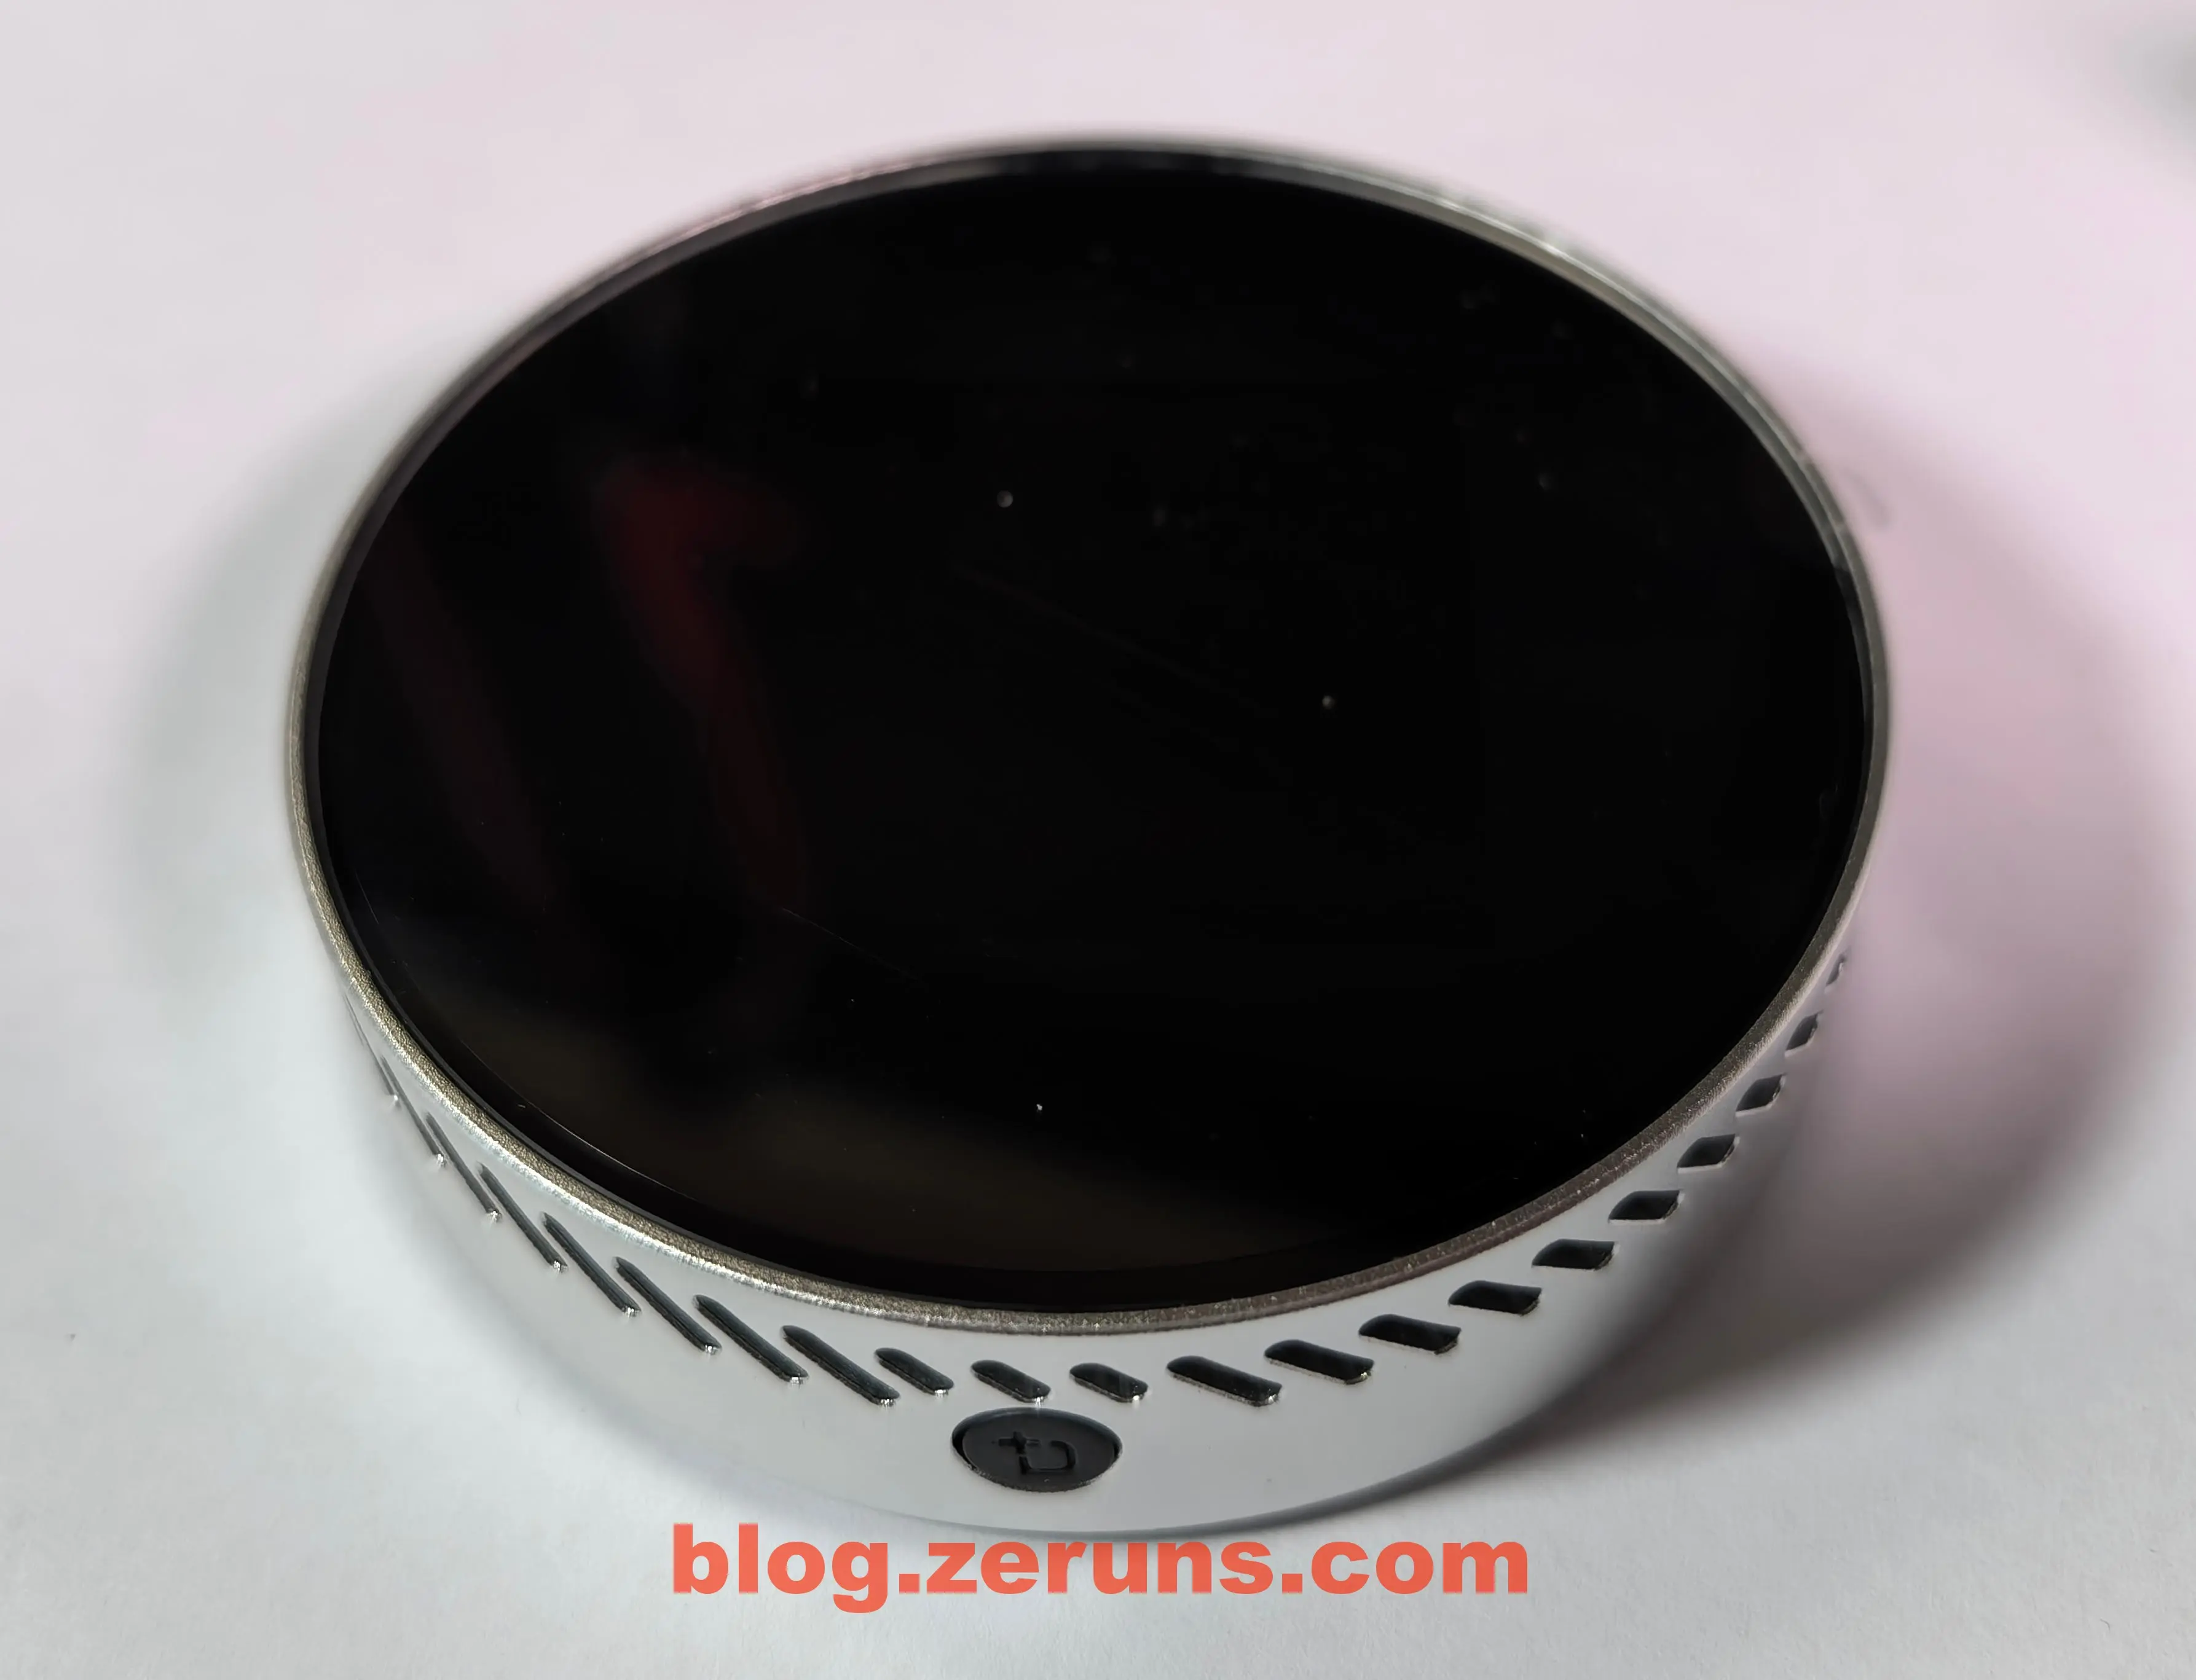
Front of the SSD Enclosure
The front side features a screen and a glass cover. The metal frame includes a button and a series of ventilation holes.
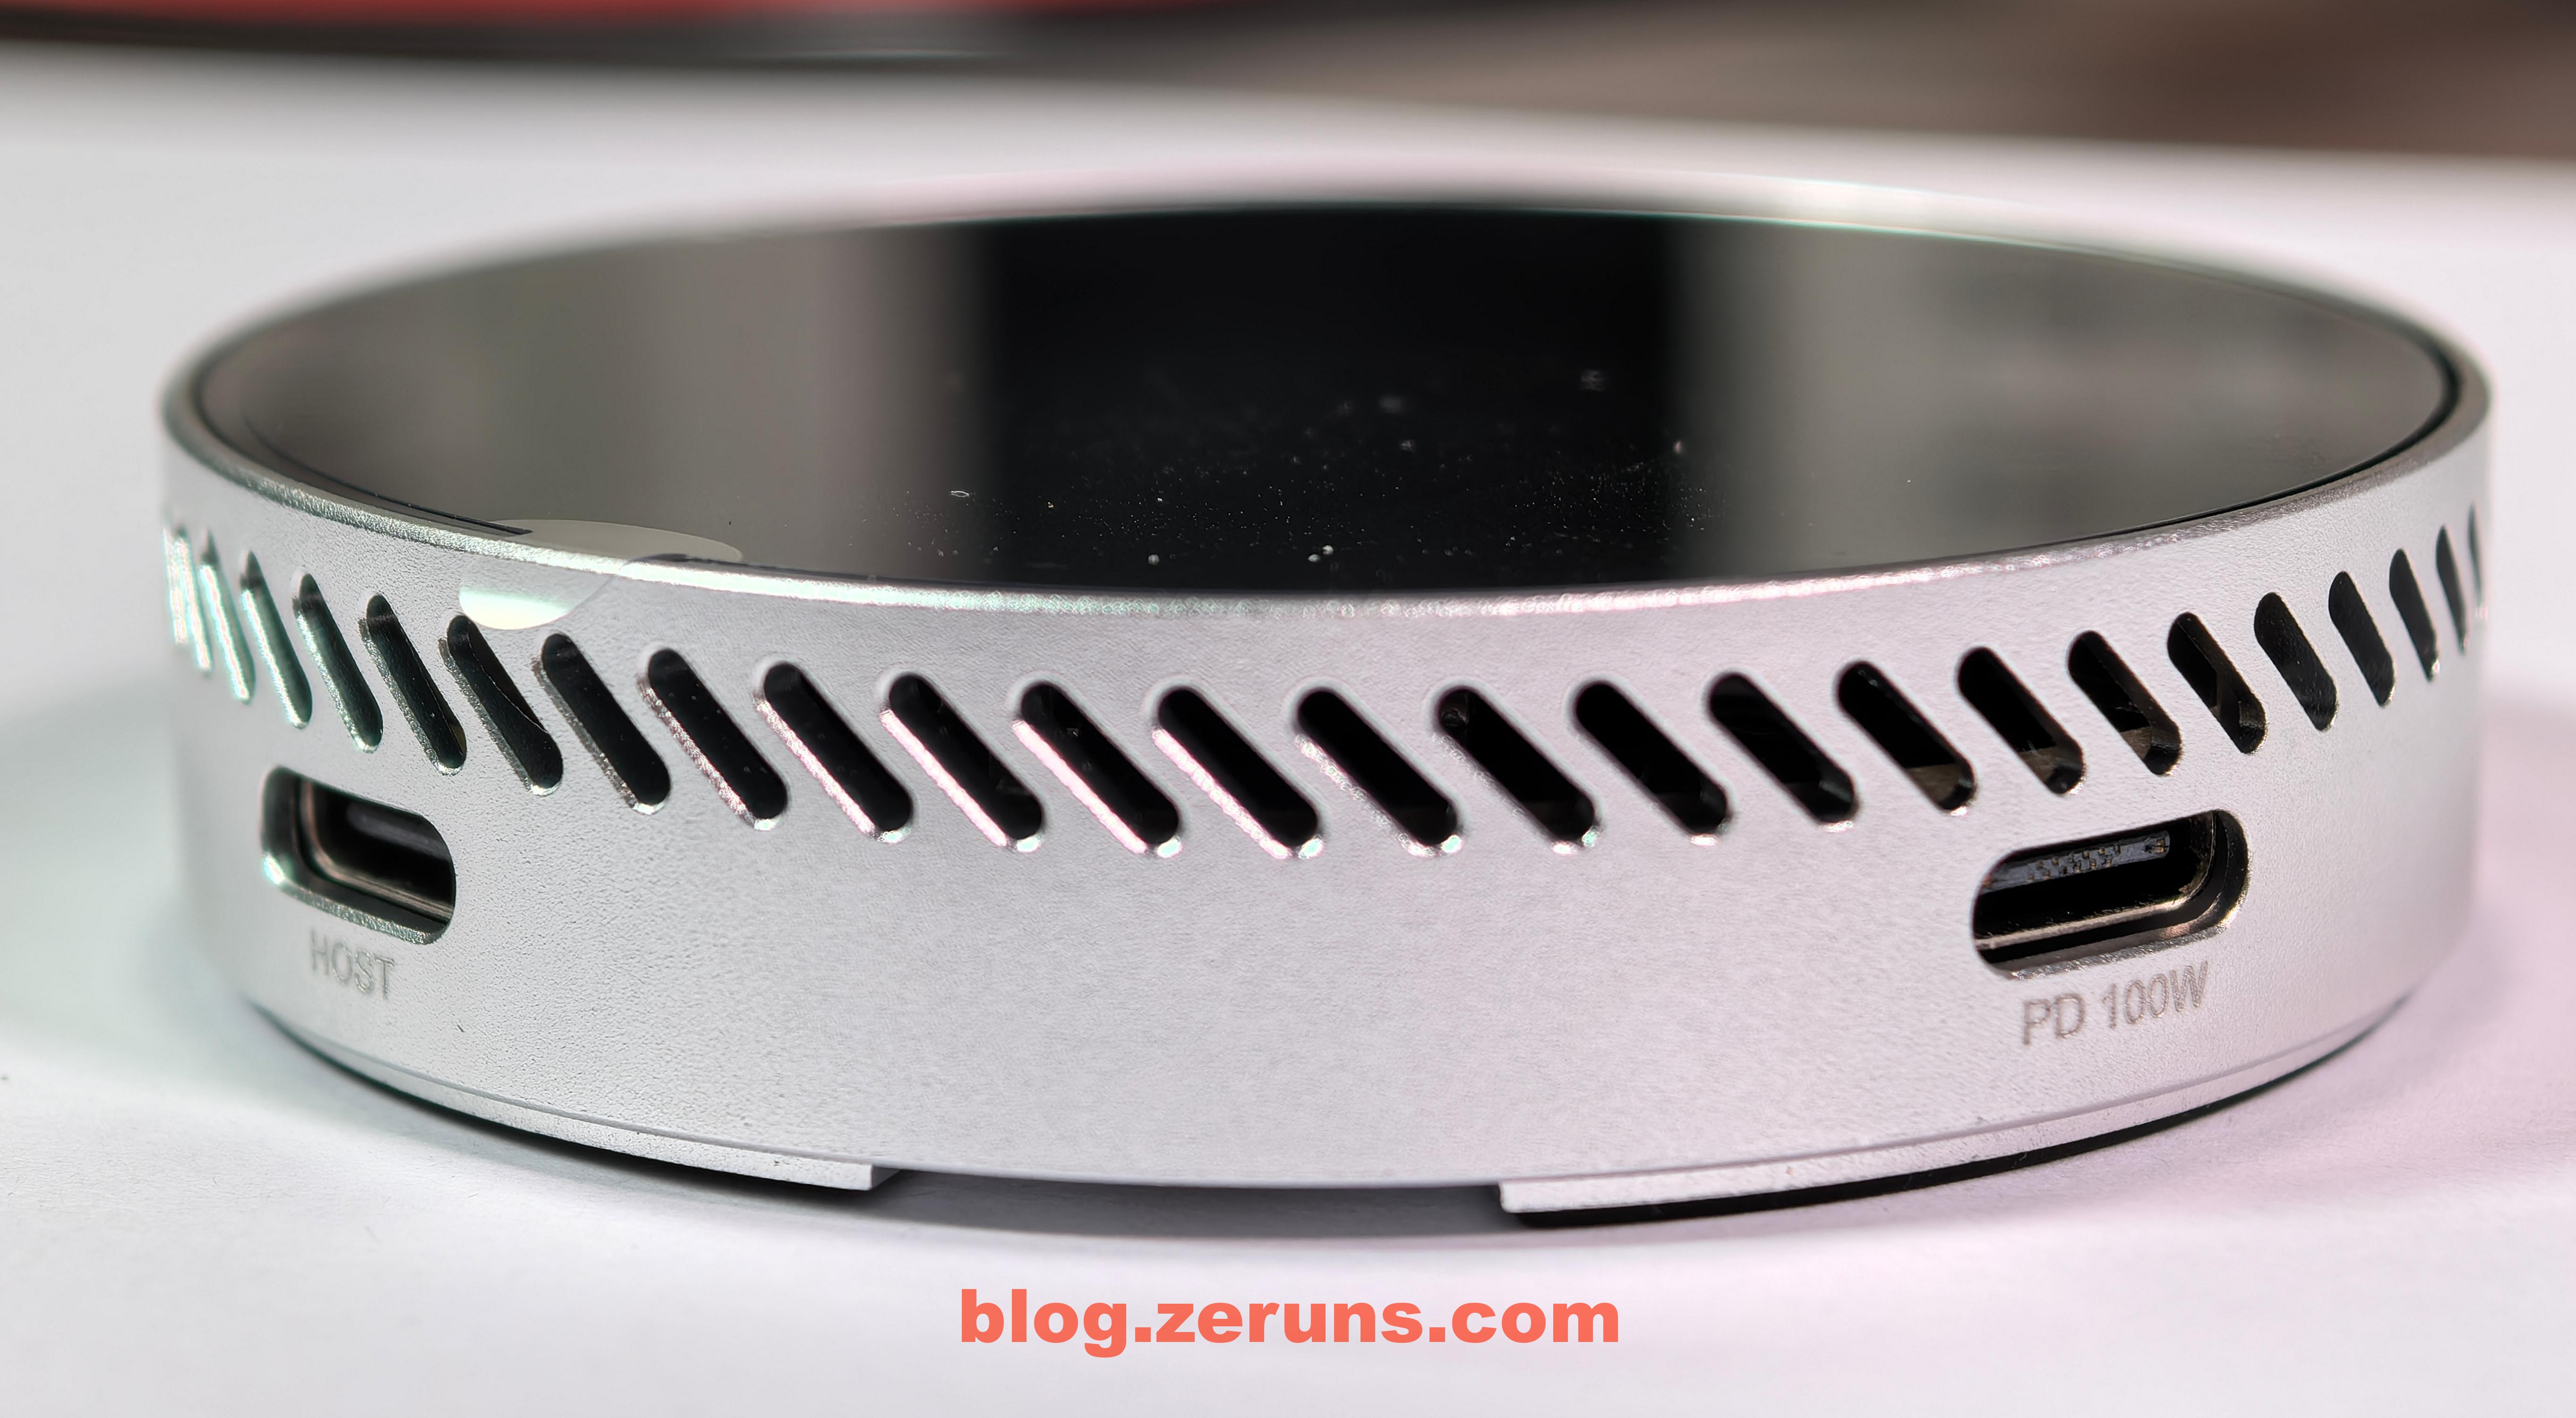
Side View
The enclosure has two Type-C ports on its side. The HOST port is for data transfer, while the PD 100W port is for power delivery.
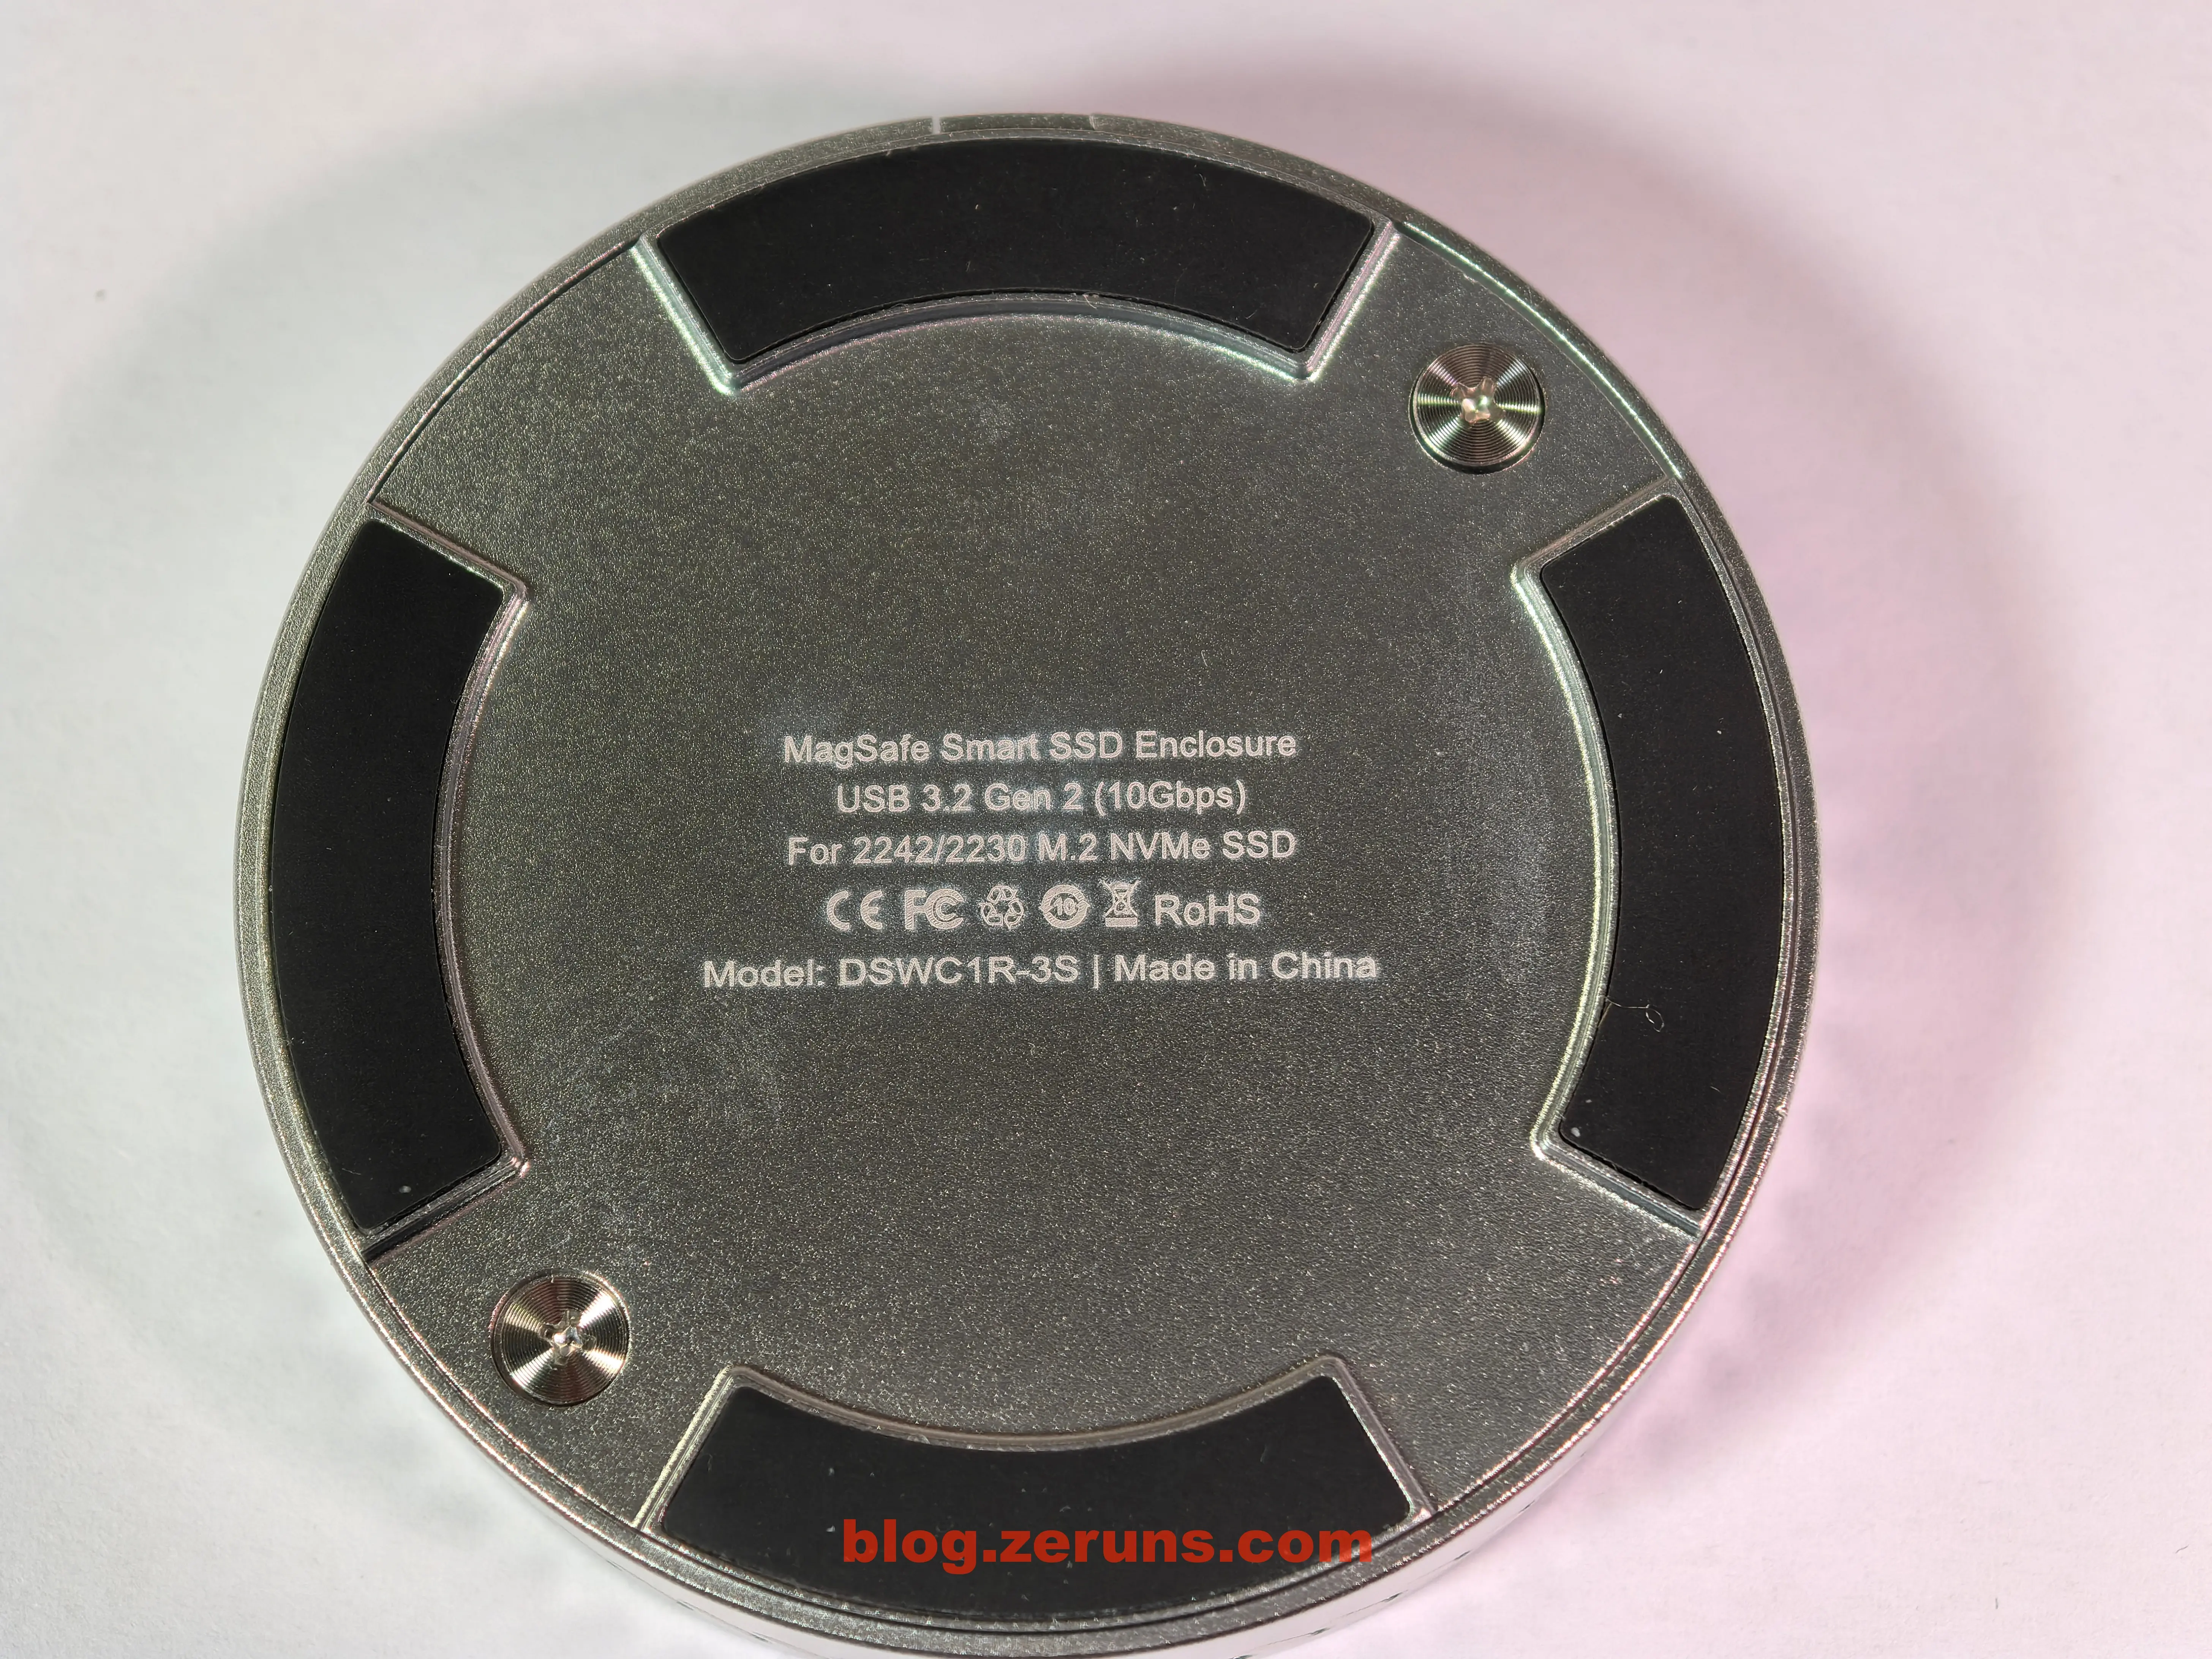
Bottom of the SSD Enclosure
The bottom panel has the model number and anti-slip feet (with built-in magnets).
Internal Structure
By removing the two screws at the bottom, you can open the back panel to install an M.2 SSD. The circuit board includes a thermal pad, which is covered by a plastic film that needs to be removed before use.
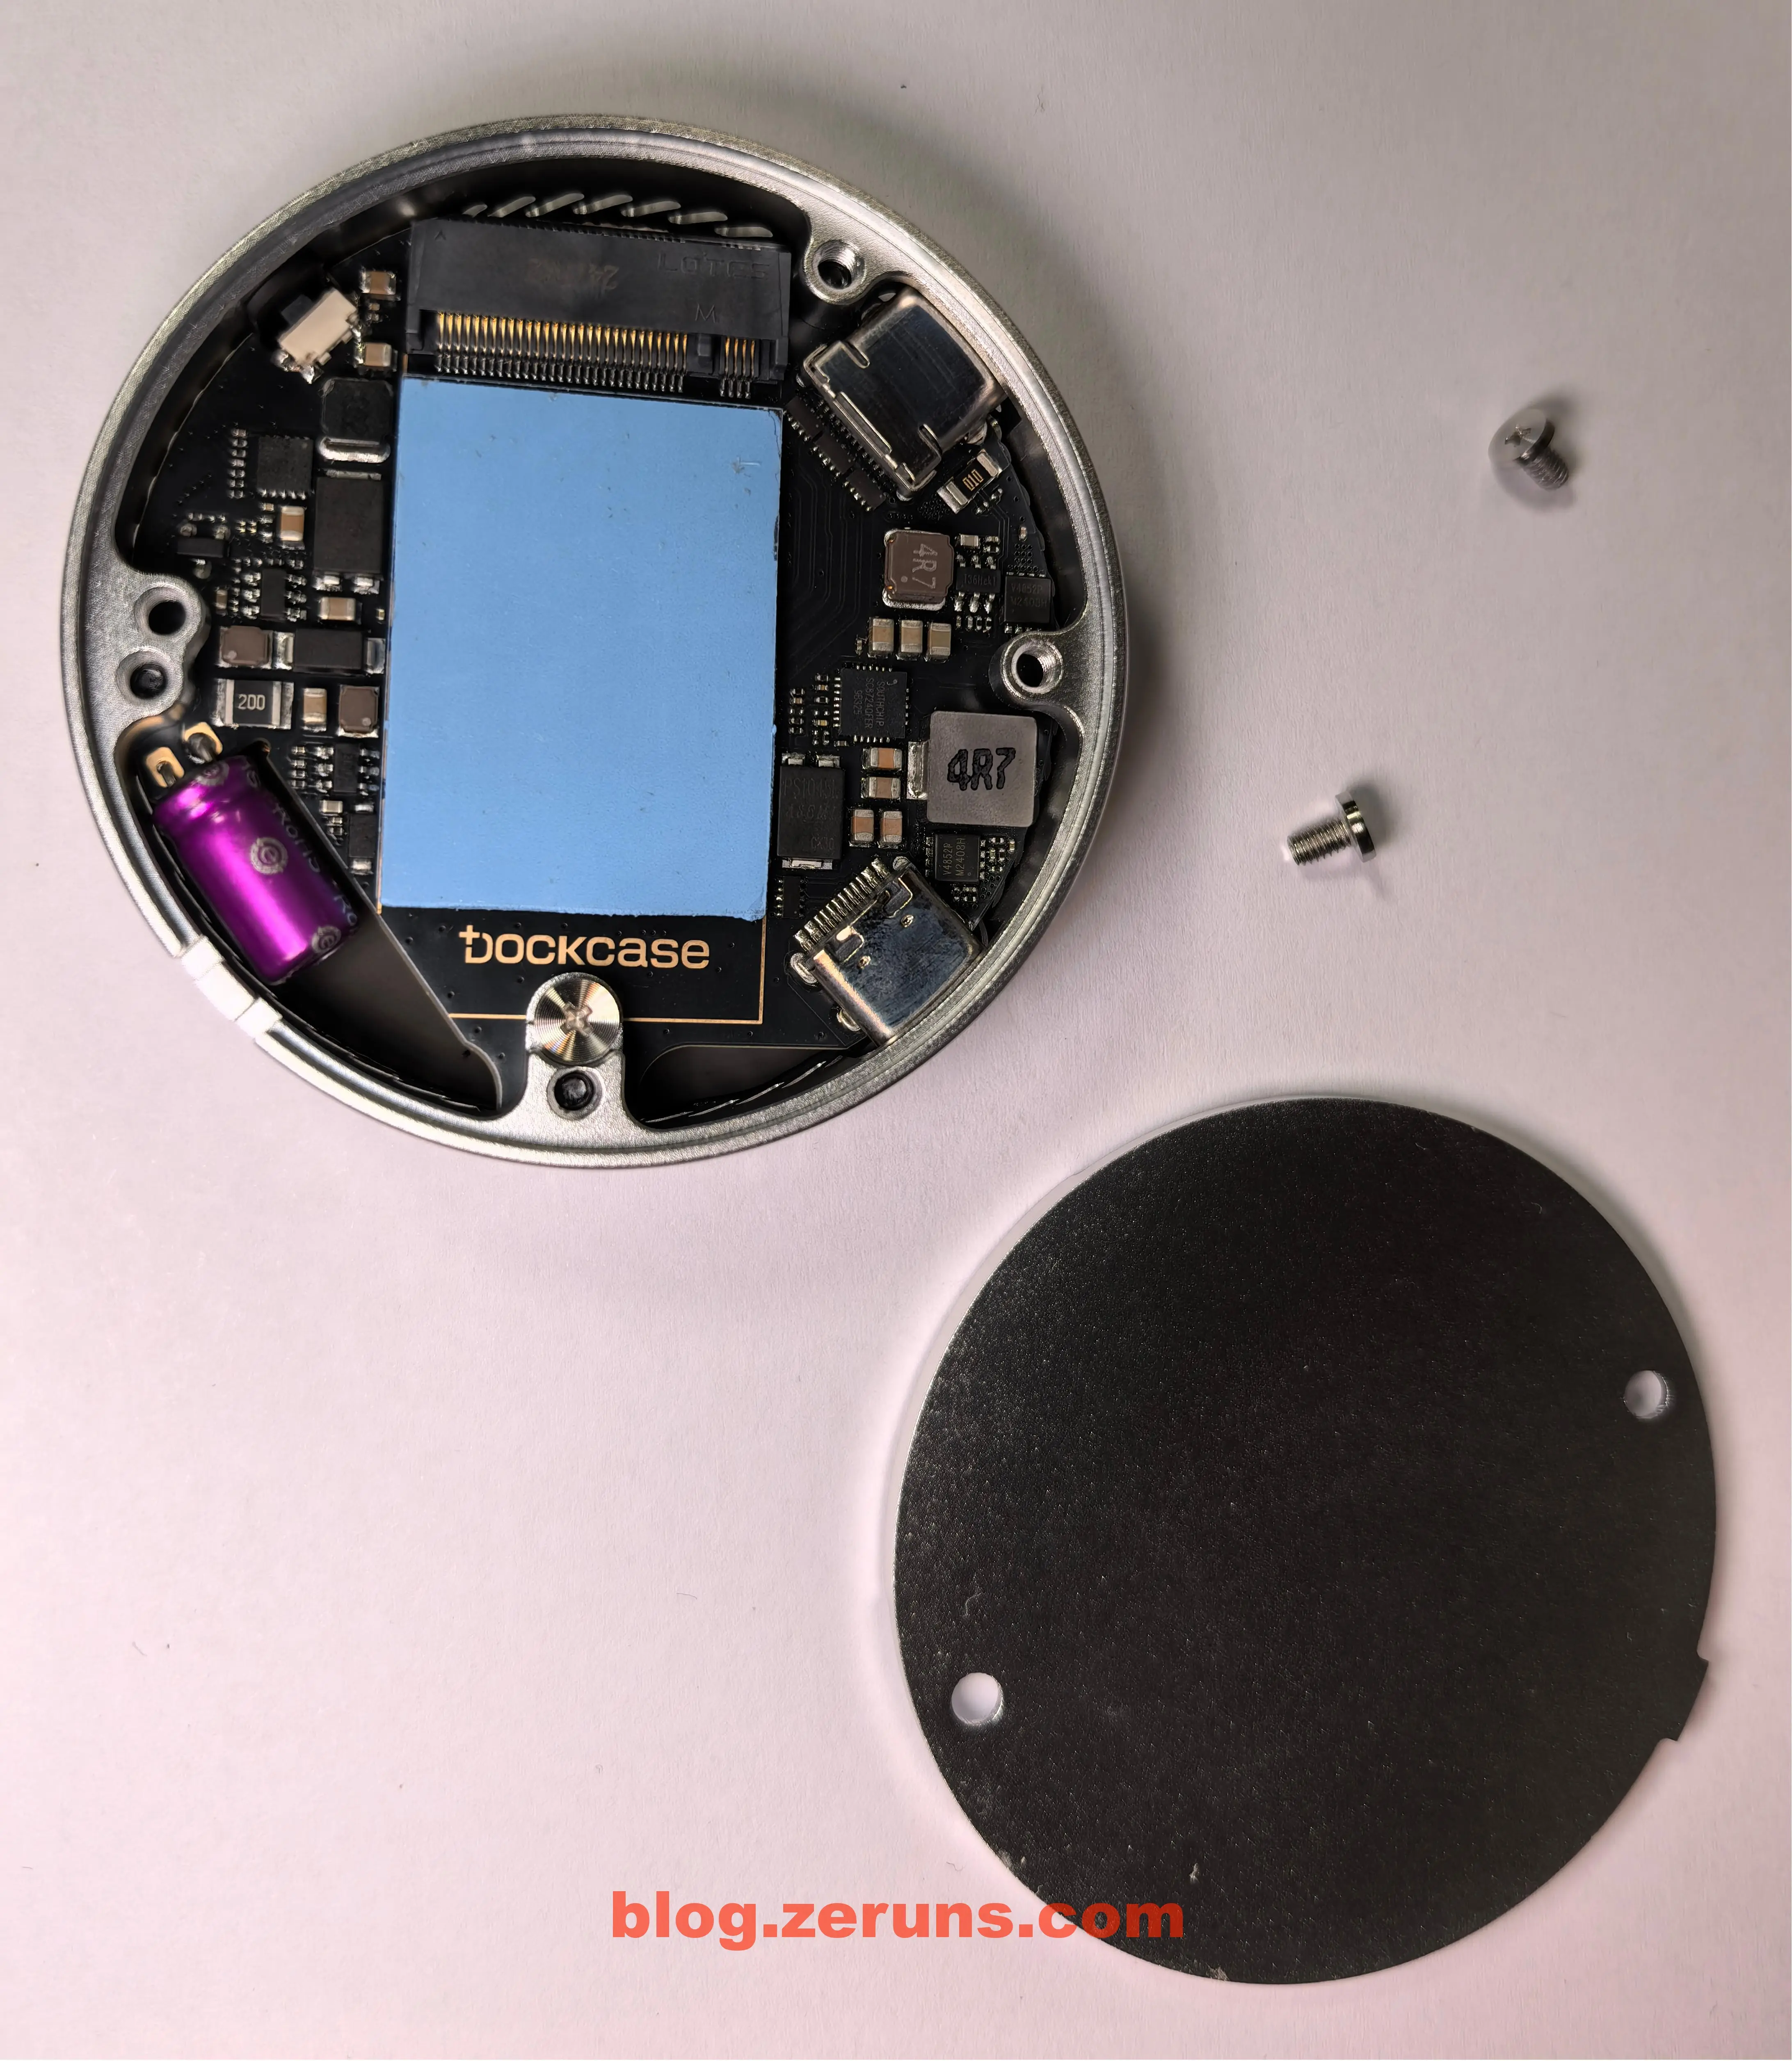
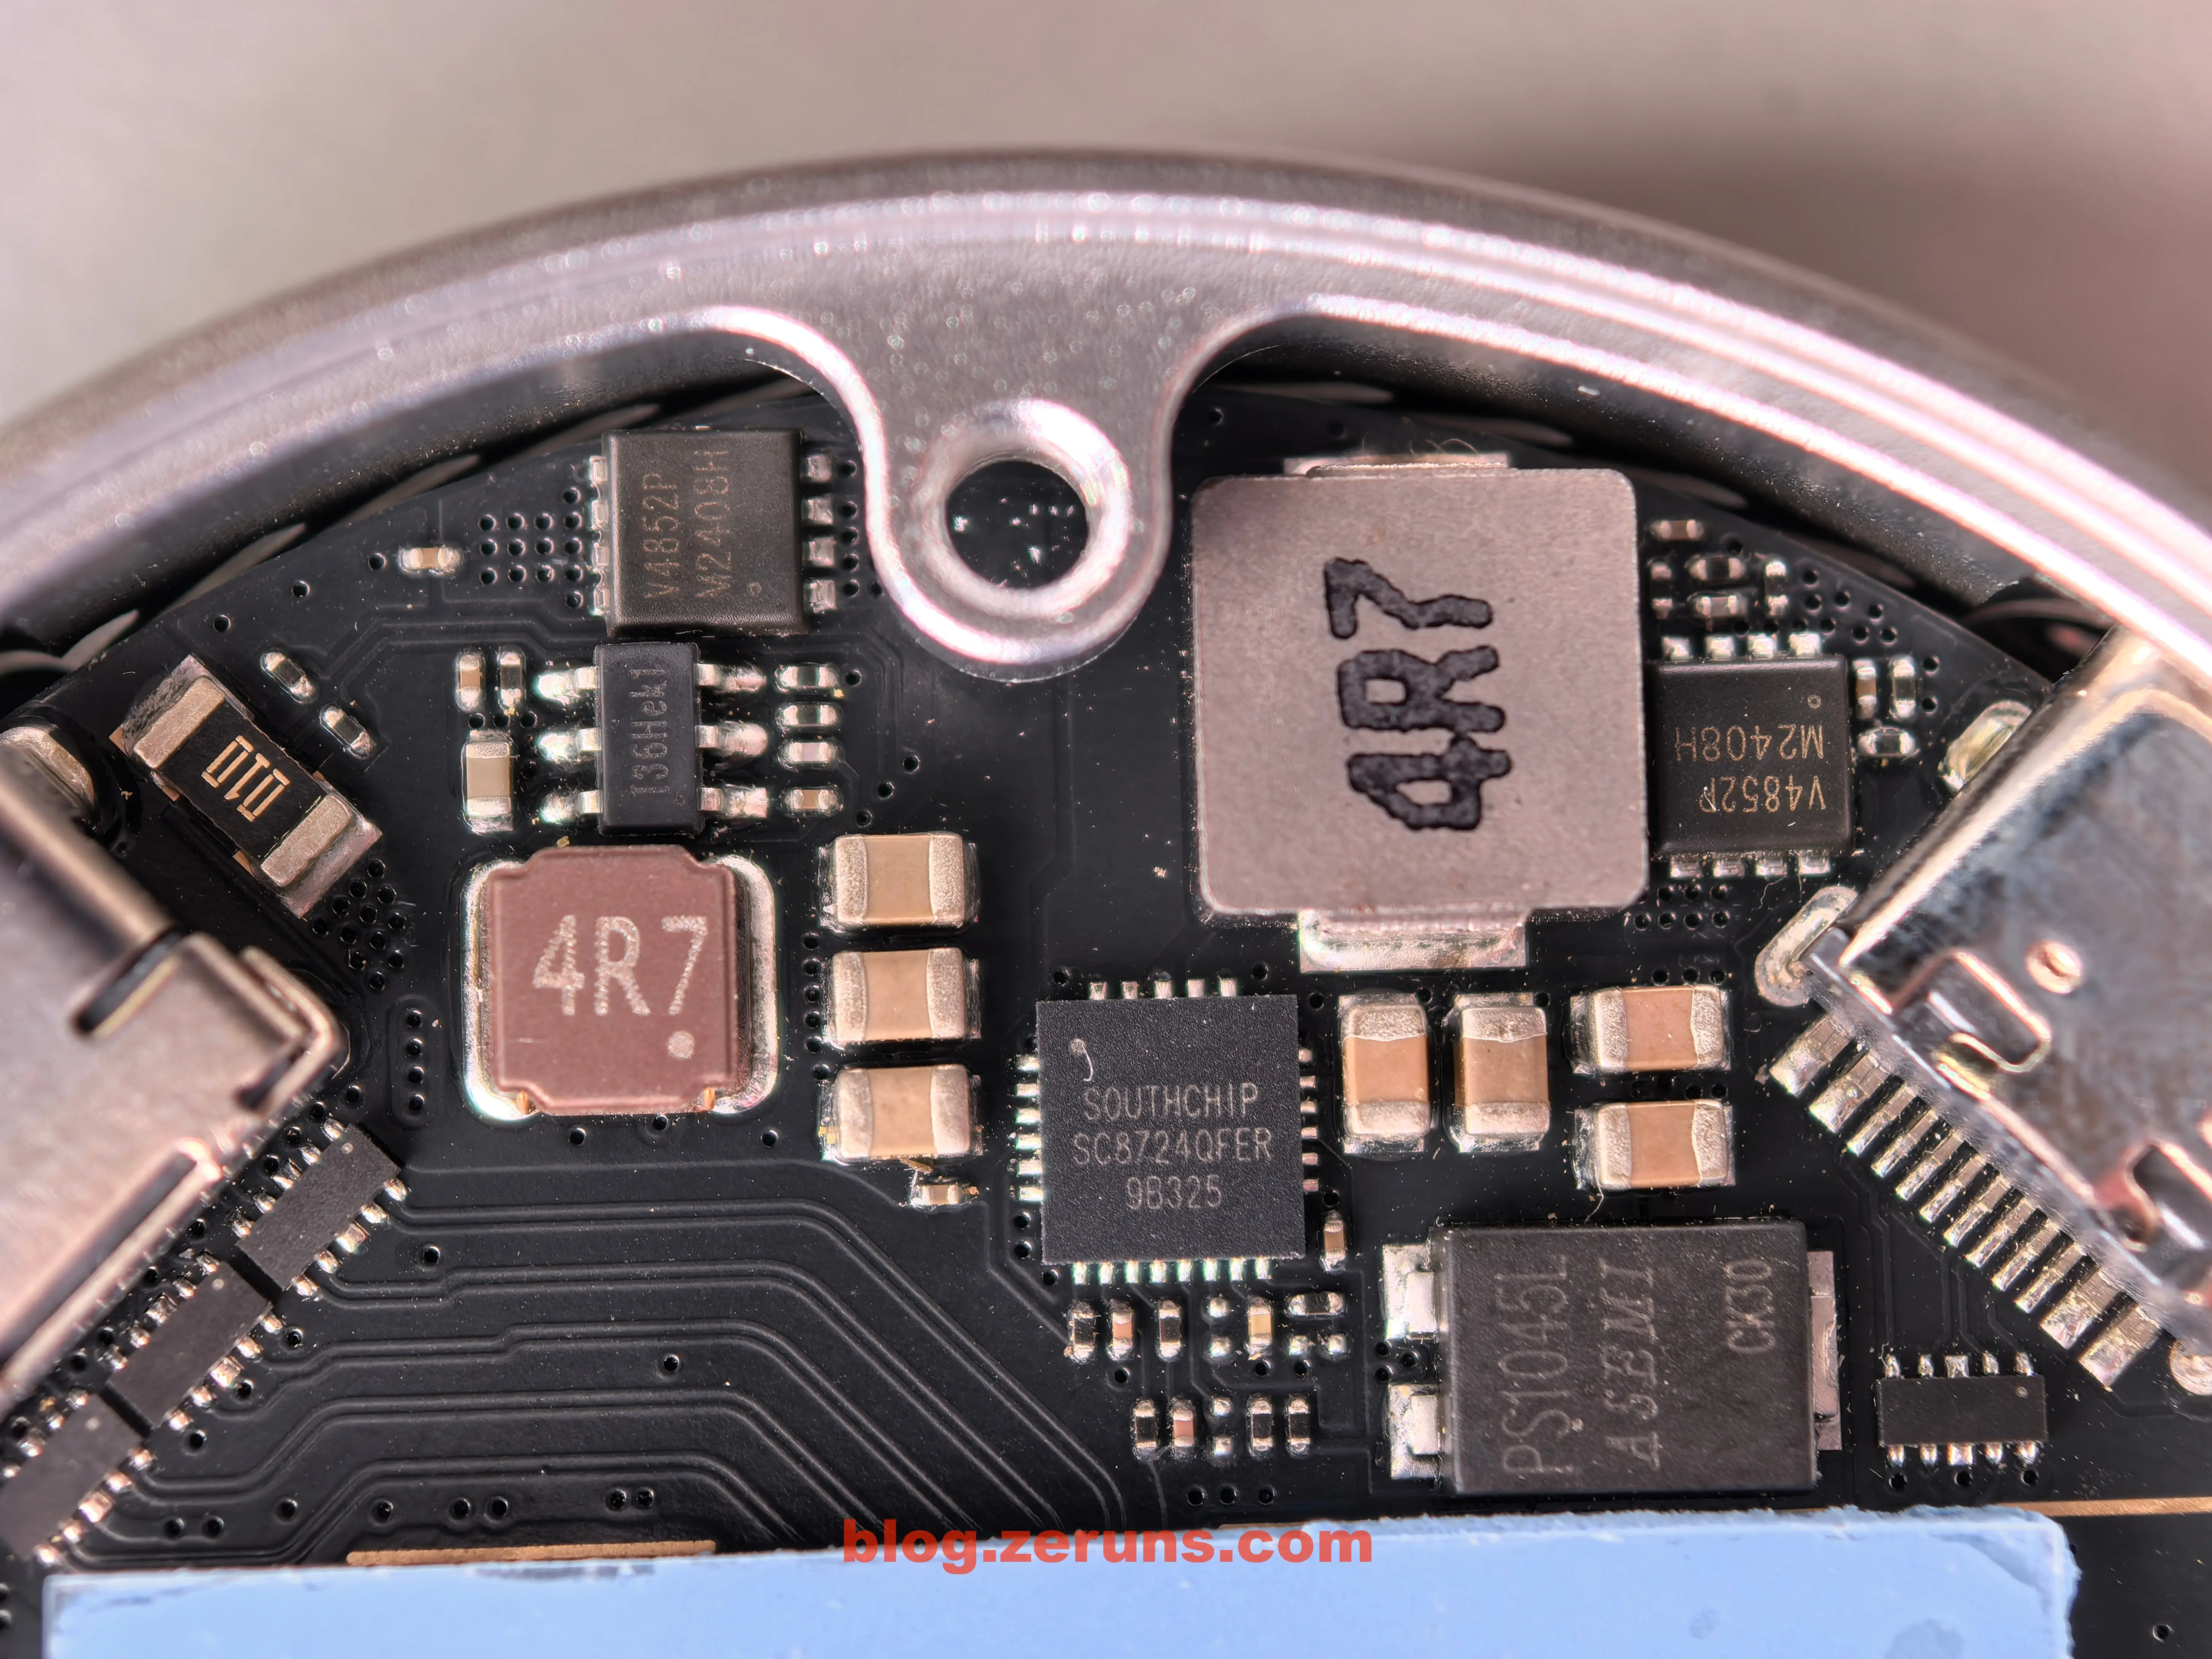
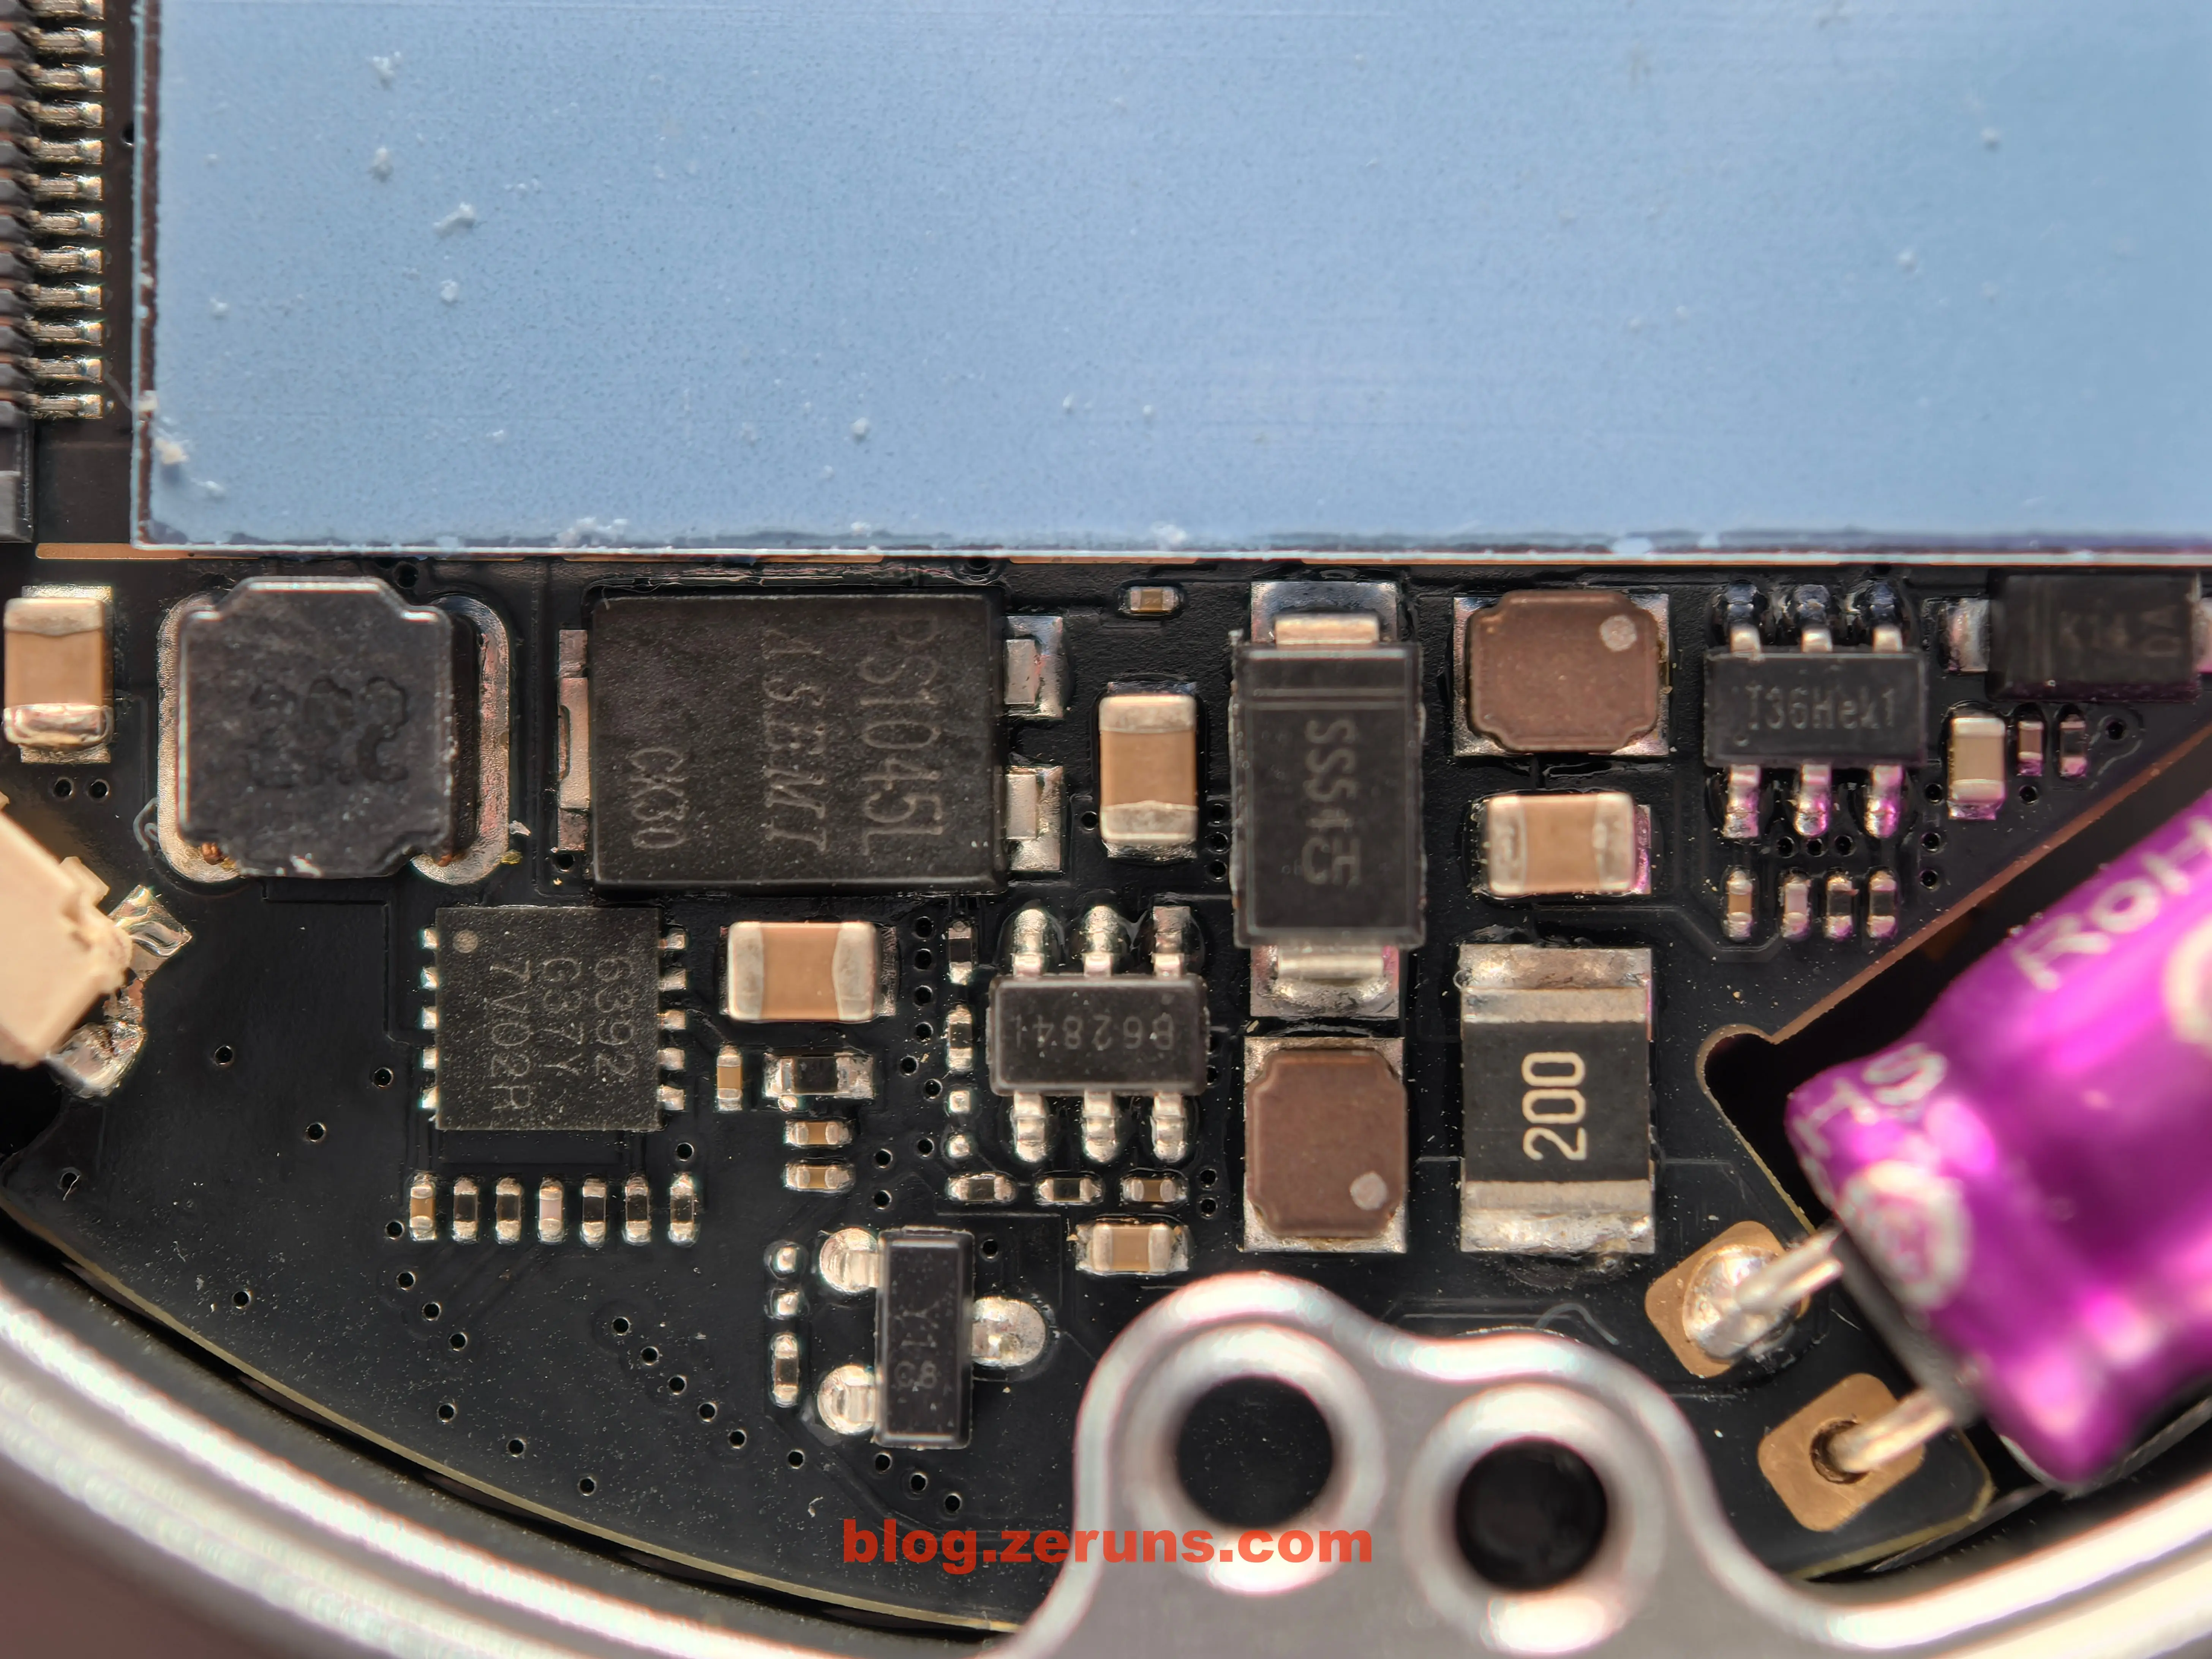
Internal Components
The chips found inside include:
- V4852P M2408H: PMOS transistor, model JMV4852P, 30V/32A
- SC8724QFER: A high-efficiency buck-boost converter from Southchip, integrating four MOSFETs. It supports 2.7-22V input and 3-22V output, with a fixed 5.1V output and a maximum current of 3.5A.
- PS1045L: A Schottky diode from ASEMI with ultra-low forward voltage drop. It features a TO-277 package, 10A forward current, and 45V reverse voltage.
- SS54: A surface-mount Schottky diode with a maximum reverse voltage of 40V, a forward current of 5A, and a low forward voltage drop (~0.55V), providing fast switching capabilities.
- 6392 G37Y 7V02R: No available data.
- 36Hek1: No available data, but likely a DC-DC power management chip.
The board also includes a large capacitor for power-loss protection, ensuring that files are not corrupted during sudden power outages and giving the SSD enough time to properly save the FTL (Flash Translation Layer) mapping table.
The main controller and display-related chips are located on the back of the PCB, beneath the glass panel. Since the adhesive is quite strong, I decided not to remove it.
According to the manufacturer's specifications, the main controller is Realtek RTL9210. The front-end interface supports USB 3.1 Gen 2 (10Gbps), USB 3.1 Gen 1 (5Gbps), and USB 2.0, while the back-end interface is PCIe 3.0 x2 (16Gbps bandwidth).
Official RTL9210B Chip Page: https://url.zeruns.com/Sc7nr
Review & Speed Test
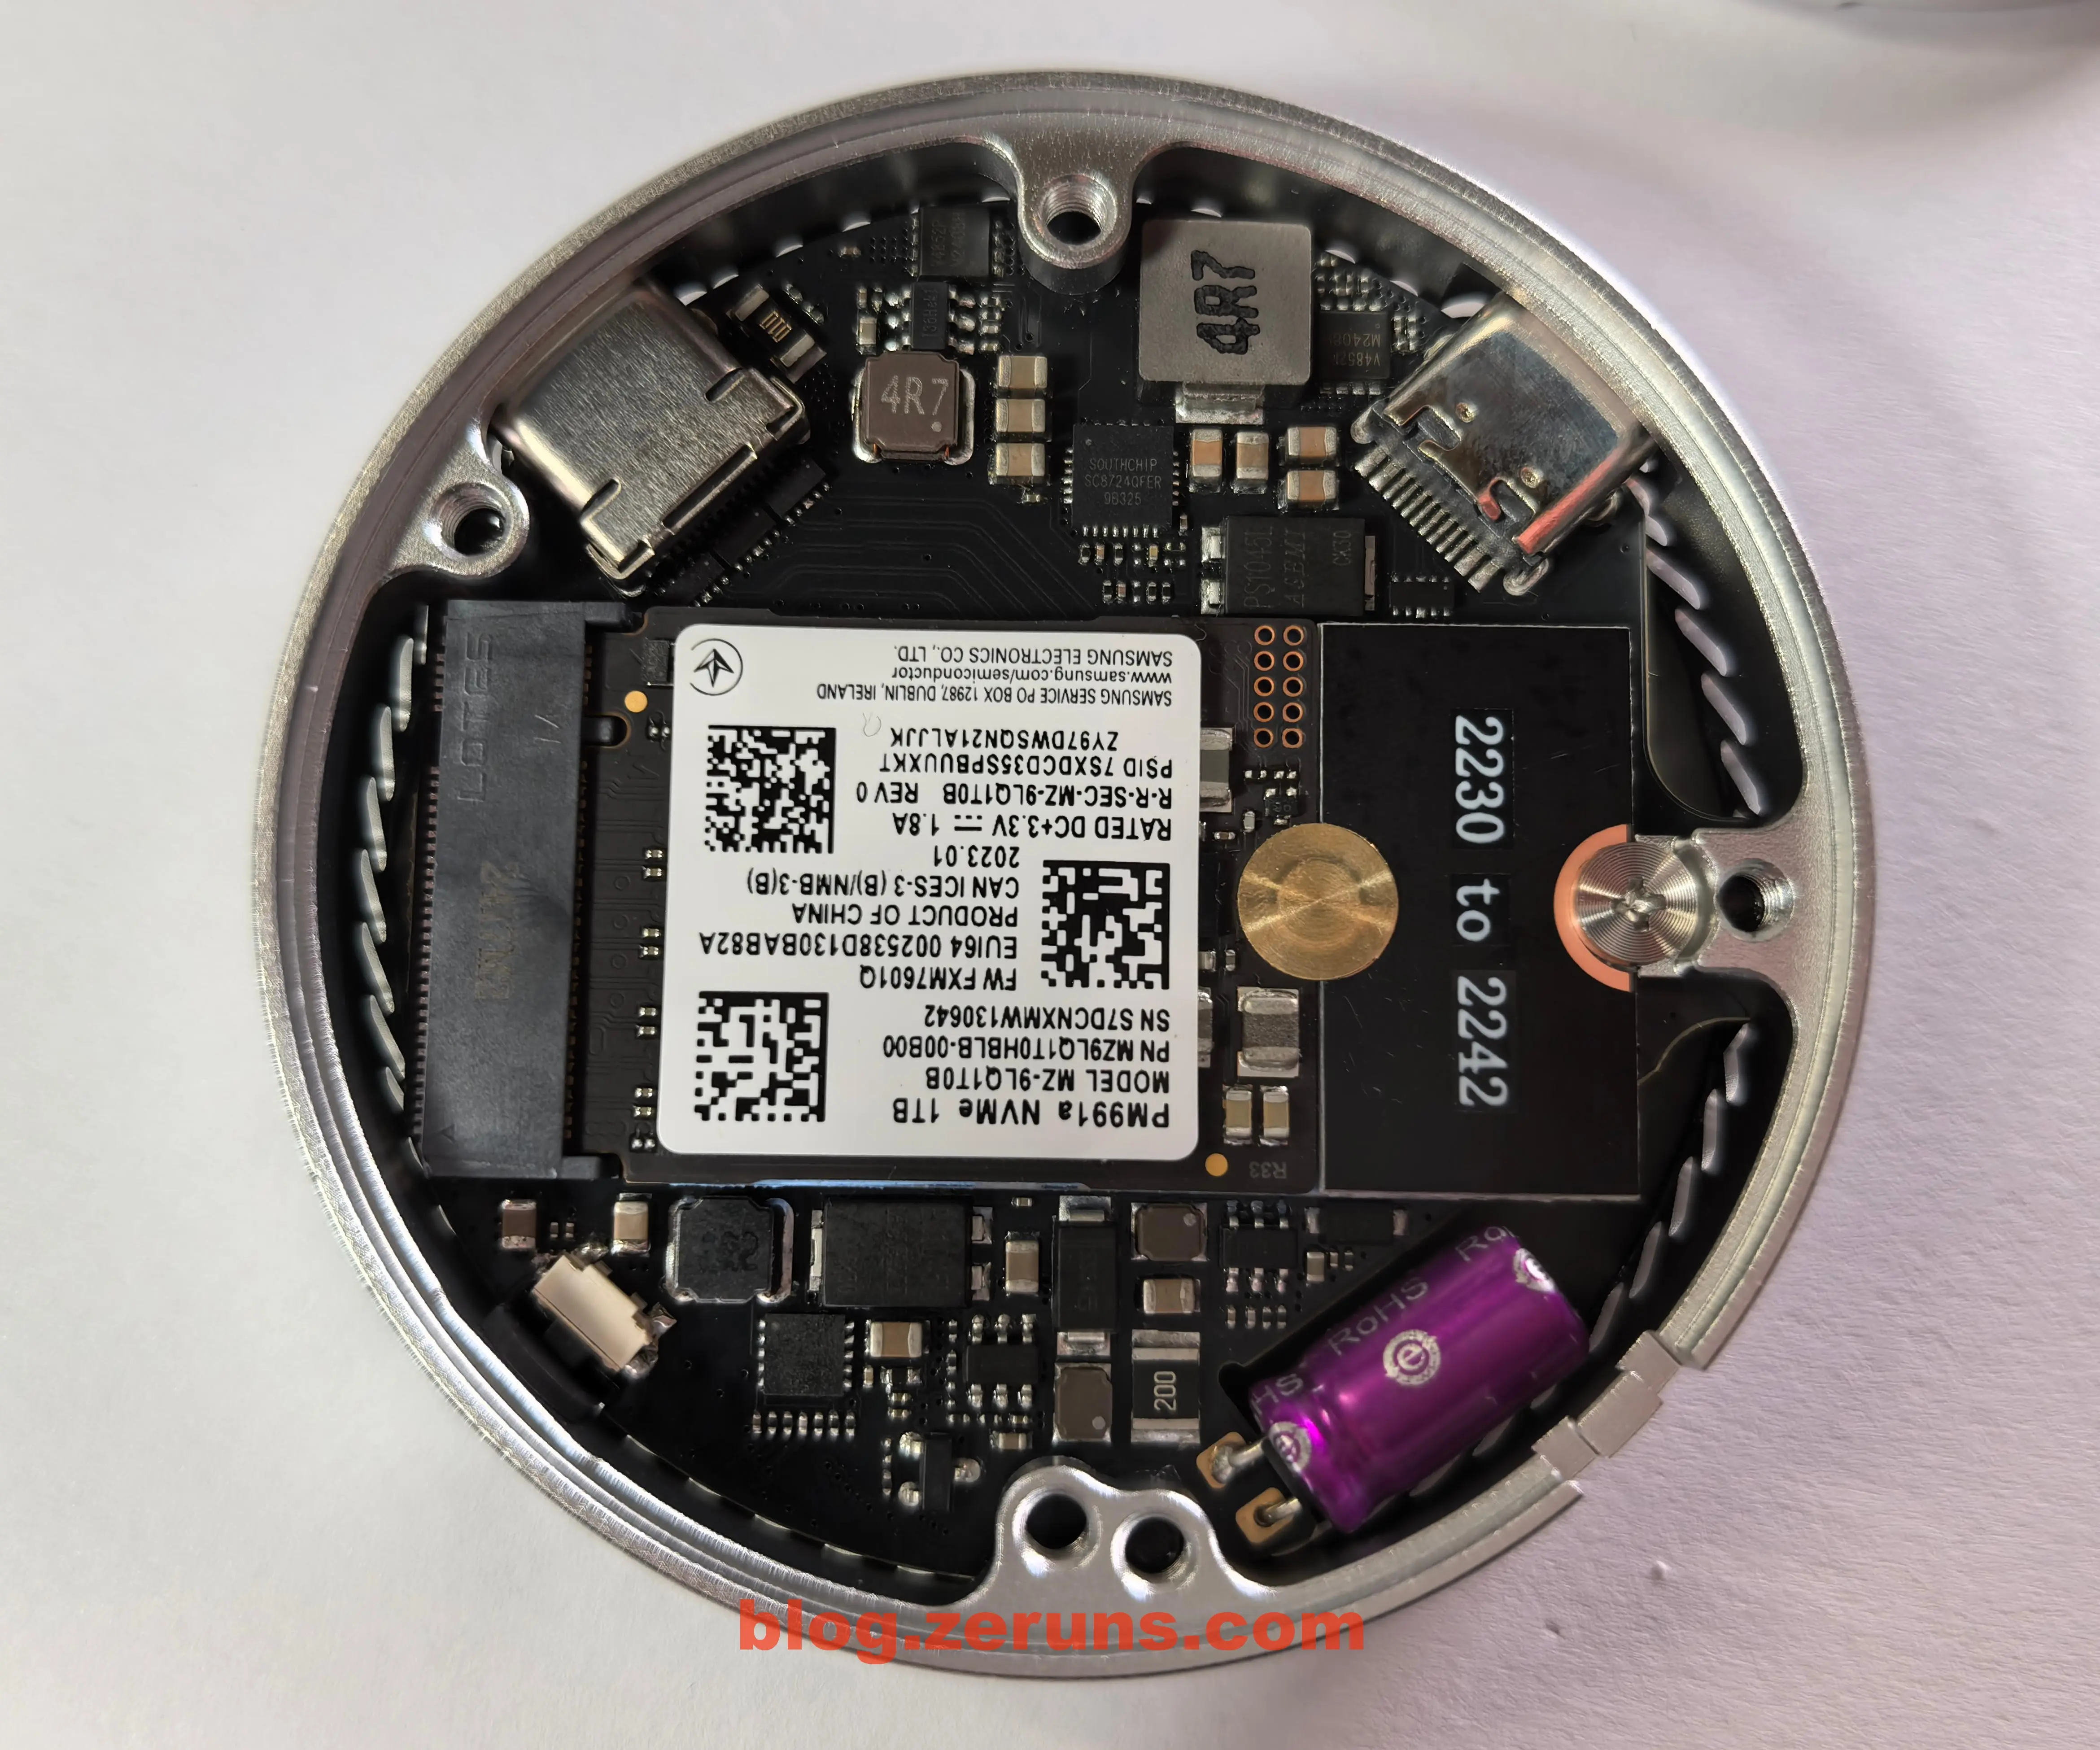
I installed a Samsung PM991a 1TB SSD (2230 form factor) for testing, requiring an extension bracket to adapt it to 2242 size.
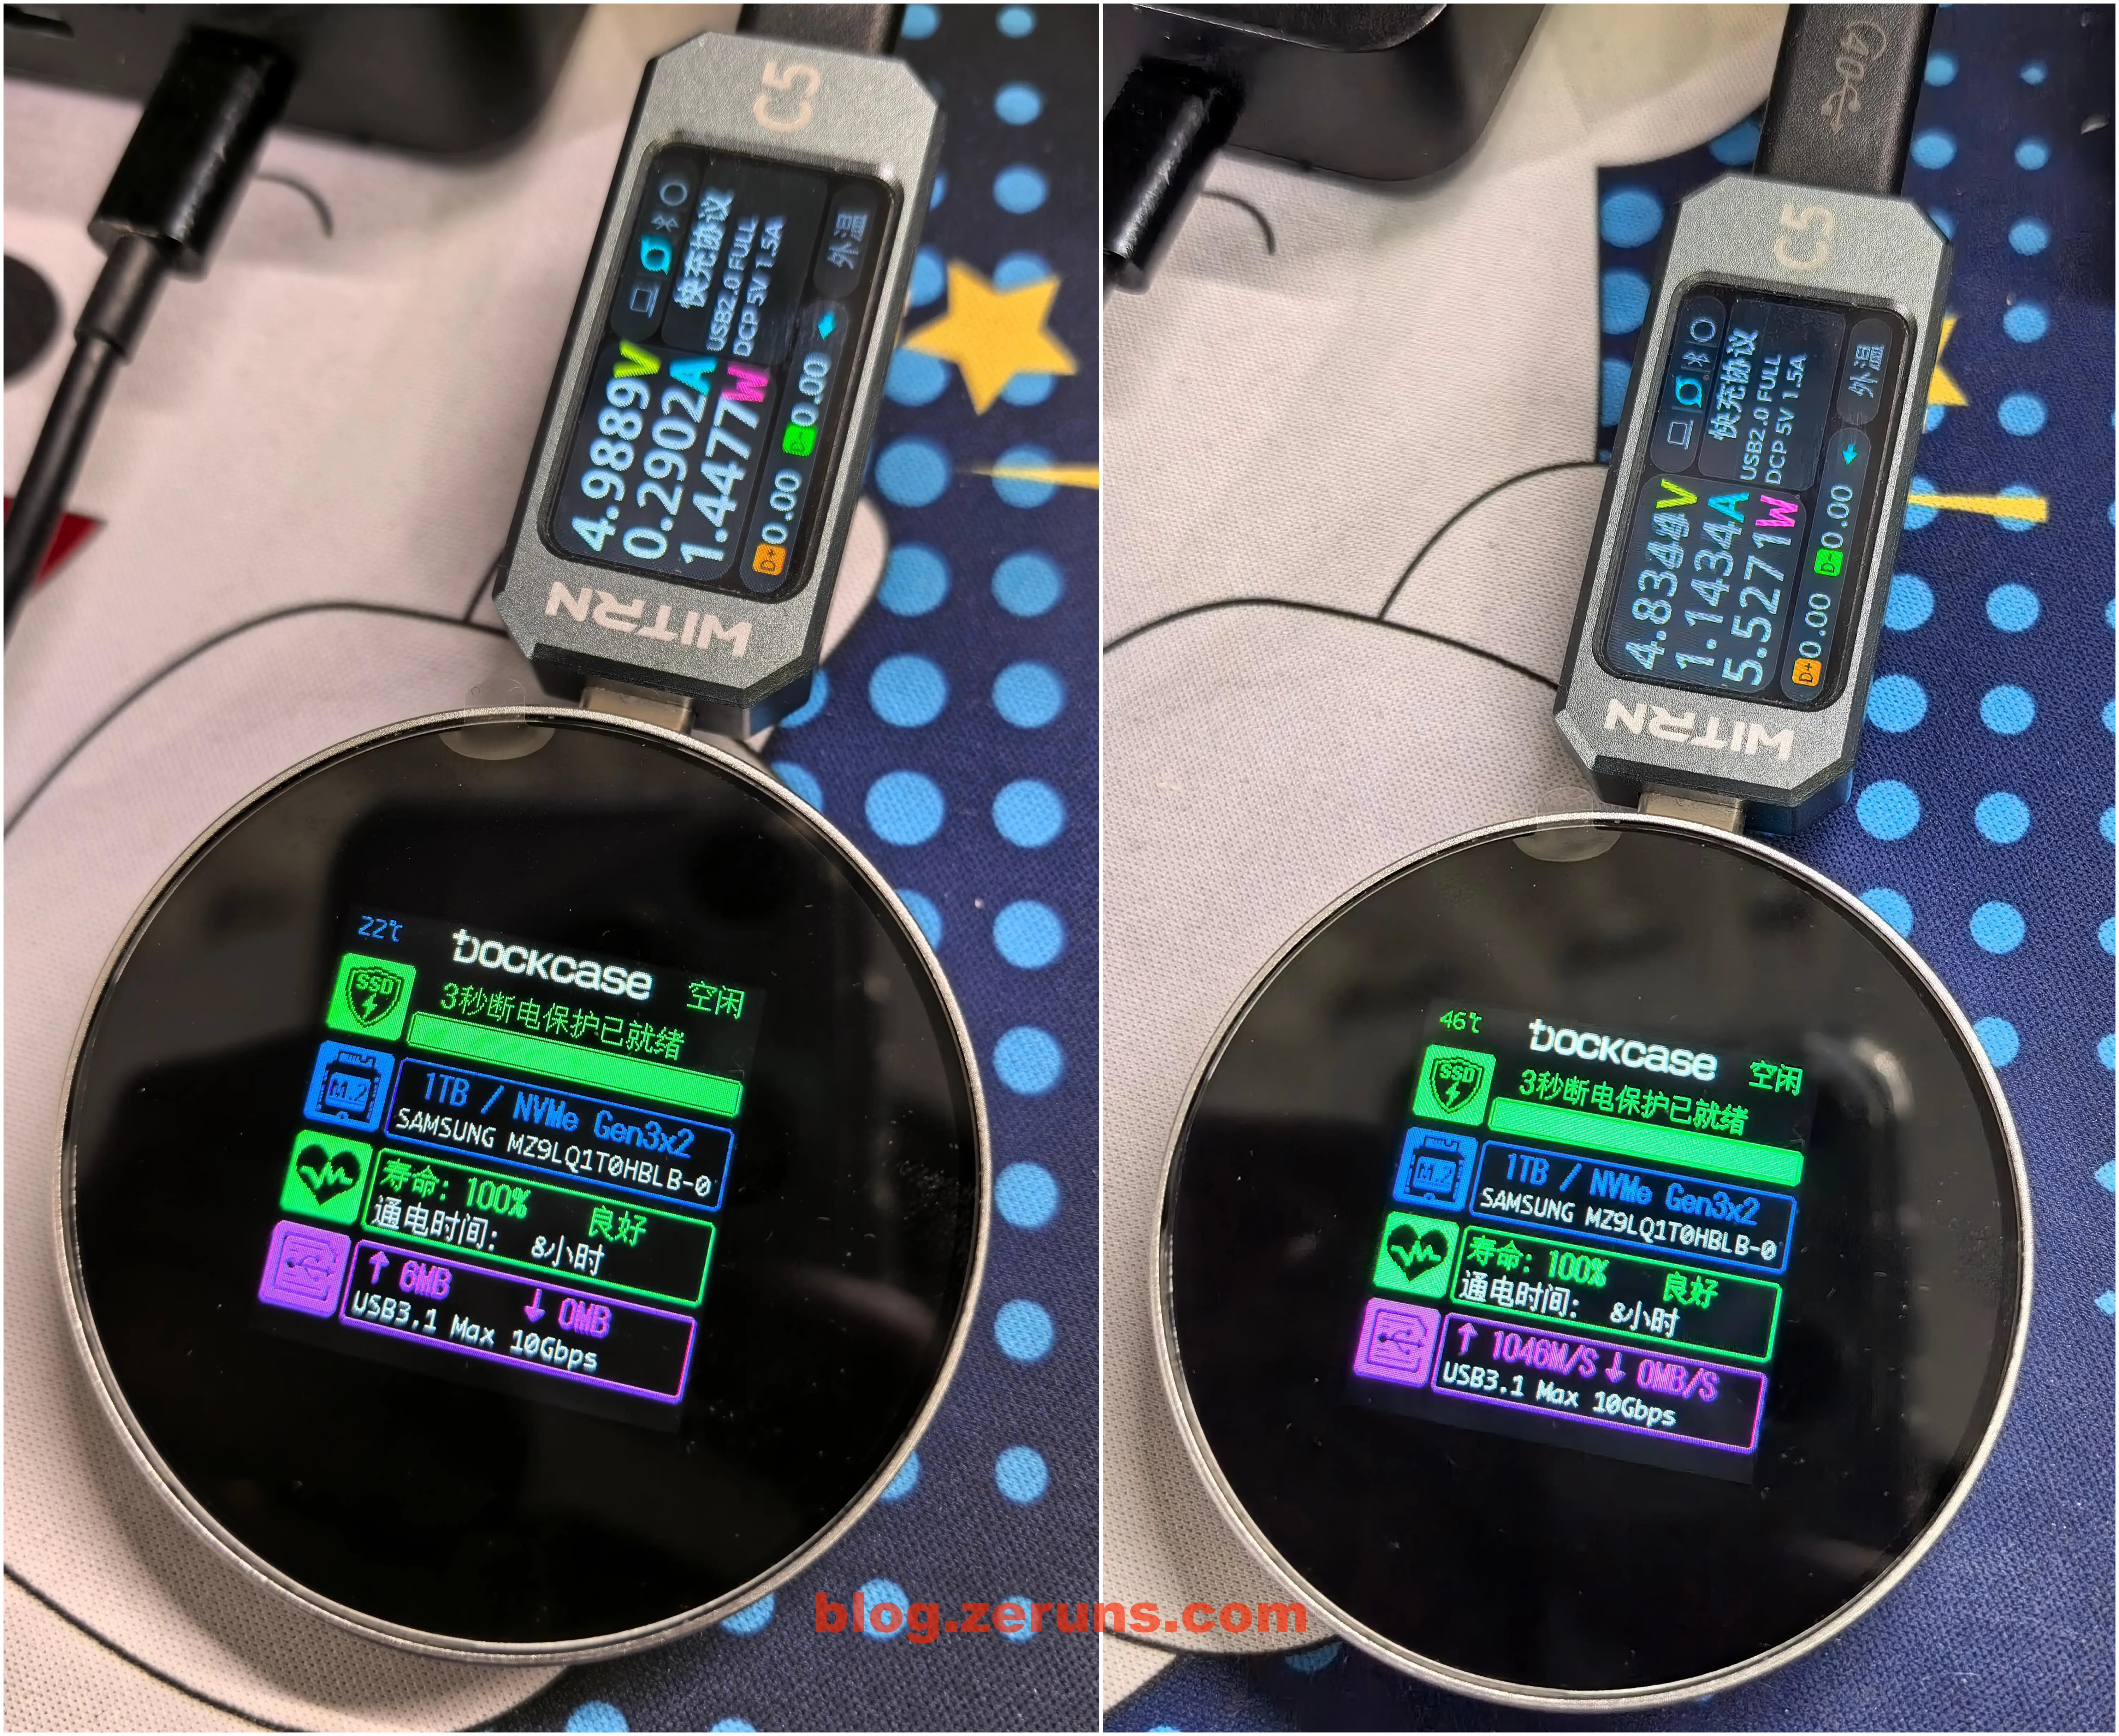
When connected to a PC with no active read/write operations, the enclosure consumes about 1.4W. The built-in screen displays real-time metrics: SSD temperature, model, capacity, lifespan, power-on time, read/write speeds, and USB protocol speed.
During full-speed read operations, the power consumption peaks at around 5.5W.
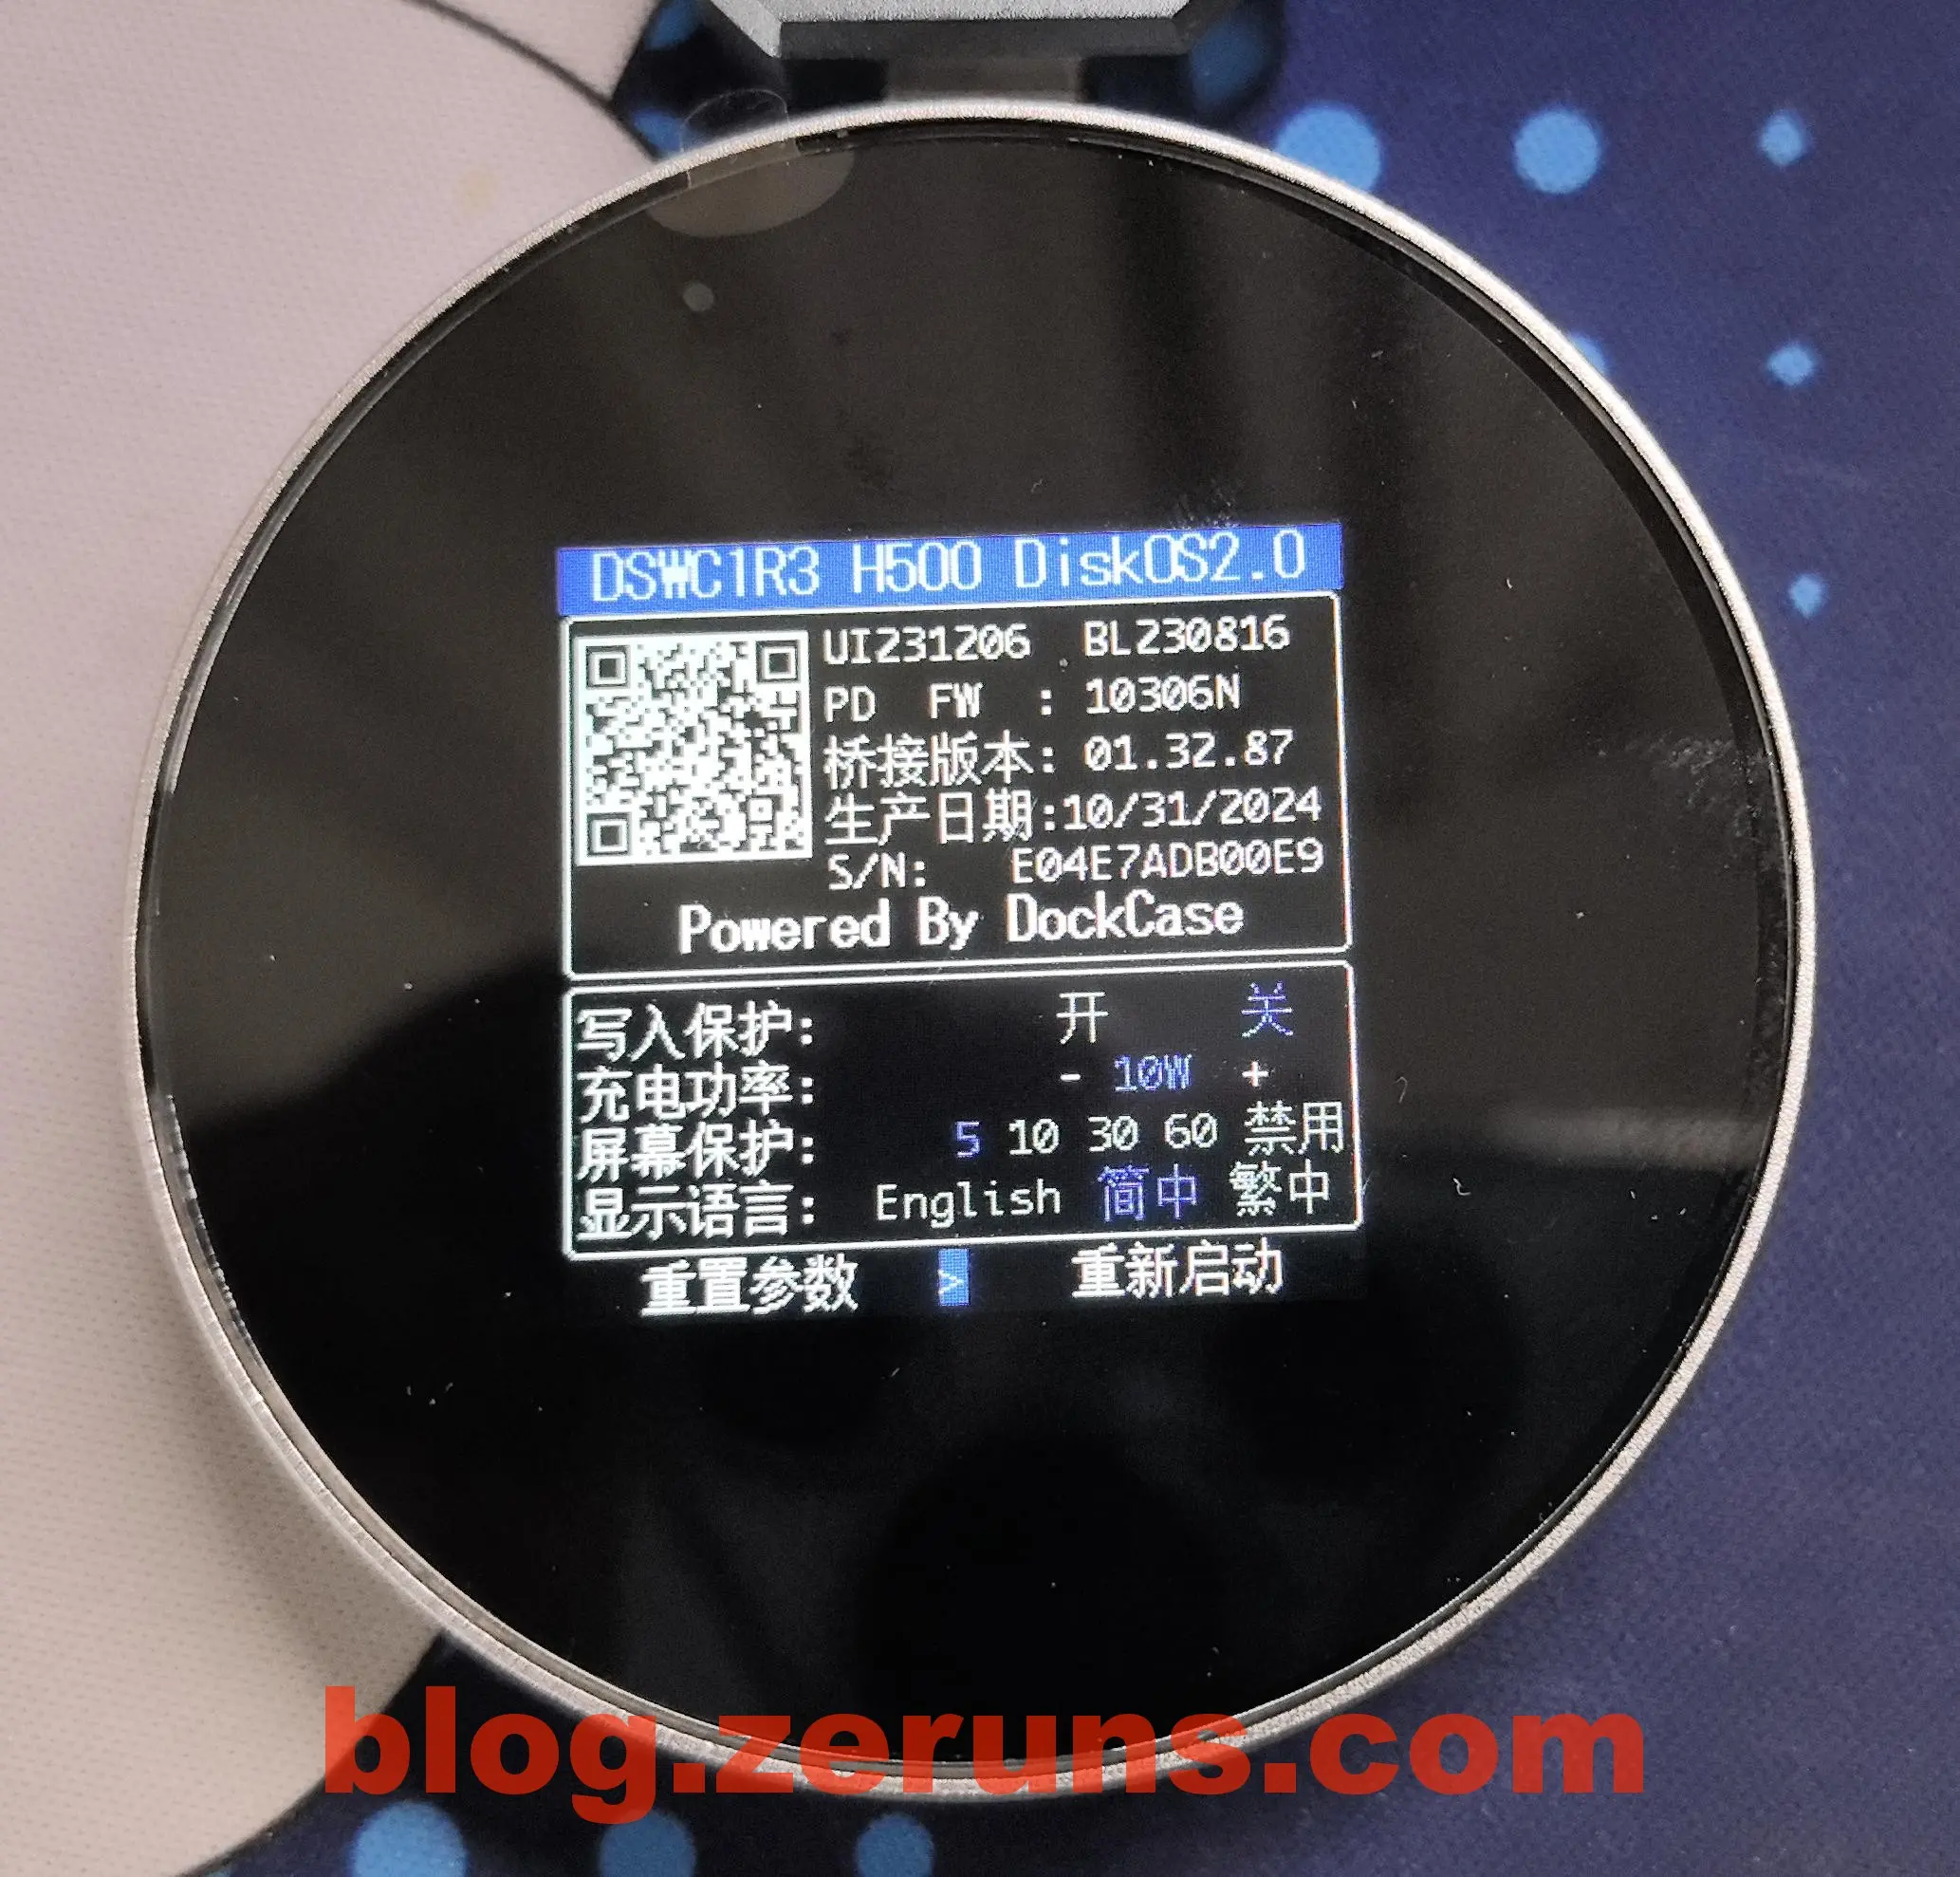
Enclosure Settings: Long-press the frame button until "About" appears to access settings. Features include write protection, screen timeout adjustment, charging power configuration (for the backup capacitor), and language selection.
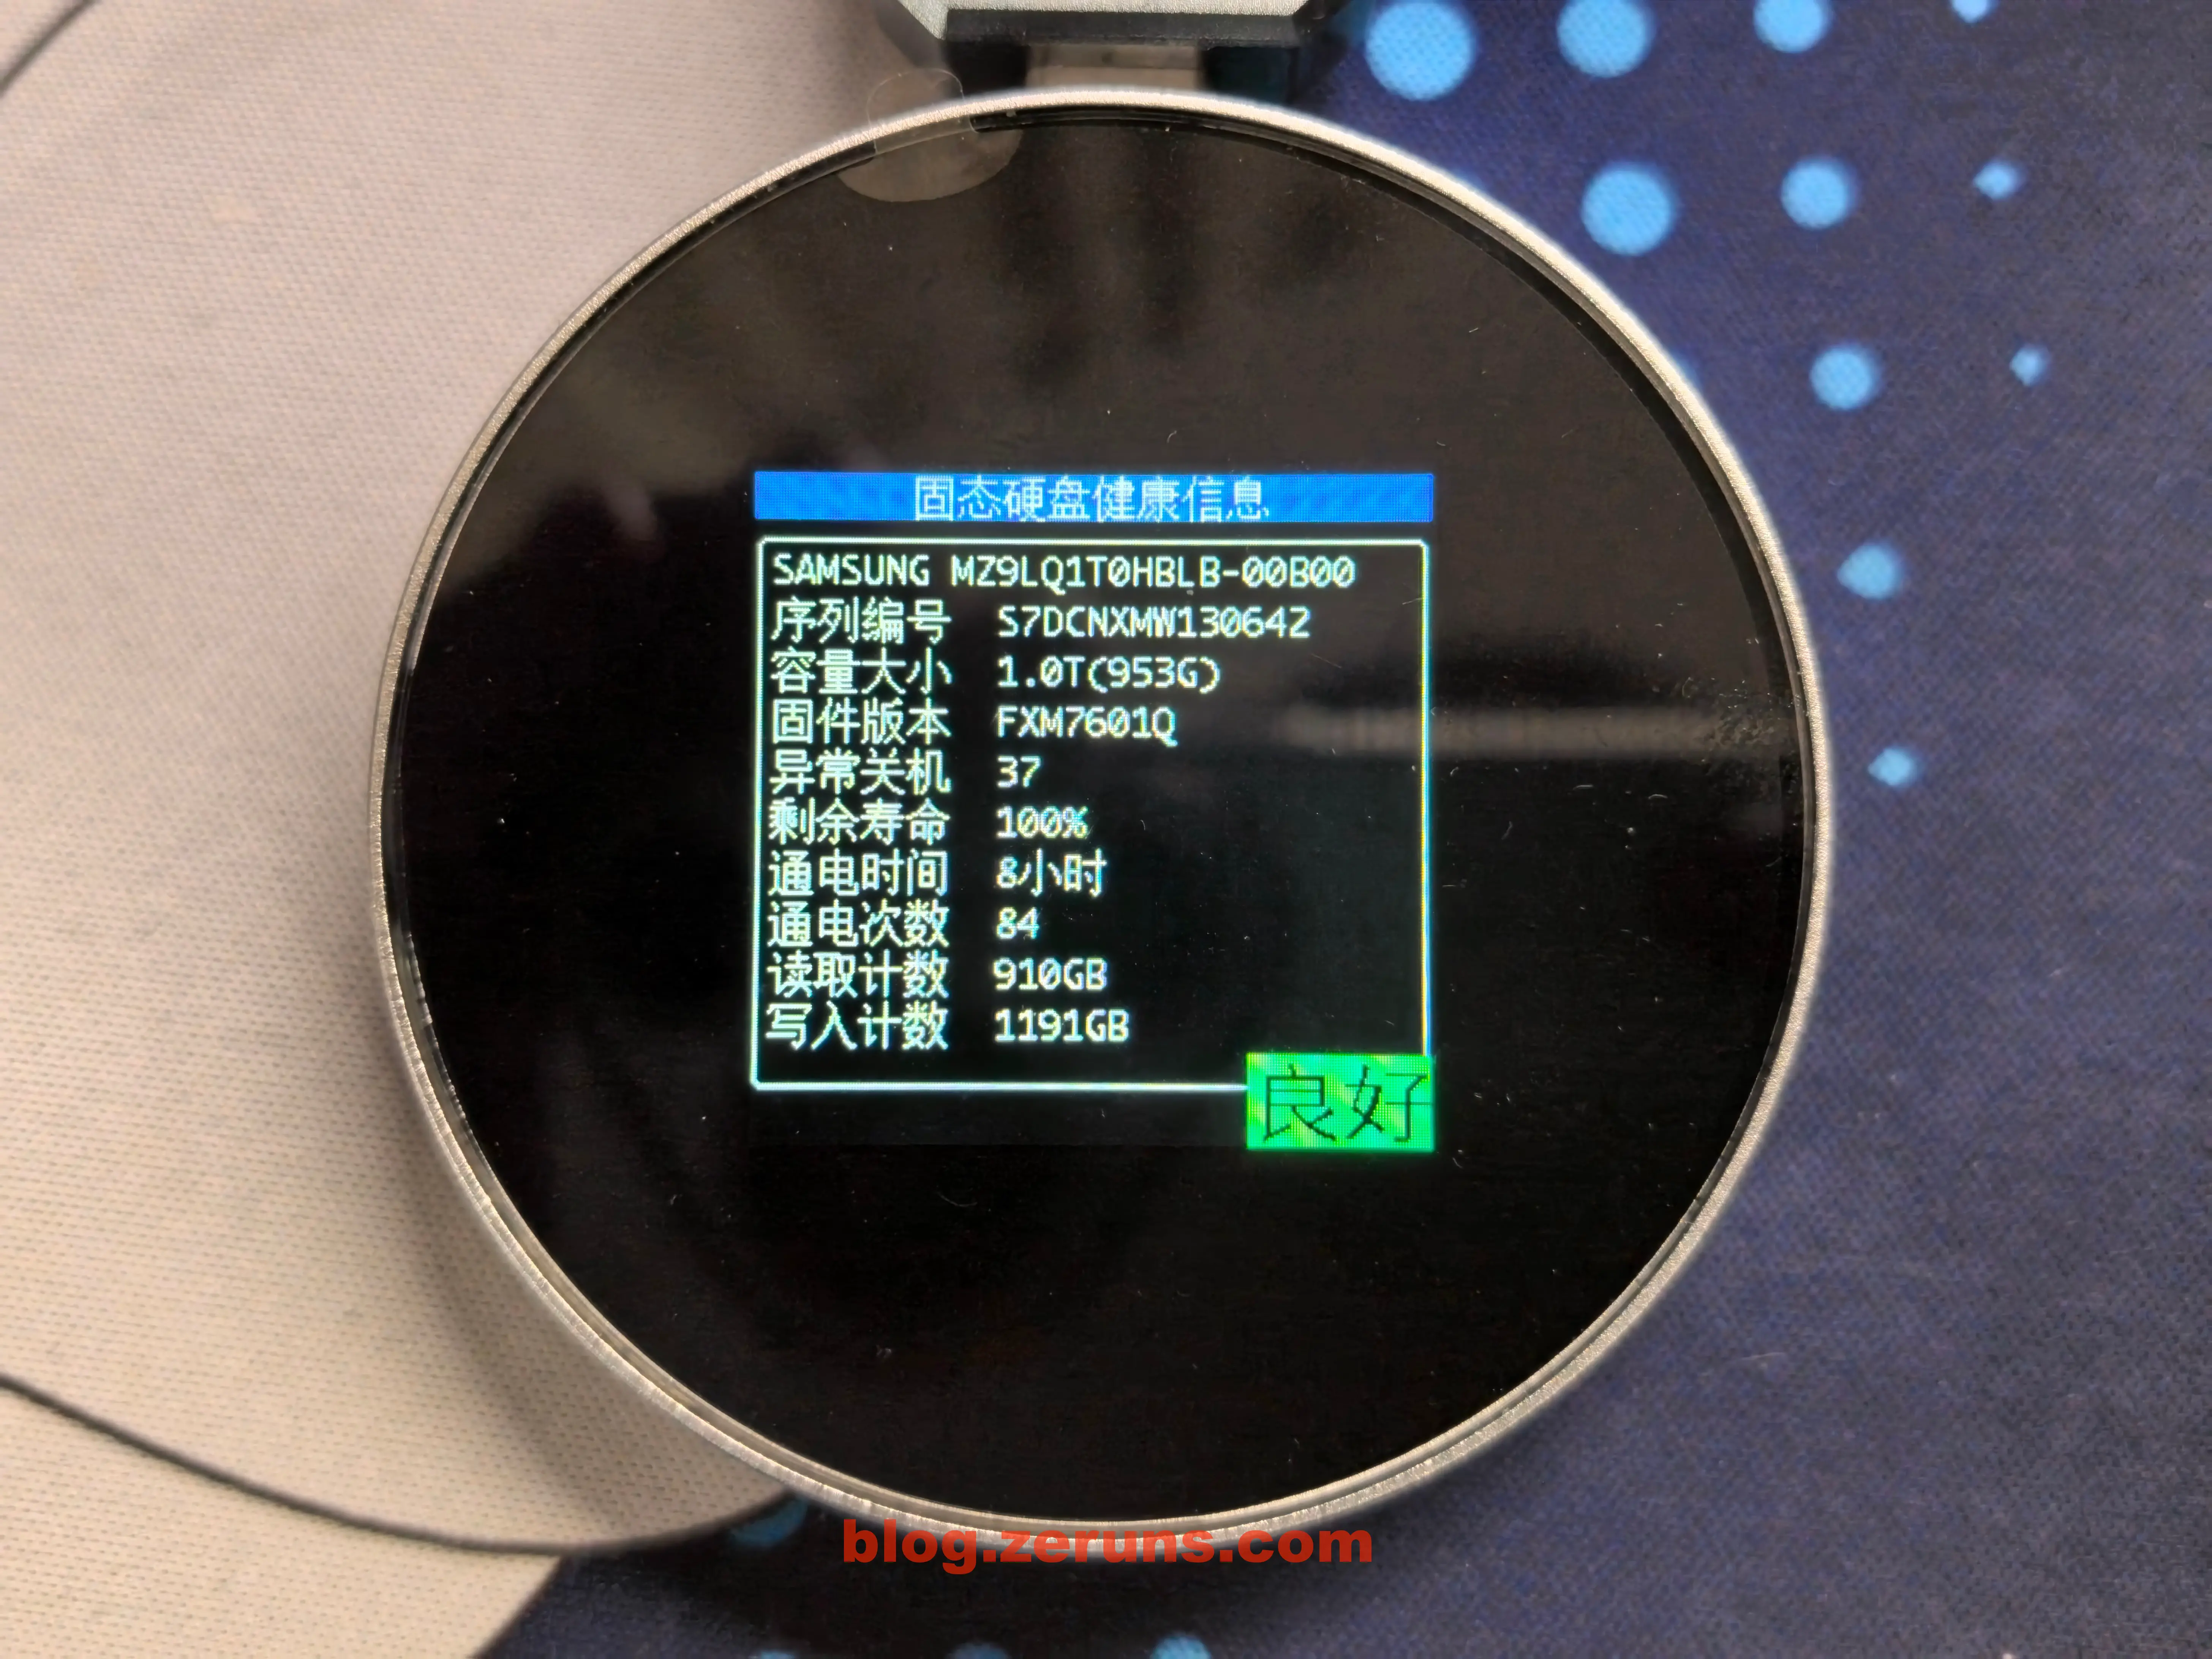
SSD Health Info: Long-press until "SSD Info" appears to view detailed diagnostics: model, serial number, capacity, firmware version, unexpected shutdown count, remaining lifespan, power-on duration/cycles, and total read/write counts.
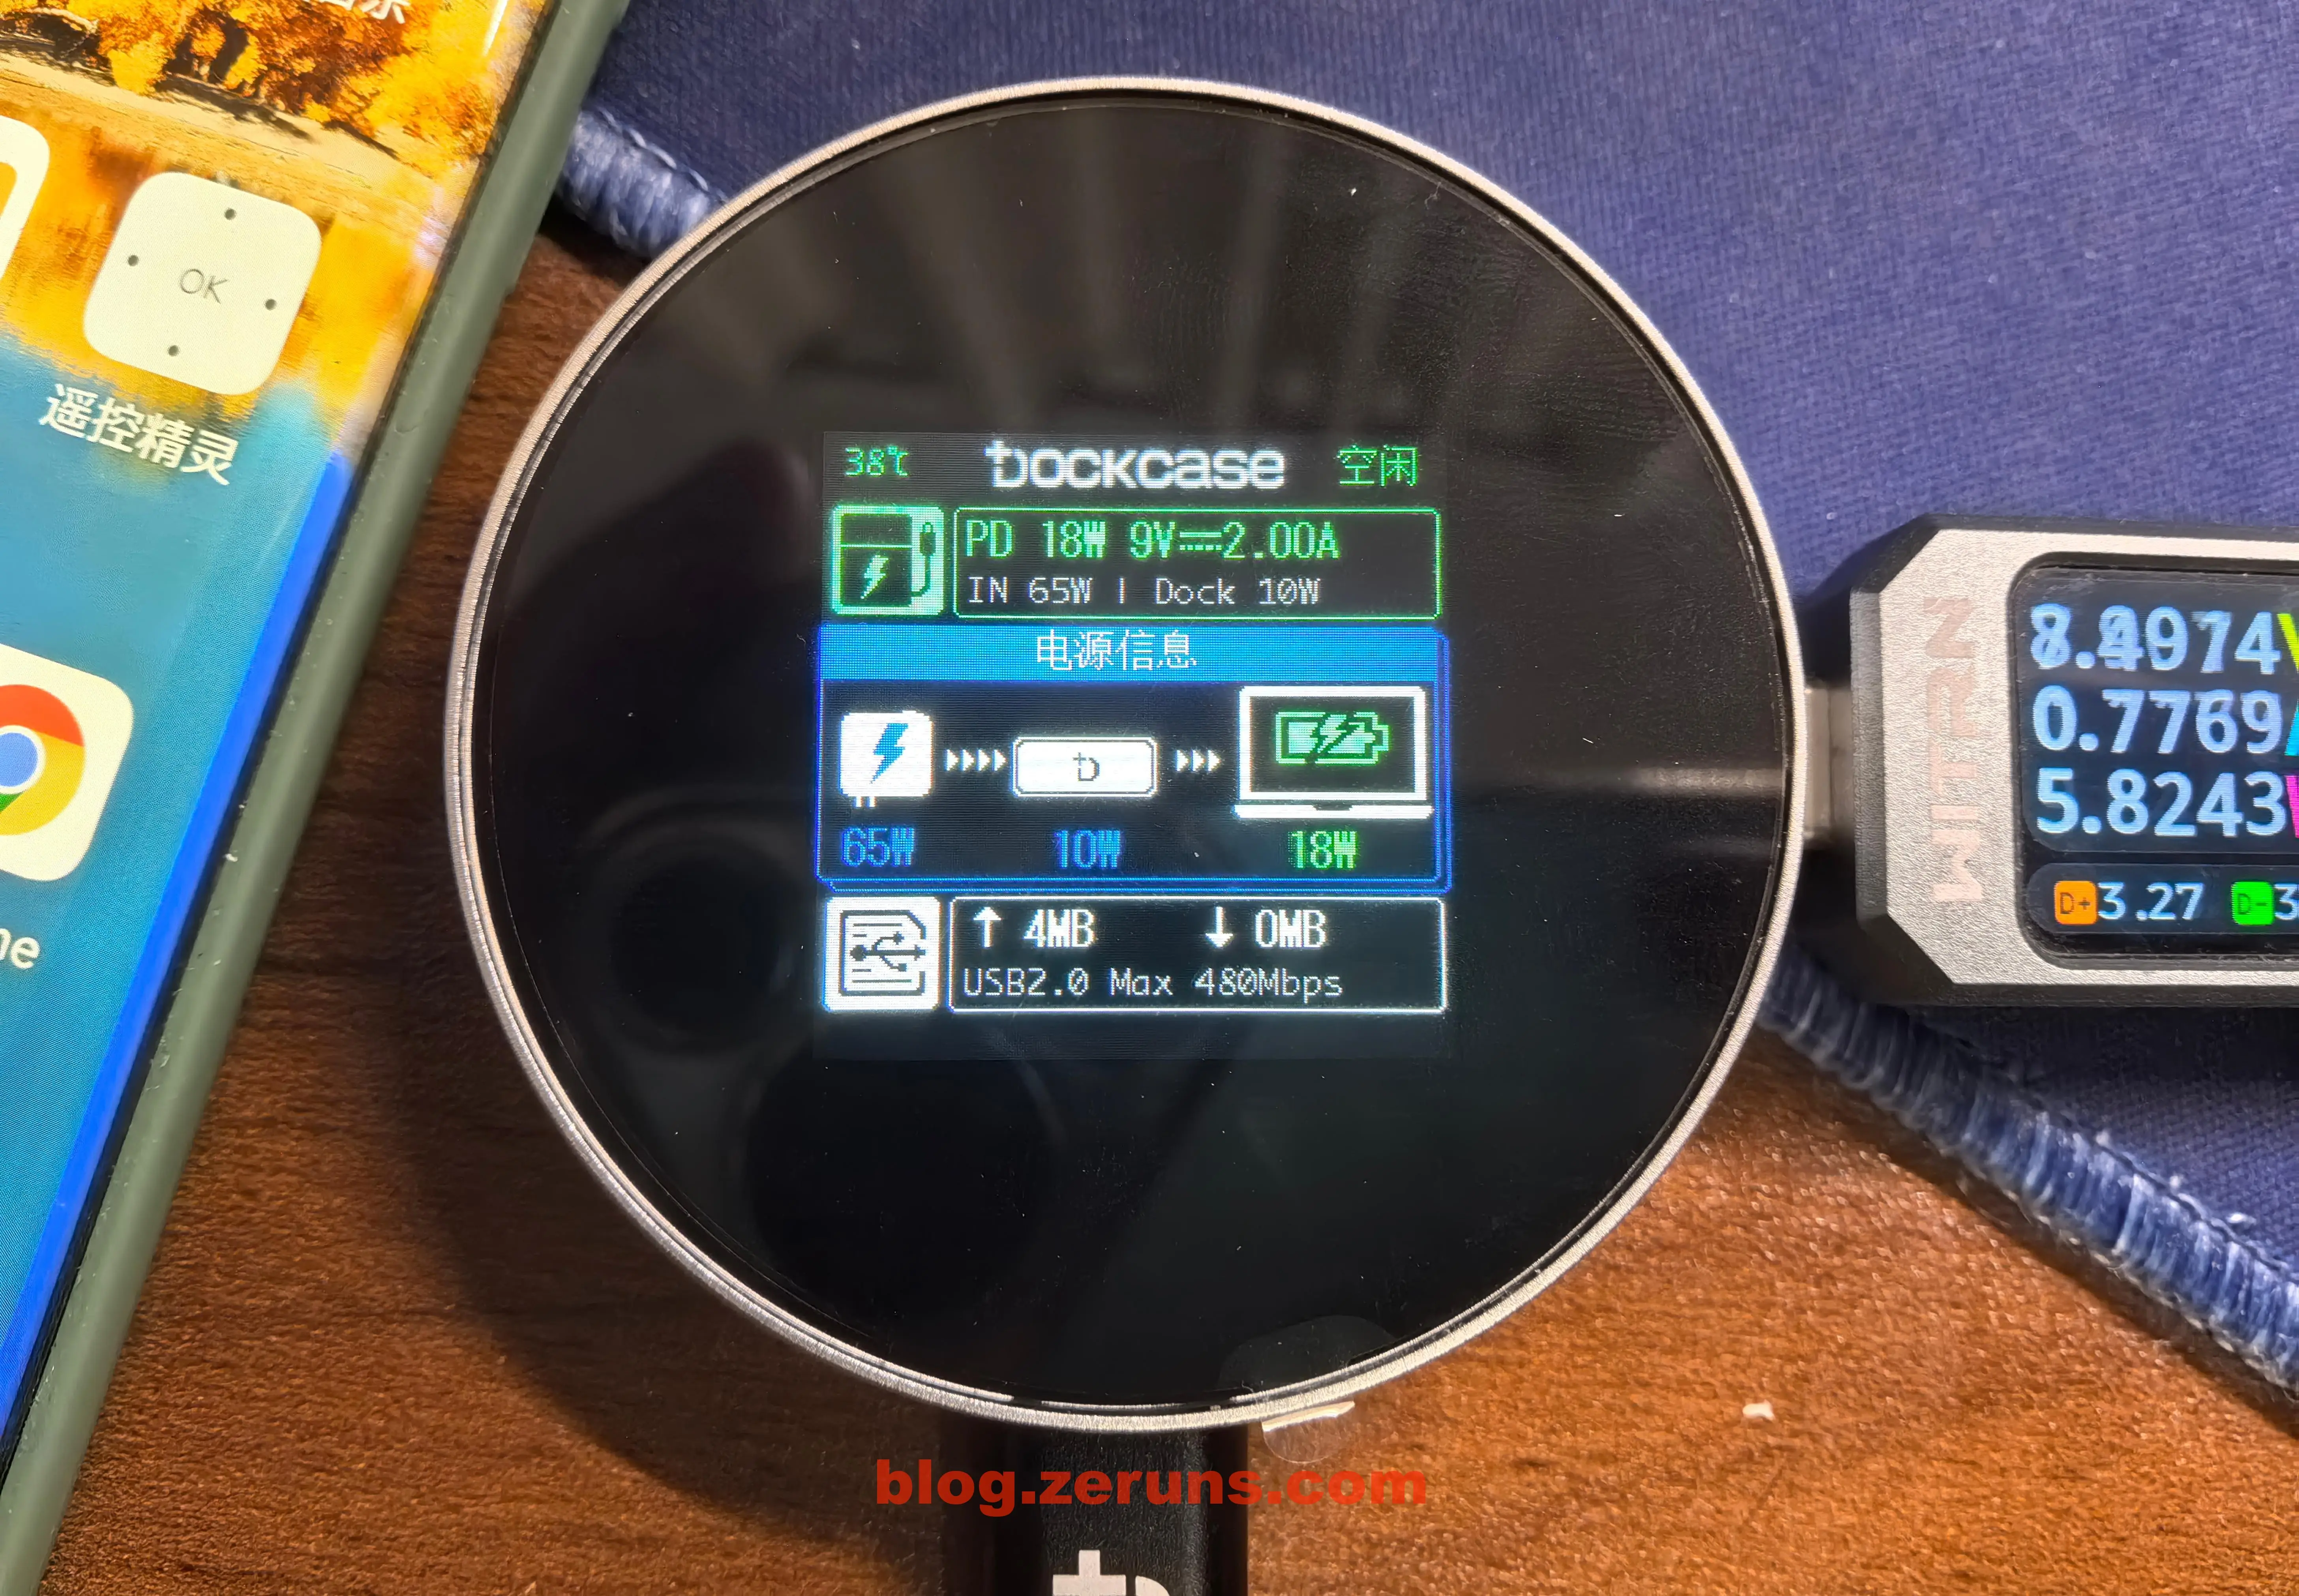
The dual USB-C ports allow simultaneous phone connectivity and PD charging. Due to Huawei's 18W PD limitation, 100W PD charging couldn't be tested.

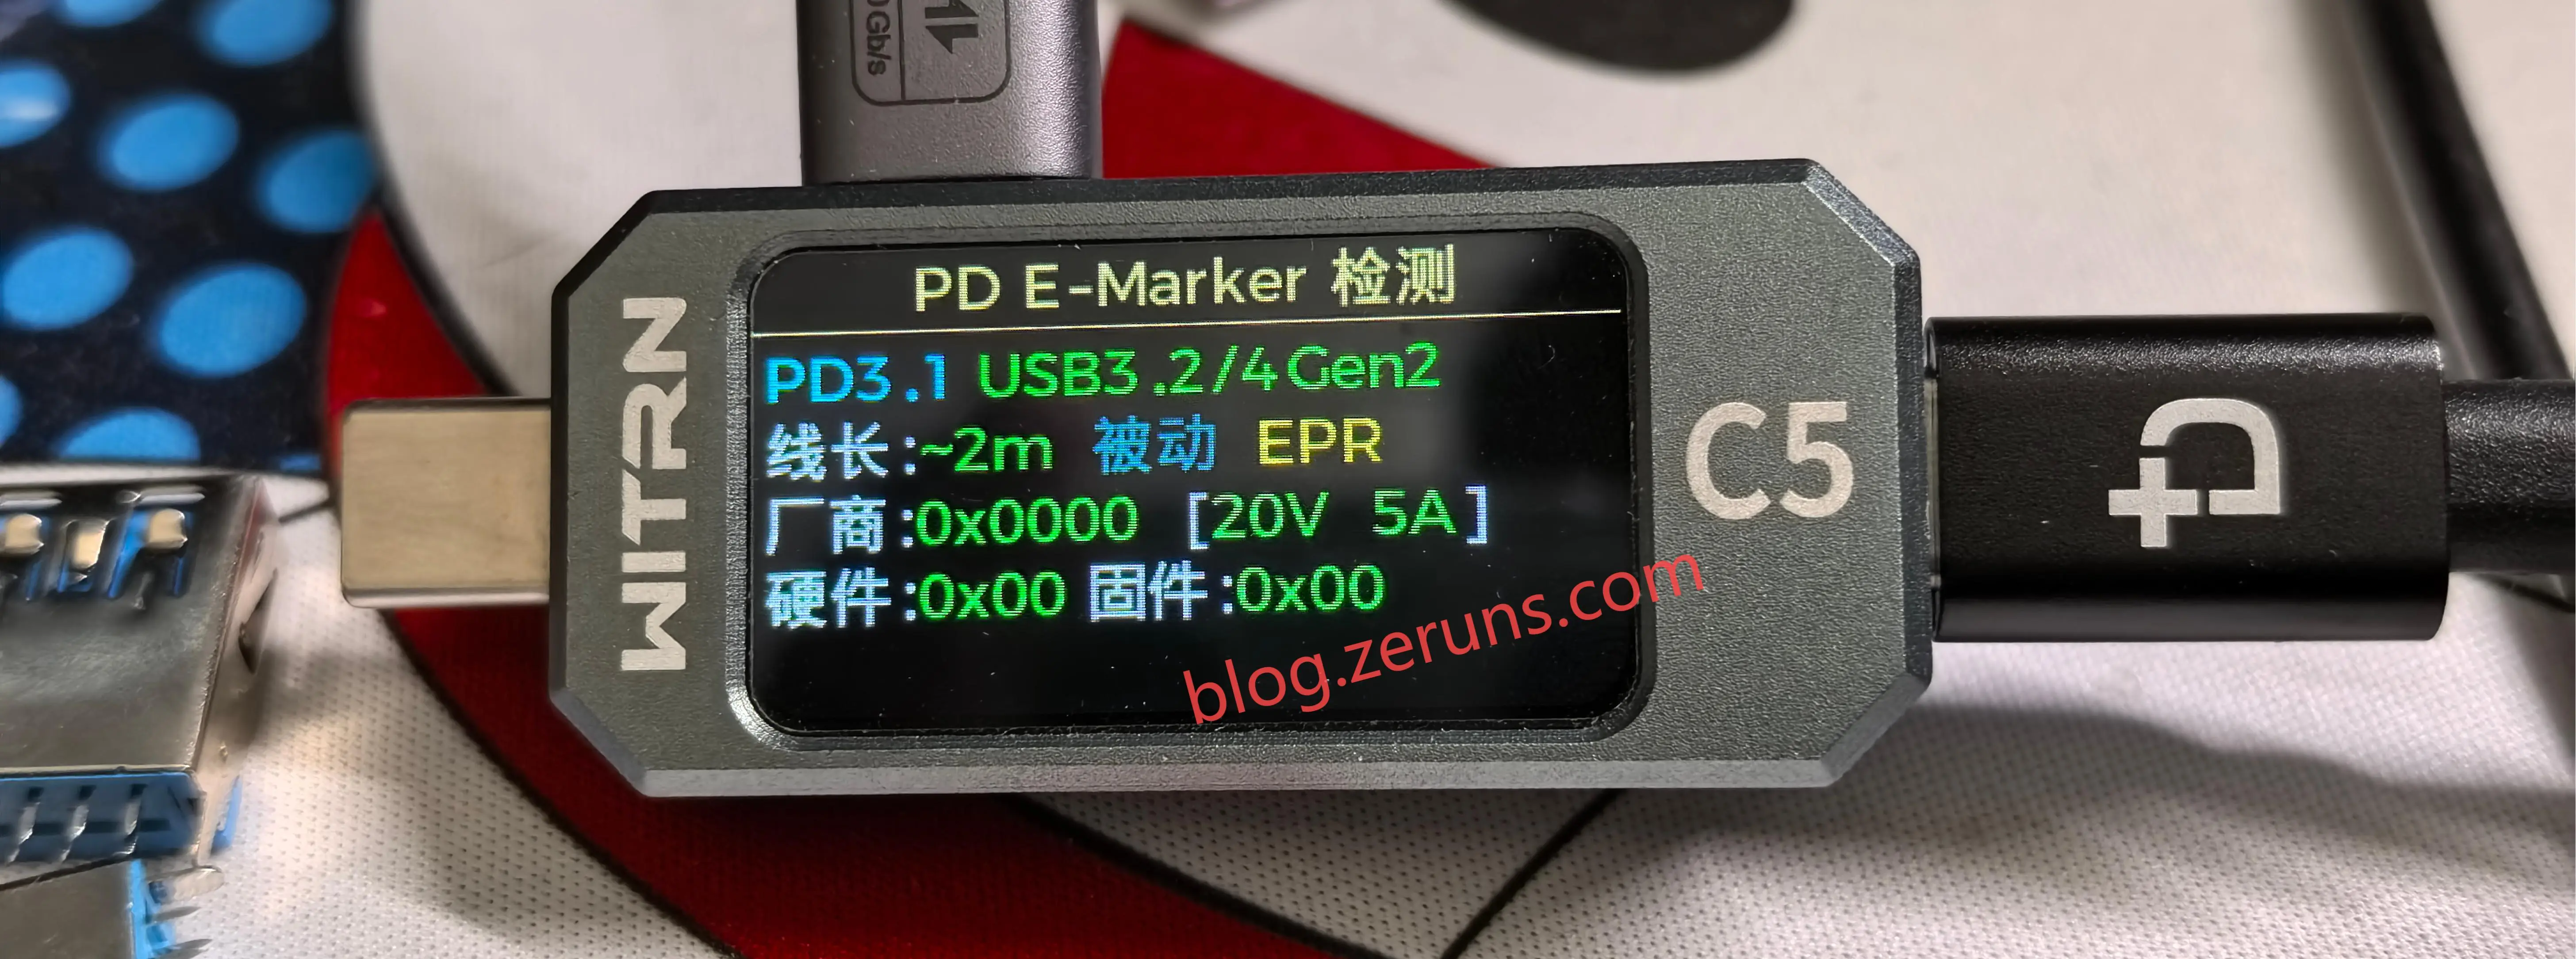
Cable Testing: Using the Weijian C5 Tester, the included cable supports USB3.2/4 Gen2, PD3.1 (20V/5A), with vendor code 0x0000.
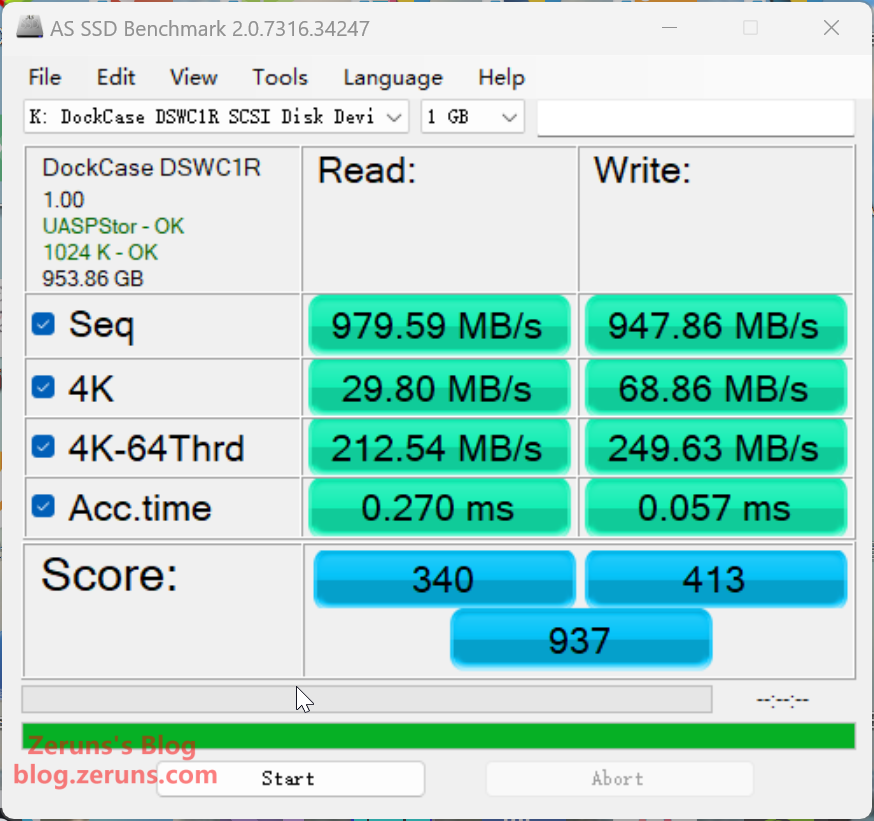
AS SSD Benchmark Results:
- Sequential Read: 979.59MB/s
- Sequential Write: 947.86MB/s
- 4K Single-Thread Read: 29.80MB/s
- 4K Single-Thread Write: 68.86MB/s
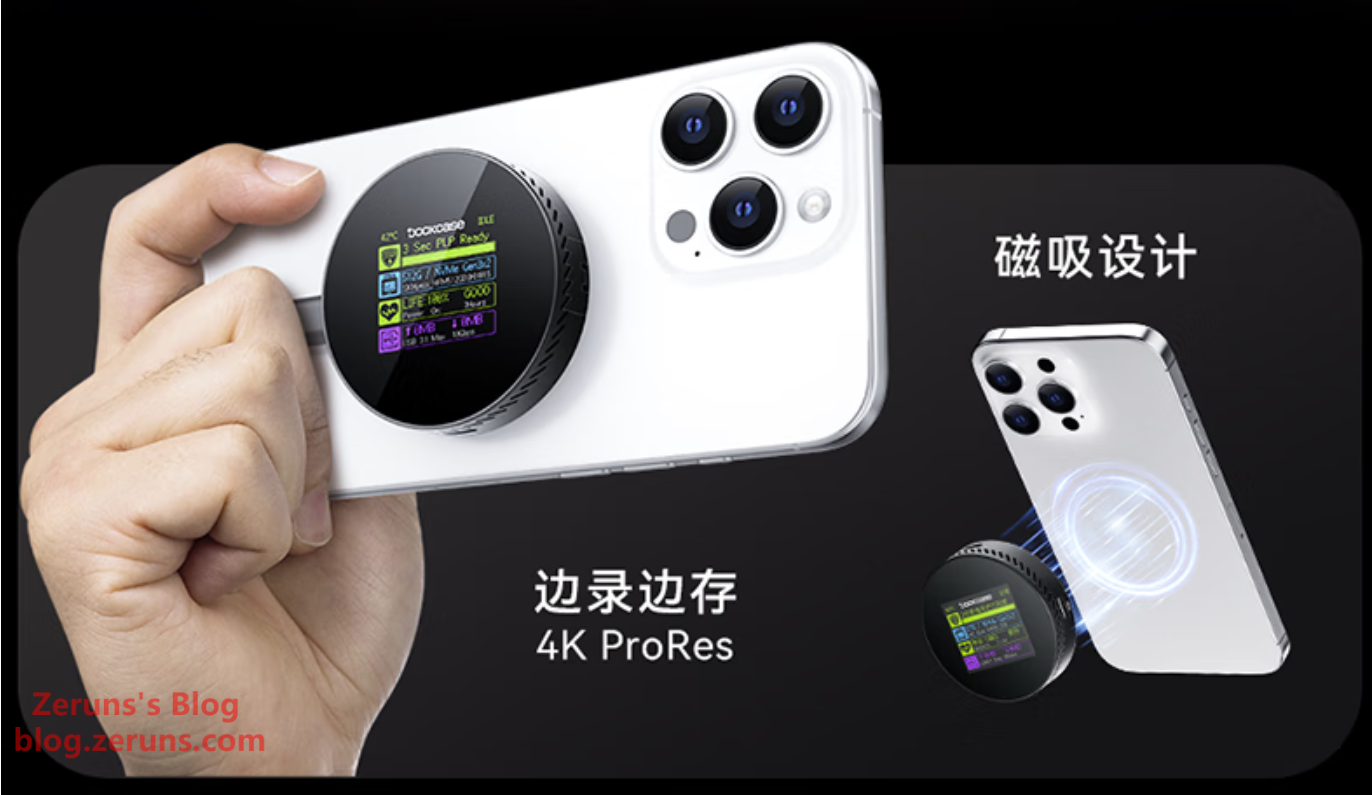
Magnetic Attachment: The enclosure magnetically attaches to iPhones for direct 4K ProRes recording. Android users can apply the included magnetic ring to achieve similar functionality.
Thermal Imaging Analysis of the Enclosure
Uni-T UTi261M Thermal Imager Unboxing and Sample Shots: https://blog.zeruns.com/archives/798.html
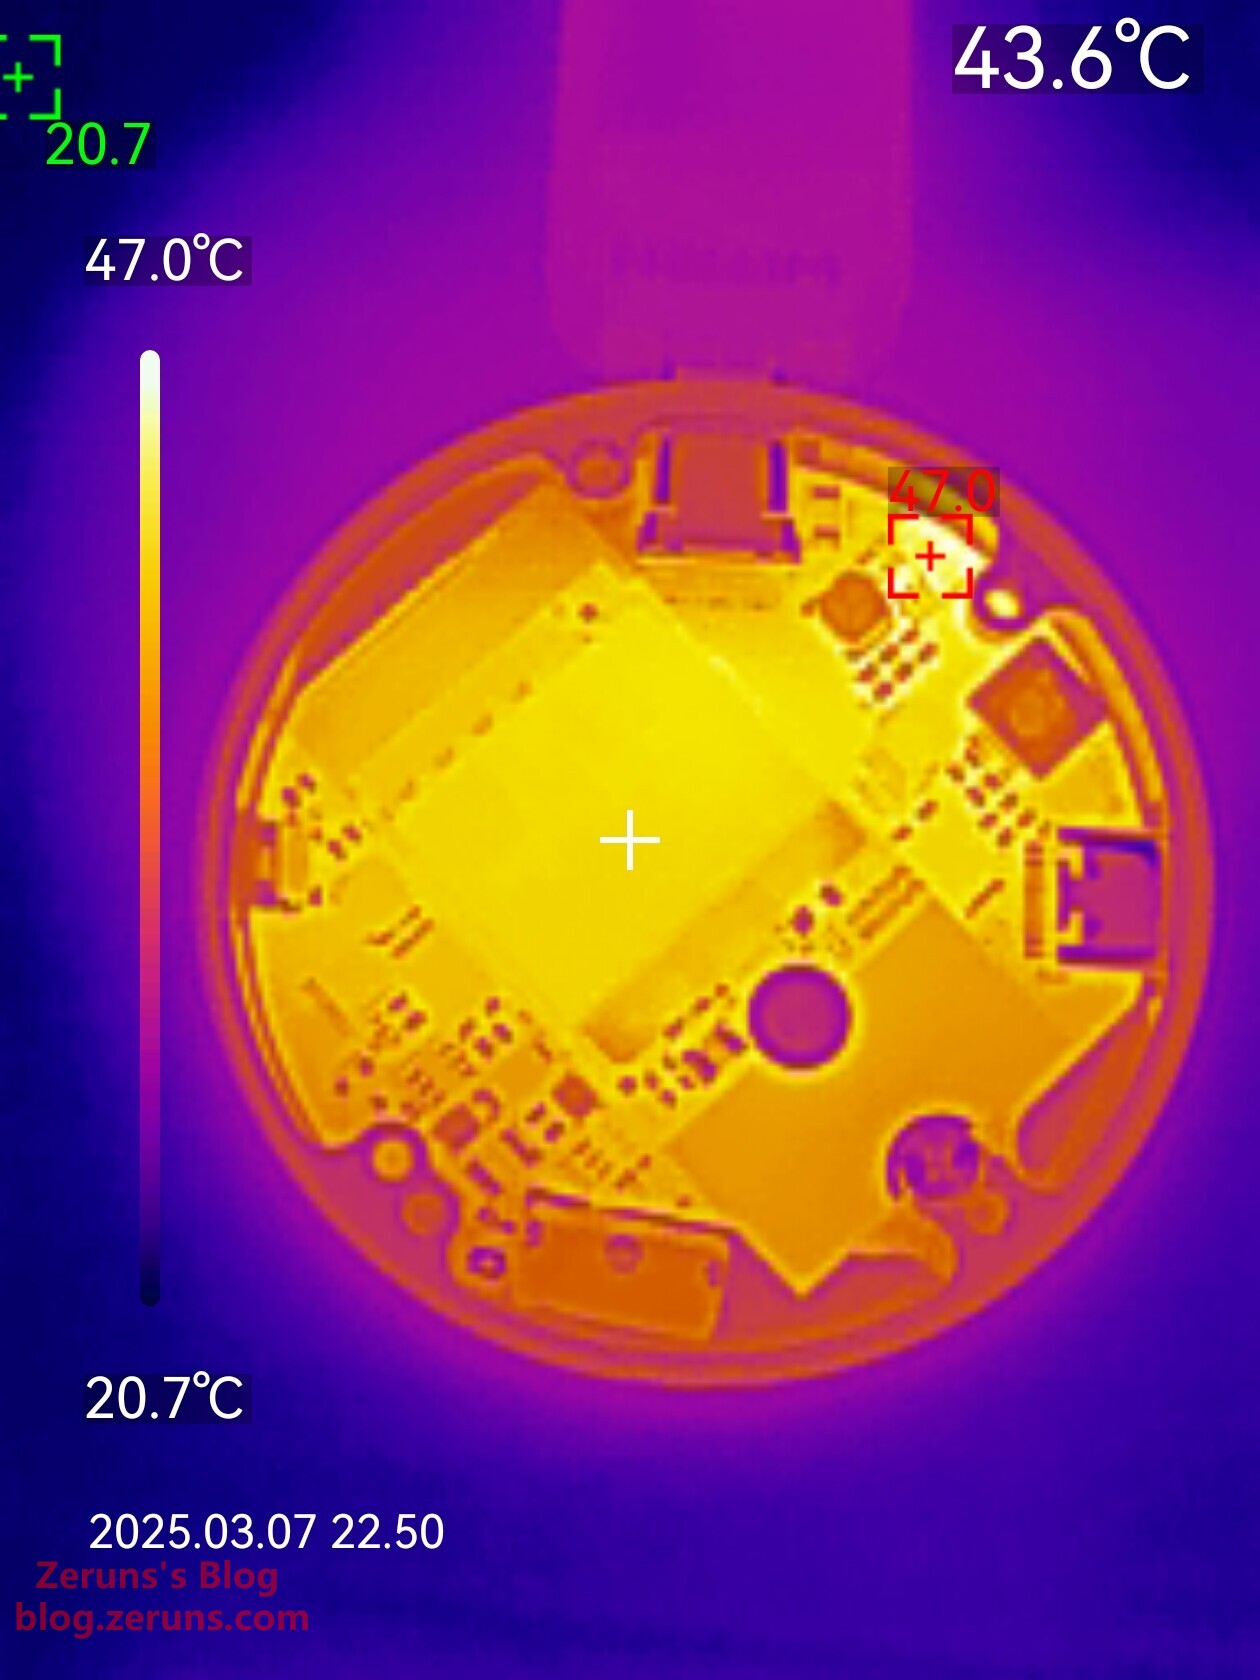
Idle State (No Read/Write Activity):
The thermal image reveals the hottest component is a PMOS transistor at 47°C (ambient temperature ~20°C). The main controller chip, located on the backside of the PCB (not visible without disassembly), operates at around 55°C based on my previous review of an enclosure with the same controller, indicating moderate thermal performance.
Full Load (Peak Read/Write):
- SSD Controller Temperature: Exceeds 90°C (tested without the bottom cover).
Recommendation: Add a thermal pad between the SSD and enclosure base. With this mod, temperatures drop below 60°C.

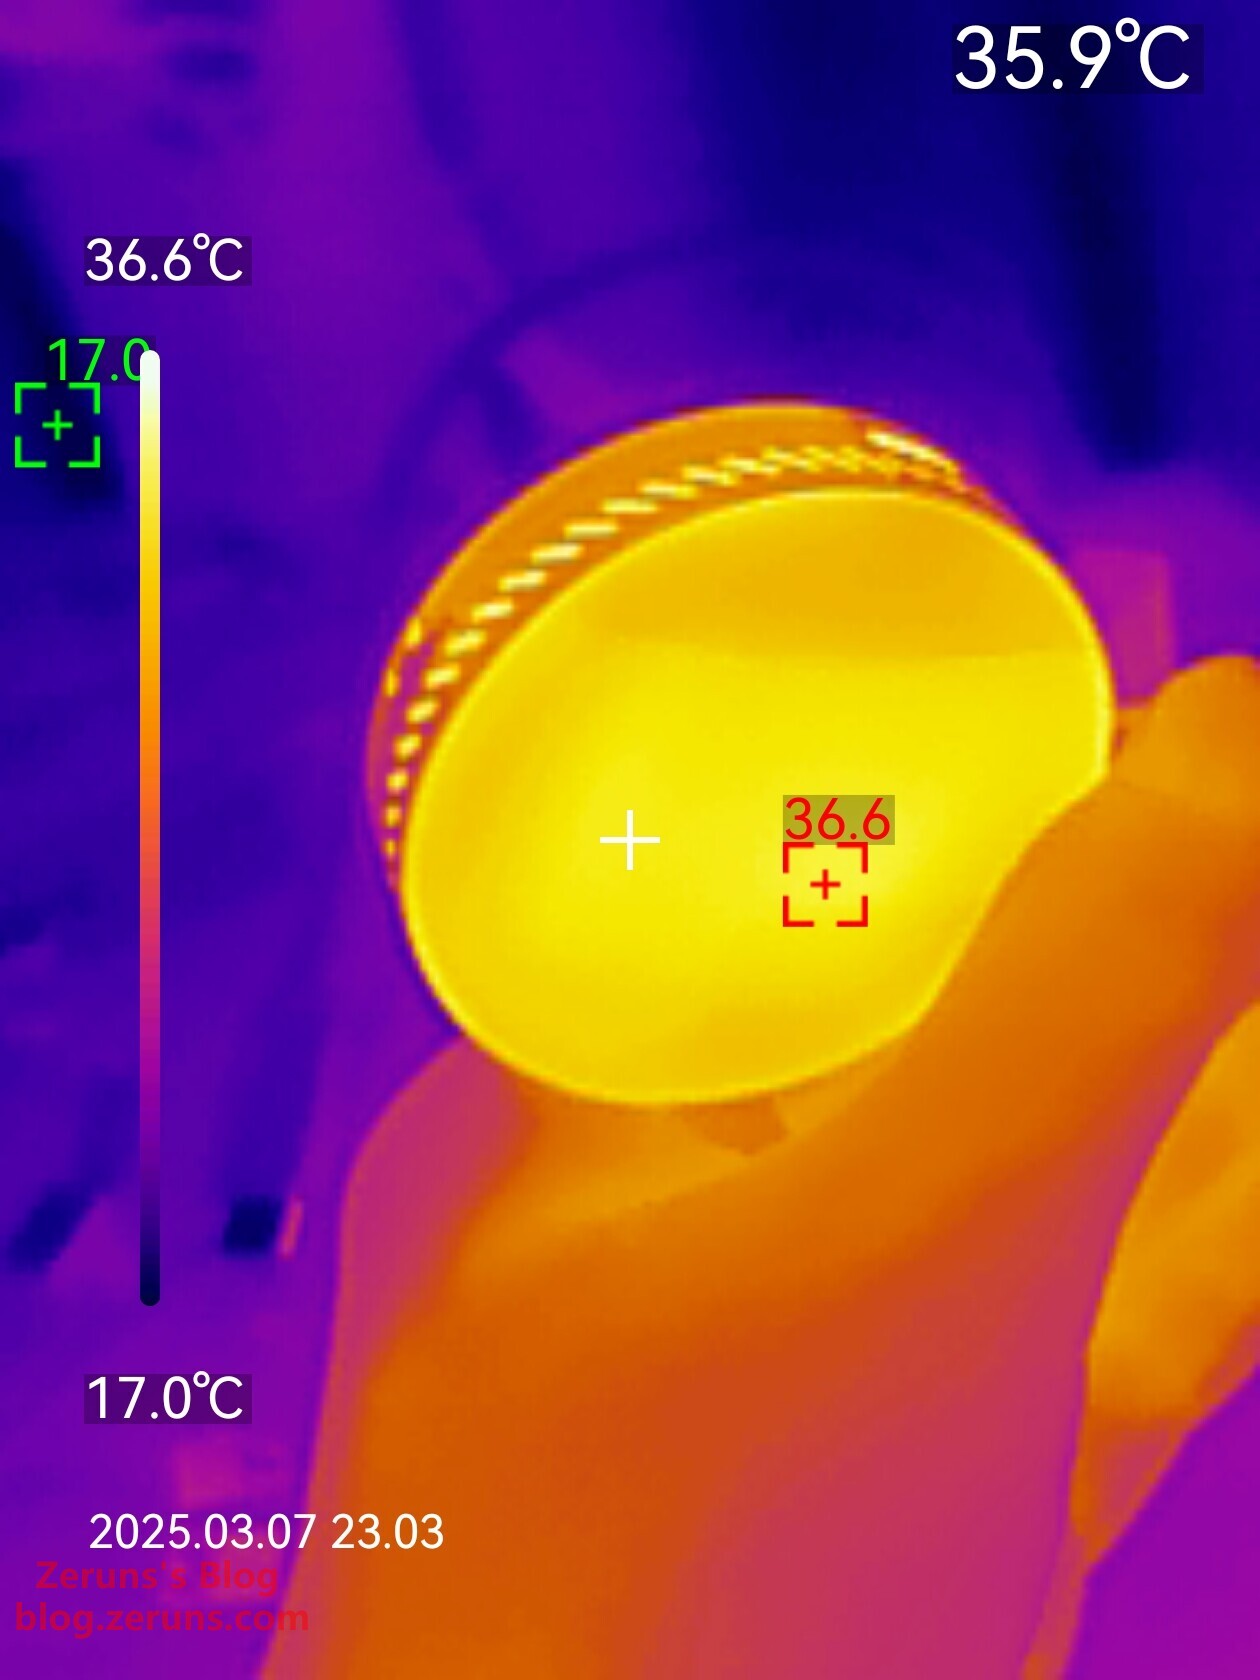
- Front Panel: Peak temperature at the display area reaches 36.6°C.
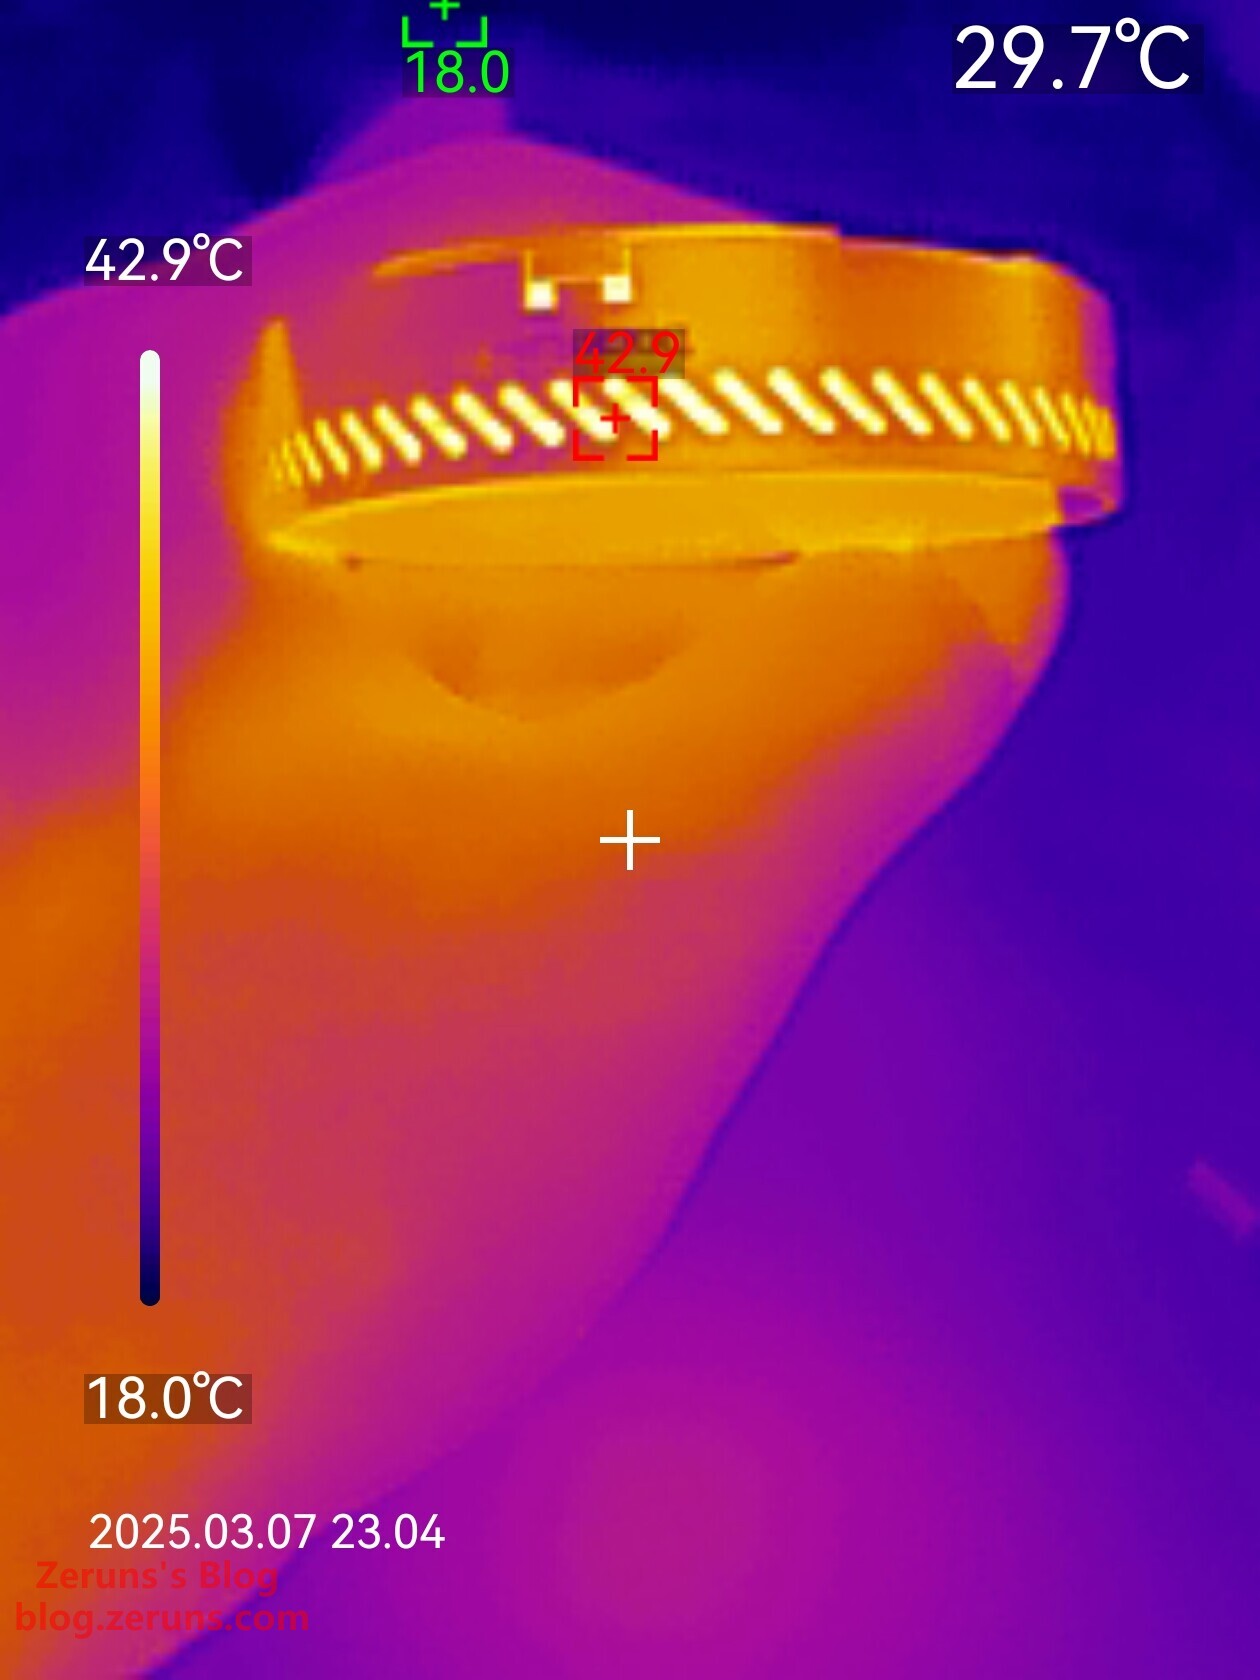
- Side Panel: Heat vents show internal temperatures up to 42.9°C.
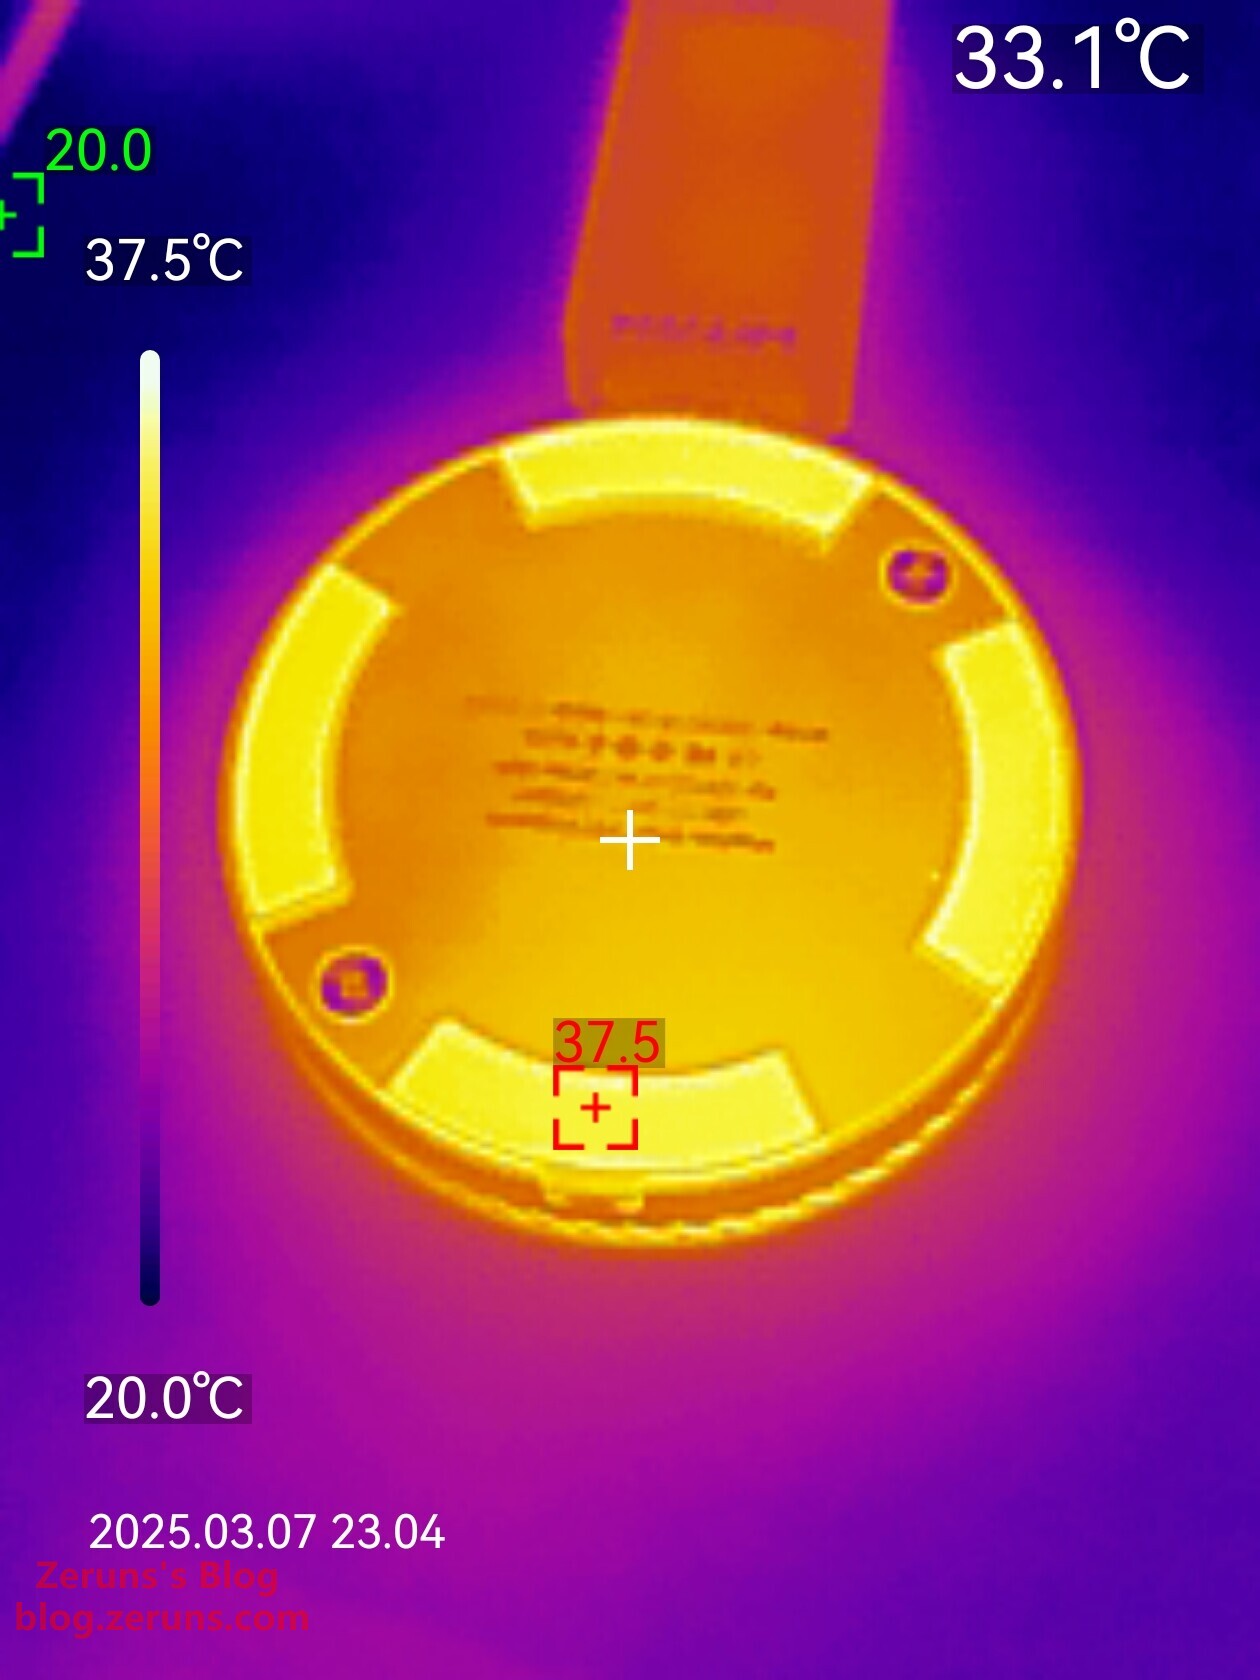
- Bottom Panel: Maximum 37.5°C (thermal imaging artifacts exaggerate heat at the rubber feet due to metal reflection).
Overall thermal performance is impressive for sustained workloads.
Recommended Reads
- Cost-Effective VPS/Cloud Server Recommendations: https://blog.zeruns.com/archives/383.html
- Minecraft Server Hosting Guide: https://blog.zeruns.com/tag/mc/
- Lightning-Fast Blog Setup: 1Panel + Halo Tutorial: https://blog.zeruns.com/archives/858.html
- Open-Source 140W+65W Buck-Boost PD3.1 Charger Module (2C+1A): https://blog.zeruns.com/archives/801.html
- DeepSeek-R1 Private AI Model Deployment on Linux: https://blog.zeruns.com/archives/853.html
- iKuai IK-Q3000 WiFi6 Router Teardown & Review: https://blog.zeruns.com/archives/860.html


Comment Section