


Minecraft [Mori Garden] Modpack Multiplayer Server Setup Guide — a step-by-step beginner-friendly tutorial on hosting a Minecraft server using Linux + MCSM + Docker.
Video tutorial: https://www.bilibili.com/video/BV1SpxmzAEHk/
What Is a Modpack?
A Minecraft modpack is a customized version of the game that includes multiple mods (modifications) and config files, allowing players to experience unique gameplay styles and content.
Modpacks are typically created and published by community members or development teams, and sometimes even by official partners.
There are various types of modpacks — technology, magic, adventure, survival, and more — each with its own unique style and gameplay experience.
- Hosting a Minecraft modpack server (Linux), ATM9 Modpack Server Setup Tutorial: https://blog.zeruns.com/archives/775.html
- Minecraft Modpack Server Setup — Pokehaan Craft 2 Server Installation Guide: https://blog.zeruns.com/archives/755.html
- Hosting Minecraft “Dragon Adventure: New Journey 2.0” Modpack Server on Linux: https://blog.zeruns.com/archives/852.html
- Rainyun Cloud App (K8s-based) — One-click Free Minecraft Bedrock Edition (BDS) Server Setup: https://blog.zeruns.com/archives/875.html
- Minecraft Better MC Modpack Multiplayer Server Setup Tutorial: https://blog.zeruns.com/archives/878.html
- Minecraft RLCraft Modpack Multiplayer Server Setup Guide: https://blog.zeruns.com/archives/885.html
- Minecraft Utopia Adventure 3.5 Modpack Multiplayer Server Setup: https://blog.zeruns.com/archives/891.html
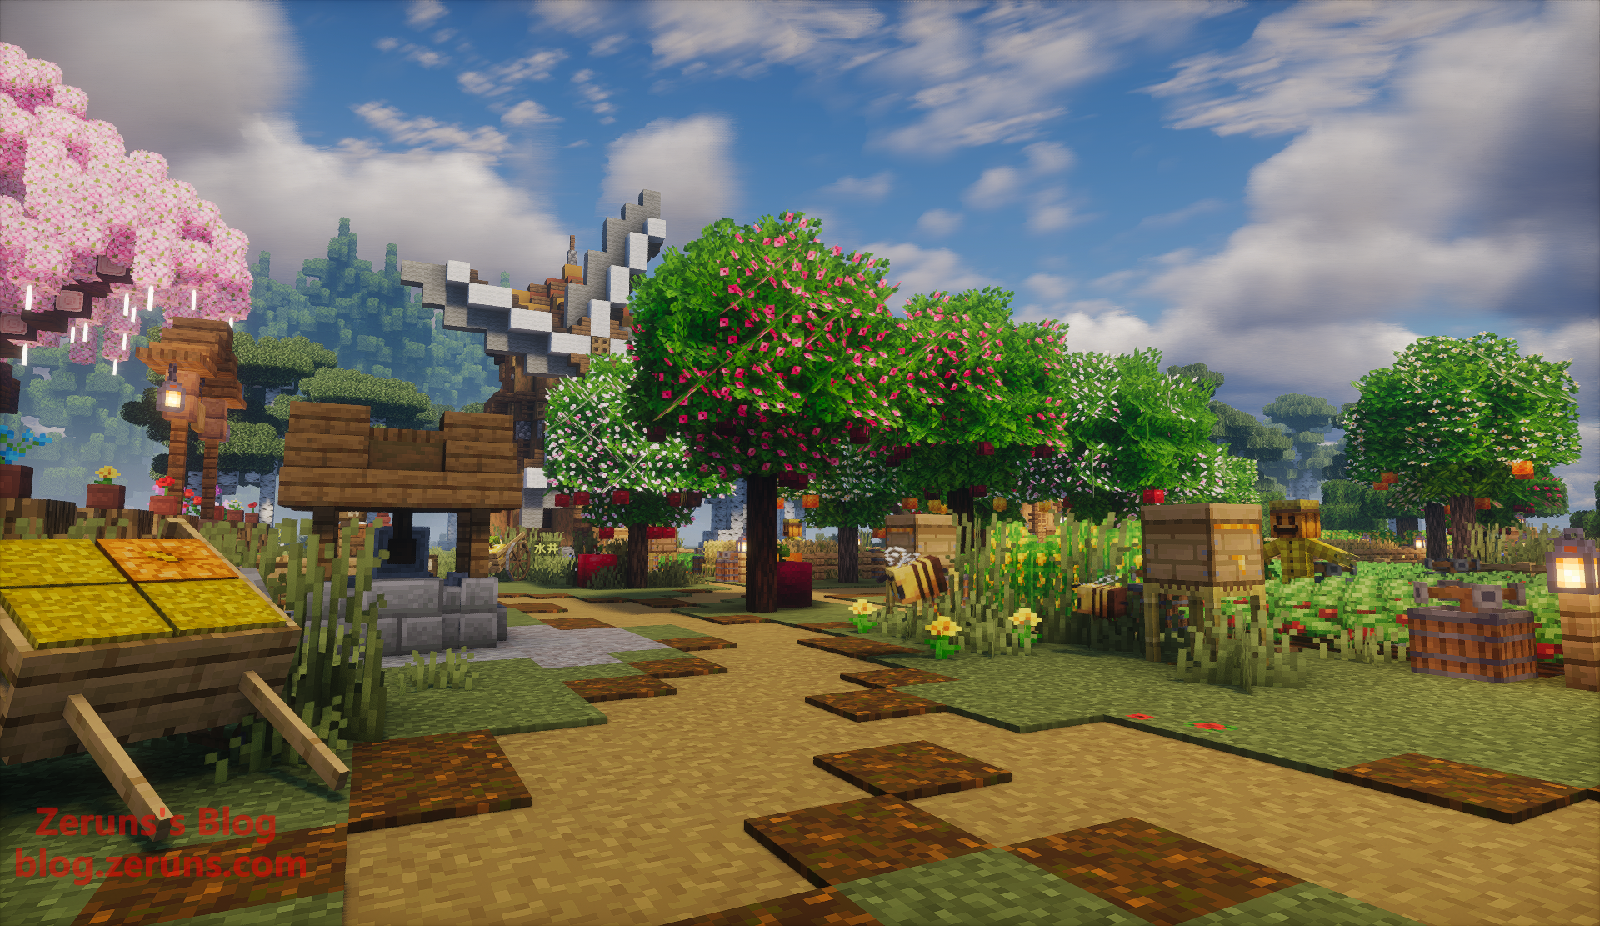
Mori Garden Modpack Overview
Tired of endless fighting and adventure? Looking for peace and serenity in Minecraft?
The 《森语田园》(Mori Garden) modpack invites you back to nature — to experience the pure joy of rural life!
Here, you can:
- ✿ Cultivate your fields and sow hope: Plant various crops and enjoy the harvest season!
- ✿ Relax and fish: Spend peaceful afternoons fishing across tranquil oceans!
- ✿ Raise animals and build a ranch: Take care of adorable animals, from gentle cows and sheep to busy buzzing bees!
- ✿ Design and construct towns: Choose from diverse blueprints and build your dream countryside town!
Modpack Features:
- Relaxing and peaceful — perfect for chill players:
No stressful combat or complex missions. Focus entirely on farming and enjoy the cozy countryside life within Minecraft. - Rich content and high replayability:
Carefully curated mods interconnected with scripts to provide an immersive and varied gameplay experience. - Beautiful visuals and immersive atmosphere:
Aesthetic texture packs and shaders create a stunning and dreamlike rural world.
Whether you seek tranquility or simply love farming and building, Mori Garden offers a charming, relaxing journey into pastoral Minecraft life.
Download now and start your idyllic adventure in the blocky world!
This modpack is based on Forge 1.20.1.

- Modpack author's Bilibili introduction video: https://www.bilibili.com/video/BV1hpPxeZEUw/
- Modpack map showcase video: https://www.bilibili.com/video/BV1oR8kz6ECu/
- The map can be purchased from the author's Afdian page for 5 RMB (optional): https://url.zeruns.com/0G8bm
- Minecraft Server Community QQ Group: 966038270
- Minecraft Server Community QQ Channel: https://pd.qq.com/s/ckmpr5e63
- Minecraft Server Community Telegram Group: https://t.me/Minecraft_zeruns
About MCSM 10
MCSManager is an open-source, distributed, one-click deployment control panel that supports managing Minecraft and Steam game servers.
MCSManager has gained notable popularity across the Minecraft and gaming server communities.
It allows you to centrally manage multiple physical servers, dynamically deploy game instances on any host, and offers a secure multi-user permission system, making multi-server management effortless.
Official MCSManager documentation: https://url.zeruns.com/FhpqL
Linux MCSManager v10 multiple installation methods and setup tutorial: https://blog.zeruns.com/archives/787.html
Download the Modpack
First, you'll need to download both the Mori Garden server and client.
You can find download links on the modpack author's Bilibili page or use the ones below.
The server package includes Windows JDK17, allowing you to simply double-click run.bat to launch it on a Windows server.
The client package contains JDK17 and the PCL2 launcher — just download and play immediately.
Mori Garden v1.1.9 Client & Server Download Links:
- Baidu Netdisk: https://pan.baidu.com/s/1A_w3rPpmXpysxIuuYrpRtw?pwd=516j
Extraction code:516j - 123 Cloud Drive (fast download, no login required): https://www.123684.com/s/2Y9Djv-mjjvH
Preparation
You'll need a server to host your Minecraft server. In this tutorial, I'm using a Rainyun Game Cloud VPS — the model I selected is 13900K with 4 cores and 8 GB of RAM.
Your server should have at least 4 cores and 8 GB of memory! Moreover, it must use a high-frequency CPU with strong single-core performance (recommended: CPU-Z single-core score above 600), such as 14900K/13900K, 7950X, or 9950X. High-version Java servers rely heavily on single-core performance and memory — large modpacks even more so!
- Rainyun discounted registration link: https://rain.zeruns.com/?s=blog-en
- Rainyun discount code:
zeruns(registering with this code gives you a 50% off coupon for the first month, plus an additional 20% off coupon in the points store. The 20% coupon can be stacked with the annual 30% discount, resulting in an effective 56% discount.)
Other high cost-performance cloud/VPS recommendations: https://blog.zeruns.com/archives/383.html
- Rainyun 14900K Ningbo High-Defense Cloud Server Performance Review: https://blog.vpszj.cn/archives/2115.html
- Introduction to 4 excellent panel hosting providers — one-click setup for Minecraft modpacks, Palworld, 7 Days to Die, CSGO, etc.: https://blog.zeruns.com/archives/808.html
- Haoliang Cloud Engine Inner Mongolia lightweight server, 16 cores / 32 GB RAM / 100 Mbps for only 120 RMB/month: https://blog.vpszj.cn/archives/2536.html
- Rainyun Ningbo High-Defense 8745HS Dedicated Server Review, 16 cores / 32 GB RAM / 500 Mbps for only 446 RMB/month: https://blog.vpszj.cn/archives/2628.html
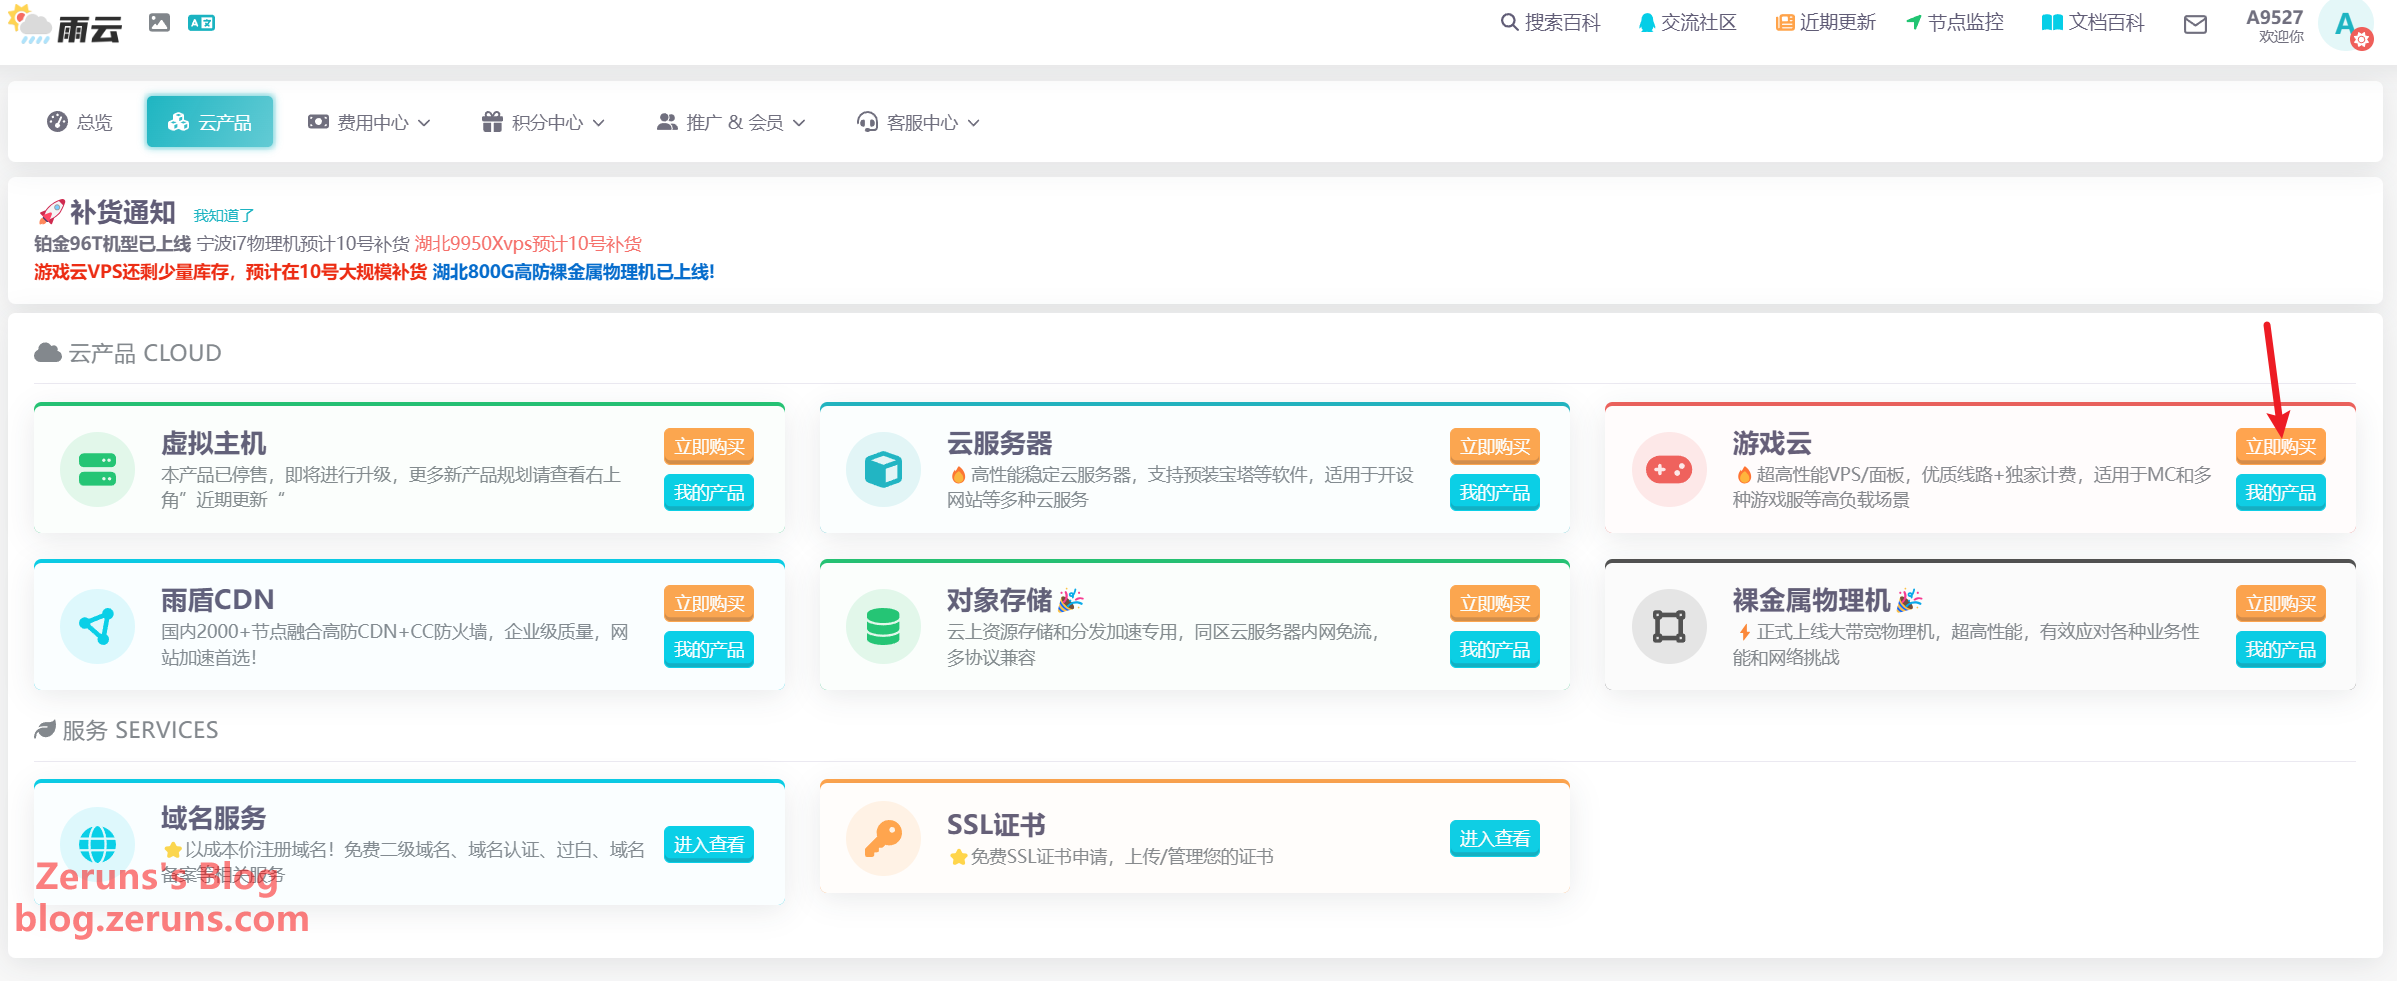
After registering, go to the Rainyun console, click Cloud Products → Game Cloud → Buy Now:
Select VPS Server, choose the model (13900K in my case), and select the region — Zhejiang Ningbo.
Note: Jiangsu Suqian uses NAT networking and provides 15 port mappings. Zhejiang Ningbo includes a dedicated public IP.
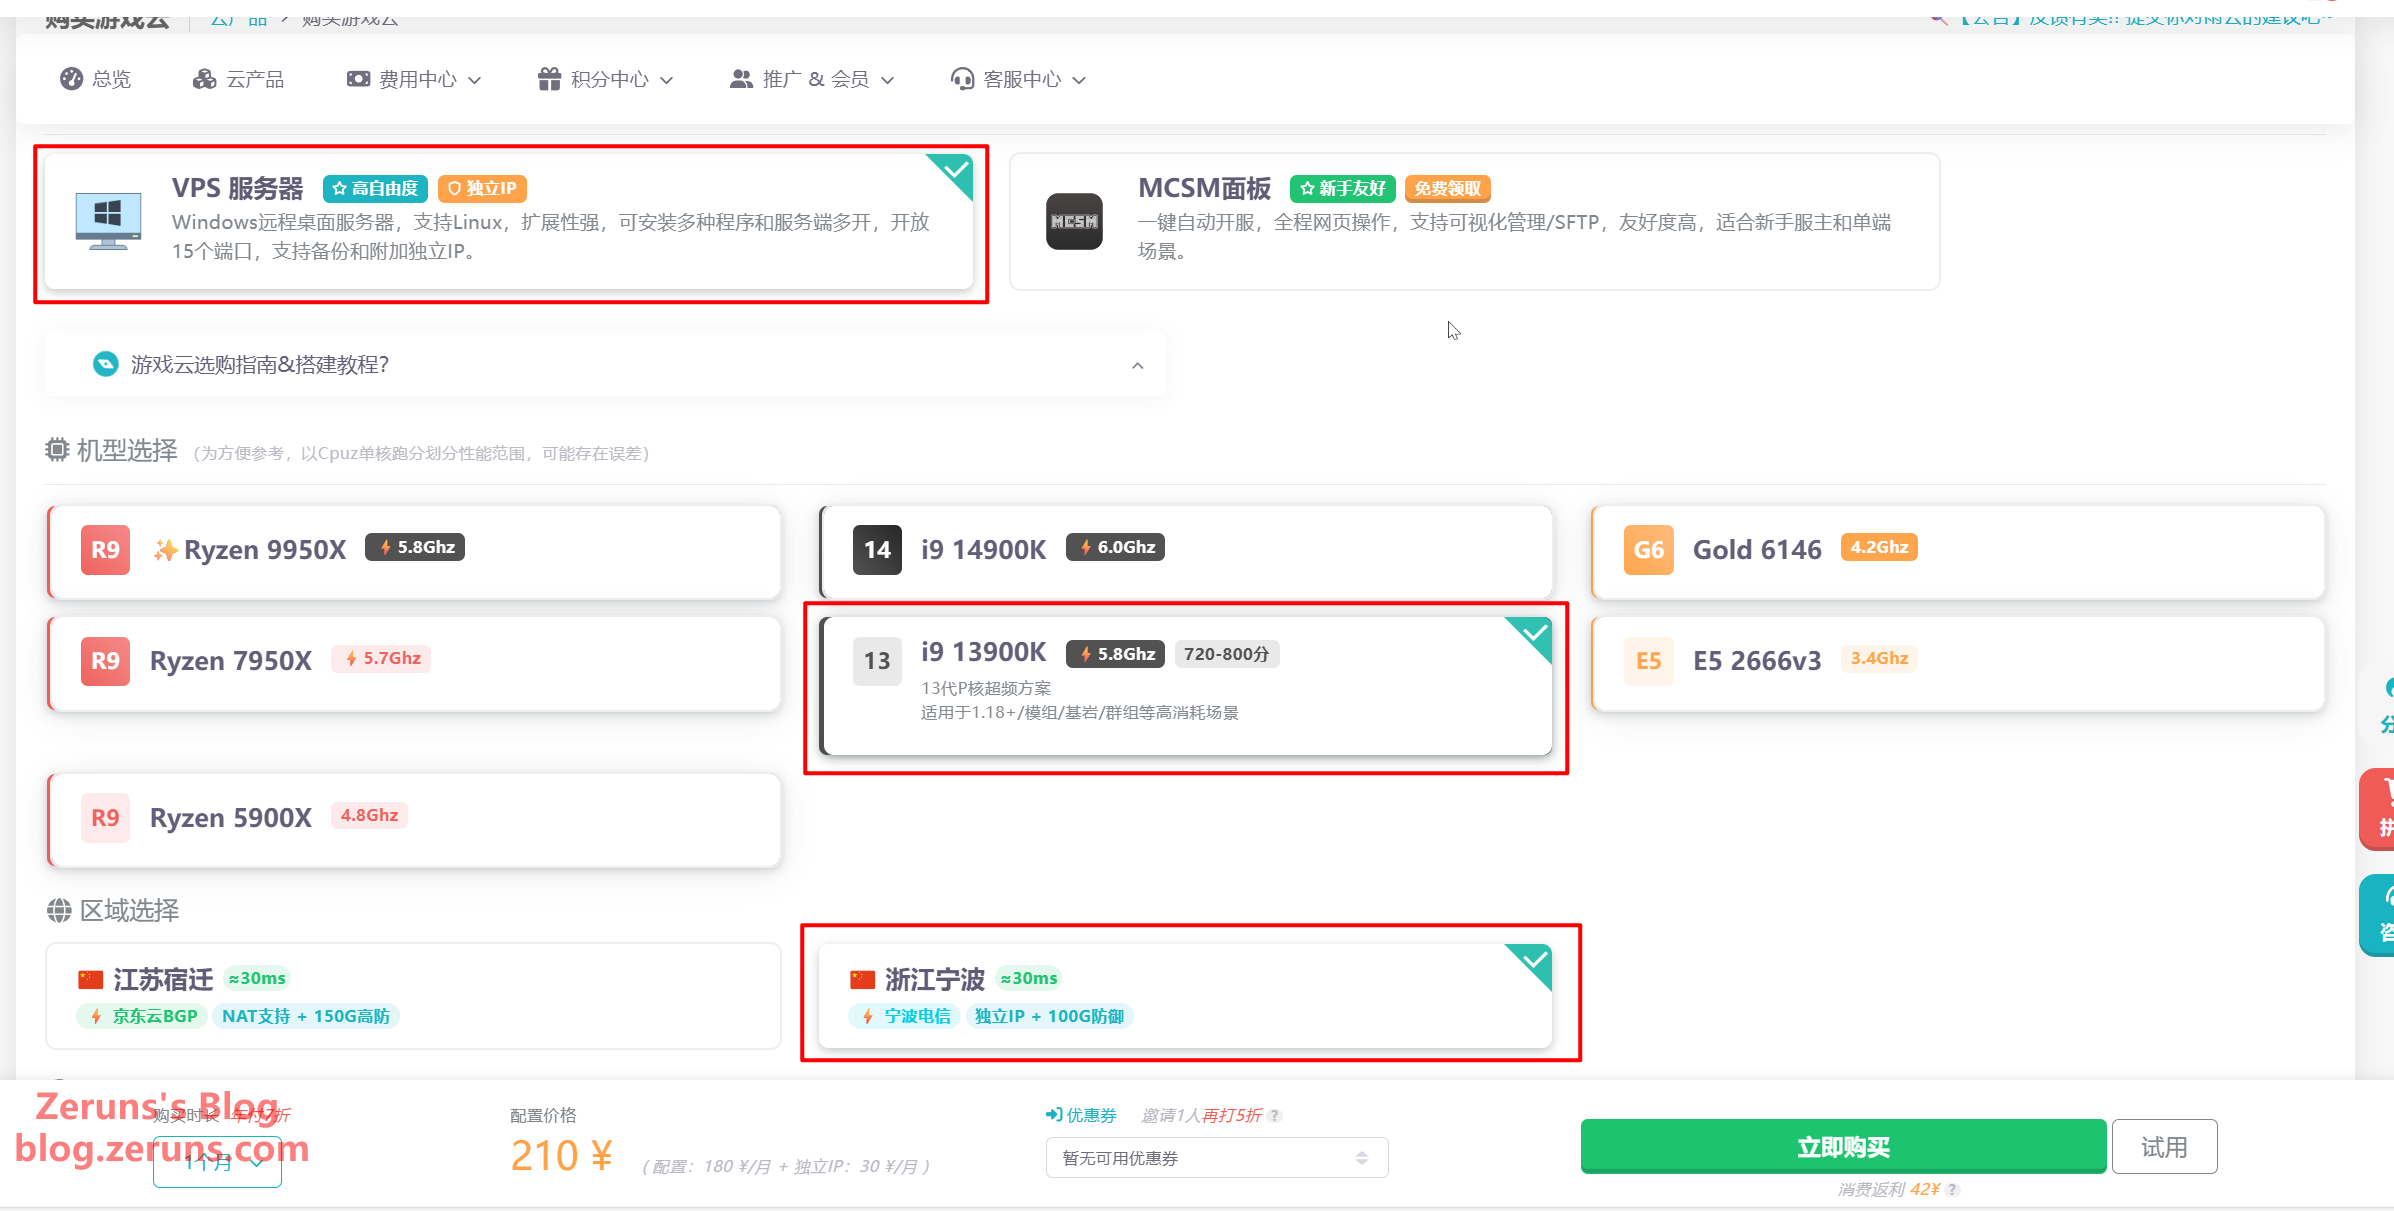
Select the billing mode — dynamic or fixed. If you only play occasionally, choose dynamic billing (extra charges apply if CPU usage exceeds 20%). Pick 4 cores and 8 GB or higher. You can upgrade memory later as more players join. The default IP type is fine. If your ISP supports IPv6, you can select the free IPv6 option to save 30 RMB/month.

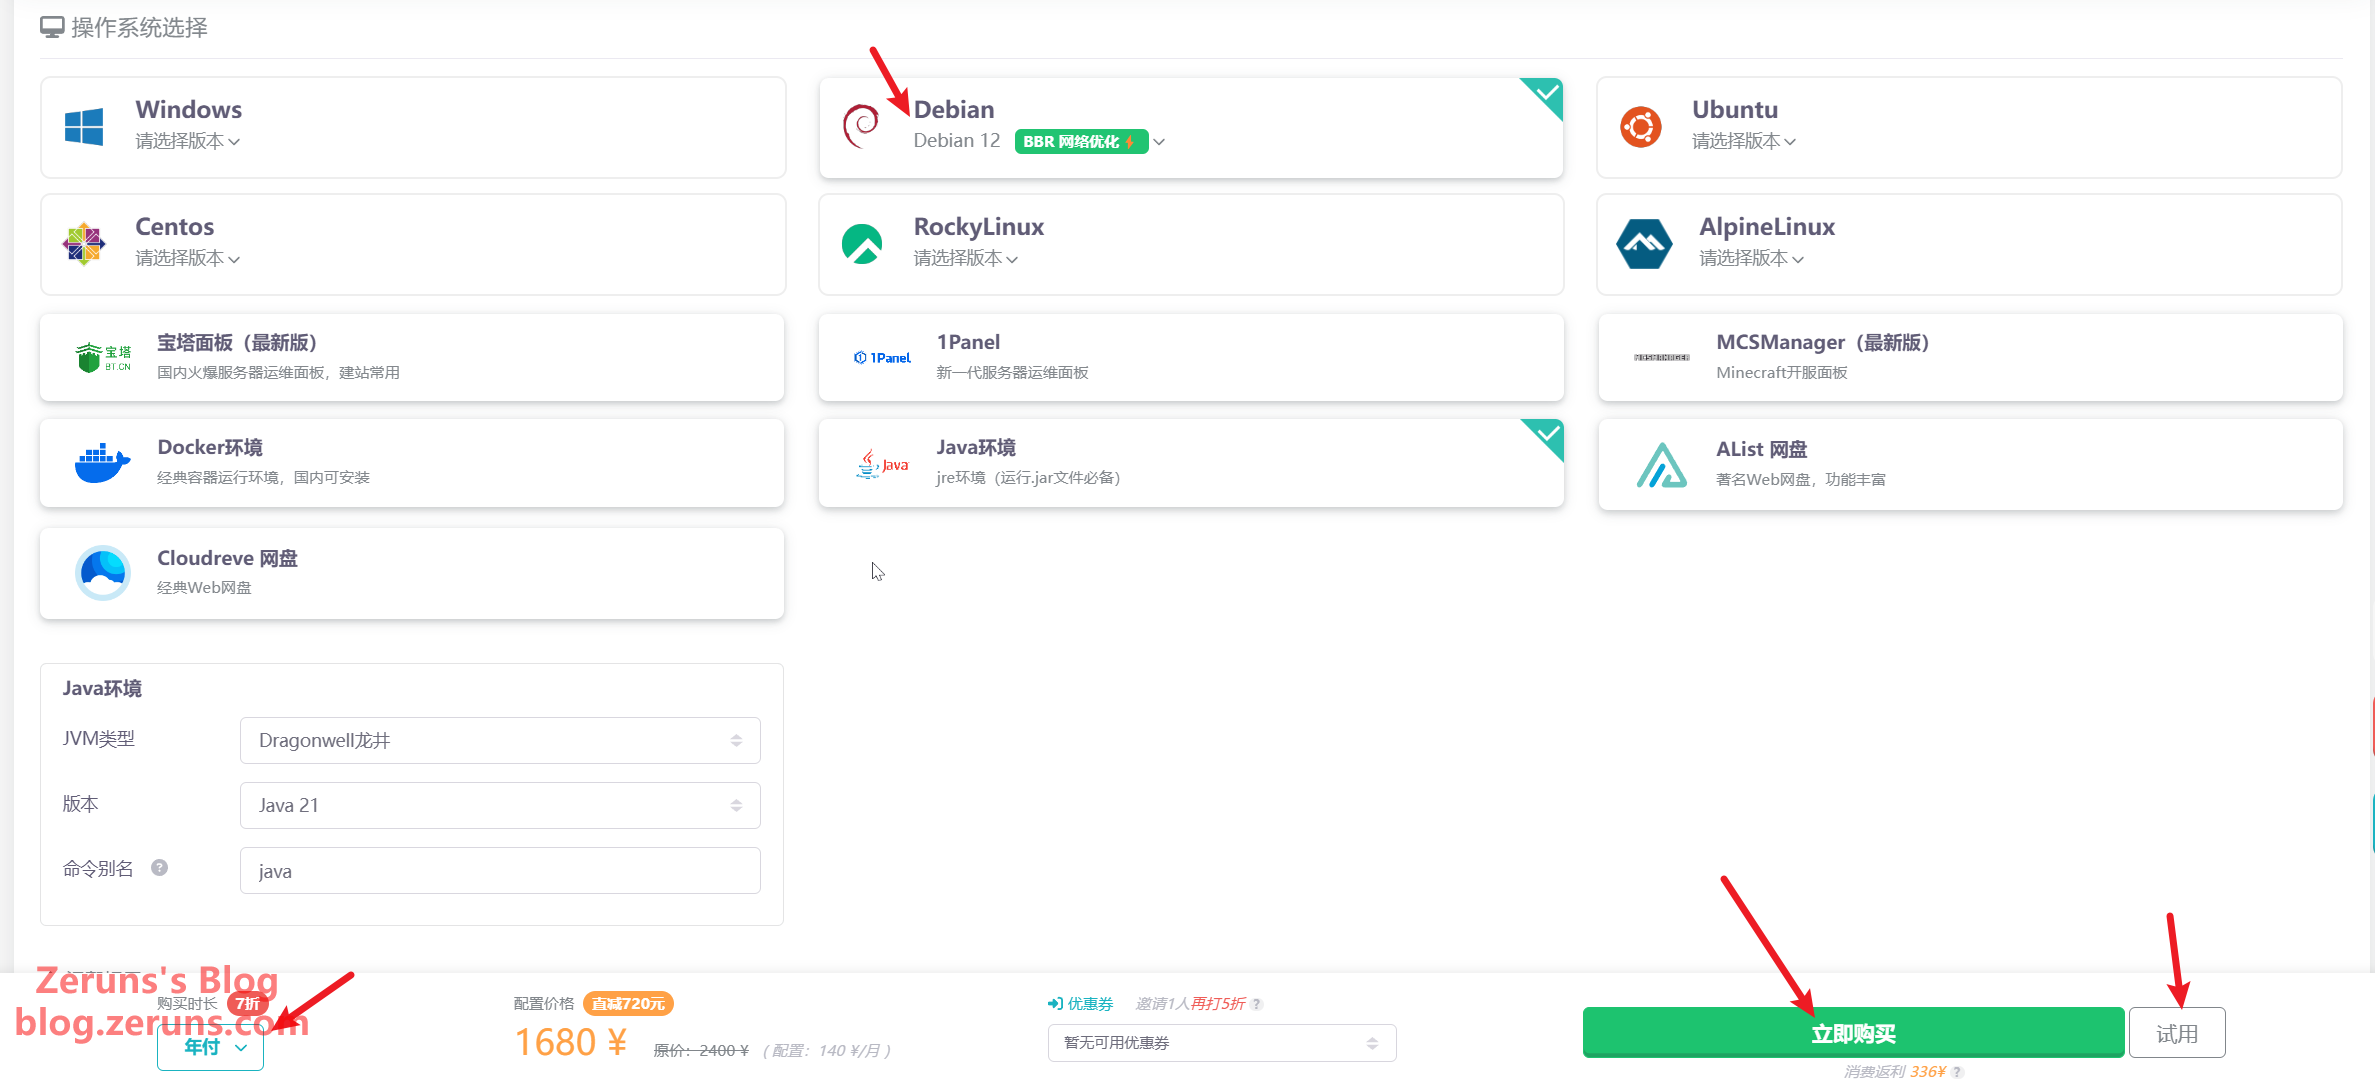
For the OS, select Debian 12. Then choose the billing period — annual plans have a 30% discount (stackable with the 20% coupon available in the points store for users who registered via my link). You can also try it for 1 day for 2 RMB.
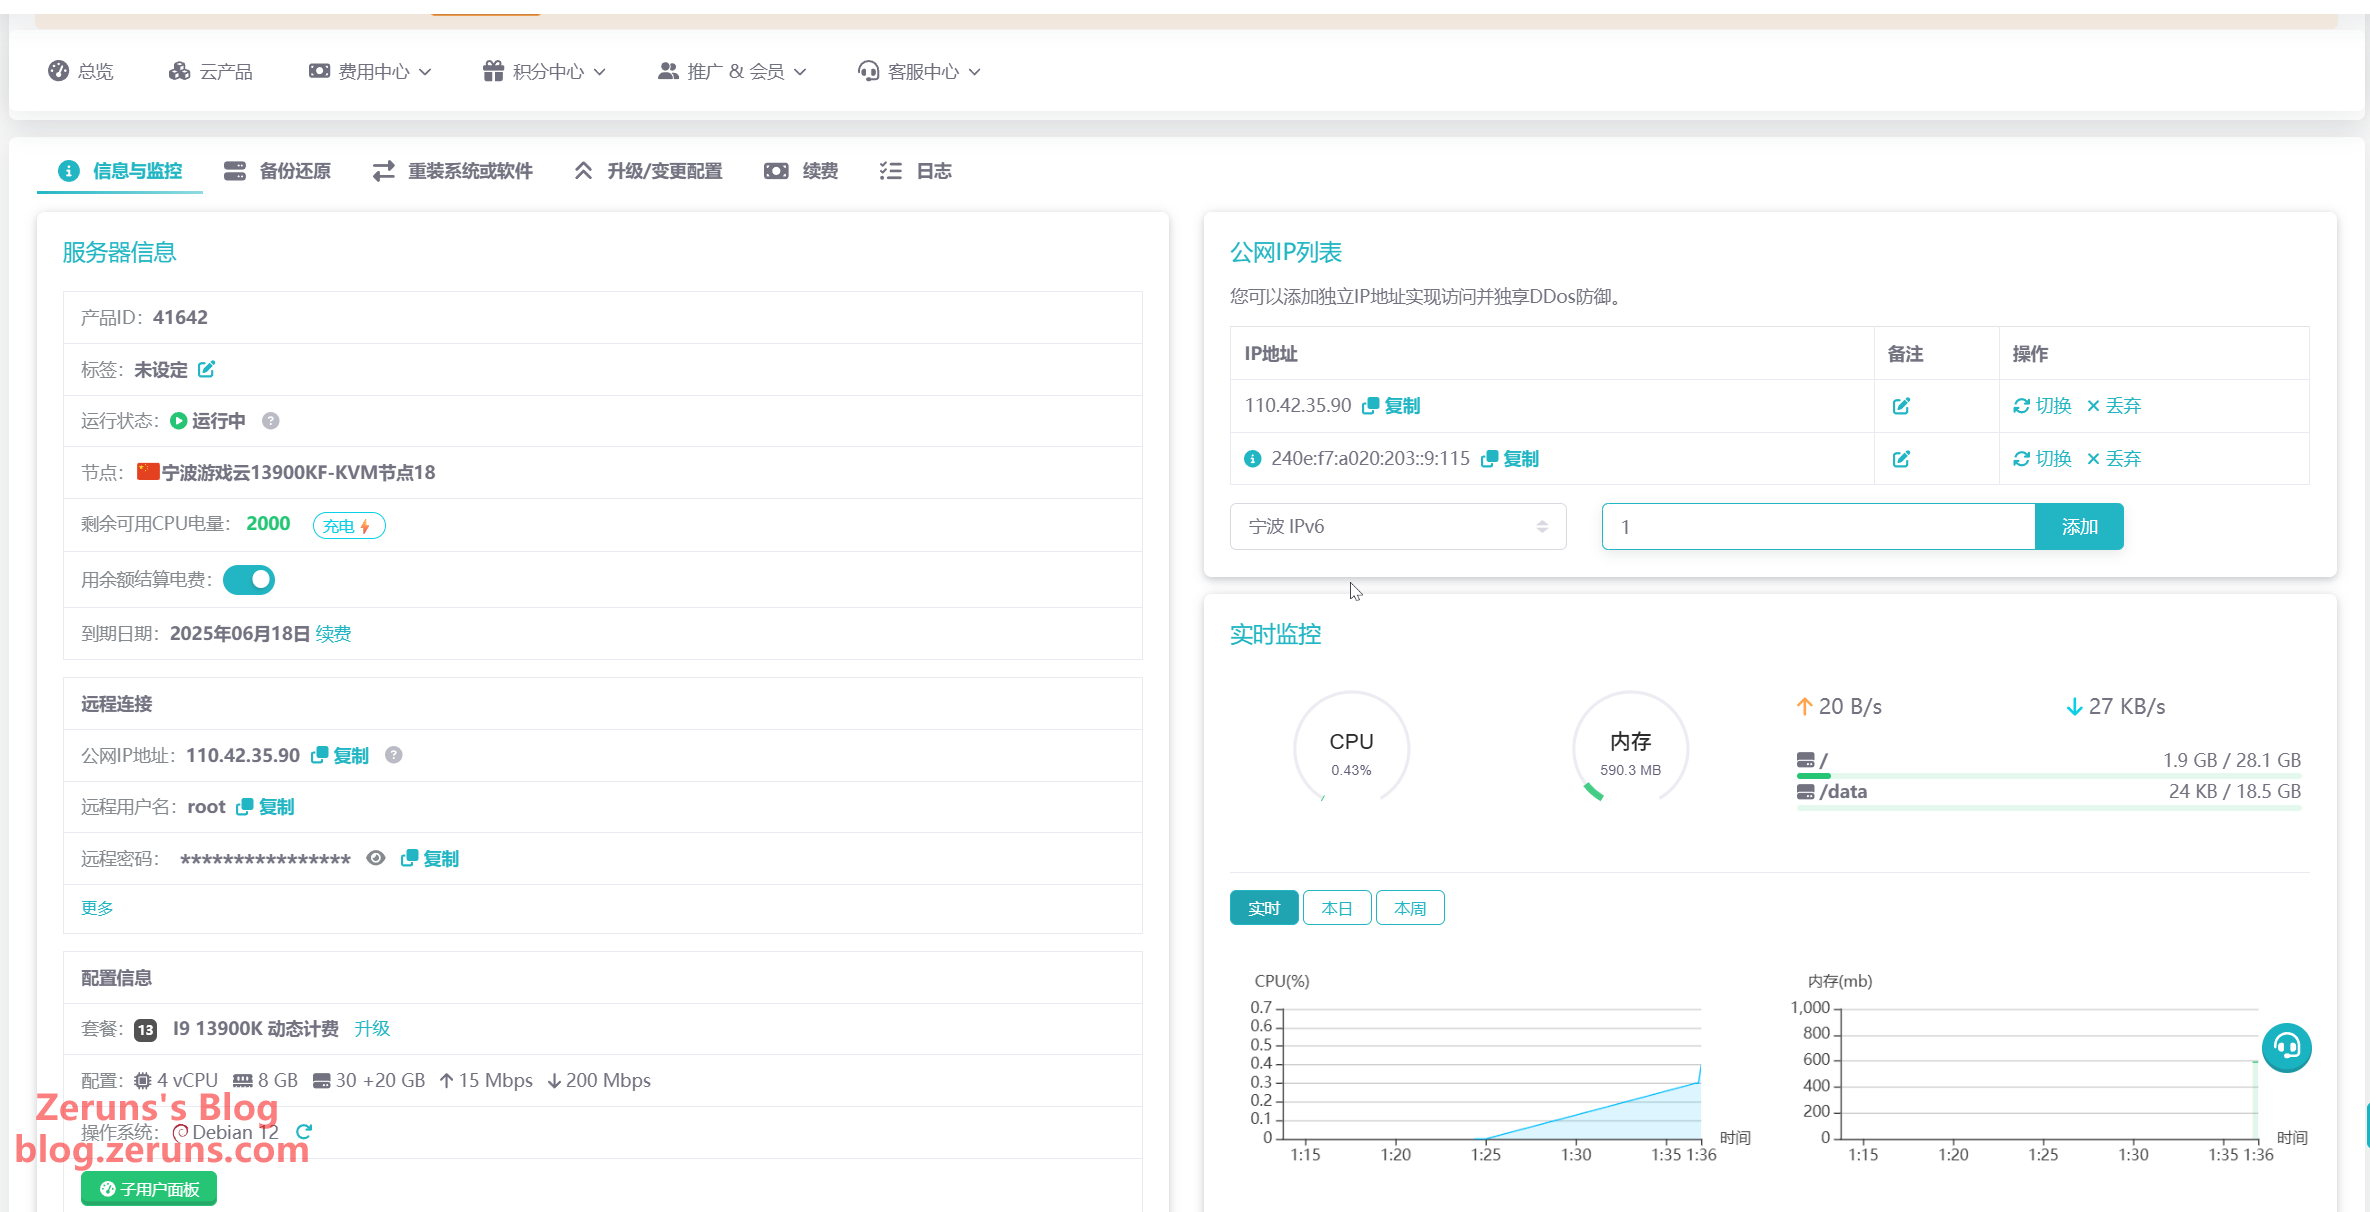
After purchase, your VPS will appear in the Game Cloud section. Click the card or Manage.
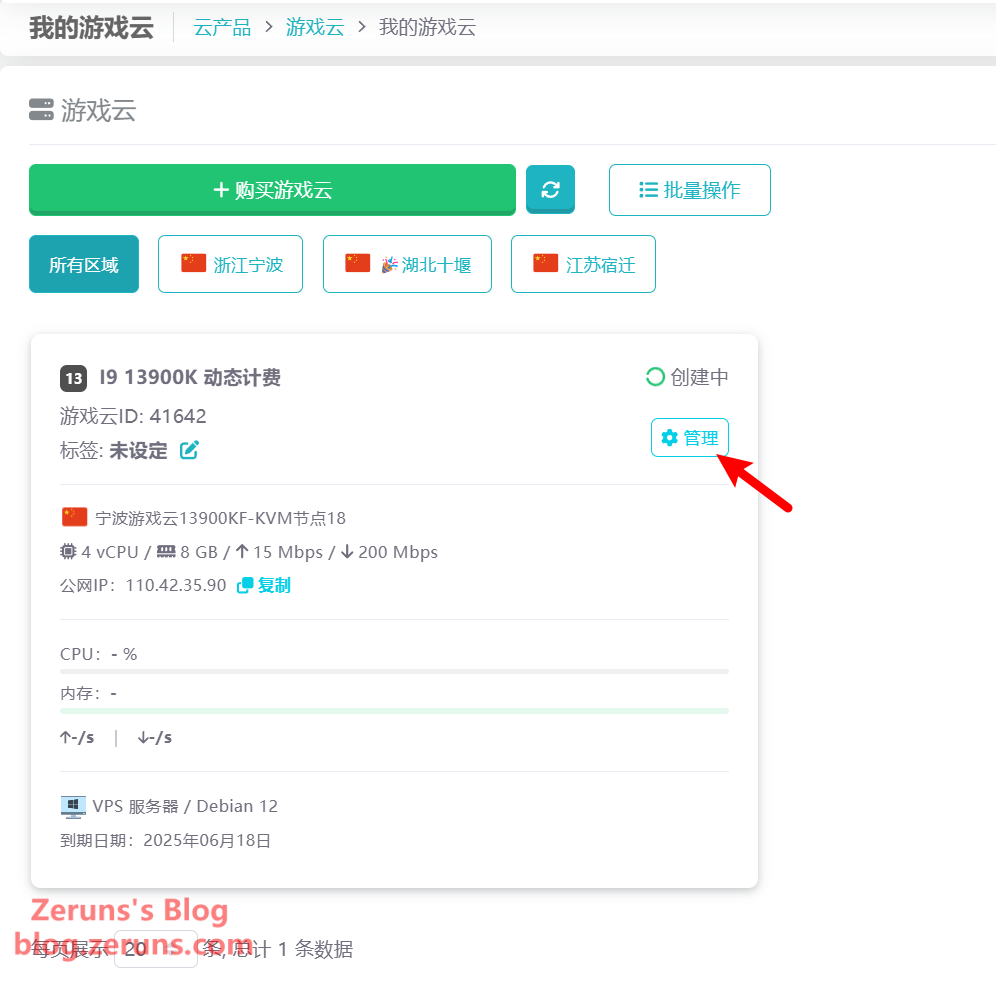
You'll now see your VPS details. From here, you can reinstall/switch OS, upgrade configuration, or add a free IPv6 address.
Connect to the Server
Download and install an SSH client — I recommend PuTTY or MobaXterm.
SSH client download link: https://www.123pan.com/ps/2Y9Djv-UAtvH.html
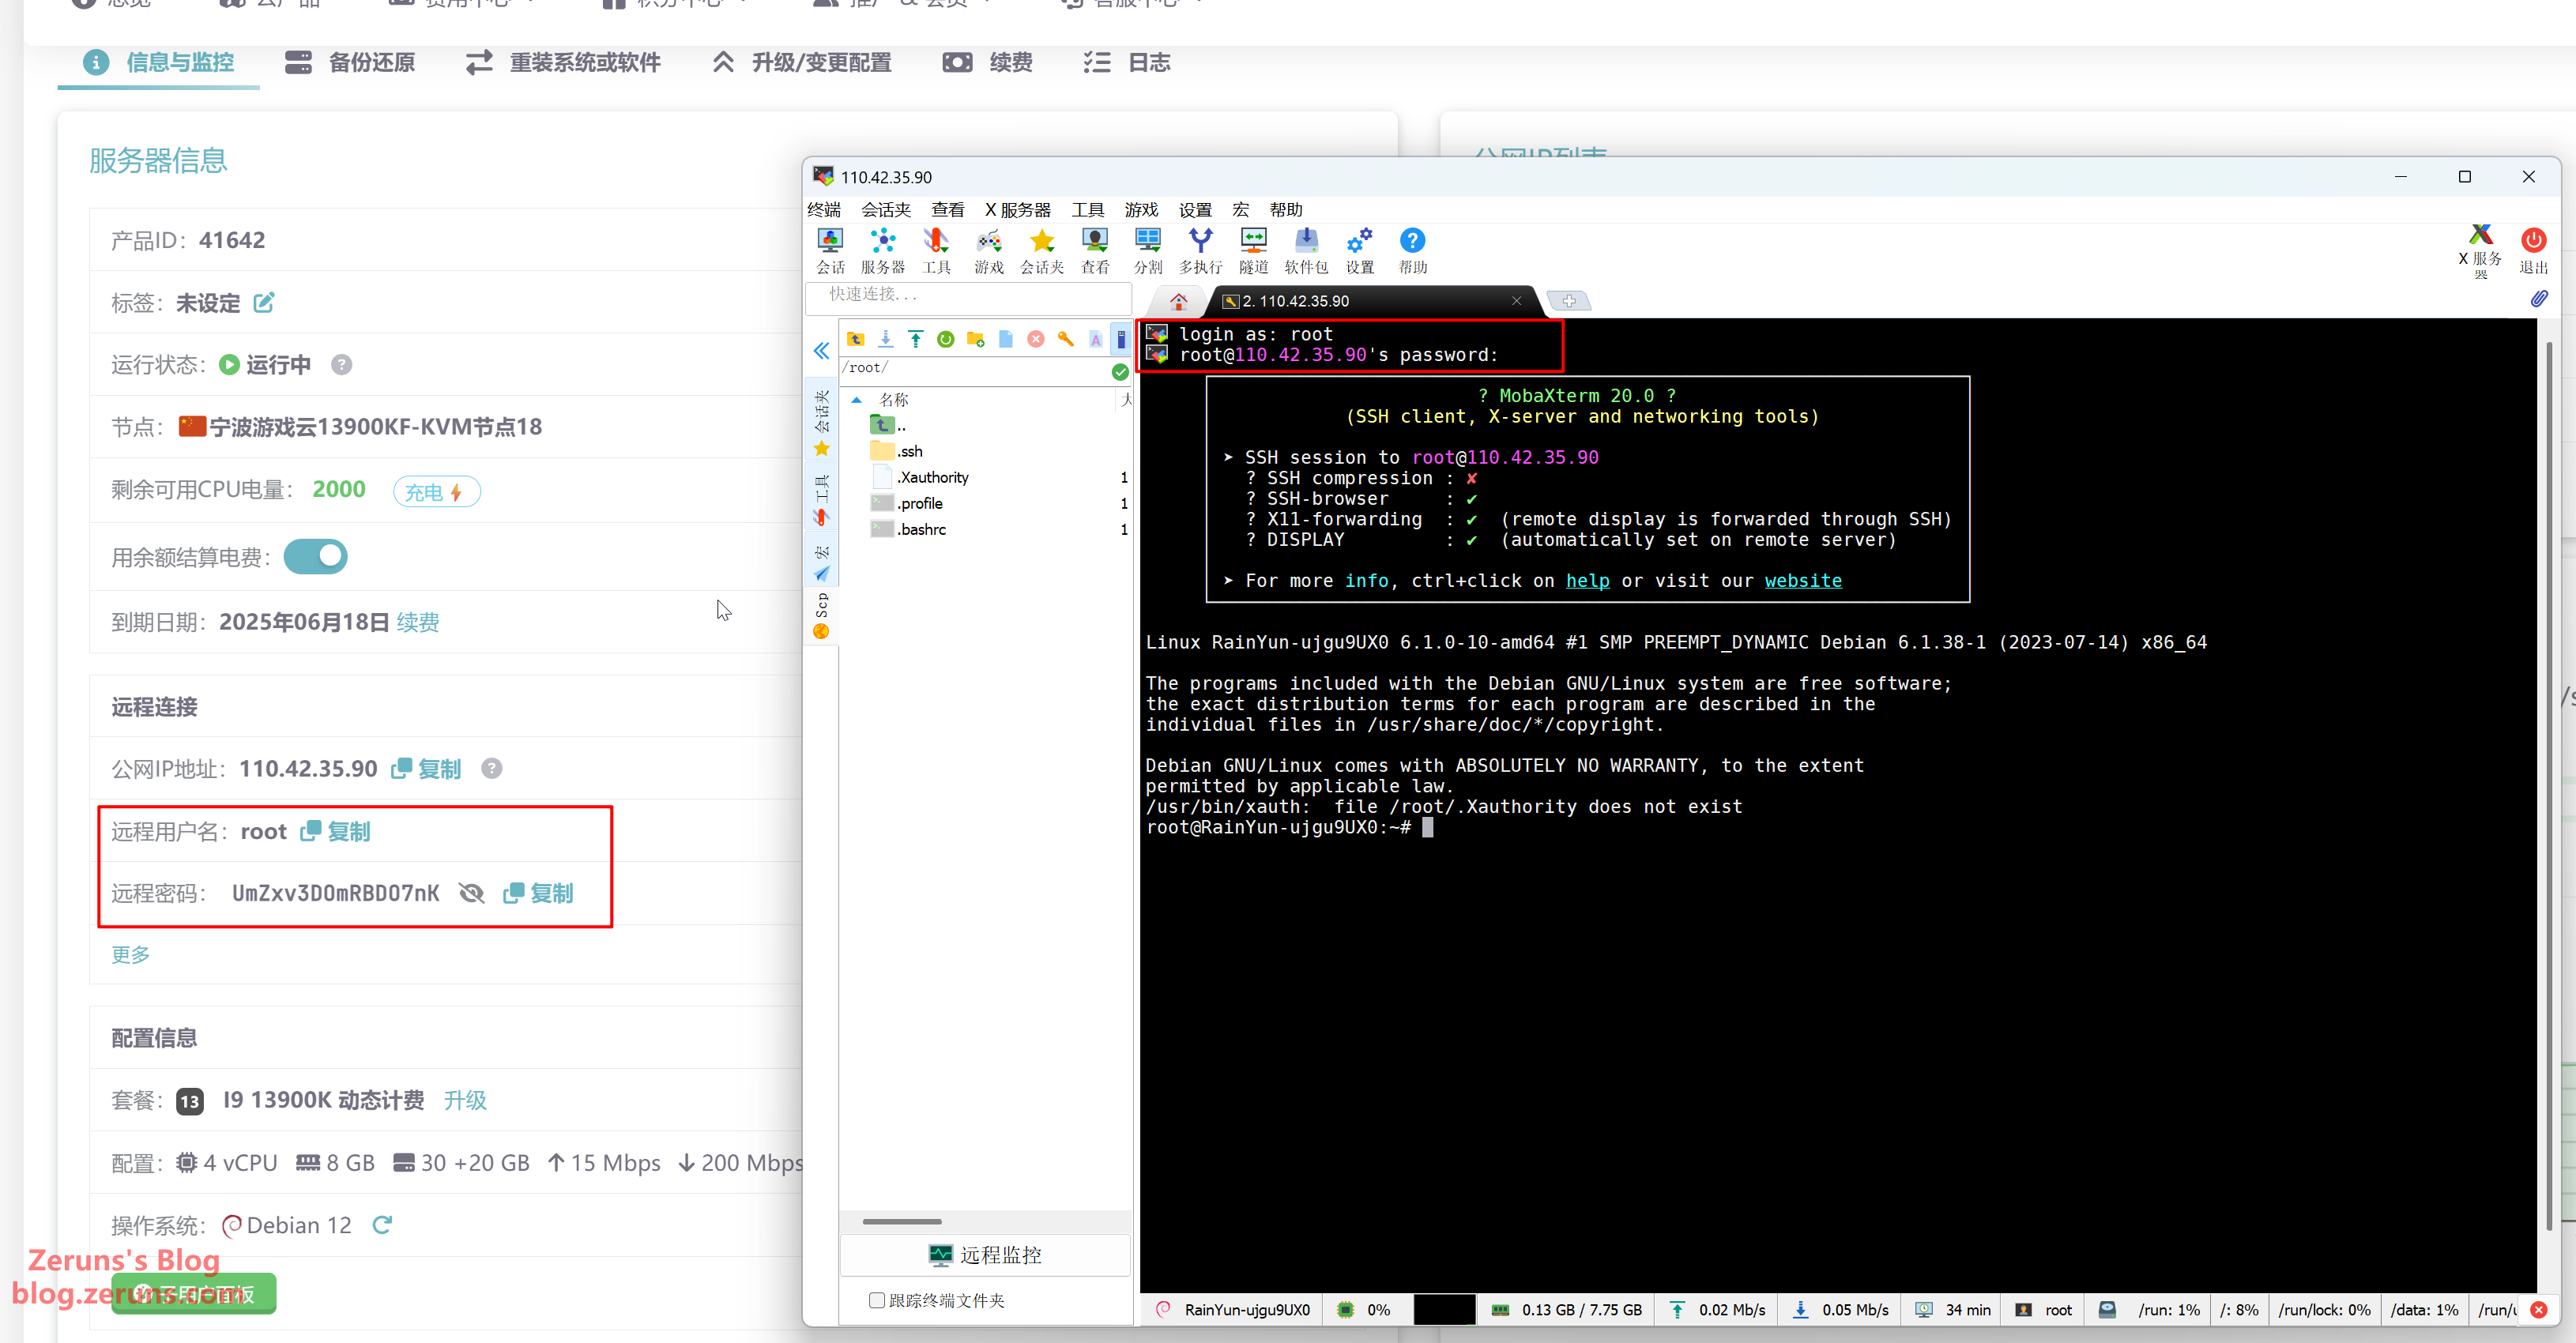
Here I'll use MobaXterm. Open the software, click Session → SSH, enter your server’s IP address under Remote Host, then click OK.
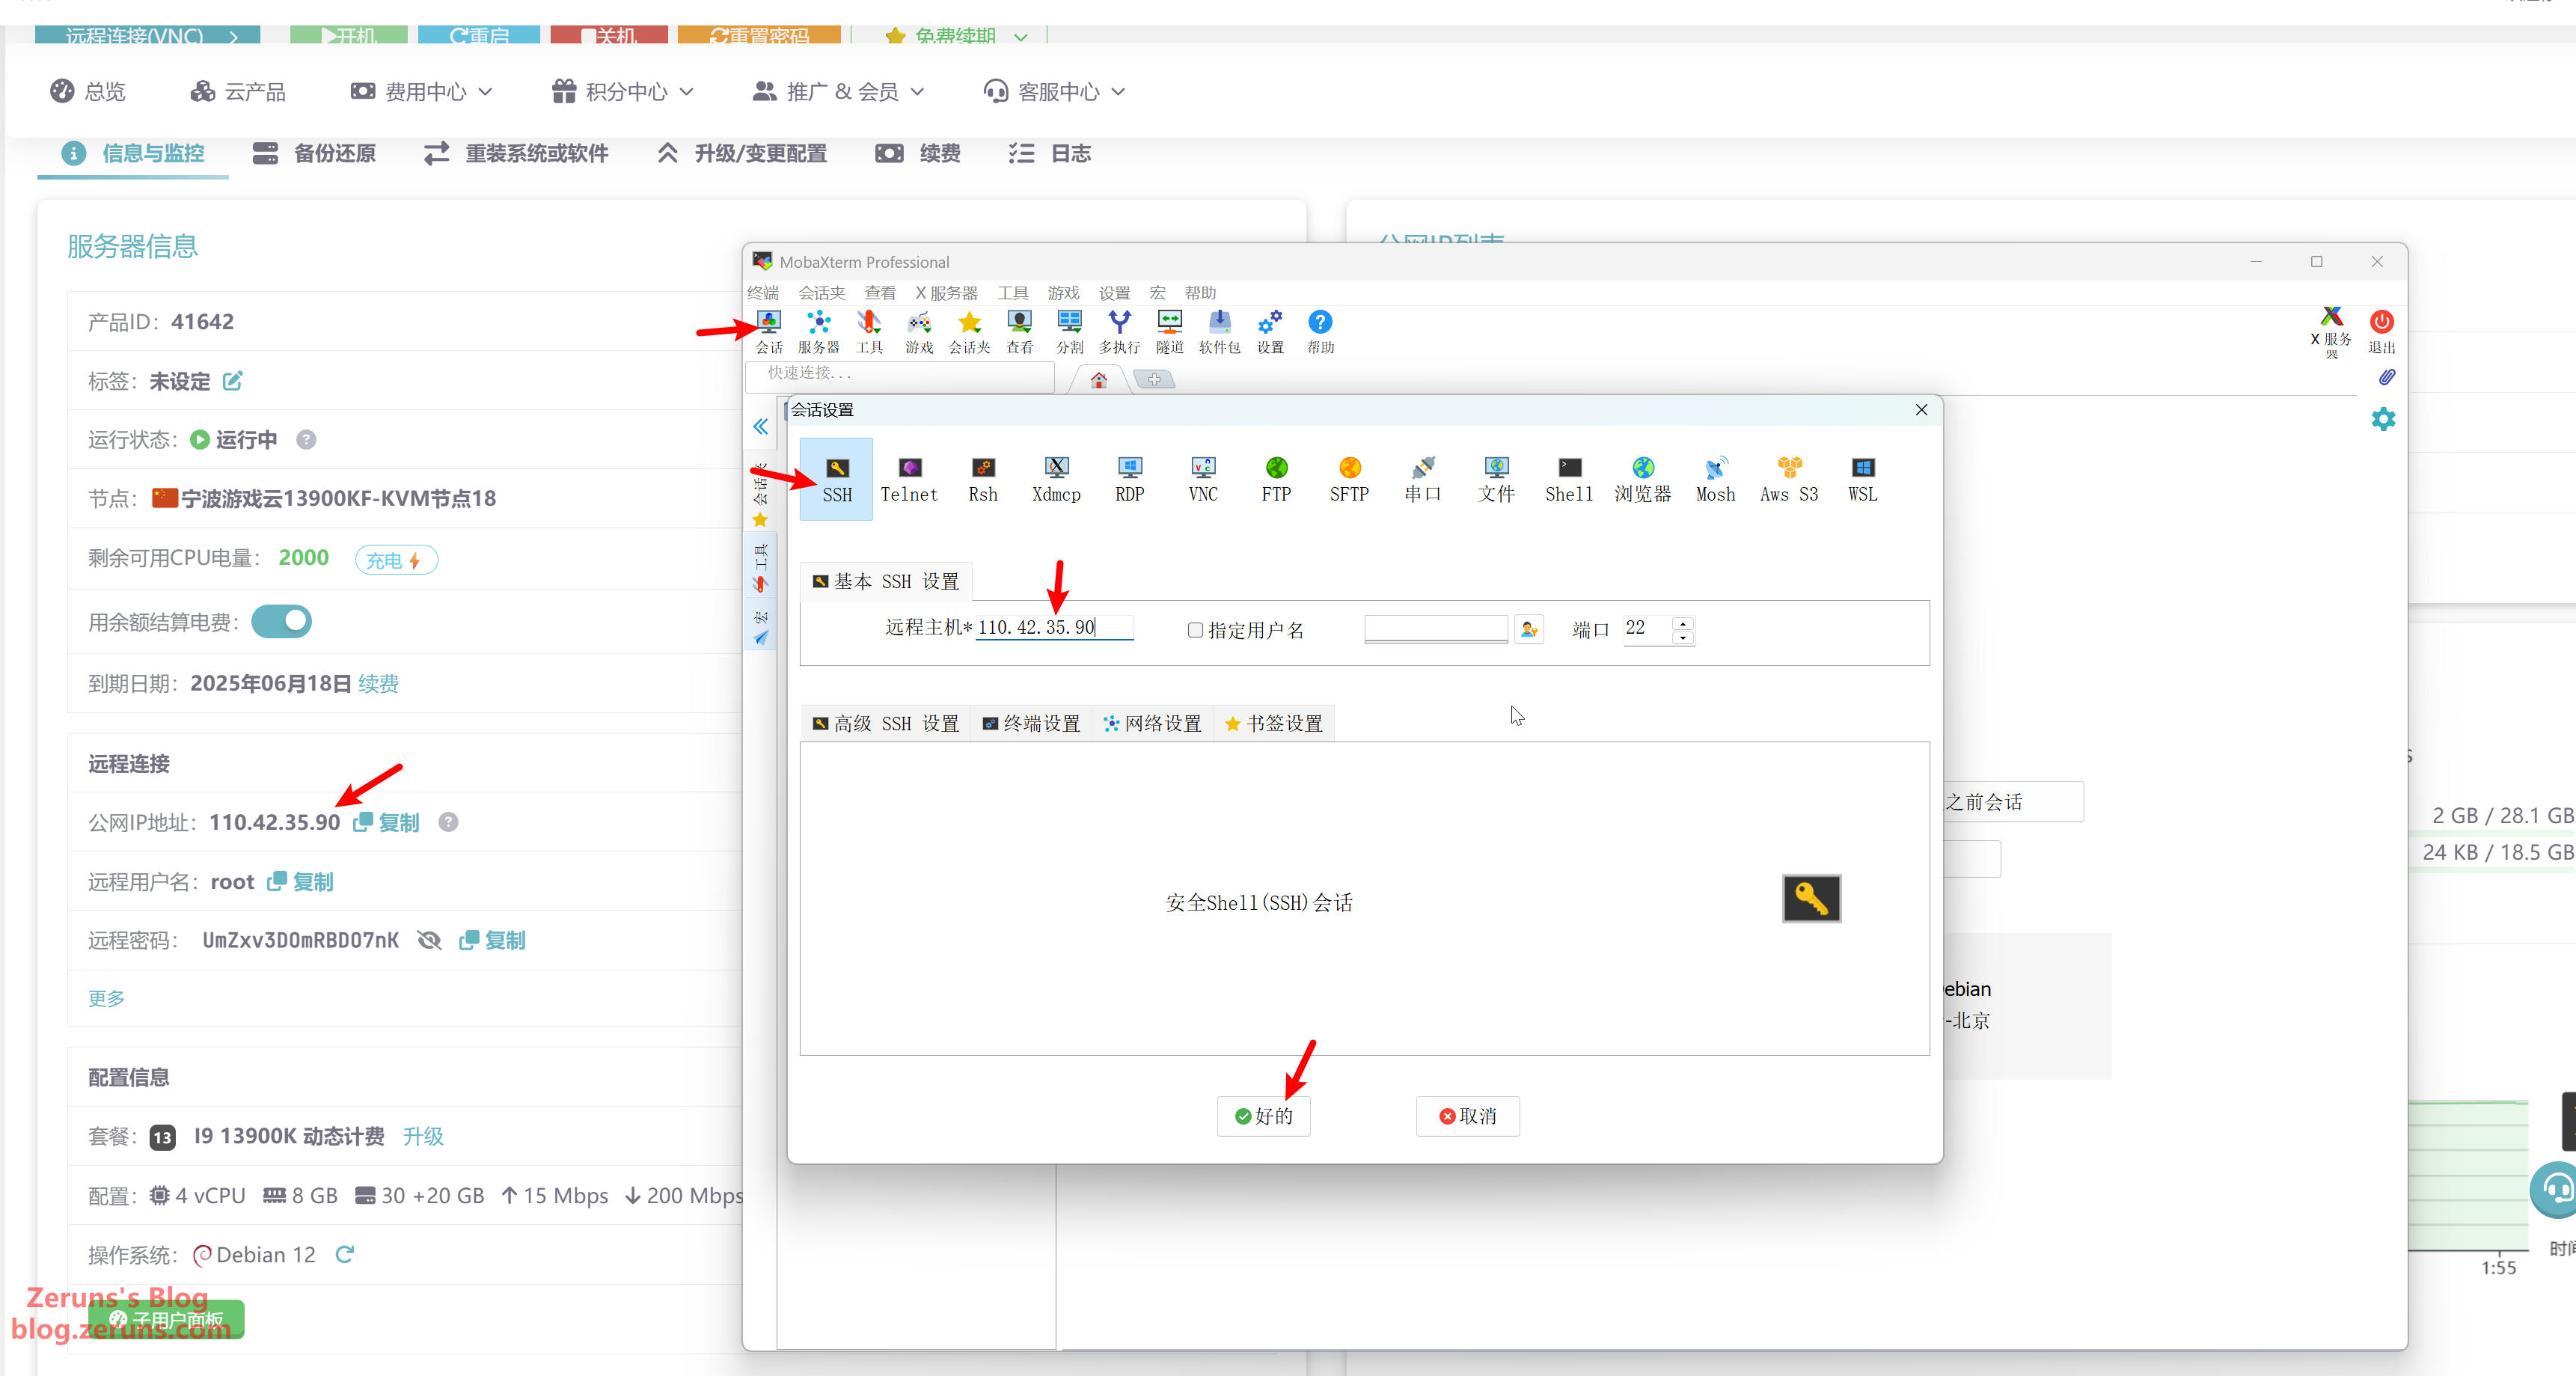
Next, enter your username (usually root) and press Enter. Then enter your password and press Enter again. (Note: the password will not appear while typing.)
💡 Tip: In the SSH terminal, you can copy text by selecting it with your mouse (it copies automatically). To paste, simply right-click.
Change APT Source
By default, the Debian apt software source points to foreign servers, so it's best to switch to a local mirror for faster downloads using chsrc.
Run the following commands in your SSH terminal (lines beginning with # are comments):
# Install chsrc
curl https://chsrc.run/posix | bash

# Auto-detect and switch to the fastest mirror
chsrc set debian

Install MCSM Panel
Quick installation script
Run the following command. If prompted to continue, type y and press Enter.
apt update && apt -y install wget && apt -y install git && sudo su -c "wget -qO- https://script.mcsmanager.com/setup_cn.sh | bash"
- The script supports AMD64 architecture on Ubuntu/CentOS/Debian/ArchLinux.
- After installation, start the services with:
systemctl start mcsm-{daemon,web}.service - Enable auto-start on boot:
systemctl enable mcsm-{daemon,web}.service - The panel files and runtime environment will be installed in
/opt/mcsmanager/.
Configuration file directory: data/SystemConfig/config.json
User data directory: data/User/*.json
Remote daemon config directory: data/RemoteServiceConfig/*.json
If you see output similar to the image below, the installation was successful.
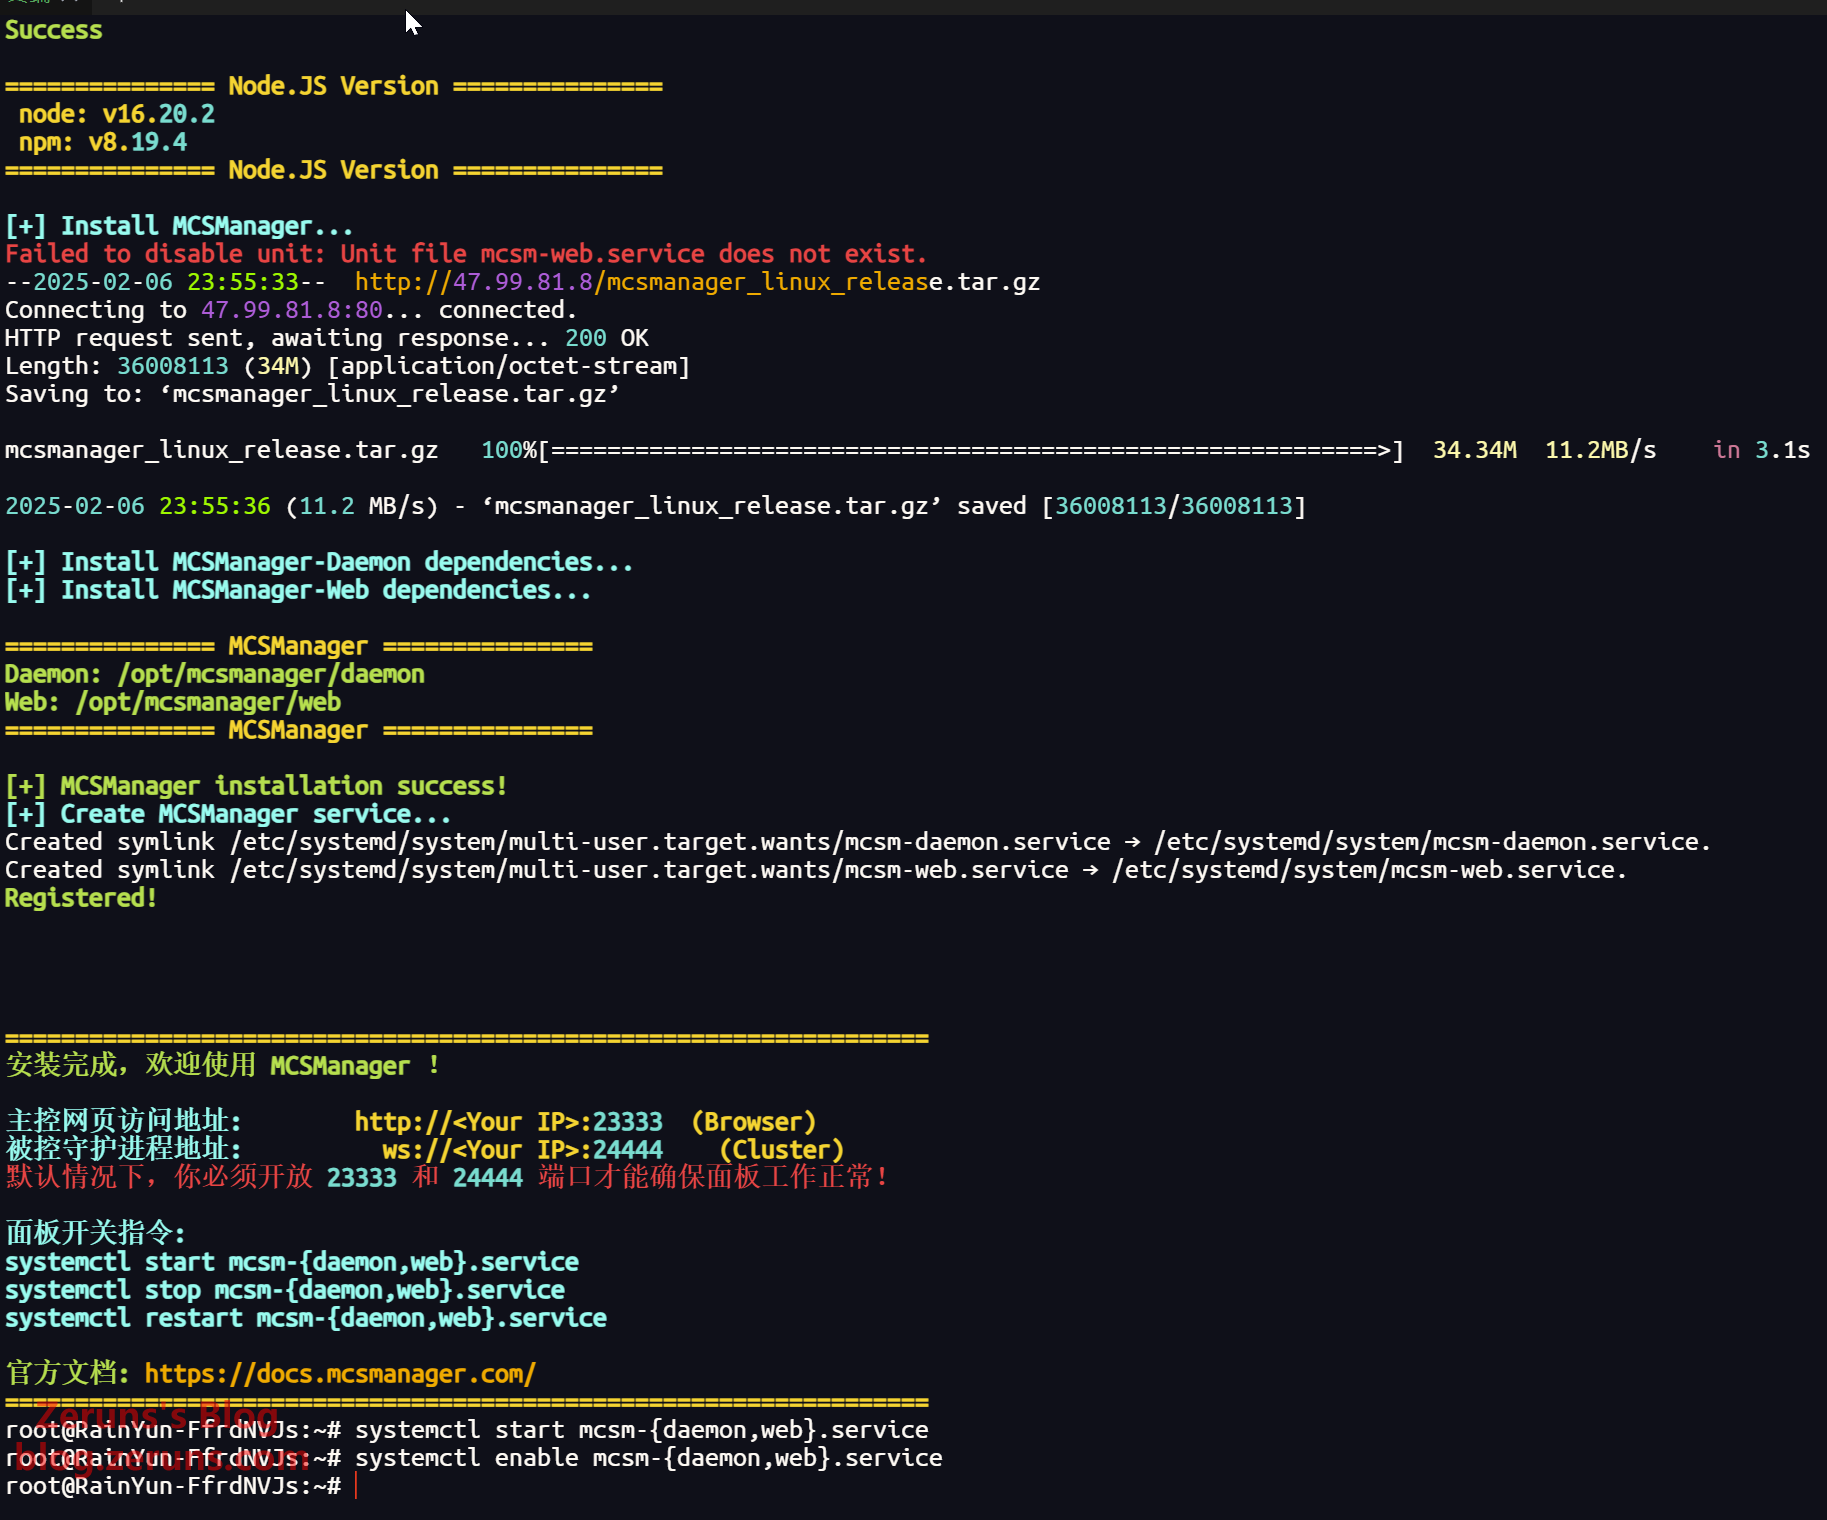
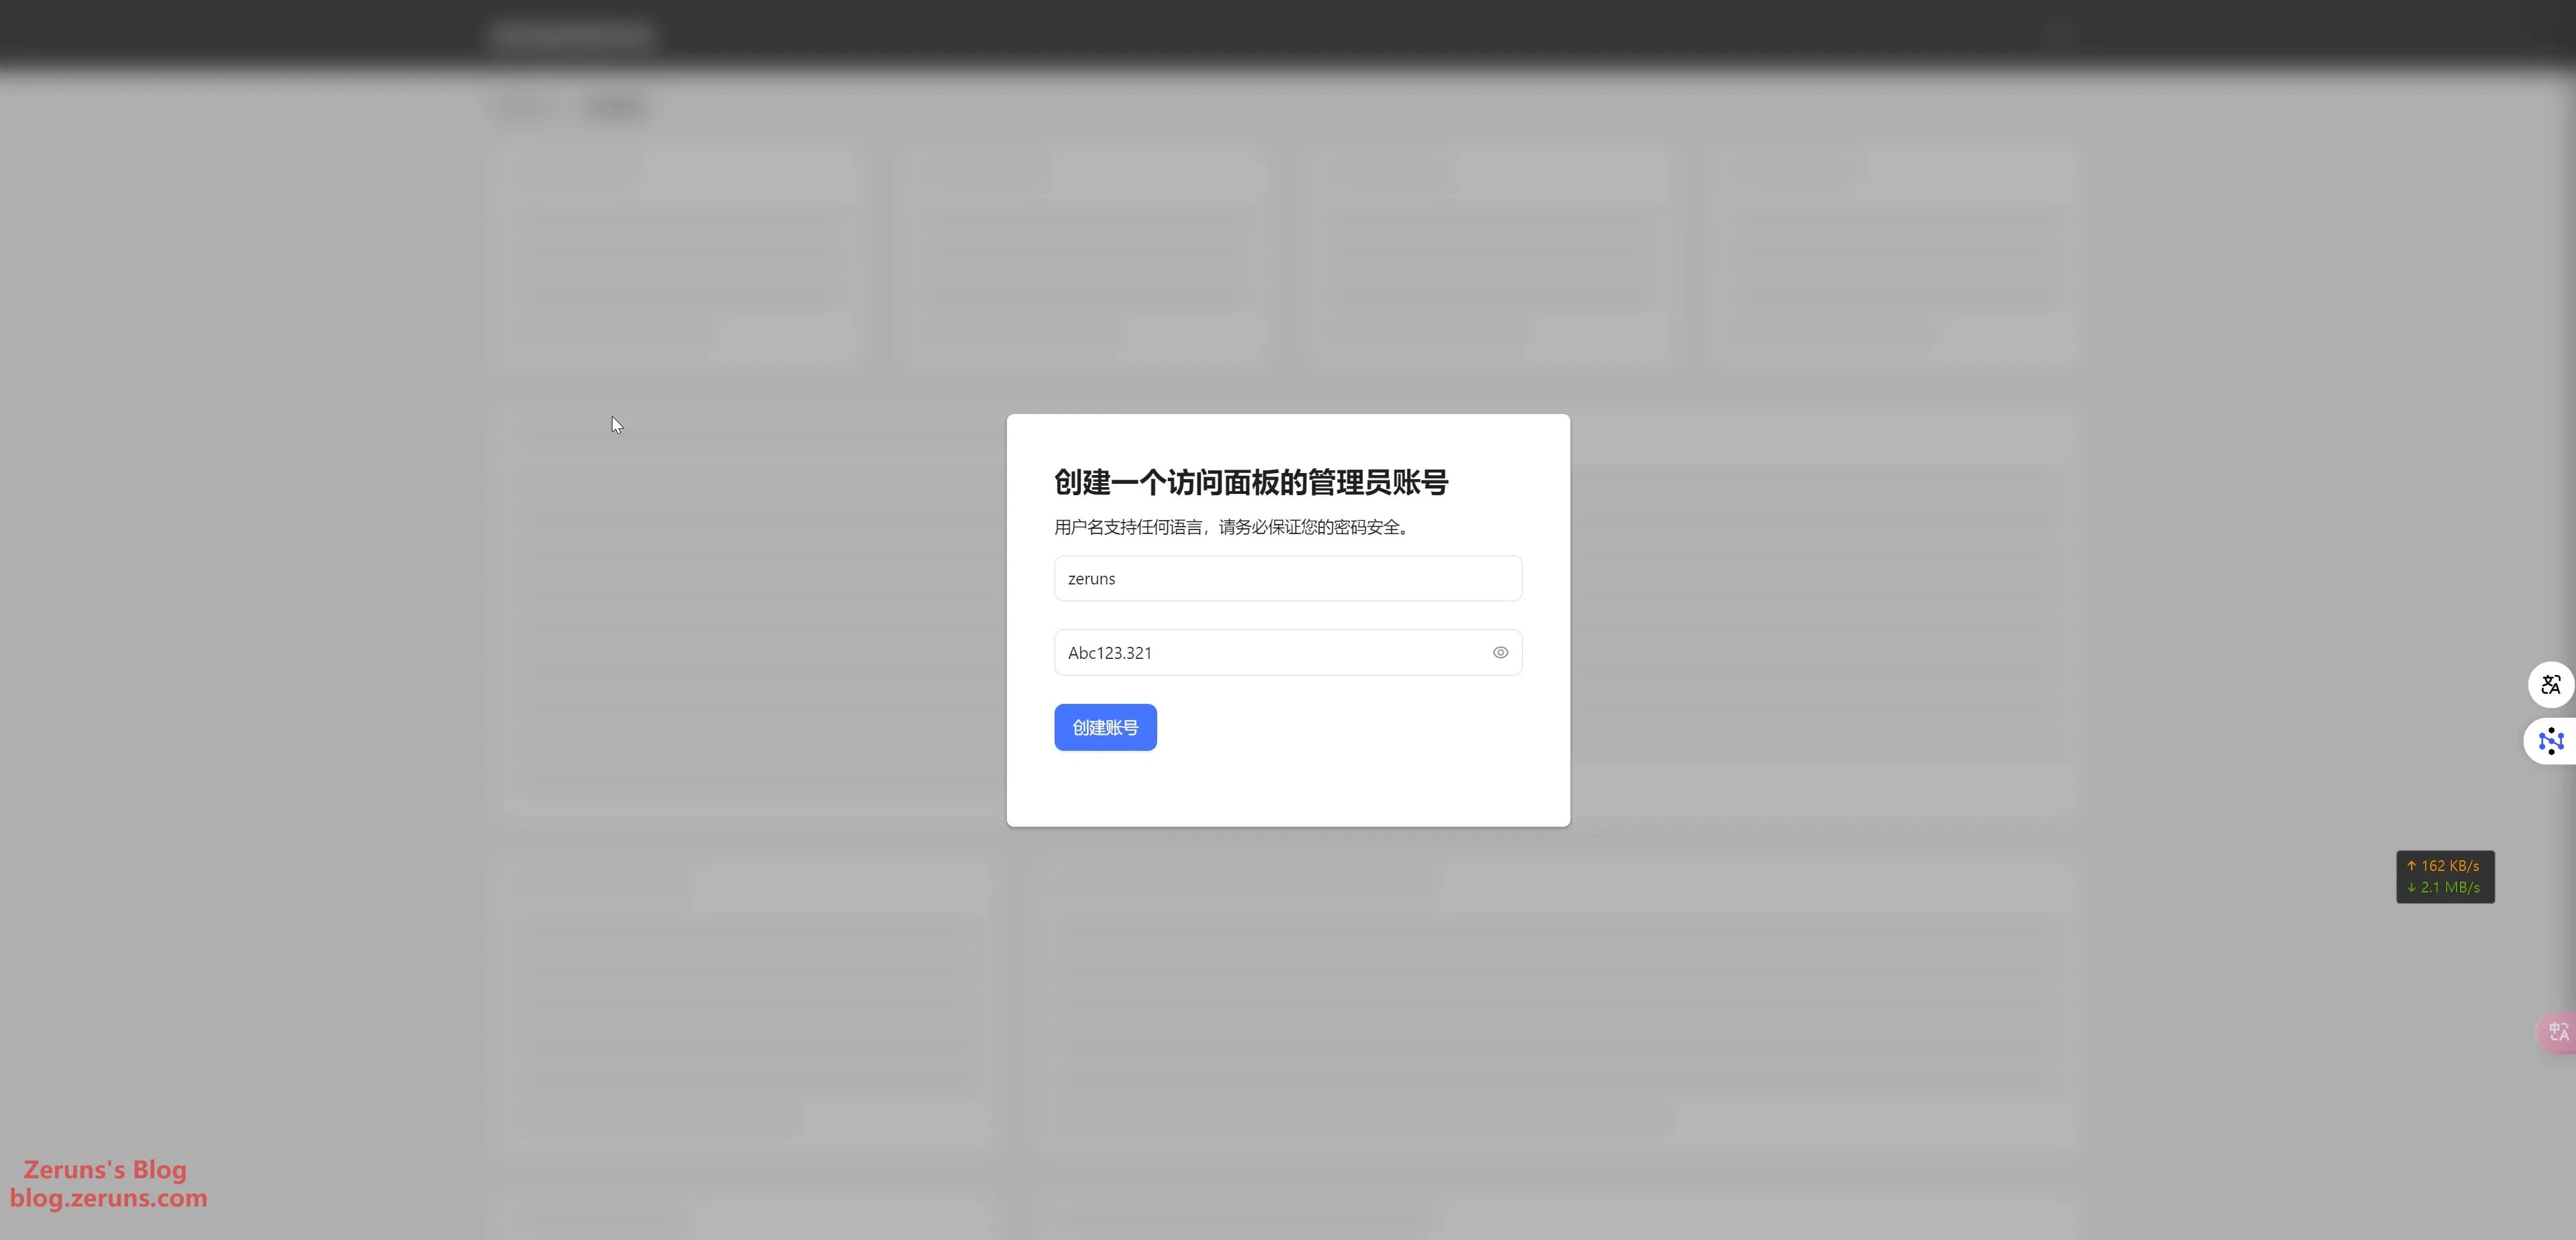
After installation, visit http://ServerIP:23333/ to access the control panel.
Follow the on-screen instructions to create your account and password.
Installing Docker
Return to the SSH terminal and enter the following commands.
Install using the apt package manager:
# Install Docker
apt -y install docker.io

# Enable Docker to start on boot and start Docker service
systemctl enable docker && systemctl start docker

# Verify installation — if successful, it will show Docker version x.x.x
docker -v

If the installation fails, try the following installation script:
# Required for users in mainland China
export DOWNLOAD_URL=https://mirrors.ustc.edu.cn/docker-ce

# Docker installation script
curl -fsSL https://get.docker.com -o get-docker.sh && sudo sh get-docker.sh

# Verify installation — if successful, it will show Docker version x.x.x
docker -v
If it still doesn't work, try the manual installation guide below:
Manual Docker installation guide: https://www.runoob.com/docker/ubuntu-docker-install.html
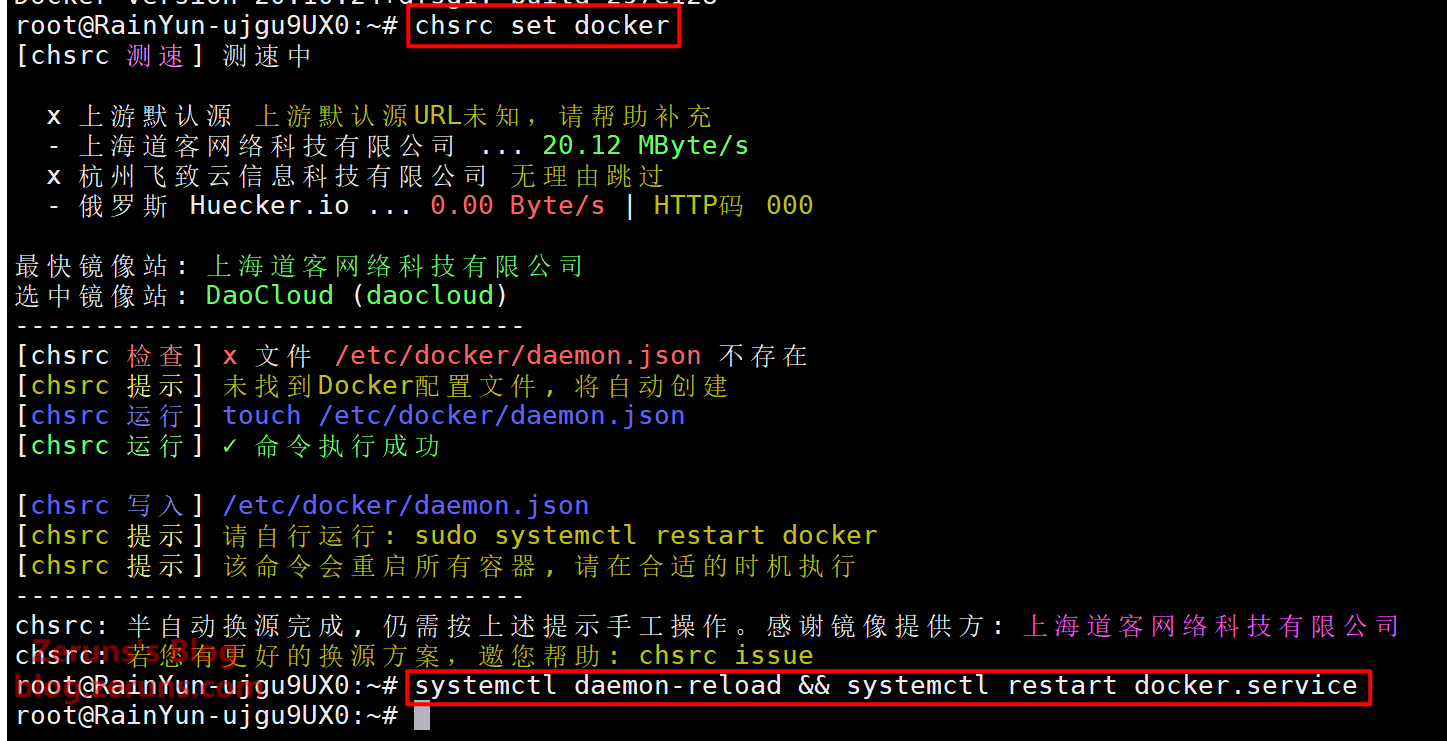
Switch Docker to a domestic mirror source
chsrc set docker

# Restart Docker
systemctl daemon-reload && systemctl restart docker.service
Installing the Java Environment
Before running the Java server, the Java Runtime Environment is essential. Below is a list of corresponding Java versions required for different Minecraft versions:
| Required Java Version | Minecraft Game Versions |
|---|---|
| Java 8 | 1.7.x, 1.8.x, 1.9.x, 1.10.x, 1.12.x, 1.13.x, 1.15.x, 1.16.x |
| Java 16 & Java 17 | 1.17.x |
| Java 17 | 1.18.x |
| Java 17 and above | 1.18.x, 1.19.x, 1.20.x |
If you are using version 1.17.x, avoid Java 20+ as compatibility issues may occur.
Always confirm which Java version your plugins support before making a decision. If a plugin doesn't specify, ask the developer to avoid unnecessary problems.
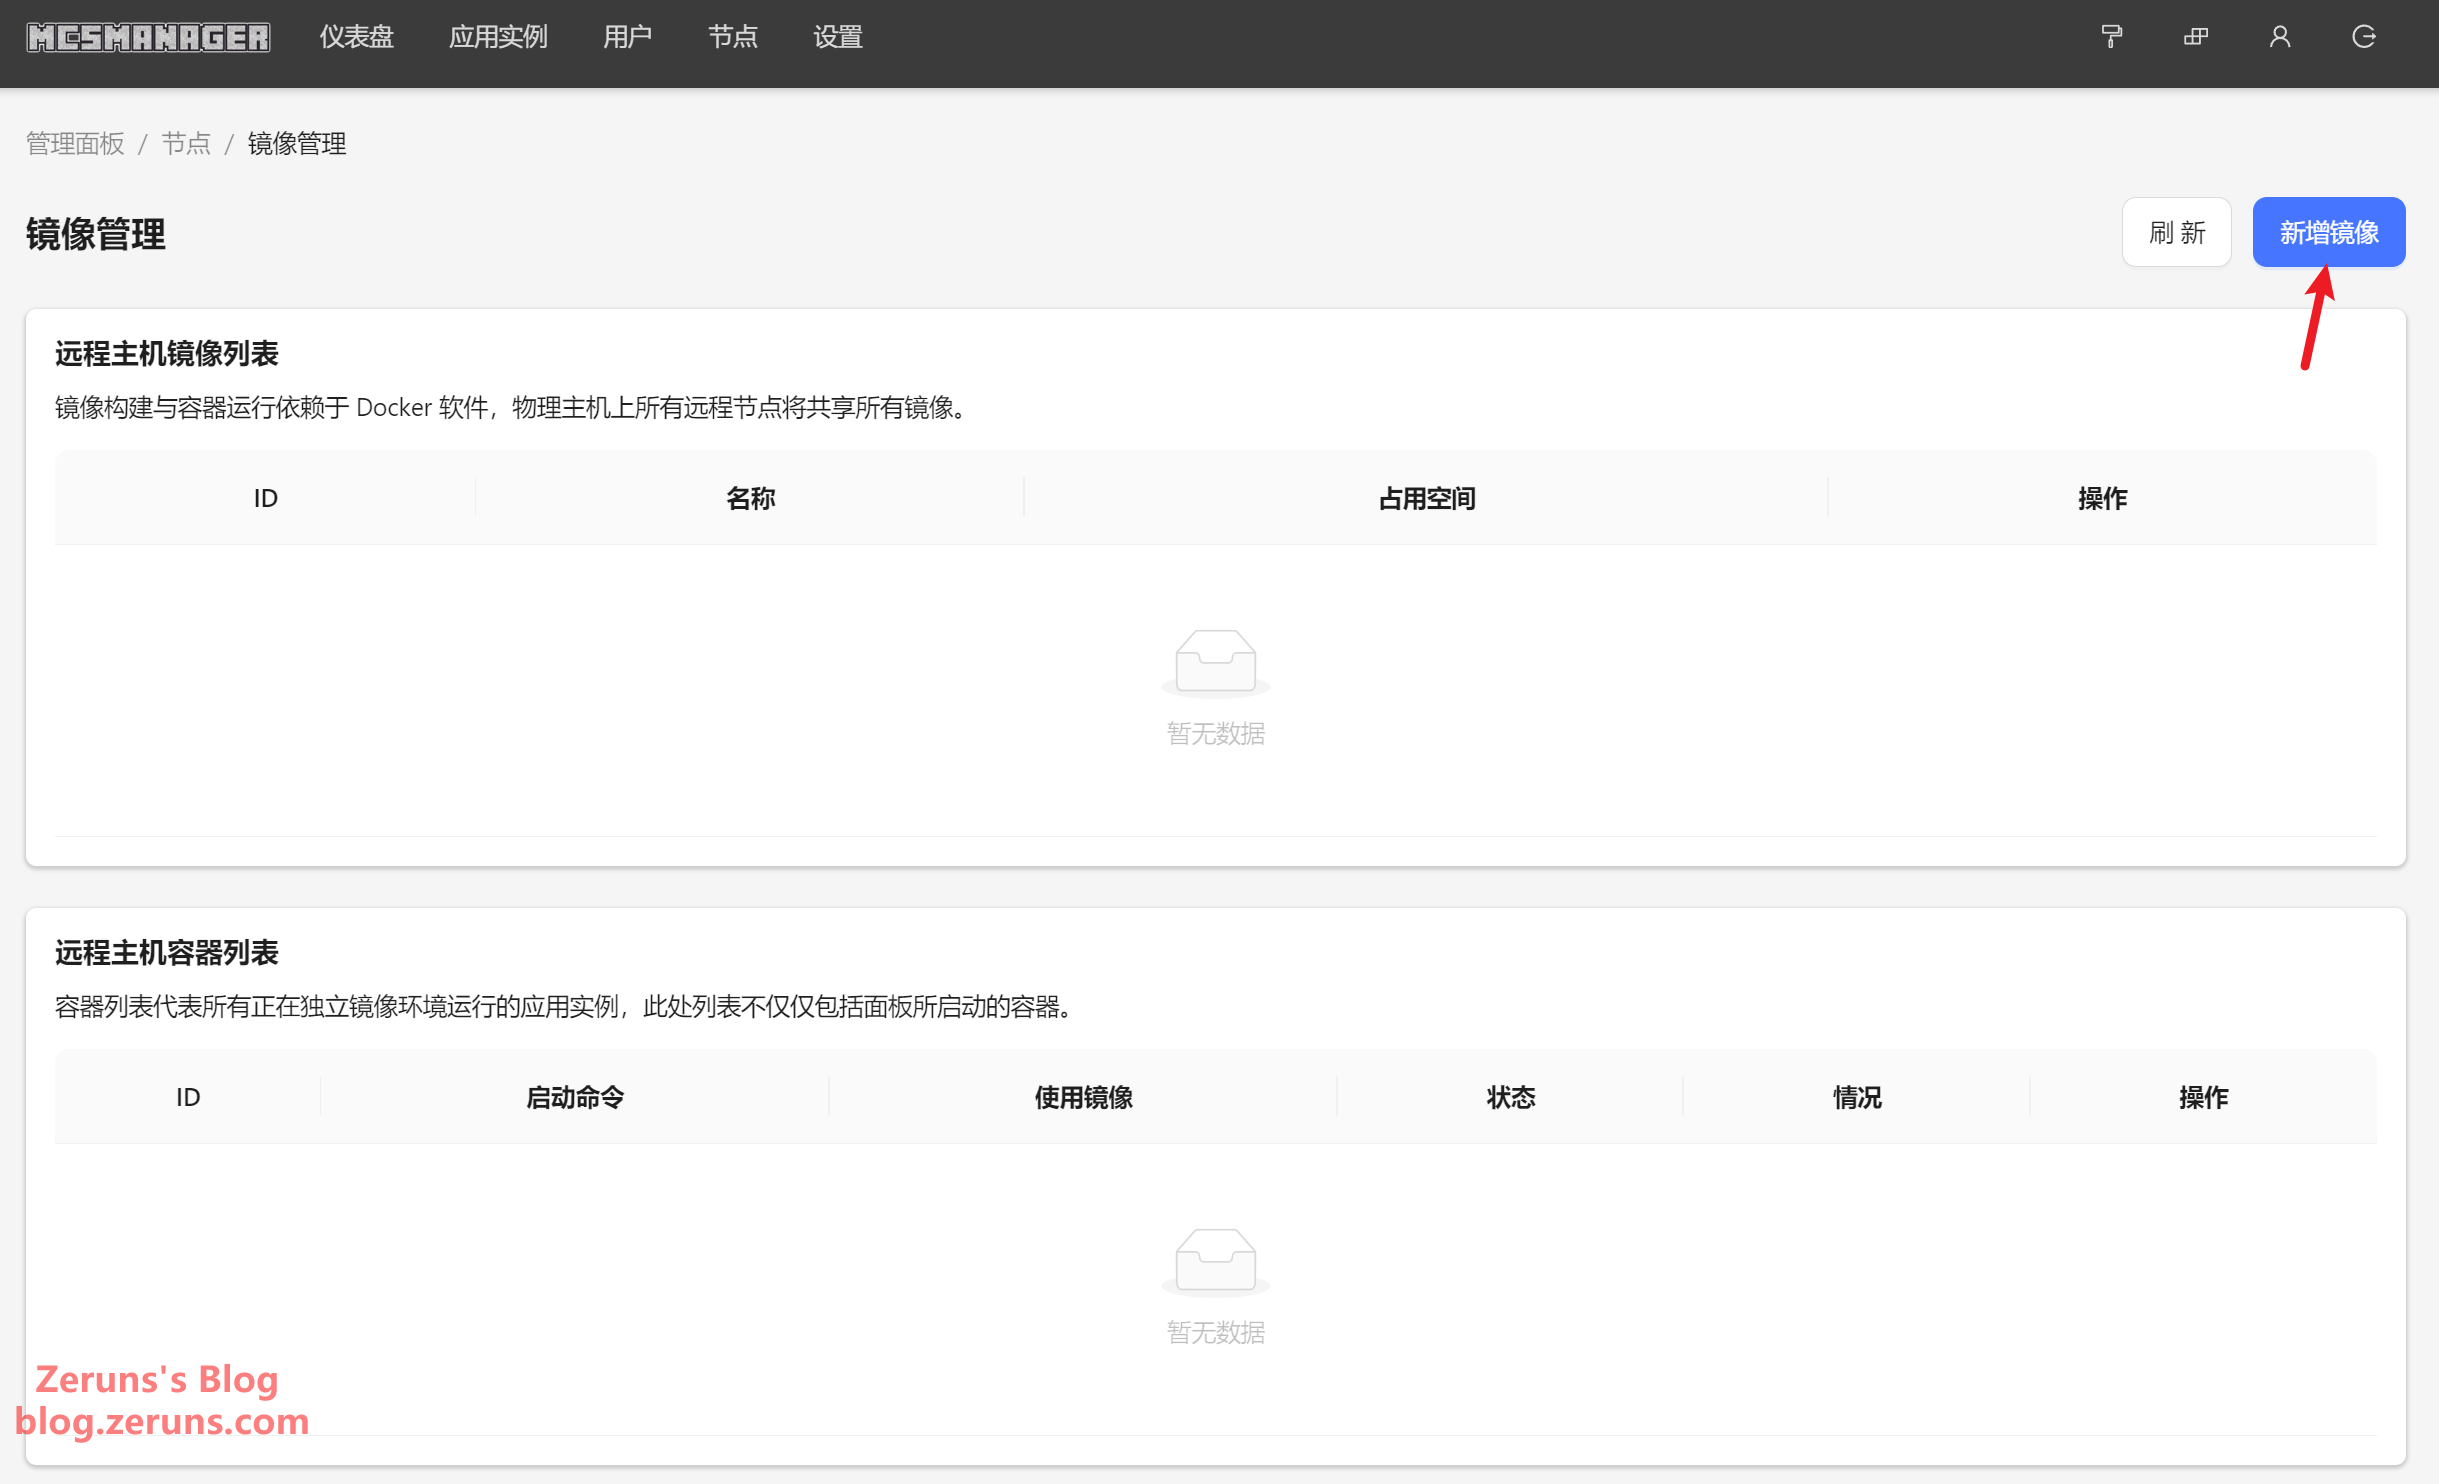
Open the panel, go to Node Management → Image Management, and click to enter.
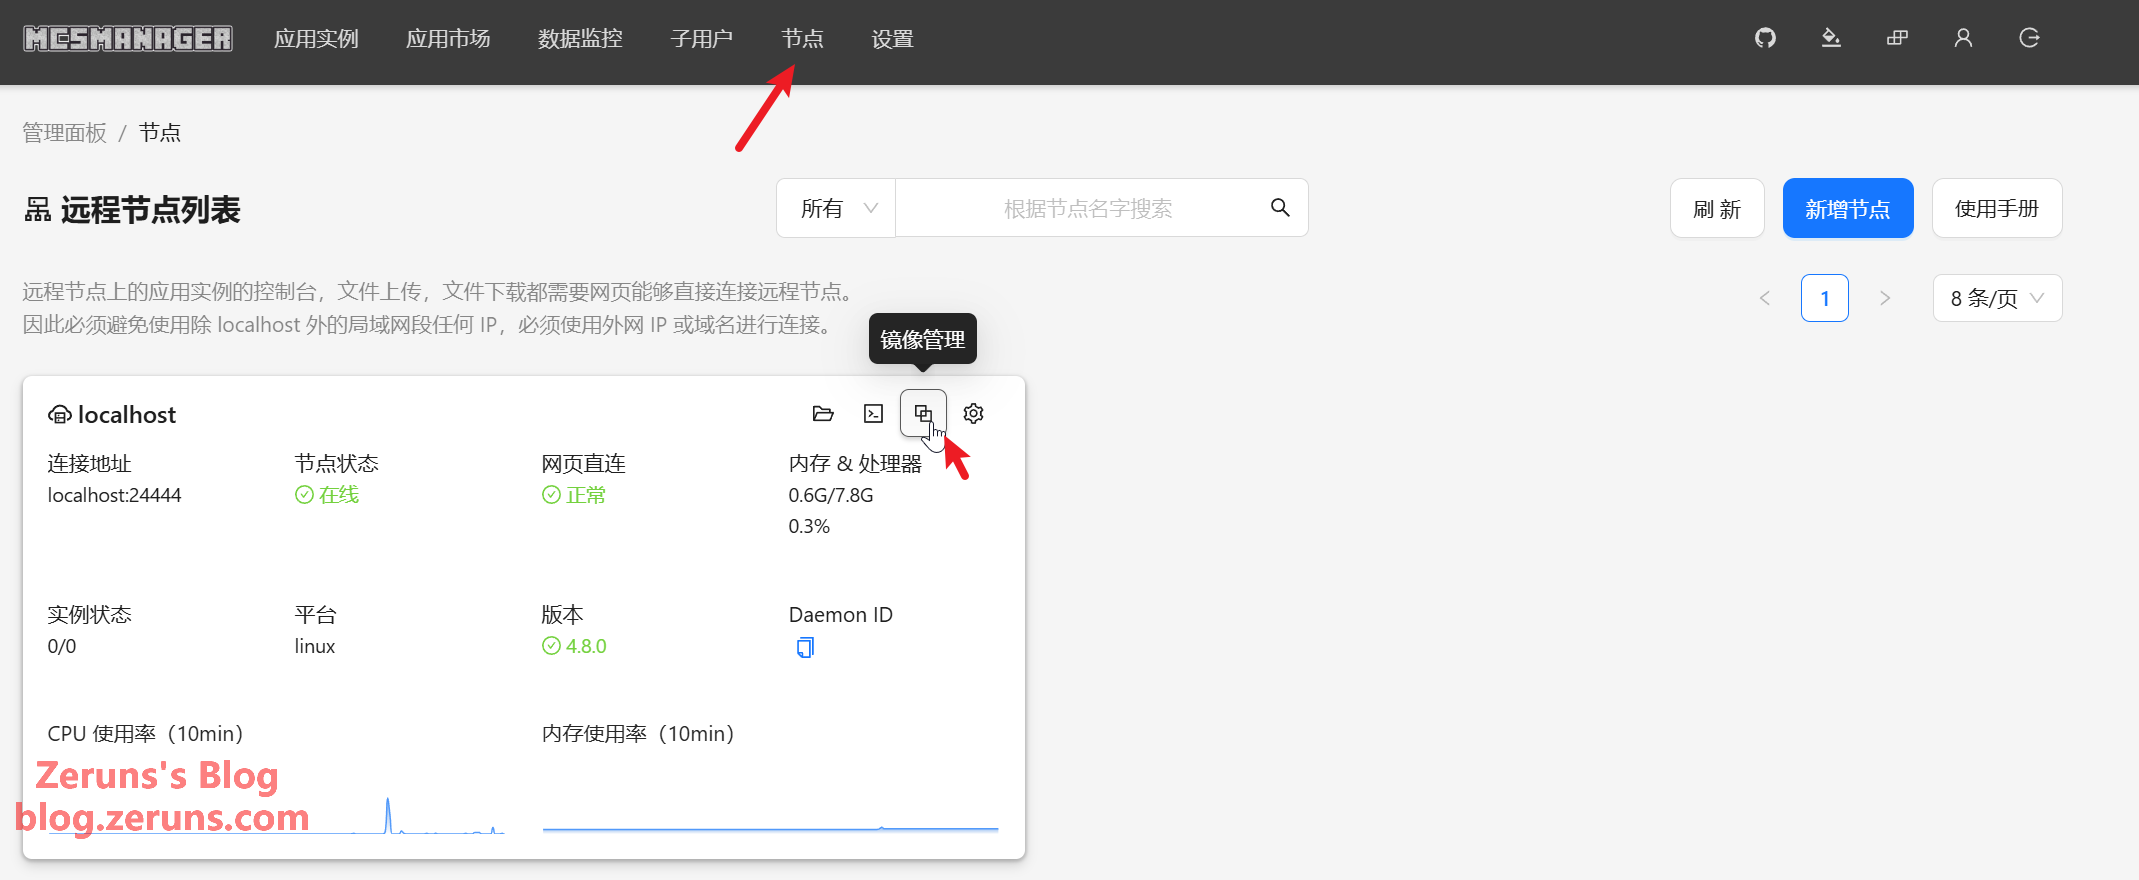
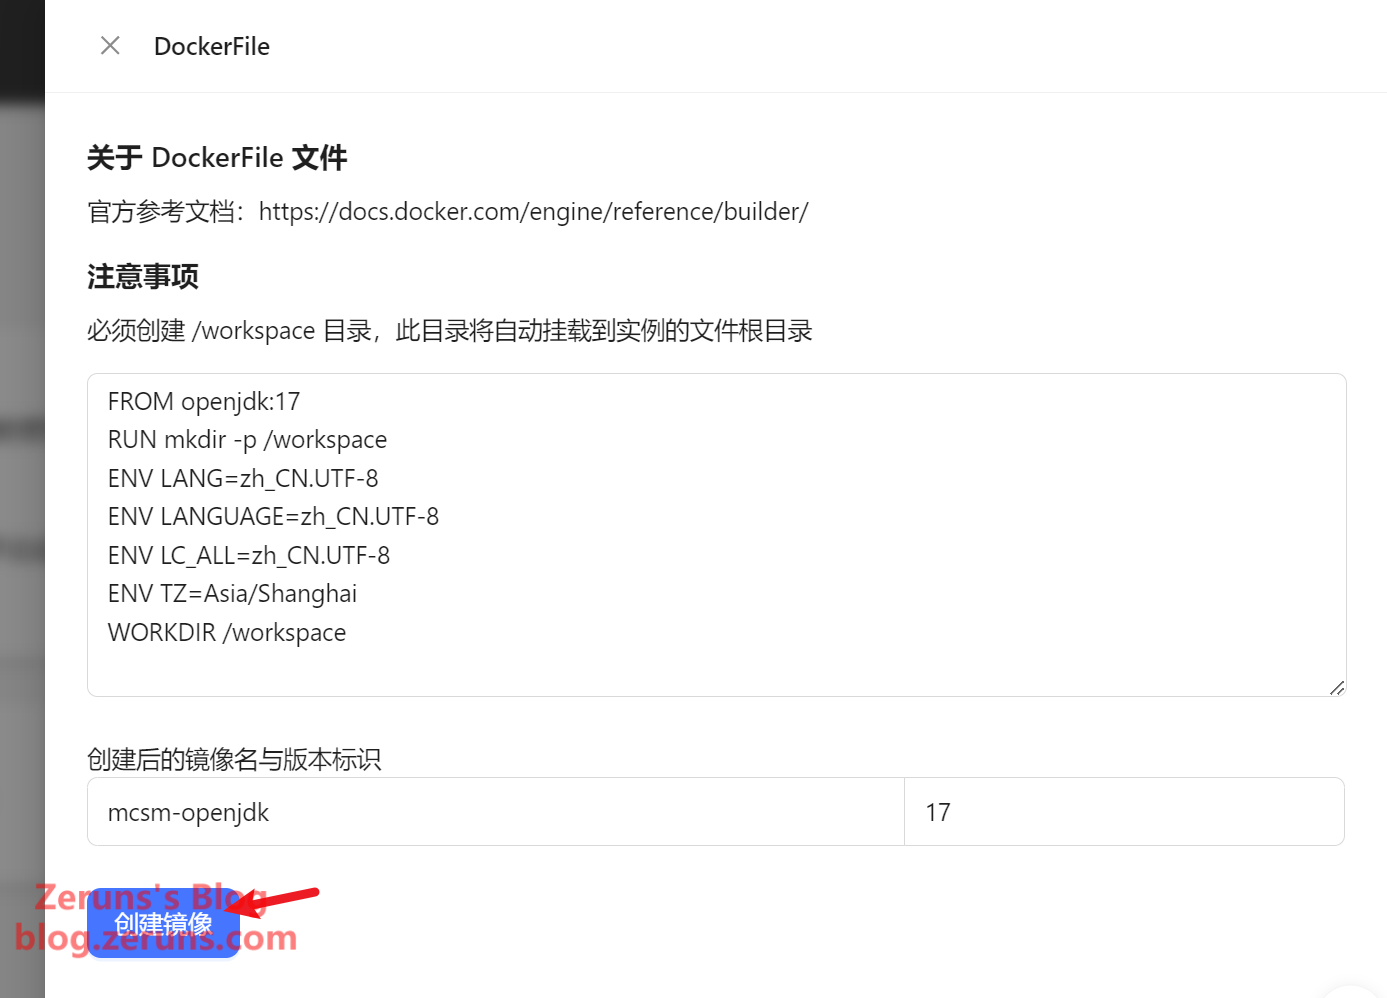
Click New Image, then click Create OpenJDK 17 environment image (choose JDK8 for versions 1.16 and below, JDK17 for versions above 1.16).
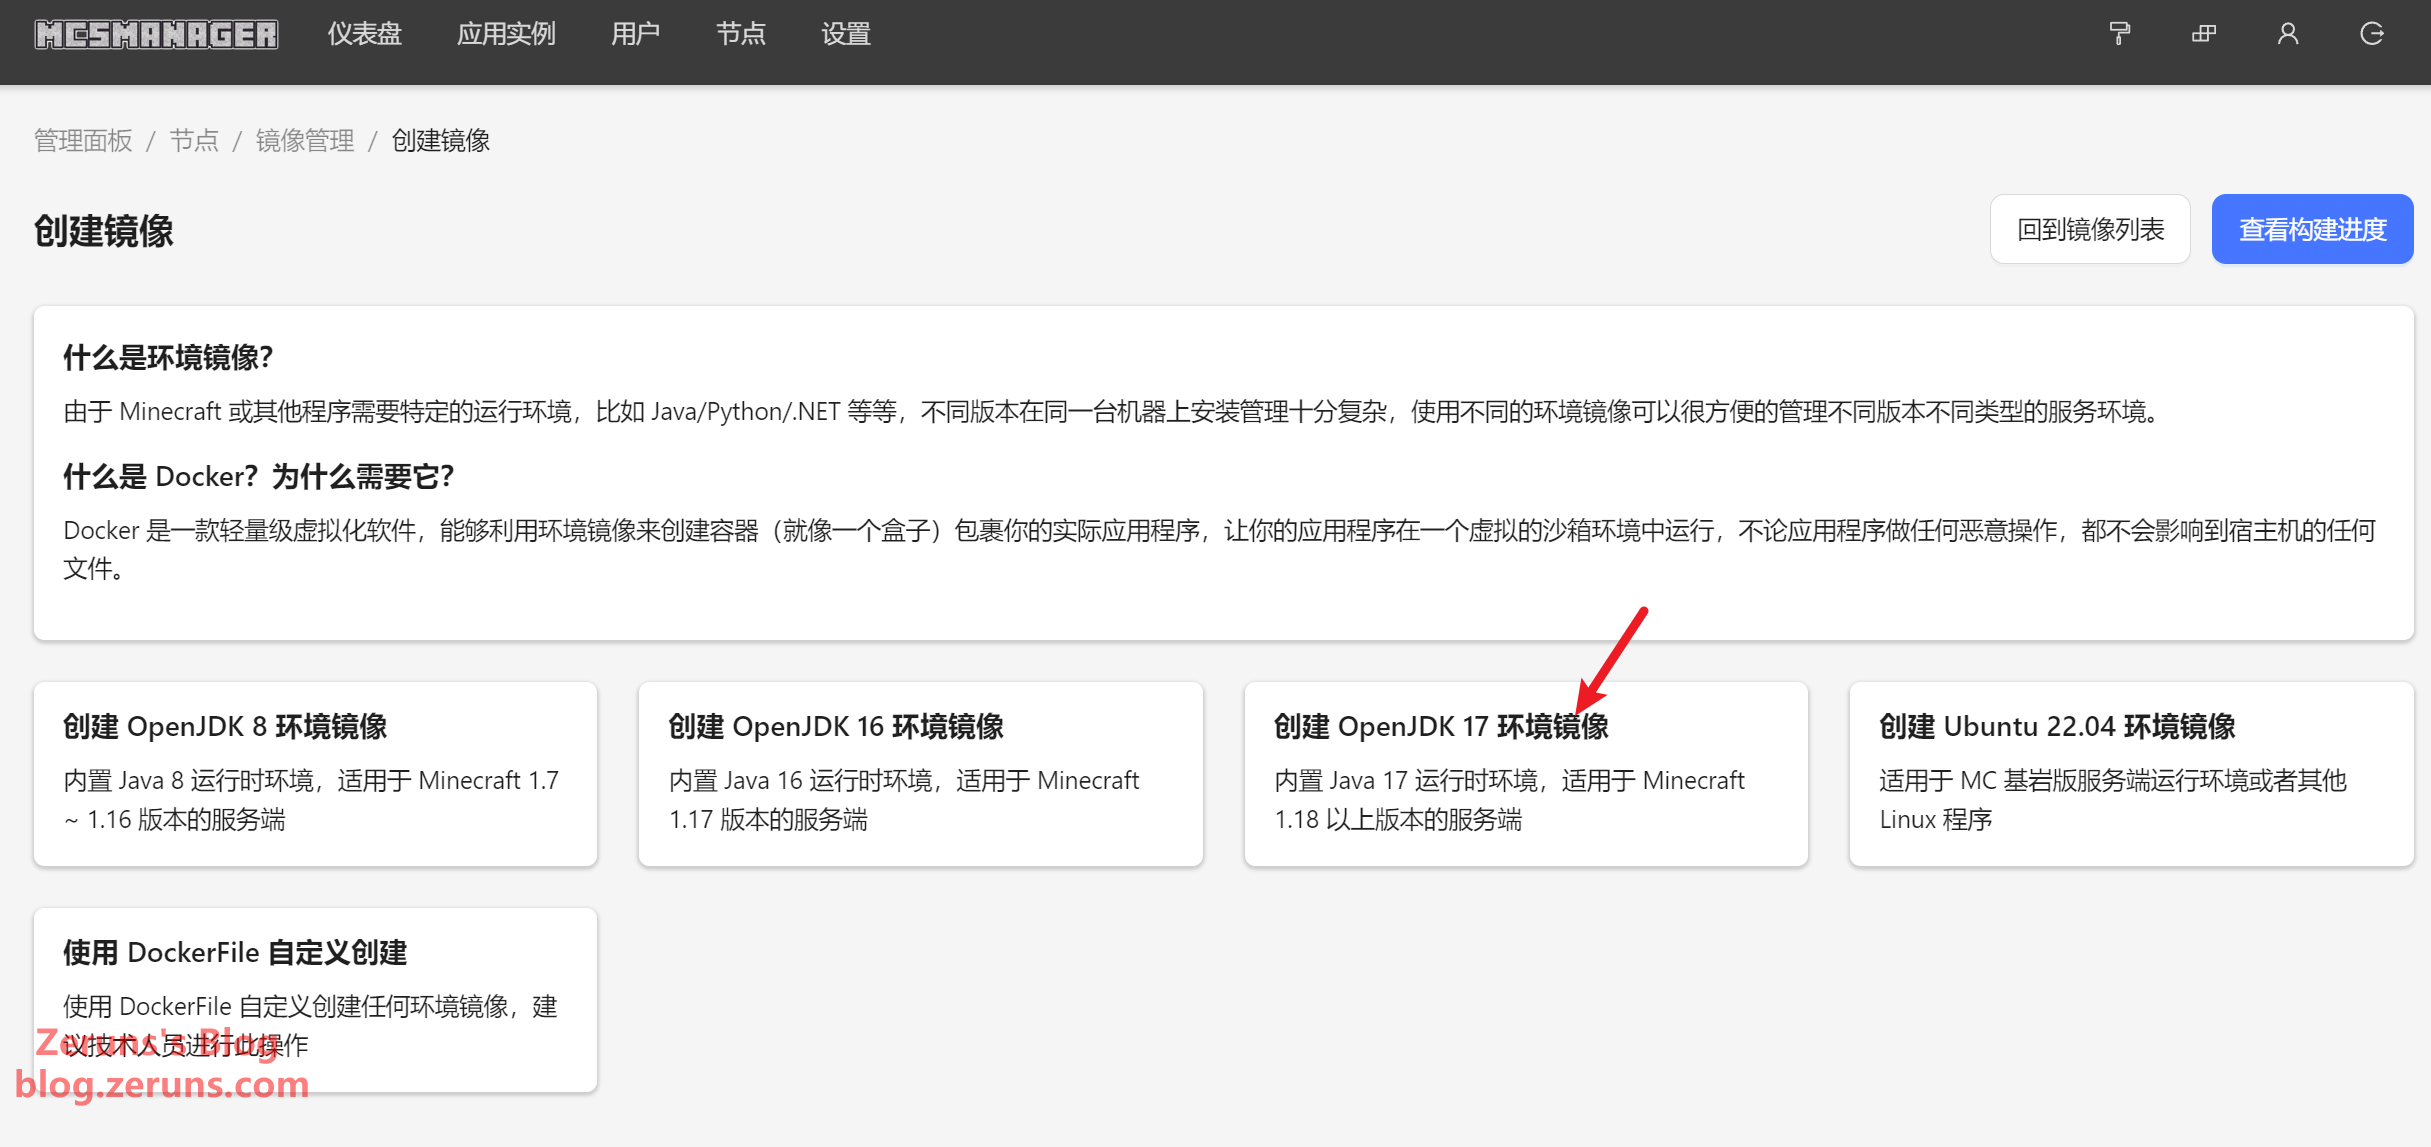
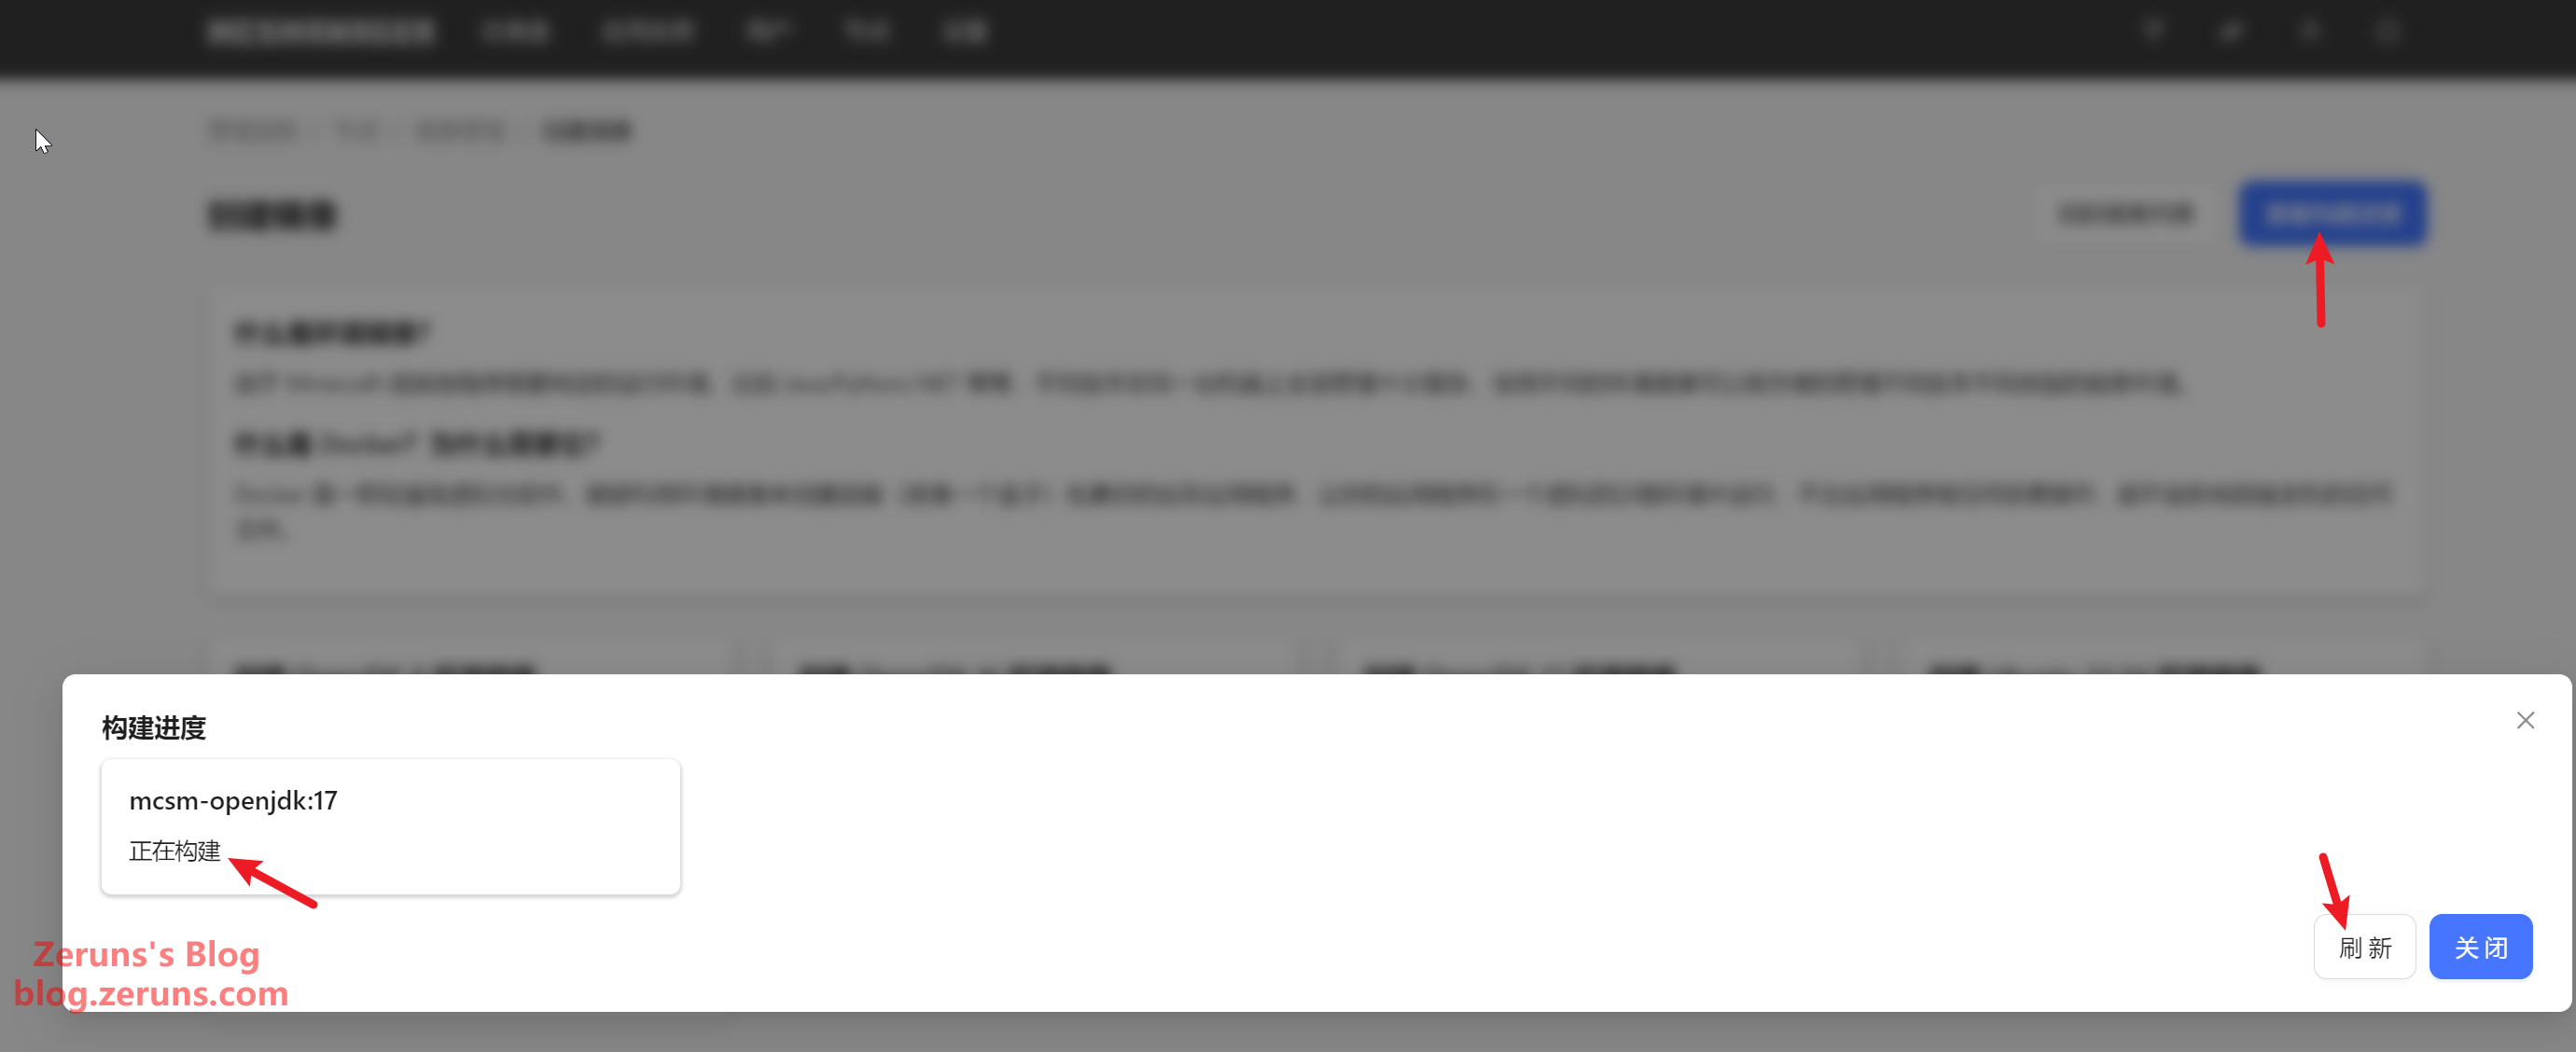
Click Confirm and wait for the build to finish.
Running the Server
First, download the modpack server from the provided link.
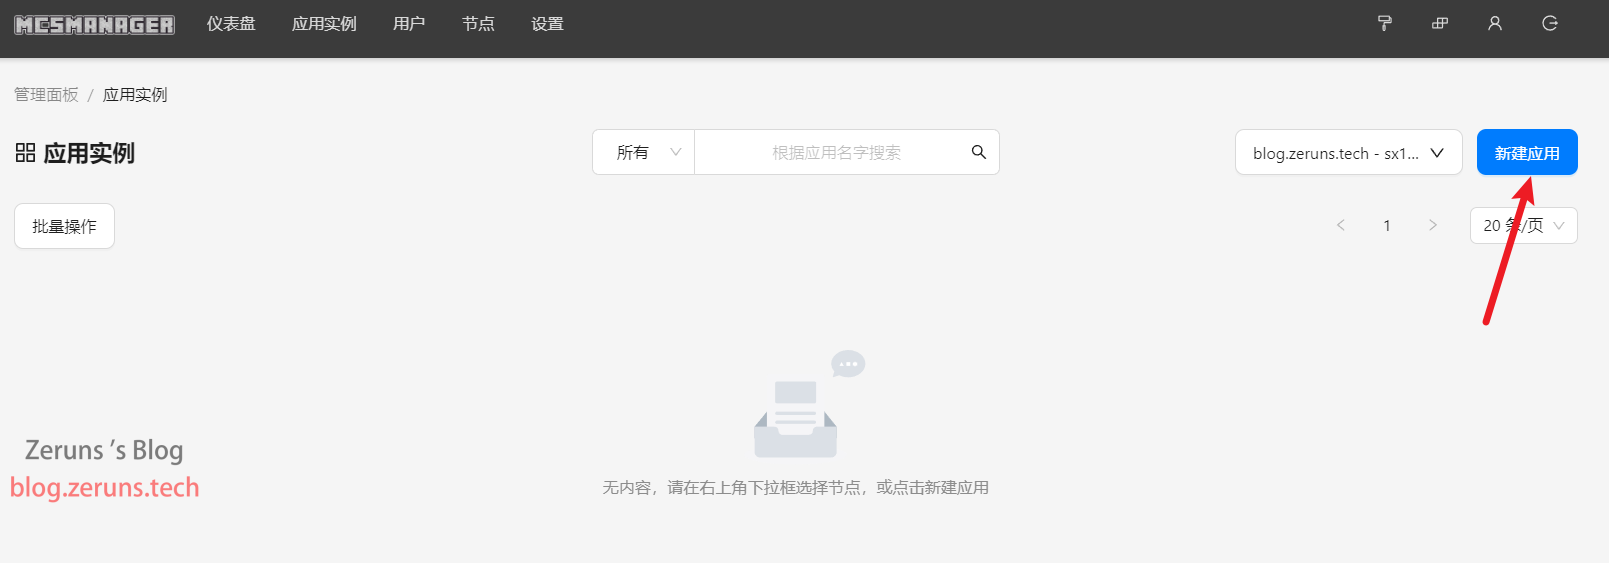
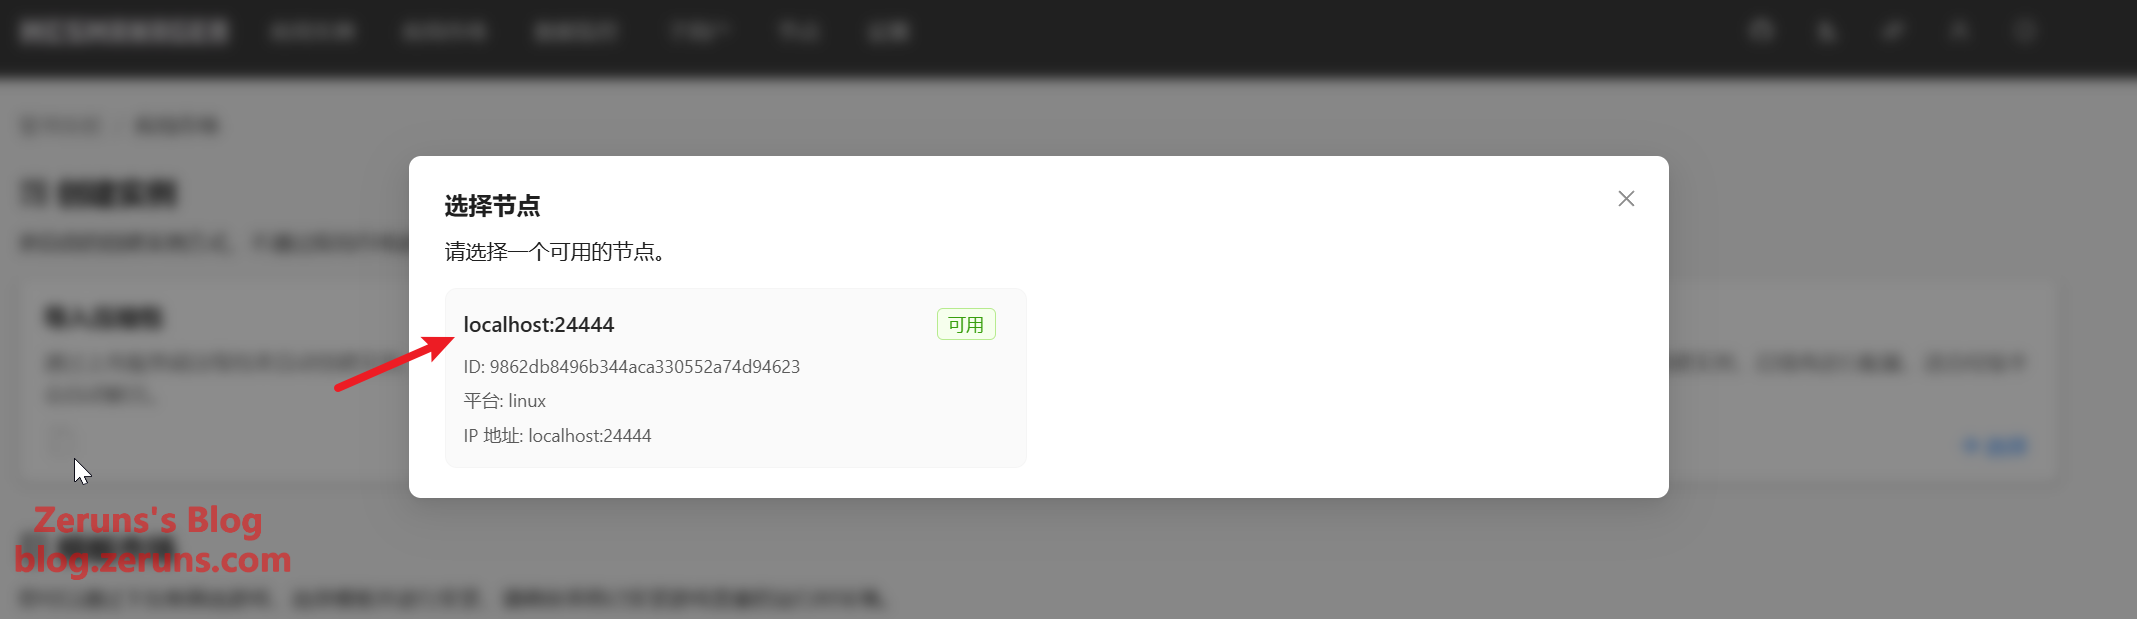
In the MCSM panel, go to Application Instances → New Application → Import Archive → Select Node.
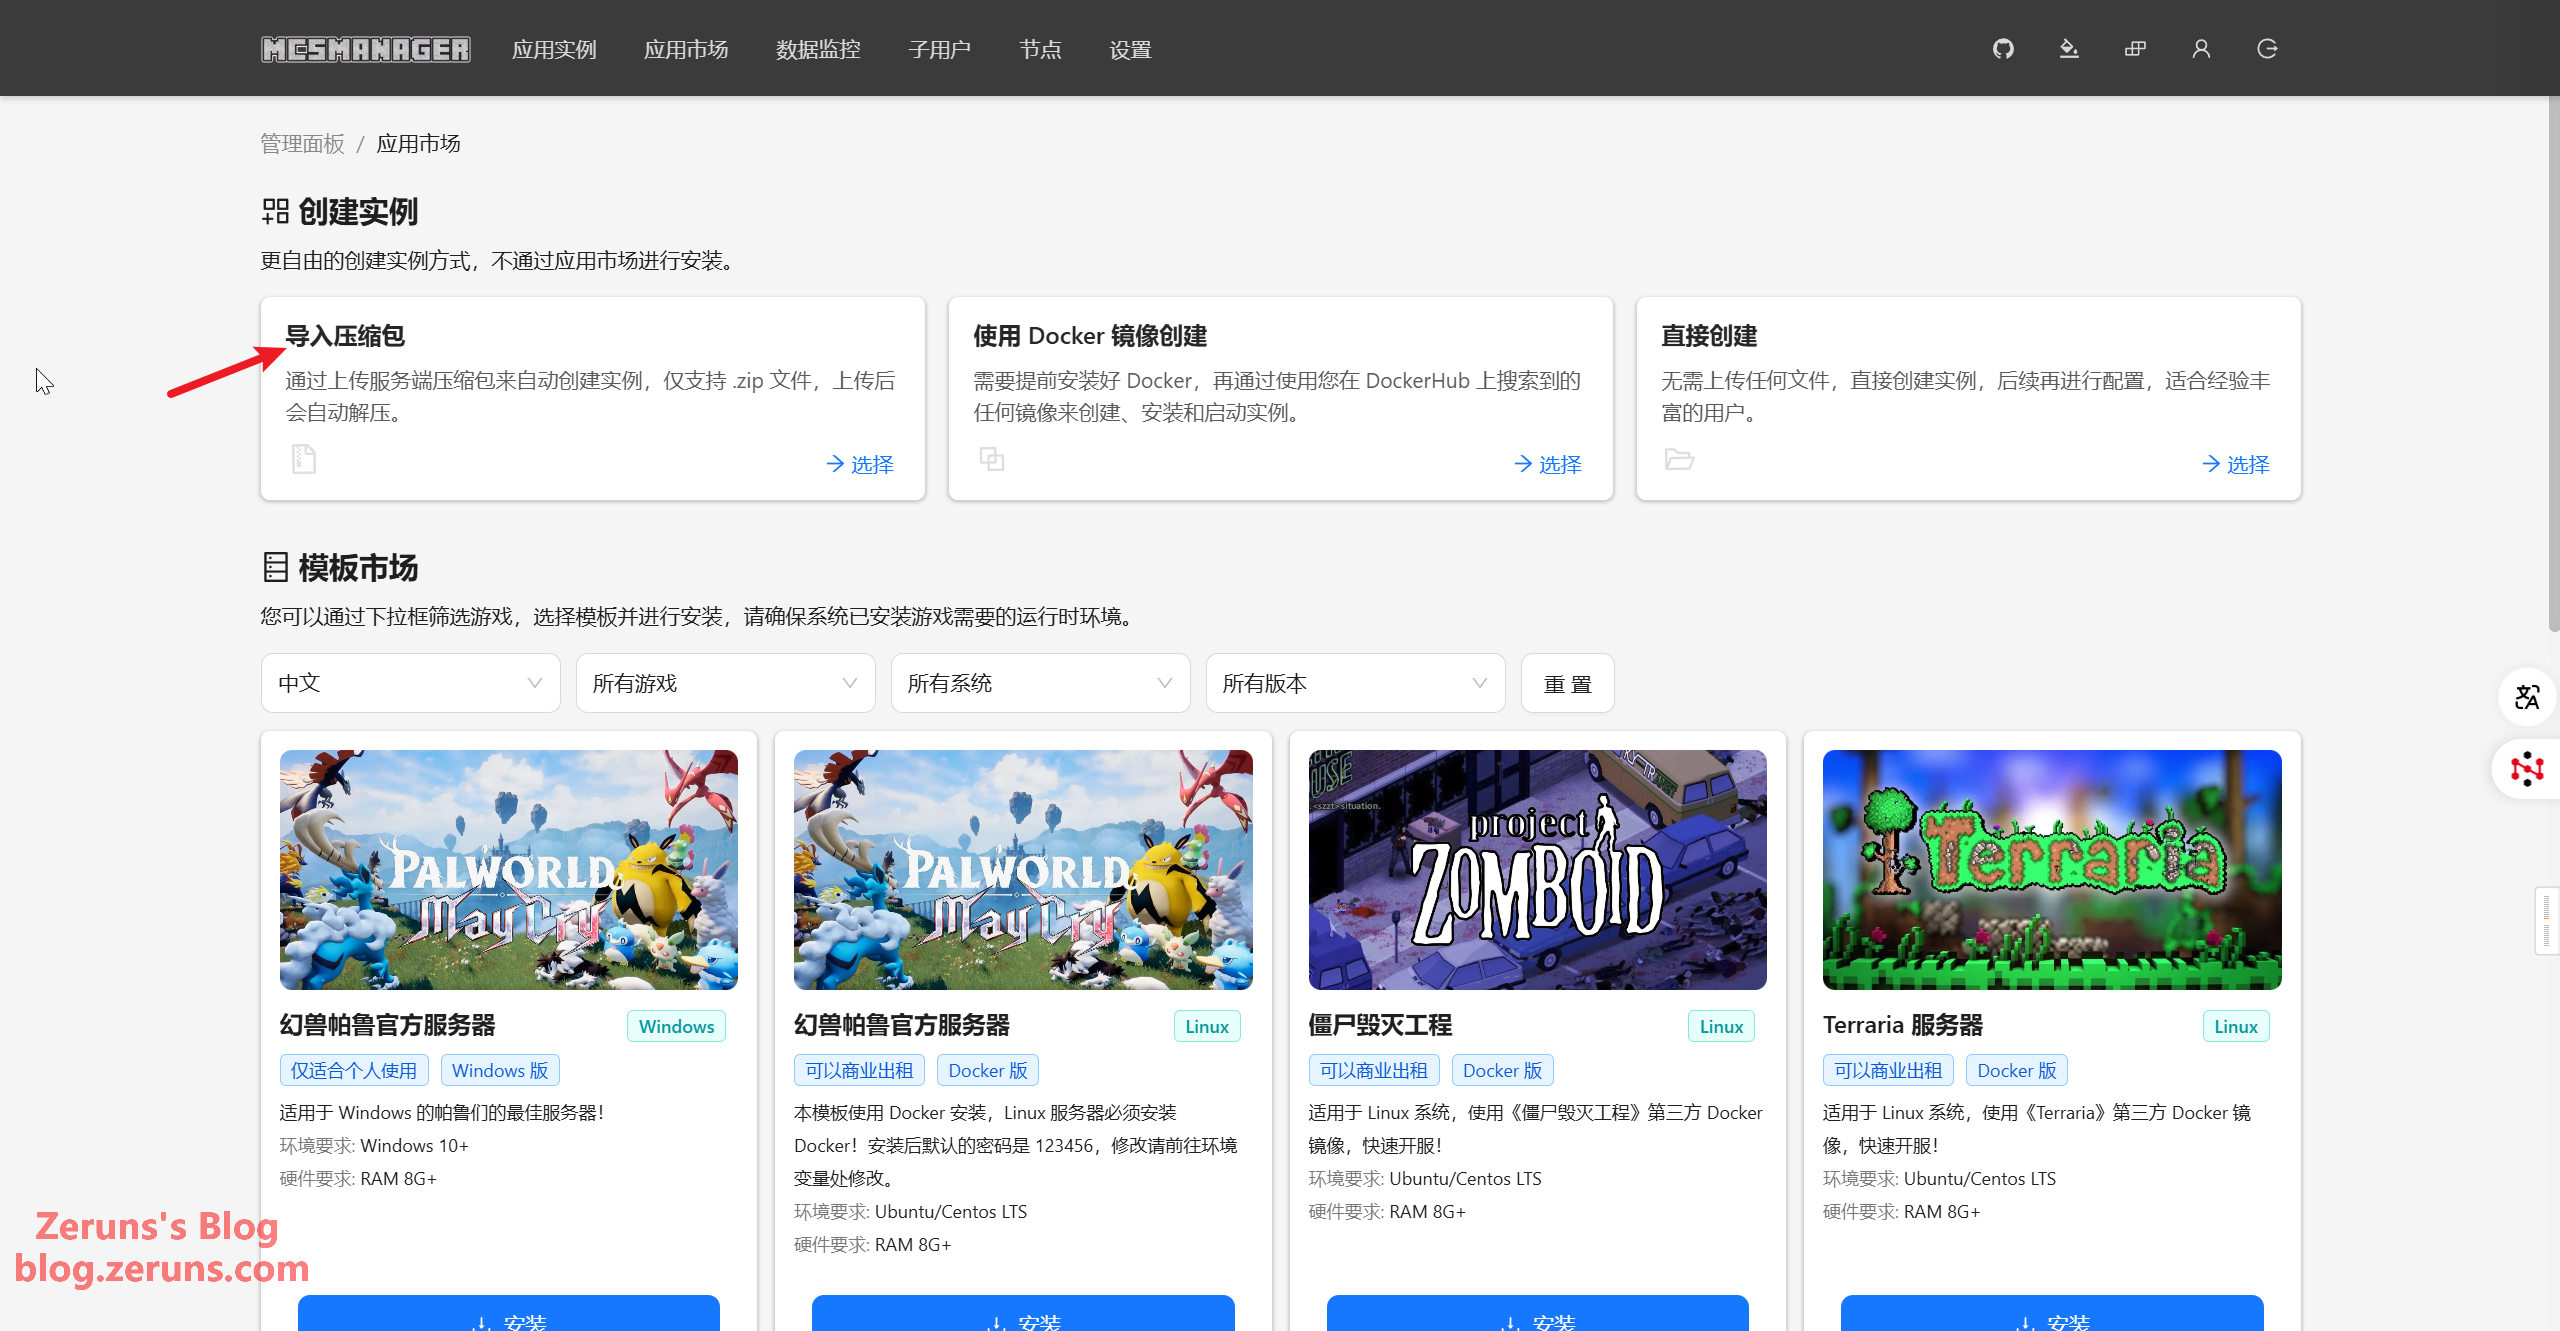
Enter any Instance Name you like. For the Startup Command, input bash run.sh (this executes the run.sh script, where the startup command is already defined). Set Instance Type to MC Java Edition Server. Then click Select zip file to upload the modpack server archive and choose GBK as the extraction encoding.

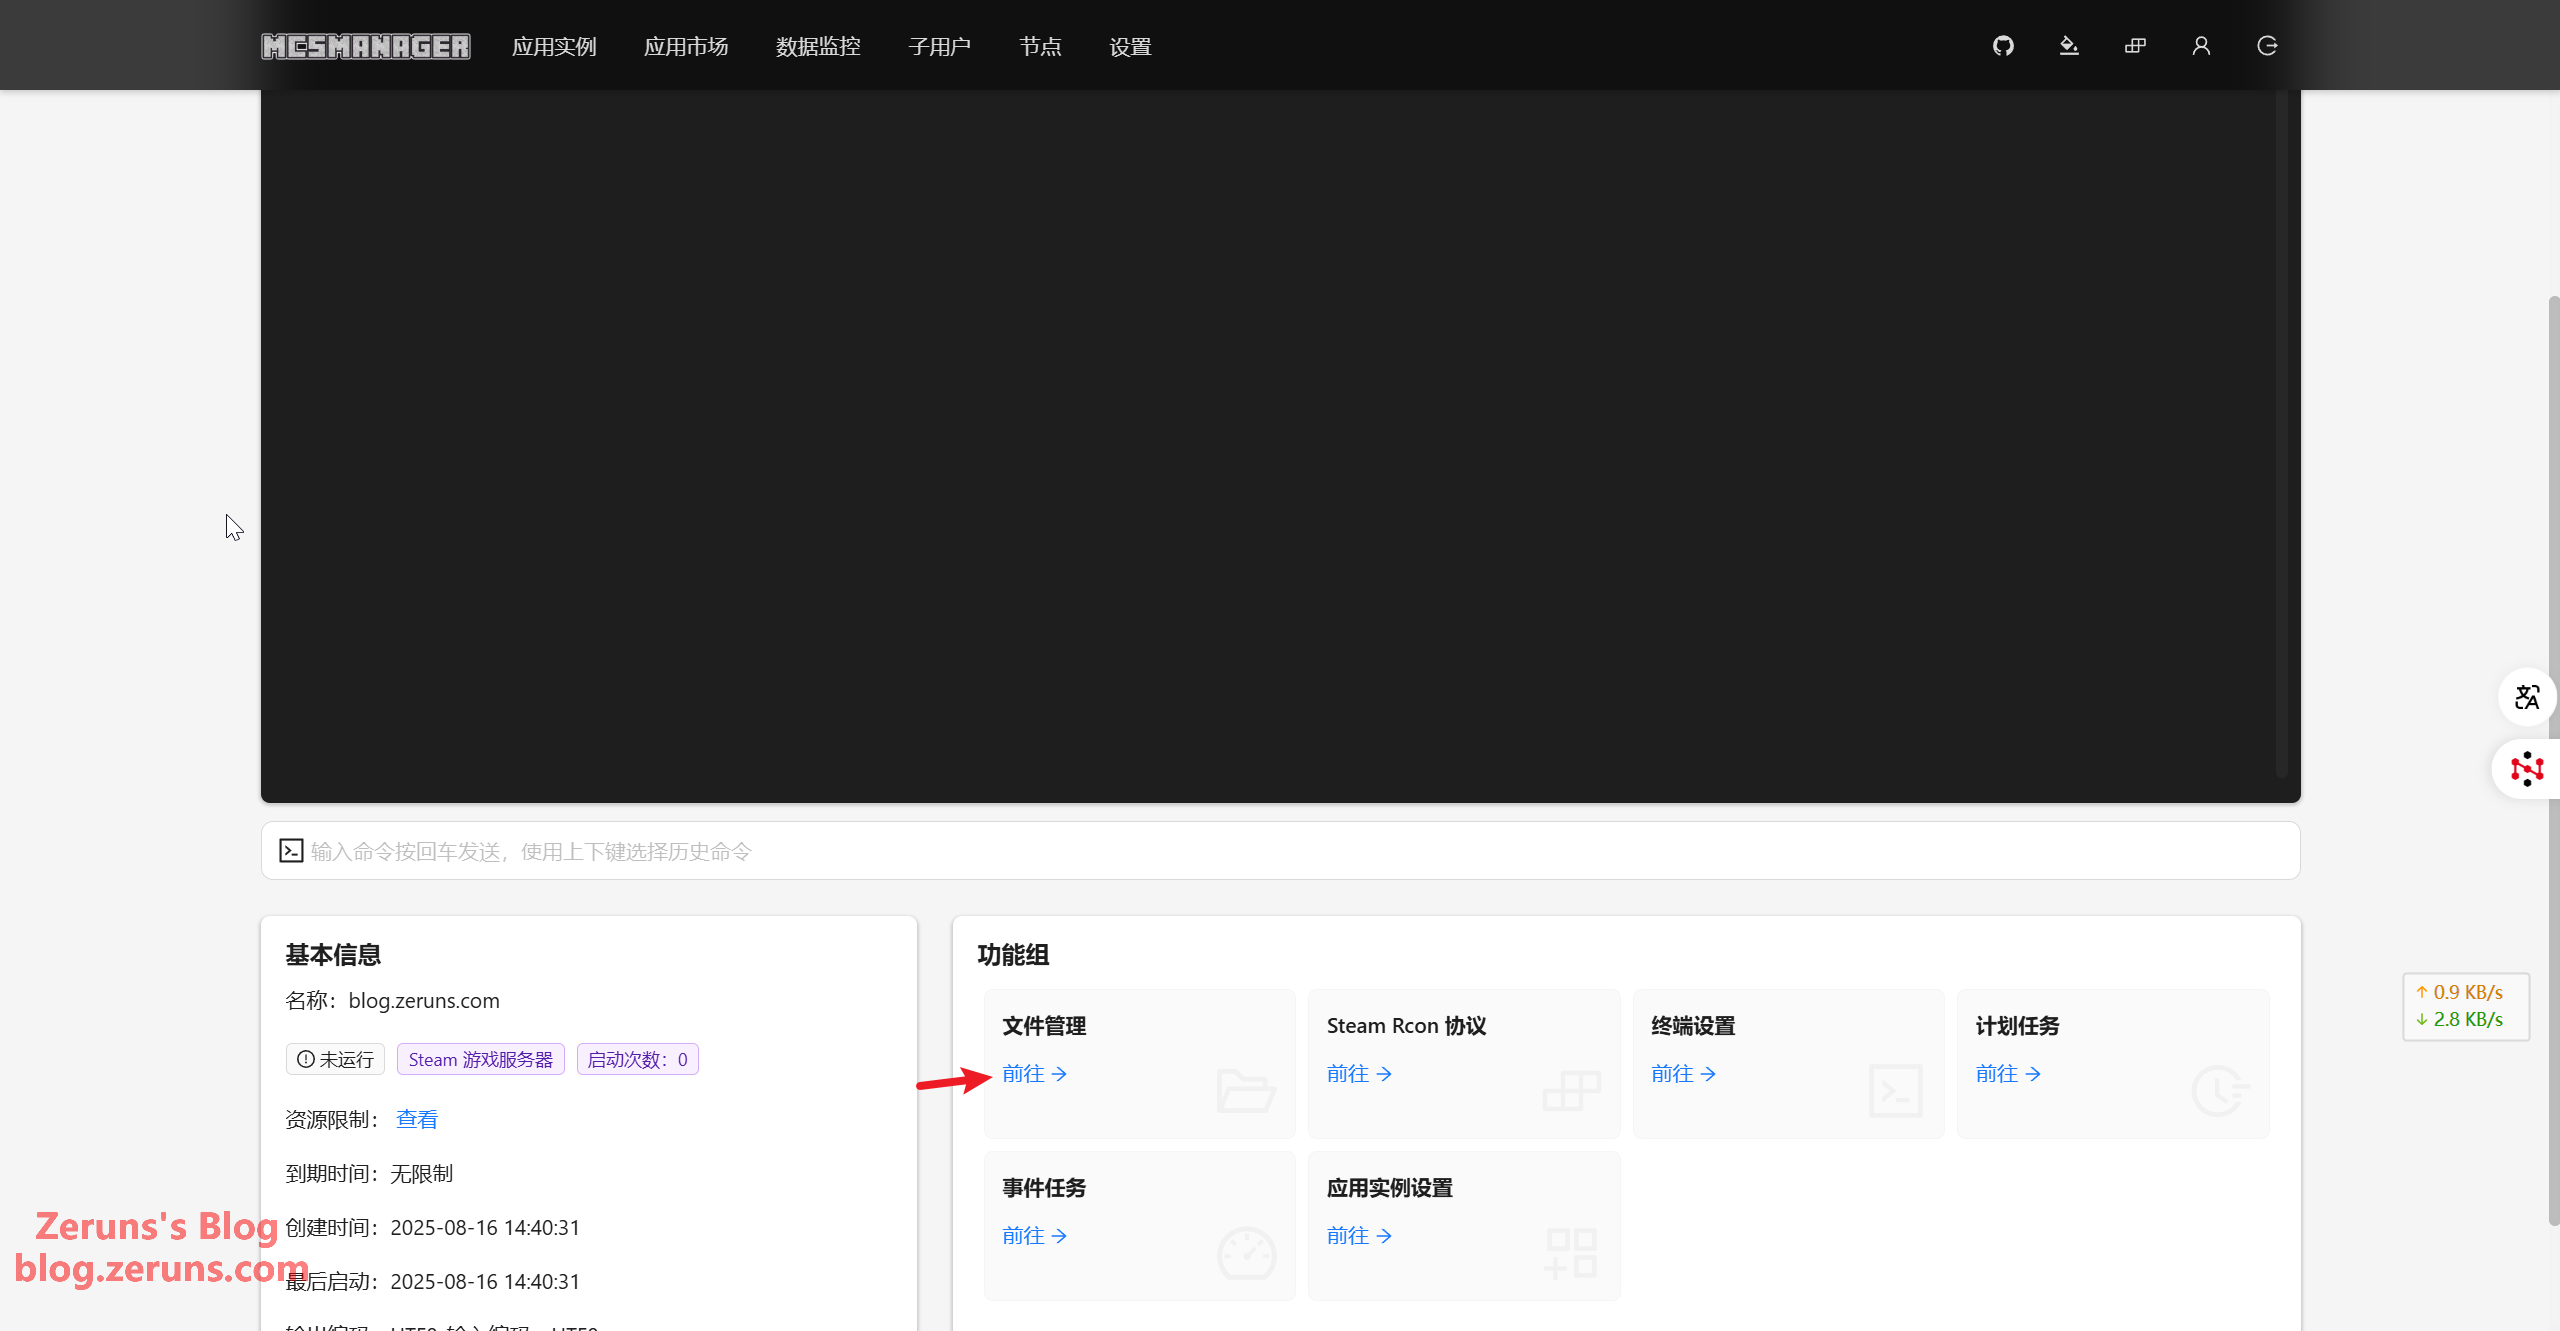
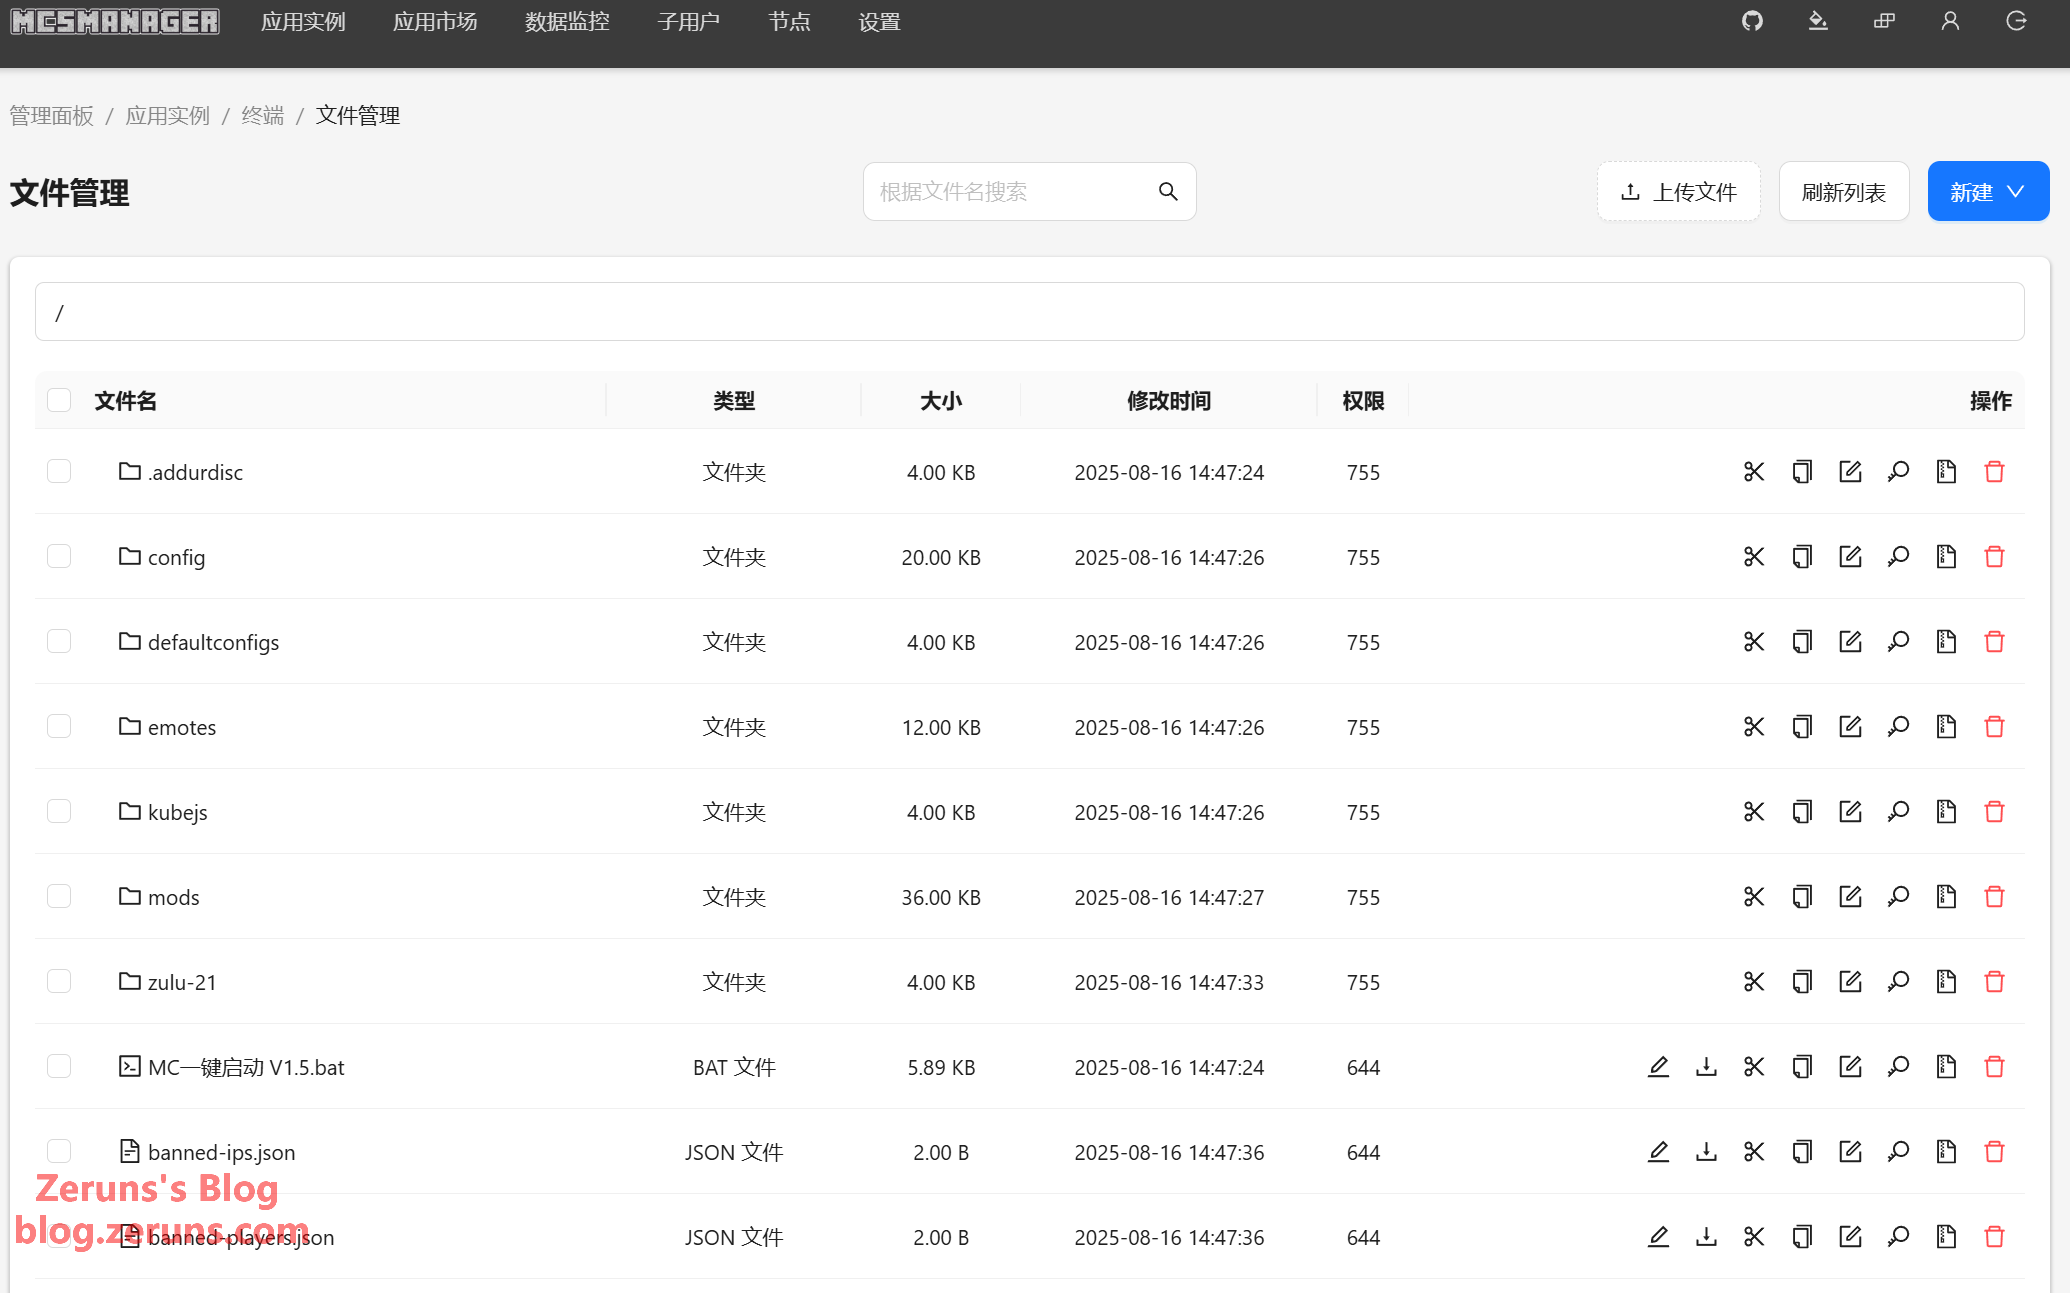
After uploading, click File Management below the instance terminal.
If the archive isn't extracted automatically, manually click the Extract button, select extract to the current directory, and choose GBK encoding. If you see a bunch of files like the screenshot below, the extraction was successful.
Then go back to Instance Terminal → Application Instance Settings.
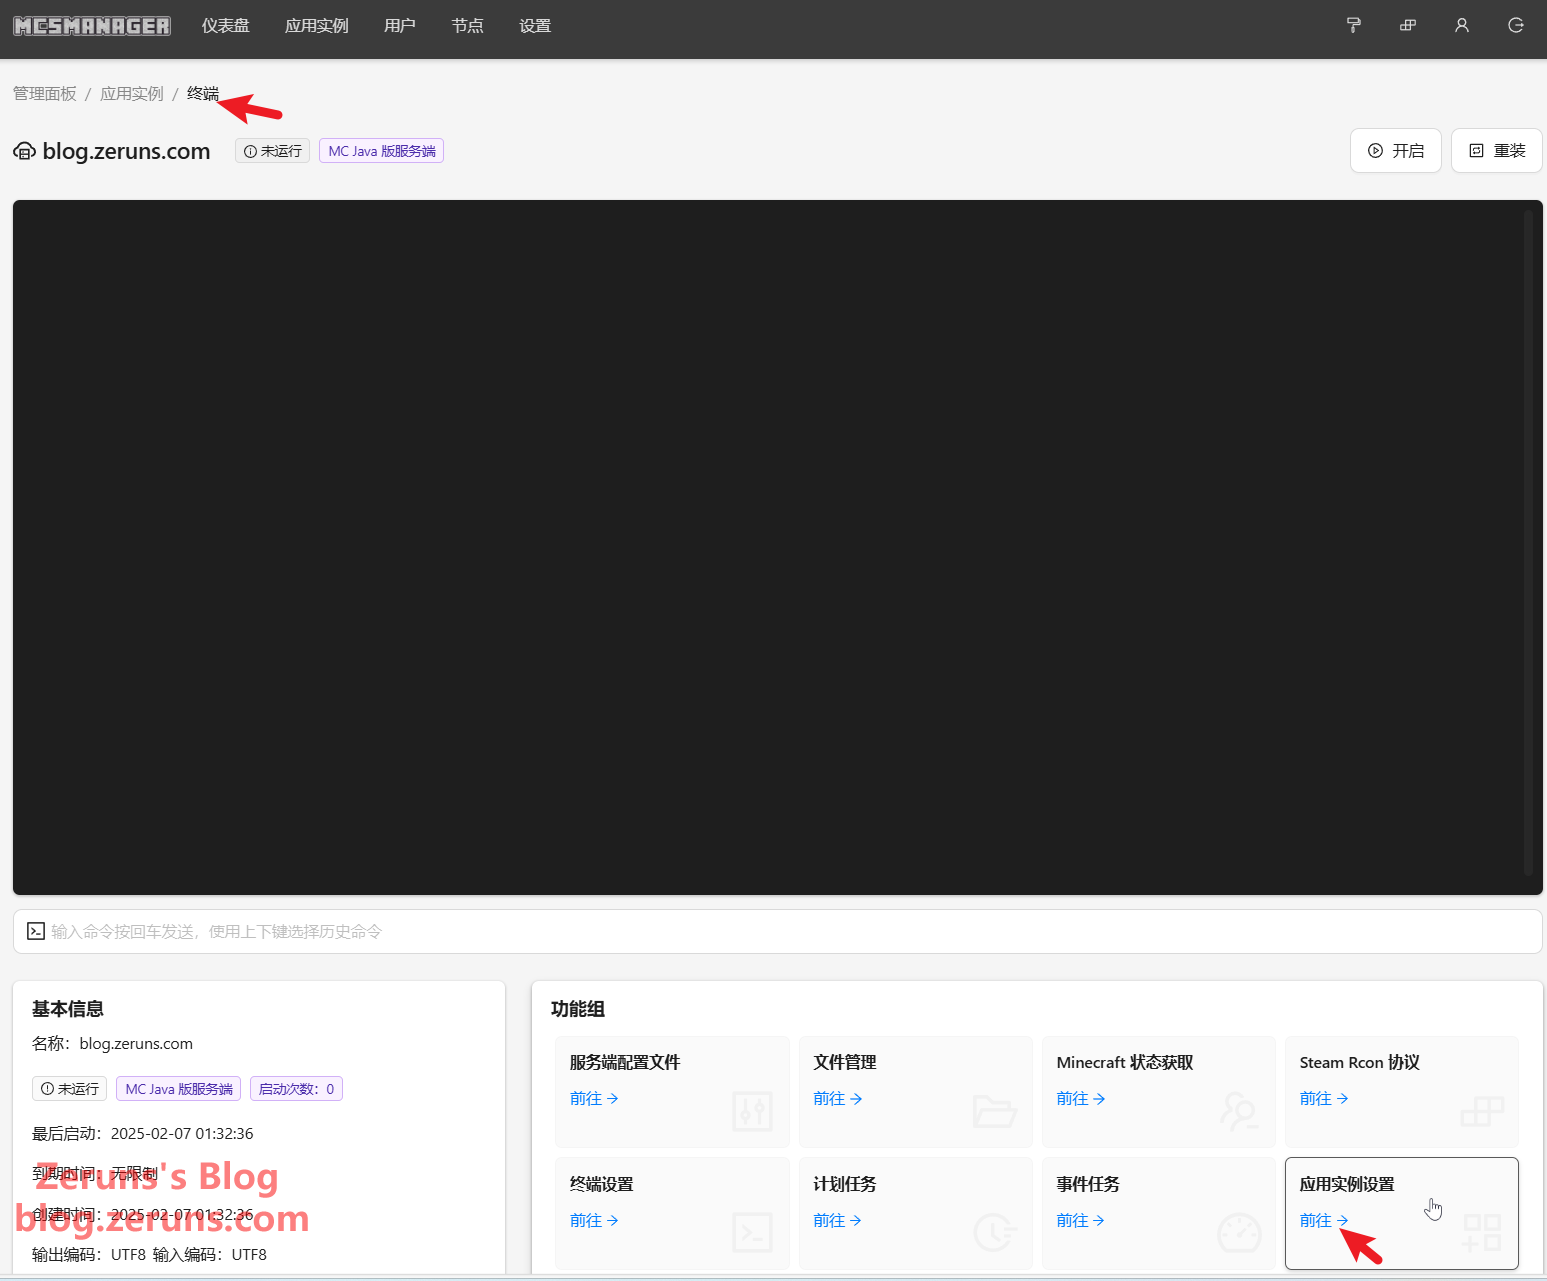
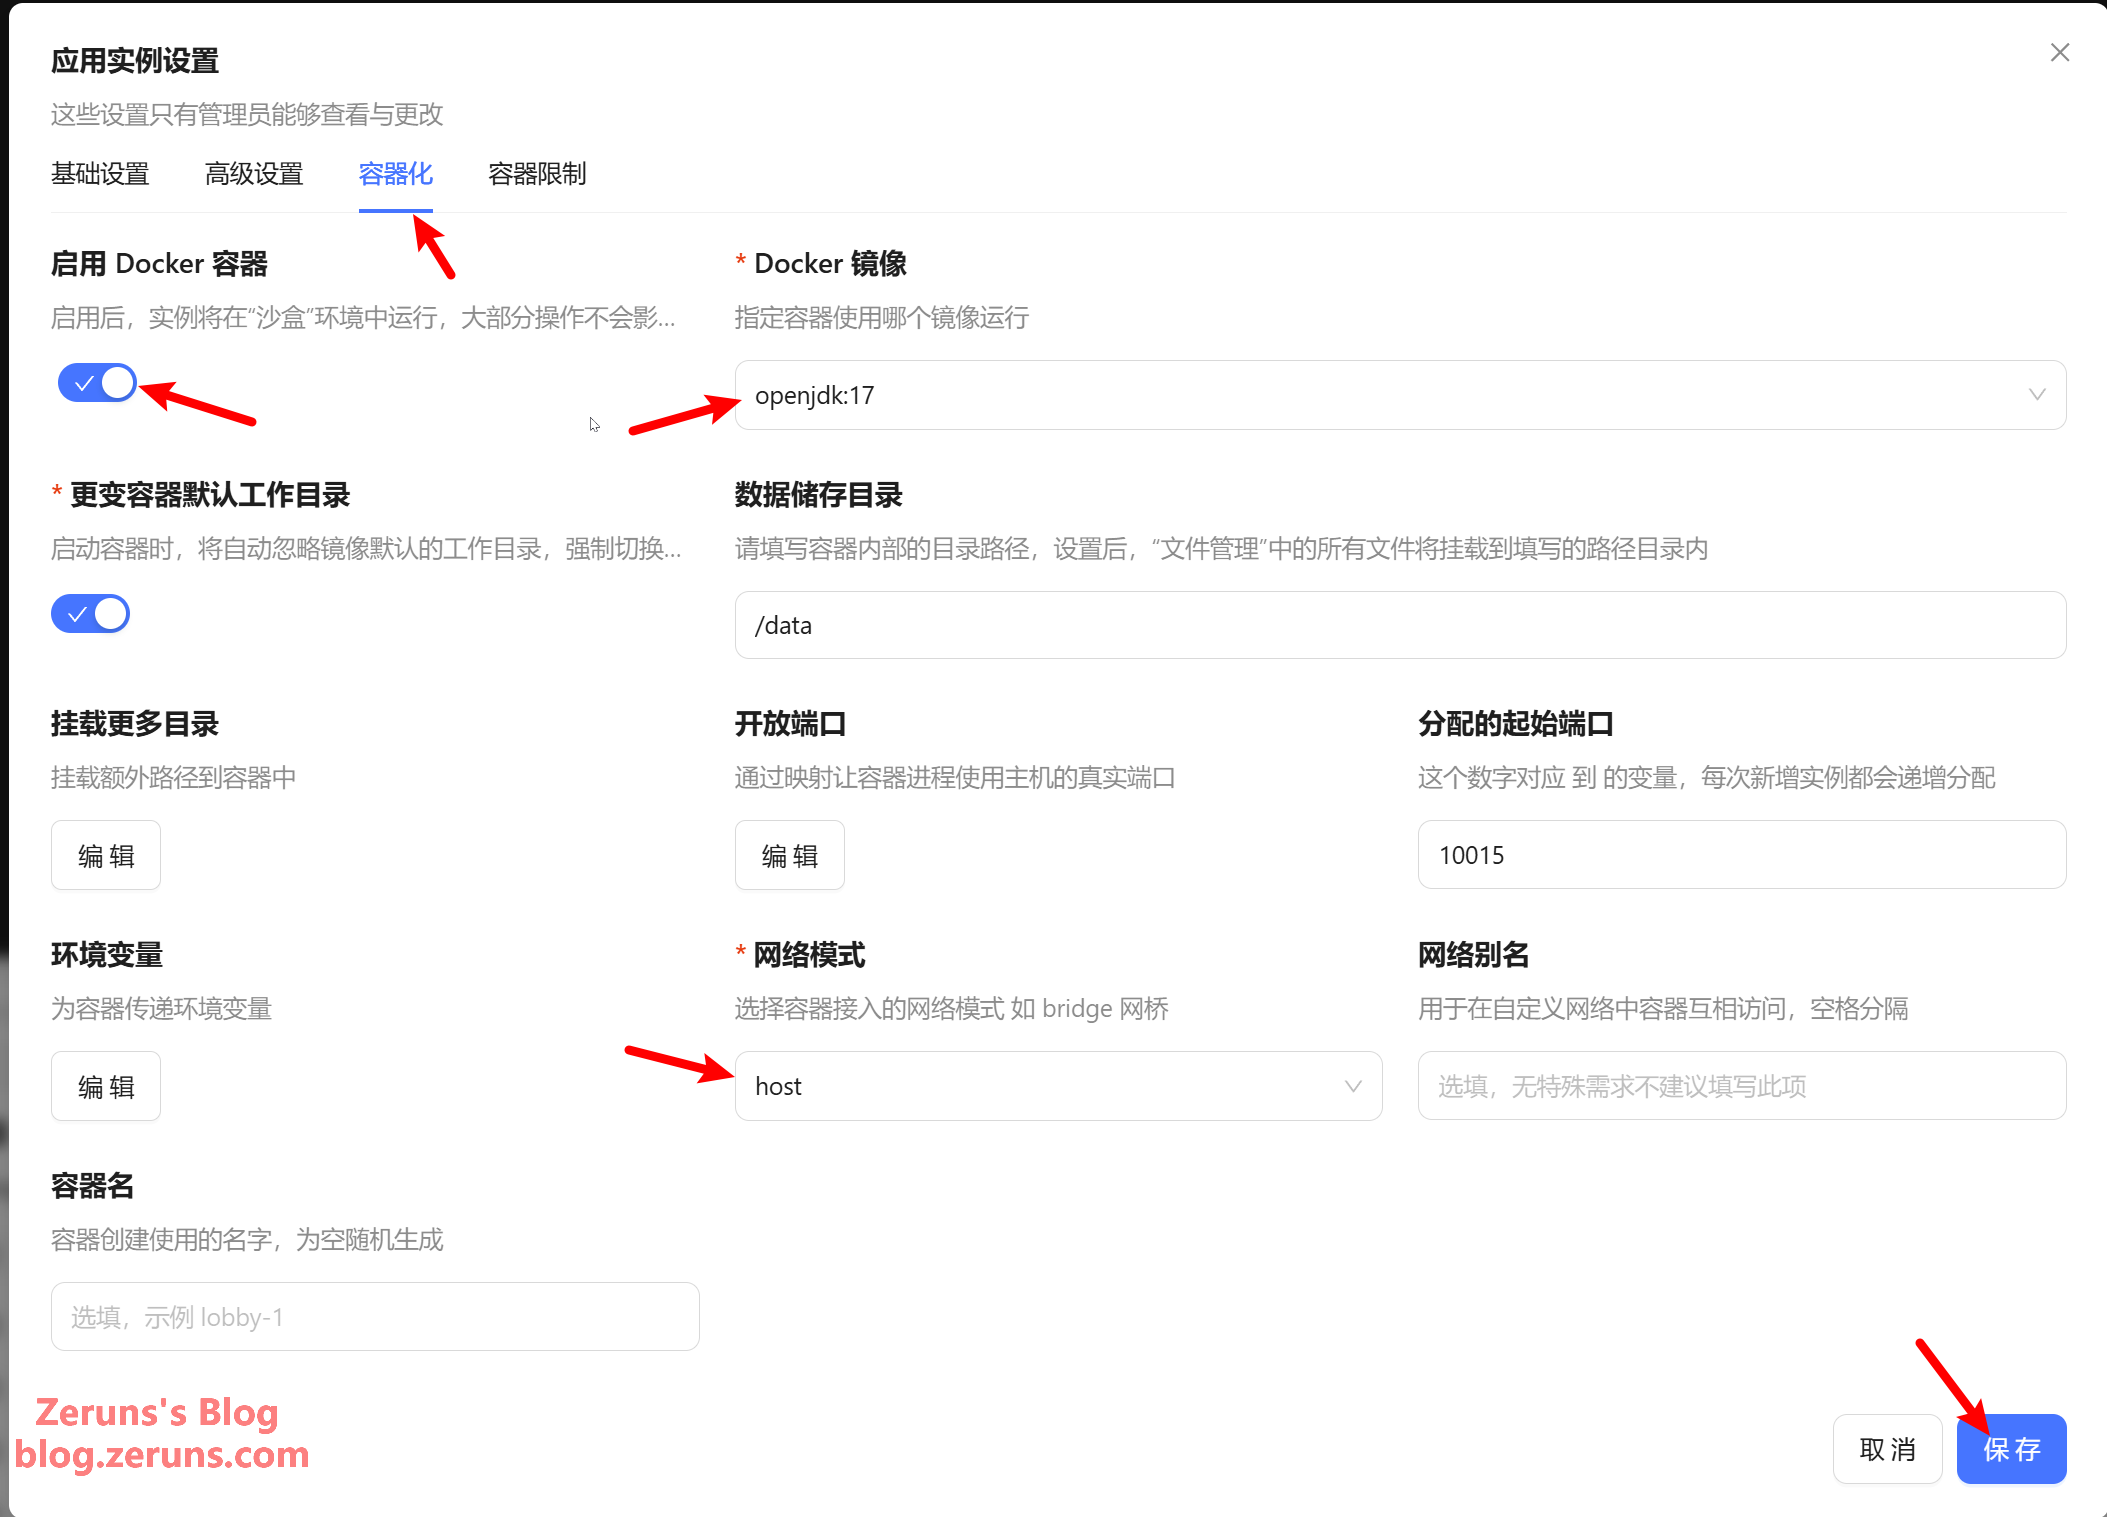
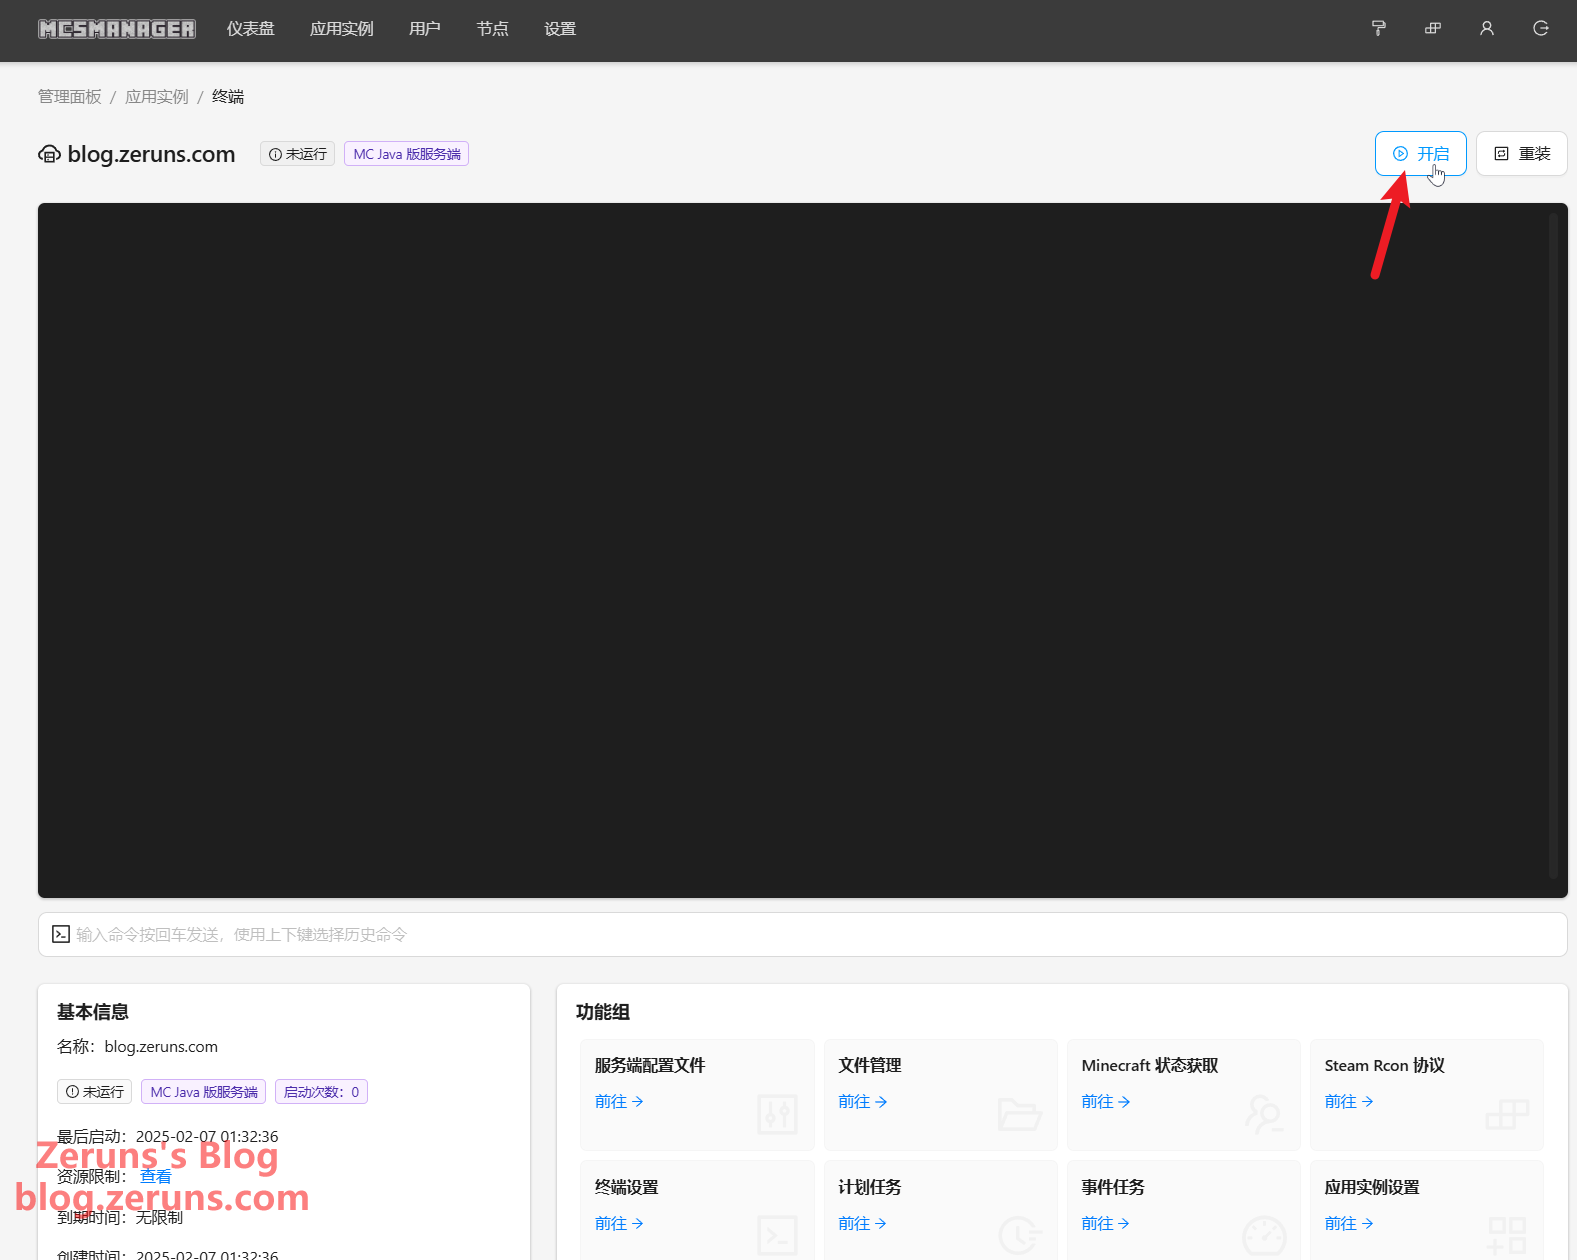
Enable Containerization, select Enable Docker Container, set Docker Image to openjdk:17, and Network Mode to host (this mode shares the same network interface as the host machine, mapping container ports directly to host ports without additional configuration). You can also set a memory limit in the container restrictions. Click Save, then Start Instance.
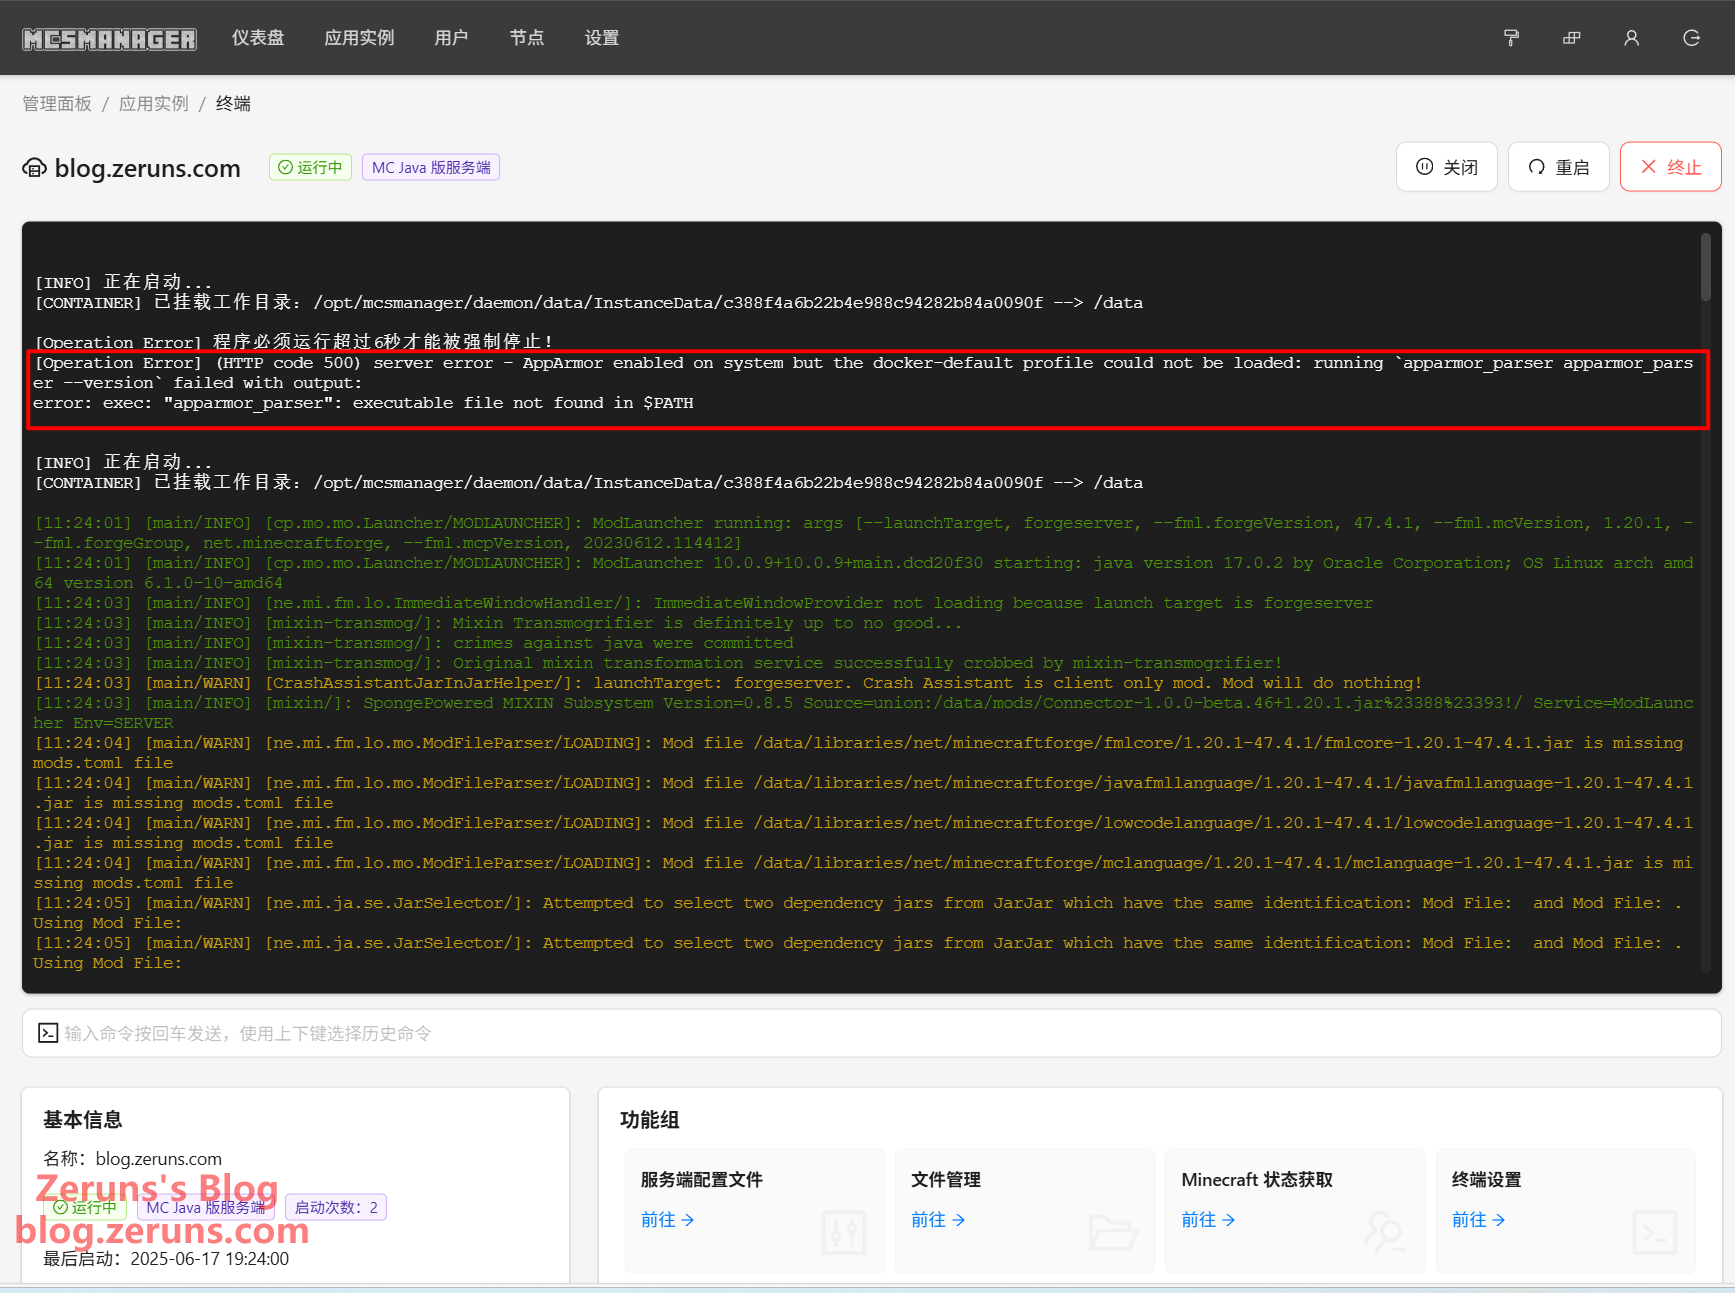
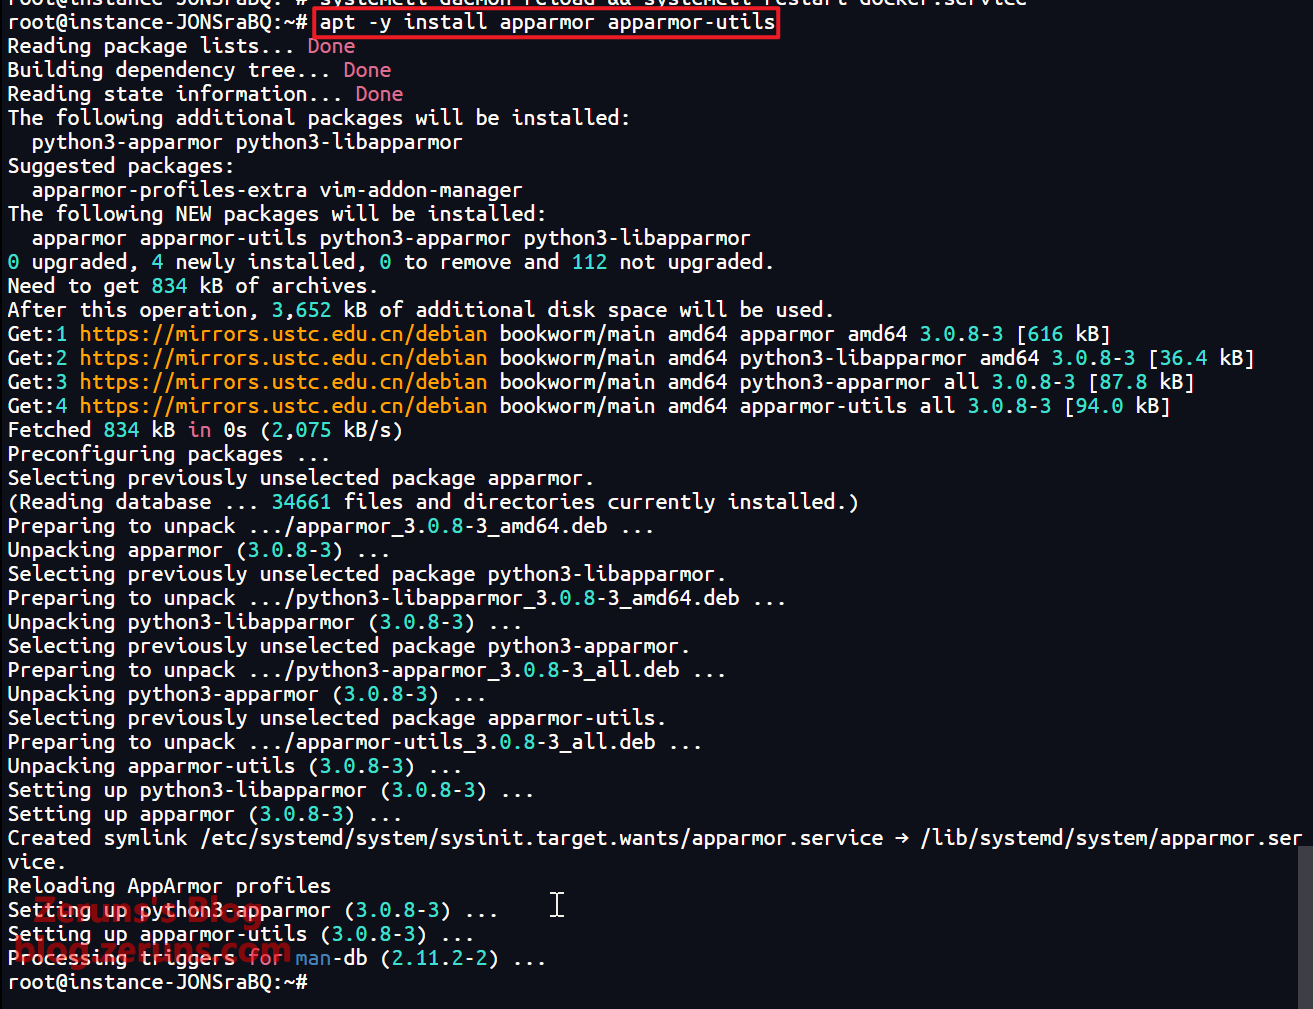
If an error appears: error: exec: "apparmor_parser": executable file not found in $PATH, run apt -y install apparmor apparmor-utils in SSH, then click Start again.
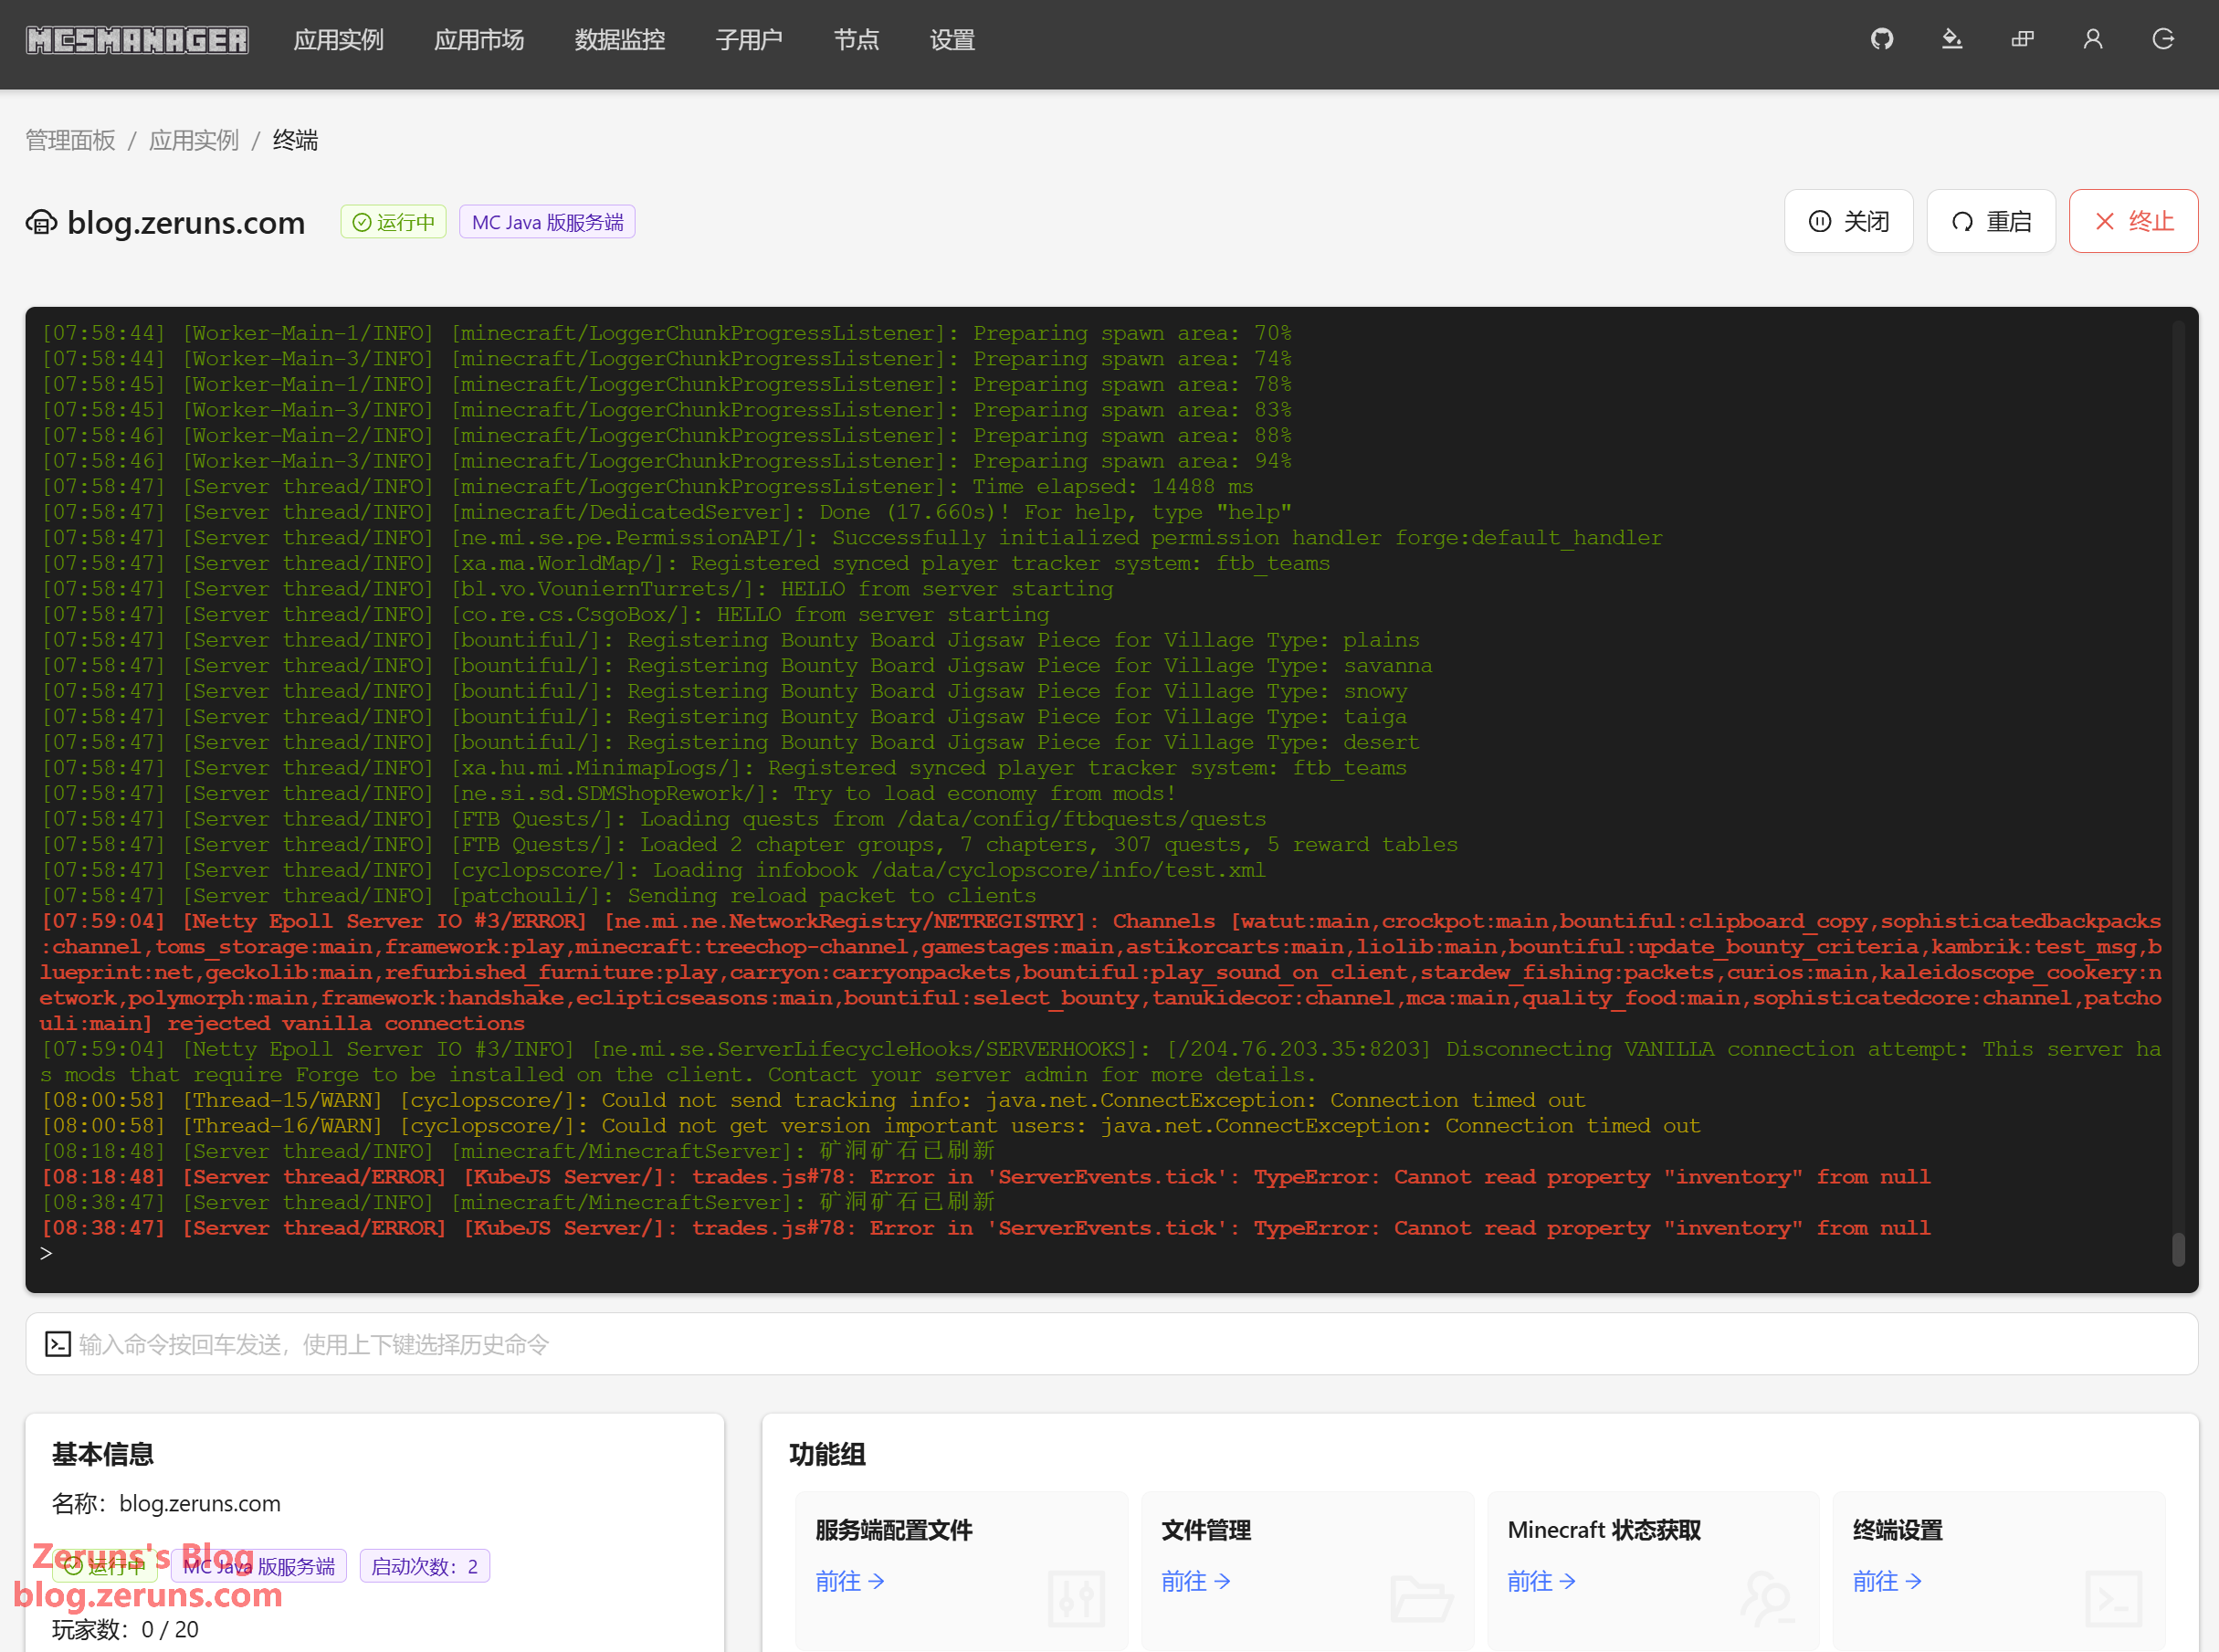
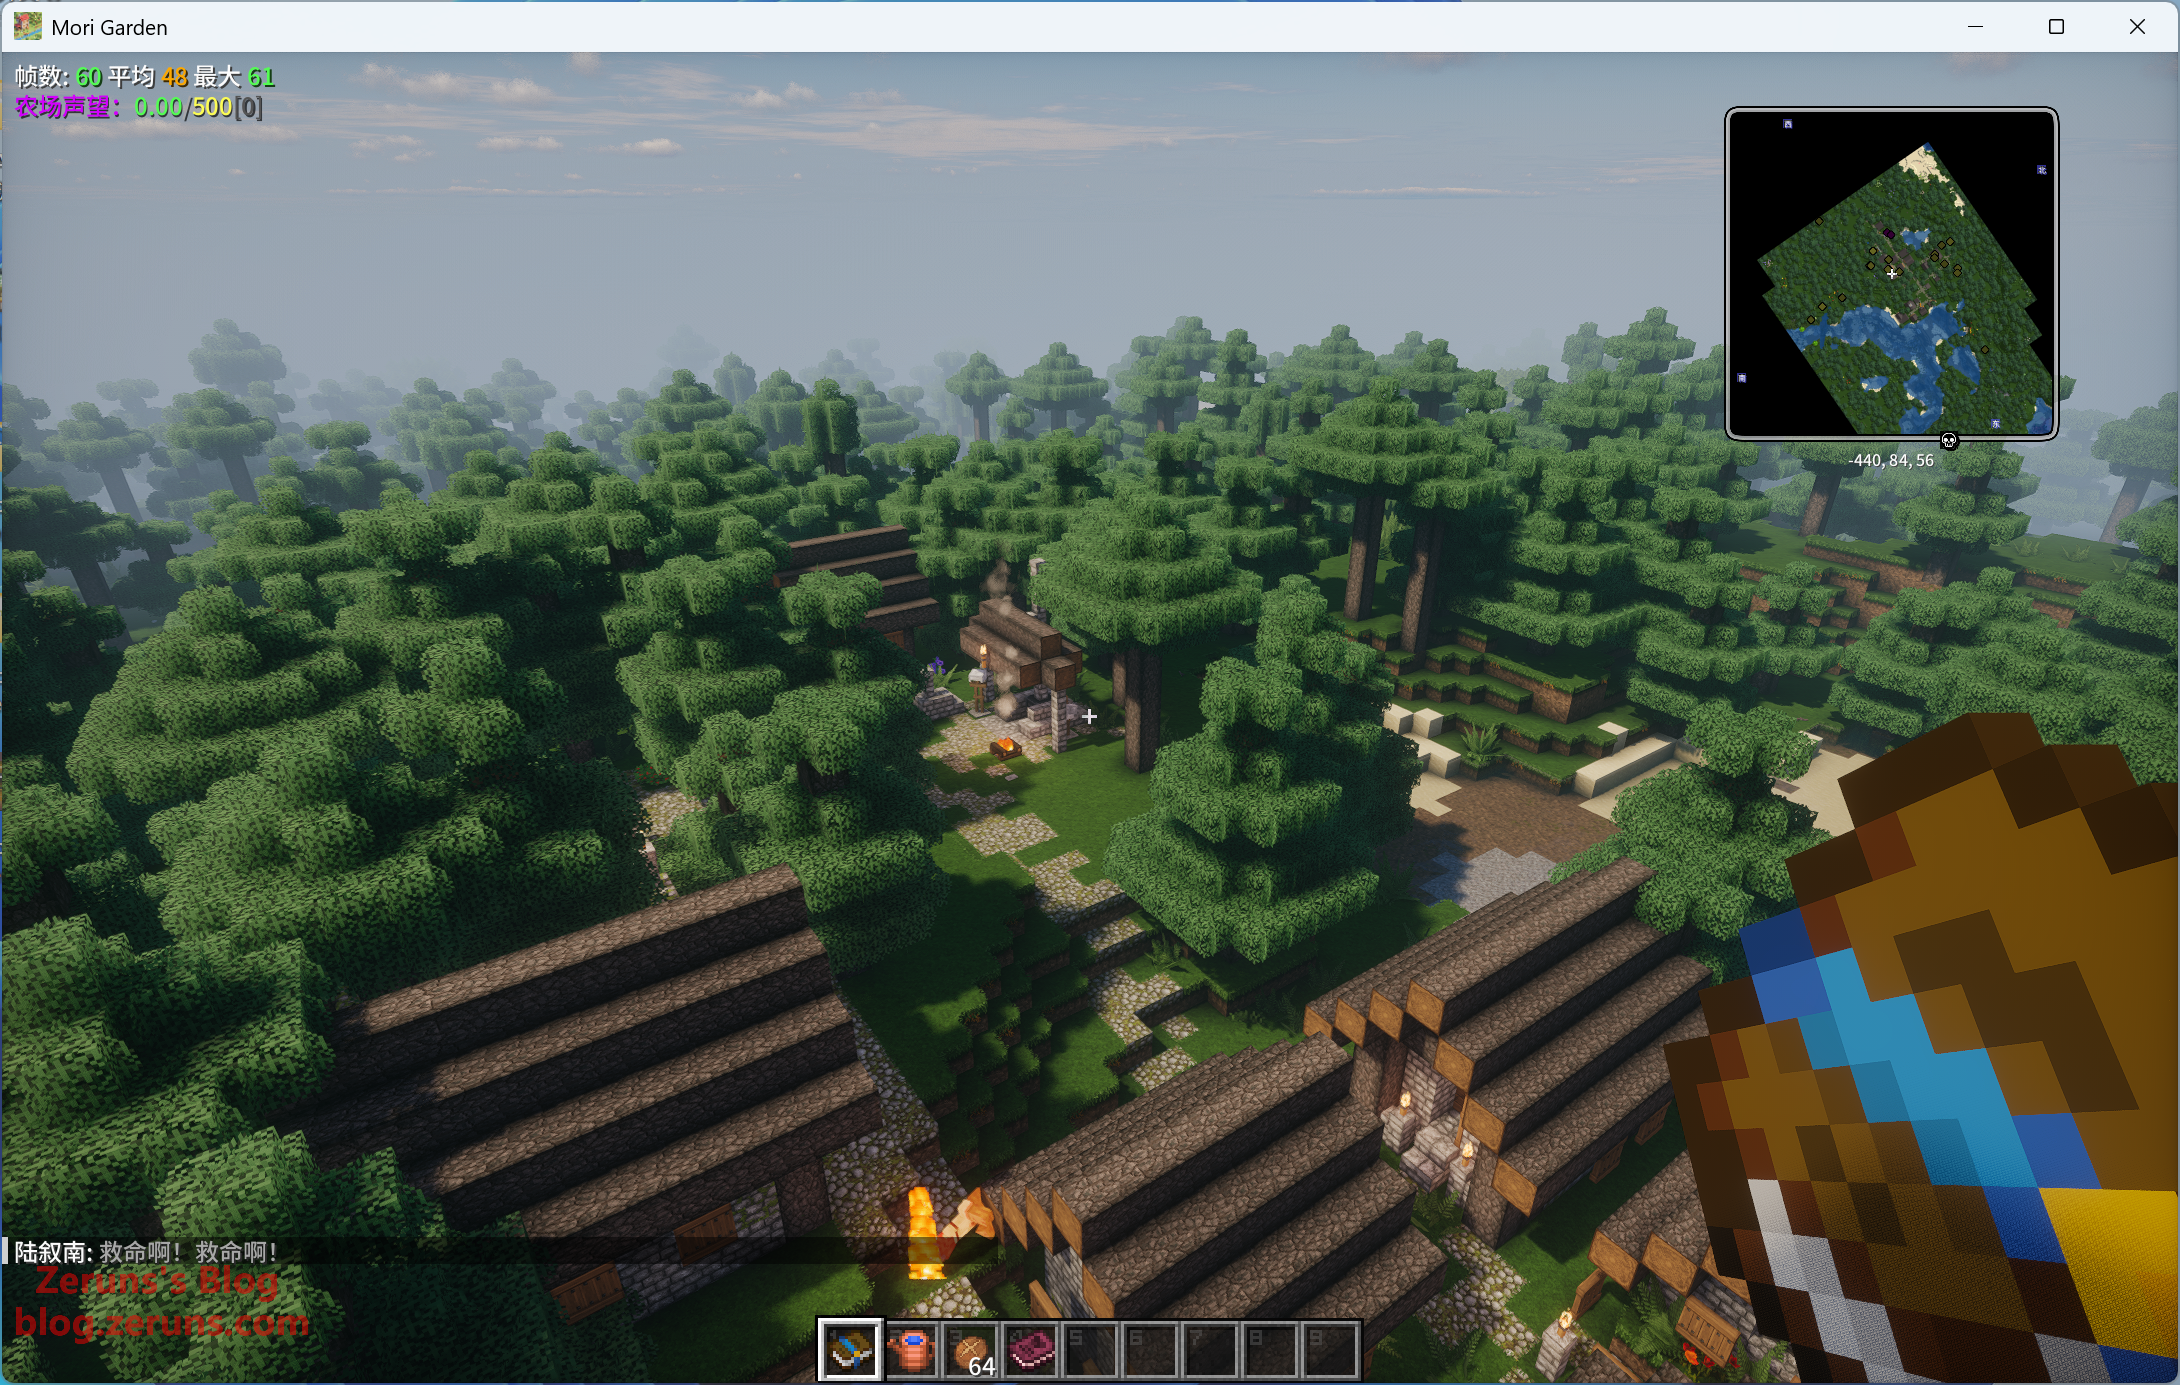
After a few minutes, the server will start successfully and be ready to join in-game.
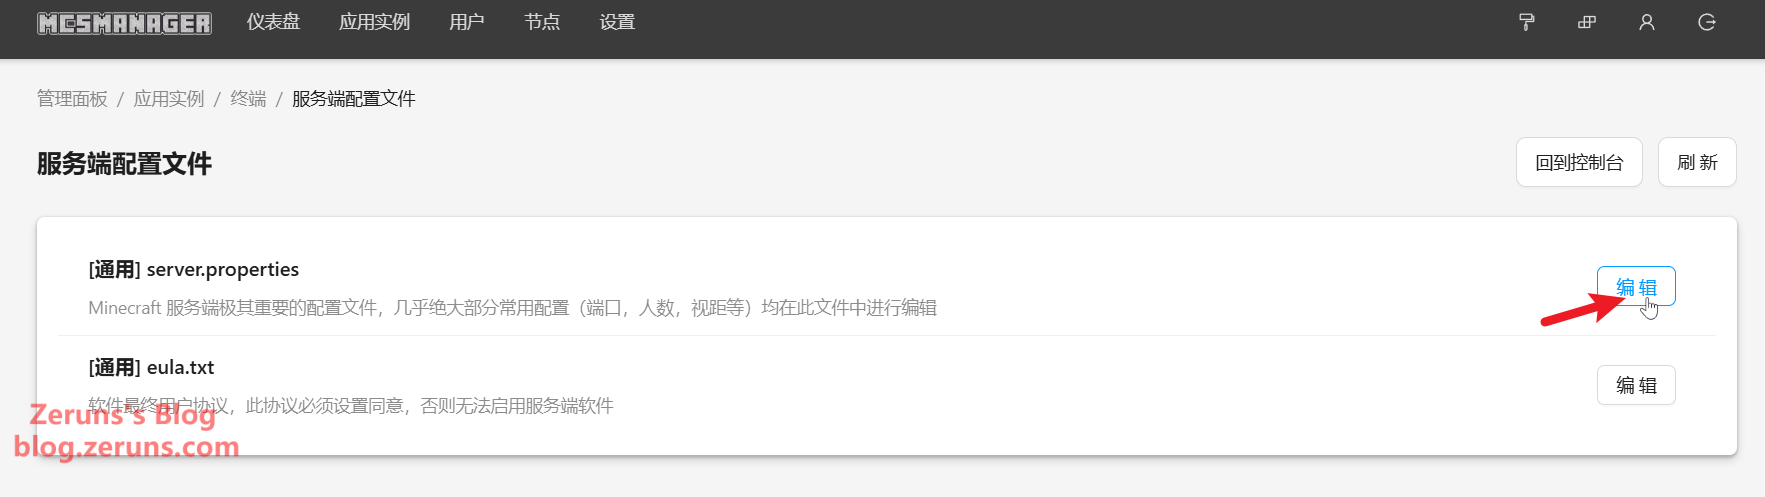
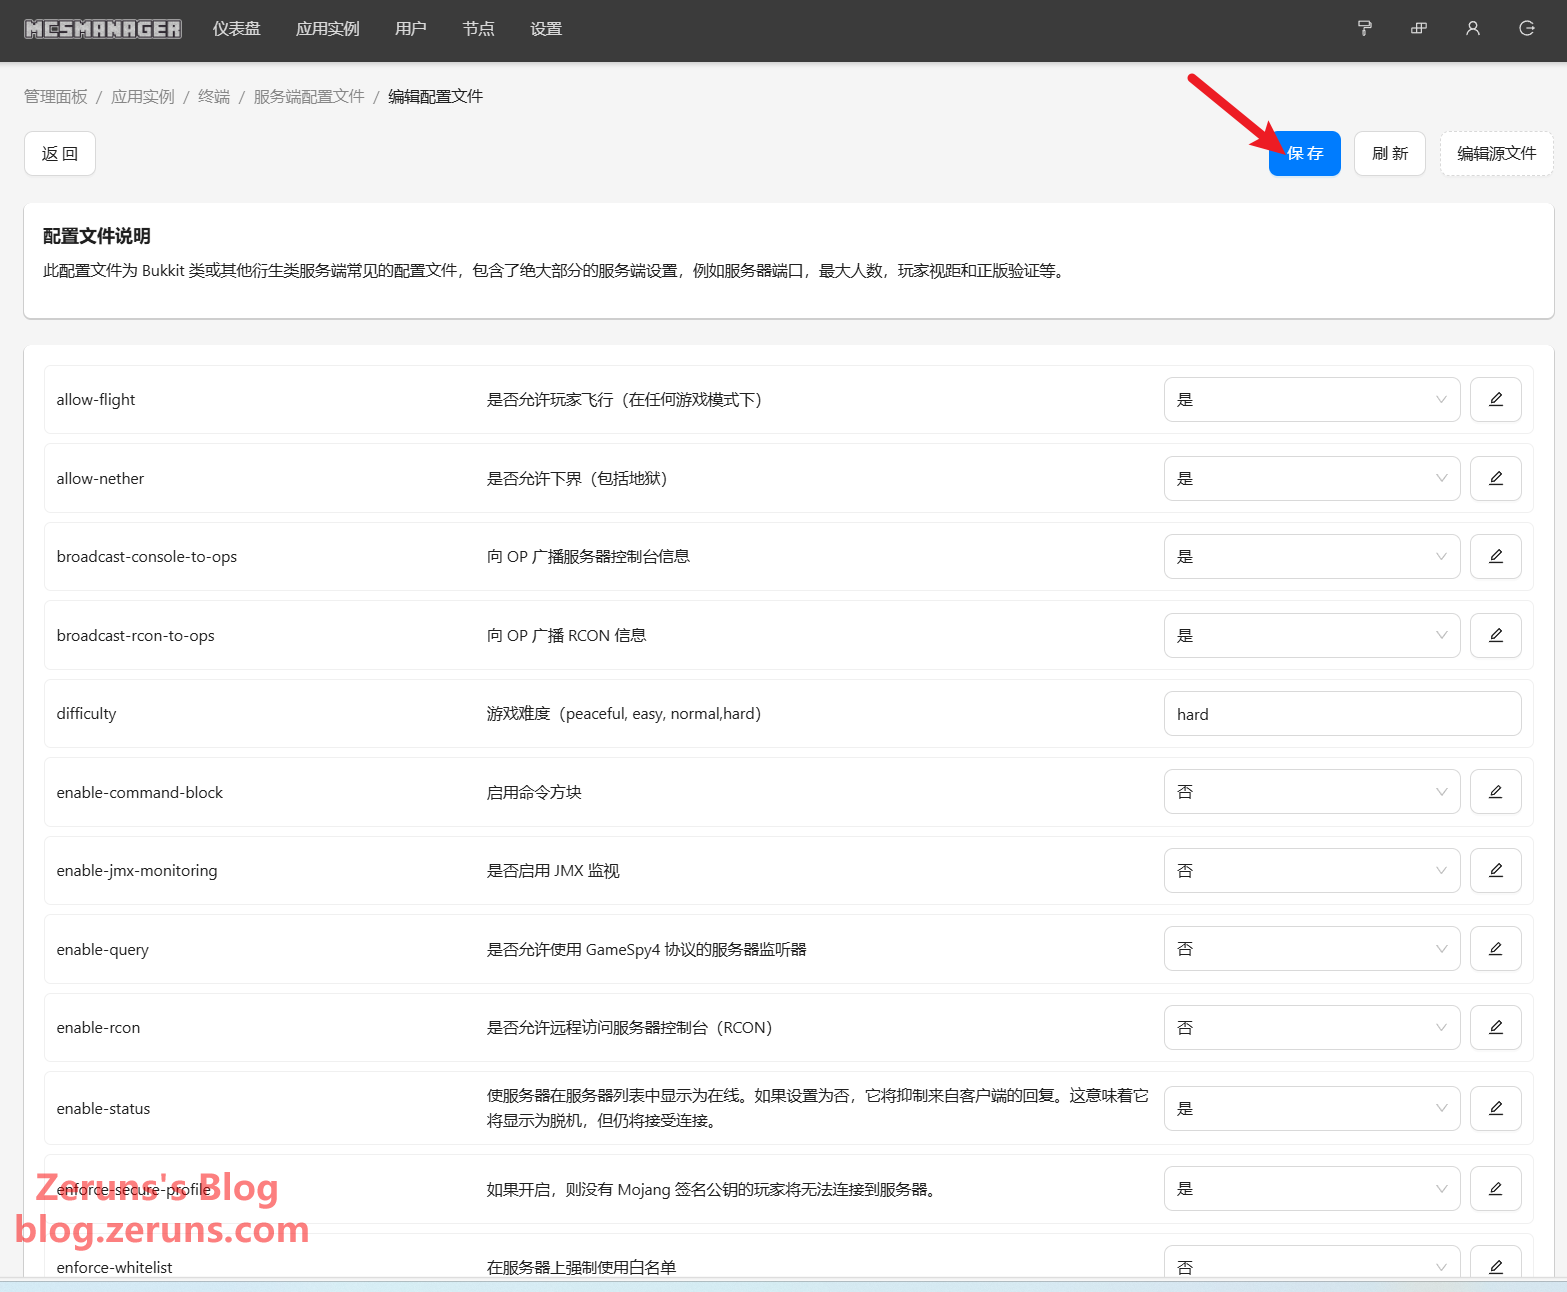
To modify server settings, go to Server Config Files → server.properties. From there, you can edit various server parameters. For non-premium players, set Online Mode (online-mode) to false (though purchasing the official game is recommended). Save changes after editing. The modpack disables authentication by default. You can also change the server port (default: 25565).
Remember to restart the instance after making changes!
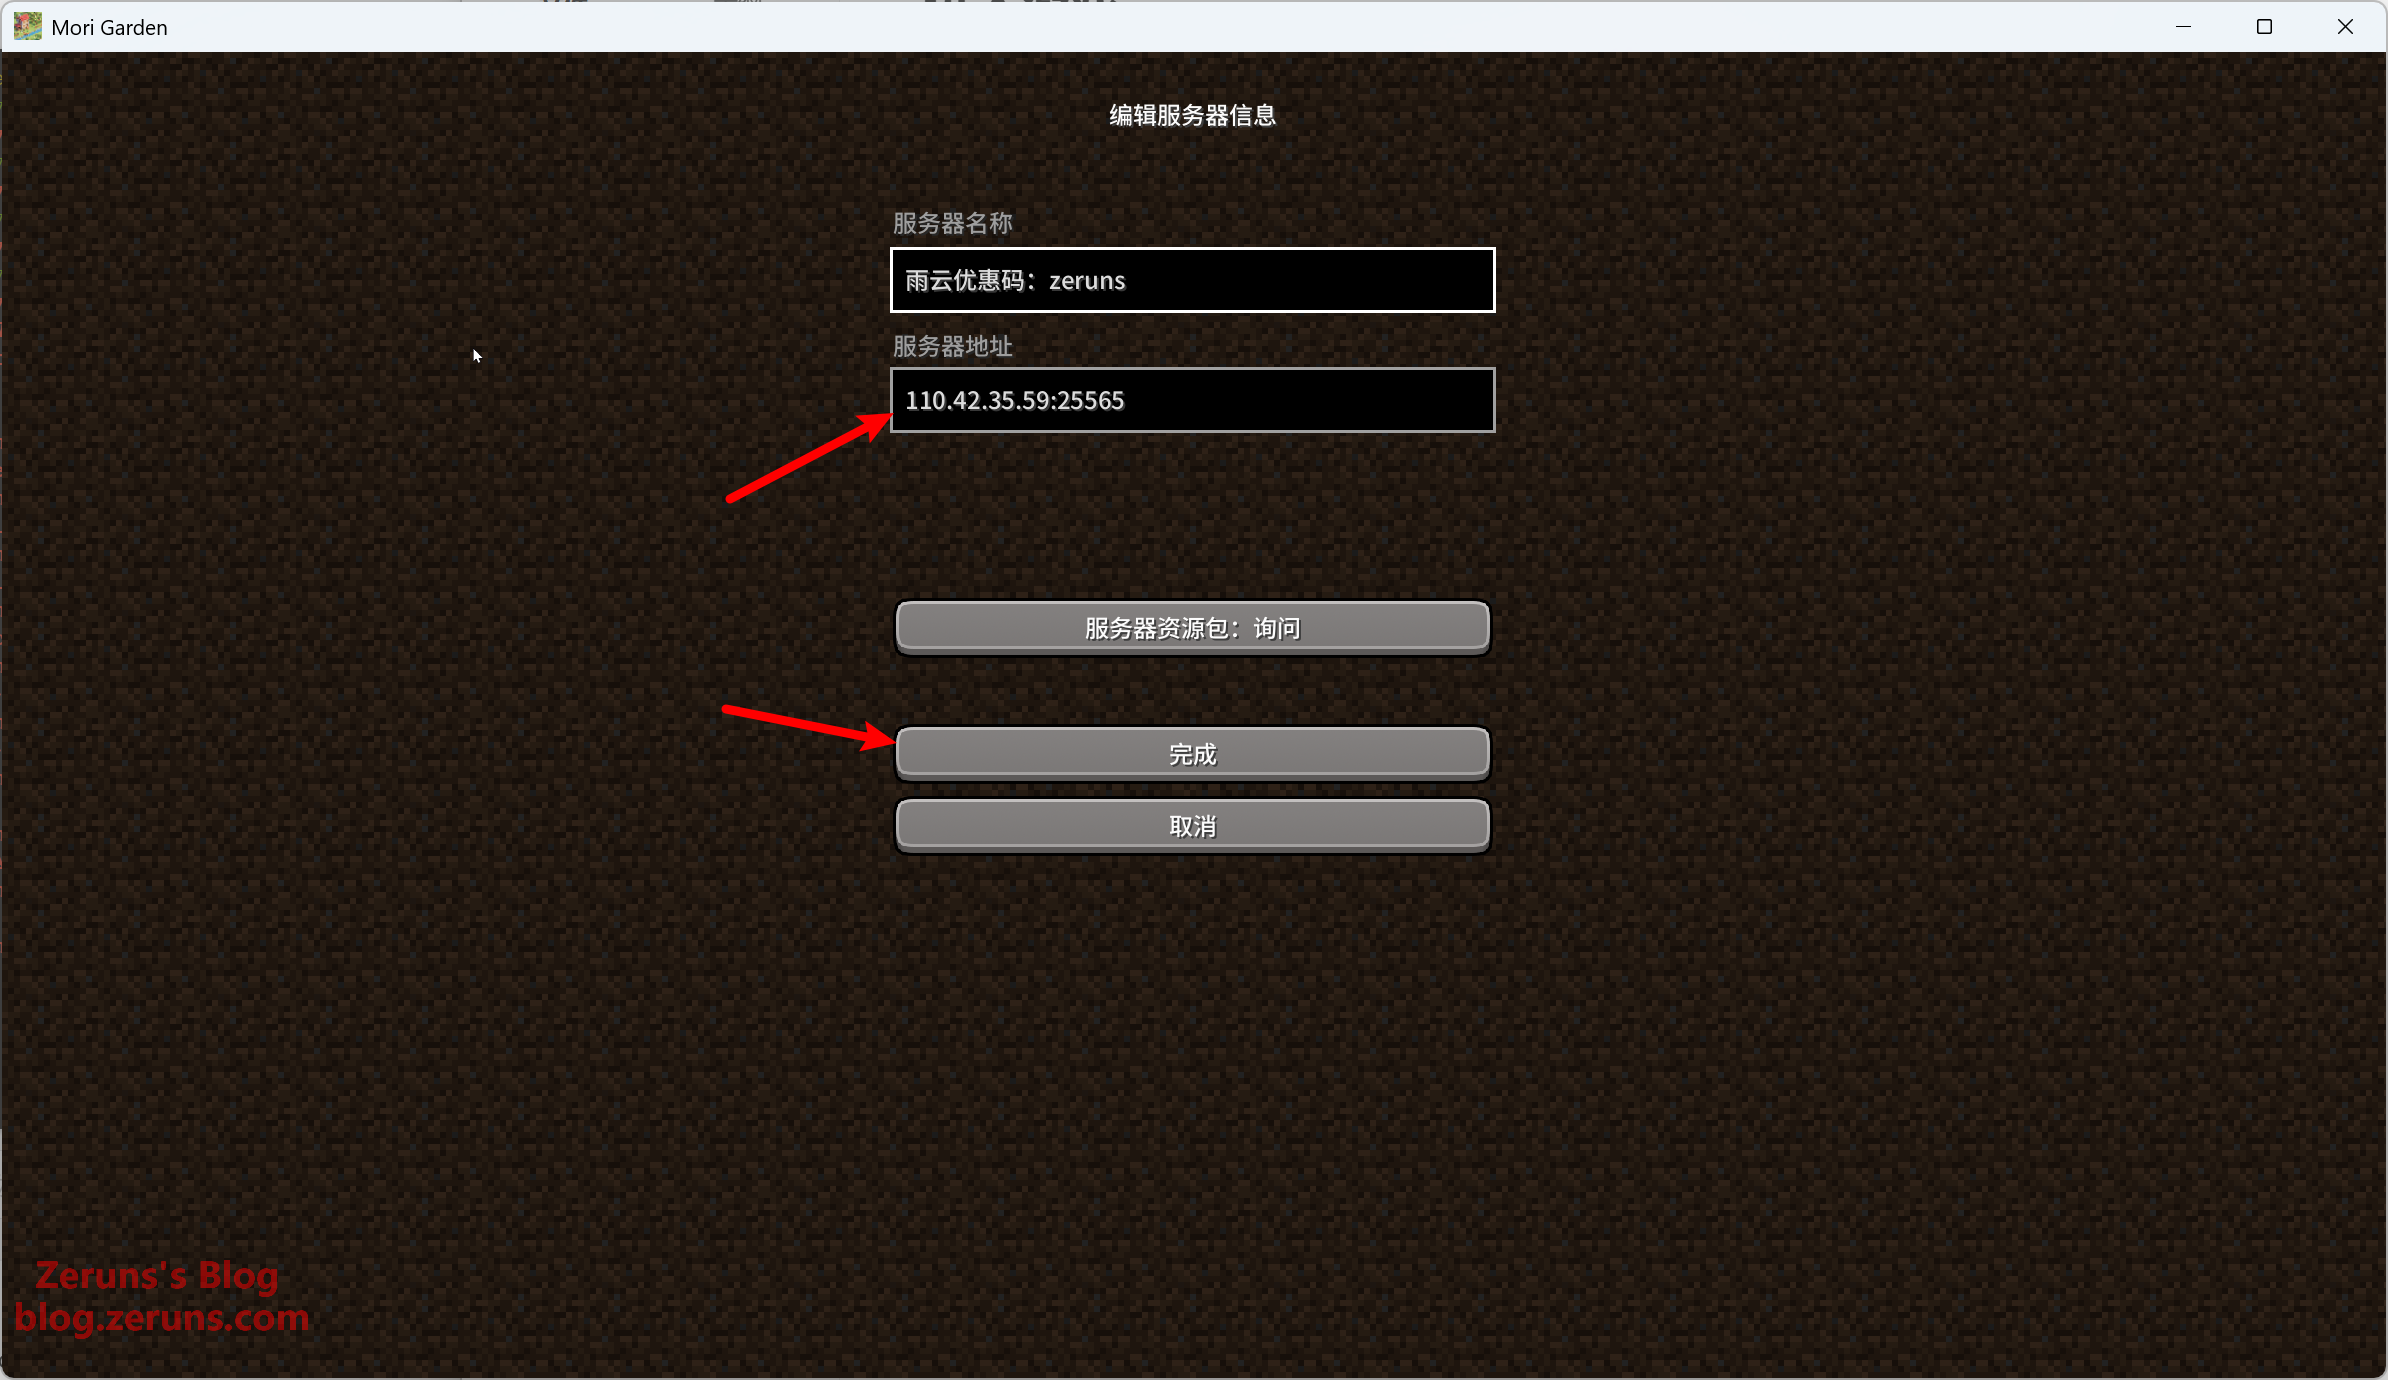
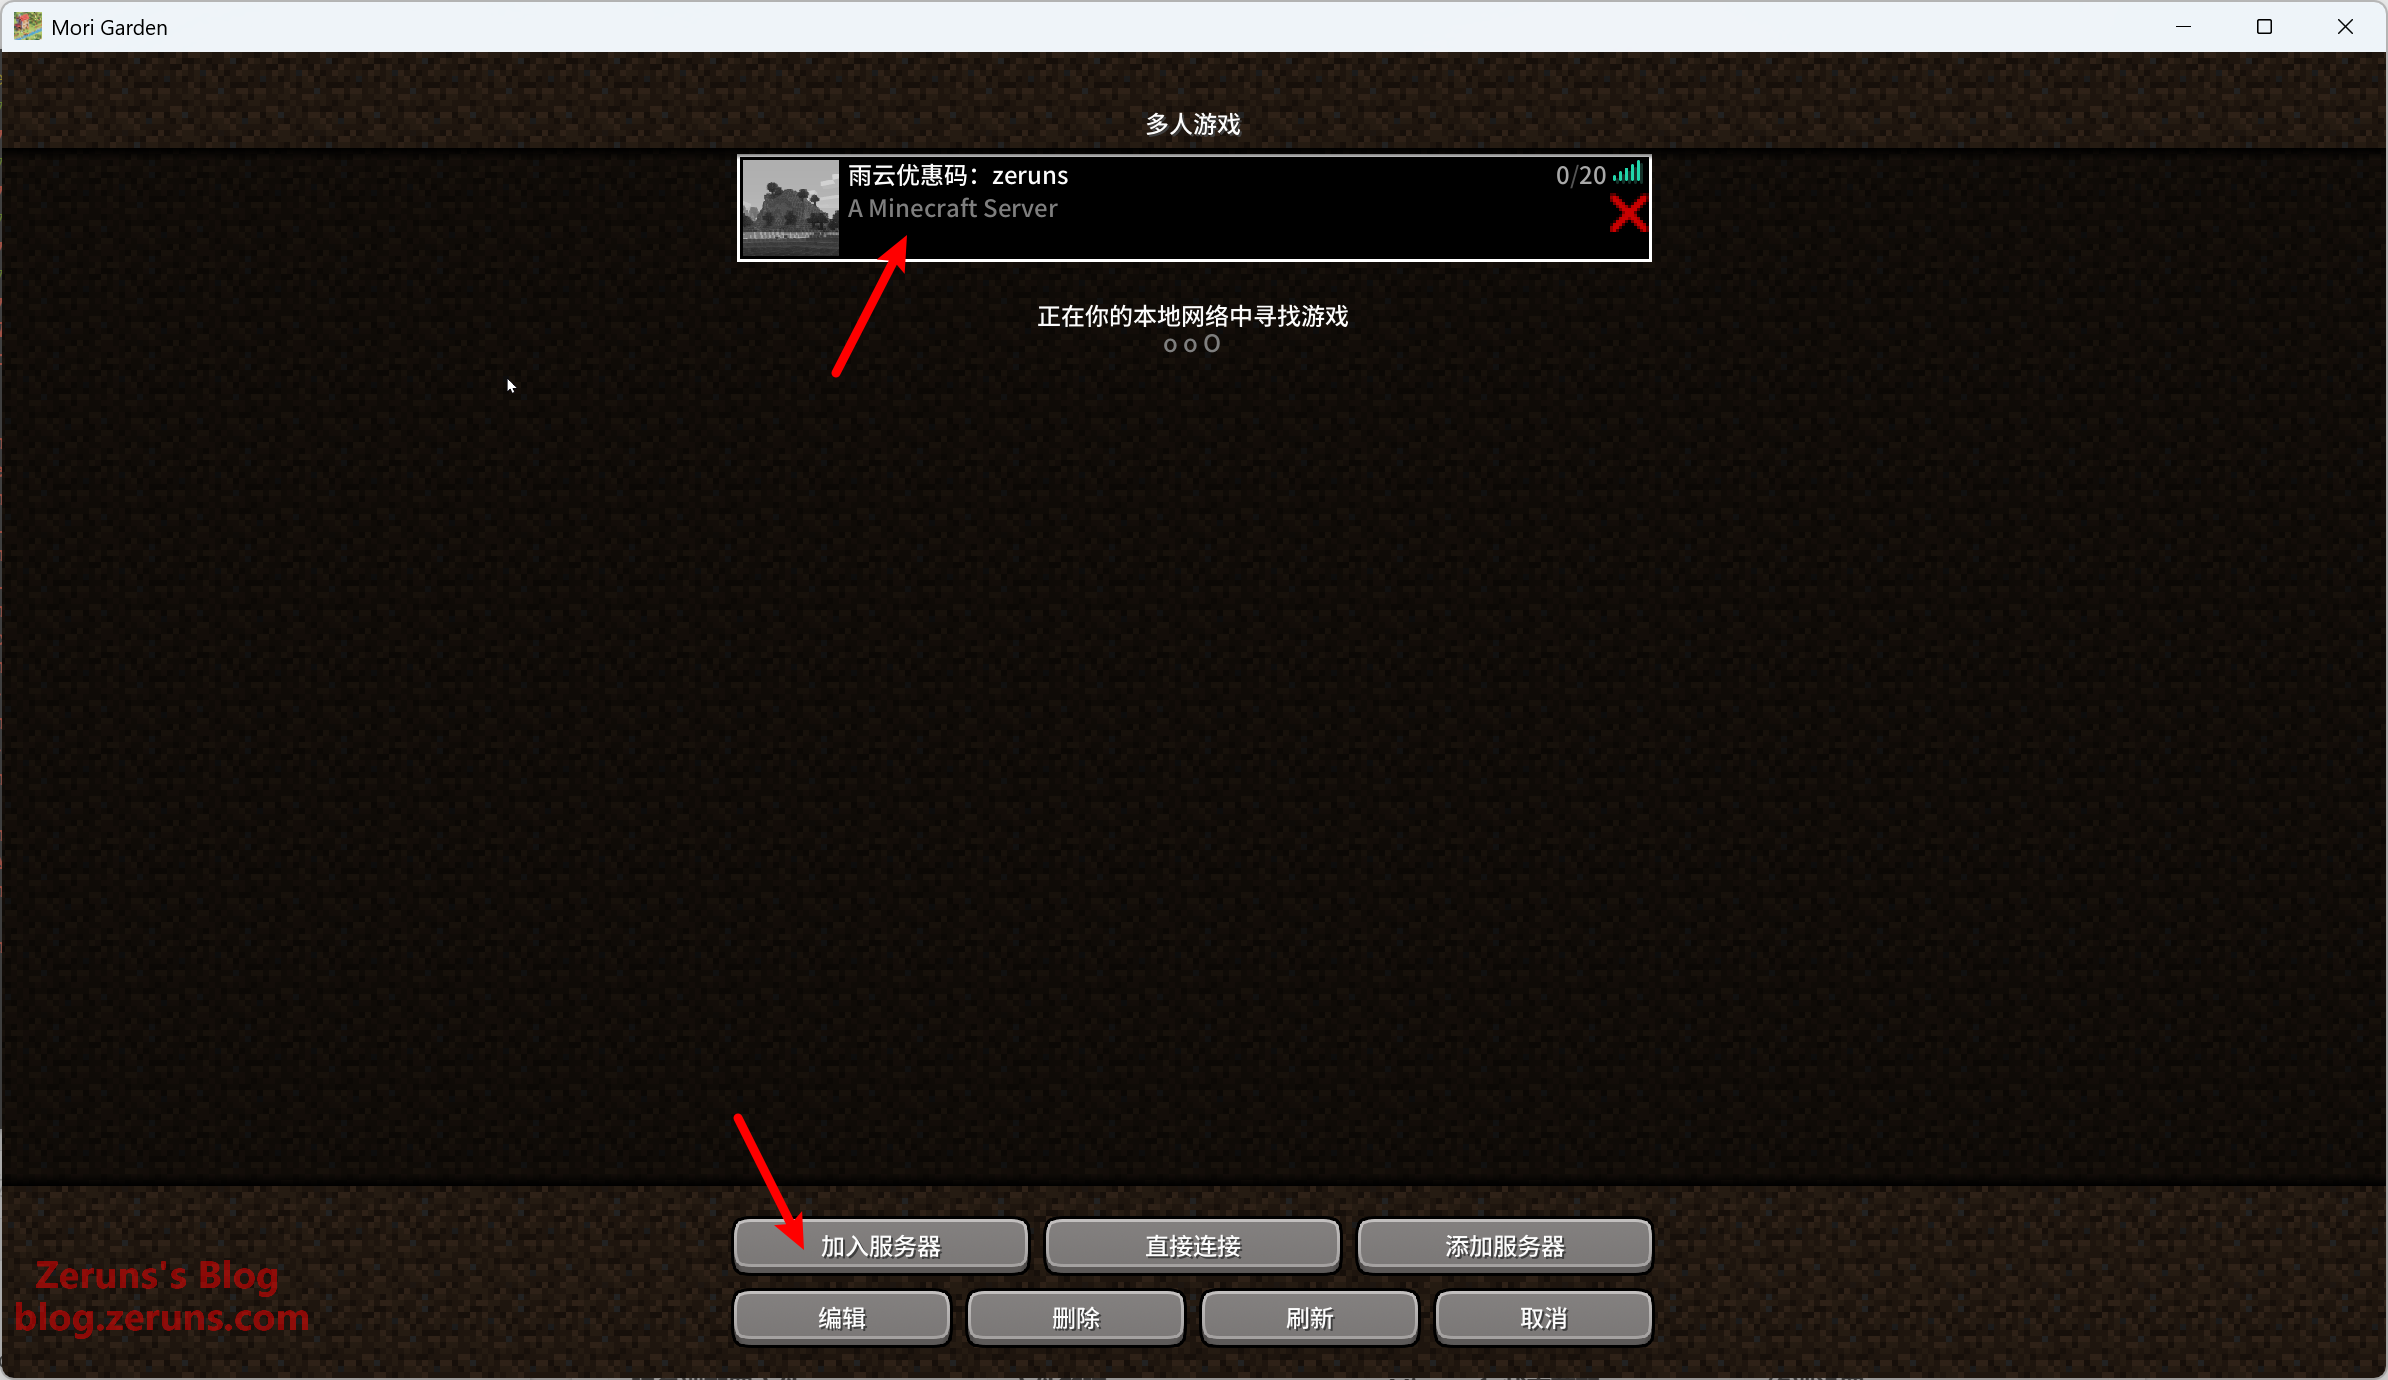
Joining the Game
In Minecraft, click Multiplayer, then Add Server, and input your server's public IP and port. The default port is 25565, which you can change in the server.properties file. Separate the IP and port using a colon, as shown below (replace with your actual info).
Example: 110.42.35.59:25565
If you are using the default port 25565, you can omit the port number and just enter the IP.
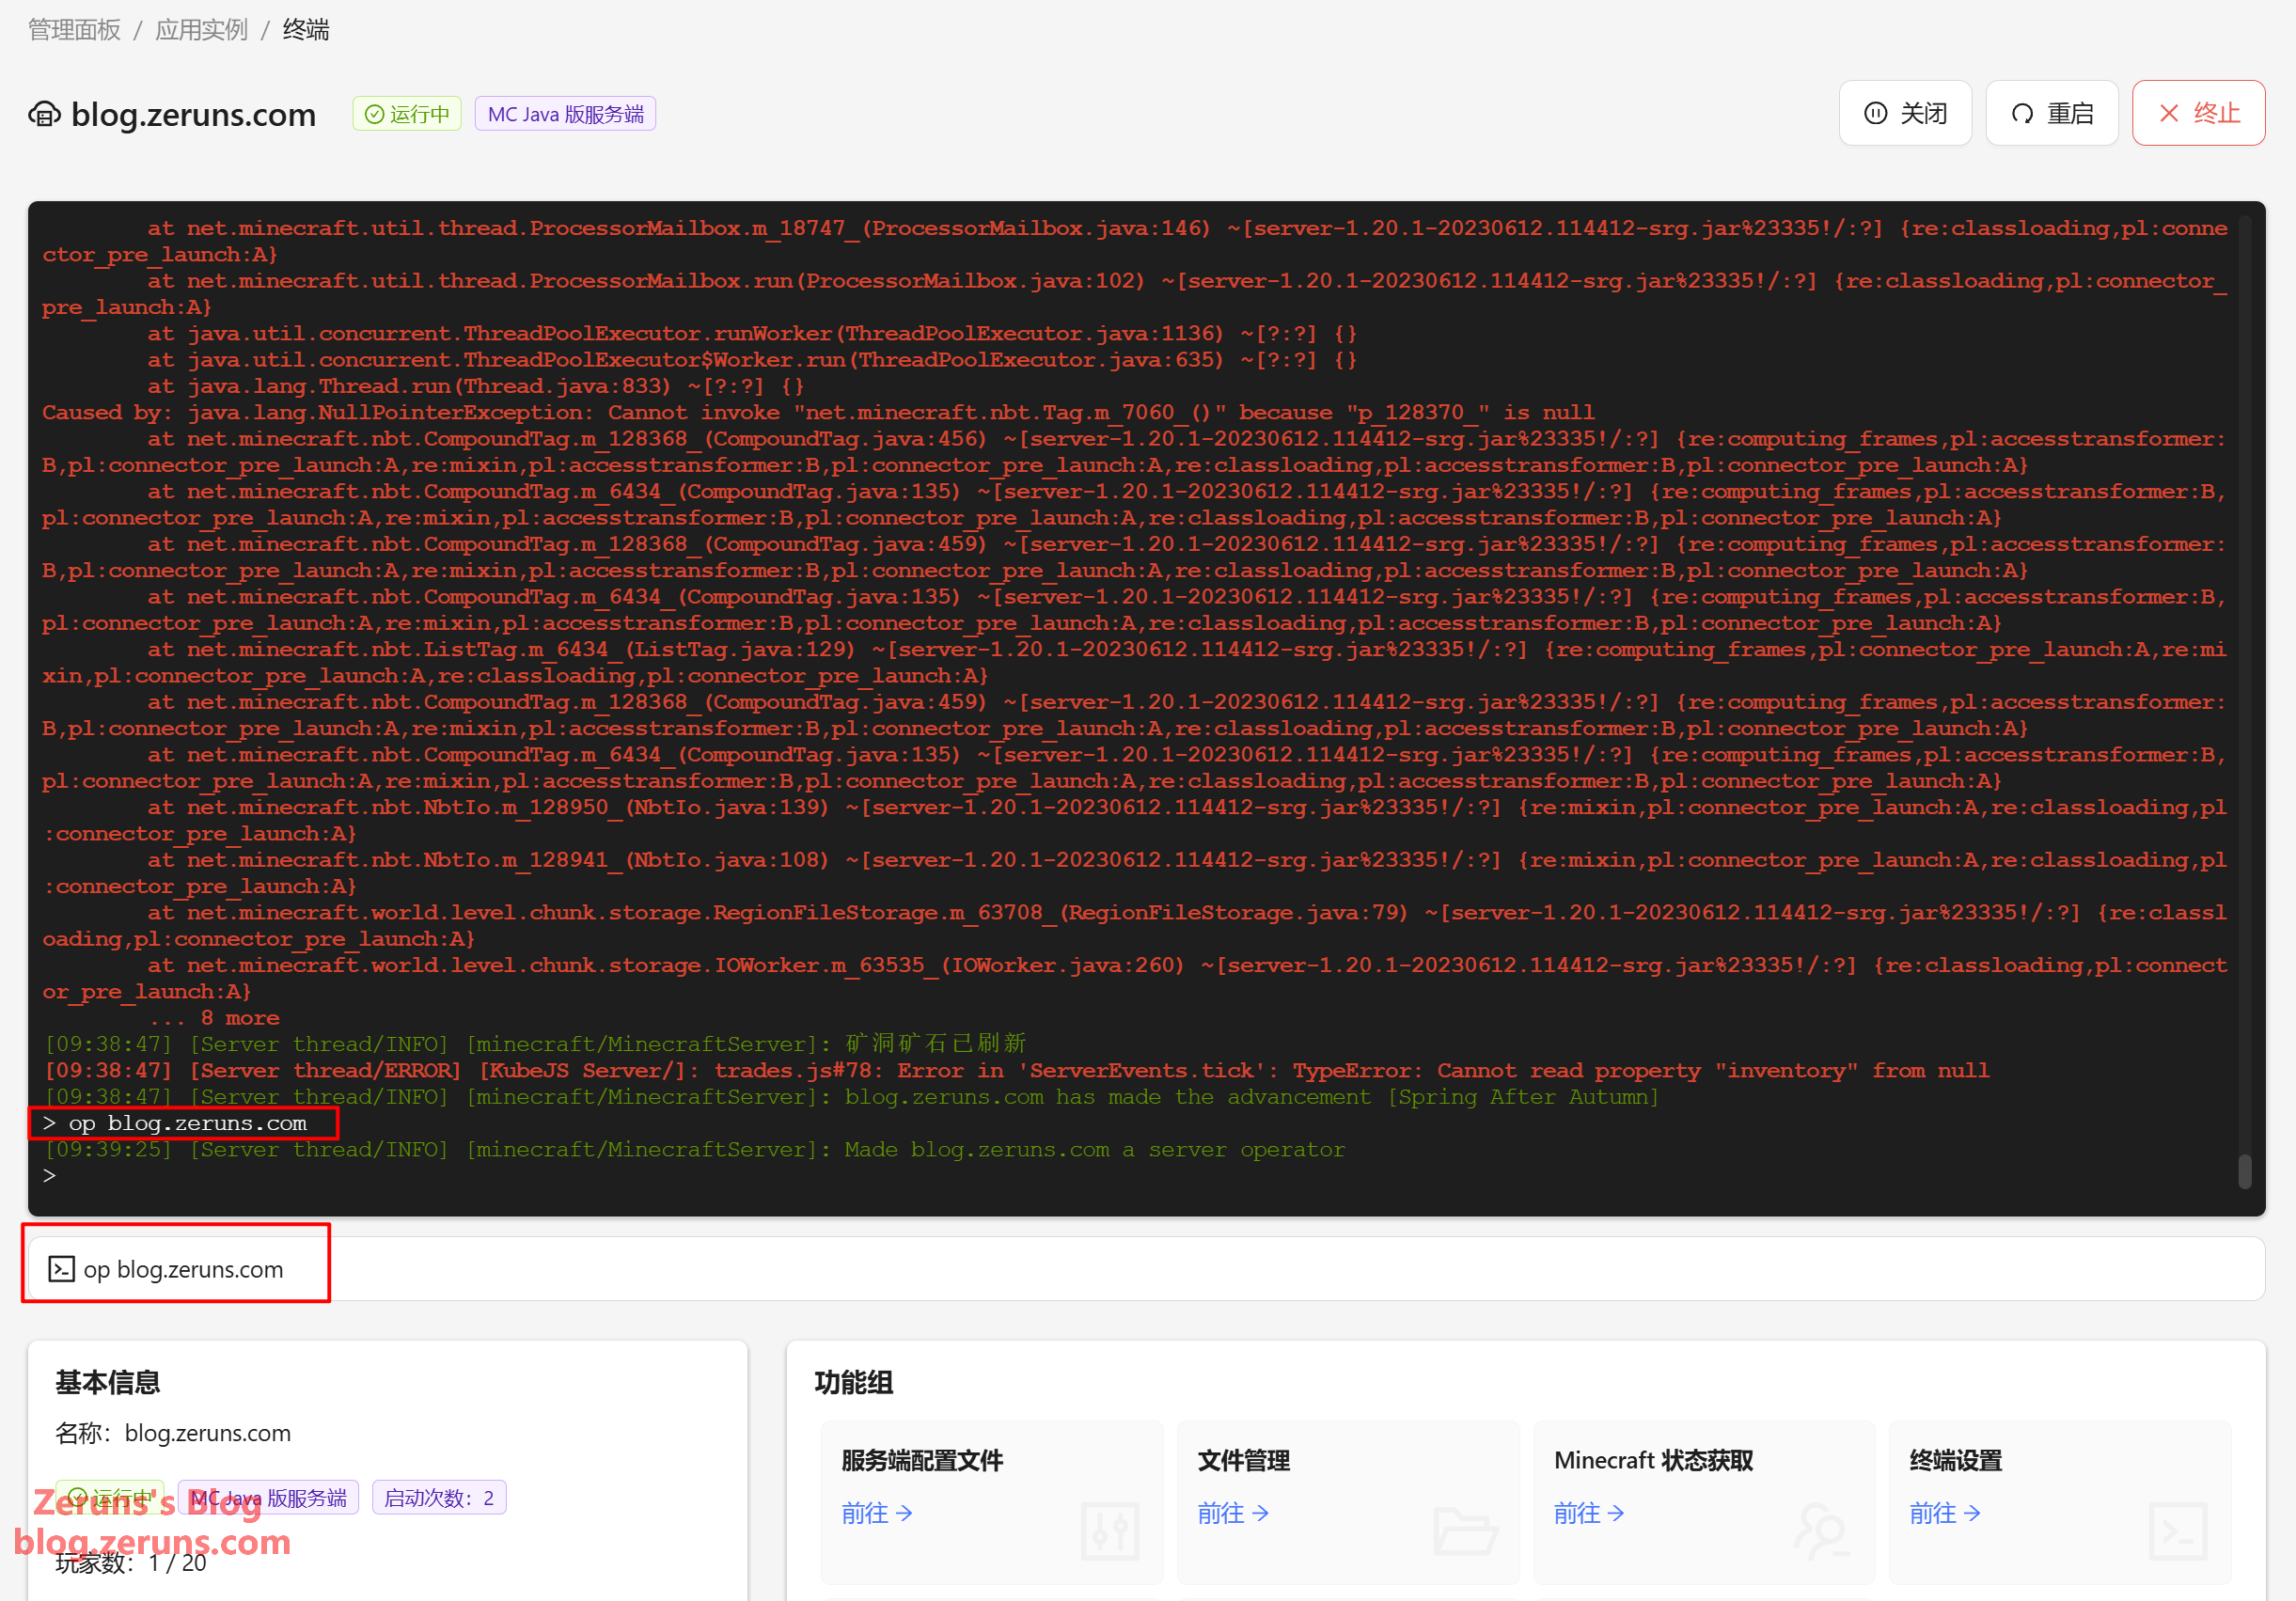
To give yourself OP (admin) privileges, enter op <your_username> in the input box at the bottom of the MCSM terminal and press Enter.
Recommended Reading
- High-performance and budget VPS/Cloud Server recommendations: https://blog.zeruns.com/archives/383.html
- Minecraft Server Setup Tutorials: https://blog.zeruns.com/tag/mc/
- Cross-border E-commerce Independent Website Tutorial — WordPress Foreign Trade Guide: https://blog.zeruns.com/archives/889.html
- MECHREVO Code10AI Laptop (Ultra7-255H) Unboxing and Teardown: https://blog.zeruns.com/archives/895.html
- STM32-based Synchronous Rectification Buck-Boost Digital Power Supply (Open Source): https://blog.zeruns.com/archives/791.html
- GL-RM1PE Unboxing and Teardown — Enable BMC Remote Management on Regular PCs: https://blog.zeruns.com/archives/900.html


Comment Section